 11
11
Corsair 7000D Airflow Review
Assembly & Finished Looks »A Closer Look - Inside
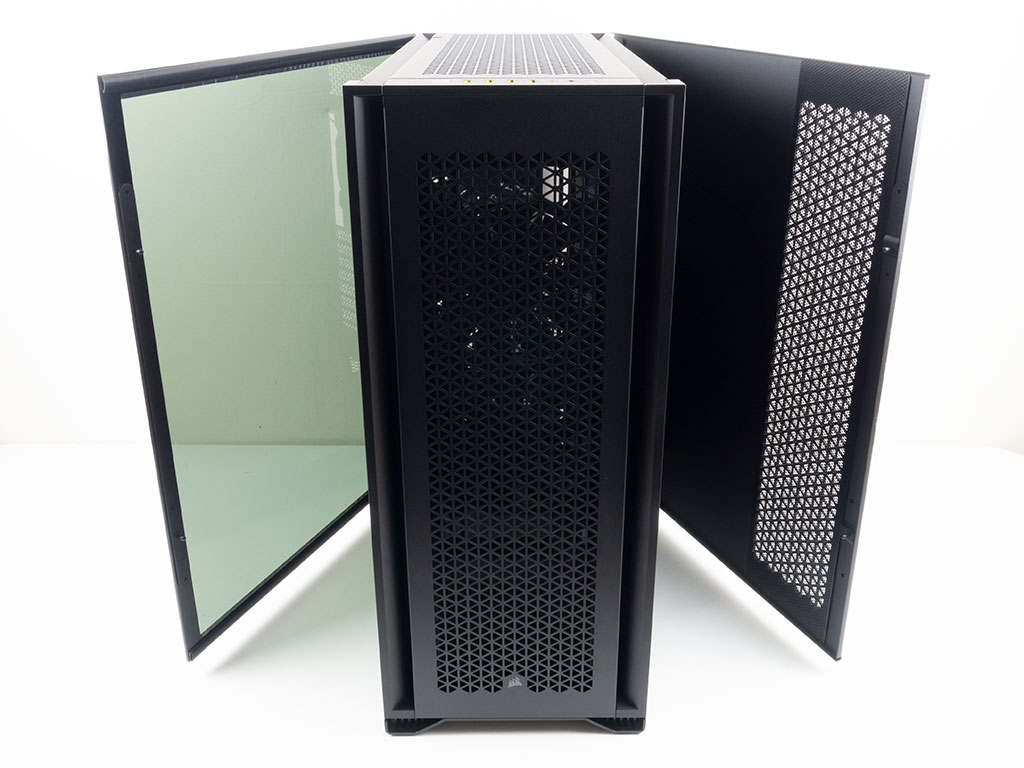

Both panels of the Corsair 7000D Airflow are placed on hinges with a single screw each holding them in place. The glass is officially 4 mm thick excluding manufacturing variance. Corsair included push pins on each side, which is great if you need to quickly and repeatedly access the interior.
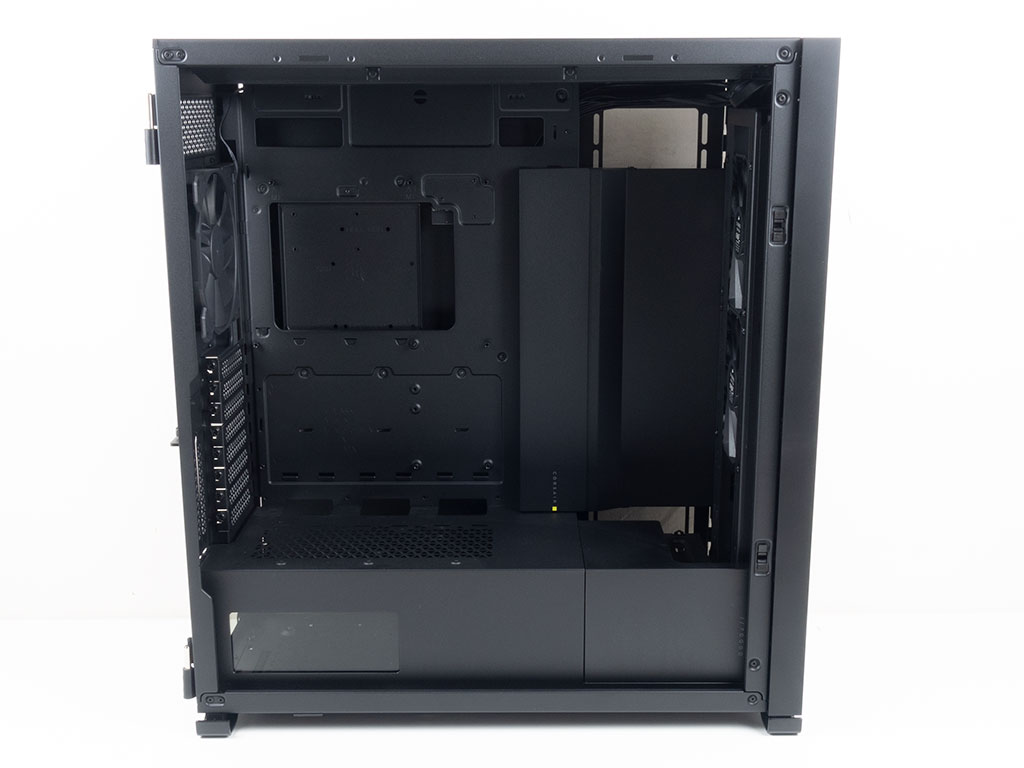
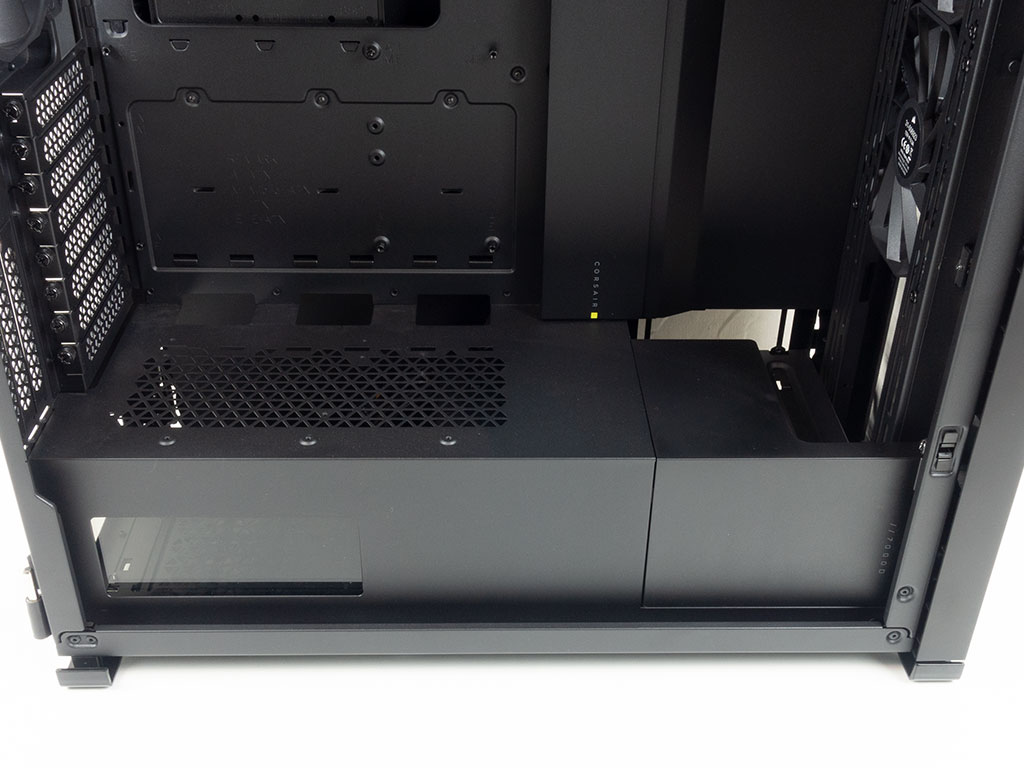
On the interior, things look quite traditional for a modern chassis, with a metal shroud on the bottom that does come with a plastic extension in the front you may replace with the accessory mentioned at the beginning of the review. You may install any of the three 2.5" HDD plates here to show off your SSDs, but those are installed behind the motherboard tray by default. I am not sure if Corsair sells these separately for those who want to add more storage. There are also three fairly large cable-routing openings in the shroud. Corsair even added a window to the shroud so that you may show off your PSU. It looks like this part is acrylic, and you may remove it completely.
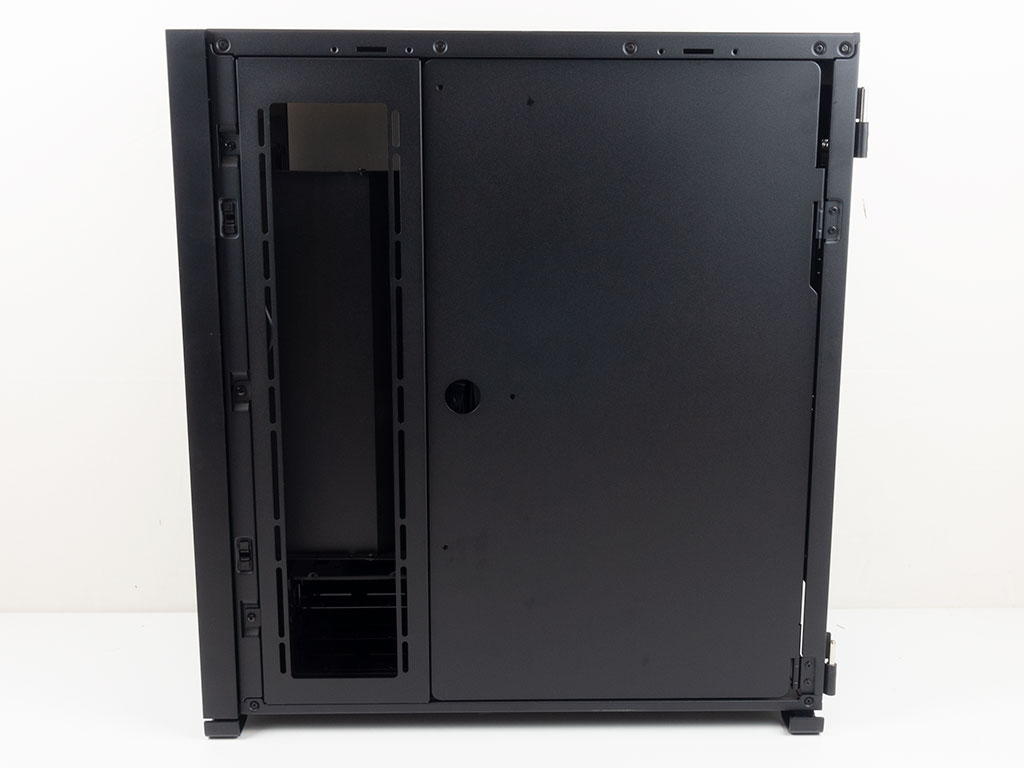
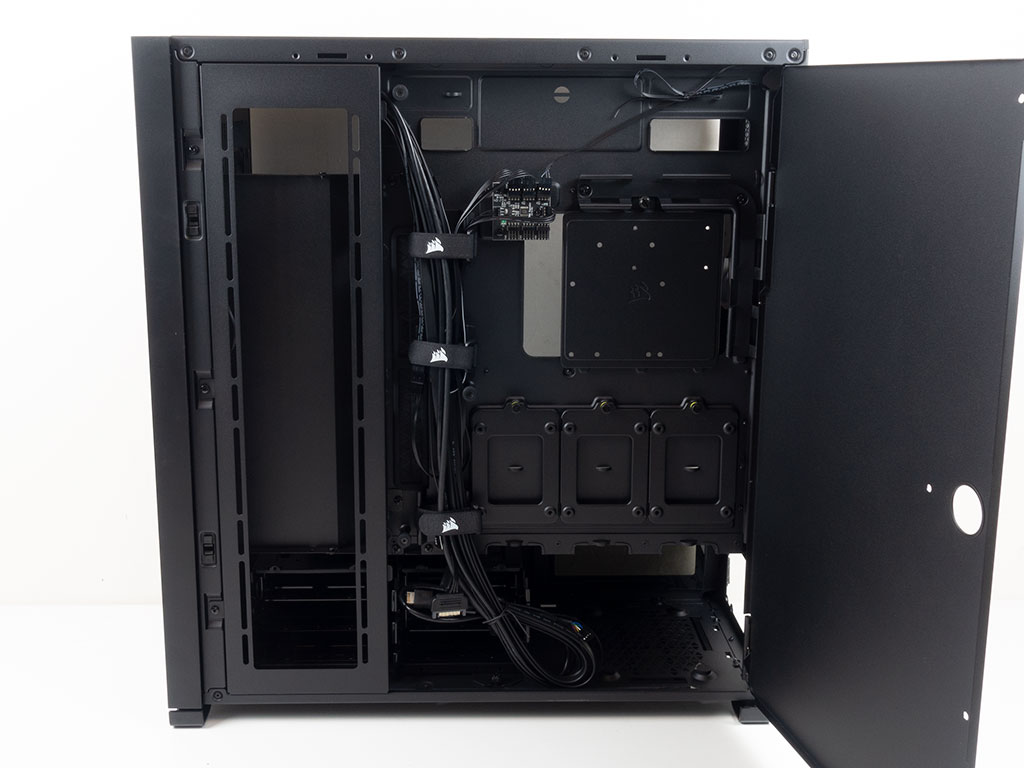
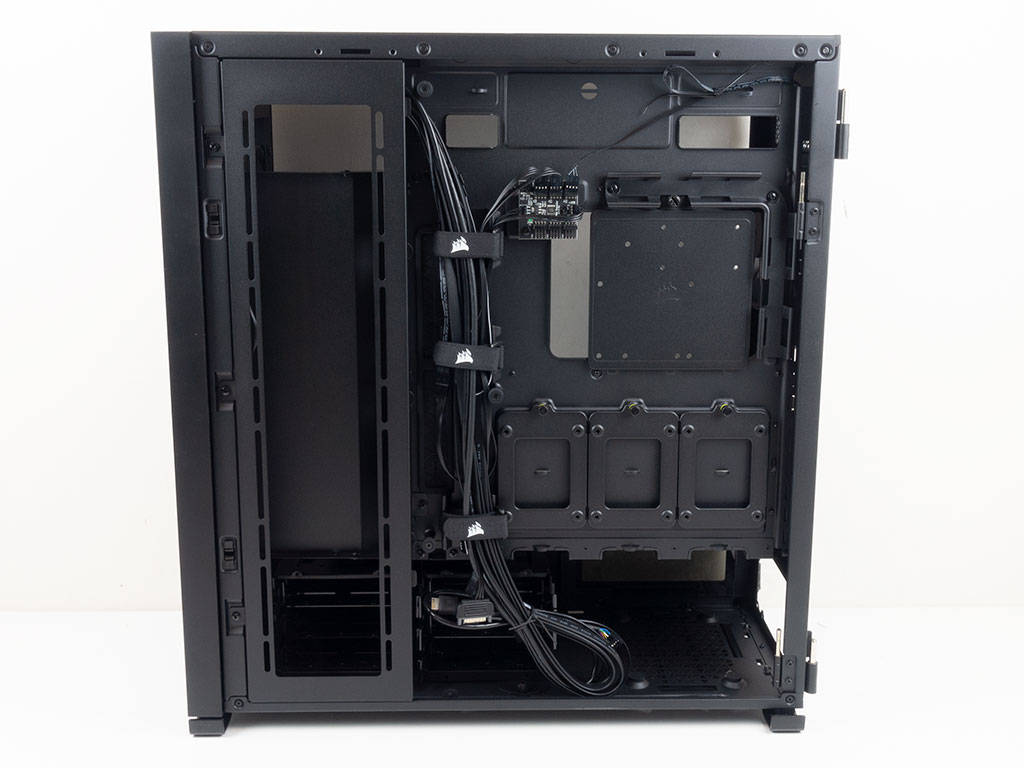
Turning the case over, you won't immediately have access to all the functional element behind the motherboard tray. Corsair continues to use a secondary cover here, which hides everything and is held in place by magnets. While it is nice, there is no real benefit with the 7000D Airflow as the solid side panel will hide everything. Just like in the 5000D Airflow, this secondary panel won't really need much pressure from within to pop off the magnets.
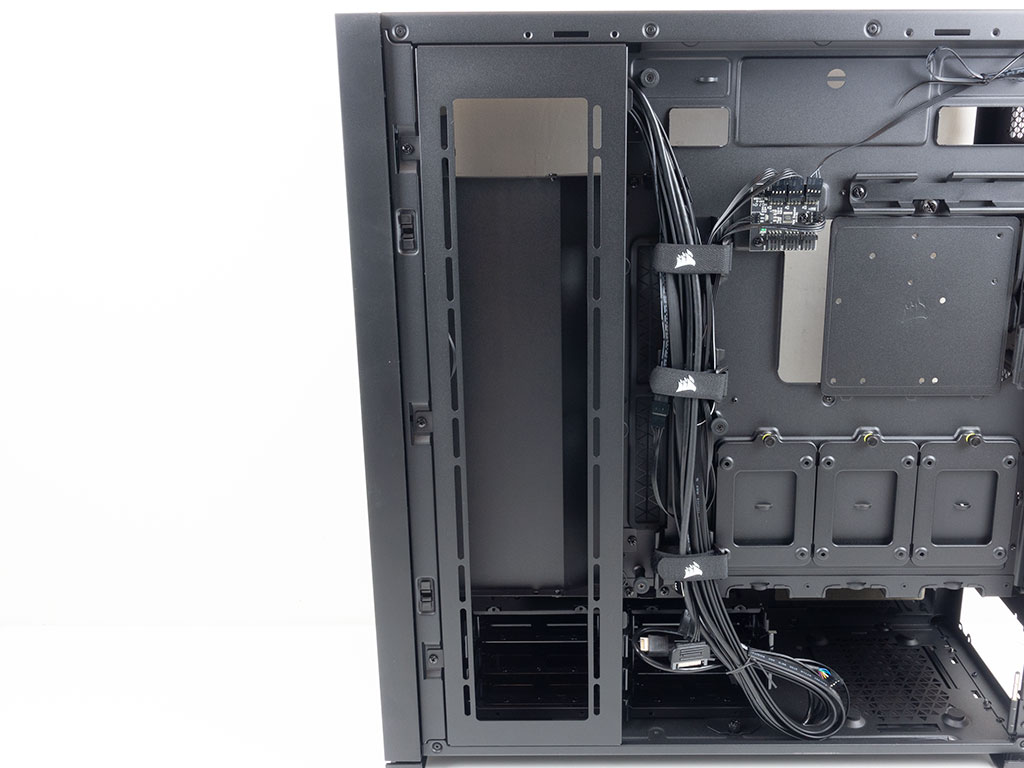
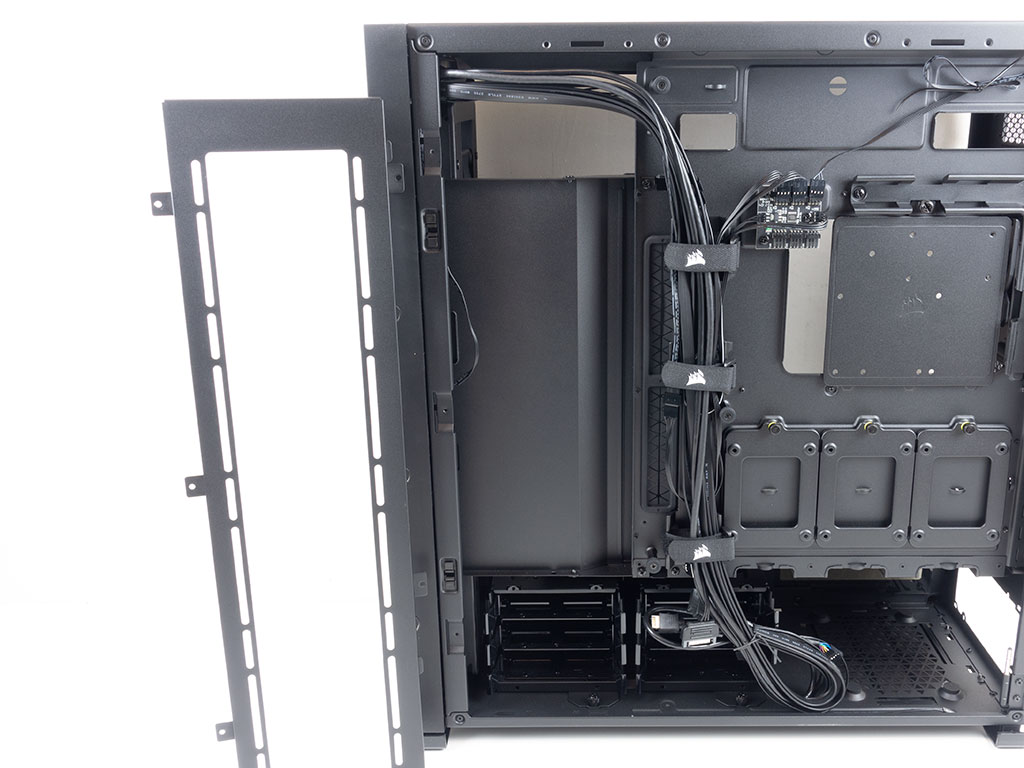
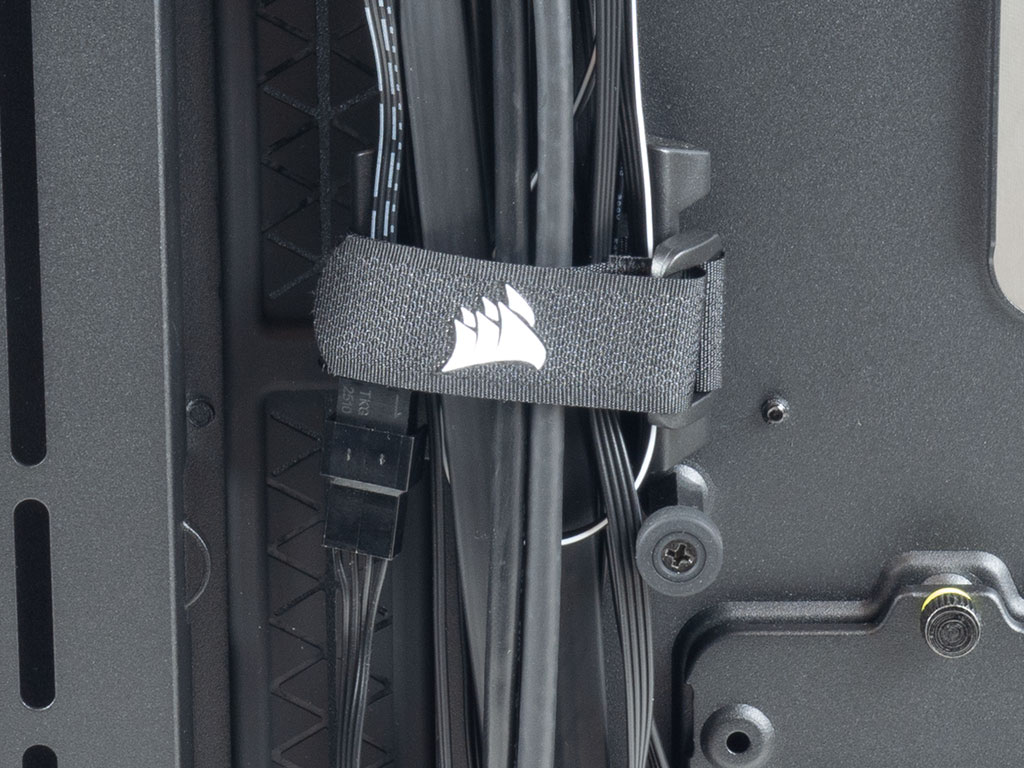
Towards the front of the chassis is the mounting position for the side fans/radiator consisting of four 120 mm spots, so a 480 mm radiator will fit as well. You may remove the bracket for easy assembly outside the confines of the case. However, to take advantage of this spot, you need to remove the solid metal cover as well, but Corsairs has pre-wired the fan cables through some openings in that panel. This means you would have to pull apart some of the cable management to free the fan PWM cables in the process. Next to that are two cable-management guides which utilize the thick, Corsair-branded Velcro ties. Three of them are pre-installed to hold the pre-routed cables in place.
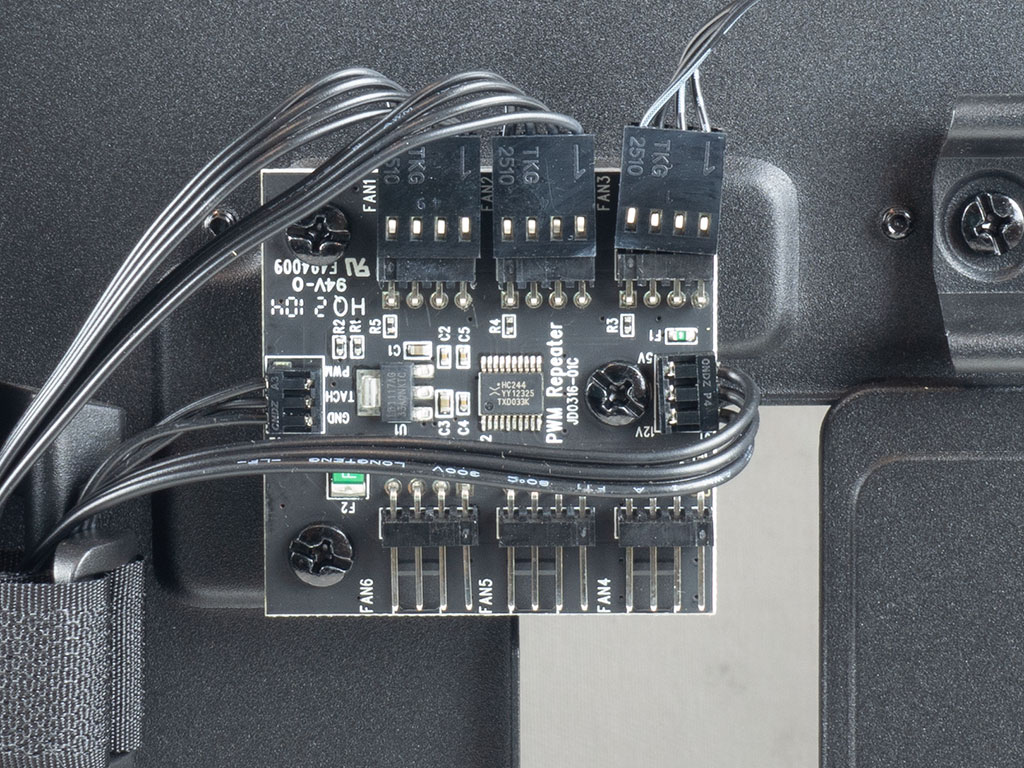
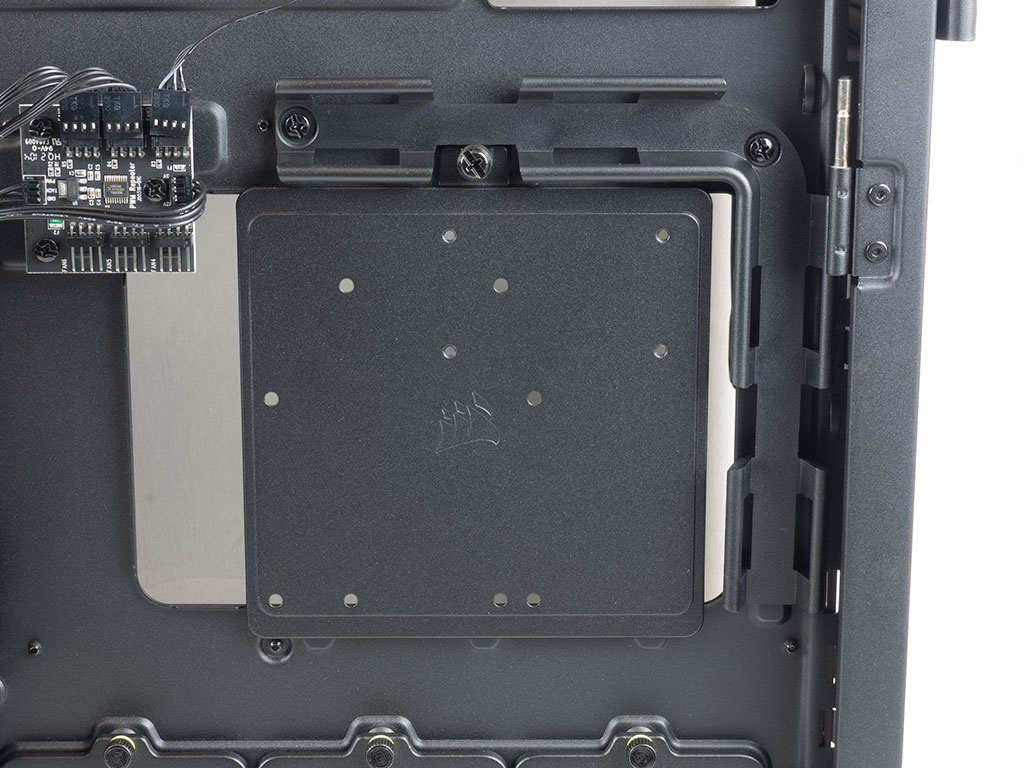
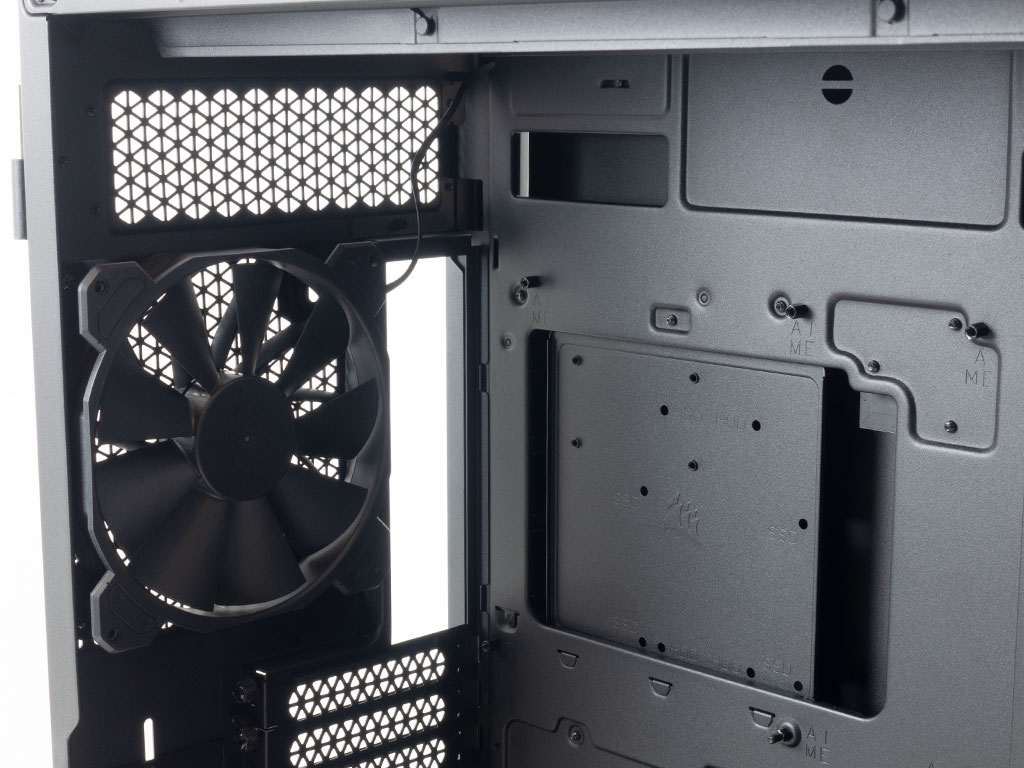
You will find the same PWM fan hub with six headers as in the 5000D Airflow. Those opting for the iCUE variant of the chassis will get the whole iCUE system instead. A plate over the opening for the CPU cooler makes installing RGB hubs or additional controllers a breeze. A set of mounting holes for an SSD are also available. Along with the three separate trays, this brings the total possible SSD count for this area of the chassis to four.
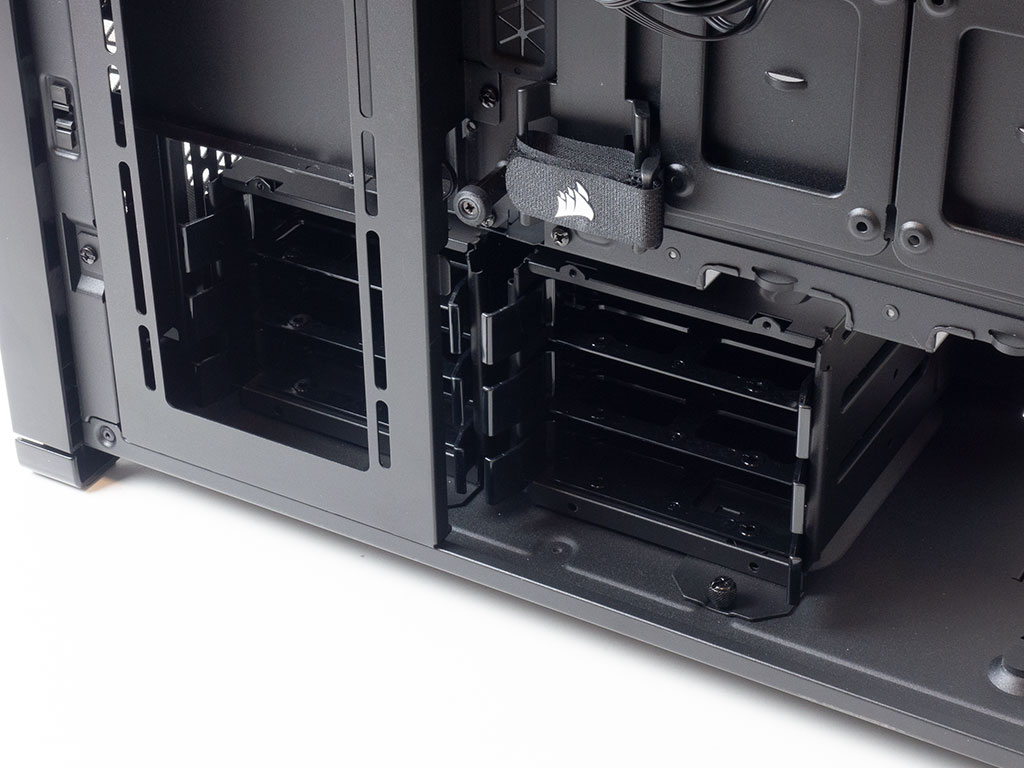
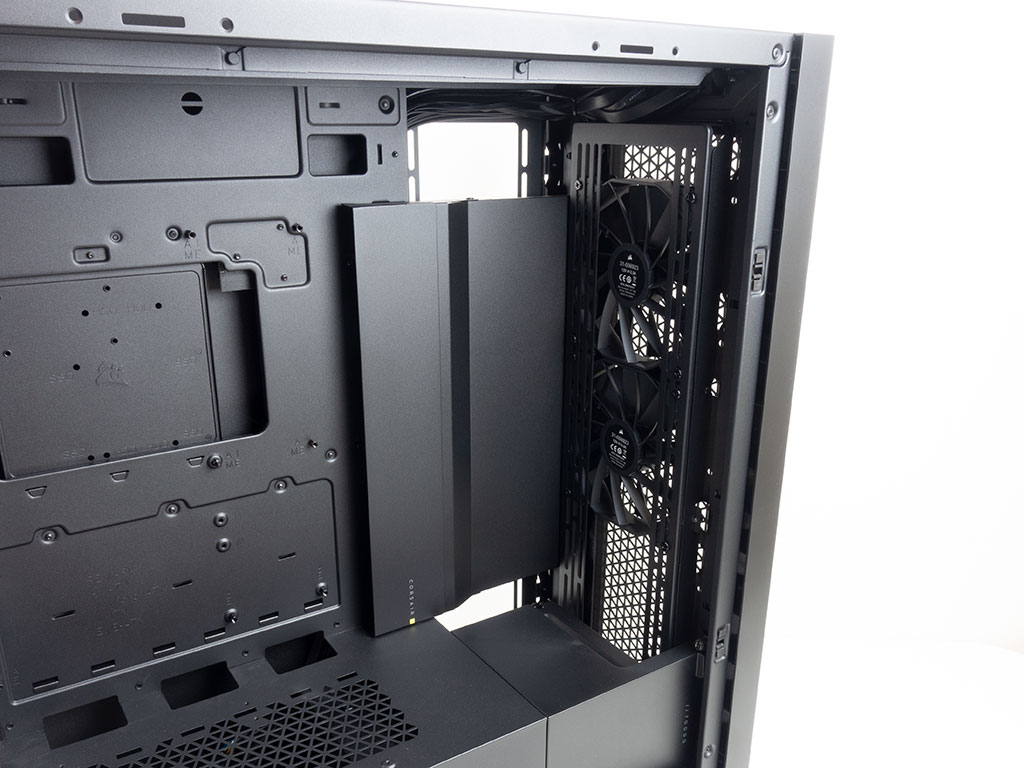

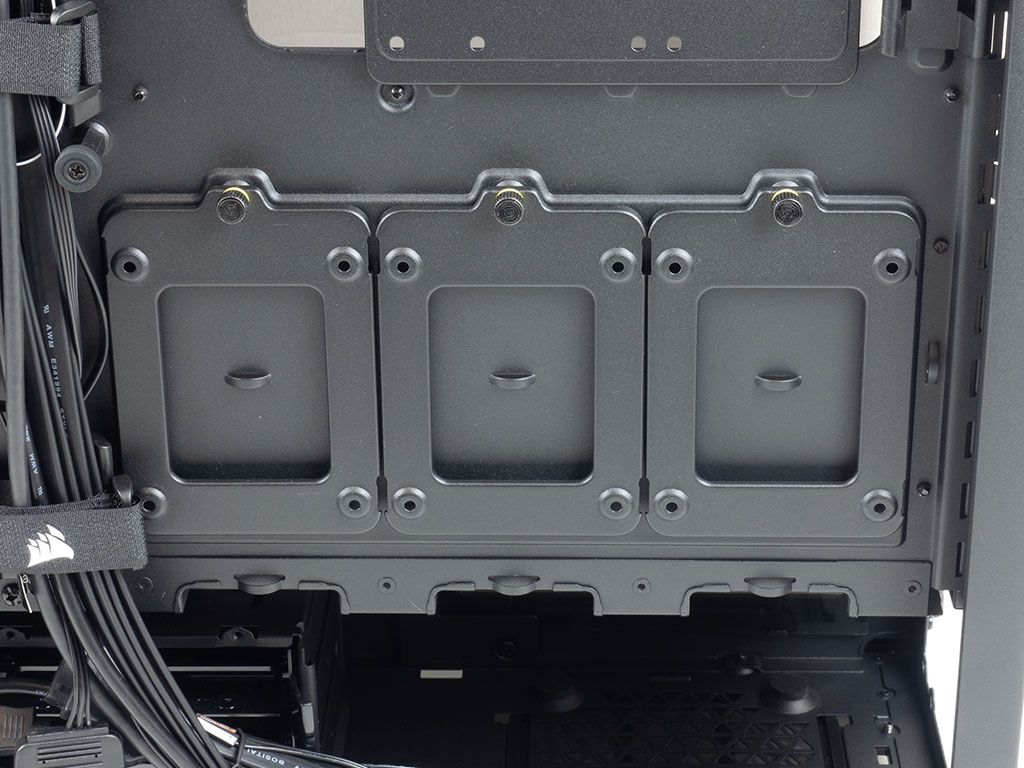
The two HDD cages under the shroud in the front hold a total of six plastic trays for two 3.5" or 2.5" drives. While one is easily accessible, the most forward unit requires you to remove the side fan/radiator mounting frame for access, so it is meant for storage you never intend to remove if you opt for cooling in this area of the Corsair 7000D Airflow. The whole area above that is for cooling purposes. Corsair has placed two retail-grade 140 mm PWM intake fans at mid-height, so the GPU will get some intake air as well.


Underneath the shroud, the PSU bay is standard-fare with its foam bits for the PSU to rest upon. Above that are the eight horizontal and three vertical expansion slots, each with its individual thumb screw holding the reusable cover in place. The retail-quality 140 mm PWM exhaust fan in the very top may be adjusted in height for alignment with your air cooler.
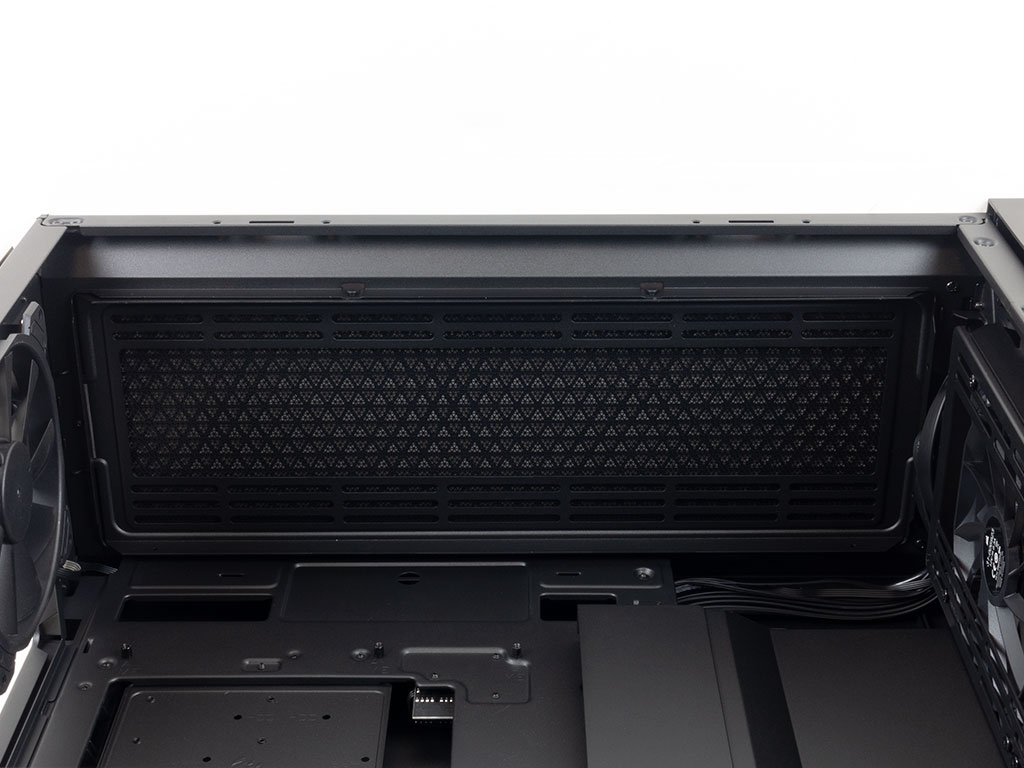
With the way the ceiling is shaped, there is still loads of space between it and the motherboard's top edge for even a thick push/pull radiator configuration because of the large dimensions of the case. I can totally see some users going all out and installing fans on top of the ceiling, and finding aftermarket dust-filter solutions. This would easily allow for a push/pull configuration with even the thickest radiators on the market.
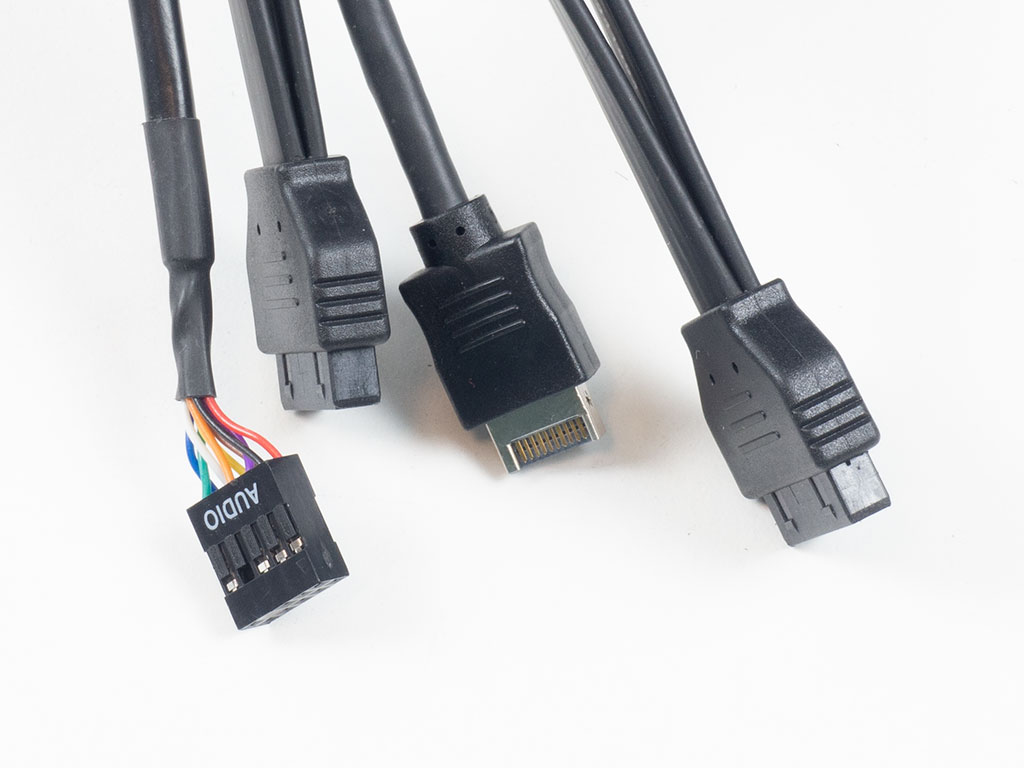

All the cables within the Corsair 7000D Airflow are black and mostly what you would expect. The two USB 3.0 cables are flat, which makes routing so much easier. There is no HDD activity LED, though, which is unfortunate for those using solid-state drives, as it is usually a good indicator of whether your system is frozen or just working really hard; that said, I can see users utilizing the power button LED as one instead.
Apr 8th, 2025 05:31 EDT
change timezone
Latest GPU Drivers
New Forum Posts
- Asus X670E Crosshair Crashes (8)
- is it worth using ssd with usb2? (13)
- Is RX 9070 VRAM temperature regular value or hotspot? (330)
- RX 9000 series GPU Owners Club (238)
- 5070 cards available below £550 in in the UK (76)
- 9070XT or 7900XT or 7900XTX (130)
- The easiest way to connect the BOOTSEL test metal terminal and the GND terminal.... (2)
- gpu heirarchy/performance/benchmarks- whos lying? (67)
- Sapphire NITRO+ RX 5700 XT BE original BIOS request (11)
- No idea how many watts this USB-C port will supply? (10)
Popular Reviews
- The Last Of Us Part 2 Performance Benchmark Review - 30 GPUs Compared
- UPERFECT UStation Delta Max Review - Two Screens In One
- PowerColor Radeon RX 9070 Hellhound Review
- ASUS Prime X870-P Wi-Fi Review
- Upcoming Hardware Launches 2025 (Updated Apr 2025)
- MCHOSE L7 Pro Review
- Sapphire Radeon RX 9070 XT Pulse Review
- Corsair RM750x Shift 750 W Review
- Sapphire Radeon RX 9070 XT Nitro+ Review - Beating NVIDIA
- DDR5 CUDIMM Explained & Benched - The New Memory Standard
Controversial News Posts
- NVIDIA GeForce RTX 5060 Ti 16 GB SKU Likely Launching at $499, According to Supply Chain Leak (161)
- MSI Doesn't Plan Radeon RX 9000 Series GPUs, Skips AMD RDNA 4 Generation Entirely (146)
- Microsoft Introduces Copilot for Gaming (124)
- AMD Radeon RX 9070 XT Reportedly Outperforms RTX 5080 Through Undervolting (119)
- NVIDIA Reportedly Prepares GeForce RTX 5060 and RTX 5060 Ti Unveil Tomorrow (115)
- Over 200,000 Sold Radeon RX 9070 and RX 9070 XT GPUs? AMD Says No Number was Given (100)
- NVIDIA GeForce RTX 5050, RTX 5060, and RTX 5060 Ti Specifications Leak (97)
- Nintendo Switch 2 Launches June 5 at $449.99 with New Hardware and Games (92)