Apr 1st, 2025 11:27 EDT
change timezone
Latest GPU Drivers
New Forum Posts
- Can you guess Which game it is? (52)
- Help me pick a UPS (13)
- Help with System Recommendations (8)
- Bought Mining rx 580 with flashed bios but yellow triangle shows at device manager (9)
- best ram to buy for my usage and system specs? (2)
- X670 owners, what kind of PCH temps do you you see? (26)
- Windows 11 General Discussion (5912)
- What is the latest game you finished or 100% (15)
- Hello (4)
- The TPU UK Clubhouse (26028)
Popular Reviews
- DDR5 CUDIMM Explained & Benched - The New Memory Standard
- Sapphire Radeon RX 9070 XT Pulse Review
- ASRock Phantom Gaming B850 Riptide Wi-Fi Review - Amazing Price/Performance
- Palit GeForce RTX 5070 GamingPro OC Review
- SilverStone Lucid 04 Review
- Samsung 9100 Pro 2 TB Review - The Best Gen 5 SSD
- Sapphire Radeon RX 9070 XT Nitro+ Review - Beating NVIDIA
- Enermax REVOLUTION D.F. 12 850 W Review
- Assassin's Creed Shadows Performance Benchmark Review - 30 GPUs Compared
- AMD Ryzen 7 9800X3D Review - The Best Gaming Processor
Controversial News Posts
- MSI Doesn't Plan Radeon RX 9000 Series GPUs, Skips AMD RDNA 4 Generation Entirely (142)
- Microsoft Introduces Copilot for Gaming (124)
- AMD Radeon RX 9070 XT Reportedly Outperforms RTX 5080 Through Undervolting (119)
- NVIDIA Reportedly Prepares GeForce RTX 5060 and RTX 5060 Ti Unveil Tomorrow (115)
- Over 200,000 Sold Radeon RX 9070 and RX 9070 XT GPUs? AMD Says No Number was Given (100)
- NVIDIA GeForce RTX 5050, RTX 5060, and RTX 5060 Ti Specifications Leak (96)
- Retailers Anticipate Increased Radeon RX 9070 Series Prices, After Initial Shipments of "MSRP" Models (90)
- China Develops Domestic EUV Tool, ASML Monopoly in Trouble (88)
 7
7
Epomaker Shadow-X Wireless Mechanical Keyboard Review
Software »Disassembly
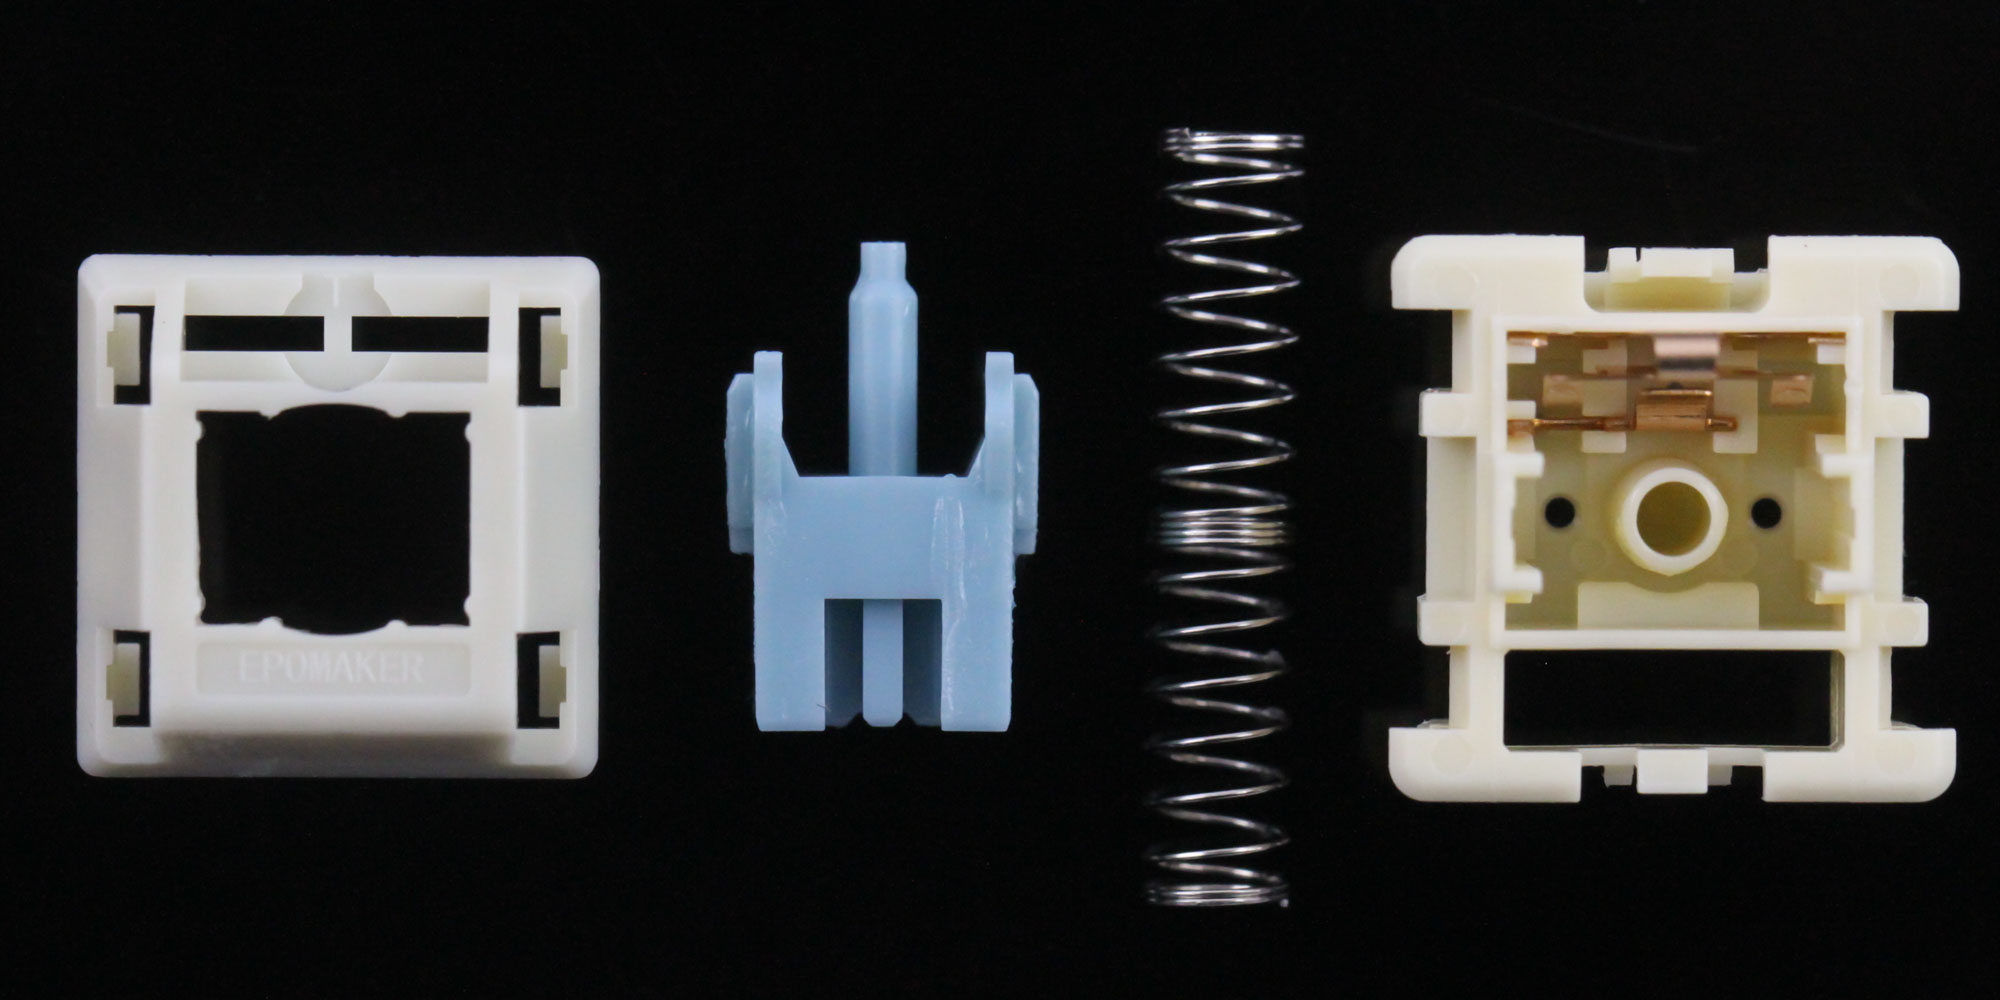
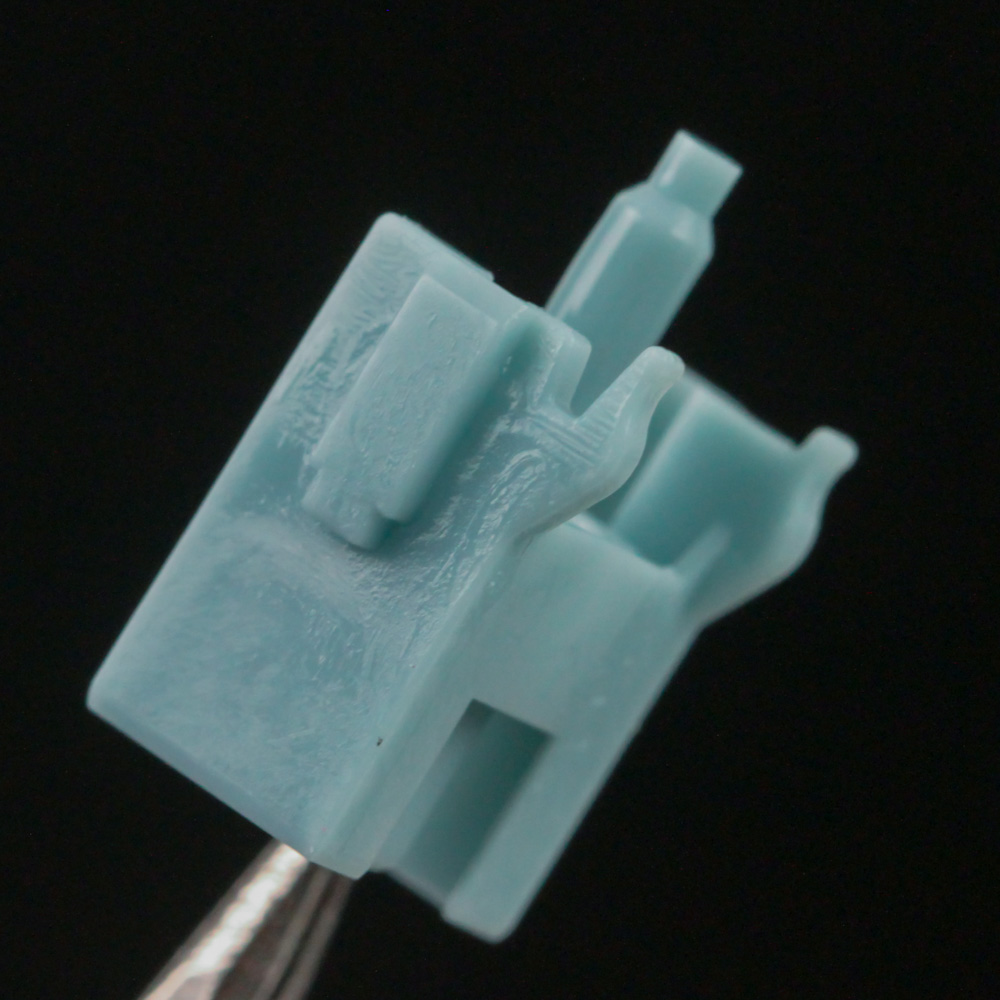
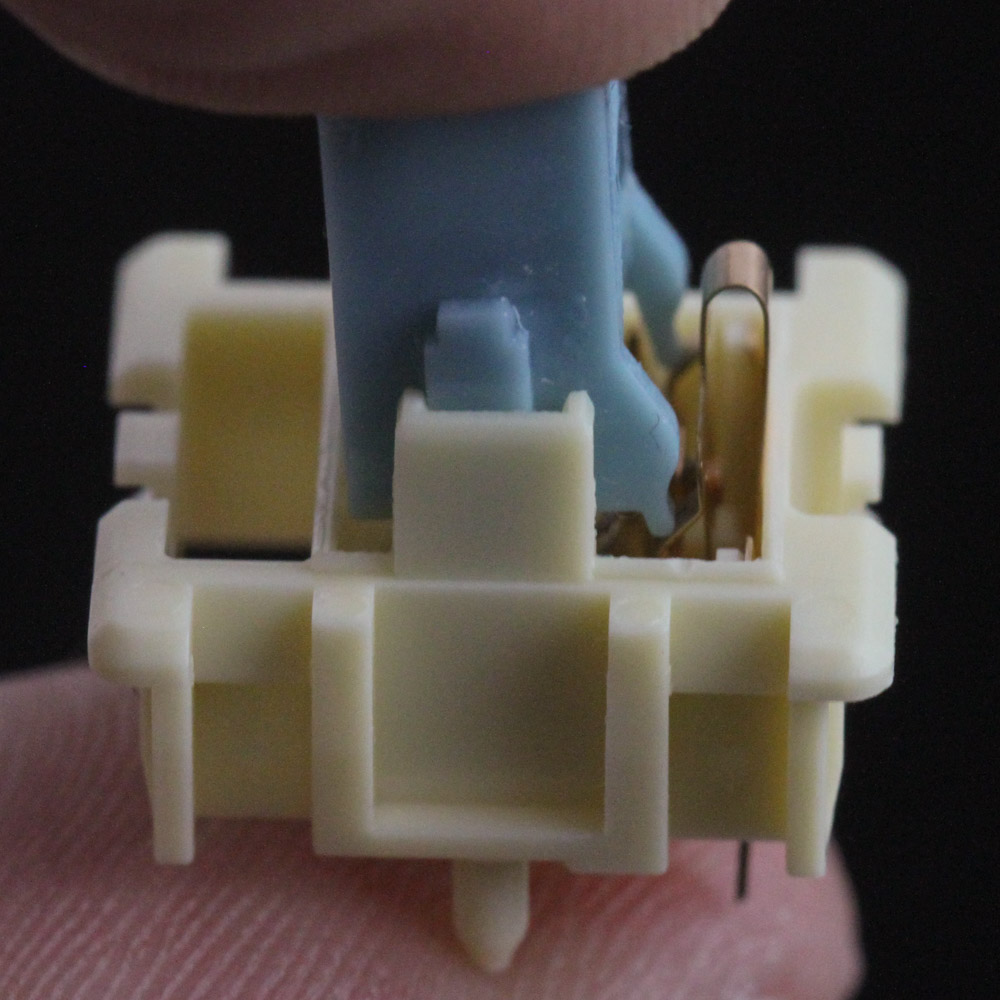
Given the hot-swappable switches here, I wanted to begin this section with a look inside the Epomaker Budgerigar switches that came on this sample. This is a tactile switch with a pre-lubed stem and spring, and well lubed even on the sides to where I don't expect to gain much from taking these apart for cleaning and re-lubing. The nylon/POM composition is also tight in tolerance with the lubing helping for smooth, low-friction travel without wobbling either. The tactile feedback comes in the form of the second bump on the stem making contact with the copper contacts in the bottom housing after the first one helps actuate the switch given the similar switch design compared to other such Cherry MX-style switches.
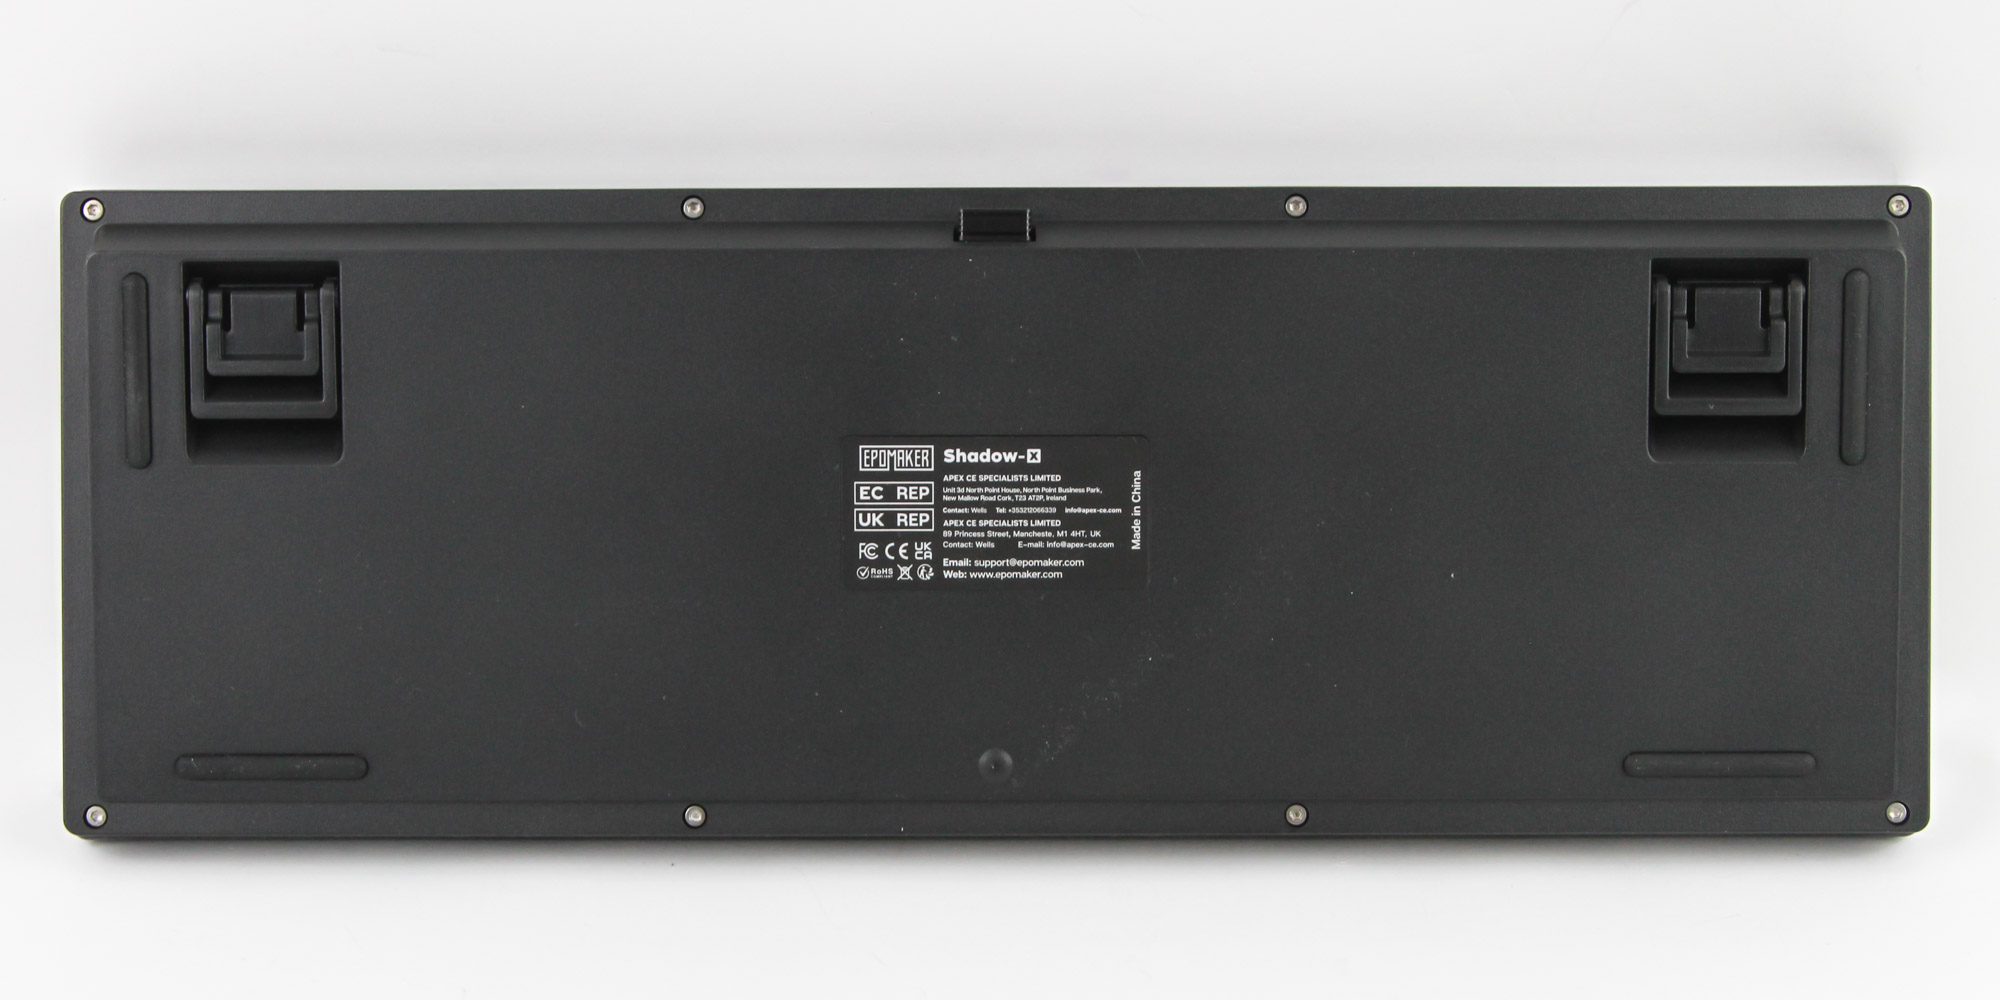
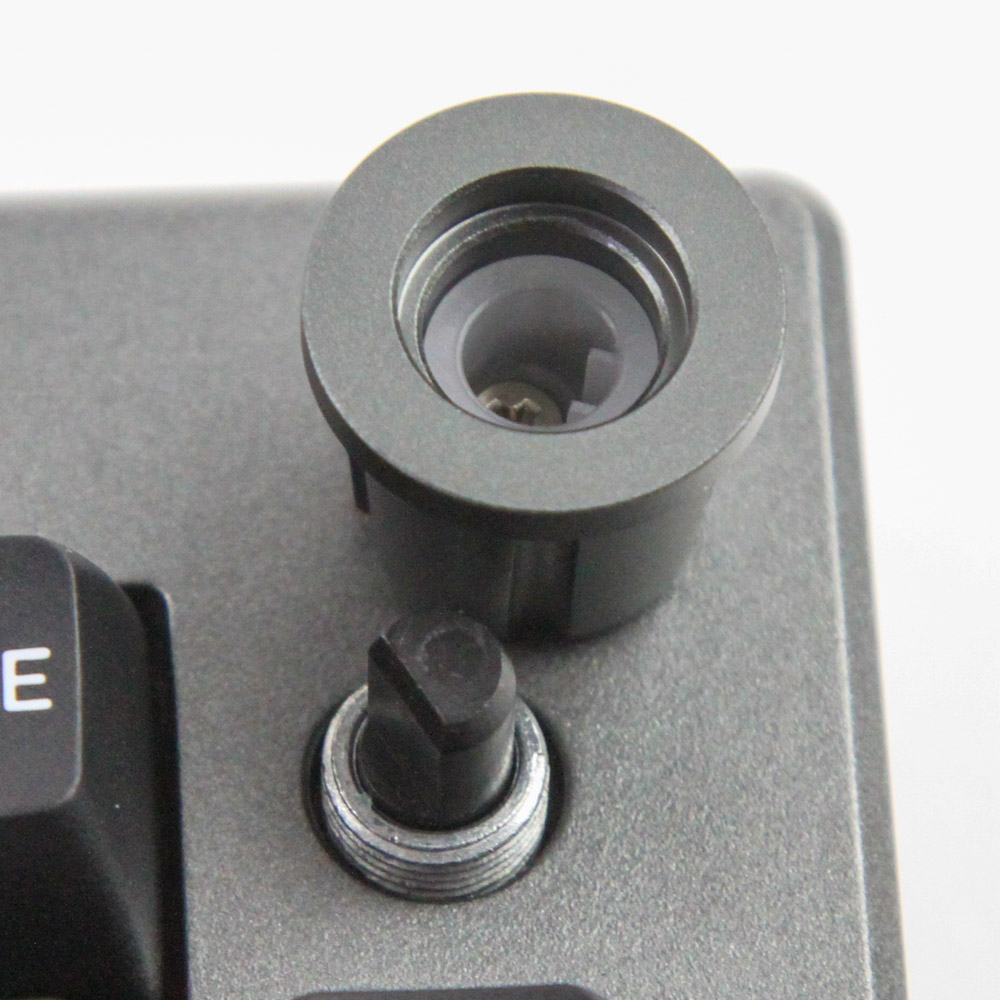
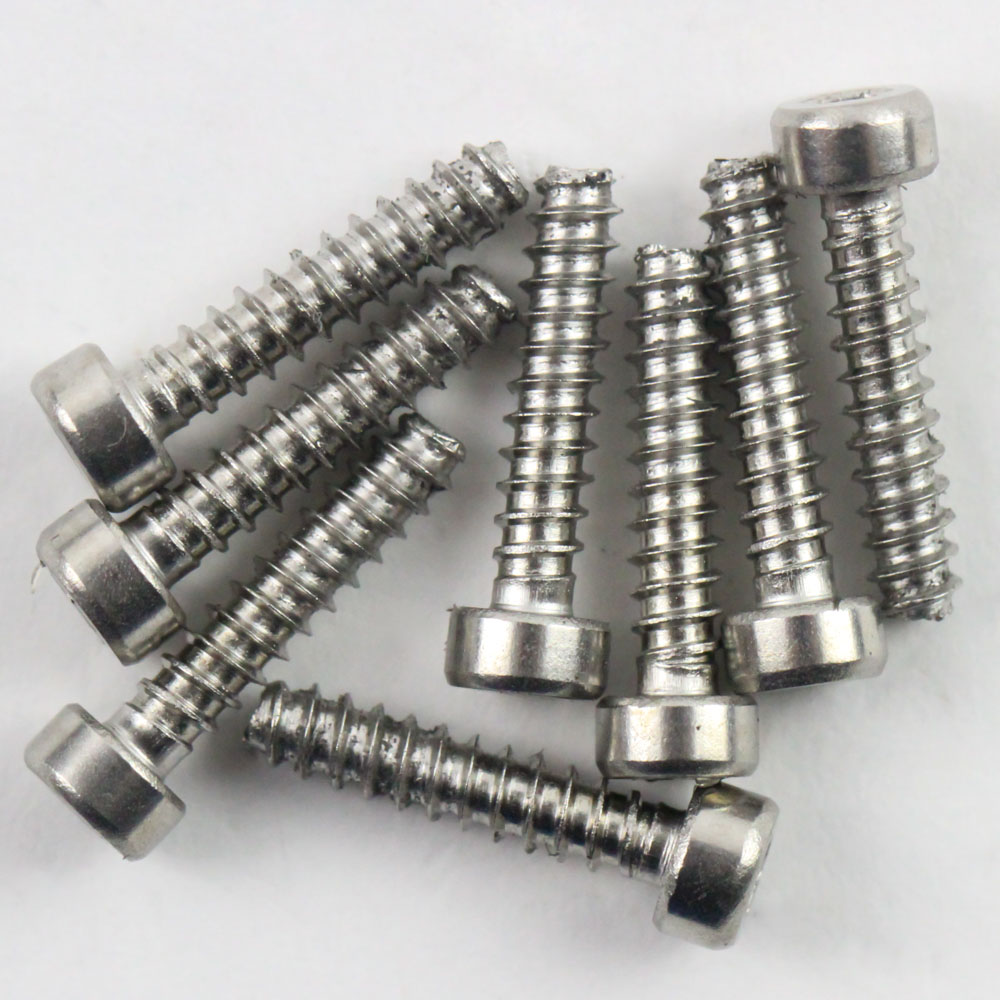
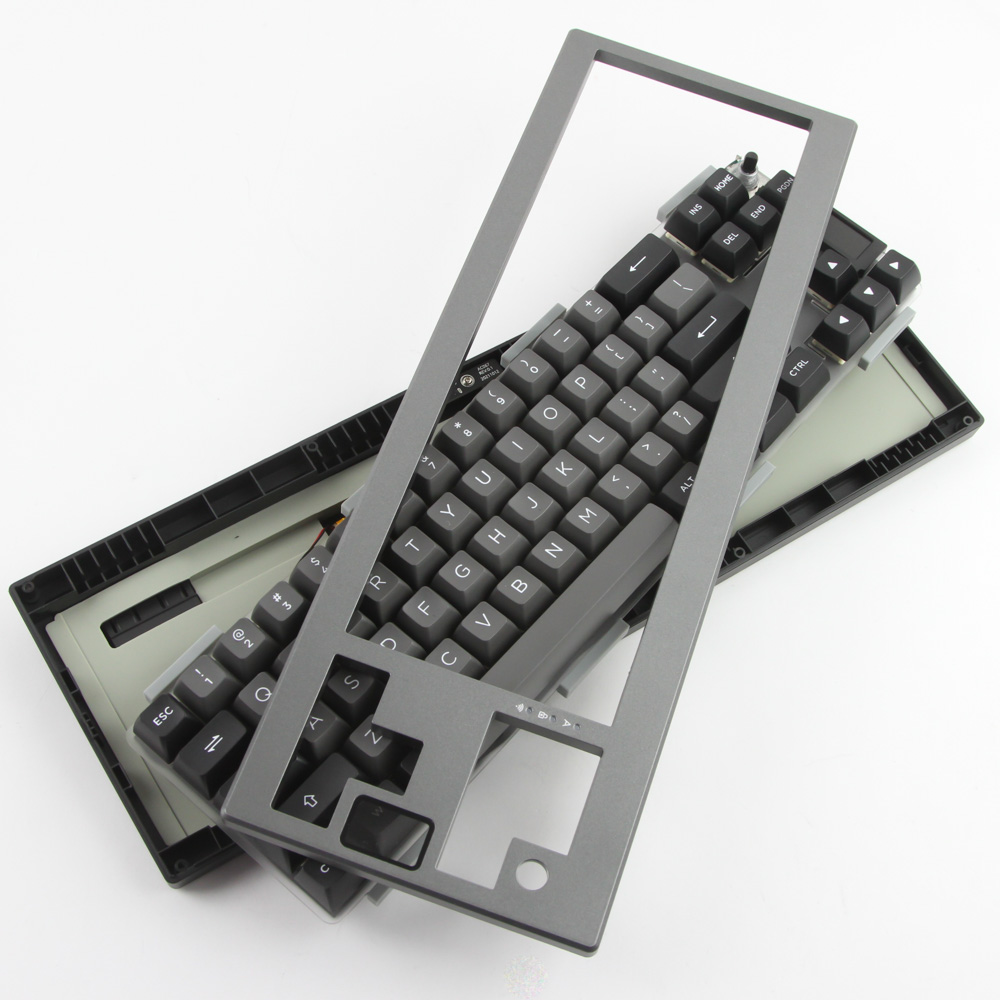

Disassembly of the keyboard is relatively simple given Epomaker has chosen to go with eight socket head screws on the back holding the case together. Pry off the knurled aluminium knob cover and then you can easily separate the top and bottom case panels as seen above. There's not a lot to see on the top panel except for confirmation of the ABS plastic composition and diffusers used for the indicator LEDs.
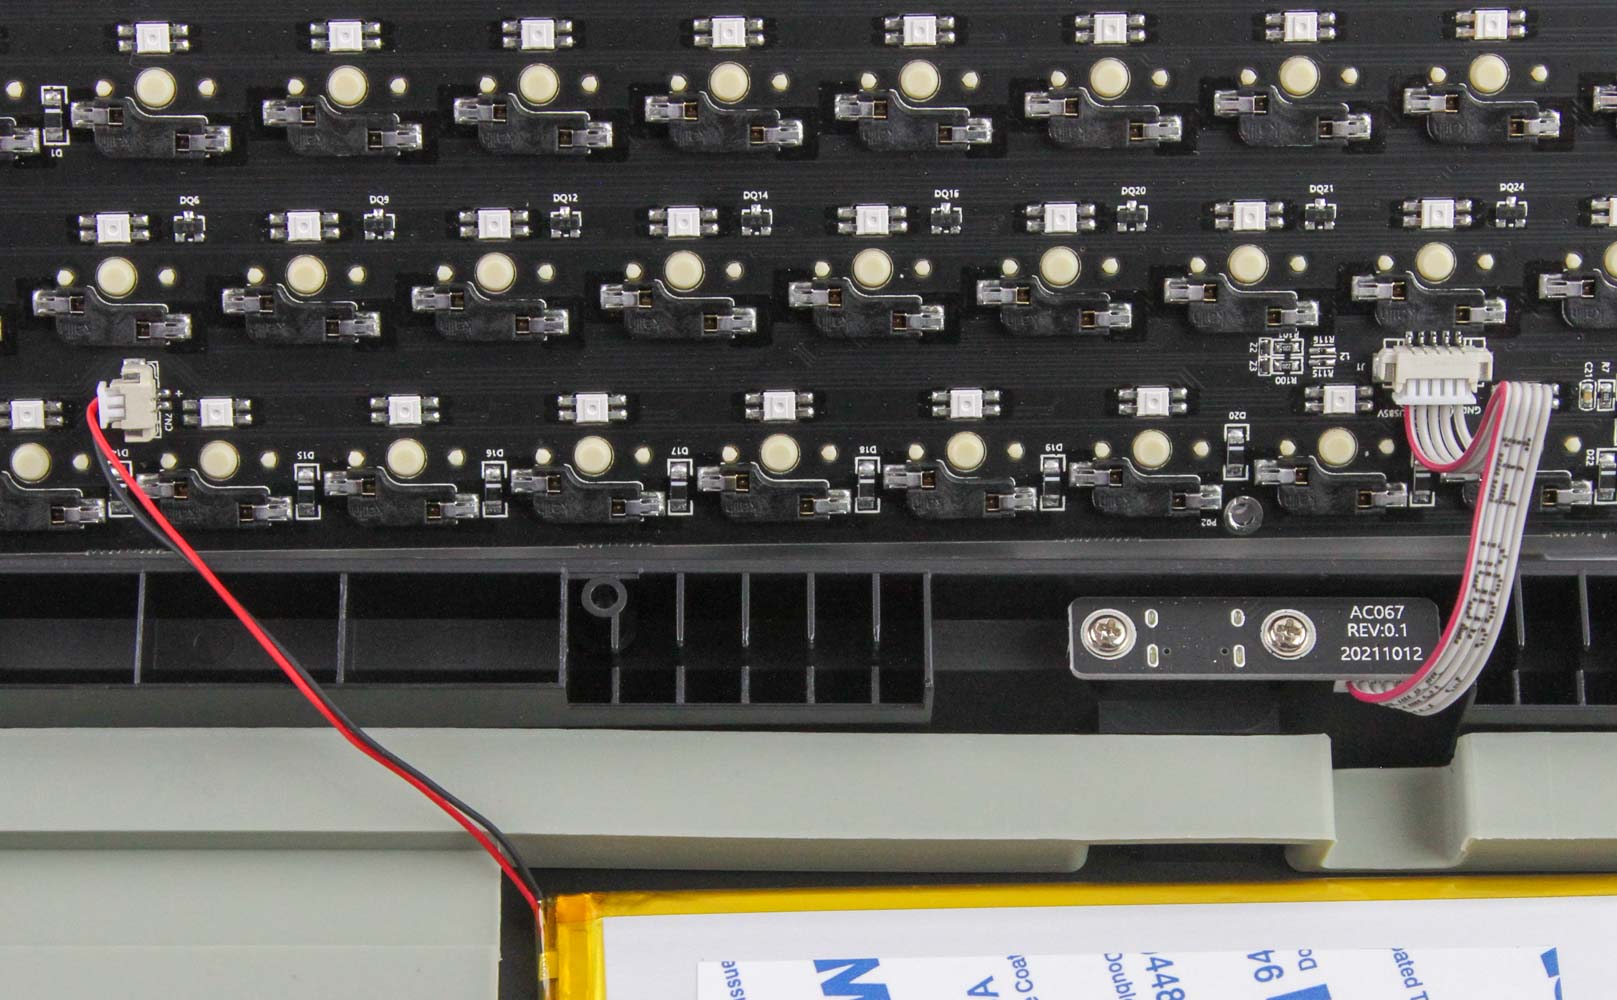
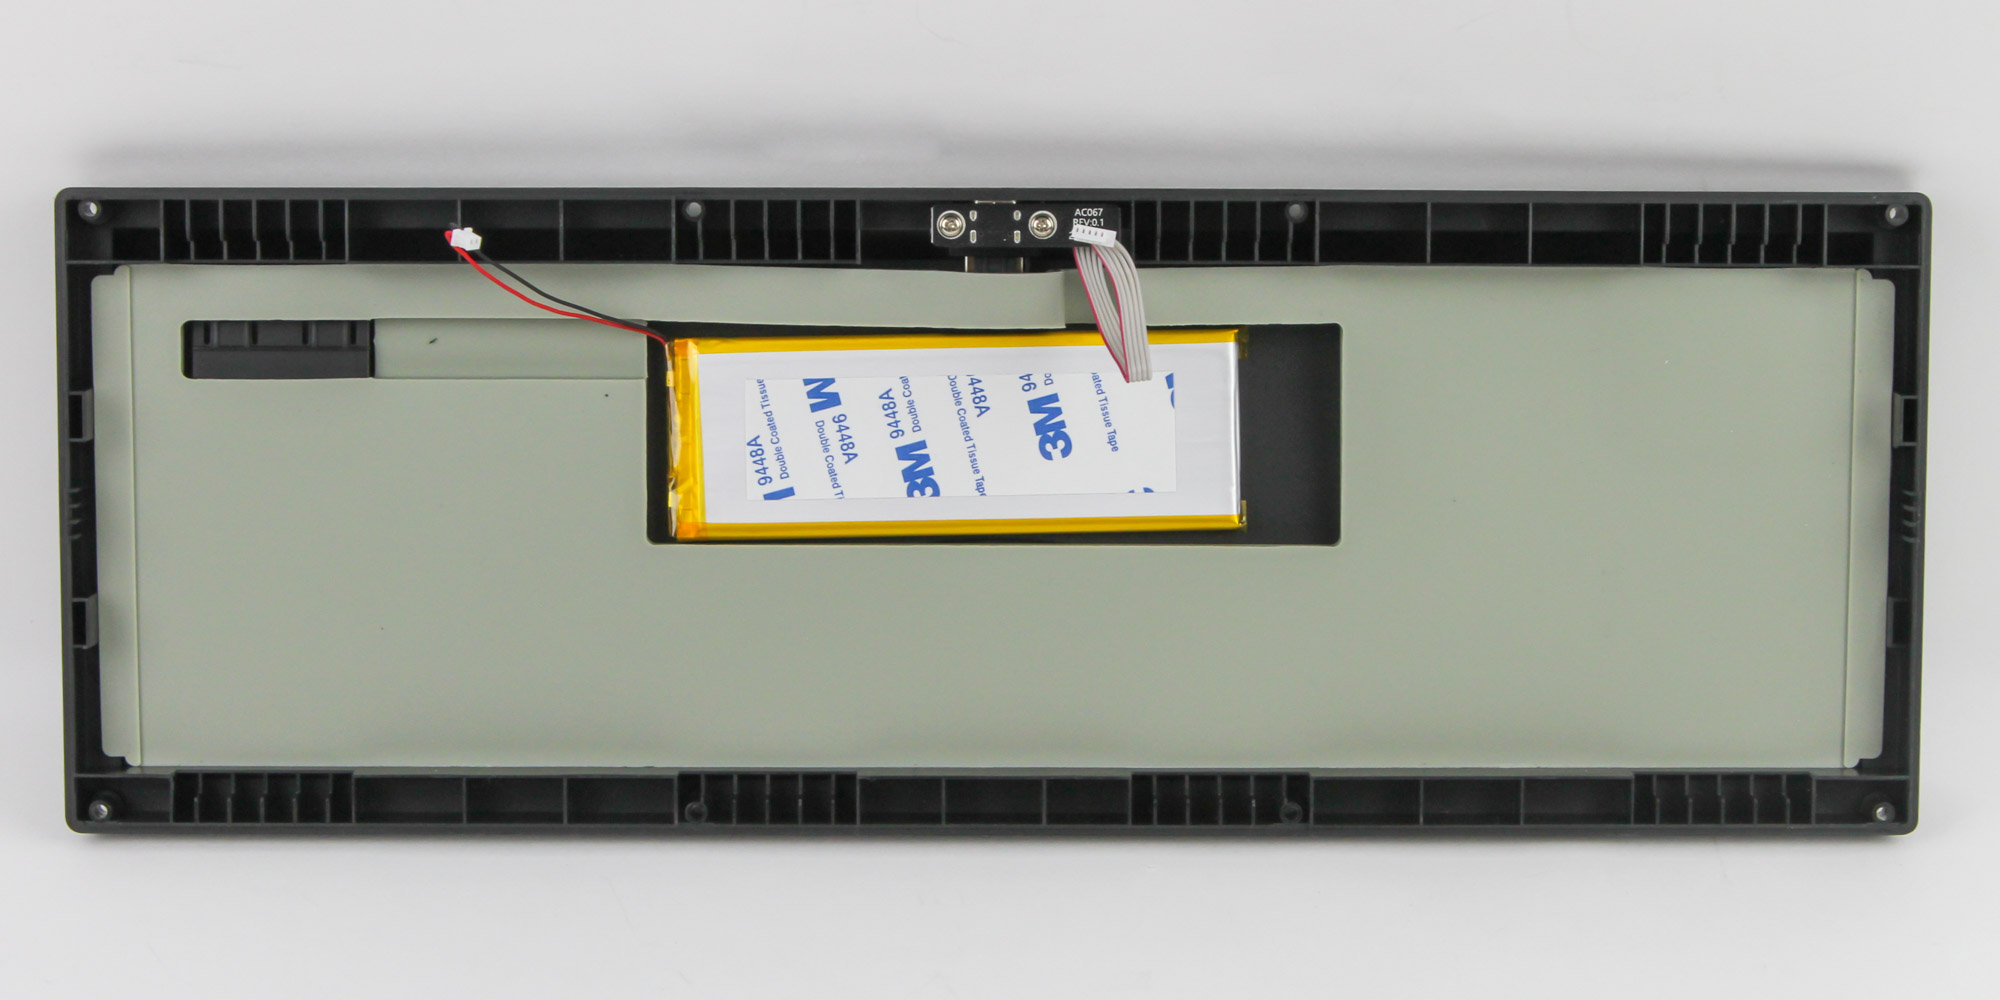
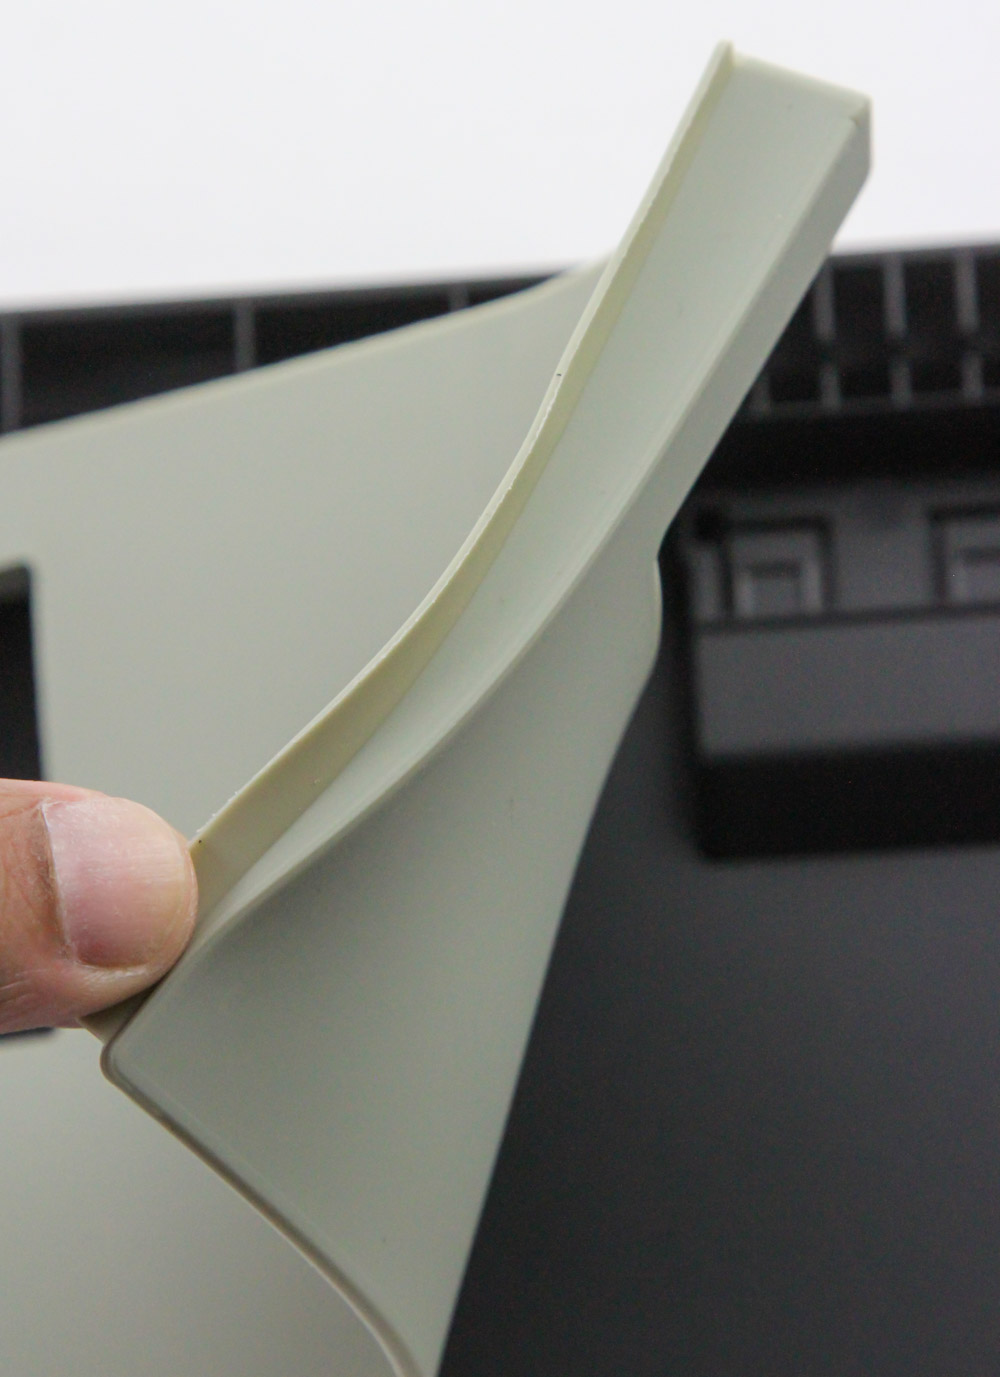
The bottom panel is still connected to the PCB via two cables—one going from a 3000 mAh pouch-style battery to power the keyboard in either of the two wireless modes and the other from a daughter PCB hosting the Type-C port itself. Disconnect both to better examine these parts wherein we see a thick, custom-made silicone rubber sheet placed between the PCB and the bottom panel to minimize reverberations. Then we get a closer look at the plate/PCB section where I was happy to see Epomaker go with more traditional and effectively silicone gaskets around the polycarbonate plate. There could have been more gaskets on the shorter sides too but this is still better than the foam inserts we saw before on more expensive keyboards such as the Epomaker RT100 that just collapsed too easily rather than helping decouple your keystrokes from the case as a proper gasket mount should.
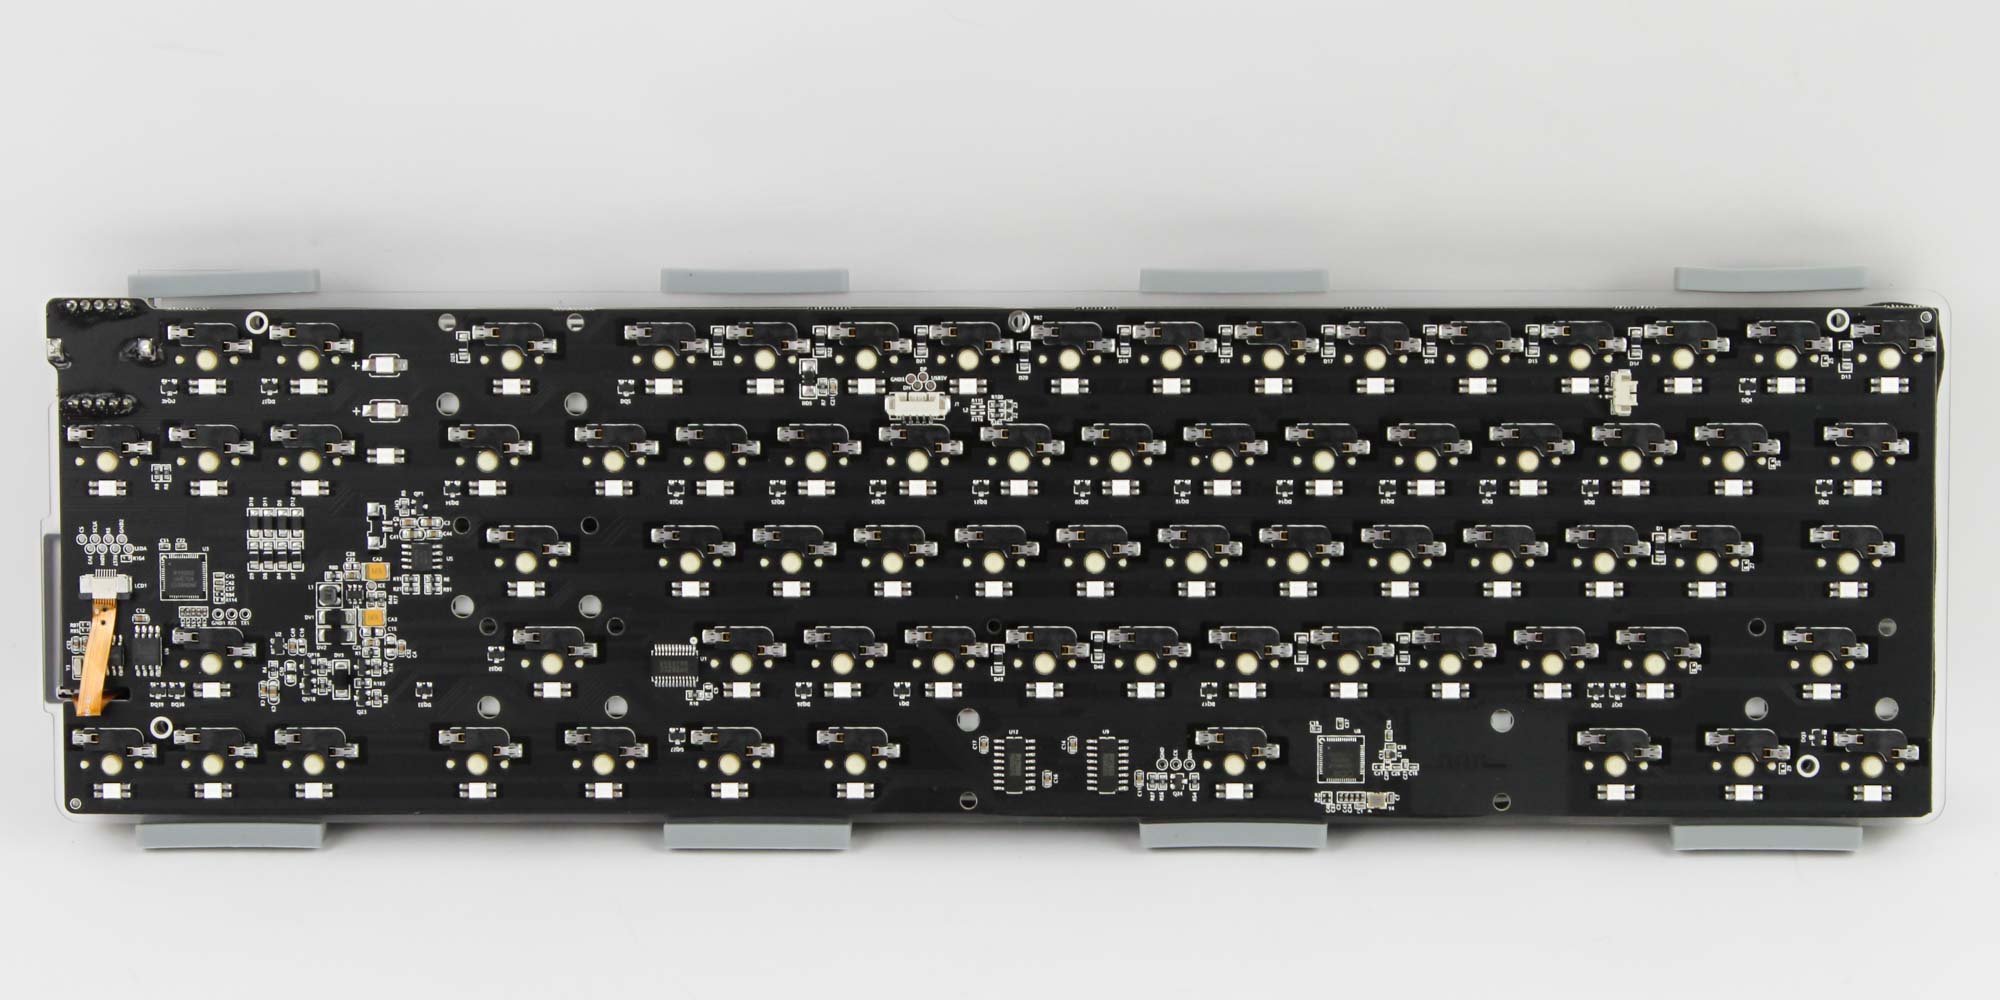
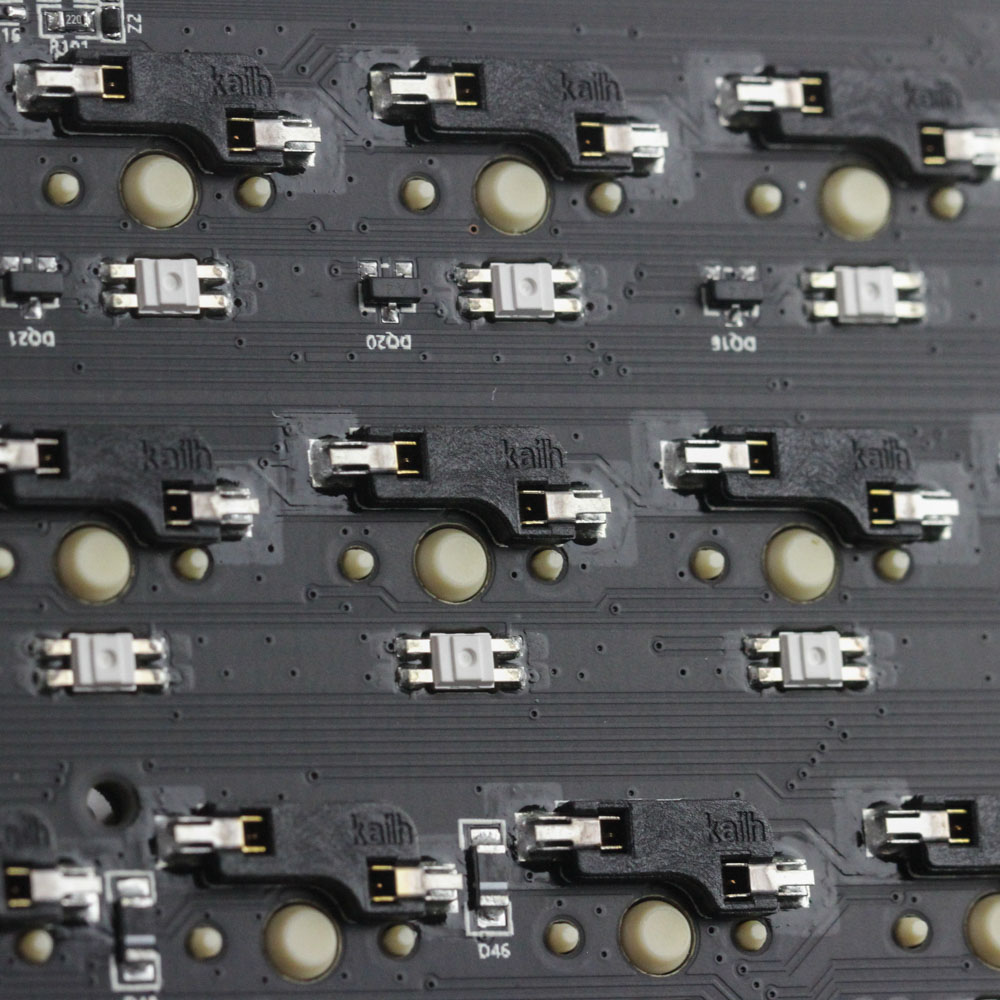
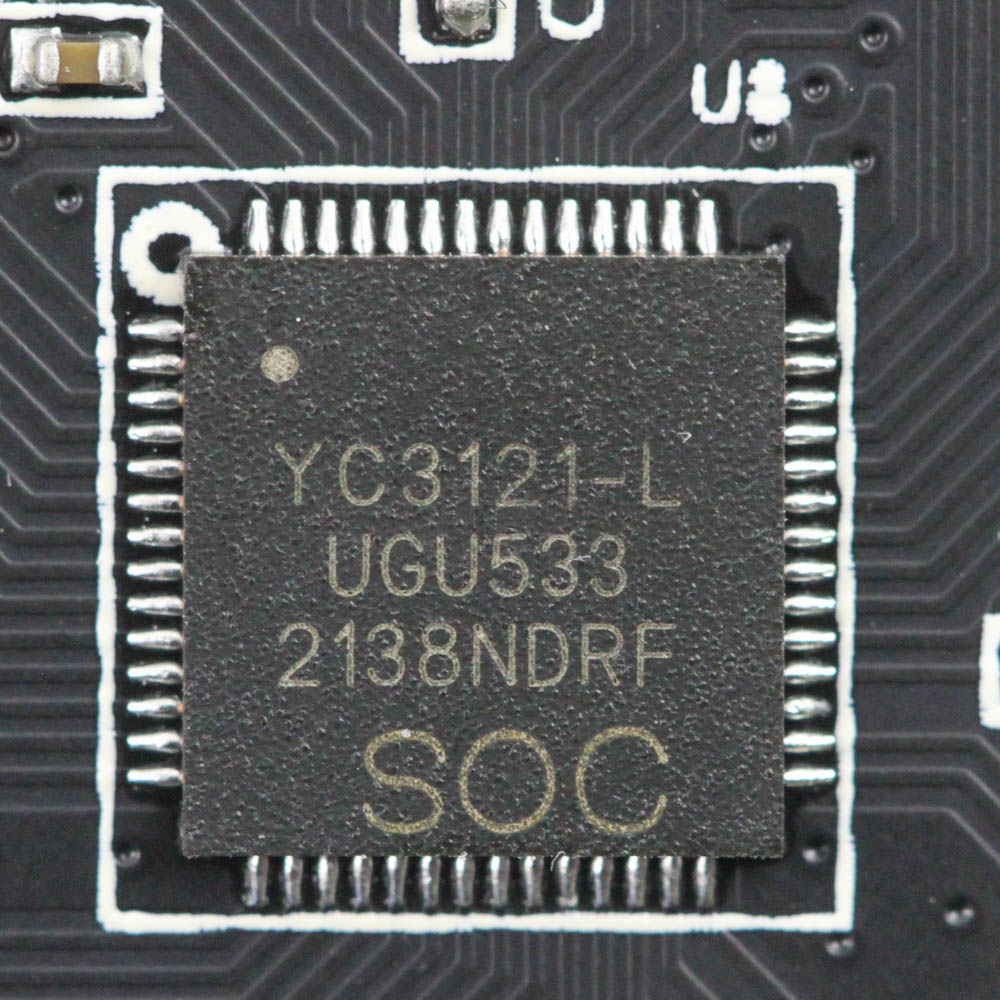
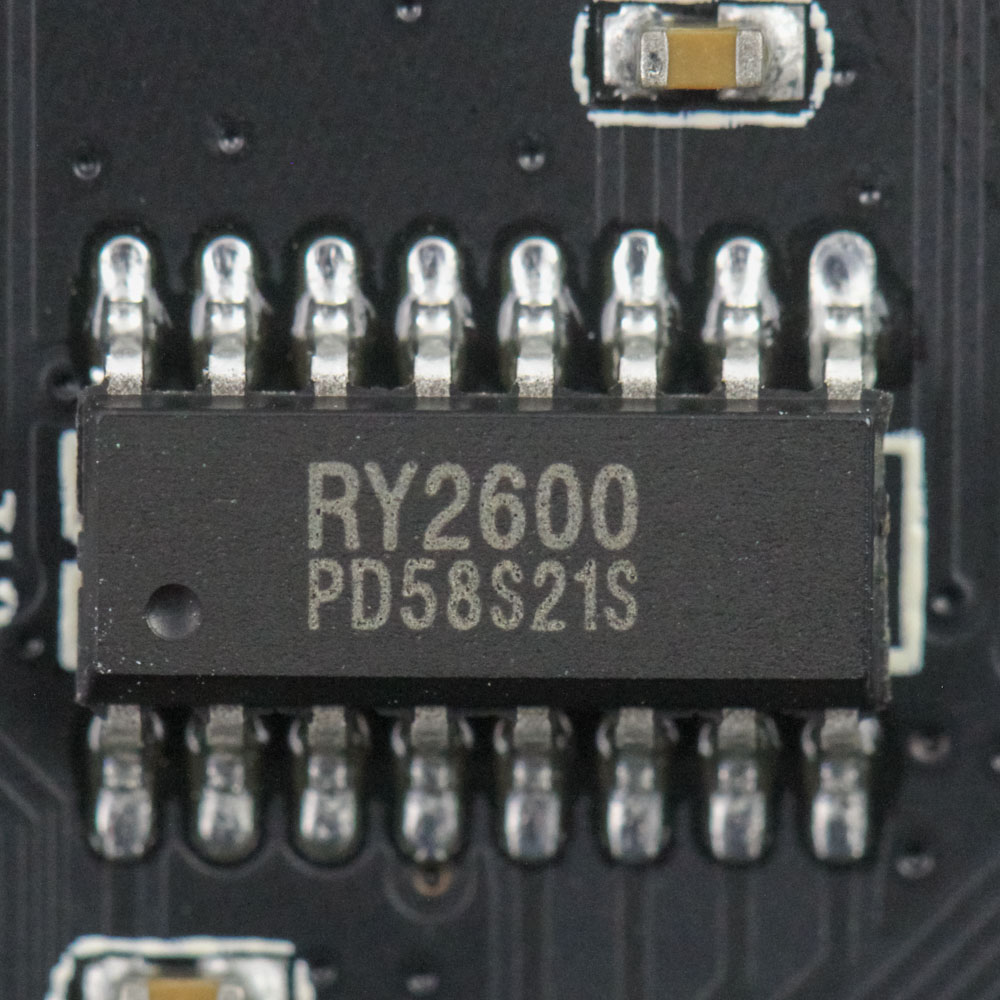
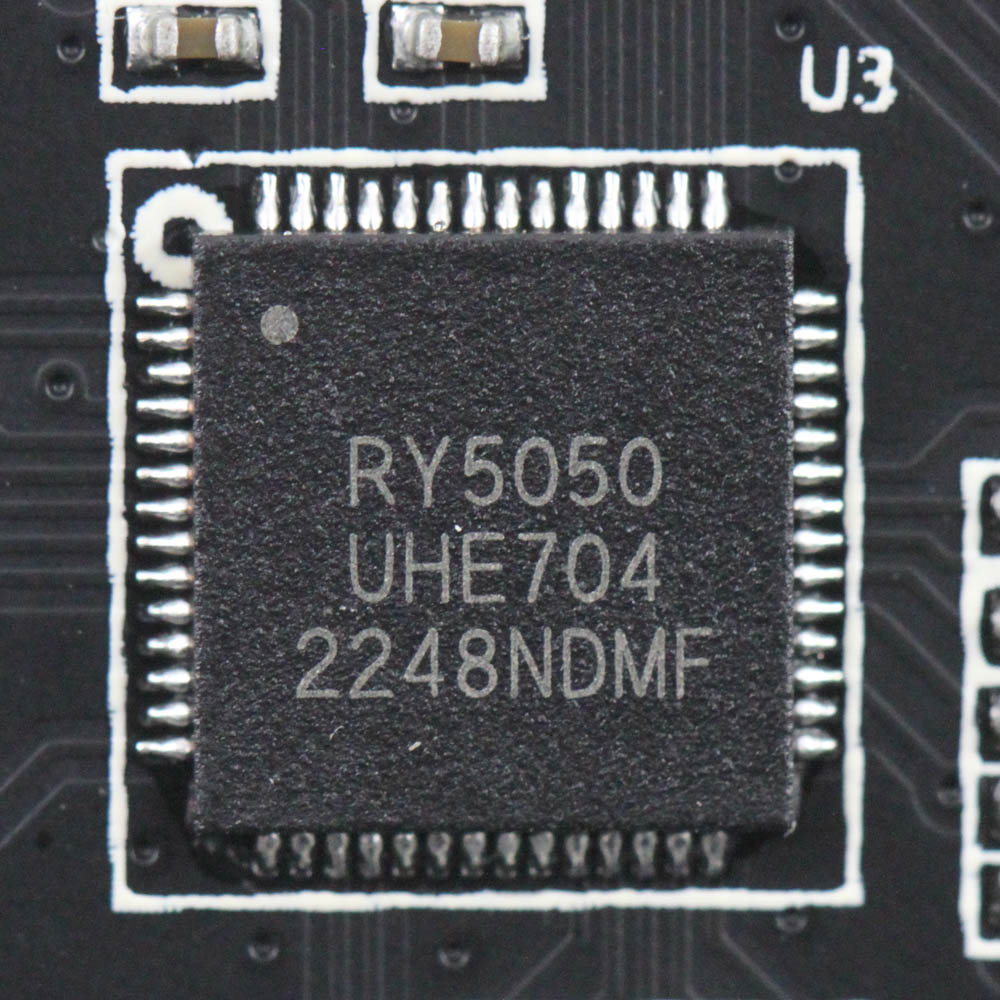
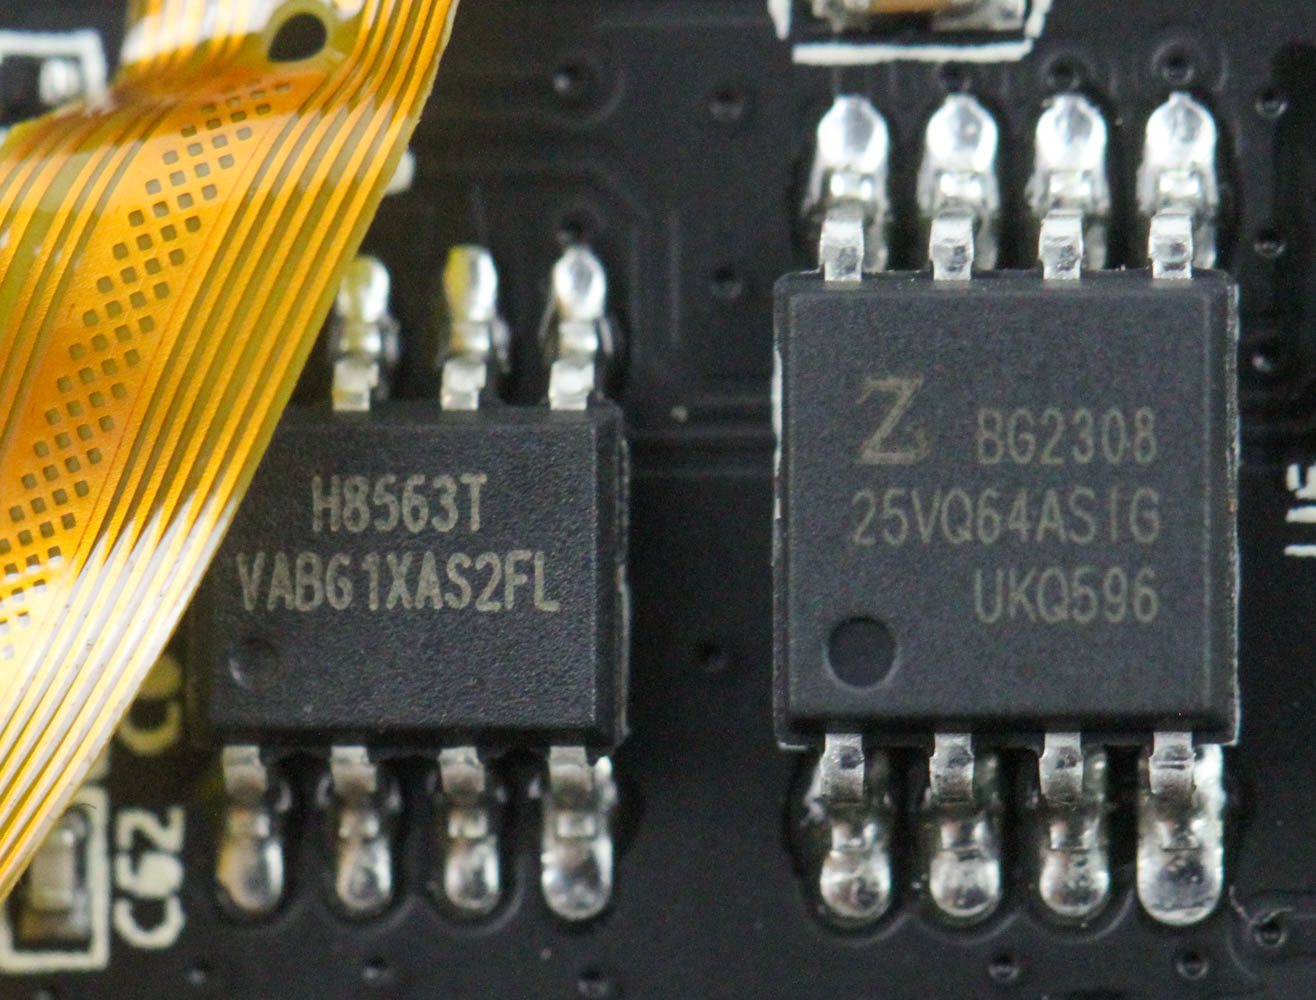
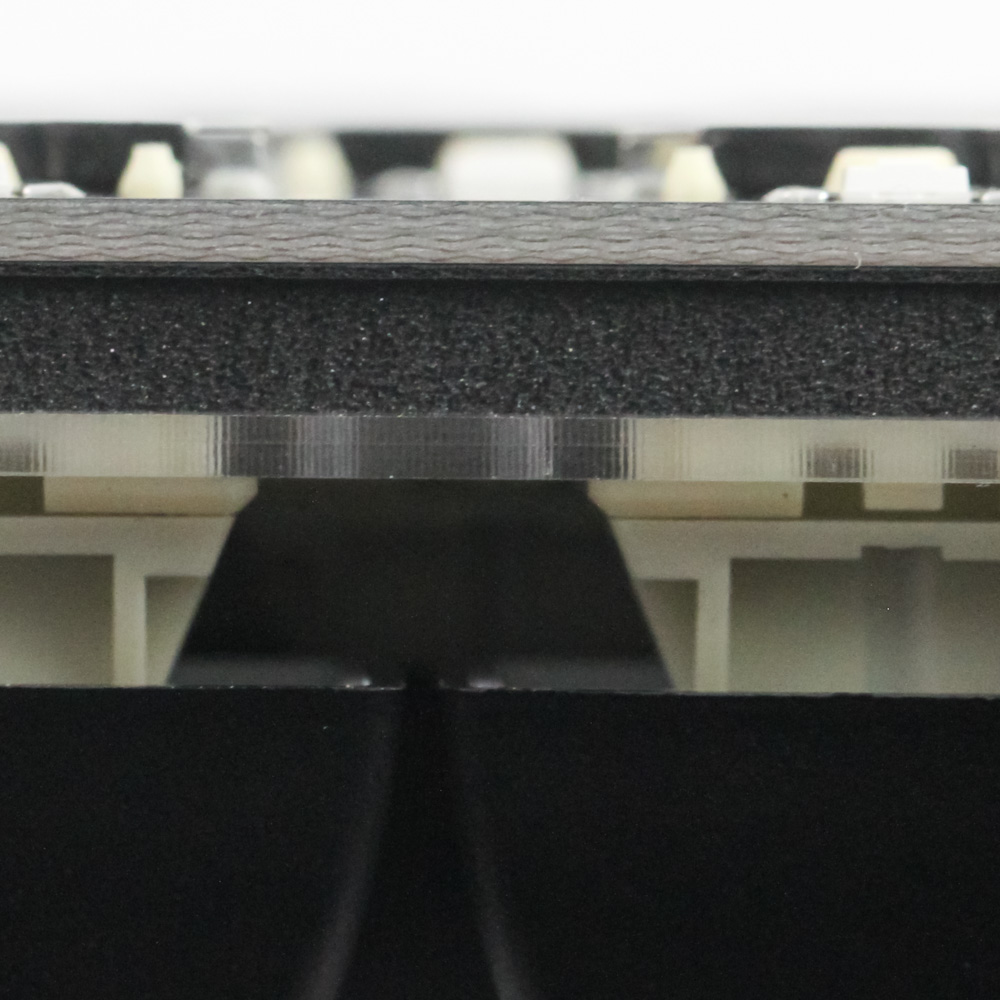
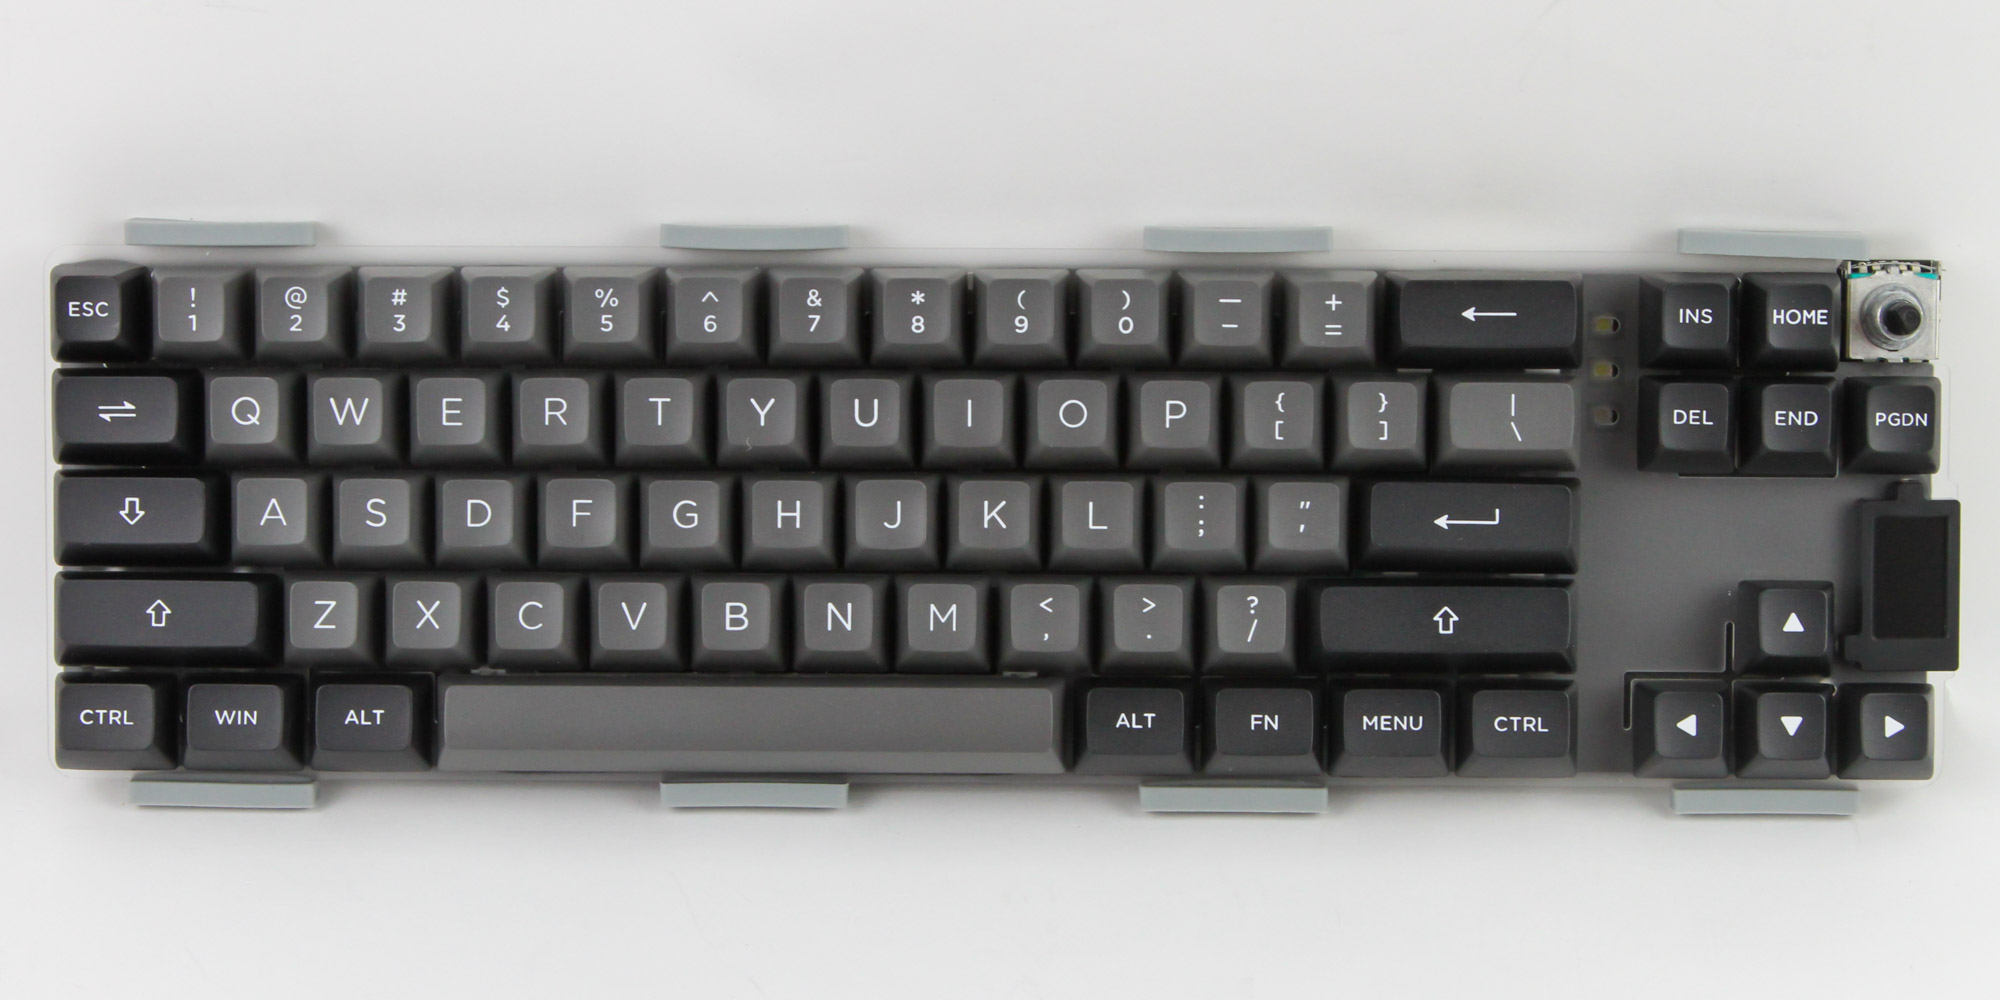
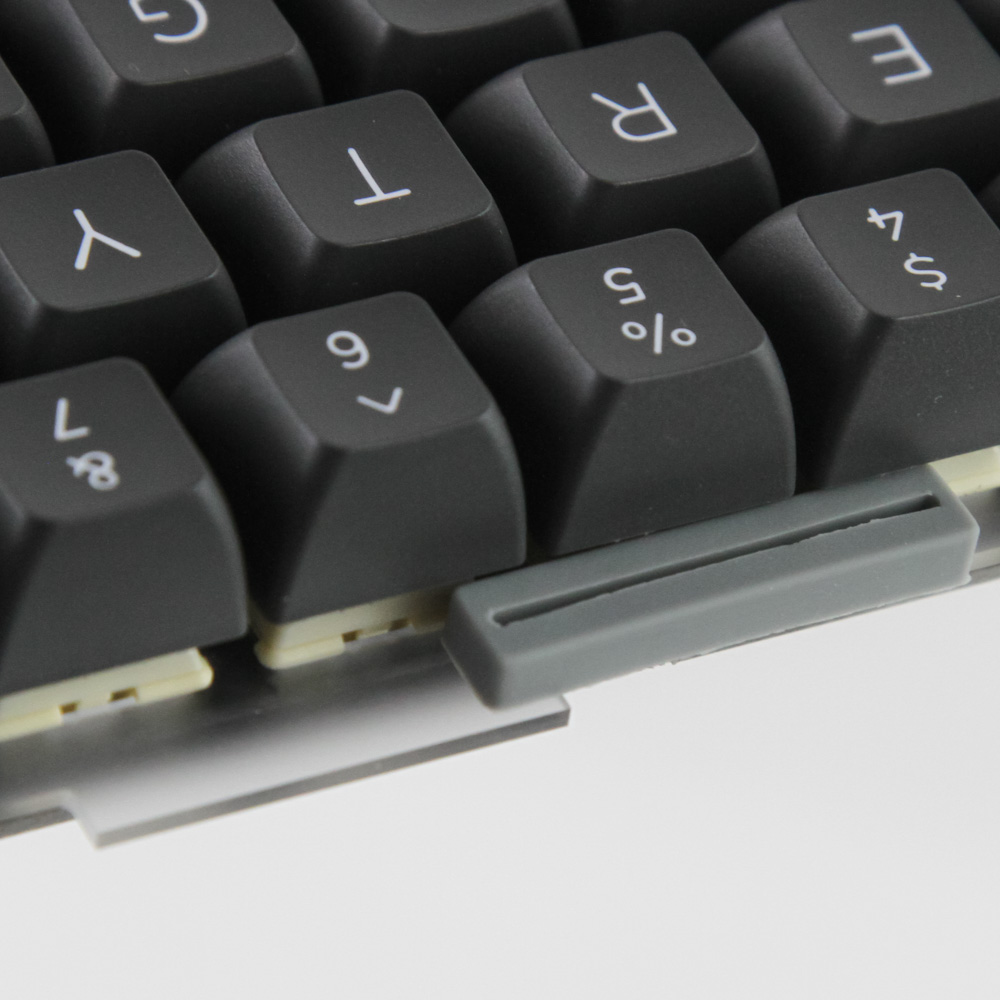
At this point you can choose to remove all keycaps and switches to further separate the plate from the primary PCB itself, and this would allow you to also potentially replace and re-lube the stabilizers too. The PCB itself is black in color with good solder quality throughout. Epomaker is using good quality Kailh 5-pin hot-swap switch sockets here which I can vouch for not only in terms of compatibility with pretty much all hot-swap 3- or 5-pin switches but also in reliability over longer periods of use should you be the type to keep experimenting with different switches. LEDs are associated with each switch in a south-facing configuration as previously discussed. There is a YiChip YC3x-series 32-bit RISC architecture USB microcontroller which doubles up as a Bluetooth 5.0 transceiver. There are a few other harder-to-identify drivers here that might well be for LED control in addition to hosting a 2.4 GHz SoC. The side view confirms the use of a foam sheet present between the plate and the PCB, in addition to the thinner switch pads we saw on the previous page, for added sound dampening. All the components, including the switch sockets, SMD LEDs, and capacitors, are soldered to a multi-layered PCB.
Before we move on, be advised that disassembly may void the warranty and that TechPowerUp is not liable for any damages incurred if you decide to go ahead and do so anyway.
Apr 1st, 2025 11:27 EDT
change timezone
Latest GPU Drivers
New Forum Posts
- Can you guess Which game it is? (52)
- Help me pick a UPS (13)
- Help with System Recommendations (8)
- Bought Mining rx 580 with flashed bios but yellow triangle shows at device manager (9)
- best ram to buy for my usage and system specs? (2)
- X670 owners, what kind of PCH temps do you you see? (26)
- Windows 11 General Discussion (5912)
- What is the latest game you finished or 100% (15)
- Hello (4)
- The TPU UK Clubhouse (26028)
Popular Reviews
- DDR5 CUDIMM Explained & Benched - The New Memory Standard
- Sapphire Radeon RX 9070 XT Pulse Review
- ASRock Phantom Gaming B850 Riptide Wi-Fi Review - Amazing Price/Performance
- Palit GeForce RTX 5070 GamingPro OC Review
- SilverStone Lucid 04 Review
- Samsung 9100 Pro 2 TB Review - The Best Gen 5 SSD
- Sapphire Radeon RX 9070 XT Nitro+ Review - Beating NVIDIA
- Enermax REVOLUTION D.F. 12 850 W Review
- Assassin's Creed Shadows Performance Benchmark Review - 30 GPUs Compared
- AMD Ryzen 7 9800X3D Review - The Best Gaming Processor
Controversial News Posts
- MSI Doesn't Plan Radeon RX 9000 Series GPUs, Skips AMD RDNA 4 Generation Entirely (142)
- Microsoft Introduces Copilot for Gaming (124)
- AMD Radeon RX 9070 XT Reportedly Outperforms RTX 5080 Through Undervolting (119)
- NVIDIA Reportedly Prepares GeForce RTX 5060 and RTX 5060 Ti Unveil Tomorrow (115)
- Over 200,000 Sold Radeon RX 9070 and RX 9070 XT GPUs? AMD Says No Number was Given (100)
- NVIDIA GeForce RTX 5050, RTX 5060, and RTX 5060 Ti Specifications Leak (96)
- Retailers Anticipate Increased Radeon RX 9070 Series Prices, After Initial Shipments of "MSRP" Models (90)
- China Develops Domestic EUV Tool, ASML Monopoly in Trouble (88)