 5
5
Gigabyte Z690I AORUS Ultra Plus DDR4 Review
VRM Temperatures & Power Consumption »Overclocking
Overclocking the 12th generation Intel processor comes with a light learning curve, owing to new voltages, and the new E-cores. I am certainly not an expert on the subject, but am making some personal progress through trial and error. Now that Alder Lake CPUs have been out long enough for a wide range of testing, the overclocking community suggests keeping them at or below 1.35 V for long-term usage. However, please do not take my applied settings as a standard or copy my voltages, and ask on the TPU forums if you have questions related to voltages and general safety tips.
Even though the ITX form factor may seem at odds with the term overclocking, all settings related to overclocking have been accounted for. Gigabyte has deployed ten 105 A power stages; It isn't always just about the maximum output of the power stages, though this is more than enough for the average overclock. You have two main ways to overclock these CPUs, and it just depends on personal preference. Either one performs an all-core overclock or chooses two of the best cores and aims for the highest overclock on those alone. In the end, I settled for the highest all-core P and E-cores overclock. You of course can set individual cores to clock higher with a voltage offset, and this motherboard certainly can do it if you have the patience to fine-tune the voltages.
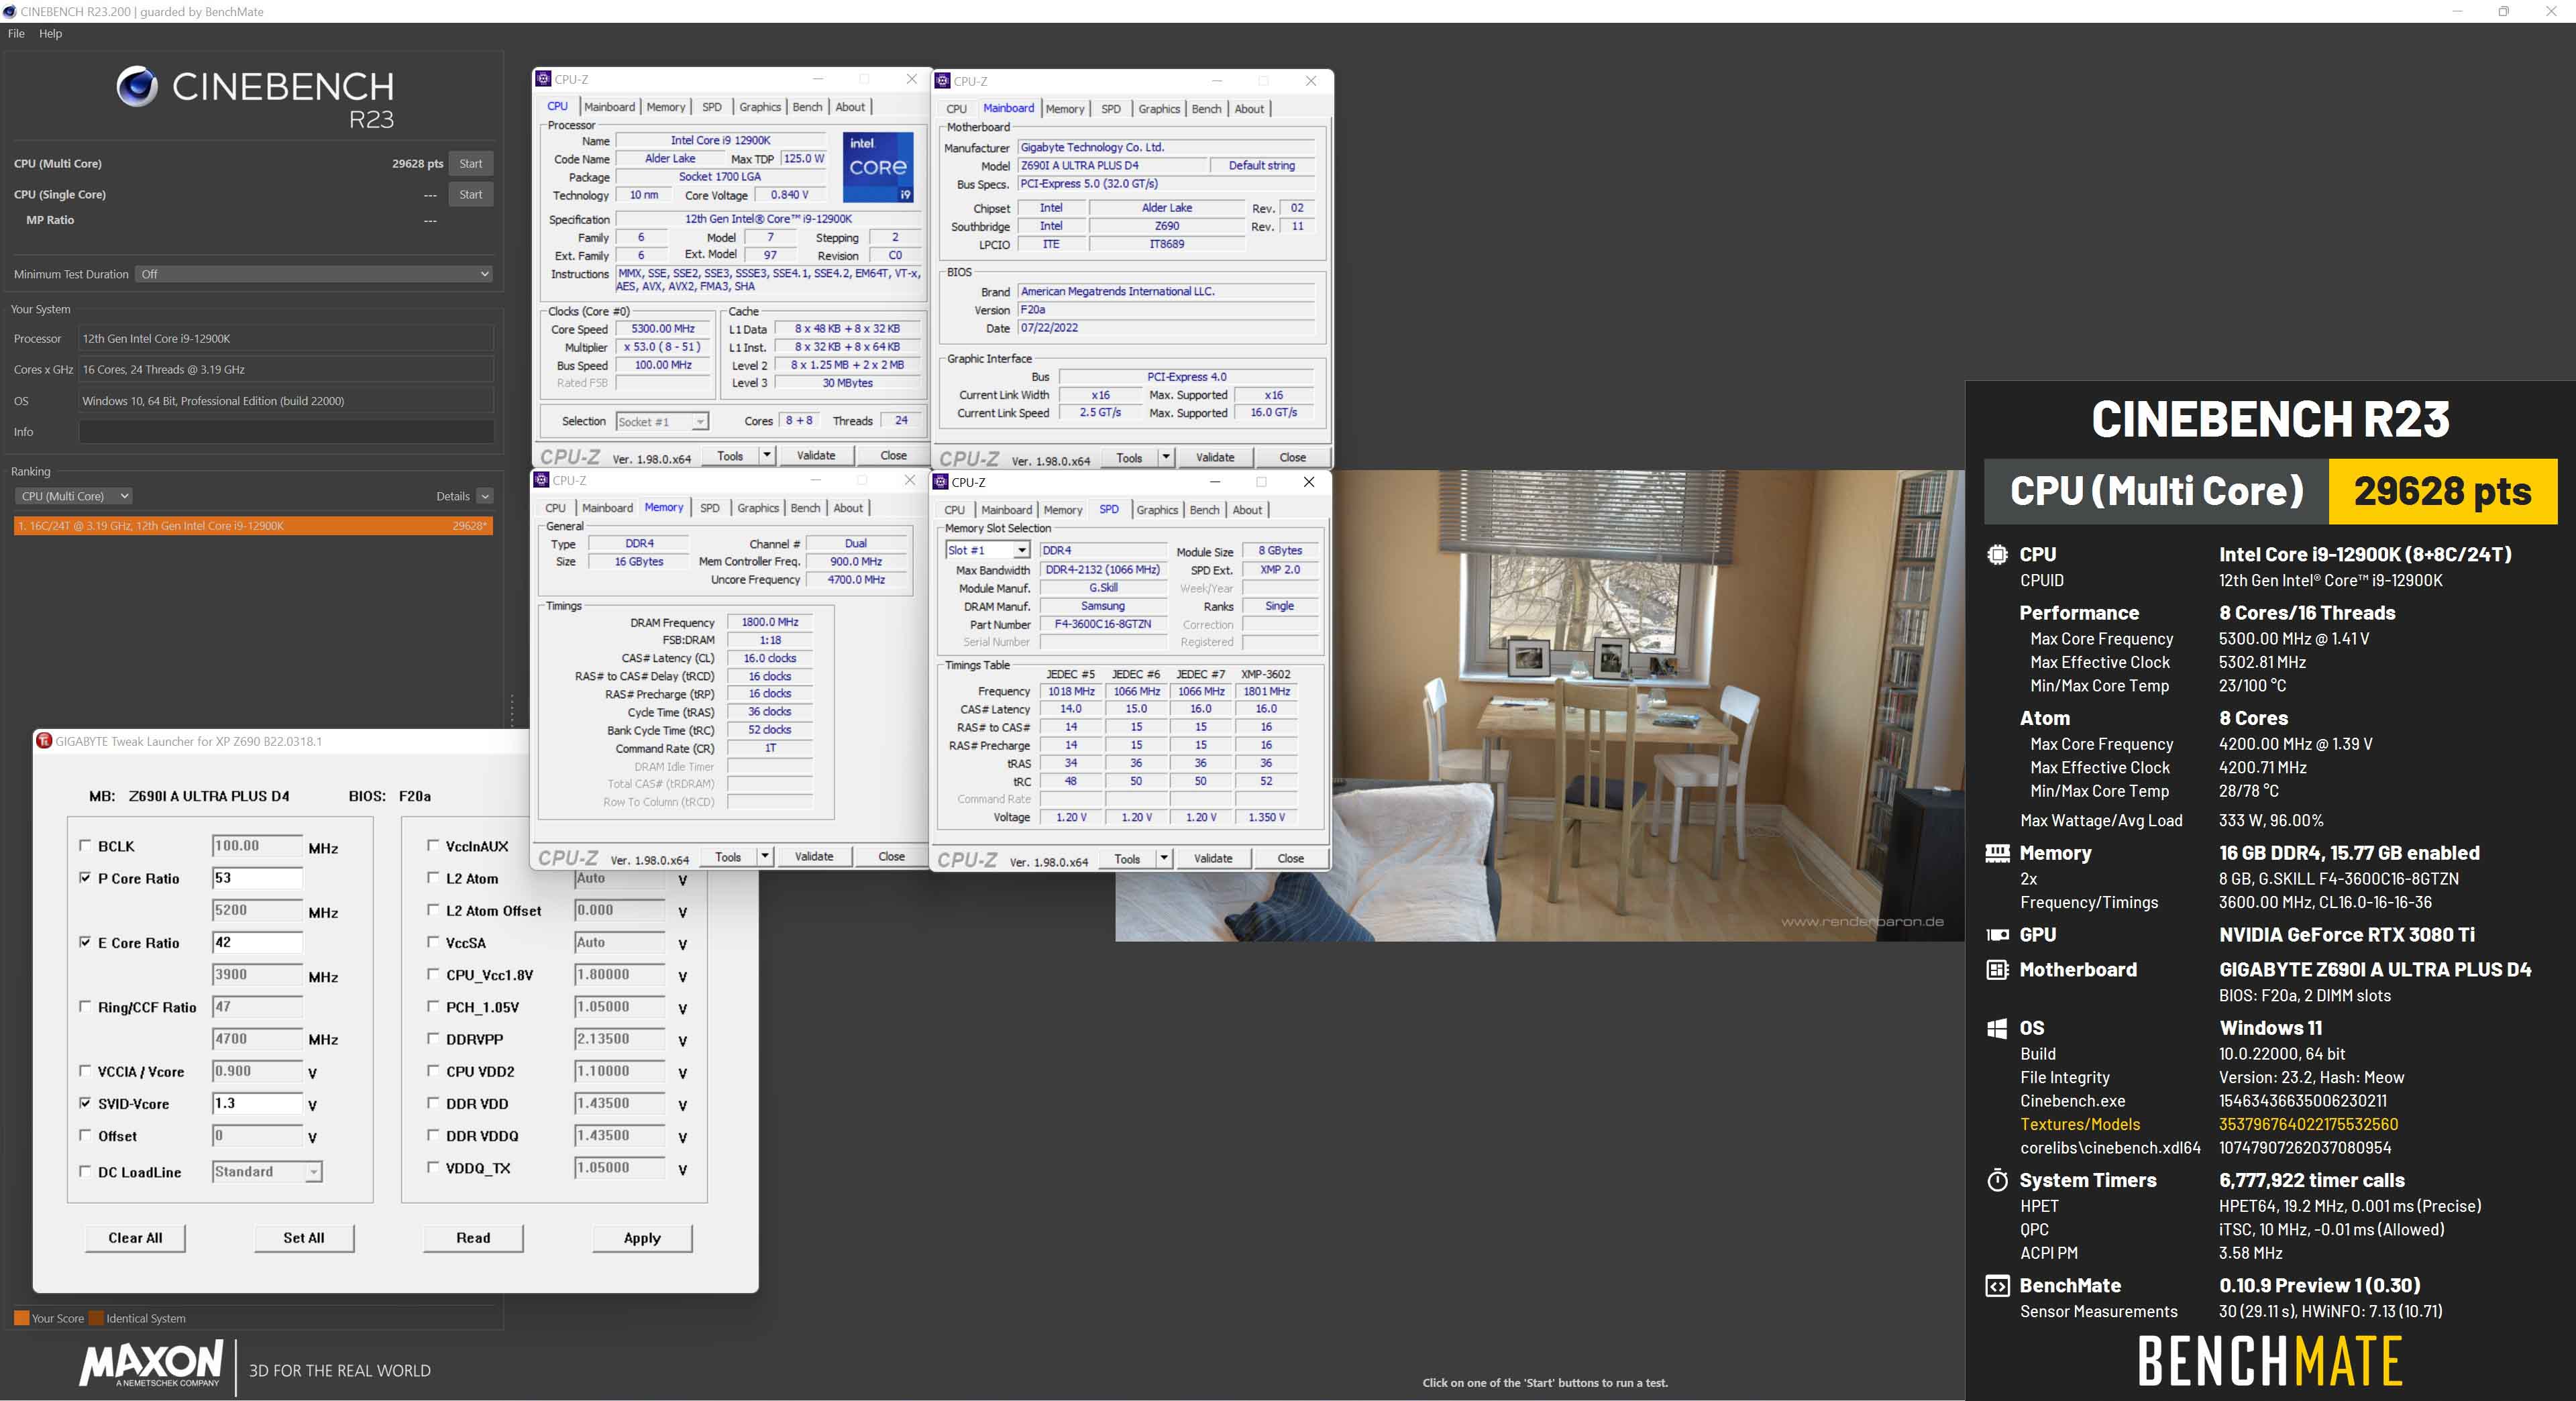
Gigabyte did a great job with the software and in the BIOS in terms of overclocking support. All the vital settings are accounted for. This makes overclocking easier for first timers or those who prefer the software method. At first, I left the E-cores and Ring Cache alone and set out to push the P-cores up until I reached the stopping point of 1.35 V with an all-core OC of 5.3 GHz in Cinebench R23. This was followed up by raising the E-cores to 4.2 GHz and a Ring Cache left to Auto.
The only issue I can across was that the Vdroop was either under or over by a fair amount. Testing different Load Line Calibration settings help offset this. The actual overclock ended up being 1.3 V using the LLC setting of "Turbo". This placed roughly 1.38 V during load on the CPU. This combination places the voltage higher than I preferred, but for the sake of time it is what was used for the final Cinebench R23 score. I'm not entirely sure why BenchMate reported 1.49 V at times. It seemed HWInfo gave more of a true value.
Memory Overclock
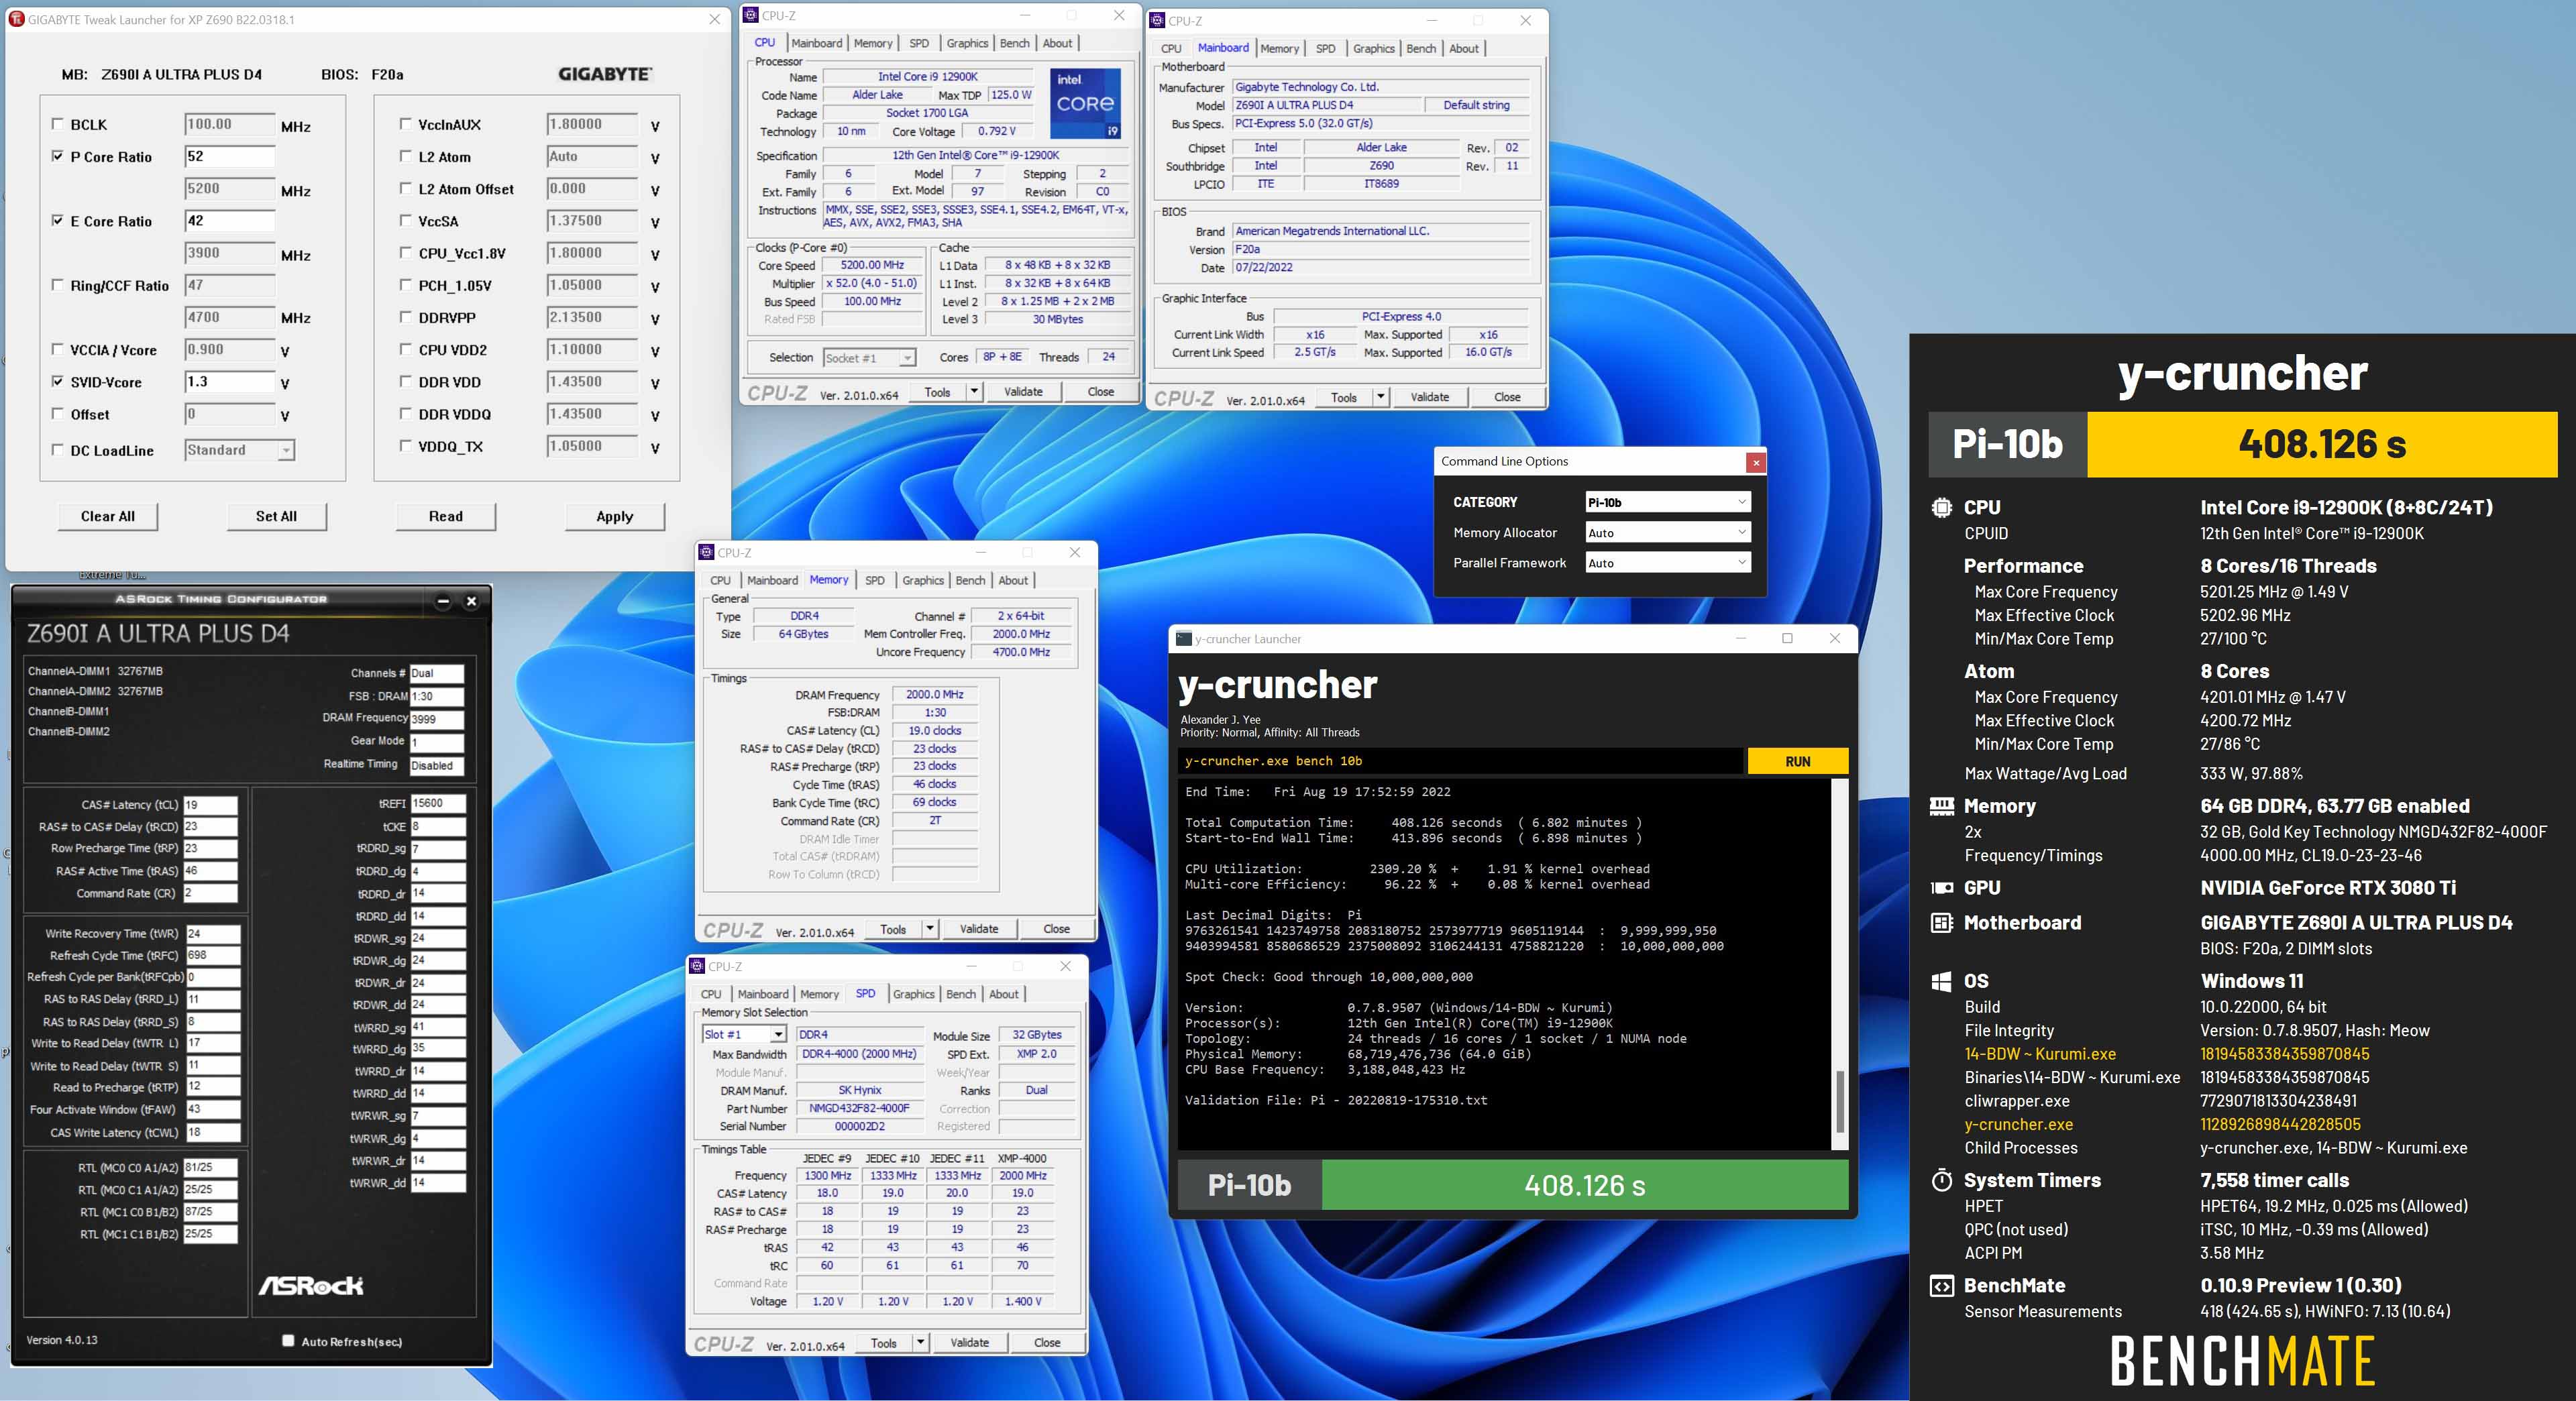
Memory support is rock solid here. Booting up 64 GB (2x 32 GB) in Gear 1 mode went exceptionally well given this motherboard has no post debug LEDs, making troubleshooting difficult. The only change made was enforcing Gear 1 (1:1 Ratio), which by default is set to auto and above any memory running above 3600 MT/s should automatically be in Gear 2. No additional voltages were adjusted for 100% memory stability, which makes this motherboard, so far, the one with the highest compatibility when using Auto settings and DDR4 that I have tested.
It was truly no fuss, plug and play experience. However, I must point out some of that has to do with the CPU. Not all memory controllers are equal in quality. Gear 1 combined with DDR4-4000 dual-rank memory is well outside what is officially supported by Intel. Please refer to Gigabyte's memory QVL for this motherboard for best results.
Looking back at some screenshots, I see now that during my CPU overclocking session, after many restarts and CMOS clears, the memory at some point reverted back to Auto and set the DDR4-3600 to Gear 2. So the takeaway here is that Auto settings can do whatever it pleases. If you want a specific setting, it is best to manually set it yourself instead of relying on the motherboards ability to decipher what is actually wanted.
Jul 12th, 2025 04:58 CDT
change timezone
Latest GPU Drivers
New Forum Posts
- Best motherboards for XP gaming (103)
- ASUS ProArt GeForce RTX 4060 Ti OC Edition 16GB GDDR6 Gaming - nvflash64 VBIOS mismatch (3)
- Steam Deck Owners Clubhouse (535)
- What are you playing? (23923)
- Chrome has removed uBlock Origin 1.64.0 (remove google search suggestions) (0)
- Can you guess Which game it is? (227)
- Will you buy a RTX 5090? (645)
- What's your latest tech purchase? (24239)
- 'NVIDIA App' not usable offline? (9)
- Have you got pie today? (16780)
Popular Reviews
- Fractal Design Epoch RGB TG Review
- Corsair FRAME 5000D RS Review
- Lexar NM1090 Pro 4 TB Review
- NVIDIA GeForce RTX 5050 8 GB Review
- NZXT N9 X870E Review
- Sapphire Radeon RX 9060 XT Pulse OC 16 GB Review - An Excellent Choice
- Our Visit to the Hunter Super Computer
- AMD Ryzen 7 9800X3D Review - The Best Gaming Processor
- Upcoming Hardware Launches 2025 (Updated May 2025)
- Chieftec Iceberg 360 Review
TPU on YouTube
Controversial News Posts
- Intel's Core Ultra 7 265K and 265KF CPUs Dip Below $250 (288)
- Some Intel Nova Lake CPUs Rumored to Challenge AMD's 3D V-Cache in Desktop Gaming (140)
- AMD Radeon RX 9070 XT Gains 9% Performance at 1440p with Latest Driver, Beats RTX 5070 Ti (131)
- NVIDIA Launches GeForce RTX 5050 for Desktops and Laptops, Starts at $249 (119)
- NVIDIA GeForce RTX 5080 SUPER Could Feature 24 GB Memory, Increased Power Limits (115)
- Microsoft Partners with AMD for Next-gen Xbox Hardware (105)
- Intel "Nova Lake‑S" Series: Seven SKUs, Up to 52 Cores and 150 W TDP (100)
- NVIDIA DLSS Transformer Cuts VRAM Usage by 20% (97)