 12
12
Glorious Model I Gaming Mouse Review
Sensor & Performance »Build Quality
Overall build quality is solid. There is no rattle when shaking the mouse. When applying lateral pressure, significant creaking but no flexing of the shell can be observed. Activating the side buttons by squeezing the sides is impossible. Lastly, accidental clicks when slamming down the mouse do occur regularly if debounce time is set to 0 ms and very rarely if debounce time is set to 2 ms.Unless noted otherwise, all descriptions apply to both samples I've received.
Buttons

Main buttons on the Model I are very good (left button) to lackluster (right button). While the left main button has some pre and moderate post-travel, button response is firm and snappy. The right main button, on the other hand, has slightly less travel, but a much worse click feel. Not only is the response dull and muted, the button also emits a rather irritating "thunk" upon rebound, which gets louder and sharper the farther to the back the button is actuated. Despite the buttons being visually separated from the shell, lateral button movement is minimal and needs to be provoked. Button stiffness is medium. A set of Kailh GM 8.0 (80 M) switches is used.

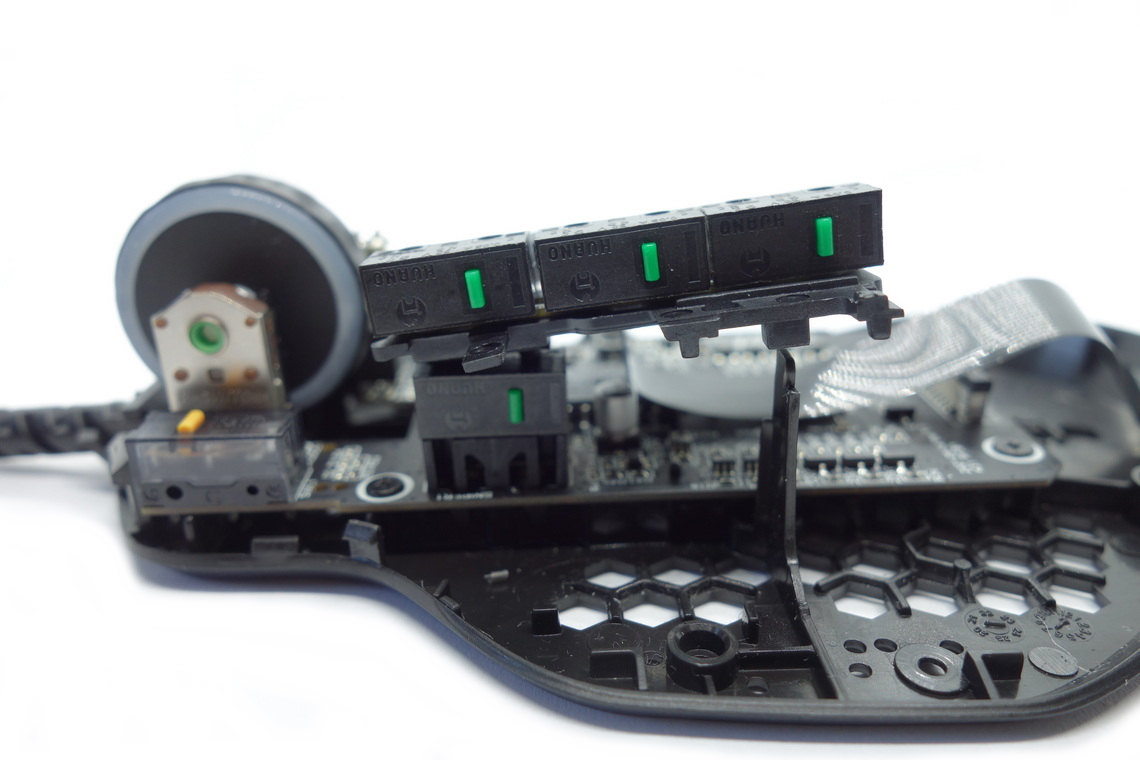
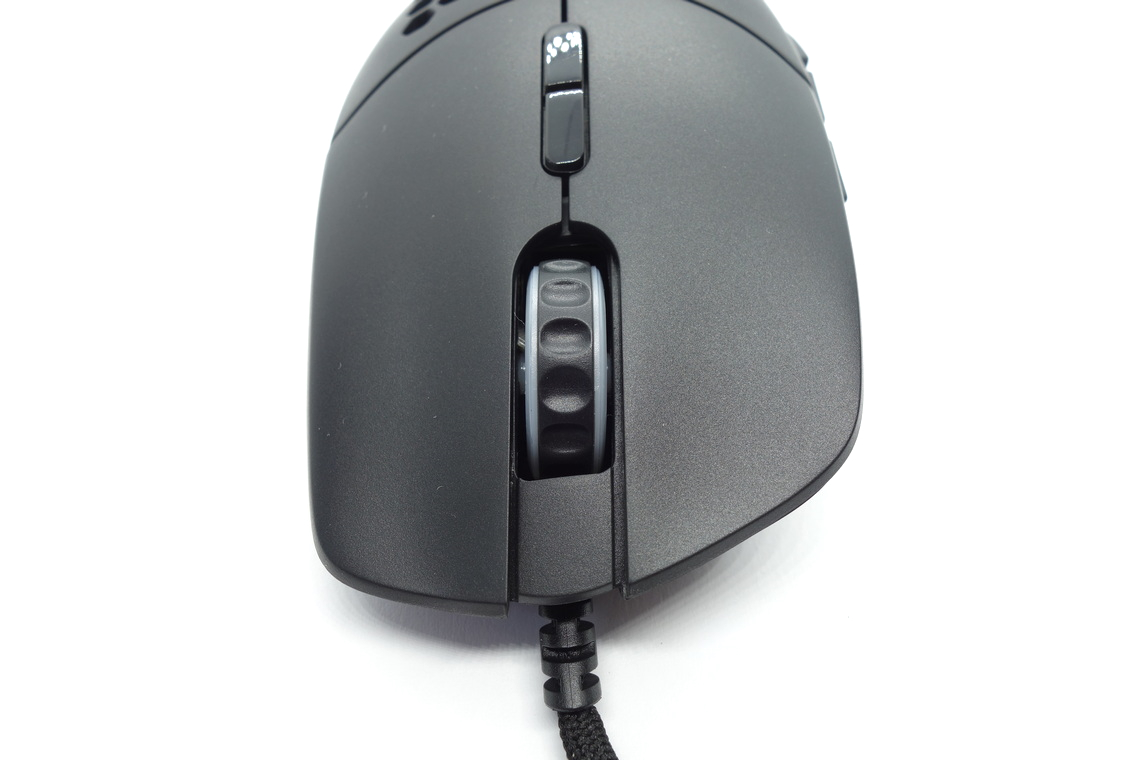
Side buttons are poor. The front side button has comparatively low pre-travel, but post-travel is massive to where the button can be pushed into the mouse almost in its entirety. The middle side button has equally massive post-travel, coupled with significant pre-travel, resulting in a mushy and spongy response. The back side button has less pre and post-travel than the middle button, albeit still a significant amount of either. The sniper button is the sole exception to this, as both pre and post-travel are minimal. The three side buttons bulge outward significantly, which makes it easier to tell them apart by feel, but does make actuation by rolling one's thumb across more difficult. Huano switches (green plunger) are used for all of these.


The sniper and back side buttons are magnetic and can be swapped for a higher or lower profile alternative. With the latter installed, the button can no longer be actuated, which can be useful if their placement is found to be irritating. Removing the magnetic side buttons without an external tool can be difficult.
At the top of the mouse are two buttons for cycling up and down through the set CPI levels. Their click feel is good. A pair of low-profile TTC switches (blue plunger) is used for these.
Scroll Wheel

The scroll wheel is excellent. Noise levels are appreciably low, and tactility is great, with clearly discernible steps and a matching tactile feel while scrolling. The encoder comes from F-Switch (brown, green core) and has a height of 12.6 mm. The middle (scroll wheel) click requires medium force for actuation. Another Huano switch (green plunger) is used for this one.
Surface
The Model I has a smooth matte surface all over. It doesn't attract fingerprints, dirt, or the likes too much. It is easy to clean, and there are no signs of wear left after doing so. All in all, excellent materials.Button Sound Test
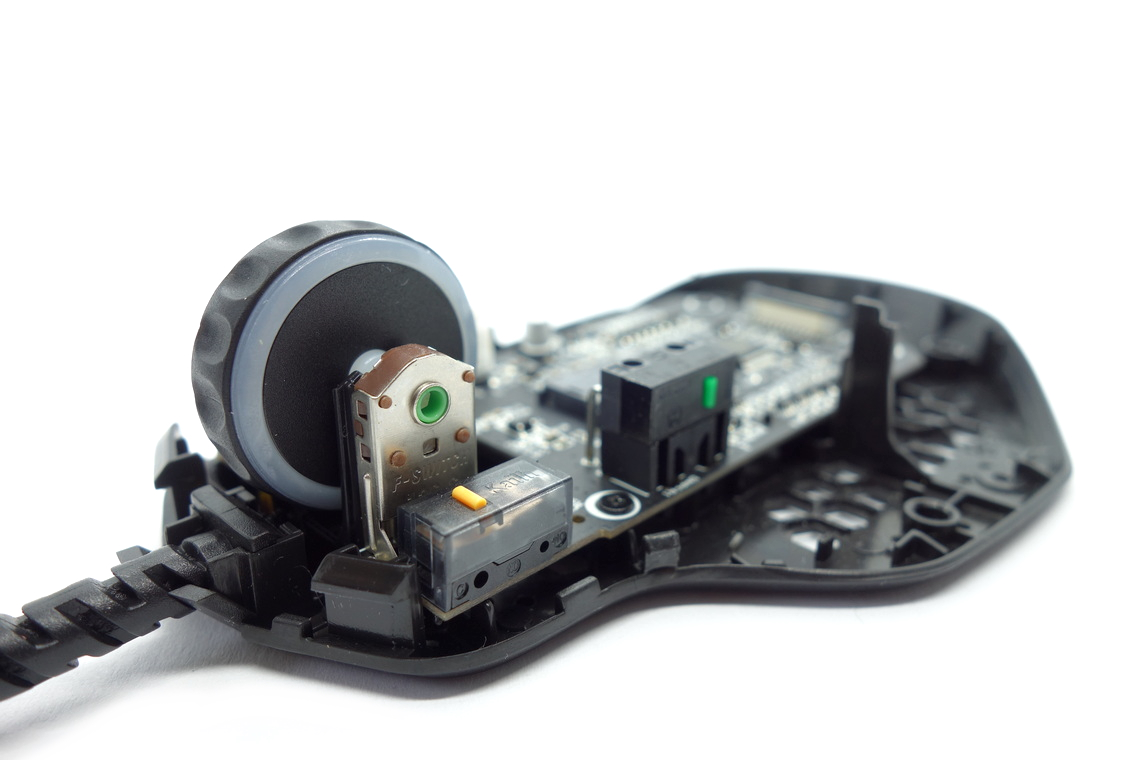
Disassembly
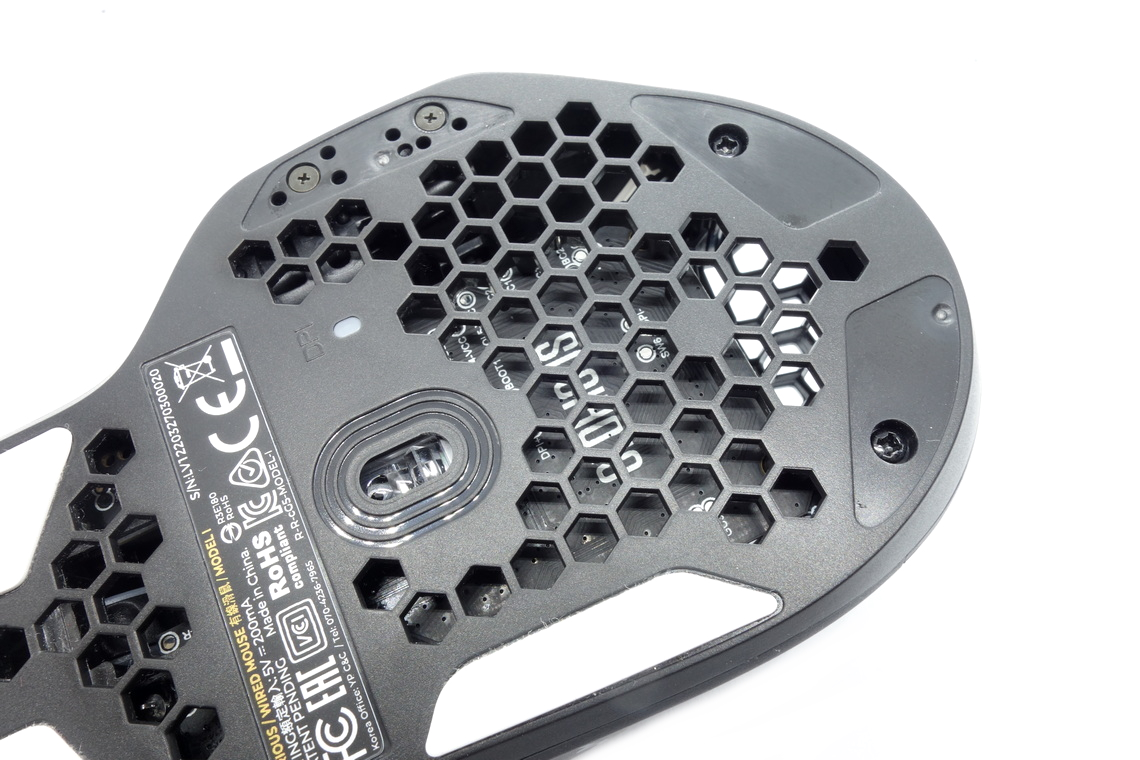
Disassembling the Model I is moderately difficult. First, remove the two rear skates and the thumb rest one, along with the screws beneath them. Once those are taken care of, simply pop the top and bottom shells apart, which are kept together by two clips at the front and two on the sides. Some caution ought to be applied as a ribbon cable connects top and bottom. The actual challenge comes from putting the whole thing back together. The top-shell PCB in particular will prove challenging.
The internal design is surprisingly complex. The main PCB is simple enough: Here we find the main buttons, scroll wheel and switch, MCU, and vertically mounted switch for the sniper button. An auxiliary PCB next to the scroll wheel provides wheel illumination. A ribbon cable leads to the top-shell PCB, which holds the CPI and remaining side buttons from which two additional ribbon cables lead to the LED side strips. The top-shell PCB is screwed into a plastic assembly, which itself is screwed into the top shell. Two additional plastic assemblies forming the side buttons are clipped into the top shell. All PCBs are very thin, and the main PCB is affixed with four screws in total. The MCU is a Holtek HT32F52352, whose datasheet can be found here.
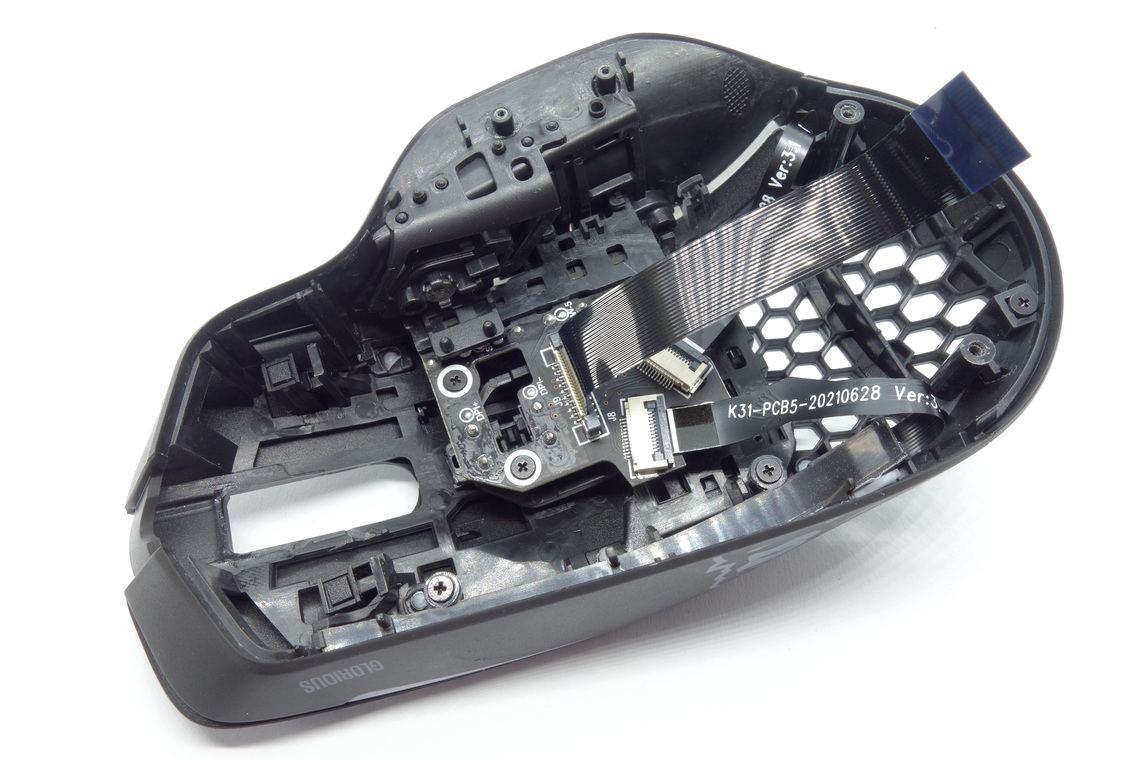

As for the soldering and general quality of the PCB, I'm unable to find any noteworthy flaws.
Feb 6th, 2025 07:47 EST
change timezone
Latest GPU Drivers
New Forum Posts
- Get a new motherboard now even though I won't be using it for some years? (47)
- TOXIC AMD Radeon™ RX 6900 XT (31)
- Bought new INTEL 1.5Tb SSD for 400$ - PCI SSD for my new PC (41)
- VMAX and EDP Other throttling on i5 14600k (3)
- Will you buy a RTX 5090? (404)
- External Samsung T7 Speed issue (8)
- Event log: A service was installed in the system. (6)
- bust interface issue can't enable PCIe 3.0 x16 (20)
- USB-C JBOD box (19)
- RTX5000 Series Owners Club (52)
Popular Reviews
- Spider-Man 2 Performance Benchmark Review - 35 GPUs Tested
- Kingdom Come Deliverance II Performance Benchmark Review - 35 GPUs Tested
- Corsair Frame 4000D Review
- NVIDIA GeForce RTX 5080 Founders Edition Review
- Gigabyte GeForce RTX 5080 Gaming OC Review
- MSI GeForce RTX 5080 Vanguard SOC Review
- AMD Ryzen 7 9800X3D Review - The Best Gaming Processor
- Formovie Cinema Edge 4K UST Laser Projector Review
- ASUS GeForce RTX 5080 Astral OC Review
- NVIDIA GeForce RTX 5090 Founders Edition Review - The New Flagship
Controversial News Posts
- NVIDIA 2025 International CES Keynote: Liveblog (470)
- AMD Debuts Radeon RX 9070 XT and RX 9070 Powered by RDNA 4, and FSR 4 (349)
- AMD Radeon 9070 XT Rumored to Outpace RTX 5070 Ti by Almost 15% (285)
- AMD is Taking Time with Radeon RX 9000 to Optimize Software and FSR 4 (256)
- AMD Denies Radeon RX 9070 XT $899 USD Starting Price Point Rumors (239)
- Edward Snowden Lashes Out at NVIDIA Over GeForce RTX 50 Pricing And Value (235)
- AMD Radeon RX 9070 XT & RX 9070 Custom Models In Stock at European Stores (226)
- New Leak Reveals NVIDIA RTX 5080 Is Slower Than RTX 4090 (215)