 3
3
Goldtouch Go!2 Bluetooth Wireless Mobile Keyboard Review
Software & Performance »Closer Examination
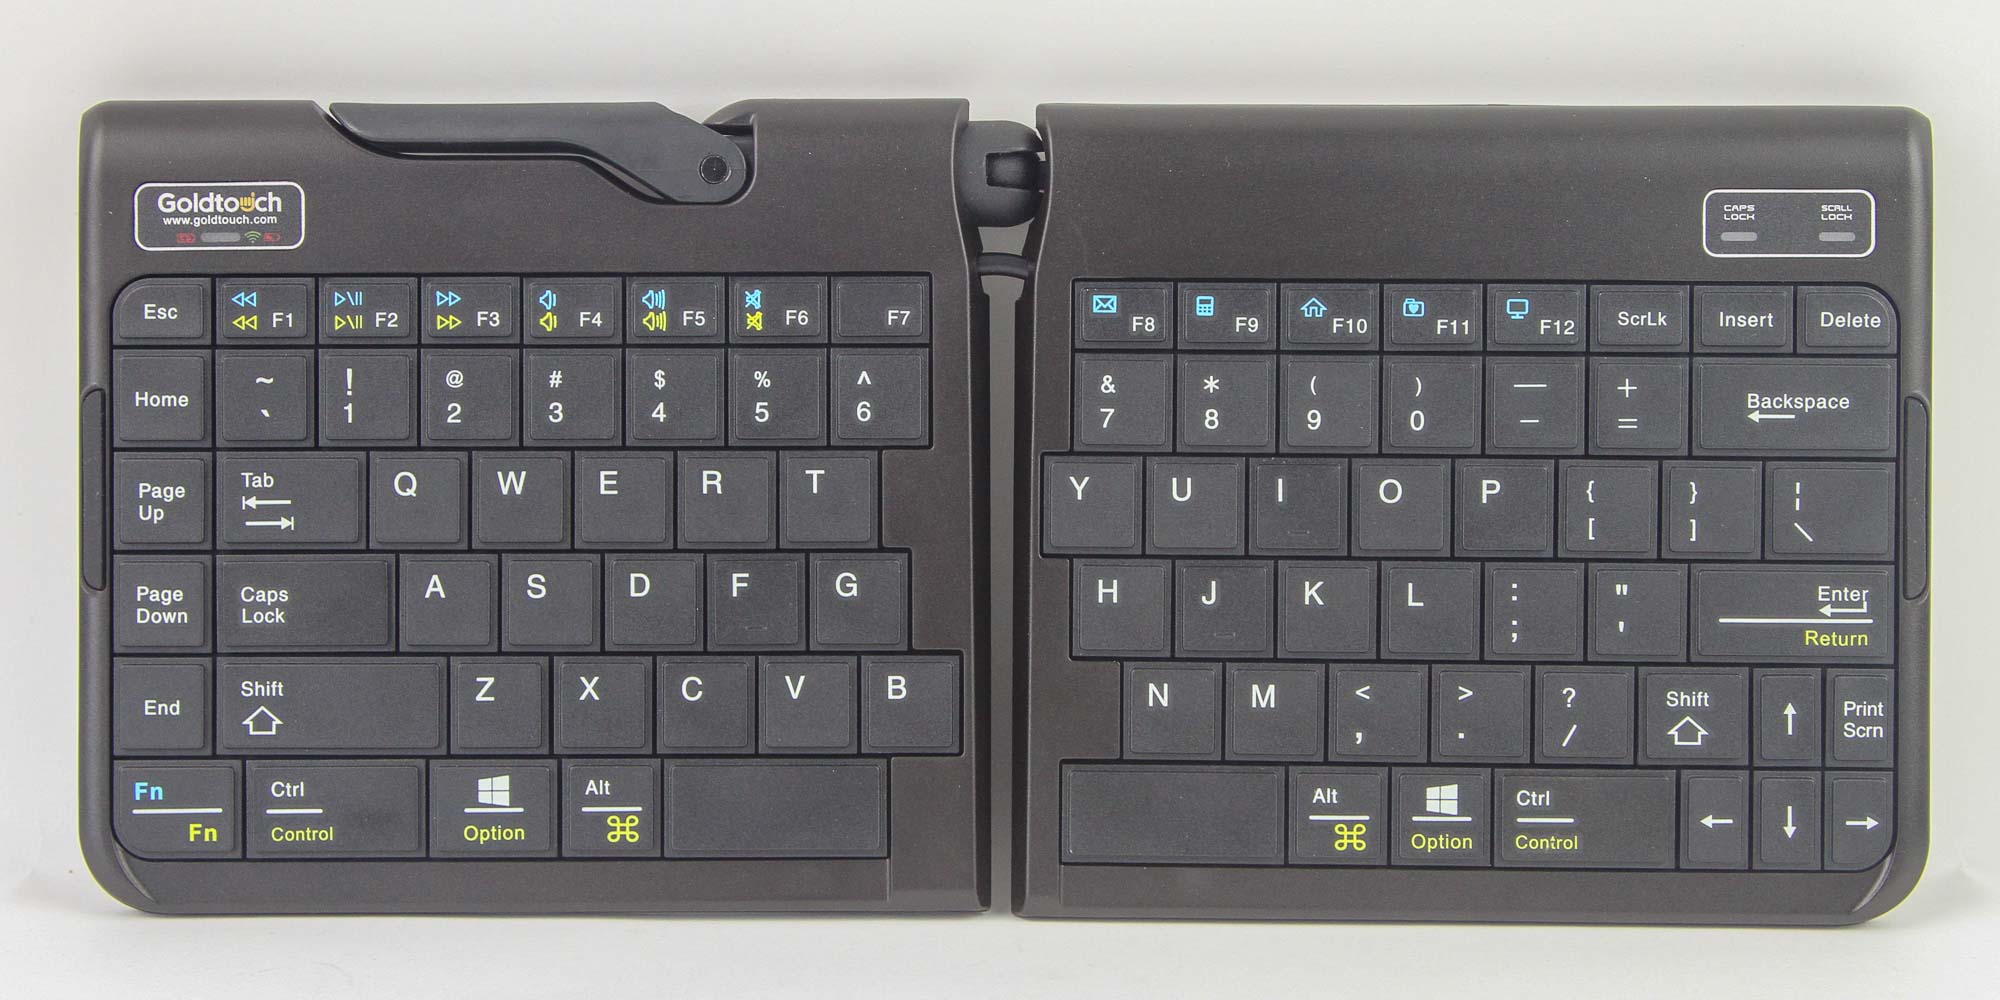
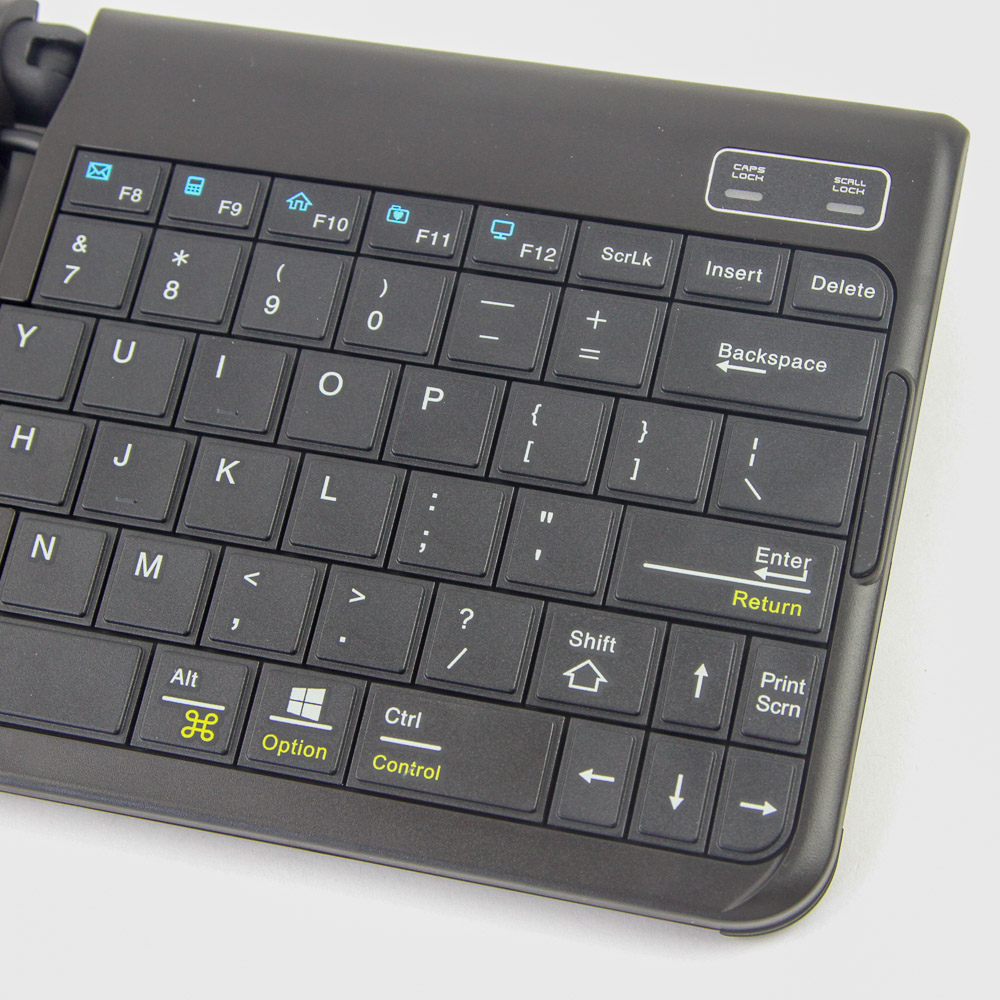
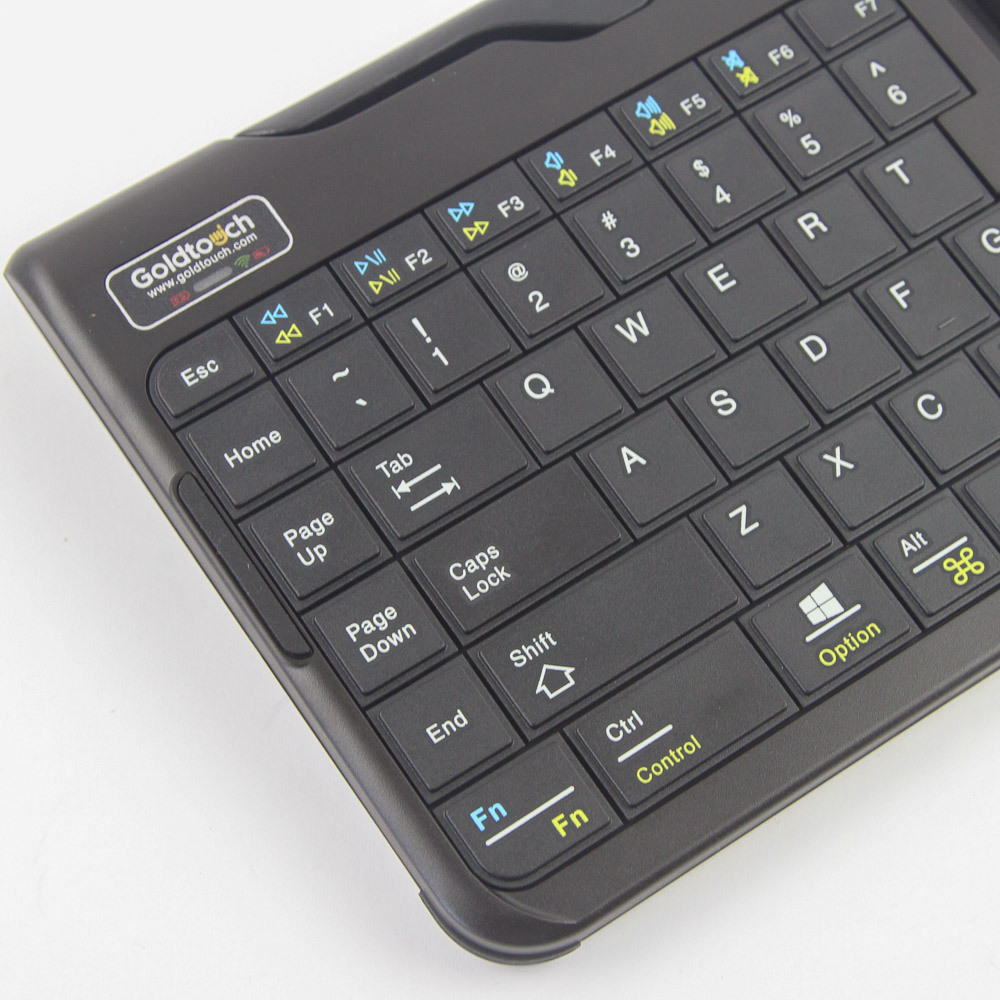
I have had my hands on several split keyboards in the past, so there is already a lot of similar DNA between them and the Goldtouch Go!2 keyboard. Typically, these keyboards adopt a smaller than TKL (TenKeyLess) form factor to allow for shorter finger travel, with a split down the middle into two halves. This in turns usually results in the space bar key either being split into multiple keys or just made shorter and put on one half. The Goldtouch Go!2 is a modified 75% form factor keyboard in that it still retains the Fn key row, but truncates the arrow key cluster column TKL keyboards have. There is no numpad either, and we see the adoption of a double space bar implementation—one per keyboard half.
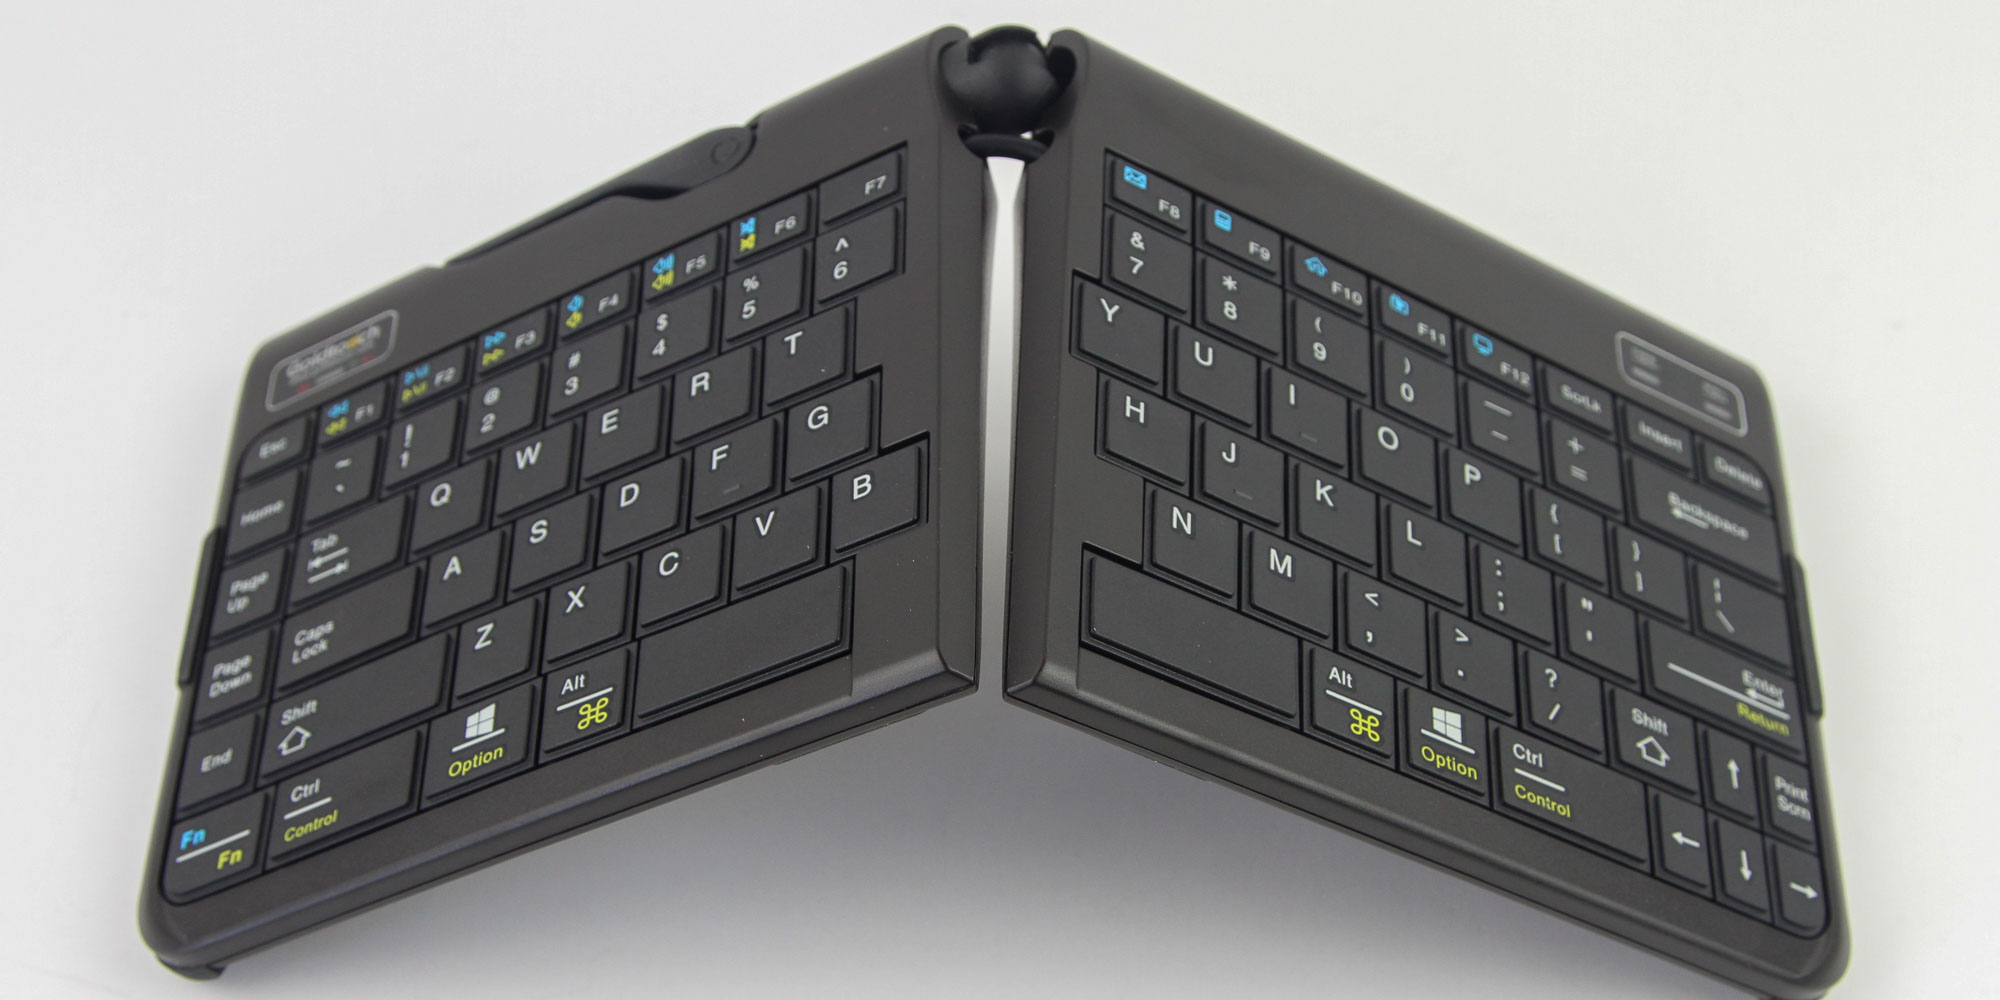
We have staggered keys as well, similar to a more typical keyboard, which will lessen the learning curve if coming from one. Despite this, the two halves meet with a smooth, flat plane in the middle. This results in the case being larger than usual even before we get to the top bezel that is positively huge in comparison to everything else. There are indicator LEDs at either end on the top, be it the battery or connection indicators on the left half or the more typical Caps Lock/Scroll Lock LEDs on the right half. The Goldtouch logo is also seen at the top here, and the keycaps have dual OS (macOS in yellow) as well as Fn-key specific functions in blue. Given the smaller form factor, we have secondary legends on more keys than usual, but this is otherwise a clean-looking keyboard that will still grab some eyes because of what is going on in the top and the middle.
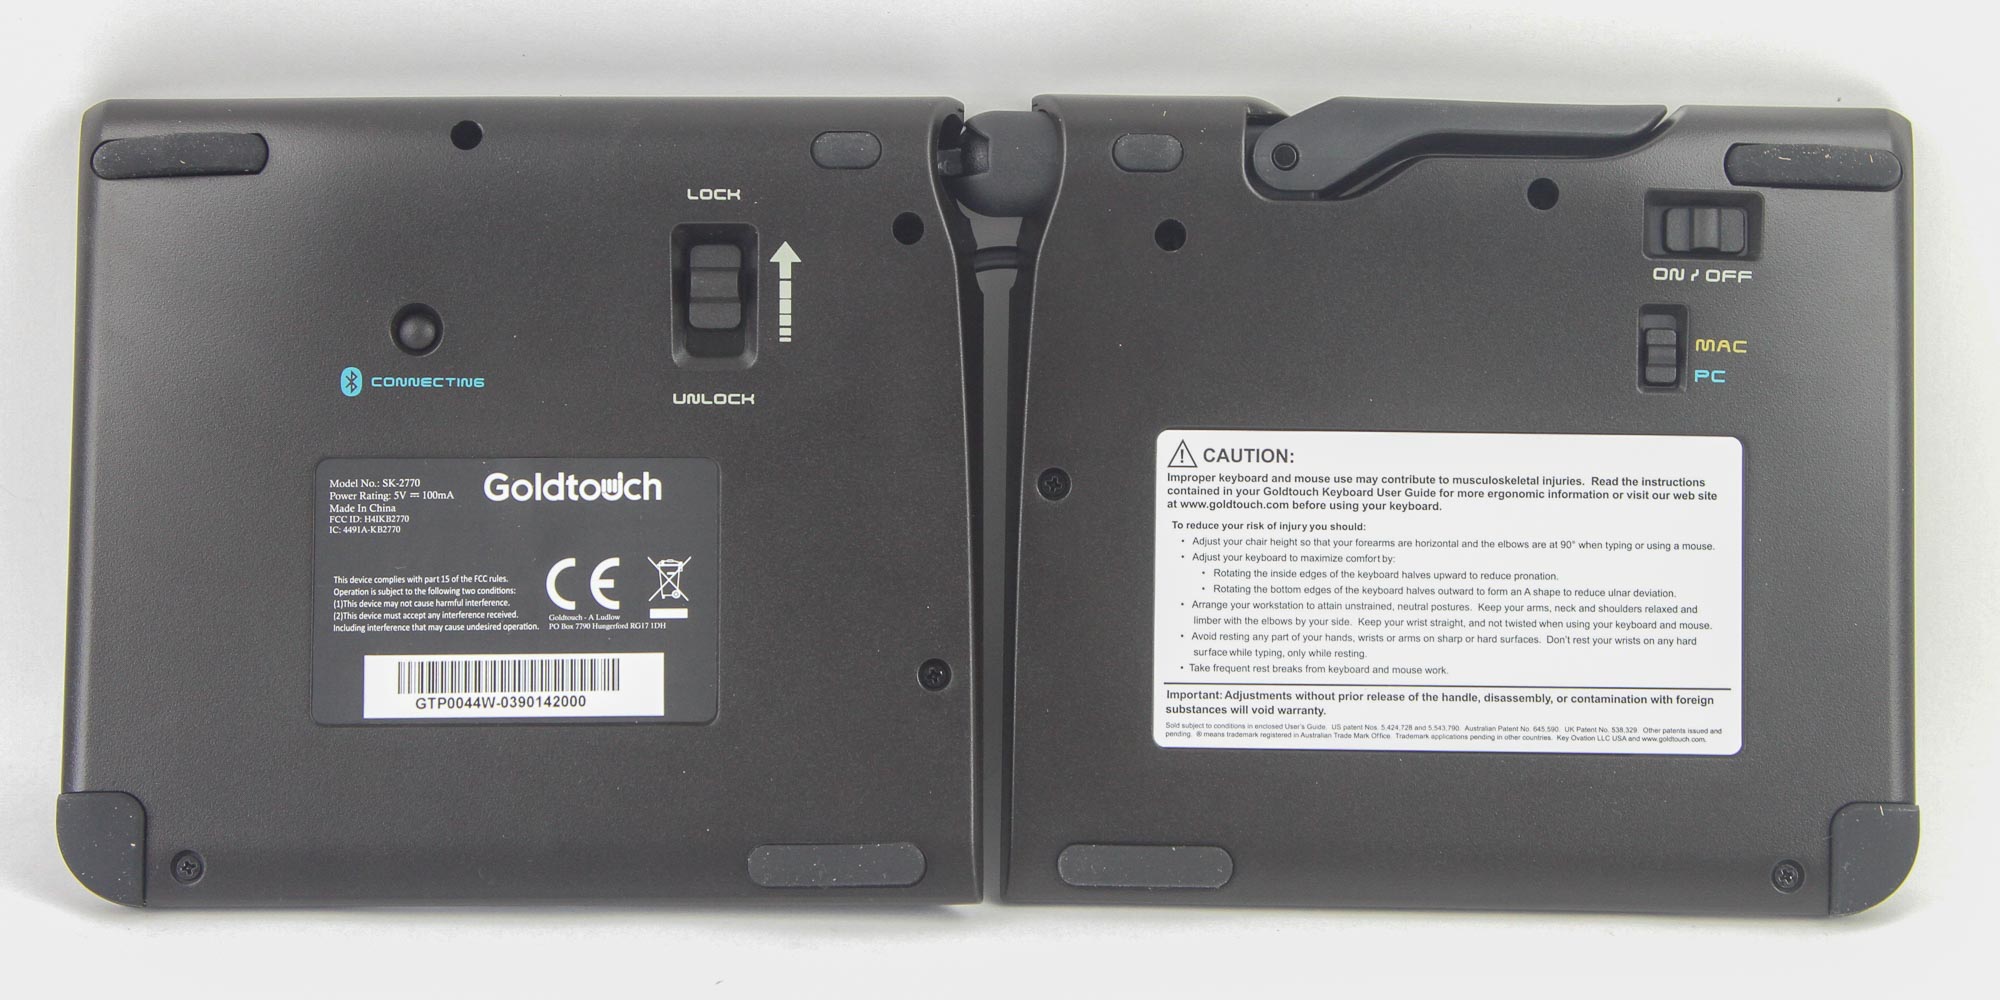
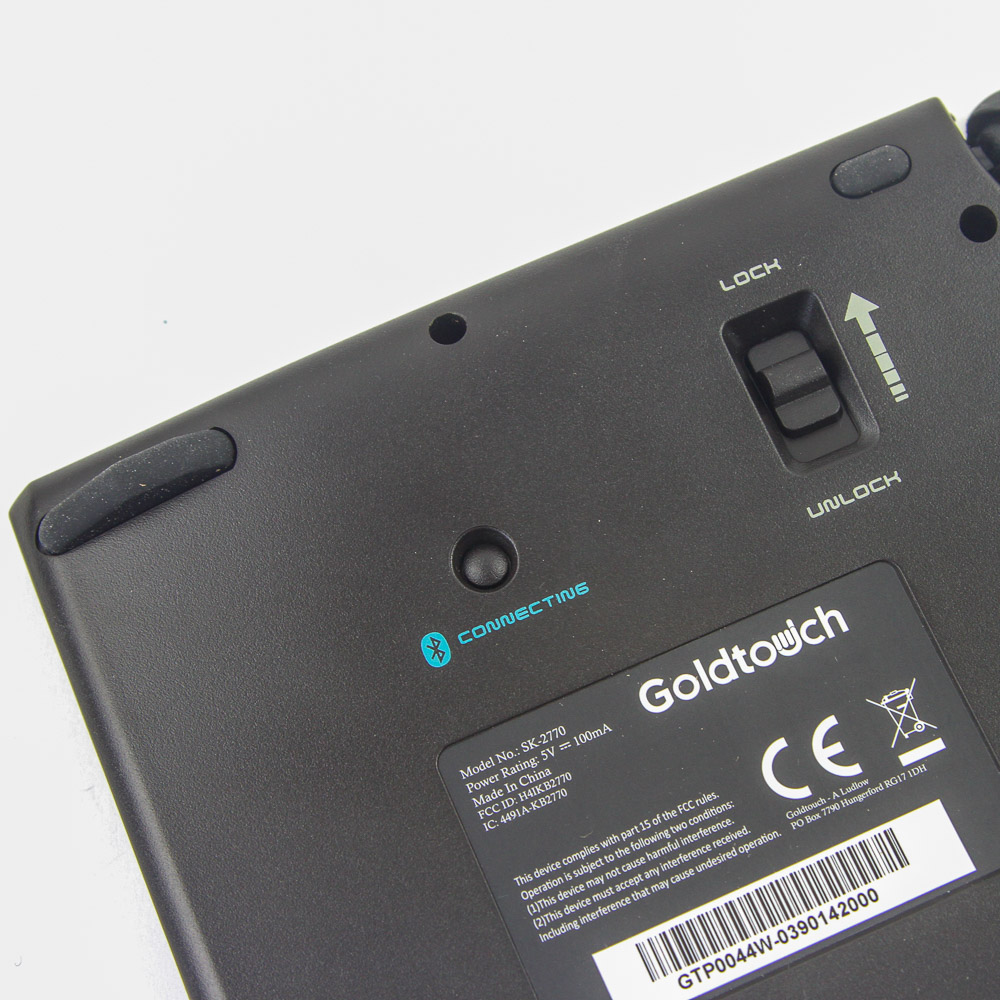
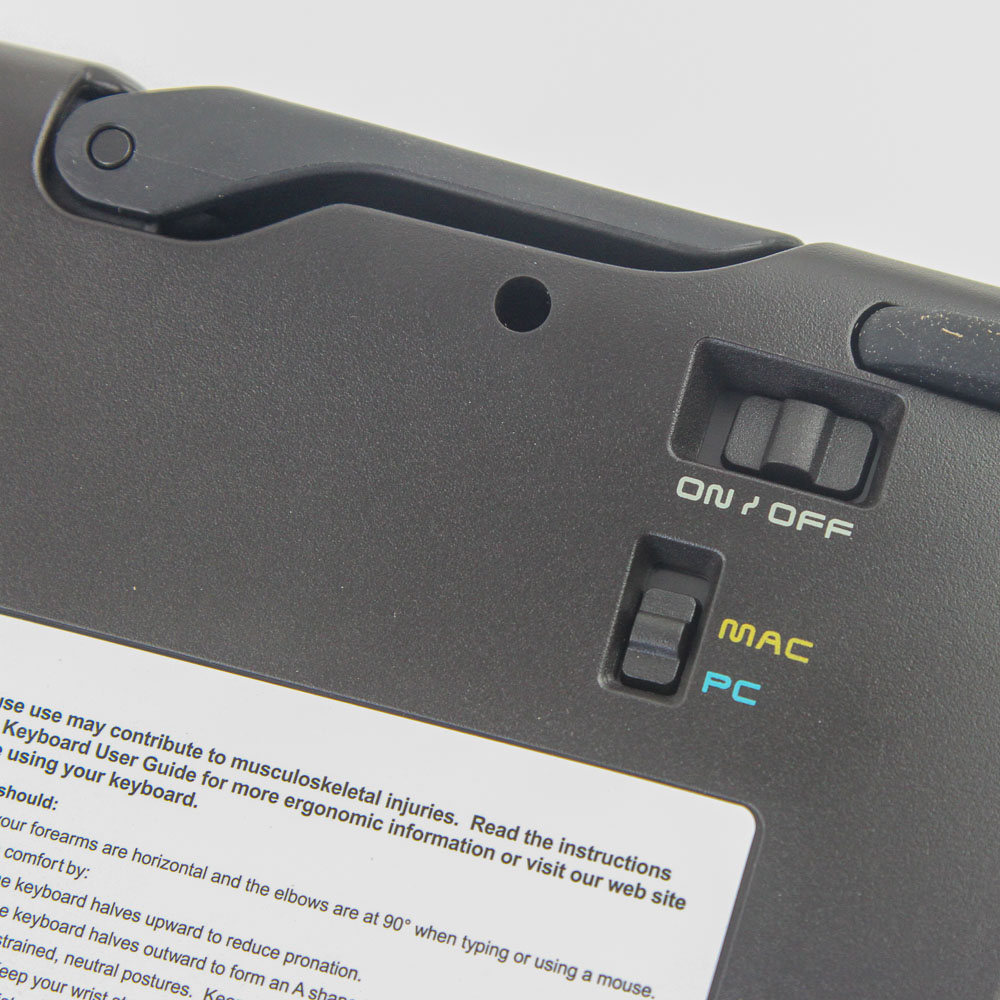
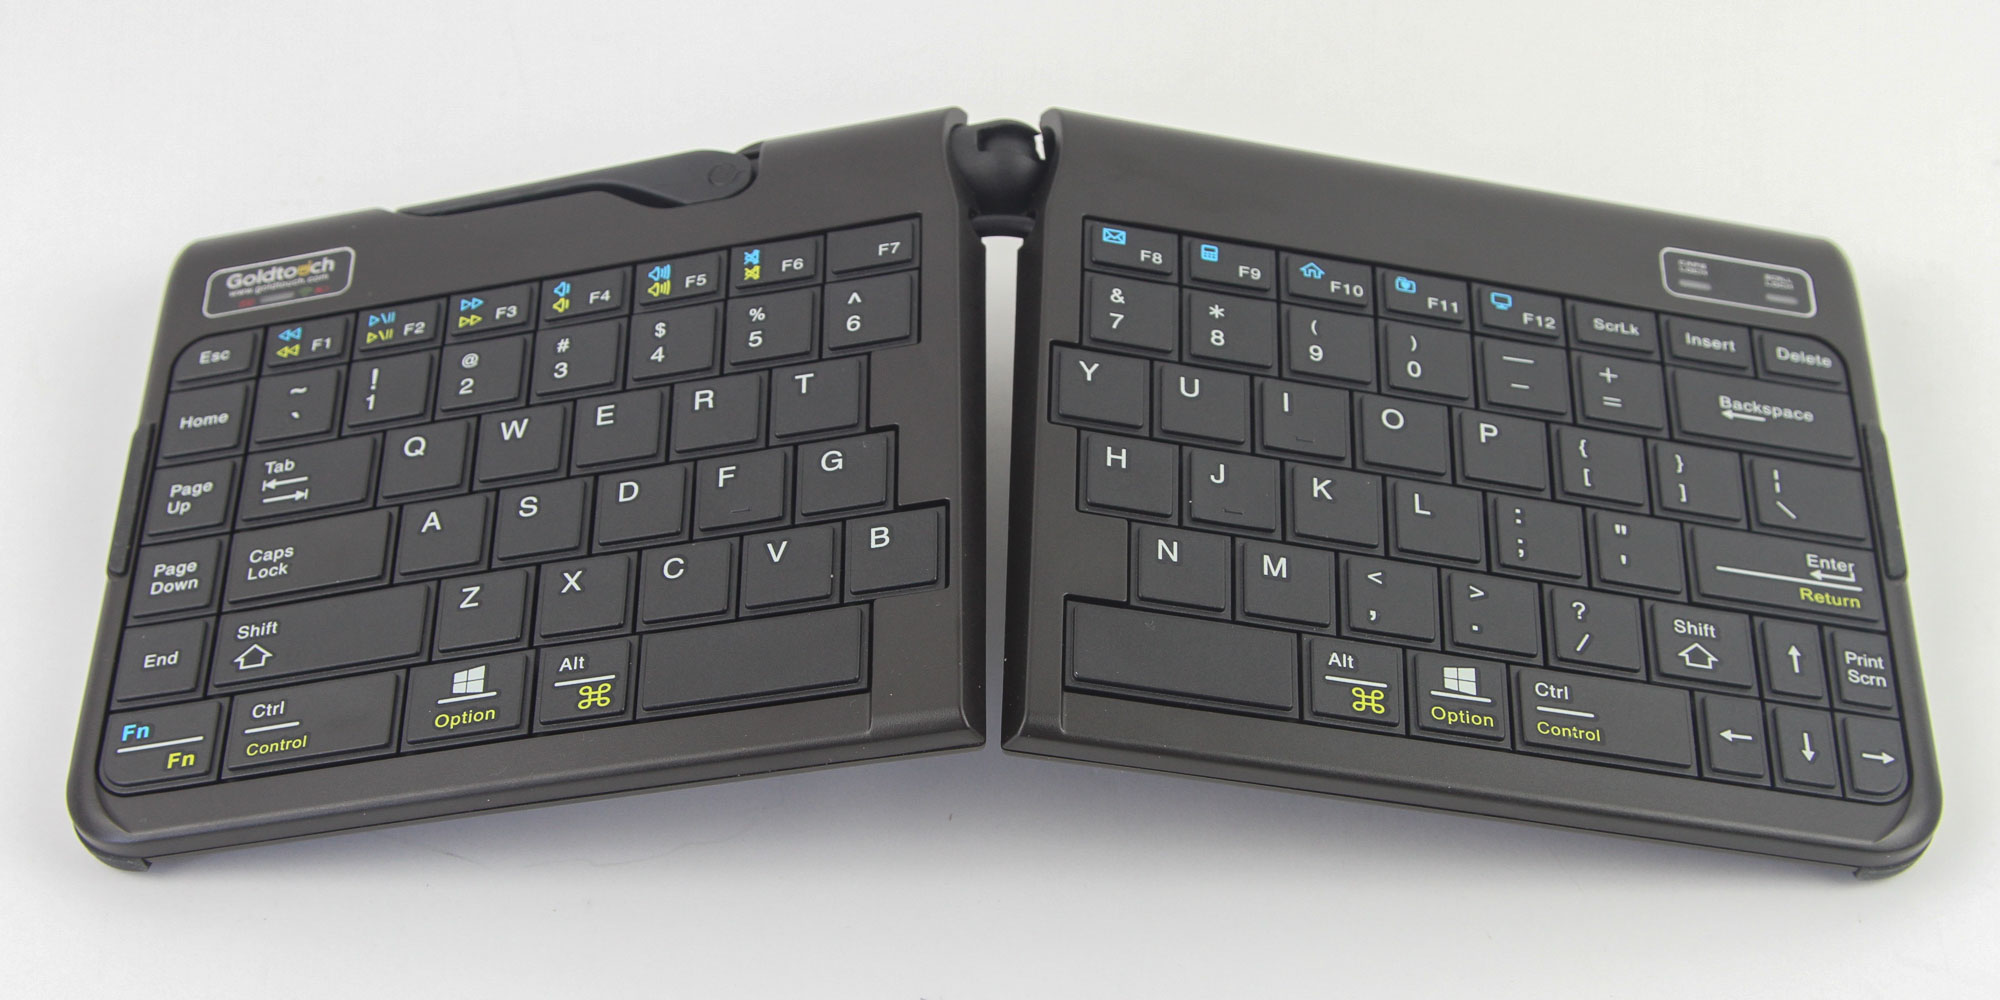
Flipping the keyboard around, we get a better idea of what else is going on here. There are the usual keyboard rubber feet at first glance, but we have four per half, and even those are actually integrated into the plastic case in that they don't lift-off as much as slide off the sides. We also have a certification sticker, this time on the right half, and a larger caution sticker talking more about the ergonomics of the keyboard in action on the left half. The right half also has the button to pair a Bluetooth connection with supported clients, of which there are several given the supported Bluetooth 3.0 protocol, as well as a slider that defaults to "Lock" and has to be held down to unlock. This comes back to the lever and ball joint we saw but shied away from mentioning before and allows the two halves of the keyboard to be unlocked for a couple of neat things. The left half, aside from housing this lever, also has the on/off button for the keyboard in addition to another slider to switch between the PC or macOS layouts.
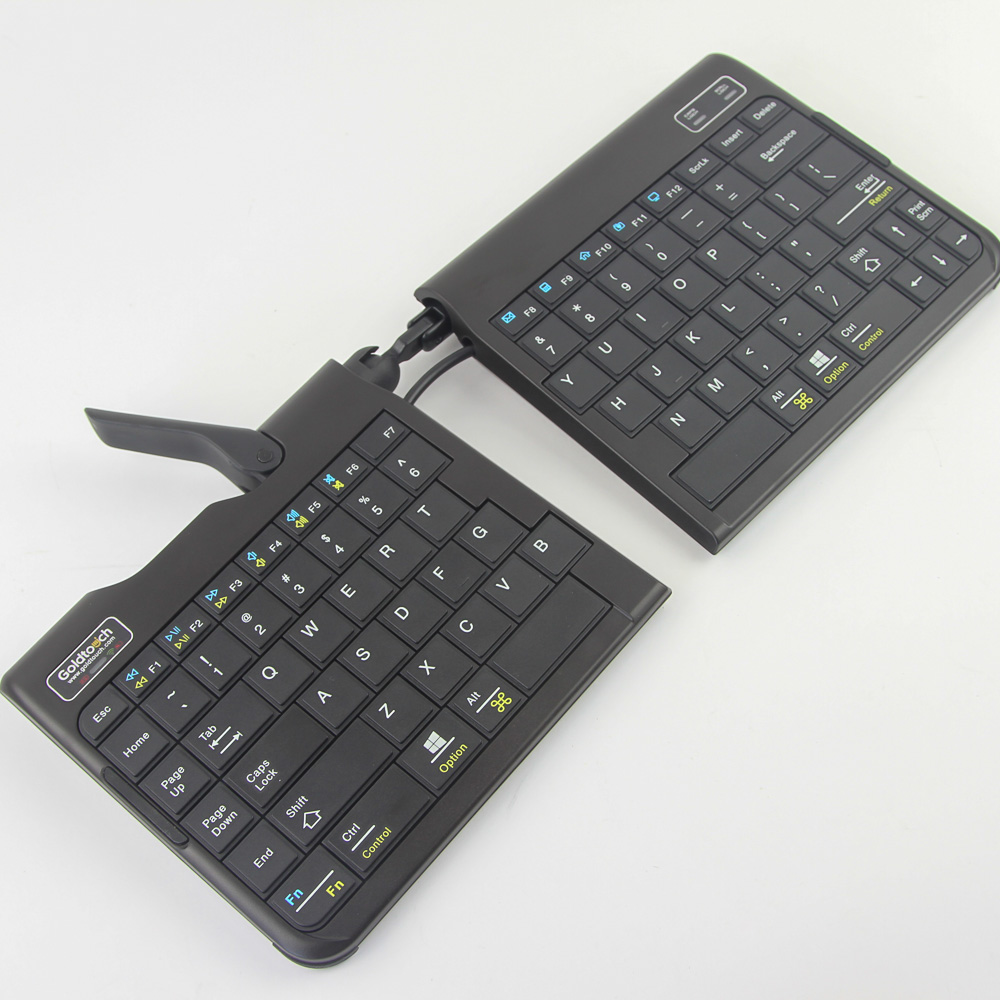
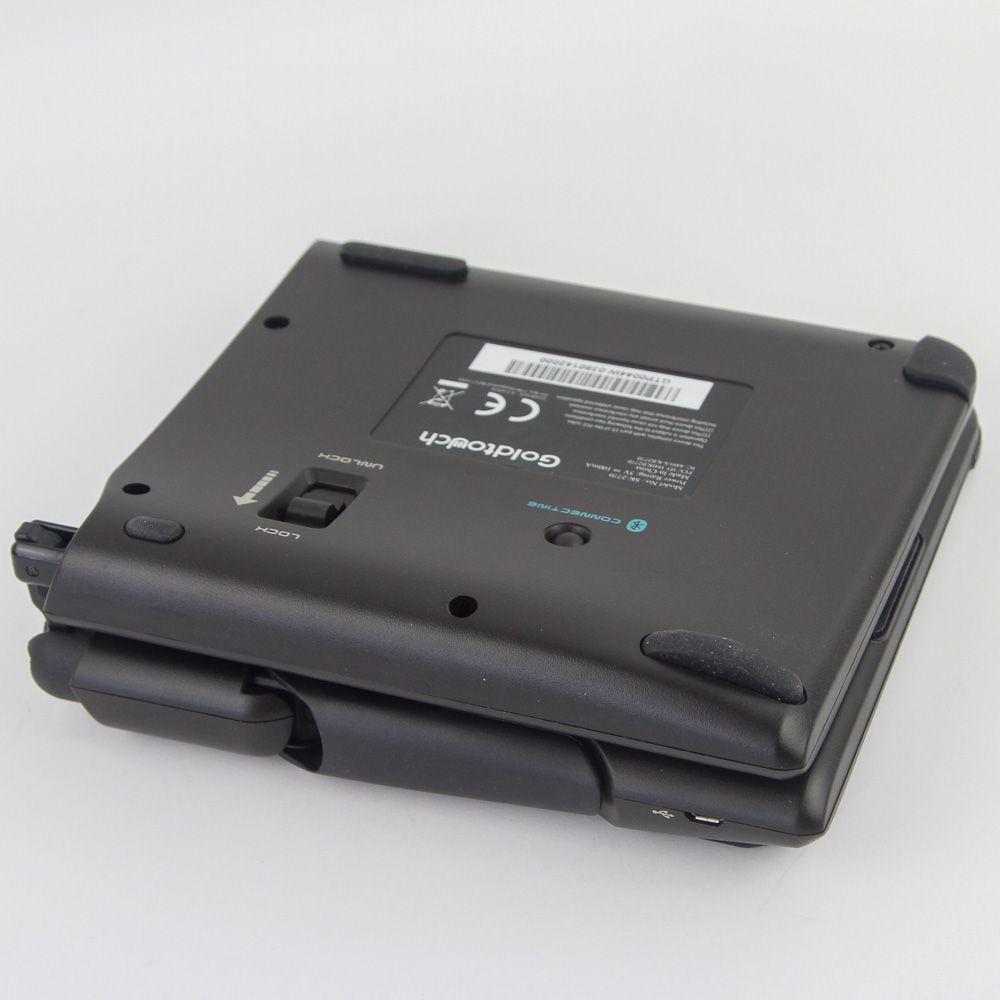

Now that you know how to lock or unlock the keyboard, let's talk more about Goldtouch's patented lock-and-lever system. The Go!2 is a mobile keyboard in that it not only supports Bluetooth connections for input, but is meant to be taken with you on the go. There is a ball socket joint in the middle of the two halves at the top, which the slider on the back locks in place. A cable underneath takes care of the actual connection, and the unlocking allows for the keyboard halves to be moved further from each other. The lever in turn locks/unlocks the ball joint for a rotary degree of freedom that combines with the transnational degree of freedom along the keyboard axis through the unlocking slider. Combined, this allows for the two halves to actually be folded over each other; now just close the lever and let go of the unlocking slider for a portable square of a keyboard you can carry around without worrying about damaging the keys that are protected in this configuration. This also explains the case being a more typical geometrical shape rather than following the split keys as with other companies, such as Mistel.
Just reverse the steps to unfold the keyboard, and the lever and ball joint allow for tenting of the keyboard as well. The user manual covers this function in more detail, including how best to select the angle for your specific needs—tenting essentially ranges from extreme (left image above) to more reasonable, the latter of which was perfect for me (right image above). You may also combine this with the unlock slider to rotate the keyboard halves upwards or downwards, an extremely neat solution that works better than having separate feet, but really also is best with compact keyboards given the single point of control at the top.
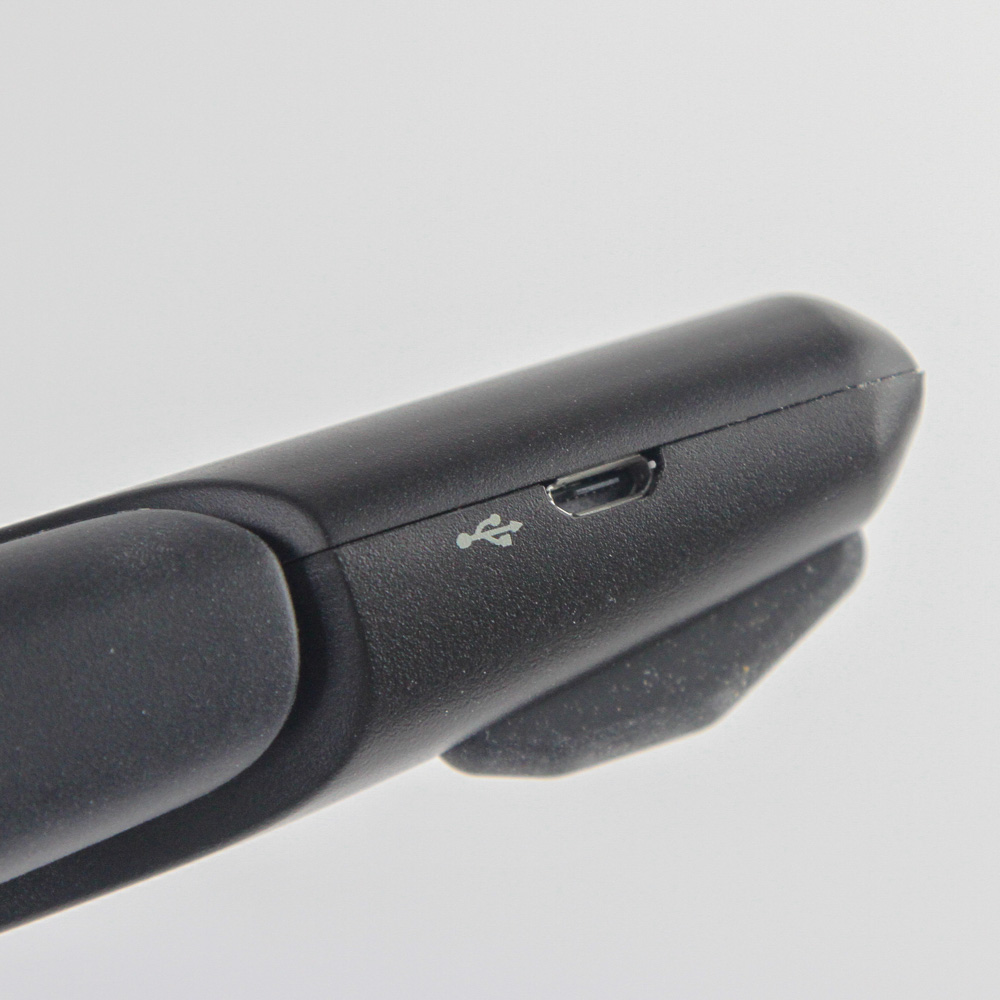
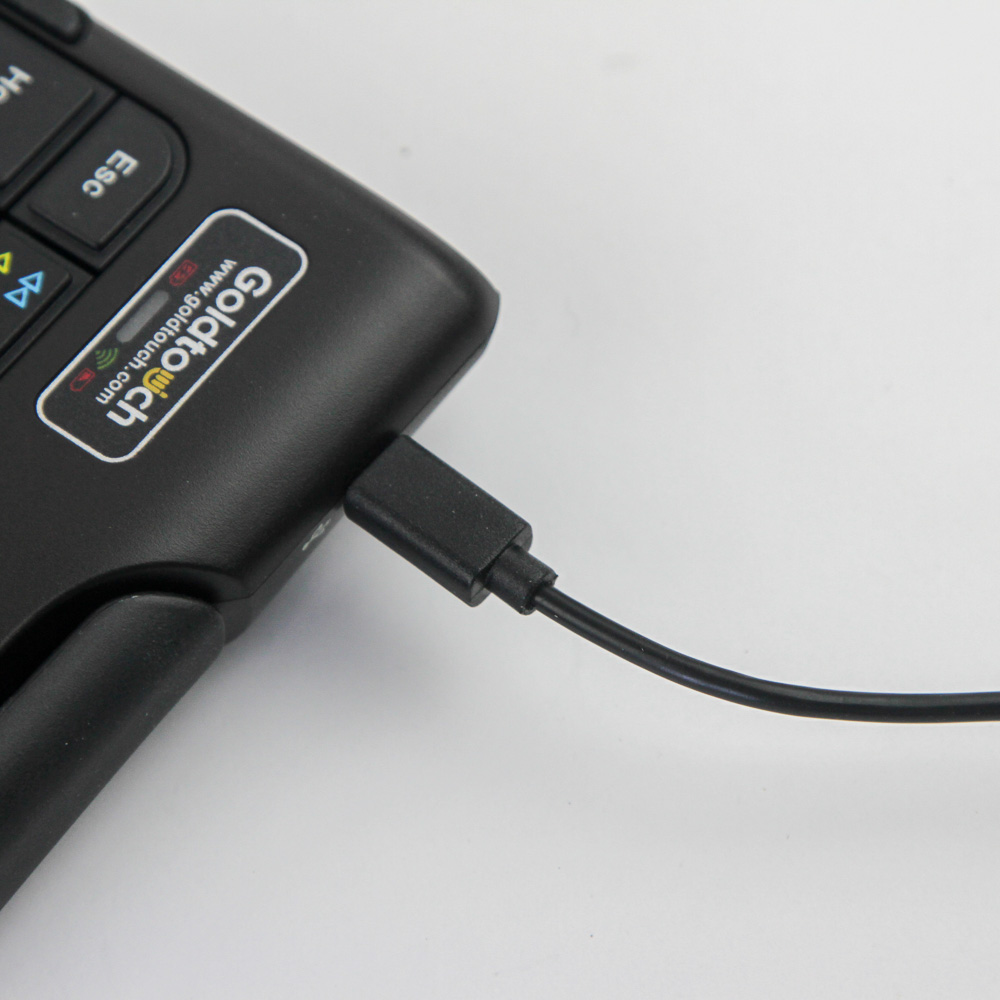
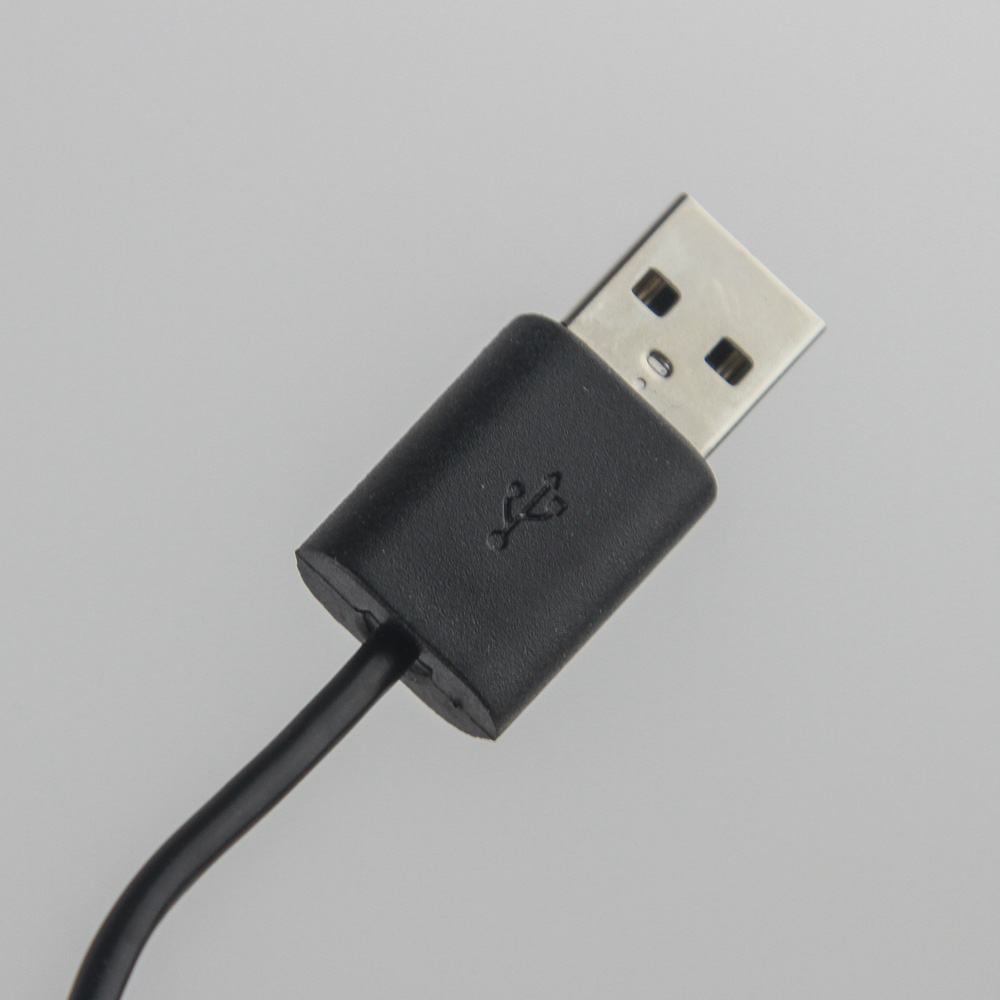
We saw the detachable cable on the previous page, and now see where it plugs into. There is a micro-USB port in the top-left corner facing away from the user, and the cable can be used for both a wired connection and charging the internal battery. The cable is quite short at only 1 foot long, which is fine for on-the-go use with laptops or tablets, and you would typically only use the cable to charge the battery while relying on the wireless Bluetooth connection to use the keyboard itself.
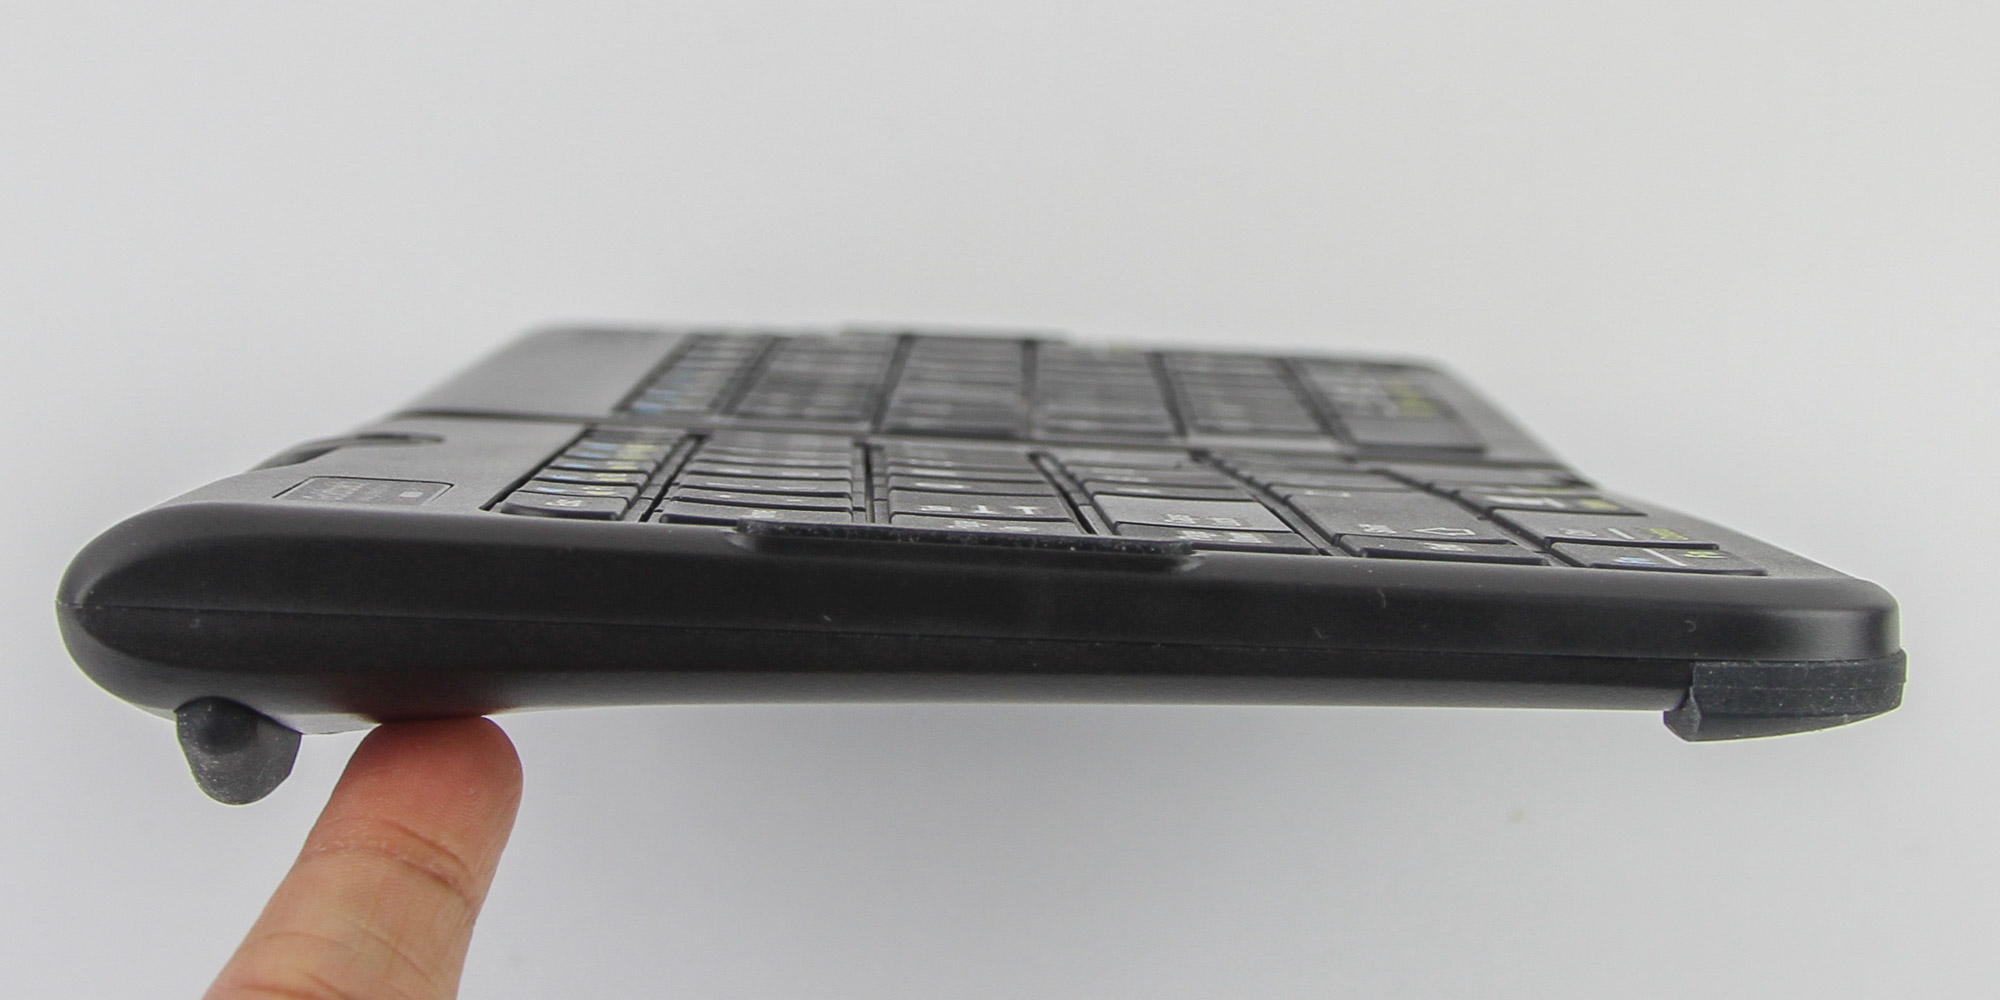
The side gives a better look at the keyboard profile, which is quite low even for membrane keyboards. The mobile, folding nature of the keyboard means Goldtouch had to go with low-profile scissor switches, and we have six rows of flat keys up top. The case is indeed the biggest part of the keyboard, housing not only the membrane sheets and PCB for each half, but also the internal battery. There is very little leeway in disassembly here, especially given the ball socket joint and lever system, to where I decided to not disassembly here since I was not confident I could do it in a non-destructive manner. But the keycaps are your standard OEM type in using ABS plastic and laser etched legends, so expect to see signs of wear and tear over time.
Jul 13th, 2025 02:06 CDT
change timezone
Latest GPU Drivers
New Forum Posts
- Is there a WIFI chip I should get? (1)
- What are you playing? (23945)
- 9060 XT 16GB or 6800 XT/6900XT? (30)
- ASUS ProArt GeForce RTX 4060 Ti OC Edition 16GB GDDR6 Gaming - nvflash64 VBIOS mismatch (5)
- Upgrade from old x58 system (10)
- New ToS of Take Two and 2K (11)
- Someone run games on AMD BC-250 under Linux * Cut down PS5 die to 6 CPU cores 24 GPU cores for use in crypto mining (86)
- GPU strip blinking,Trixx software not working properly,fan health fail... (1)
- 'NVIDIA App' not usable offline? (19)
- VBIOS issues (7)
Popular Reviews
- Fractal Design Epoch RGB TG Review
- Lexar NM1090 Pro 4 TB Review
- Corsair FRAME 5000D RS Review
- Our Visit to the Hunter Super Computer
- NVIDIA GeForce RTX 5050 8 GB Review
- NZXT N9 X870E Review
- Sapphire Radeon RX 9060 XT Pulse OC 16 GB Review - An Excellent Choice
- AMD Ryzen 7 9800X3D Review - The Best Gaming Processor
- Upcoming Hardware Launches 2025 (Updated May 2025)
- Chieftec Iceberg 360 Review
TPU on YouTube
Controversial News Posts
- Intel's Core Ultra 7 265K and 265KF CPUs Dip Below $250 (288)
- Some Intel Nova Lake CPUs Rumored to Challenge AMD's 3D V-Cache in Desktop Gaming (140)
- AMD Radeon RX 9070 XT Gains 9% Performance at 1440p with Latest Driver, Beats RTX 5070 Ti (131)
- NVIDIA Launches GeForce RTX 5050 for Desktops and Laptops, Starts at $249 (120)
- NVIDIA GeForce RTX 5080 SUPER Could Feature 24 GB Memory, Increased Power Limits (115)
- Microsoft Partners with AMD for Next-gen Xbox Hardware (105)
- Intel "Nova Lake‑S" Series: Seven SKUs, Up to 52 Cores and 150 W TDP (100)
- NVIDIA DLSS Transformer Cuts VRAM Usage by 20% (97)