 0
0
In Win 703 Review
Value & Conclusion »Test System
| System Parts for Case Reviews | |
|---|---|
| Processor: | Intel Core i7-4770K @ 4.2 GHz (Haswell, 8192 KB Cache) |
| Motherboards: | ATX: Gigabyte GA-Z97X-Gaming 7 mATX: Gigabyte GA-Q87M-D2H mini-ITX: GA-H97N-WIFI Provided by: Gigabyte |
| Graphic Card: | Long: NVIDIA GeForce GTX 280 OEM Short: HIS Radeon 5350 HD |
| Memory: | Crucial Ballistix Tactical DIMM Kit 8GB @ DDR3-1600, CL8-8-8-24 Provided by: Crucial |
| HDD: | Western Digital 320 GB 7200 RPM |
| SSD: | Crucial MX100 256GB SATA 6Gbps Provided by: Crucial |
| Power Supply: | Fractal Design Edison M 550W Provided by: Fractal Design |
| Cooling: | Air Cooling: Be Quiet Shadow Rock 2 Liquid Cooling: Fractal Design Kelvin T12 & S24 Provided by: Fractal Design |
Assembly
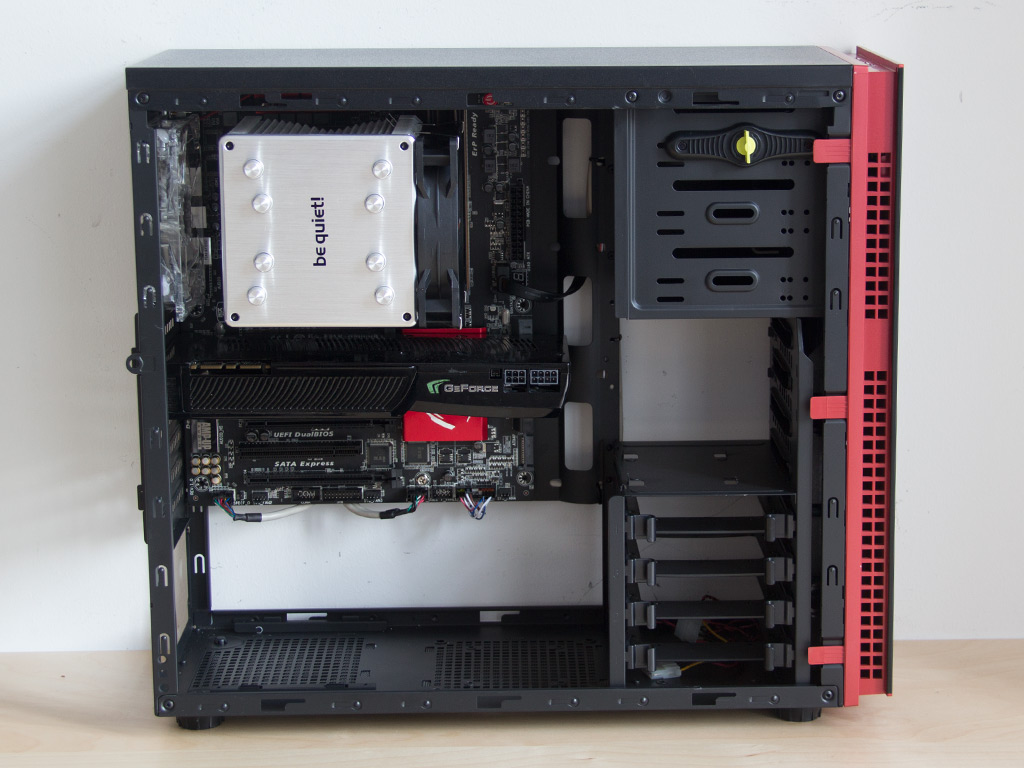
Installing the motherboard is done by simply screwing it down onto the pre-installed mounts. While these will work perfectly fine, some boards with long leads on their solder side may end up shorting out on these mounts. Chances are slim, but it is still possible. There is plenty of space to the right and below the board at this stage, but you will have a hard time reaching the 4- or 8-pin CPU connector with a big cooler installed as there is virtually no additional room above the motherboard.
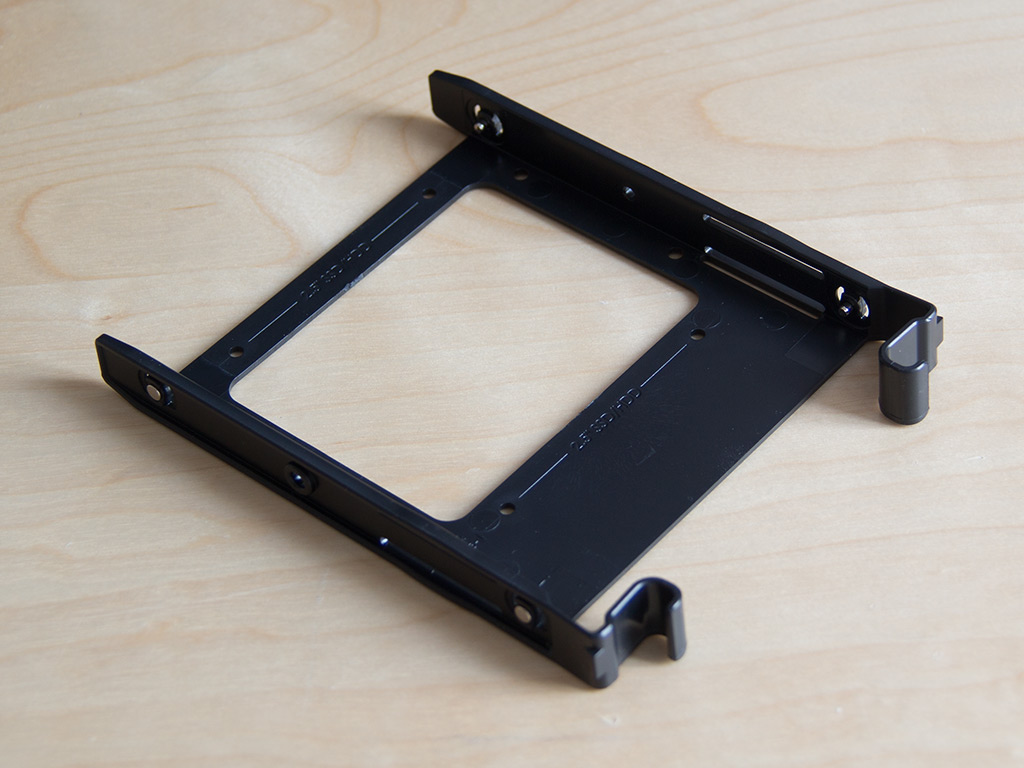
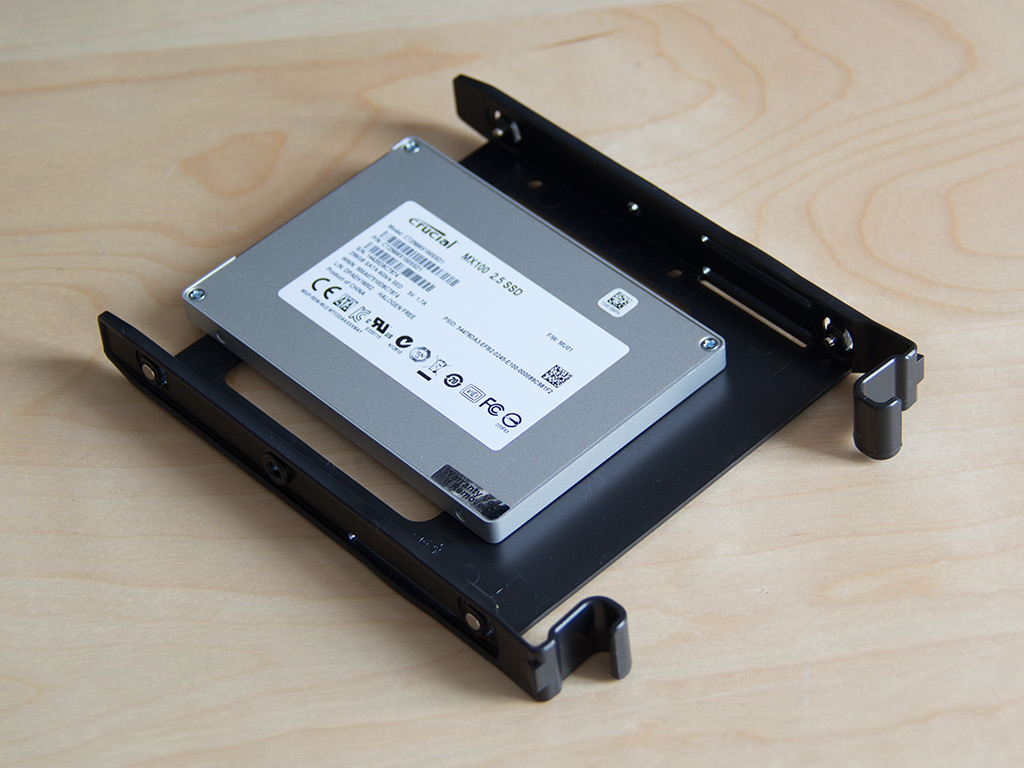
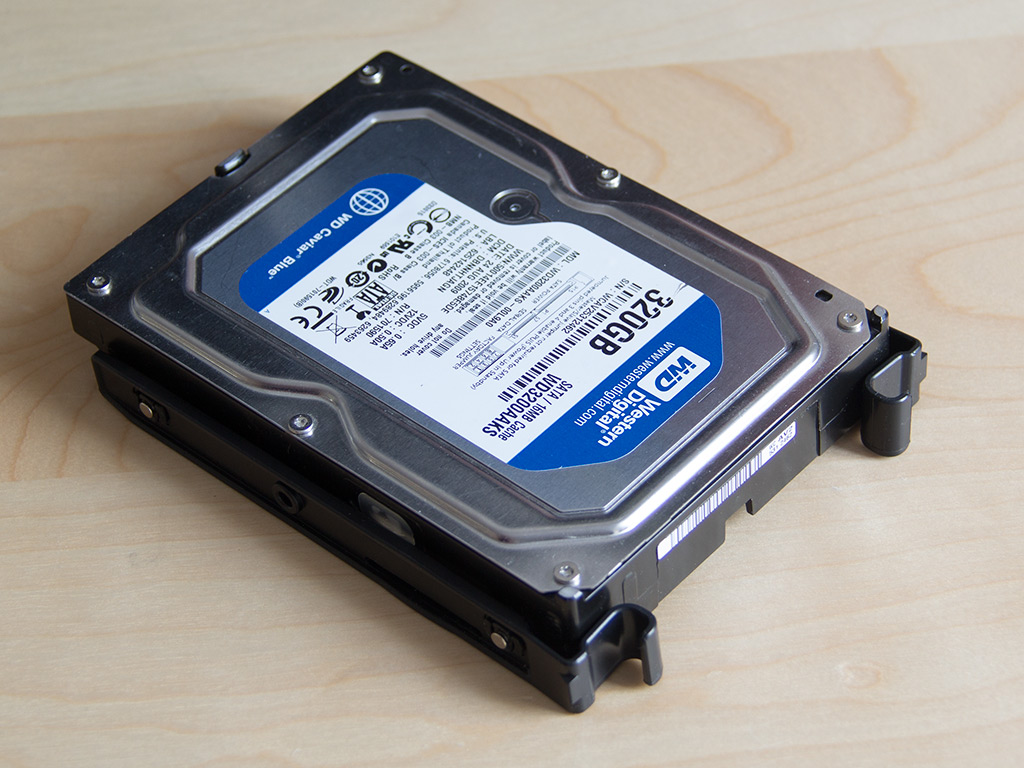
Installing the hard drives is quite easy thanks to the trays. If you are using a 3.5" drive, you will have to first apply the rubber rings as an anti-vibration measure. In such a scenario, no screws or tools are required as the metal pins will hold the drive in place securely. If you are installing a 2.5" drive, you will have to use traditional screws instead. Interestingly enough, In Win only offers a very limited number of screws, so you will need to get more if you are filling the chassis to the rim. It would be good of In Win to include the right amount out of the box.
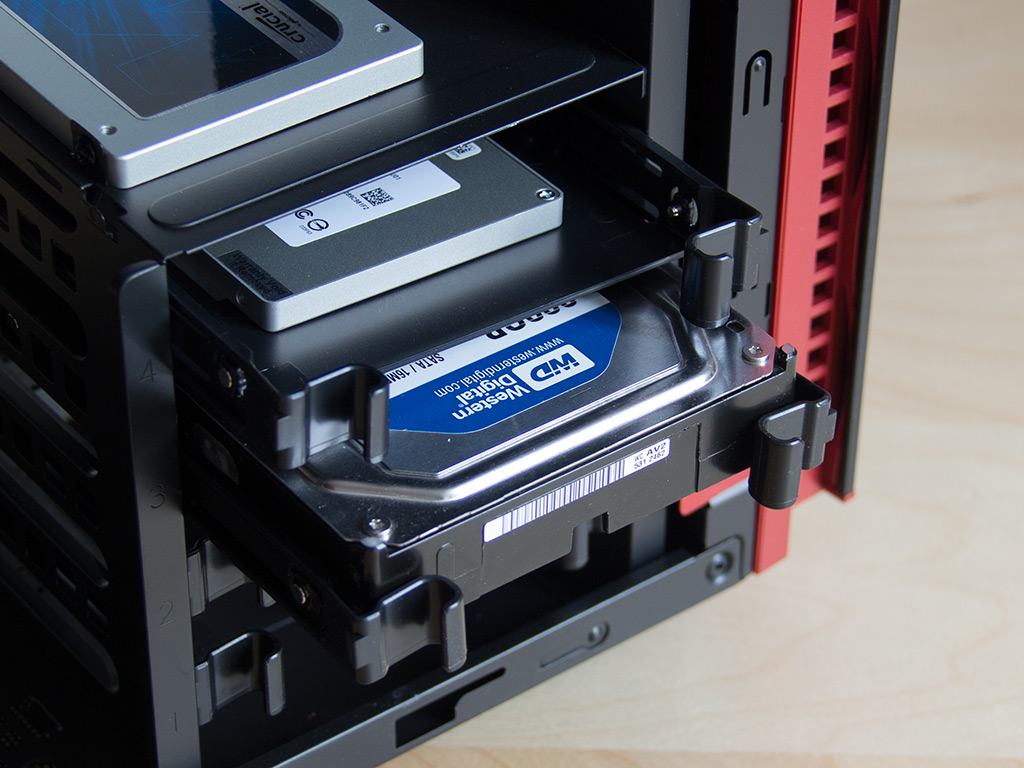
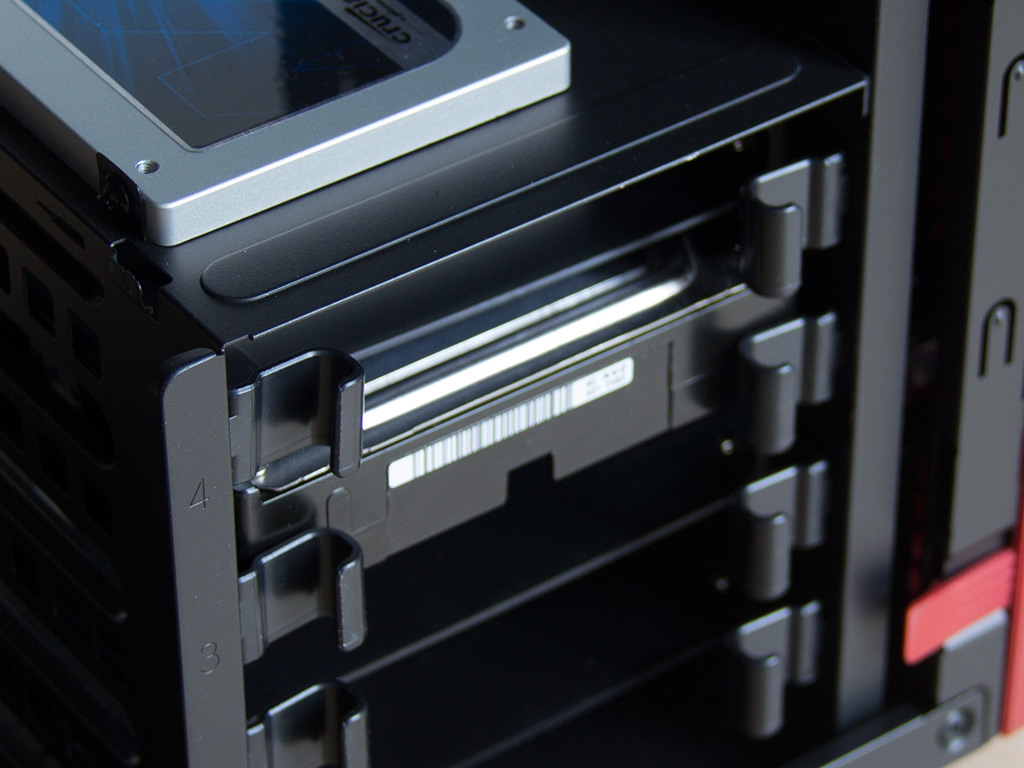
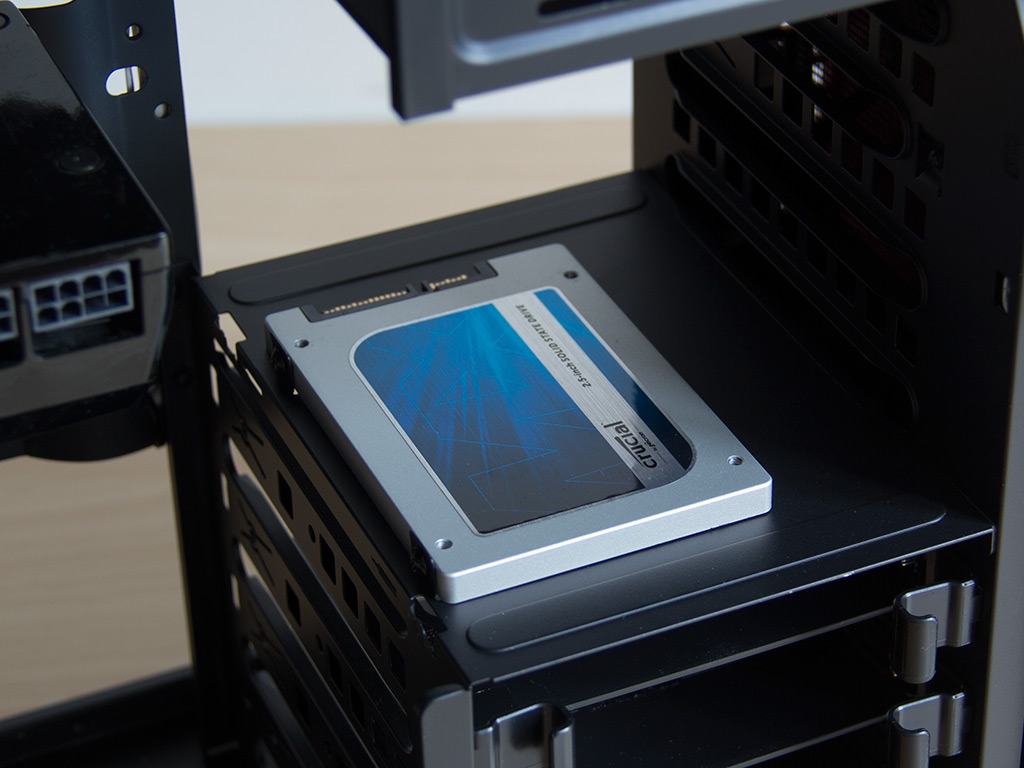
Once filled, simply slide the trays back into place until they snap down. In addition to these, you may install a 2.5" drive on the top of the cage with two additional screws. It is the perfect spot to showcase your high-end SSD to envious onlookers at a LAN party, for example.
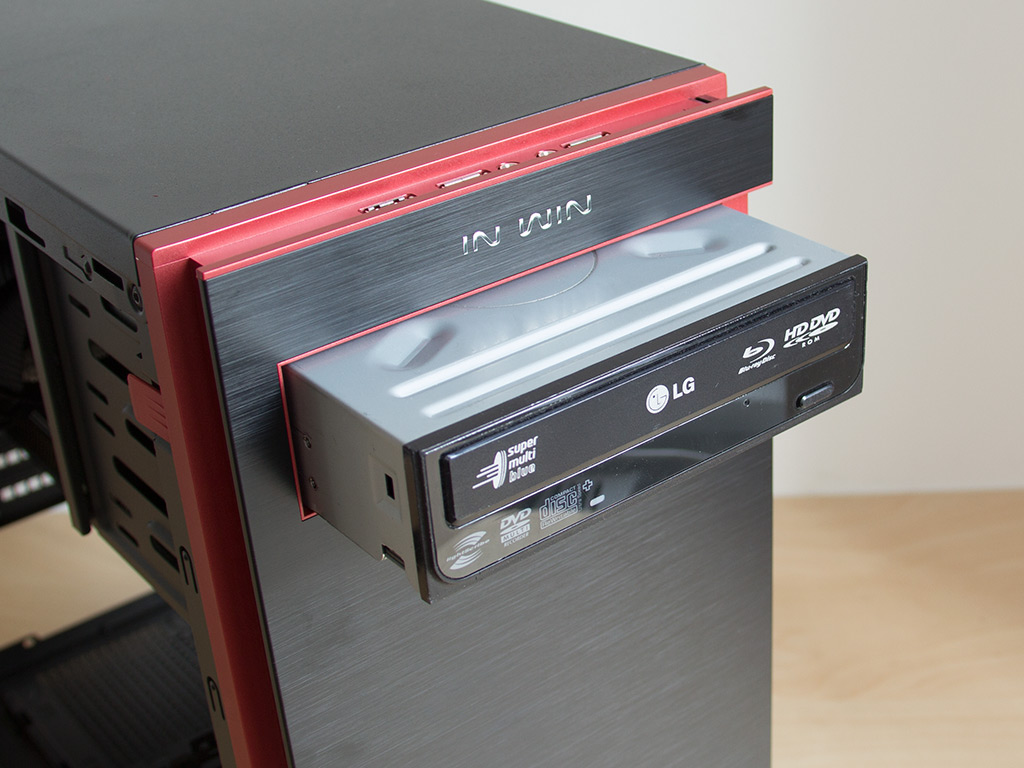
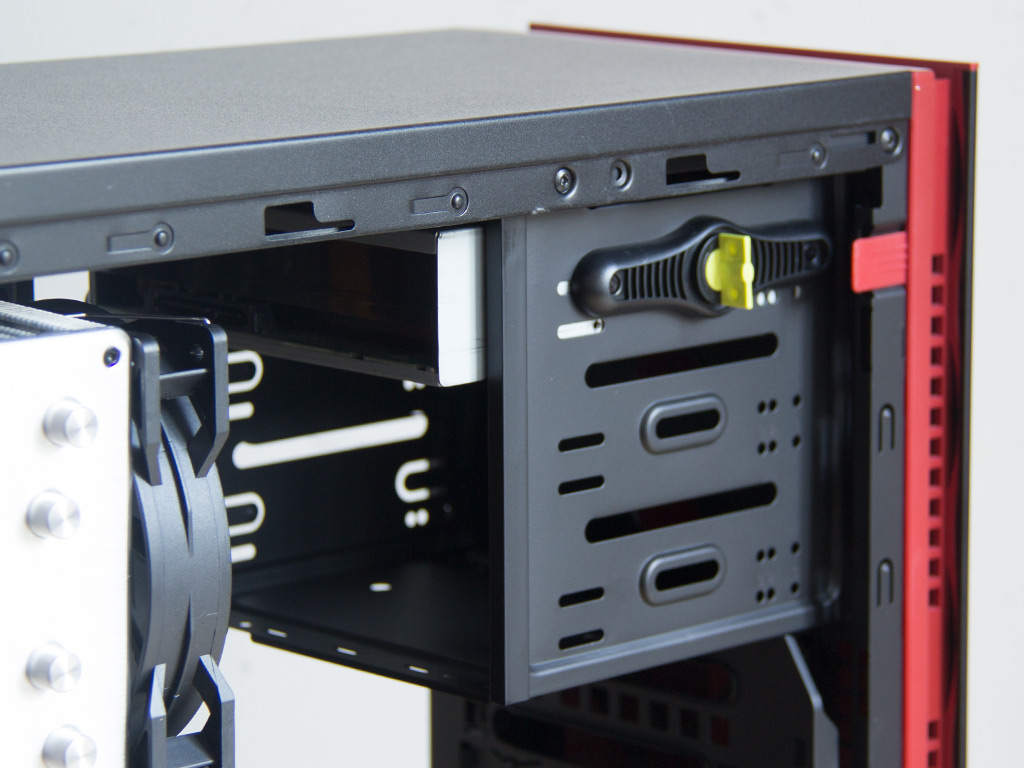
Installing the optical drive requires you to remove the locking bar made out of solid plastic first. Once the drive bay is free, simply slide the drive into place and secure it. Ideally, no screws or tools are required, but you have the option to use screws to secure the drive properly. Considering it is a one-sided mechanism and comes in a neon green color, some may be inclined to go straight for all-black screws instead.
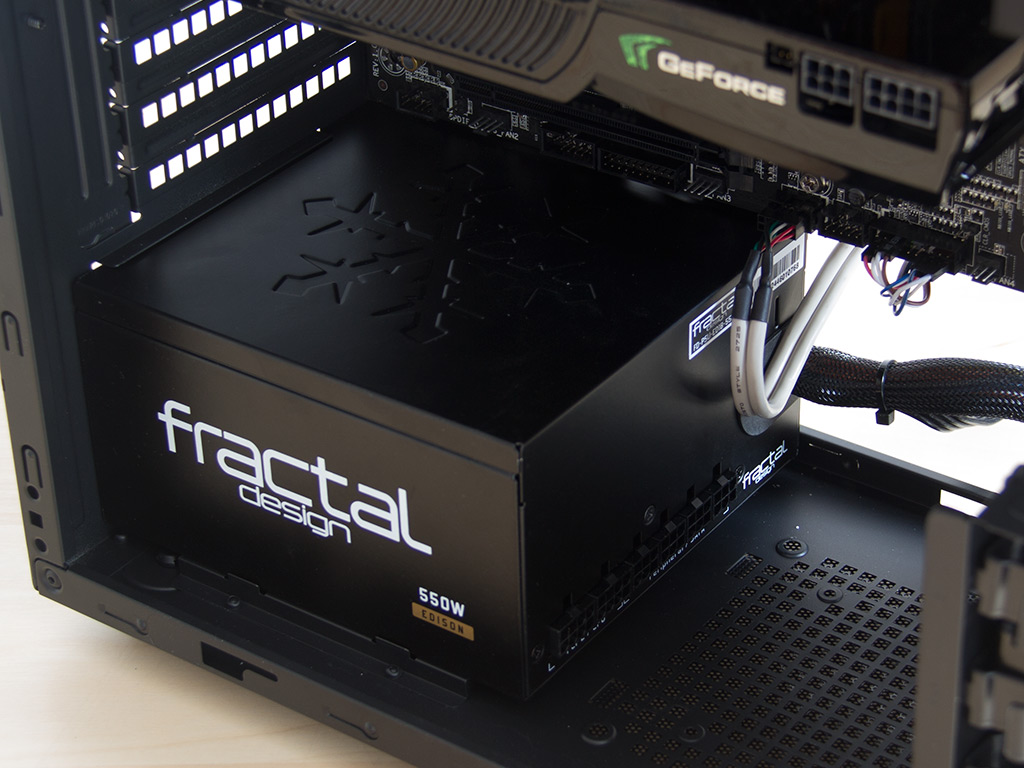
Installing the PSU bears no surprises. Simply put it in place and secure it. As there is very little space between board and PSU, you will have to watch your cable routing to make sure it does not get in the way of things.
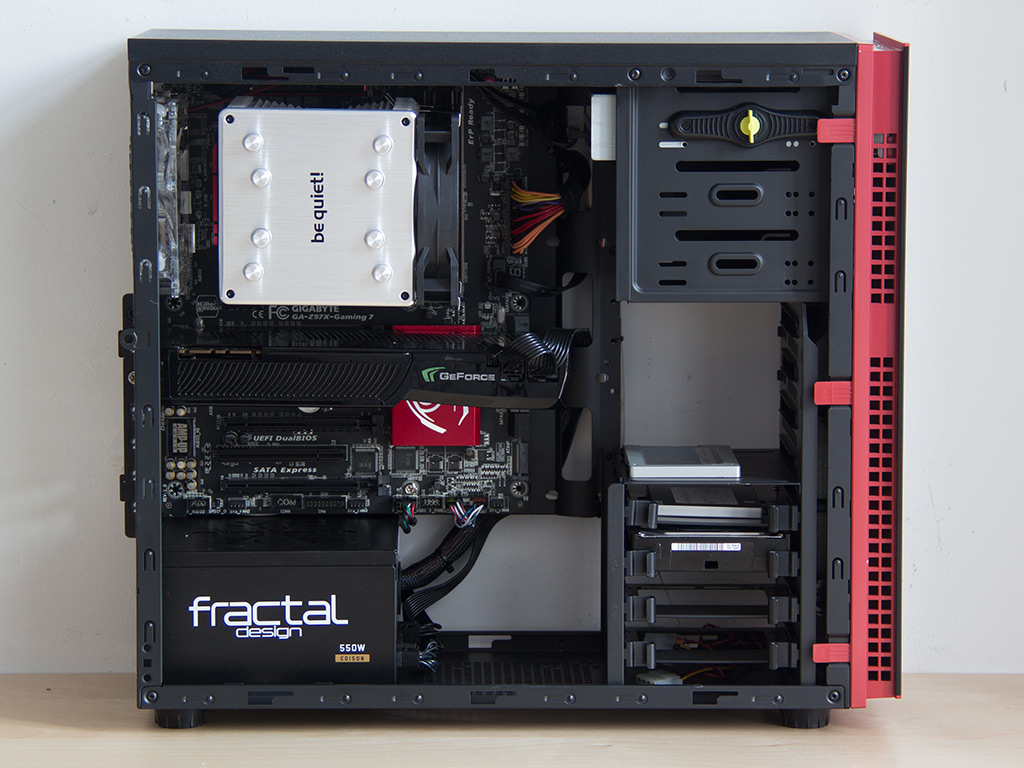
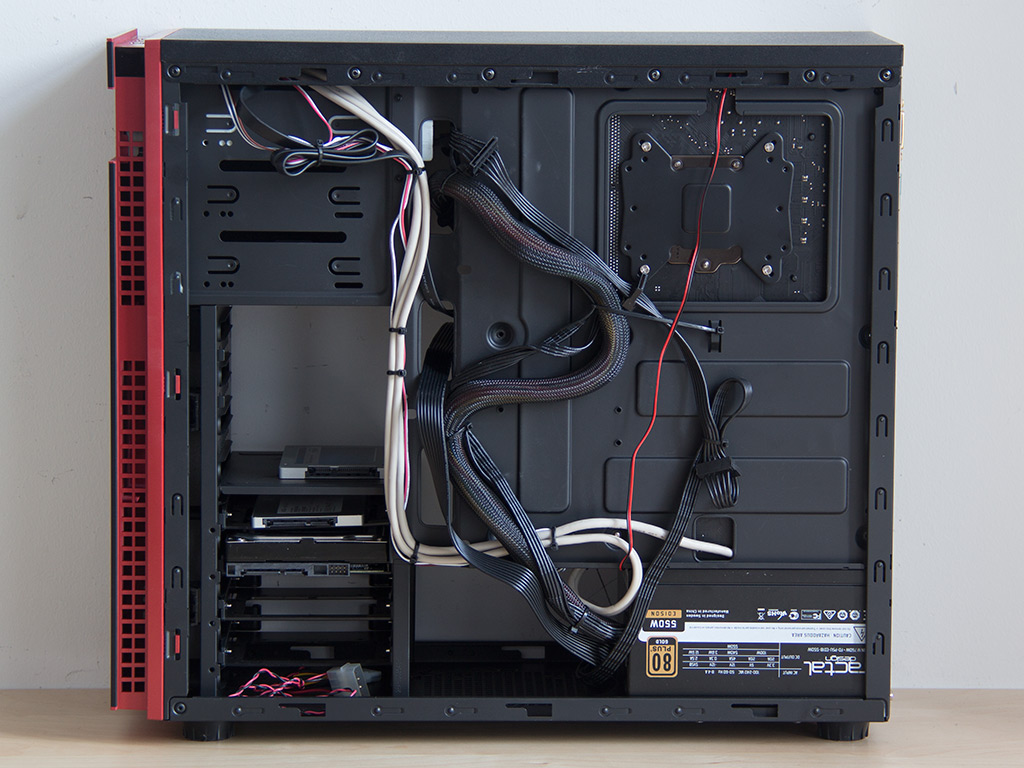
With everything installed, the In Win 703 makes a clean impression. Especially if you consider the gray cables, lack of rubber grommets, and open space by the PSU. I ran all the gray cables along the side of openings to make sure you would not see them in a running system; I also made a point of using gaps between the board and PSU to route and hide cables as nicely as possible.
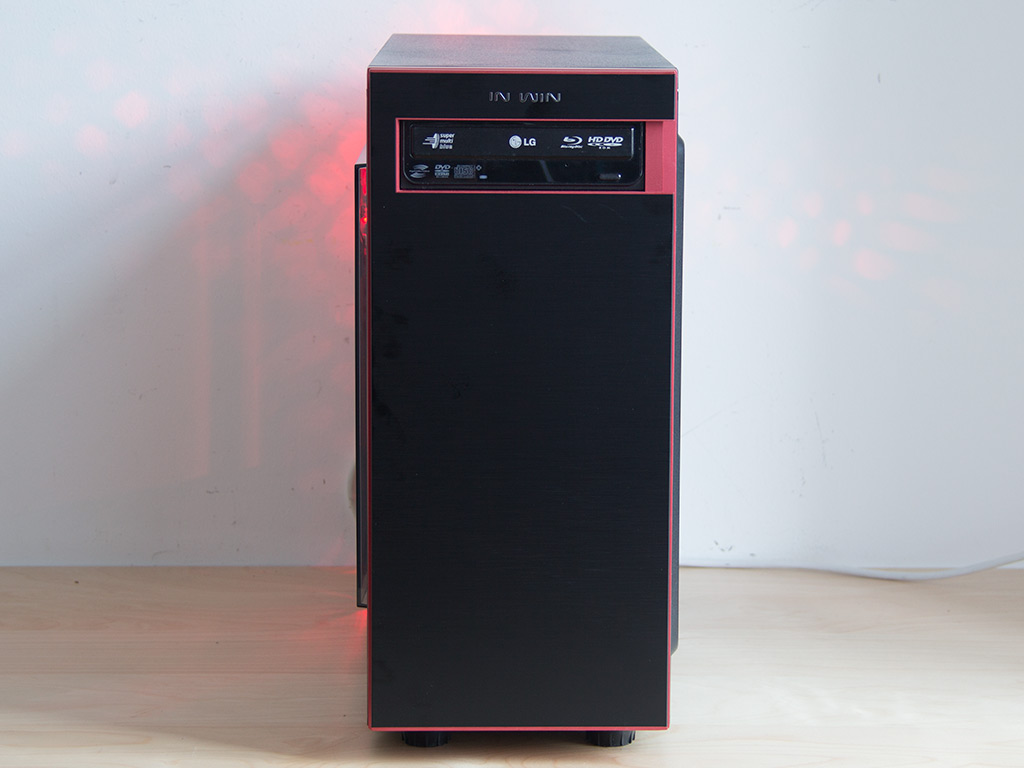
Finished Looks

With all the covers back in place, the In Win 703 actually looks pretty sexy for a case of this price point. In Win has once again nailed it in terms of design. The red and black elements combine well with the fan's red LEDs, which makes for a pretty nifty look. Unfortunately, the power LED is blue, which seems a bit out of place.
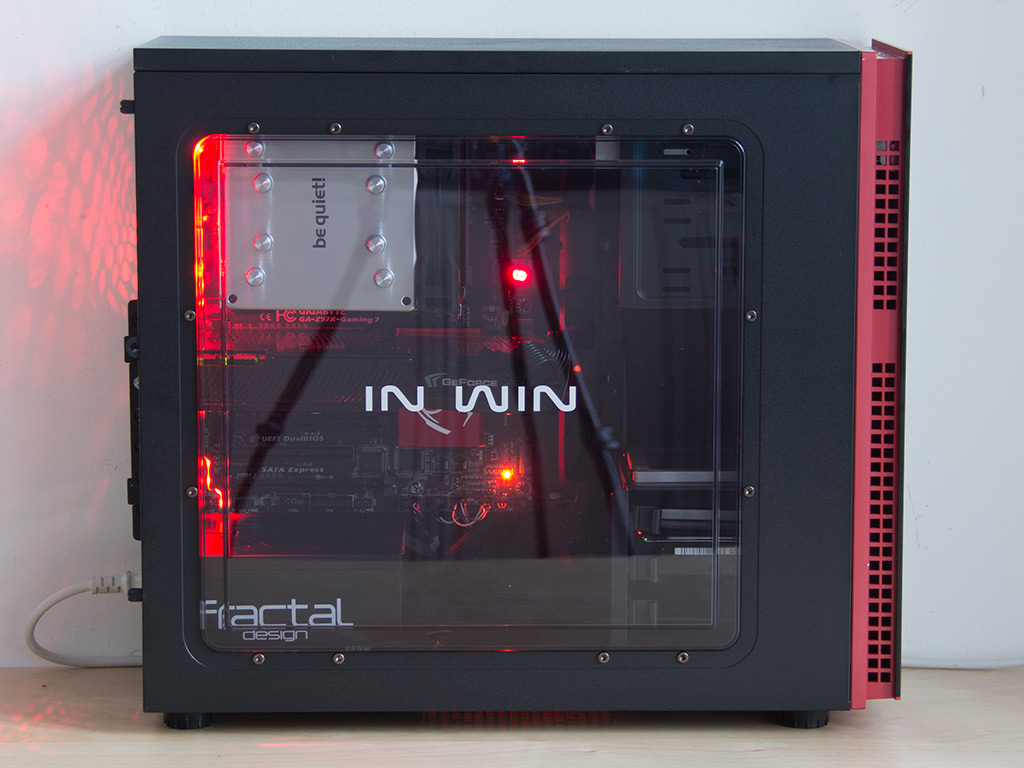

The asymmetrical drive bay in front bears a bit more red once the drive bay cover has been removed, but it still looks great. Turning the chassis around, the large window lets you look at all the parts within should you want to show them off at the next LAN Party. Everything in the rear is also where you would expect it to be, with the red LED fan pouring quite a bit of light into the 703 and out toward the back.
Jul 10th, 2025 02:43 CDT
change timezone
Latest GPU Drivers
New Forum Posts
- Do you still use Antivirus software on your latest hardware? (75)
- Screen burn-in (21)
- TPU's Nostalgic Hardware Club (20493)
- 3DMARK "LEGENDARY" (326)
- Post Your TIMESPY, PCMARK10 & FIRESTRIKE SCORES! (2019) (321)
- 5070ti overclock...what are your settings? (47)
- 'NVIDIA App' not usable offline? (1)
- G-Sync Not Working in Borderless / Window Mode - Windows 11 (5)
- [GPU-Z Test Build] New Kernel Driver, Everyone: Please Test (78)
- Friend's monitor randomly loses signal (3)
Popular Reviews
- NZXT N9 X870E Review
- NVIDIA GeForce RTX 5050 8 GB Review
- Fractal Design Epoch RGB TG Review
- Corsair FRAME 5000D RS Review
- Fractal Design Scape Review - Debut Done Right
- AMD Ryzen 7 9800X3D Review - The Best Gaming Processor
- Sapphire Radeon RX 9060 XT Pulse OC 16 GB Review - An Excellent Choice
- Upcoming Hardware Launches 2025 (Updated May 2025)
- Sapphire Radeon RX 9070 XT Nitro+ Review - Beating NVIDIA
- PowerColor ALPHYN AM10 Review
TPU on YouTube
Controversial News Posts
- Intel's Core Ultra 7 265K and 265KF CPUs Dip Below $250 (288)
- Some Intel Nova Lake CPUs Rumored to Challenge AMD's 3D V-Cache in Desktop Gaming (140)
- NVIDIA Launches GeForce RTX 5050 for Desktops and Laptops, Starts at $249 (117)
- AMD Radeon RX 9070 XT Gains 9% Performance at 1440p with Latest Driver, Beats RTX 5070 Ti (116)
- NVIDIA GeForce RTX 5080 SUPER Could Feature 24 GB Memory, Increased Power Limits (115)
- Microsoft Partners with AMD for Next-gen Xbox Hardware (105)
- Intel "Nova Lake‑S" Series: Seven SKUs, Up to 52 Cores and 150 W TDP (100)
- NVIDIA DLSS Transformer Cuts VRAM Usage by 20% (97)