 5
5
James Donkey RS2 3.0 Gasket Mount Wireless Keyboard Review
Software »Disassembly
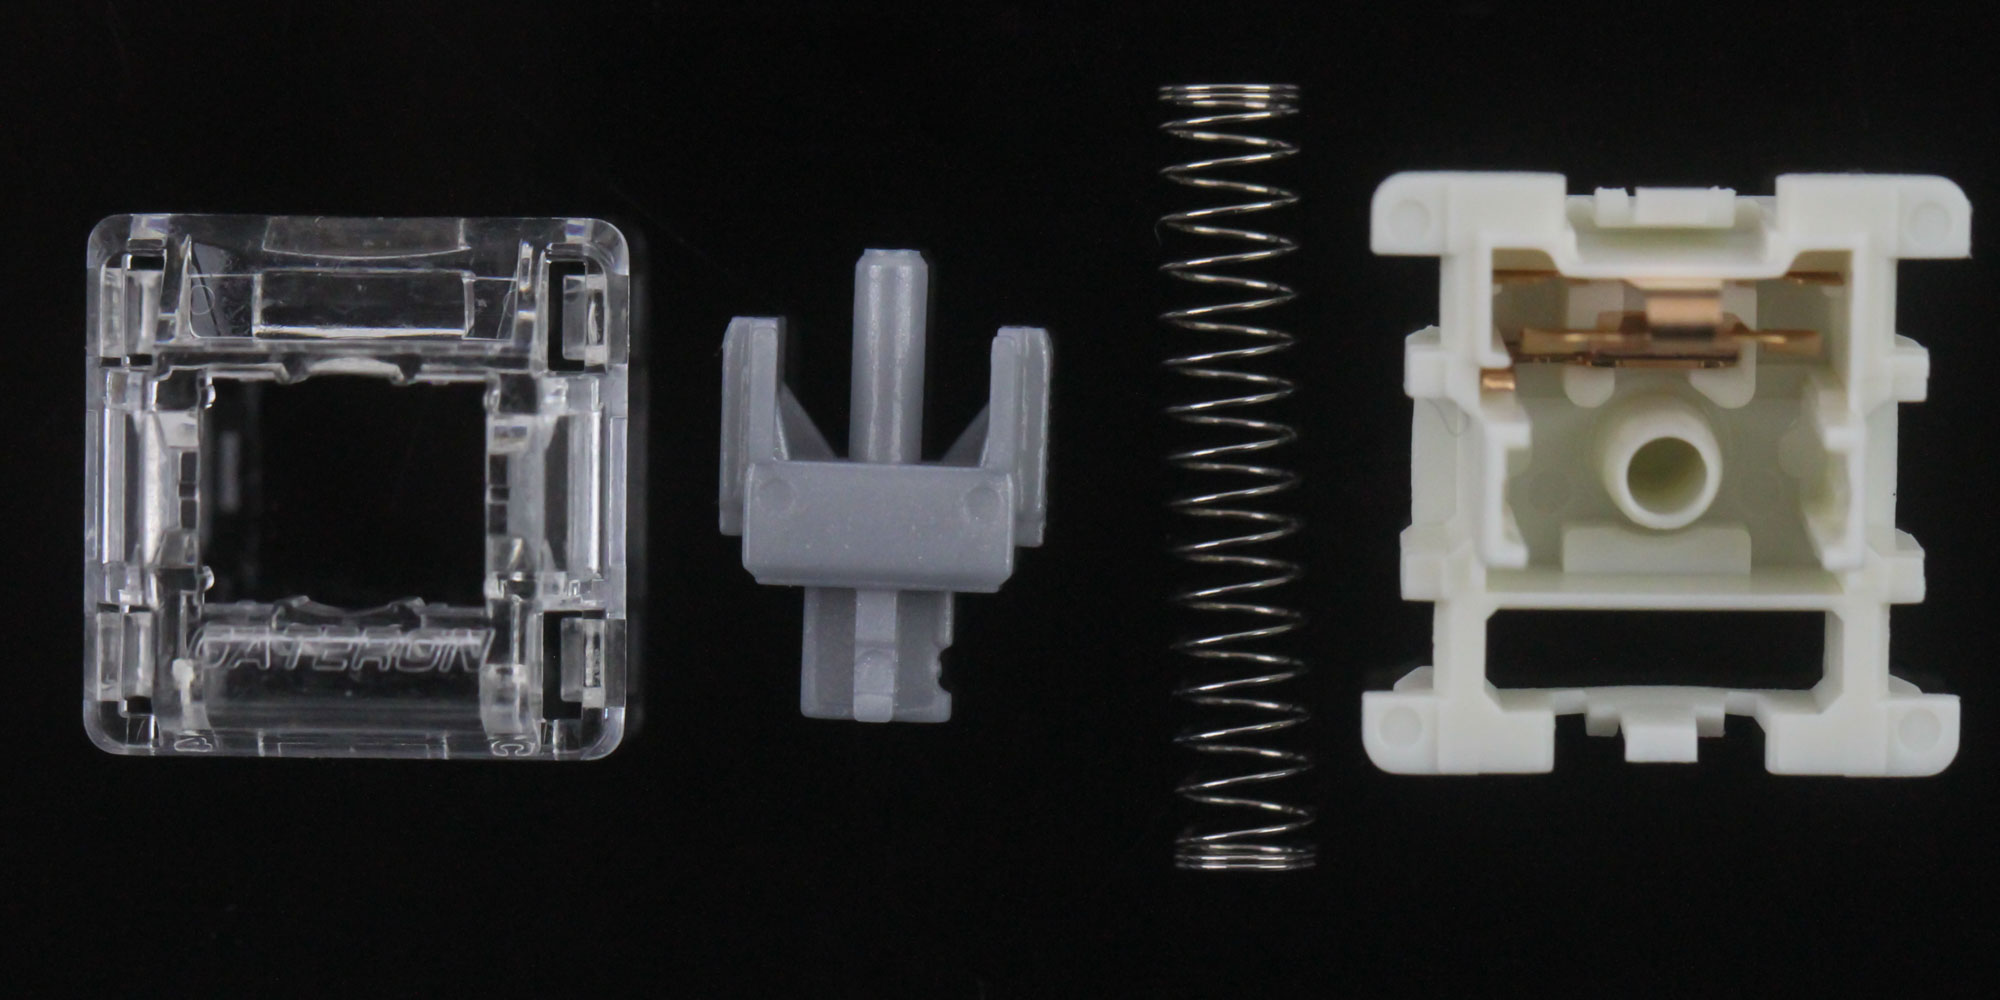

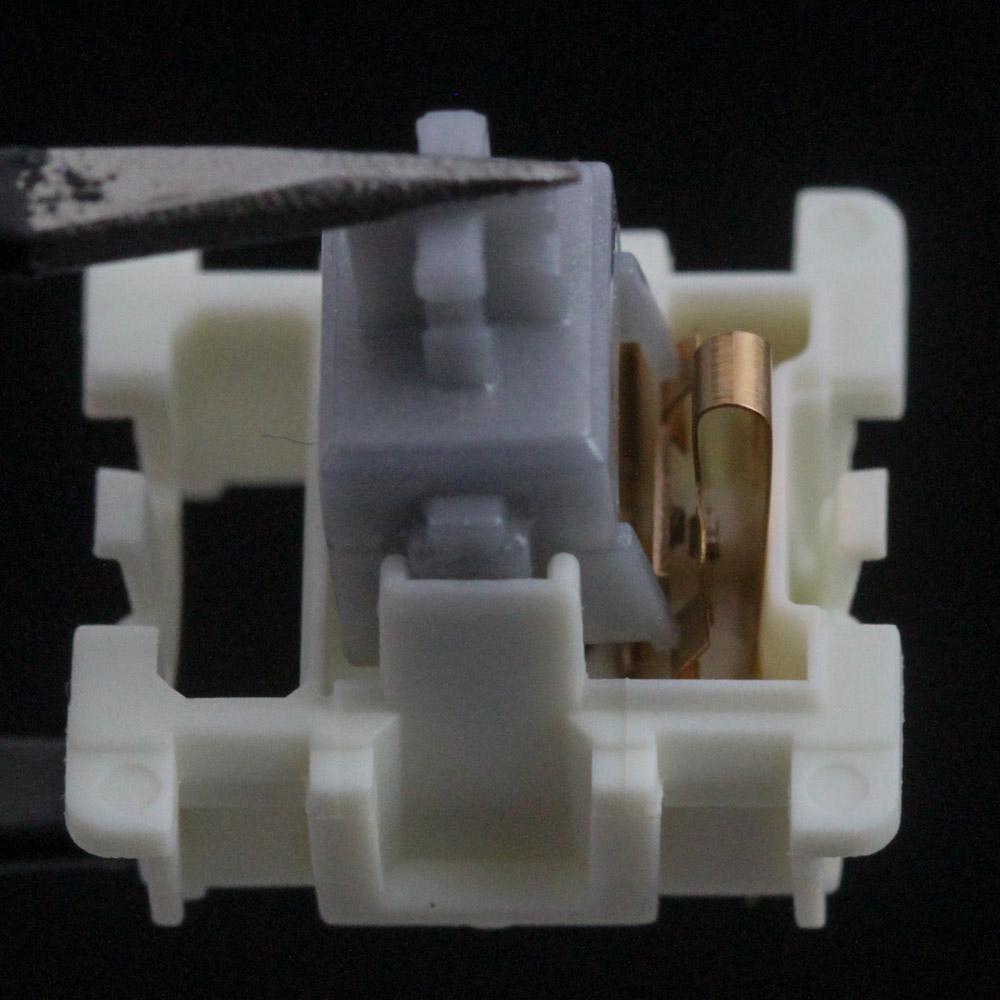
Given the hot-swappable switch feature on the James Donkey RS2 3.0, I wanted to begin this section with a look inside the Gateron G Pro 2.0 Silver switches that came on this sample. The switch is held together with plastic clips on the top and bottom housing. Use a thin flat screwdriver to pry one side off before the other, but not by too much. The top has compatibility with SMD LEDs only compared to the previous G Pro switches that also support 2/4-pin LEDs. The stem comes lightly pre-lubed at the factory and is shorter than usual while being paired with Gateron's longer 2-stage spring. The actuation notch is also placed lower down so that it hits the gold-plated crosspoint contacts sooner thus resulting in earlier actuation along the pathway of the stem, making this a linear "speed" switch.
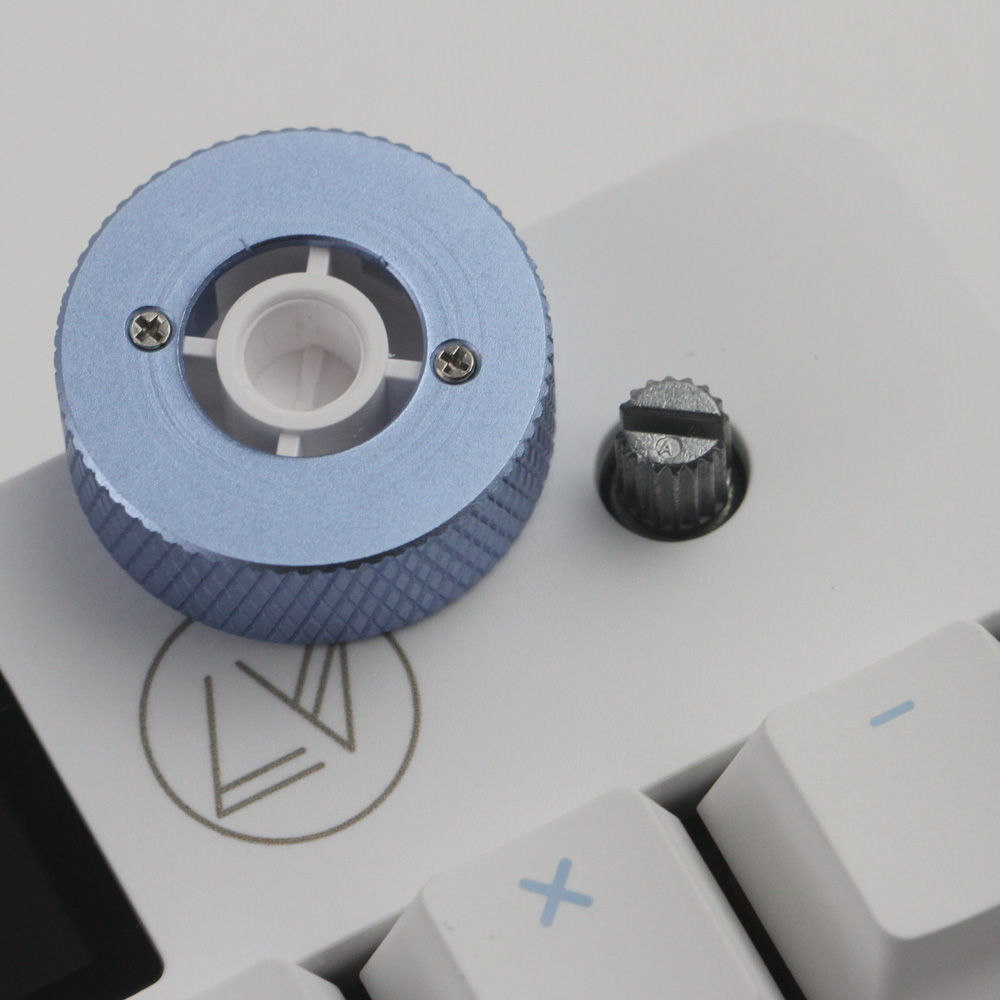
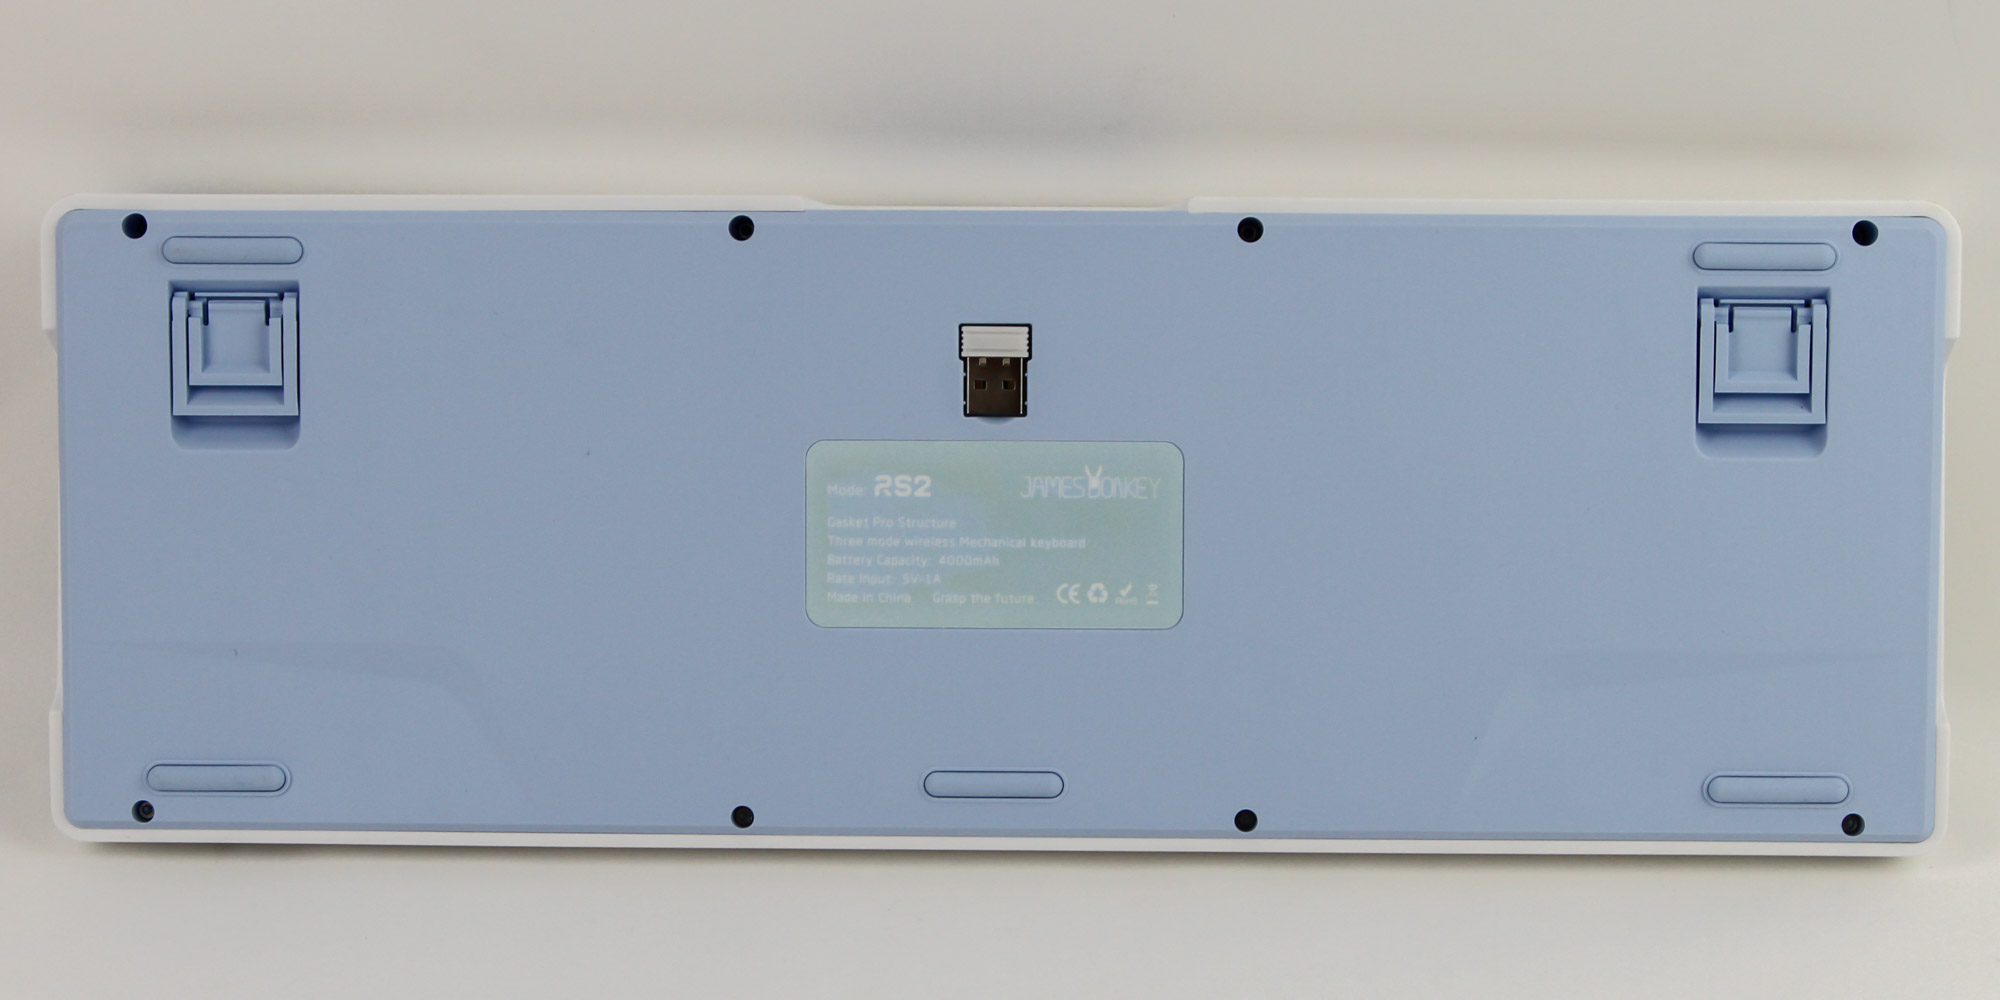
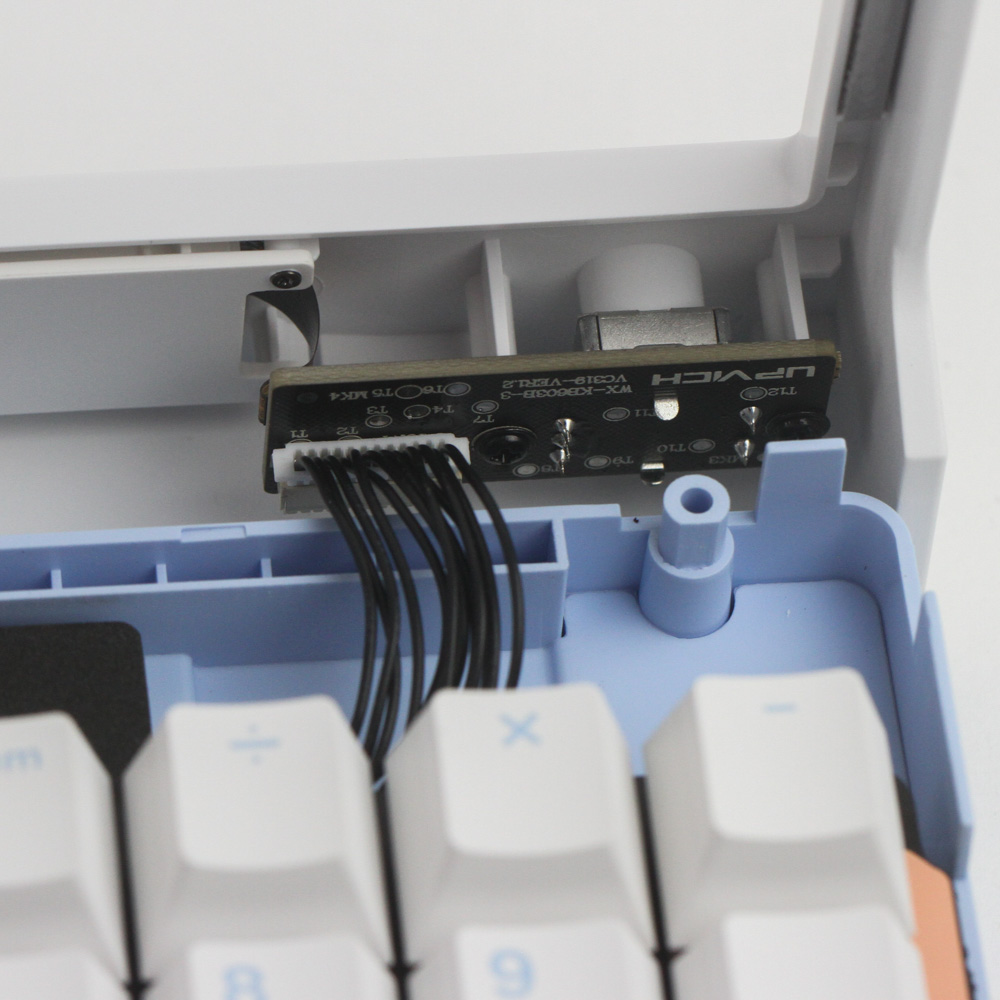
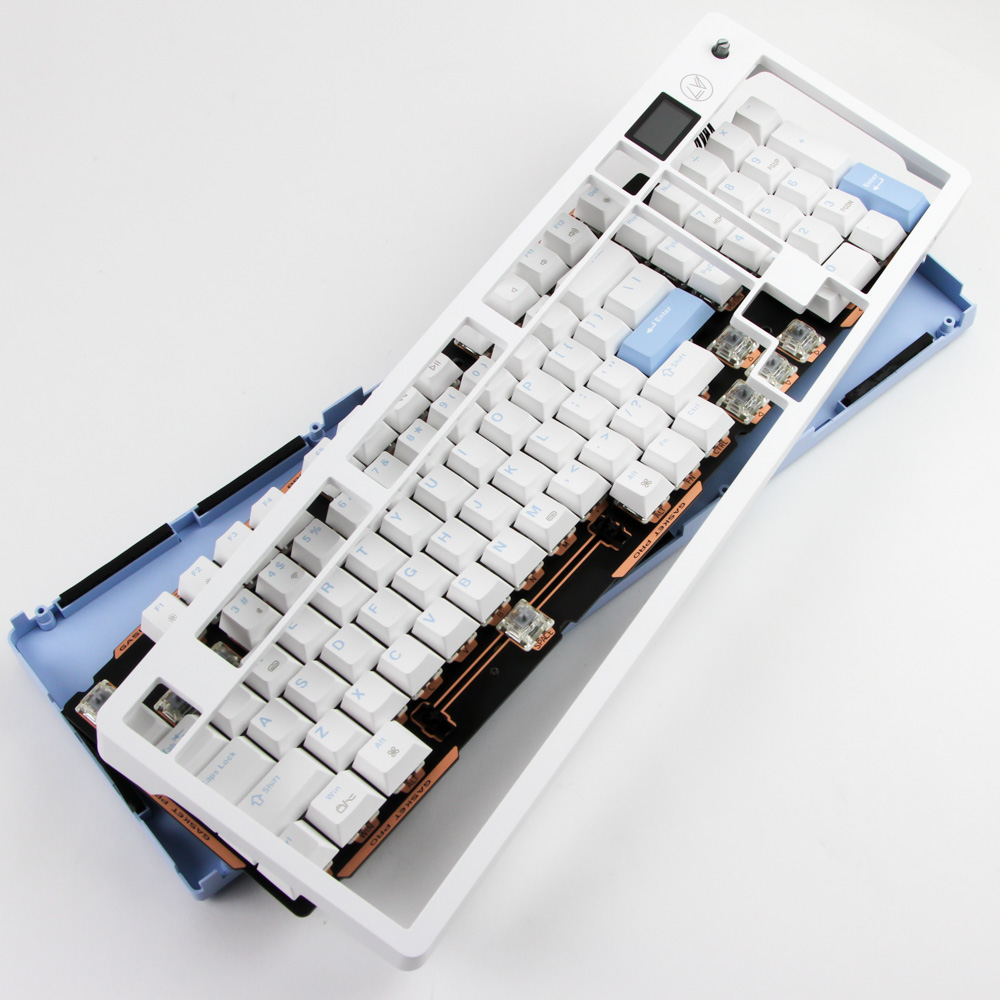
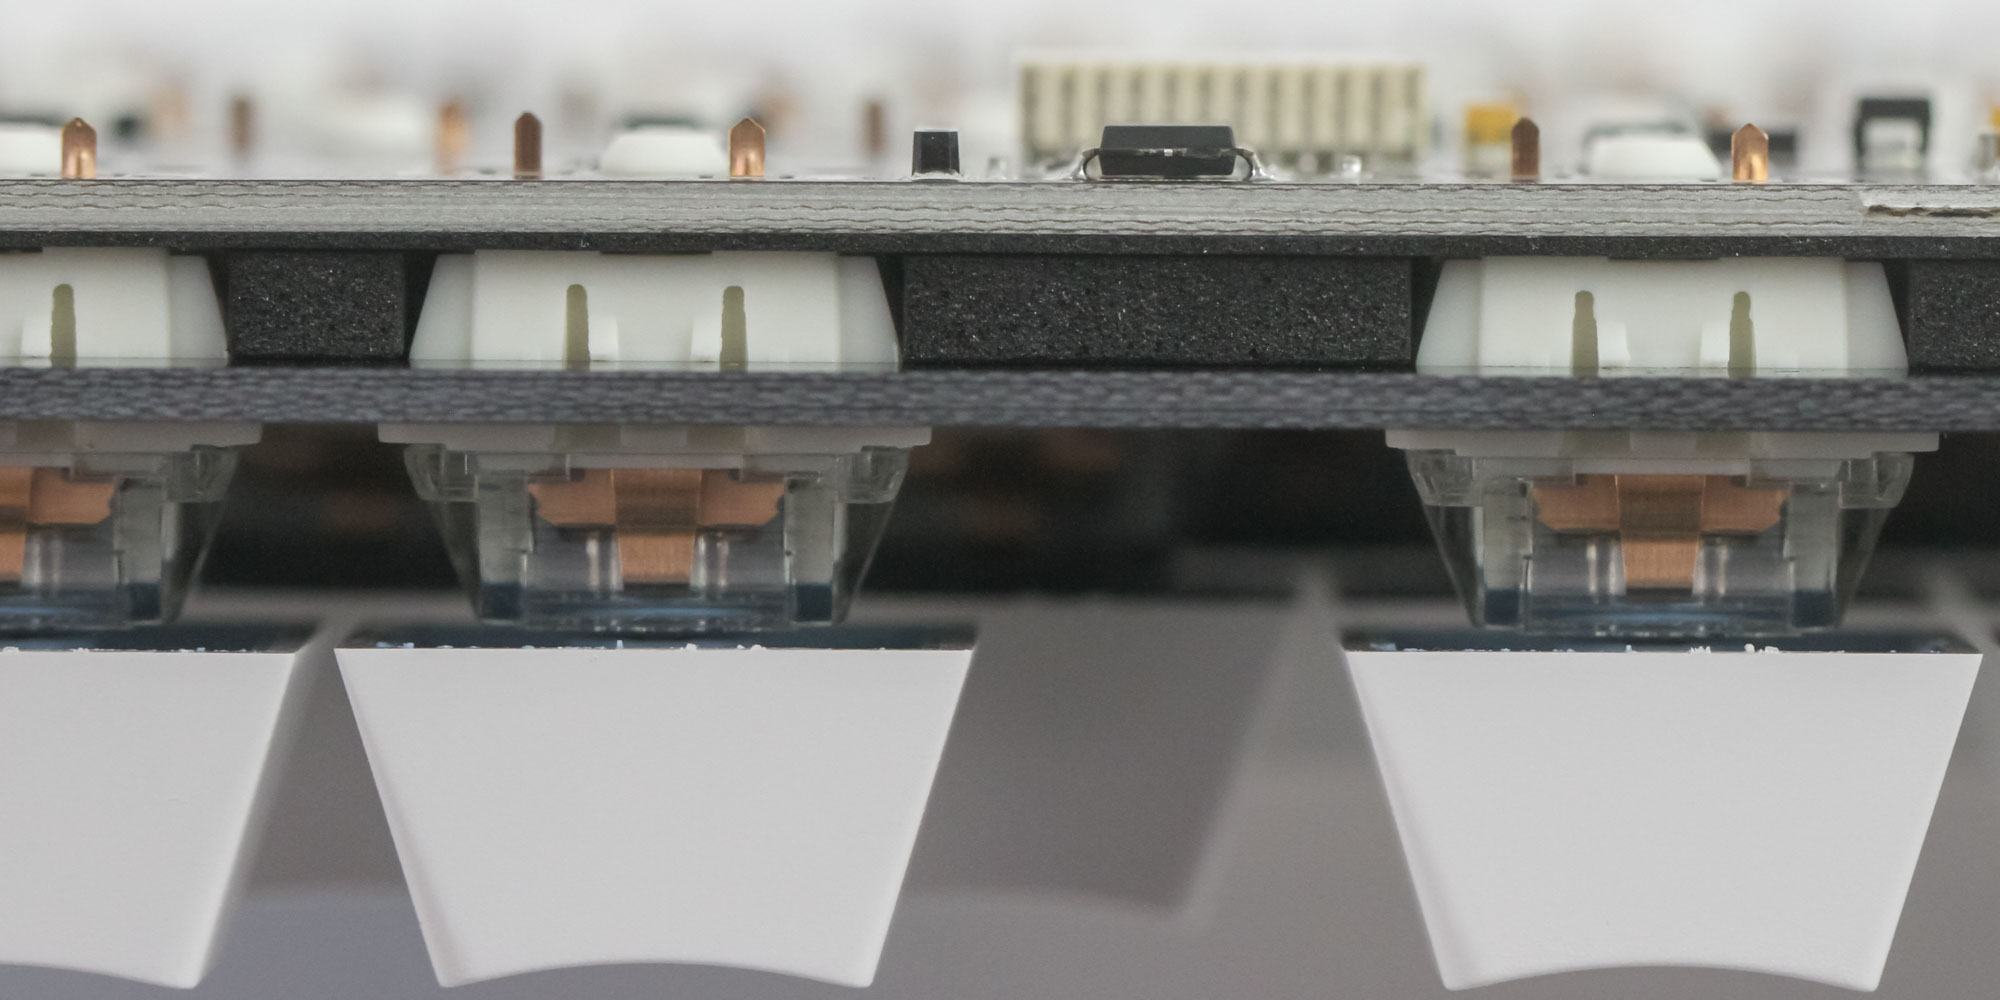
Disassembly of the keyboard itself is simpler than I thought given the two-piece plastic chassis. I thought perhaps there would be the usual interlocking plastic tabs used except James Donkey surprised me with the use of eight hex head screws on the back that the provided screwdriver helps remove. You do not need to remove any keycaps as I originally thought although do pull off the wheel cover to make it easier to separate everything. The top case panel has a daughter PCB on the right corner that you need to dislodge to fully extract it; this is in charge of the wheel and the display itself. We also see the same soft/low-density foam pieces here that James Donkey likes to think are gaskets. The top "gaskets" are installed in cutouts in the case panel here and are easy to lose so do be careful.
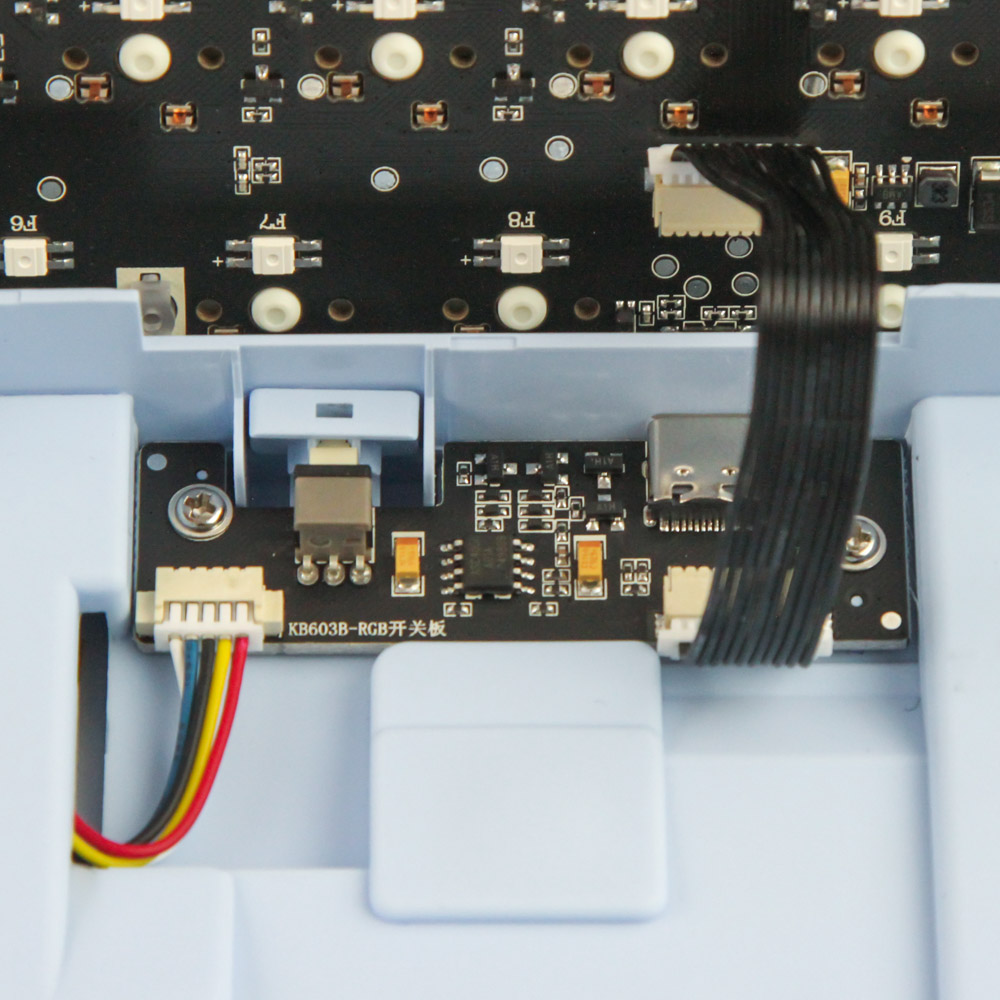

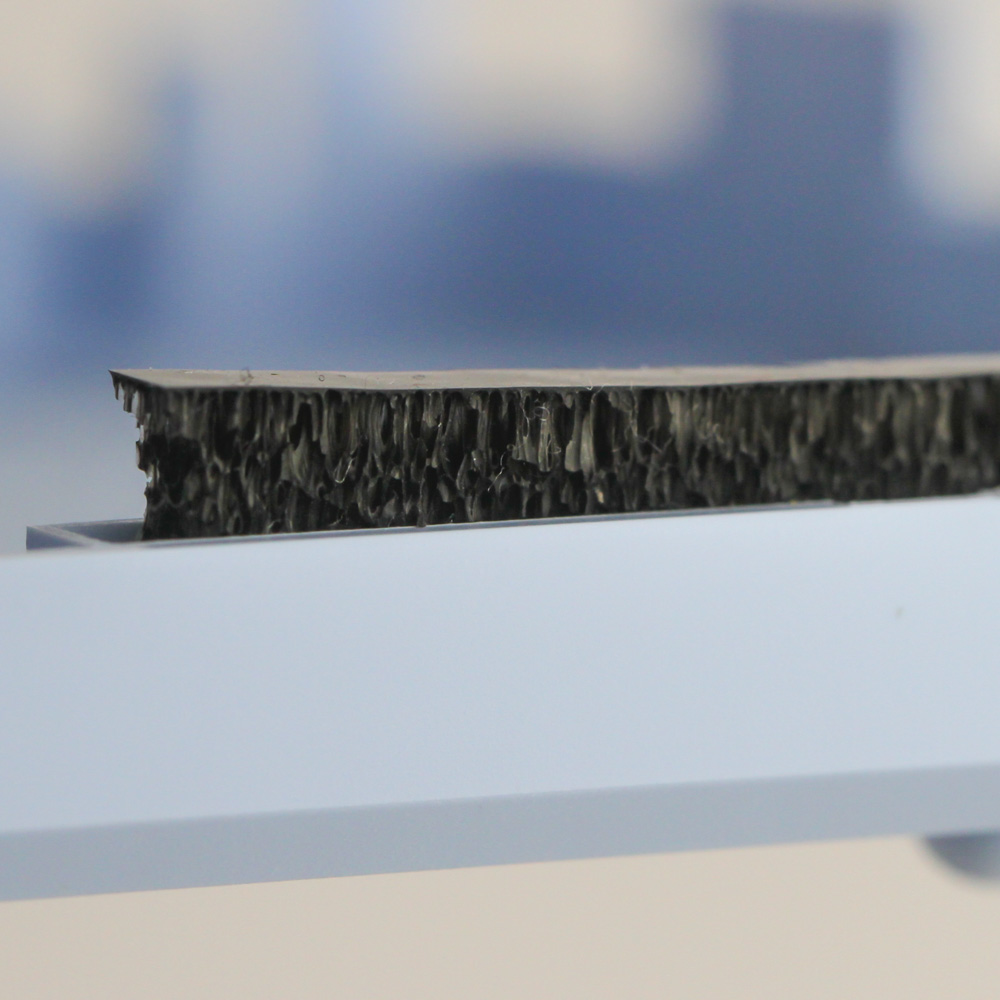
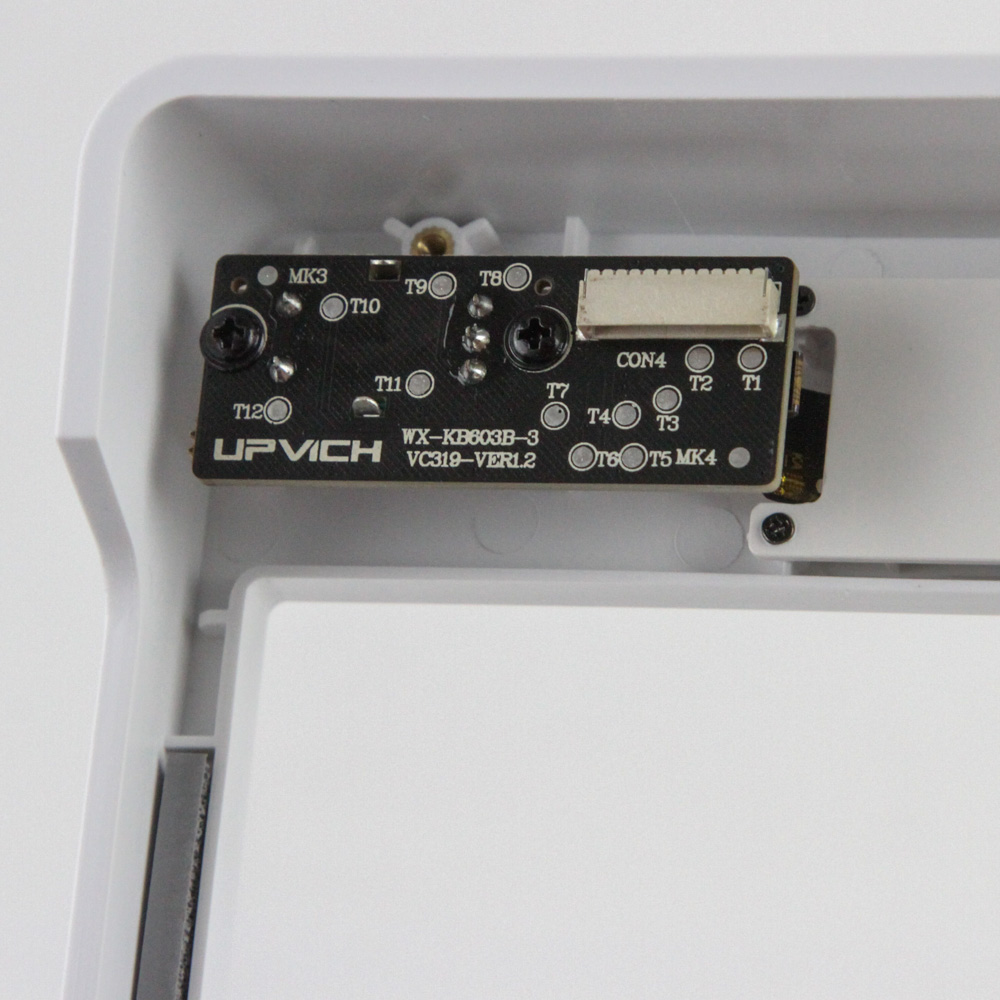
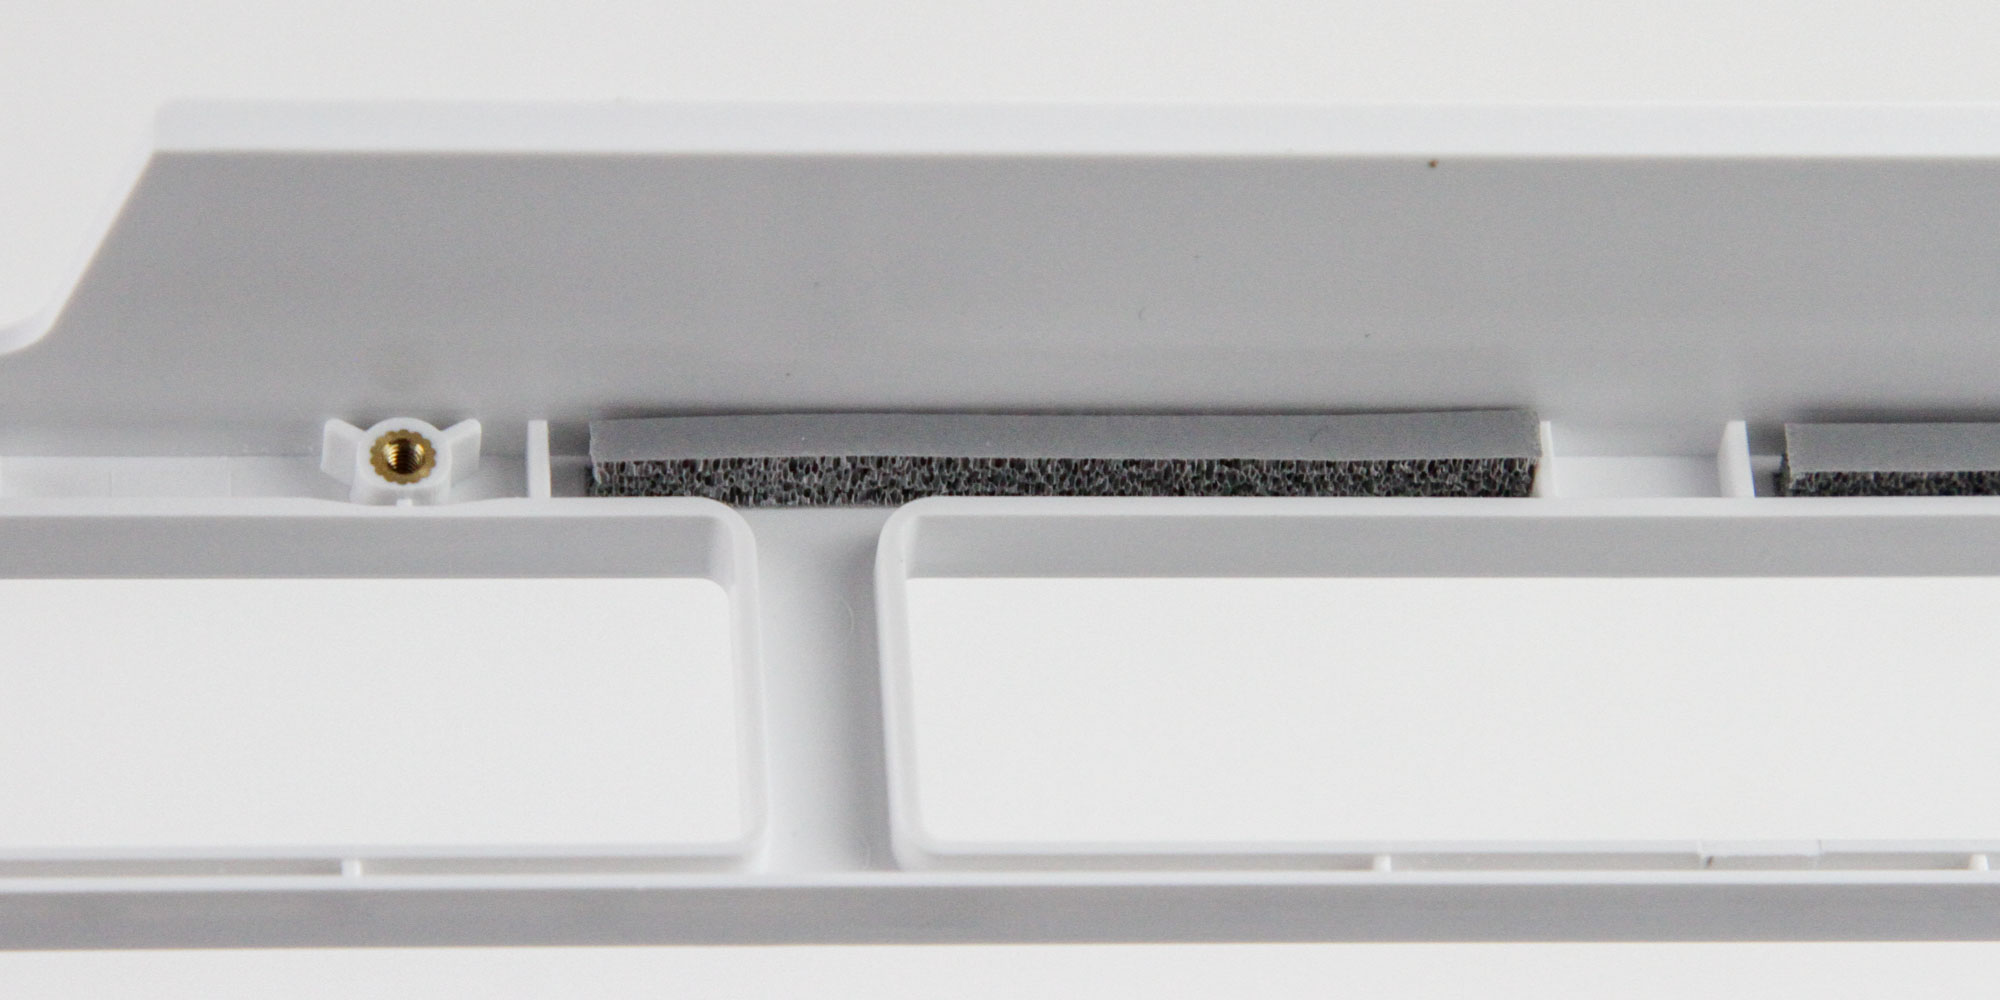
The bottom case panel also has a daughter PCB that is connected to the primary one and here too you will need to remove two connectors—one for the USB input and the other from the 4000 mAh battery placed here to power the wireless connections available on the RS2 3.0. This is a good increase from the 3000 mAh battery in the original RS2 and will help increase the battery life further. There is also a thick silicone sheet custom made for the RS2 3.0 placed between the PCB and the bottom panel and it also happens to be in blue despite not being visible in use. This will help dampen typing noise in use and also reduce reverberations from the otherwise empty space here. More of those "gaskets" are placed on the bottom panel too. In theory these do work like a sandwich with the PCB/plate in the middle and helps decouple your typing from the chassis. In practice though these are far too soft to absorb typing pressure properly and end up just collapsing unevenly. So I would want to see proper silicone gaskets next time before James Donkey tries to market its keyboards as gasket mount units.
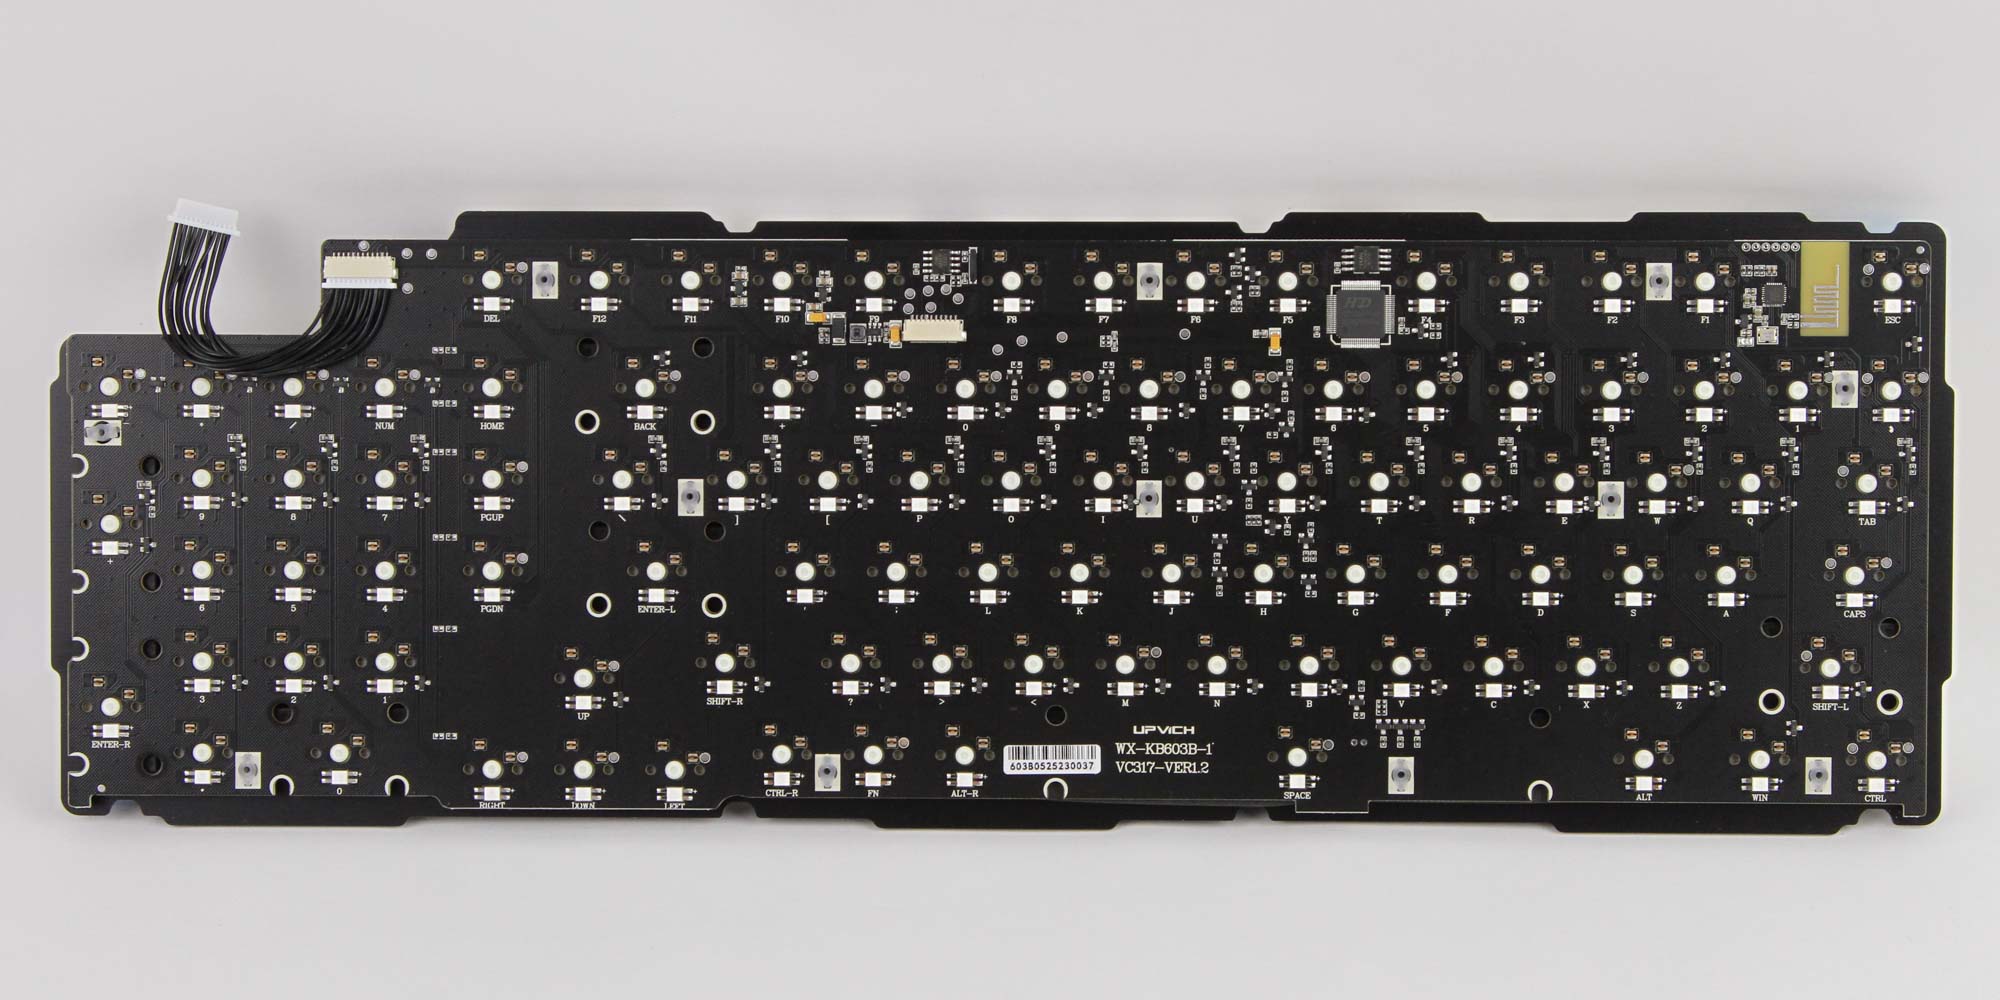
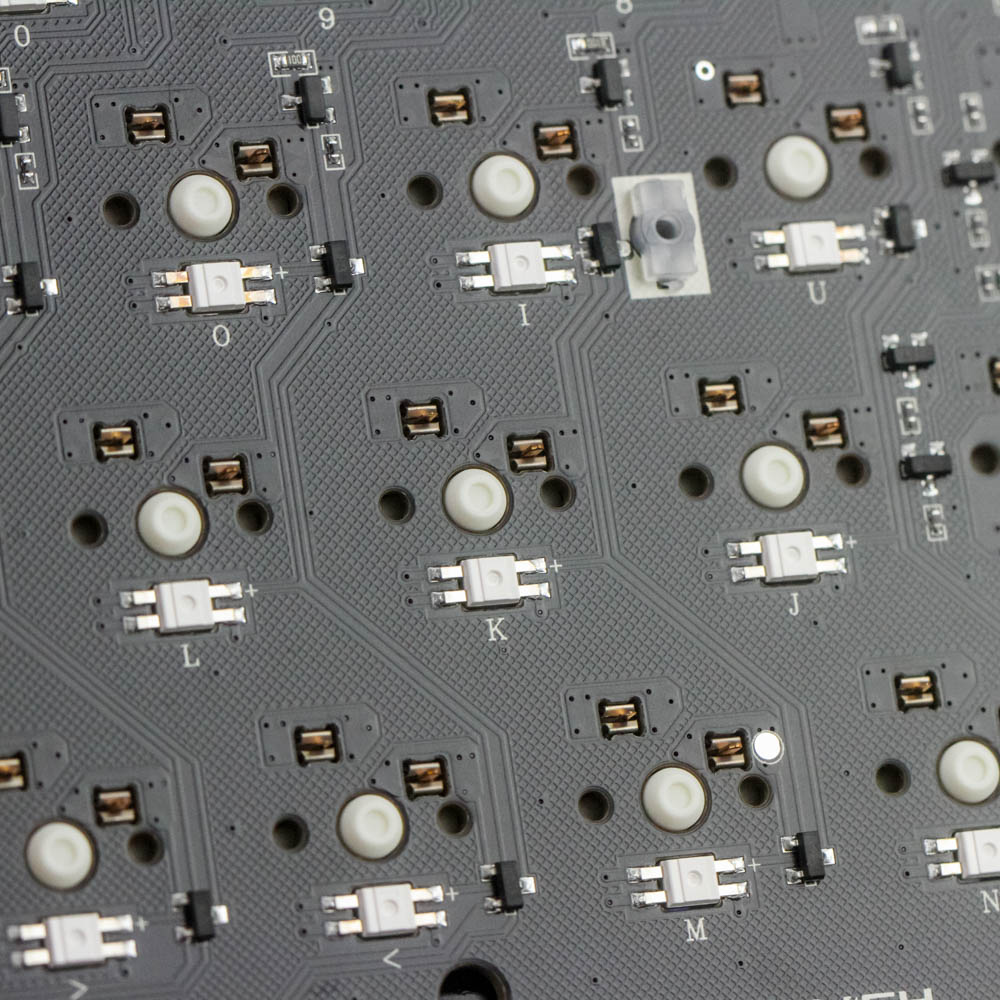
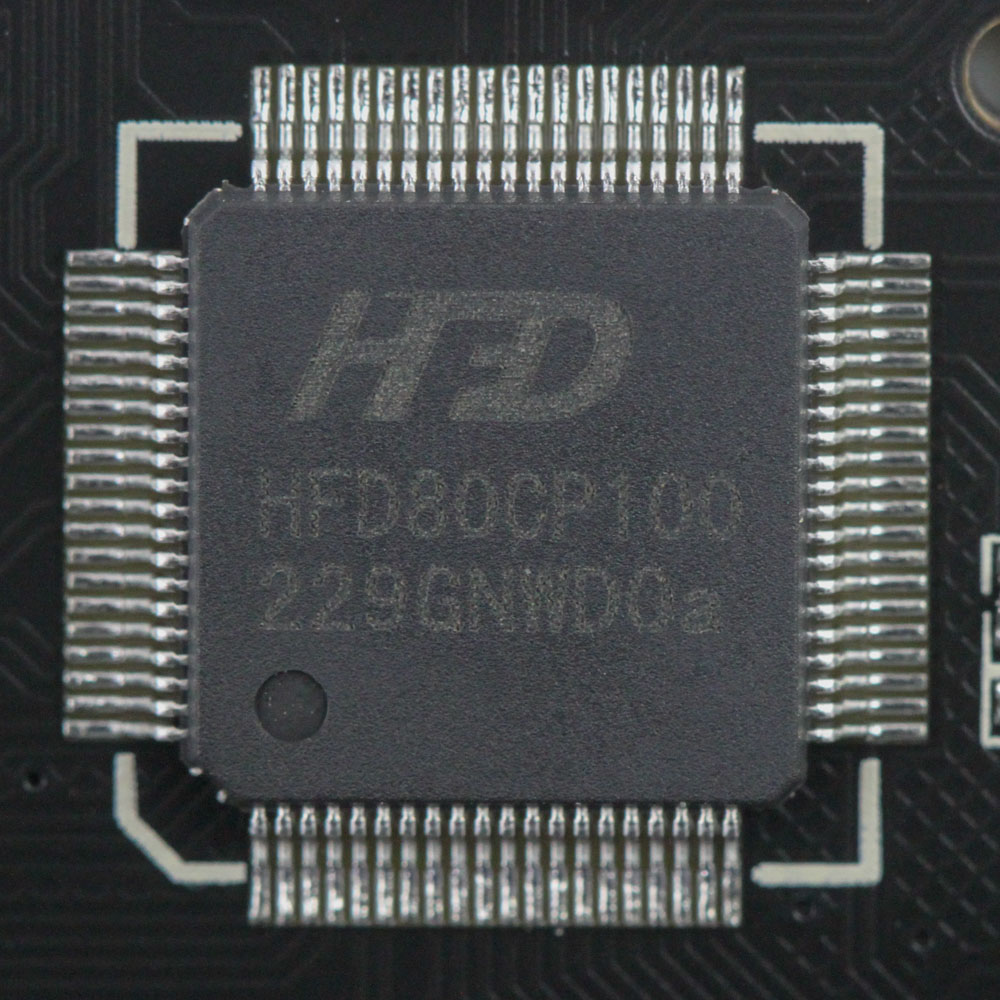
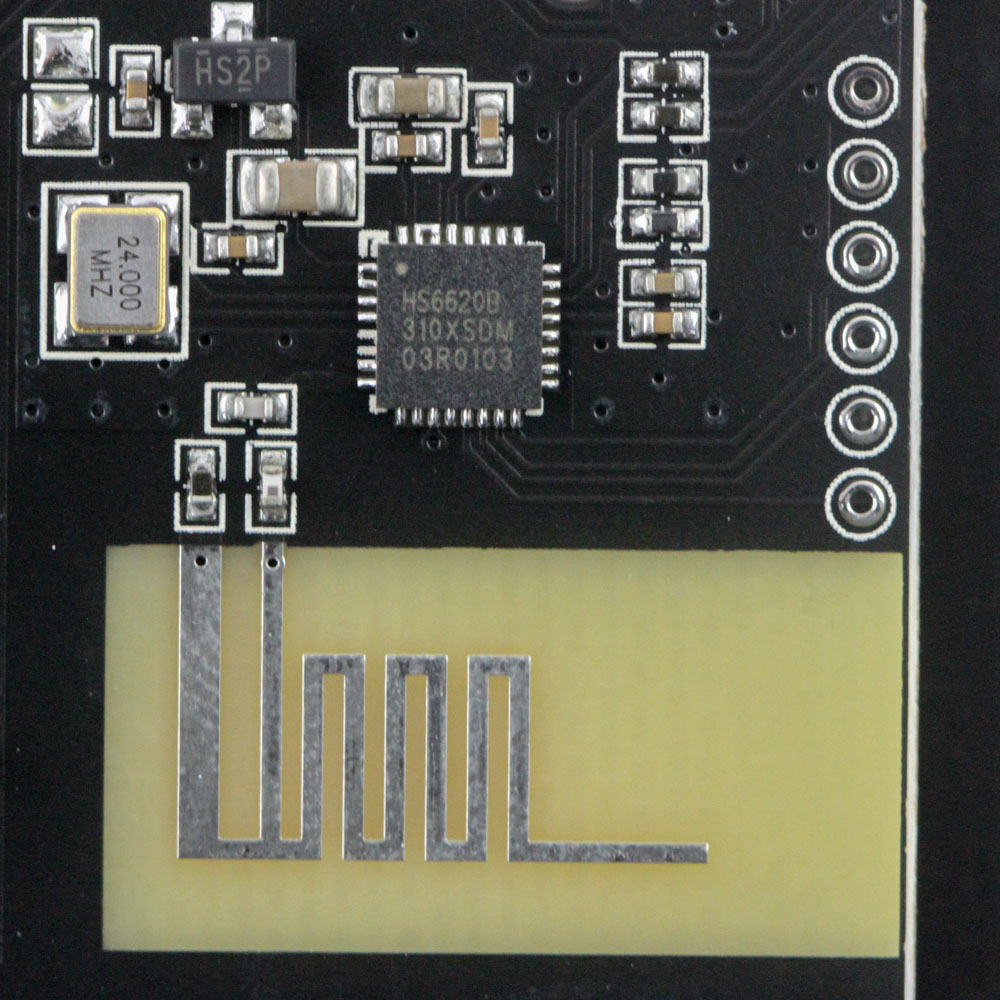
Now we get to the primary PCB itself which is also black in color to match the two daughter boards. The FR4 composite plate is screwed in place from the other side but can be easily removed to gain access to the switch sockets and stabilizers for further modding. Solder quality overall is excellent and I have no complaints about the concealed hot-swap sockets used too. Powering the keyboard is an unidentified HFD80CP100 USB microcontroller as well as an HS6620 ARM-Cortex SoC/Bluetooth/2.4 GHz transceiver that has been used on the original RS2 and a few smart watches before. Not the most powerful hardware here thus but James Donkey confirms the MCU itself is a newer version that can handle more, including the customizable wheel and screen. All the components, including the switch sockets, SMD LEDs, and capacitors, are soldered to a multi-layered PCB.
Before we move on, be advised that disassembly may void the warranty and that TechPowerUp is not liable for any damages incurred if you decide to go ahead and do so anyway.
Jul 10th, 2025 01:59 CDT
change timezone
Latest GPU Drivers
New Forum Posts
- Post Your TIMESPY, PCMARK10 & FIRESTRIKE SCORES! (2019) (321)
- 5070ti overclock...what are your settings? (47)
- 'NVIDIA App' not usable offline? (1)
- G-Sync Not Working in Borderless / Window Mode - Windows 11 (5)
- Screen burn-in (19)
- [GPU-Z Test Build] New Kernel Driver, Everyone: Please Test (78)
- Friend's monitor randomly loses signal (3)
- What's your latest tech purchase? (24234)
- Do you still use Antivirus software on your latest hardware? (74)
- Oblivion Remastered (97)
Popular Reviews
- NZXT N9 X870E Review
- NVIDIA GeForce RTX 5050 8 GB Review
- Fractal Design Epoch RGB TG Review
- Corsair FRAME 5000D RS Review
- Fractal Design Scape Review - Debut Done Right
- AMD Ryzen 7 9800X3D Review - The Best Gaming Processor
- Sapphire Radeon RX 9060 XT Pulse OC 16 GB Review - An Excellent Choice
- Upcoming Hardware Launches 2025 (Updated May 2025)
- Sapphire Radeon RX 9070 XT Nitro+ Review - Beating NVIDIA
- PowerColor ALPHYN AM10 Review
TPU on YouTube
Controversial News Posts
- Intel's Core Ultra 7 265K and 265KF CPUs Dip Below $250 (288)
- Some Intel Nova Lake CPUs Rumored to Challenge AMD's 3D V-Cache in Desktop Gaming (140)
- NVIDIA Launches GeForce RTX 5050 for Desktops and Laptops, Starts at $249 (117)
- AMD Radeon RX 9070 XT Gains 9% Performance at 1440p with Latest Driver, Beats RTX 5070 Ti (116)
- NVIDIA GeForce RTX 5080 SUPER Could Feature 24 GB Memory, Increased Power Limits (115)
- Microsoft Partners with AMD for Next-gen Xbox Hardware (105)
- Intel "Nova Lake‑S" Series: Seven SKUs, Up to 52 Cores and 150 W TDP (100)
- NVIDIA DLSS Transformer Cuts VRAM Usage by 20% (97)