 44
44
MSI Nightblade MI2 GAMING PC Review
The Install »A Closer Look


We need to look at the stuff I had to pull out of the MSI Nightblade MI2 before moving on. The initial item was the VGA tray with the system's main fan and the rigid PCIe extender, which will make fitting the GPU into what little space there is possible. The rigid PCB helps in keeping an installed GPU in position, while optimizing the GPU's slightly longer connection to the CPU itself.
Looking closely at the red centrifugal fan, it is of a brand I haven't heard of before. The ball-bearing design uses large, deep vanes to suck air in through either side of the shroud, before pushing it out through the heatsink's metal fins.


That heatsink is comprised of a metal hot plate that connects to a fin array via two large copper heatpipes. Combined with the fan pictured above and my test-bench's Intel i7-6700K, I rarely heard this constallation produce any noise at all, with just the occasional blast of air being shot out the back of the Nightblade MI2. It's really simple, but quite effective. Take the power-saving route with a 65W TDP CPU and you should end up with pretty decent temperatures indeed.
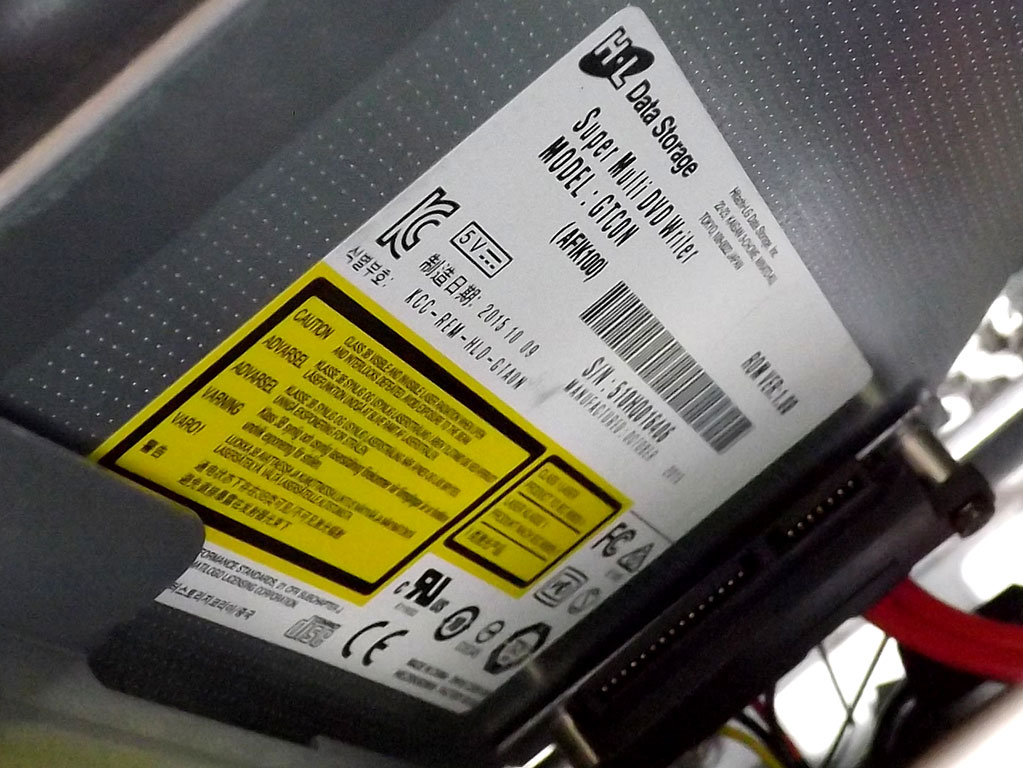
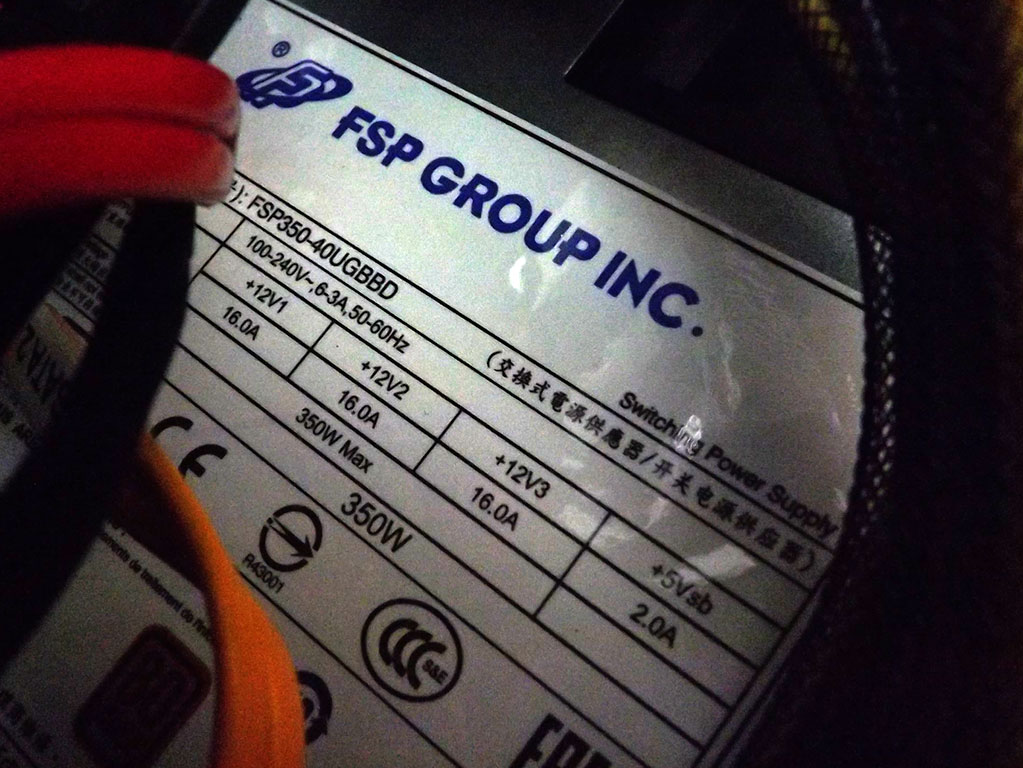
With those bits removed, I managed to poke my camera into the case for snap shots of the labels on both the included DVD drive and 350W power supply. The power supply is from FSP, a company that's been around forever. The DVD drive is Hitachi-LG made.

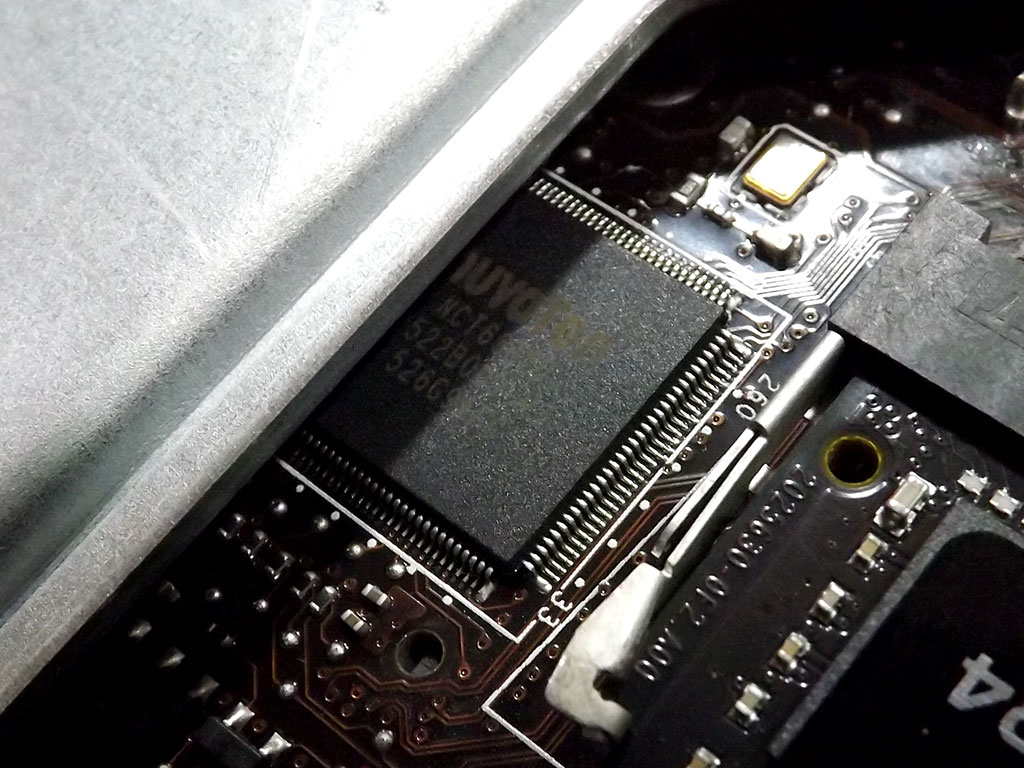
Poking around a bit more, I found that each SATA cable has a label on it, as well as being of a different color. This makes tracking down which cable has been attached to which device incredibly simple. I also noticed a Nuvoton Super I/O controller on the back of the motherboard, responsible for the PS/2 port, monitoring, and fan control.


The rear of the board is where the M.2 slot is situated, ready for 2280 drives only. One of the two SO-DIMM slots is also here.


Fortunately, there is a large opening for you to easily access the M.2 and SO-DIMM slots. The second DIMM slot, however, is a bit harder to reach because of its orientation and the CMOS battery MSI taped to it. I pulled the CMOS battery off and stuck it behind the bundle of close-by wires instead.


Searching the front of the board, I found an ASM1442K TMDS IC for the rear I/O panel's HDMI port and the Realtek ALC1150 audio CODEC, on front of the board and right by the PCIe slot.

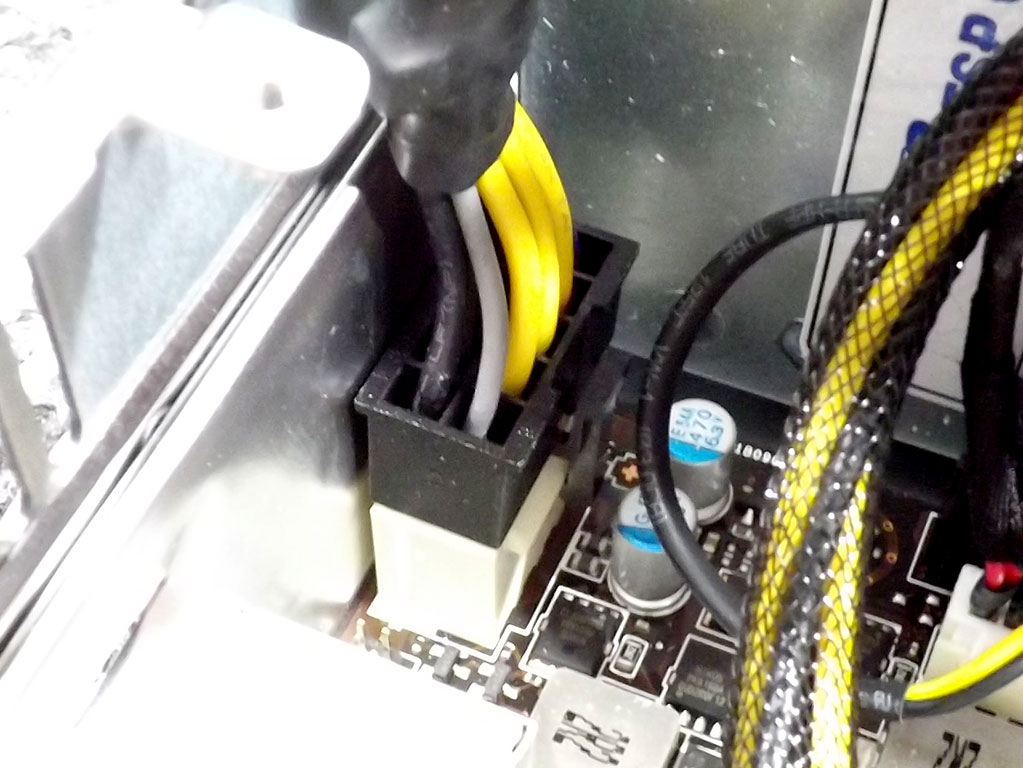
There's an Intel Wi-Fi controller in the board's front mini-PCIe slot for those who can't reach a wired connection, and a custom 10-pin power plug has been placed in the corner opposite to it.
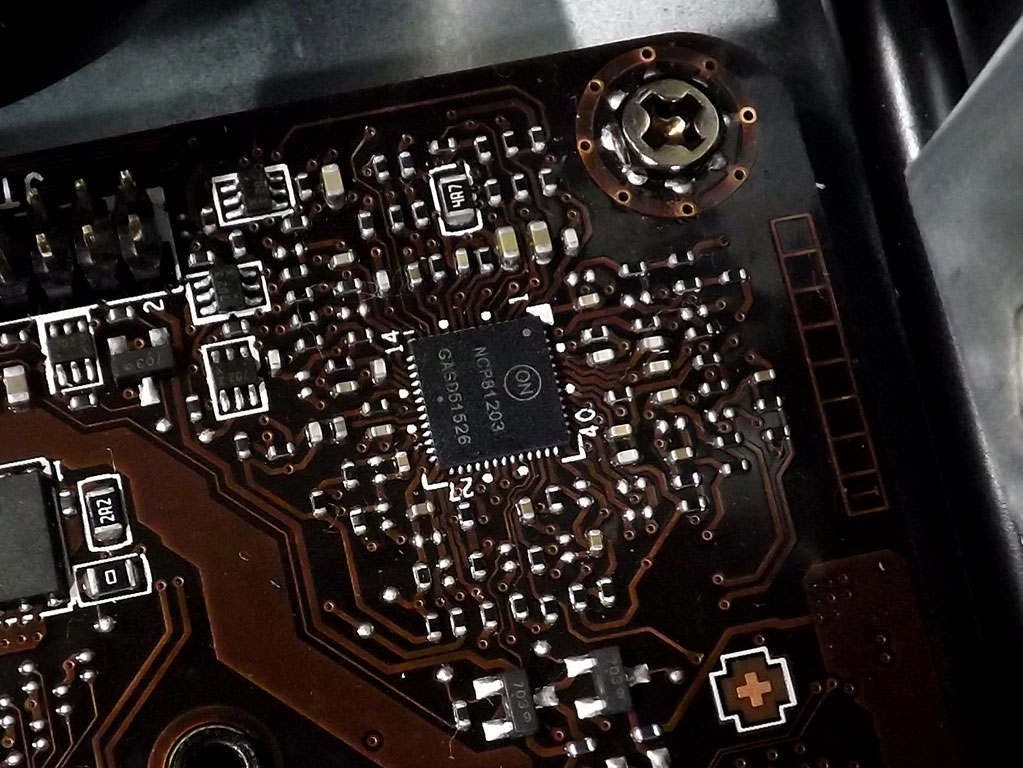

I located an NCP81203 3+2 VRM controller and 5 power phases on the board itself, right next to the CPU socket.
Jul 10th, 2025 02:43 CDT
change timezone
Latest GPU Drivers
New Forum Posts
- Do you still use Antivirus software on your latest hardware? (75)
- Screen burn-in (21)
- TPU's Nostalgic Hardware Club (20493)
- 3DMARK "LEGENDARY" (326)
- Post Your TIMESPY, PCMARK10 & FIRESTRIKE SCORES! (2019) (321)
- 5070ti overclock...what are your settings? (47)
- 'NVIDIA App' not usable offline? (1)
- G-Sync Not Working in Borderless / Window Mode - Windows 11 (5)
- [GPU-Z Test Build] New Kernel Driver, Everyone: Please Test (78)
- Friend's monitor randomly loses signal (3)
Popular Reviews
- NZXT N9 X870E Review
- NVIDIA GeForce RTX 5050 8 GB Review
- Fractal Design Epoch RGB TG Review
- Corsair FRAME 5000D RS Review
- Fractal Design Scape Review - Debut Done Right
- AMD Ryzen 7 9800X3D Review - The Best Gaming Processor
- Sapphire Radeon RX 9060 XT Pulse OC 16 GB Review - An Excellent Choice
- Upcoming Hardware Launches 2025 (Updated May 2025)
- Sapphire Radeon RX 9070 XT Nitro+ Review - Beating NVIDIA
- PowerColor ALPHYN AM10 Review
TPU on YouTube
Controversial News Posts
- Intel's Core Ultra 7 265K and 265KF CPUs Dip Below $250 (288)
- Some Intel Nova Lake CPUs Rumored to Challenge AMD's 3D V-Cache in Desktop Gaming (140)
- NVIDIA Launches GeForce RTX 5050 for Desktops and Laptops, Starts at $249 (117)
- AMD Radeon RX 9070 XT Gains 9% Performance at 1440p with Latest Driver, Beats RTX 5070 Ti (116)
- NVIDIA GeForce RTX 5080 SUPER Could Feature 24 GB Memory, Increased Power Limits (115)
- Microsoft Partners with AMD for Next-gen Xbox Hardware (105)
- Intel "Nova Lake‑S" Series: Seven SKUs, Up to 52 Cores and 150 W TDP (100)
- NVIDIA DLSS Transformer Cuts VRAM Usage by 20% (97)