 5
5
NOX Coolbay HX Case & APEX 700W Review
Value & Conclusion »Assembly
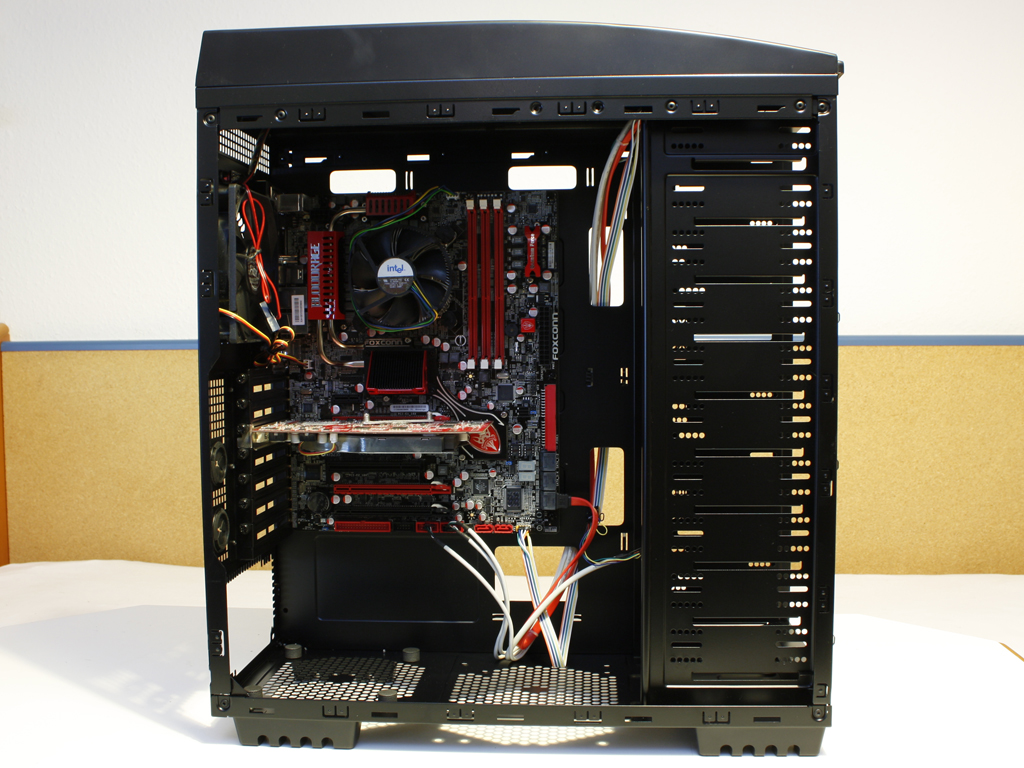
Installing the mainboard is done with the use of the afore mentioned bumps and stand-offs. One major difference to the Antec 900 is the fact that this case is a bit larger up top, giving you ample space between the 200 mm fan up top and the edge of the mainboard. This means that you will be able to install huge CPU fans without having to worry about interfering with the ceiling fan.
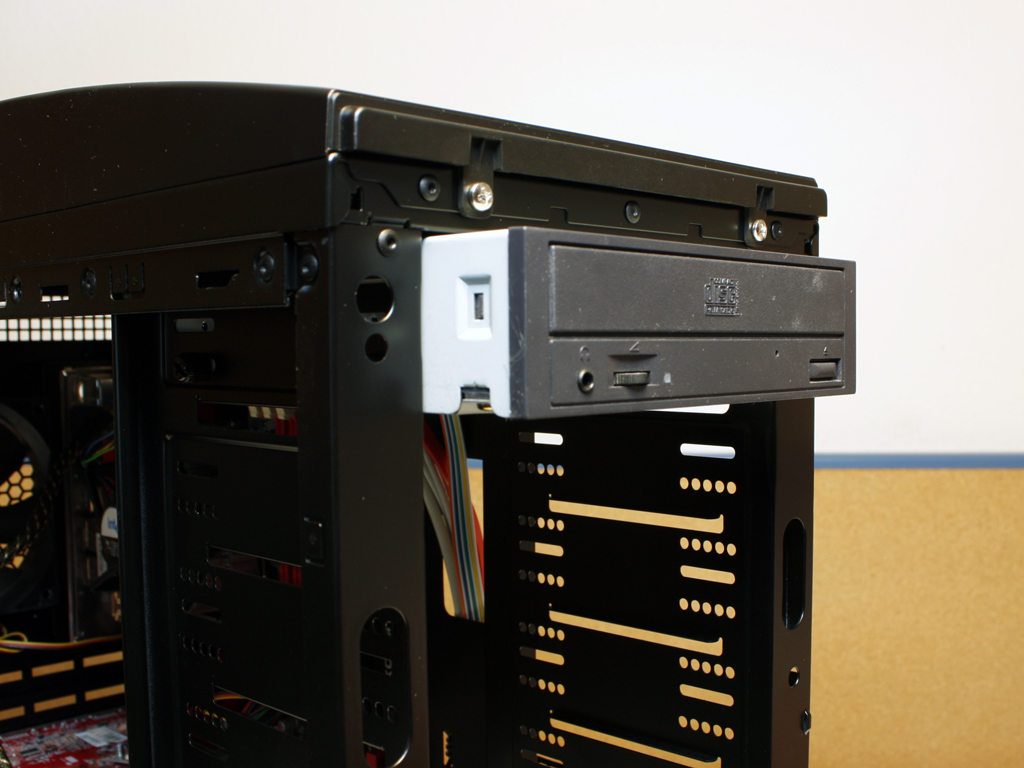

Placing the optical drive within the Coolbay HX is an easy task as well, as soon as you have pulled off the front of the chassis. Simply slide it in place and use the supplied, black thumb screws to hold it in place. You just have to make sure that you align the drive correctly so it lines up with the front of the case.
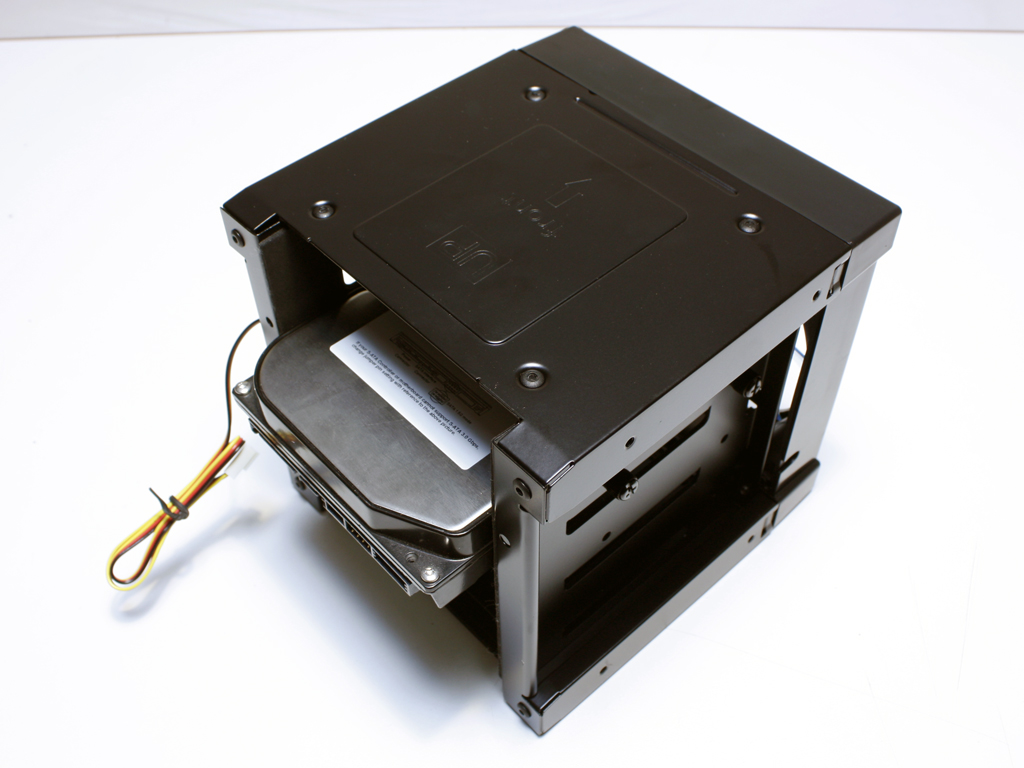
The hard drives are held in place with thumb screws as well. Once installed, slide in the entire cage into the case and secure it with four thumb screws on each side. Don't forget to connect the cooling fan to your mainboard after doing so.
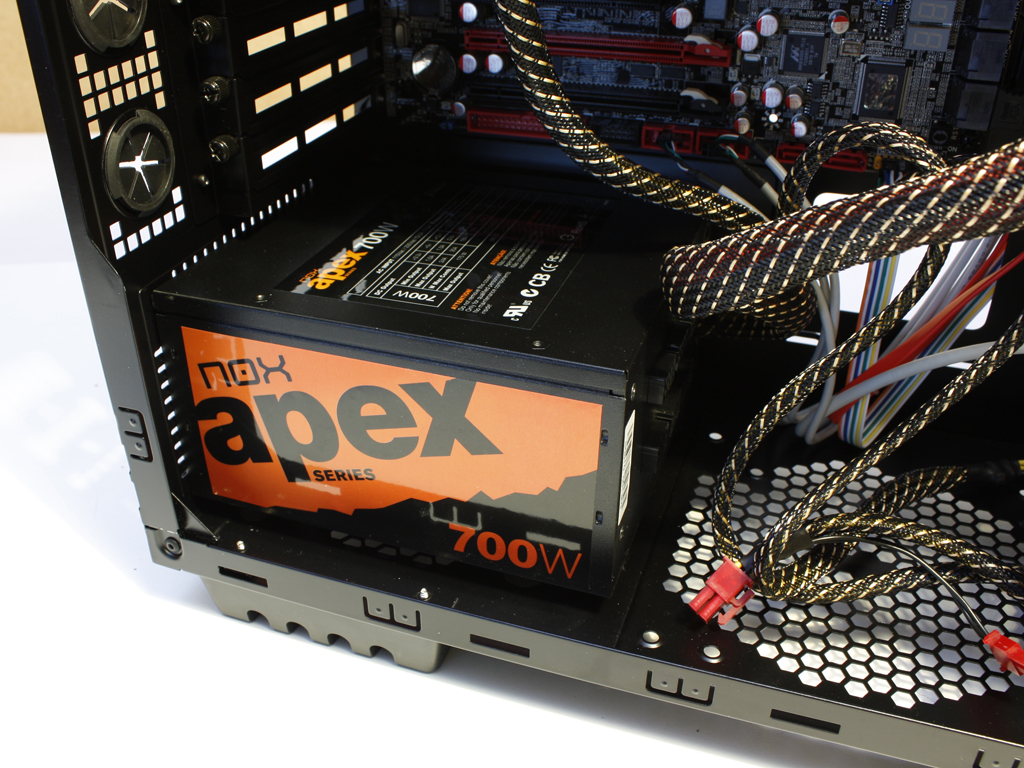
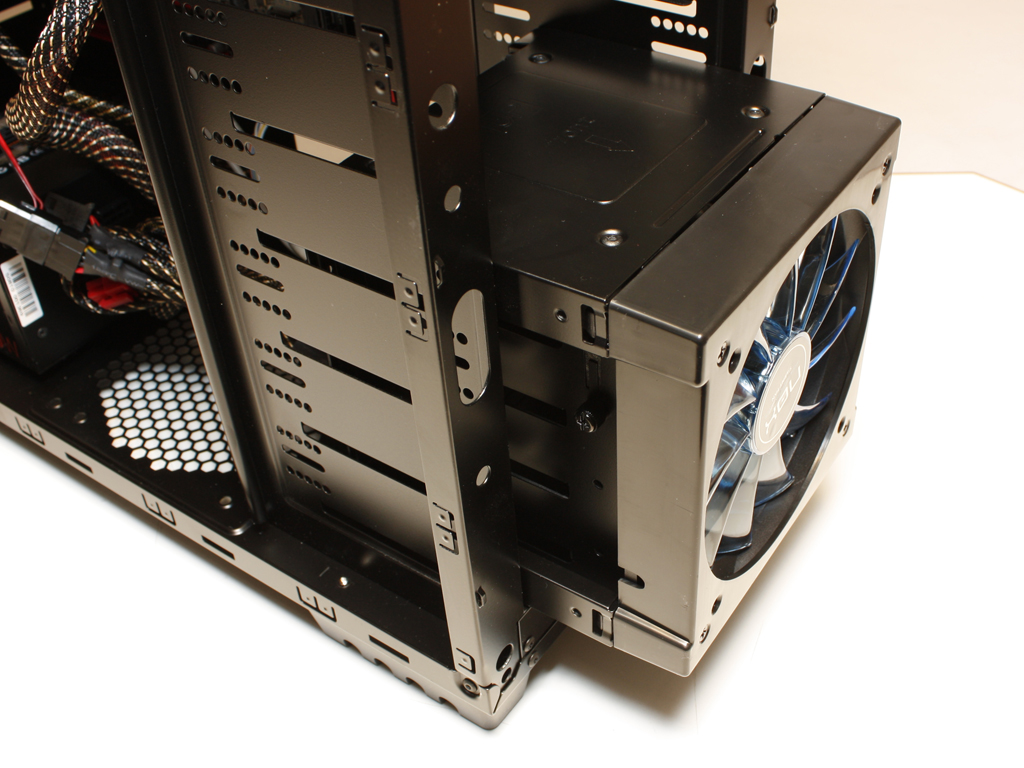
The Apex power supply fits the Coolbay HX perfectly. It is not too long to cover the bottom air vent for that optional fan and the rating label can easily be viewed. The unit is secured with thumb screws as well.
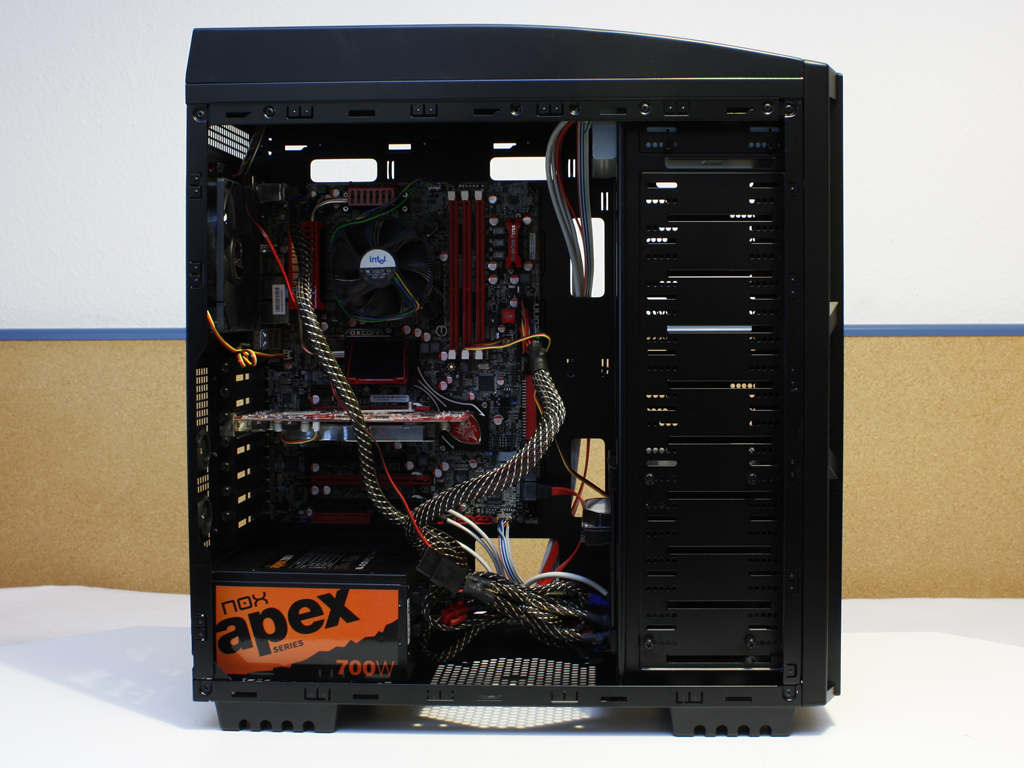
Once everything is installed, it is apparent that you will still have ample room to move around. Nonetheless, installing a lot of drives or a multi GPU setup will reduce the free space noticably. The overall height of the chassis, being somewhere between a standard mid-tower and a full-tower does translate into more space than expected.
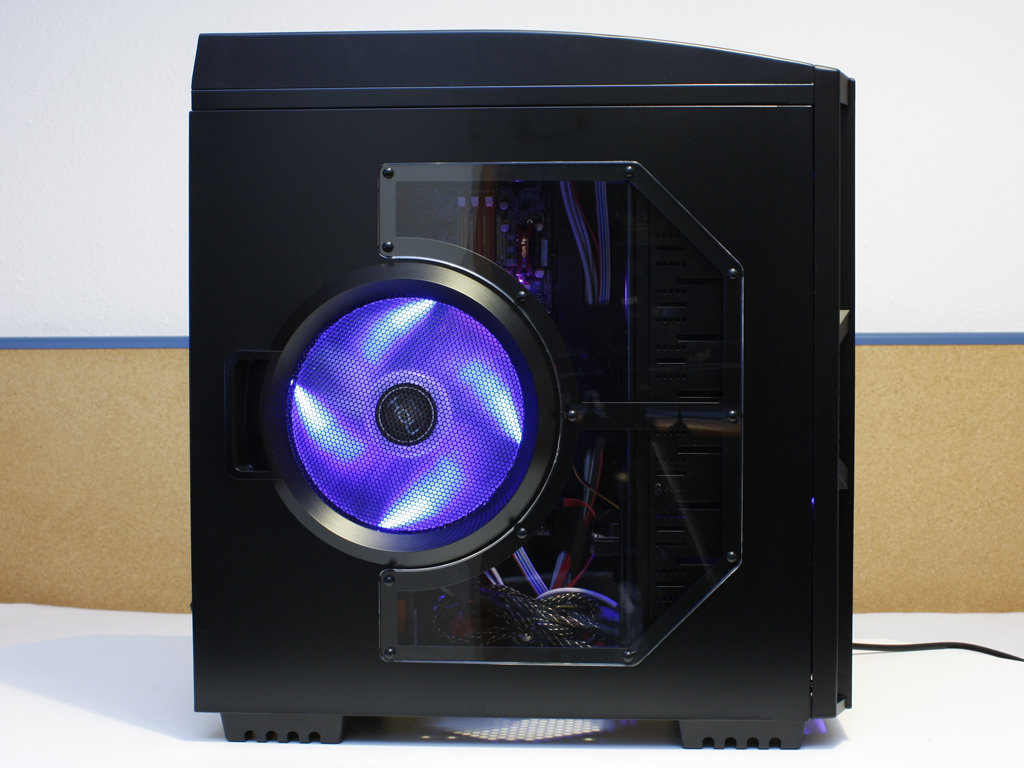
Finished Looks
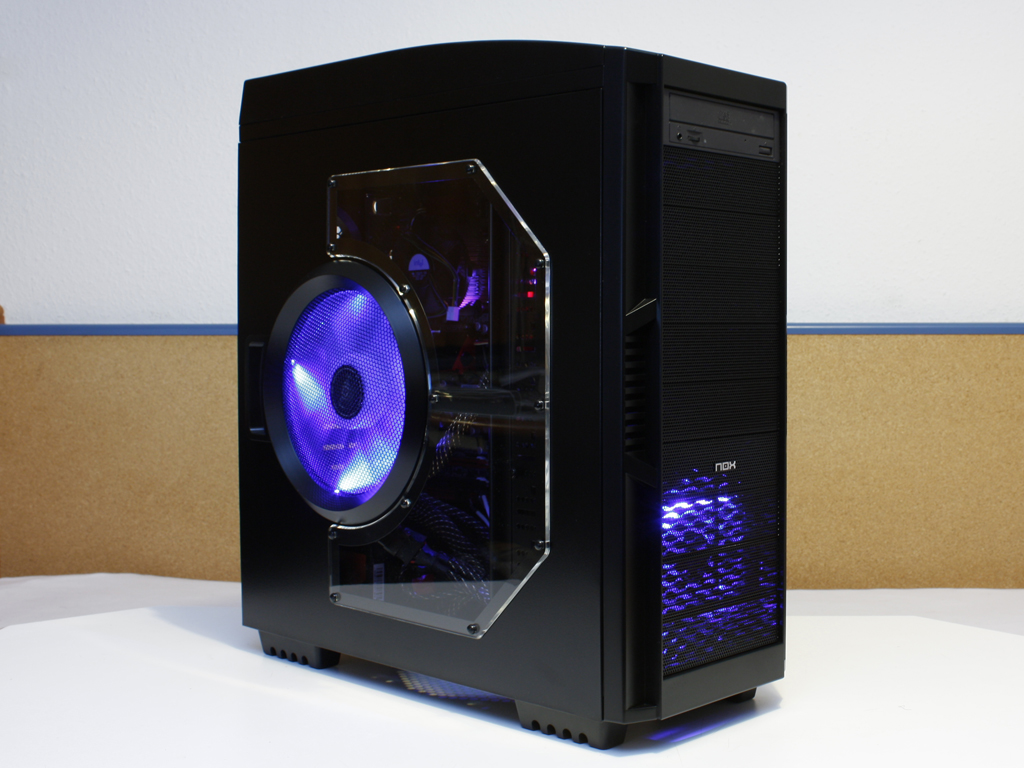
The finished case looks really nice. The included 120 and 140 mm fans are extremely quiet once controlled by the mainboard. The top 200 mm fan is quite loud on the highest setting, but also pushes a lot of air out of the chassis. I would suggest leaving it at the lowest setting, on which it still moves more air than any 140 mm or smaller unit, while keeping the noise to a minimum. Luckily, the LED lit 200 mm side fan does not spin nearly as fast and is barely audible.
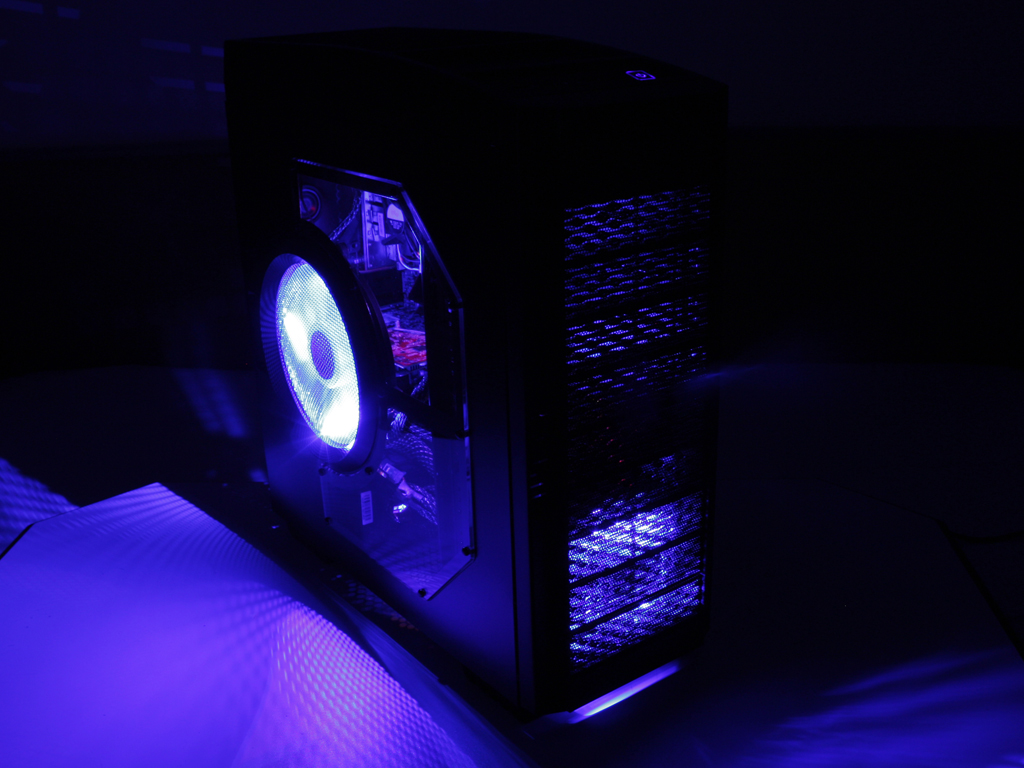
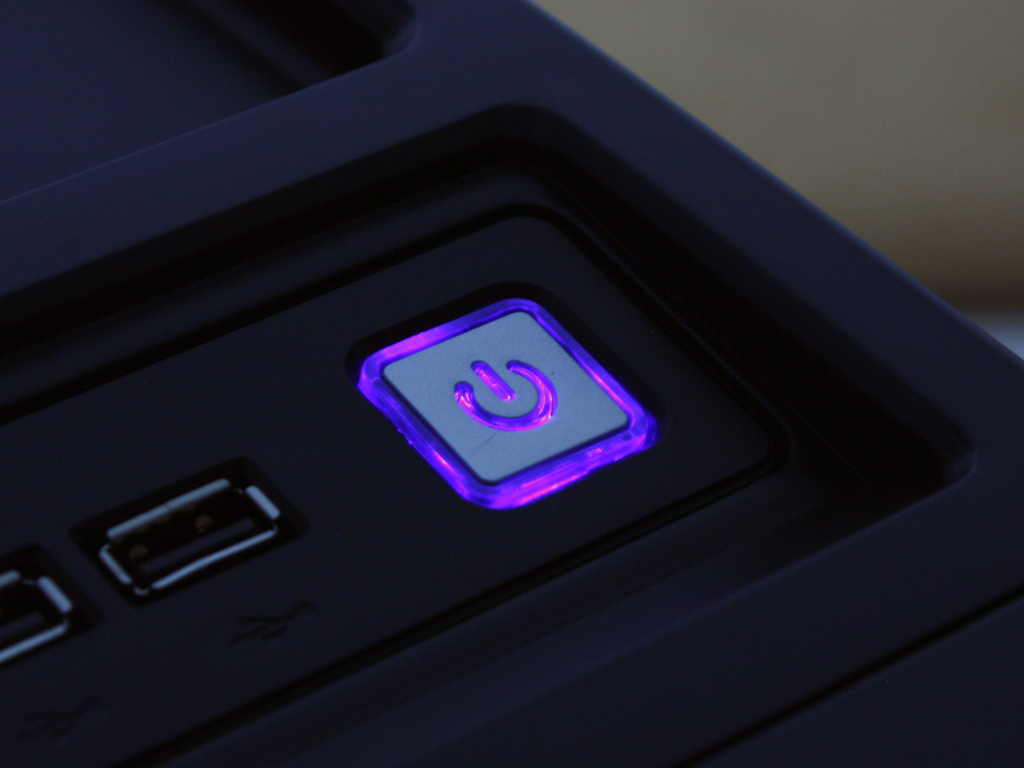
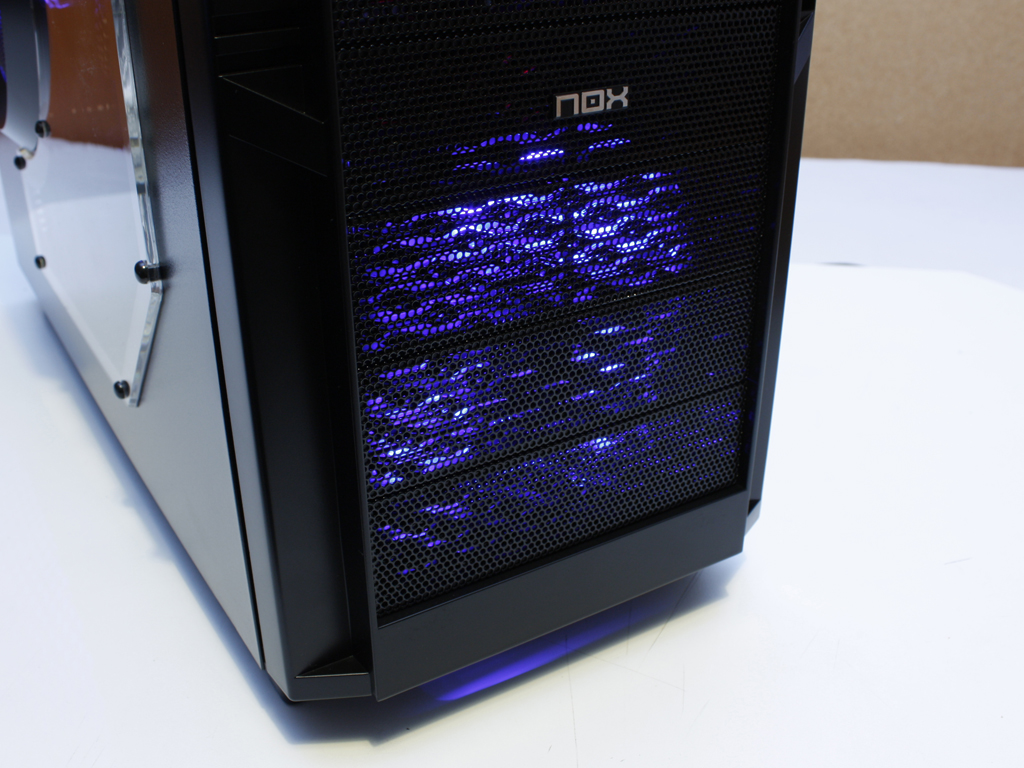
The lighting of the side fan looks great and is very even. There are not simply four LEDs as it seems. To give you an idea about the relation of the intensity of the different light sources I have included a picture in complete darkness. No flash was used and the exposure time was kept to a minimum. As you can see the side fan is the brightest, followed by the front intake fan. Notice the very weak light from the power button. Even after turning off the light in the room and taking a ~15 second shot of the power button LED, you can barely make out any lighting effect.
Jul 2nd, 2025 23:22 CDT
change timezone
Latest GPU Drivers
New Forum Posts
- Will you buy a RTX 5090? (588)
- AMD RX 7000 series GPU Owners' Club (1327)
- What's your latest tech purchase? (24189)
- RDNA 4 Fine Wine? (HUB Vid) (41)
- GravityMark v1.89 GPU Benchmark (308)
- Good time in the year to buy a new PC (5)
- The Official Thermal Interface Material thread (1767)
- What Windows is overall the best to you and why? (262)
- Nvidia drivers (6)
- How do you view TPU & the internet in general? (With poll) (54)
Popular Reviews
- ASUS ROG Crosshair X870E Extreme Review
- Crucial T710 2 TB Review - Record-Breaking Gen 5
- Sapphire Radeon RX 9060 XT Pulse OC 16 GB Review - An Excellent Choice
- PowerColor ALPHYN AM10 Review
- Upcoming Hardware Launches 2025 (Updated May 2025)
- AMD Ryzen 7 9800X3D Review - The Best Gaming Processor
- AVerMedia CamStream 4K Review
- Sapphire Radeon RX 9070 XT Nitro+ Review - Beating NVIDIA
- NVIDIA GeForce RTX 5060 8 GB Review
- AMD Ryzen 9 9950X3D Review - Great for Gaming and Productivity
TPU on YouTube
Controversial News Posts
- Intel's Core Ultra 7 265K and 265KF CPUs Dip Below $250 (288)
- NVIDIA Grabs Market Share, AMD Loses Ground, and Intel Disappears in Latest dGPU Update (212)
- Some Intel Nova Lake CPUs Rumored to Challenge AMD's 3D V-Cache in Desktop Gaming (140)
- NVIDIA GeForce RTX 5080 SUPER Could Feature 24 GB Memory, Increased Power Limits (114)
- NVIDIA Launches GeForce RTX 5050 for Desktops and Laptops, Starts at $249 (105)
- Microsoft Partners with AMD for Next-gen Xbox Hardware (105)
- Intel "Nova Lake‑S" Series: Seven SKUs, Up to 52 Cores and 150 W TDP (100)
- NVIDIA DLSS Transformer Cuts VRAM Usage by 20% (96)