 11
11
Originative SABER68 Keyboard Review
Driver »Disassembly

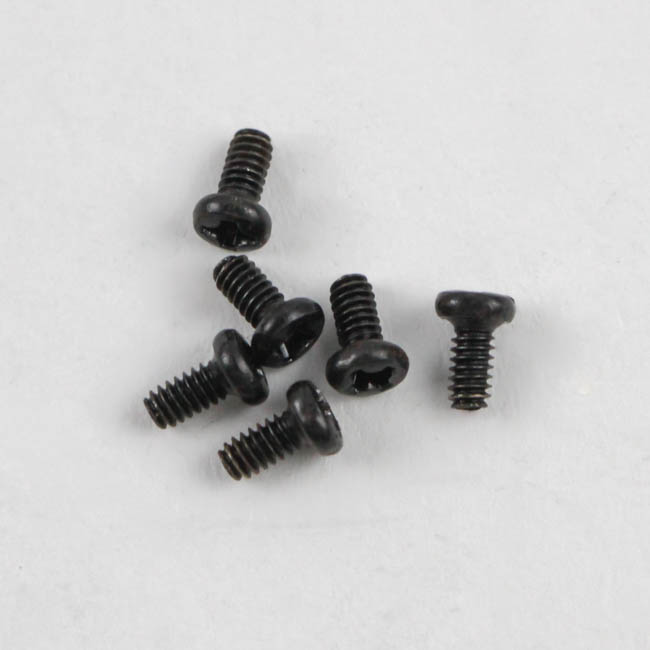
Disassembly of the SABER68 is a piece of cake. Remove the keycaps blocking access to the six screws that attach the keyboard to the case. If you are like me, you will have removed most if not all by the time you realize you have all you need. These are tiny Ph 2 head screws that are on a bottom layer through the plate, so get a magnetic driver/bit if you can to make it easy - especially when putting this back together.
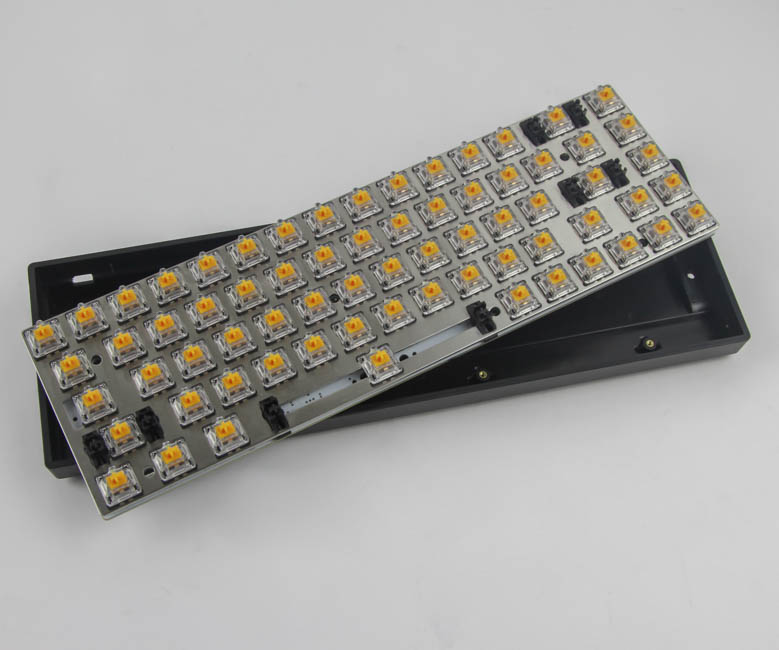
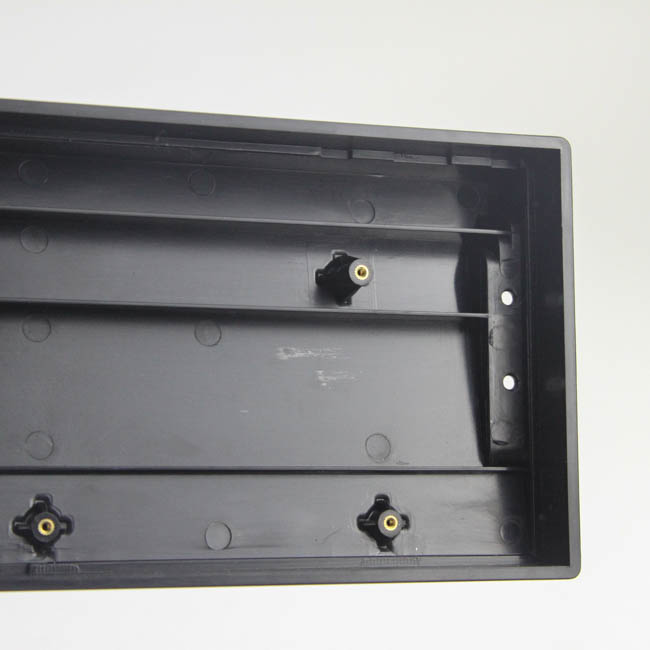
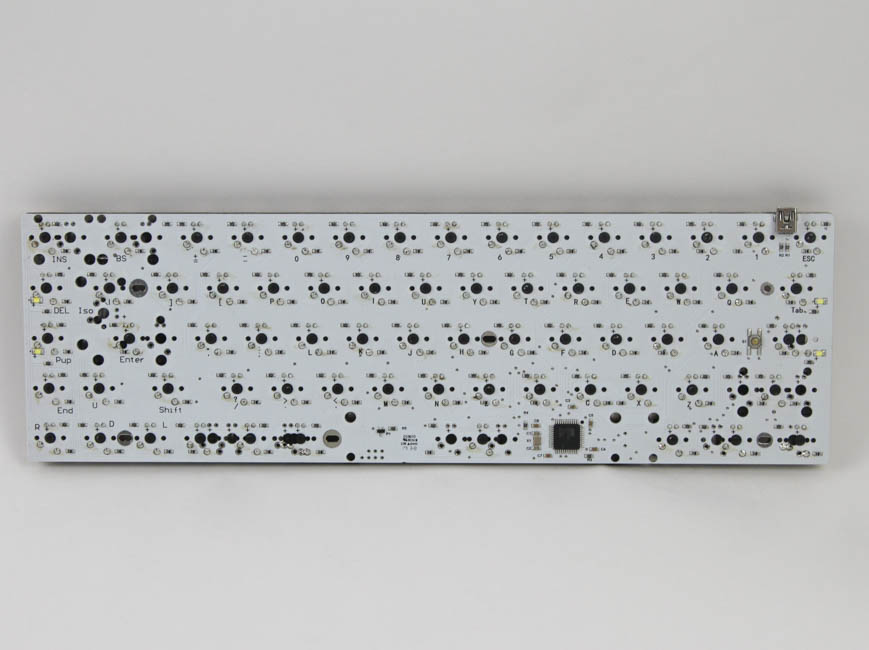
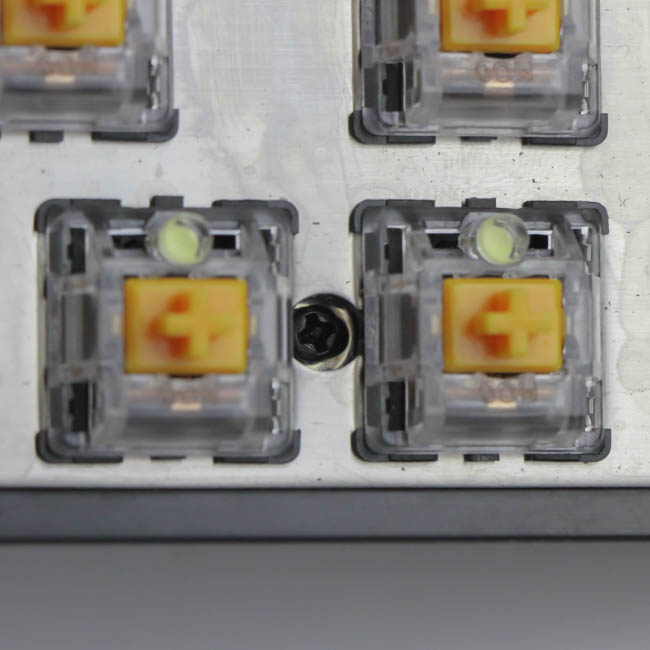
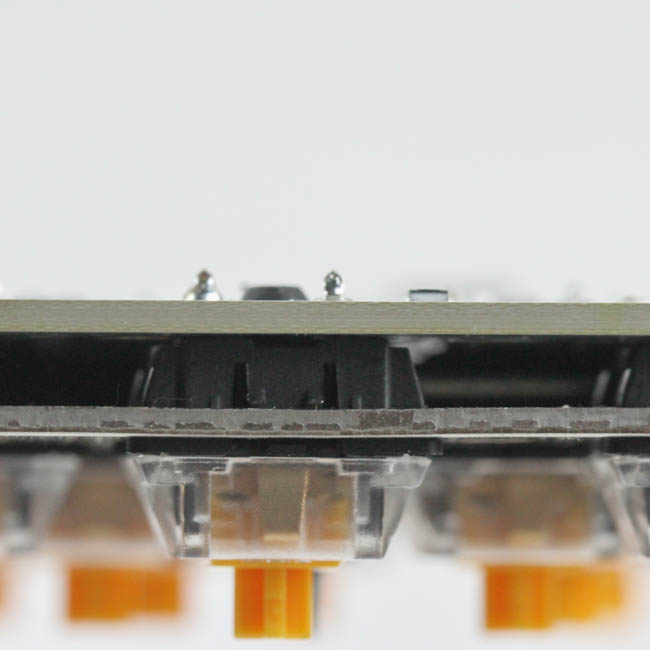
Once all six screws are removed, you can take the case away. Notice the pressed, metal-threaded inserts so the screws do not strip away the plastic in the case. The keyboard has a steel plate to provide rigidity, and at these smaller form factors, the mass benefit of going with aluminum does not make the added cost worth it. The steel plate has a polish and a brushed finish applied, which looks nice and at the same time reflects some of the light from the LEDs upwards to aid with the edge-lighting here. The PCB is a nice white color for those who care.
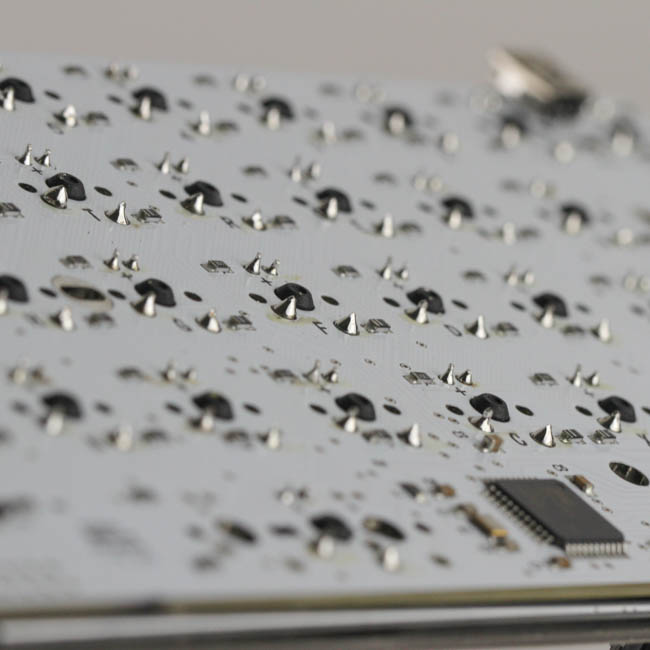
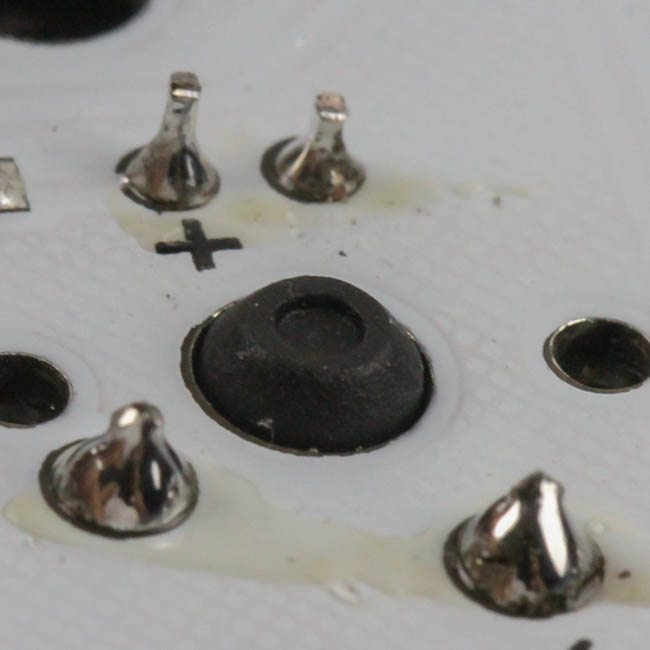
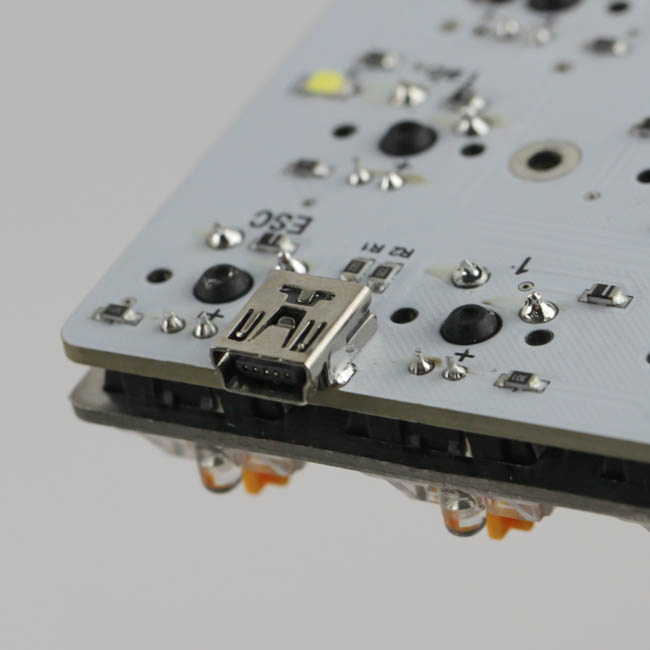
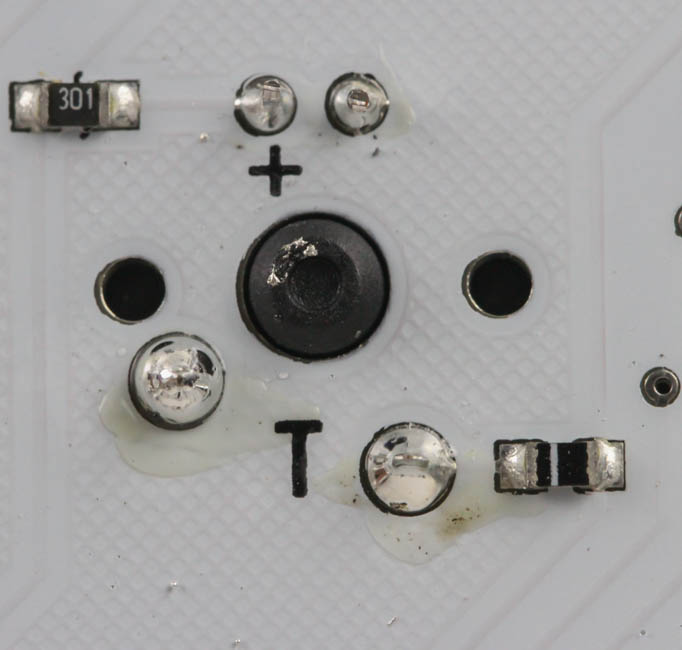
The actual PCB assembly and component soldering can definitely be improved. There's some sloppy work here with excess solder flux that is easily seen on the white PCB, and some solder peaks are fairly close to each other. I brought this up with Originative since perhaps a smaller company may not have hands-on manpower to deal with QC at the factory, but it turns out they are aware of this, are not happy, and are looking to change it positively. Nothing I would have figured out if I had not removed the case, but still a good thing to know and note. The primary components are all soldered just fine, including the mini-USB connector.

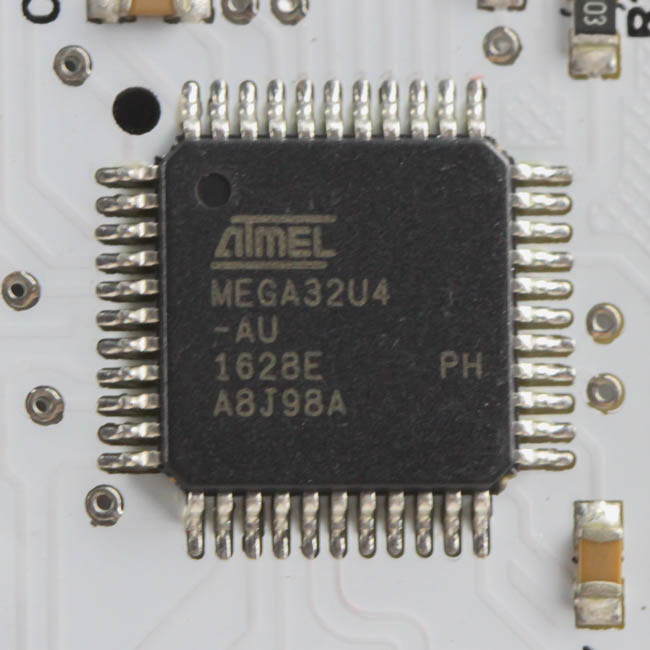
Here, we can see the firmware flash button more clearly. It is best to use something not electrically conductive to poke around in this area, although the button itself is large enough to not make that a real concern. Powering the keyboard is an Atmel ATmega32U4 low-power 8-bit microcontroller based on the RISC (Reduced Instruction Set Computing) architecture. It has 32 KB of on-board flash memory, 8 Kb EEPROM, 20 Kb SRAM, and an onboard USB controller to help store the firmware and accept supported replacement firmware files when programming the keyboard. With no RGB LEDs here, there is no need for dedicated LED drivers either. All of this is on a multi-layer PCB, which is the norm these days.
Before we take a look at the driver, be advised that disassembly will void the warranty and that TechPowerUp is not liable for any damages incurred if you decide to go ahead and do so anyway.
Apr 3rd, 2025 16:26 EDT
change timezone
Latest GPU Drivers
New Forum Posts
- Windows 11 General Discussion (5920)
- Someone knowledable on memory voltages want to chime in? (also what is PMIC and should I be worried) (3)
- Help me decide if I should buy the arc B580 (As a backup) (11)
- Help me pick a UPS (47)
- New AM5 build [help] (15)
- 4x16gb how are these? (12)
- New posts added to last post (2)
- What's your latest tech purchase? (23459)
- Free Games Thread (4610)
- Gigabyte graphic card - TIM GEL application failure? (15)
Popular Reviews
- DDR5 CUDIMM Explained & Benched - The New Memory Standard
- Sapphire Radeon RX 9070 XT Pulse Review
- SilverStone Lucid 04 Review
- PowerColor Radeon RX 9070 Hellhound Review
- Sapphire Radeon RX 9070 XT Nitro+ Review - Beating NVIDIA
- Pwnage Trinity CF Review
- Palit GeForce RTX 5070 GamingPro OC Review
- ASRock Phantom Gaming B850 Riptide Wi-Fi Review - Amazing Price/Performance
- AMD Ryzen 7 9800X3D Review - The Best Gaming Processor
- Samsung 9100 Pro 2 TB Review - The Best Gen 5 SSD
Controversial News Posts
- MSI Doesn't Plan Radeon RX 9000 Series GPUs, Skips AMD RDNA 4 Generation Entirely (146)
- Microsoft Introduces Copilot for Gaming (124)
- AMD Radeon RX 9070 XT Reportedly Outperforms RTX 5080 Through Undervolting (119)
- NVIDIA Reportedly Prepares GeForce RTX 5060 and RTX 5060 Ti Unveil Tomorrow (115)
- Over 200,000 Sold Radeon RX 9070 and RX 9070 XT GPUs? AMD Says No Number was Given (100)
- NVIDIA GeForce RTX 5050, RTX 5060, and RTX 5060 Ti Specifications Leak (96)
- Retailers Anticipate Increased Radeon RX 9070 Series Prices, After Initial Shipments of "MSRP" Models (90)
- China Develops Domestic EUV Tool, ASML Monopoly in Trouble (88)