 0
0
Penclic Mini Keyboard C2 Review
Driver & Performance »Disassembly


There are three Phillips head screws at the top of the back that need to be removed before prying open and separating the two plastic panel pieces that make up the case of the keyboard. At this point, there are still a couple of things keeping the two together, so tread carefully lest you break something.

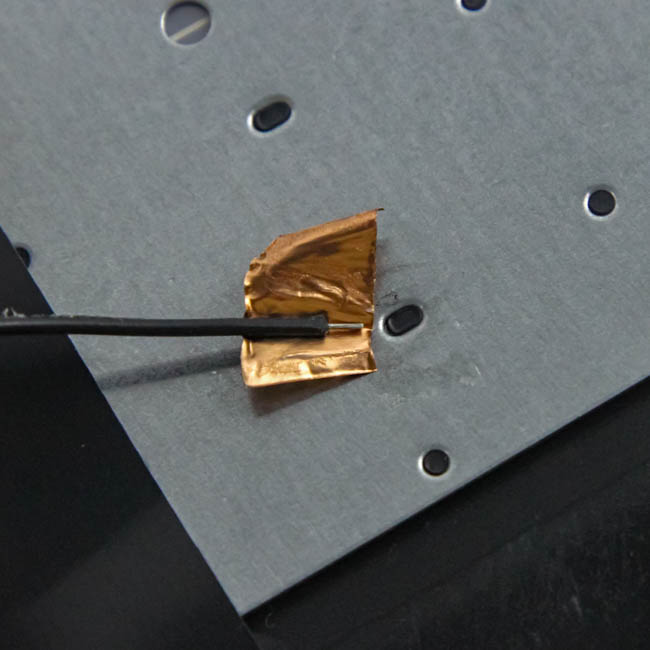
The first thing to do is to loosen and remove the ribbon cable from the PCB attached to the bottom panel piece. There is also a wire, an electrical connection, from the PCB that makes contact with the top piece housing the switches themselves. The wire is held in place with a piece of copper tape, so be careful here as well. Once done, we can take a better look at the two pieces separately.
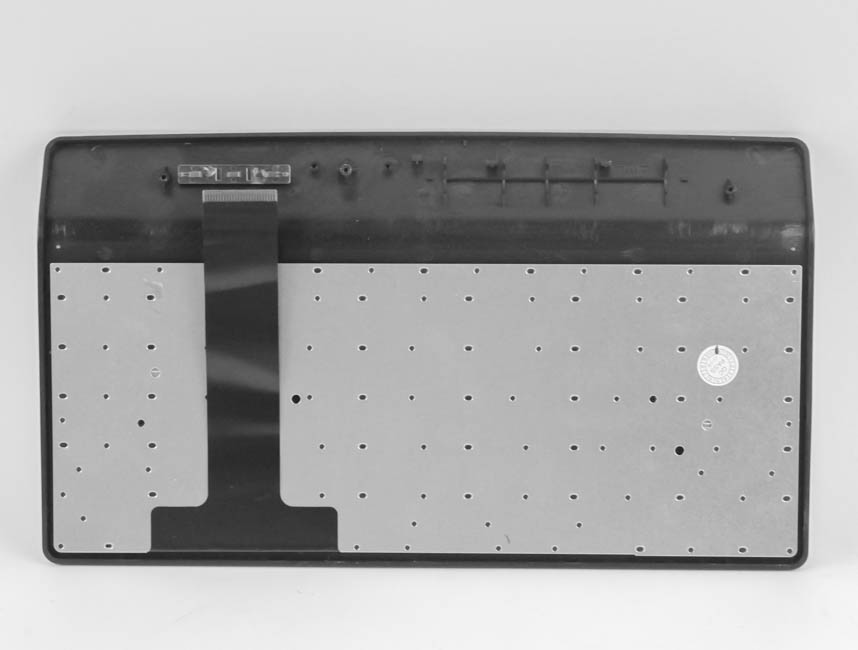
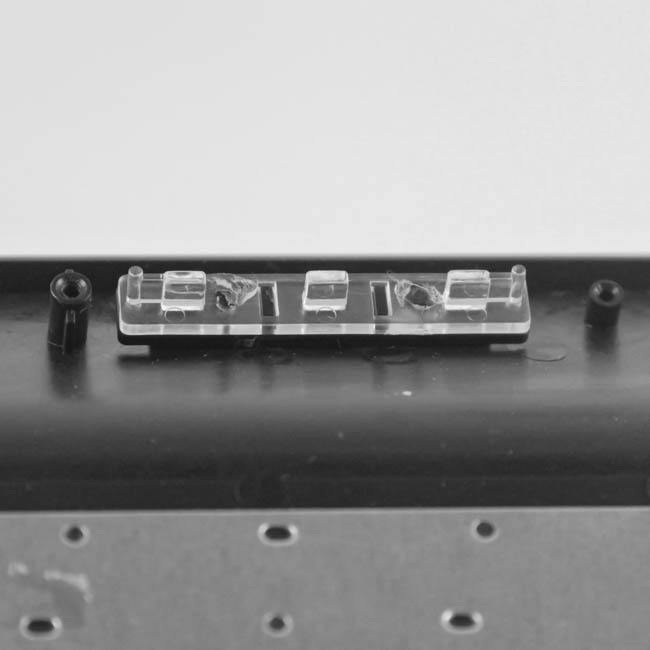
The top piece has the switches as mentioned above, but also the steel plate that helps provide structural rigidity and a backplane for the membrane part of the switches to rest upon and make contact with. There are also light diffusers where the LEDs on the keyboard are going to light up to help provide uniform lighting when the lights are on for visual indication.
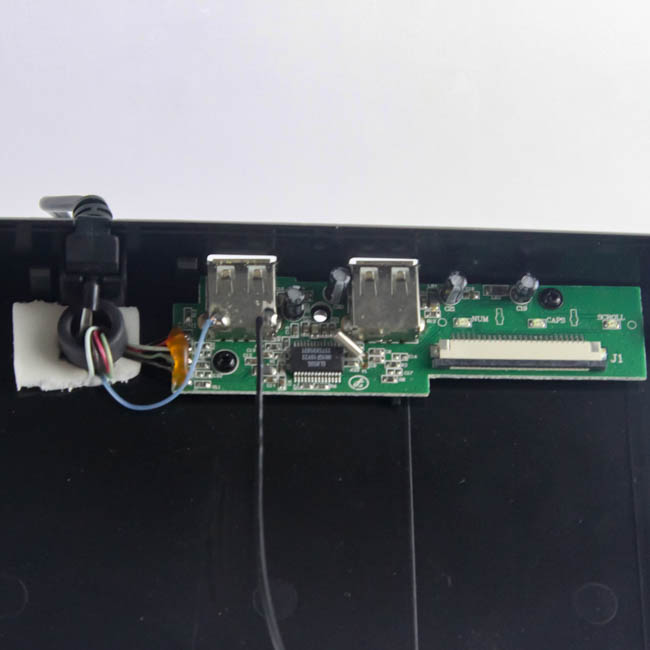
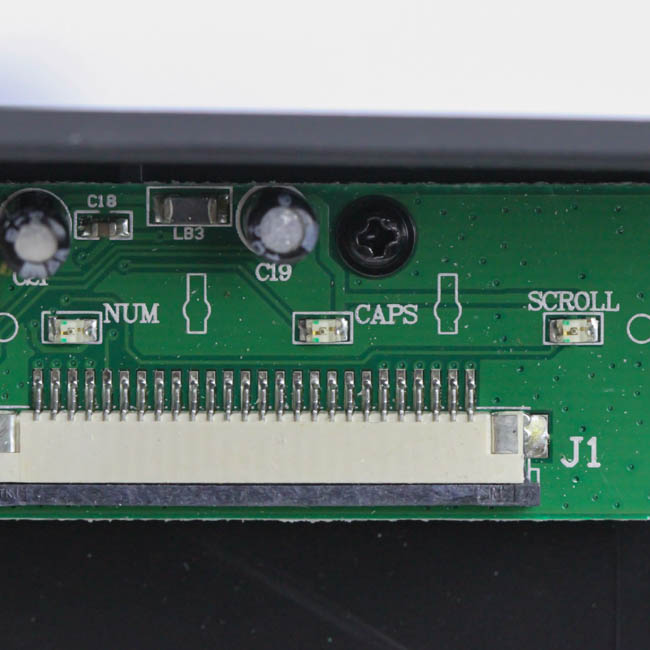
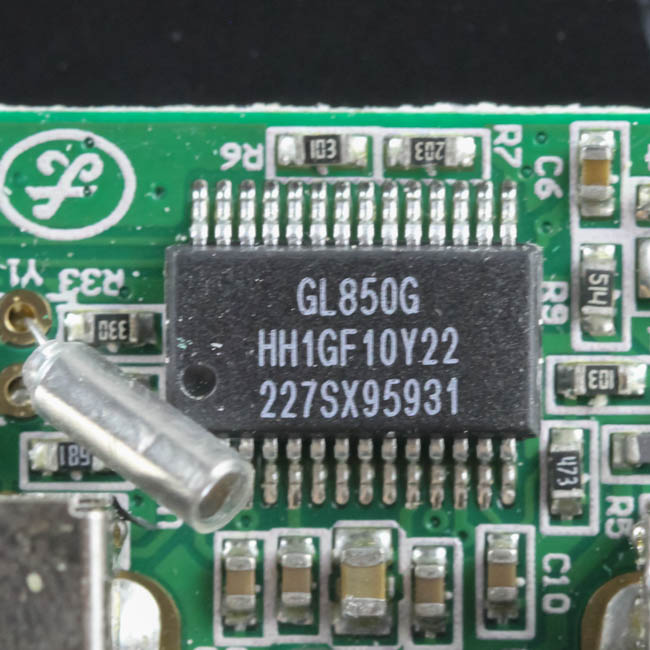
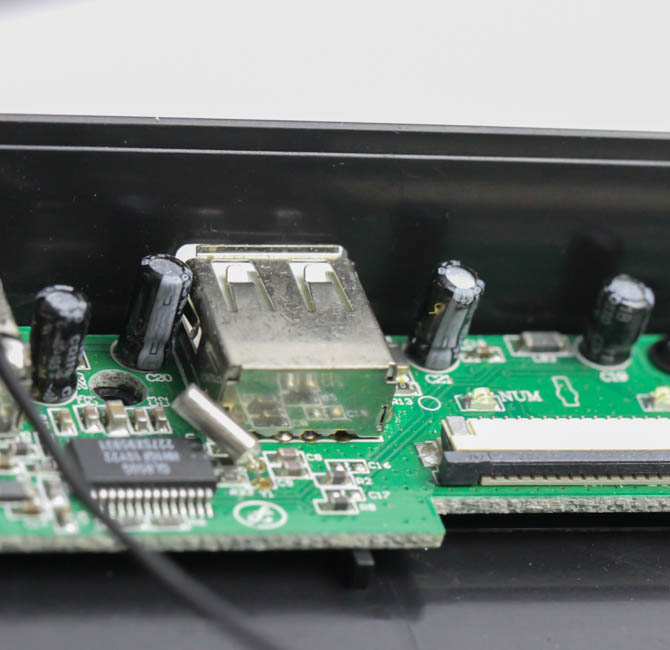
The PCB is fairly small, and to be fair, there's not much it has to do here anyway. There are the three LEDs for Num Lock, Caps Lock and Scroll Lock, four solid capacitors, and helping operate the USB hub is a Genesys Logic GL850G USB 2.0 hub controller. The keyboard MCU must be on the other side of the PCB, but there is not enough slack on the cable wires to unscrew and turn it over. Given this basic functionality of the keyboard, and it performing just fine, I am content not knowing exactly what it is.
Before we take a look at the driver, be advised that disassembly will void the warranty and that TechPowerUp is not liable for any damages incurred if you decided to go ahead and do so anyway.
Jul 3rd, 2025 21:36 CDT
change timezone
Latest GPU Drivers
New Forum Posts
- How do you view TPU & the internet in general? (With poll) (58)
- HP Zbook 15 G2 GPU Upgrade (12)
- What Windows is overall the best to you and why? (266)
- Will you buy a RTX 5090? (610)
- What phone you use as your daily driver? And, a discussion of them. (1756)
- GPU-Z Display Bug via DP 2.1? (3)
- What would you buy? (51)
- A Final Fantasy IX Reminiscence - My love letter and homage to one of the best stories ever told (90)
- GravityMark v1.89 GPU Benchmark (309)
- RTX 5070 discussion (5)
Popular Reviews
- ASUS ROG Crosshair X870E Extreme Review
- Crucial T710 2 TB Review - Record-Breaking Gen 5
- Fractal Design Scape Review - Debut Done Right
- PowerColor ALPHYN AM10 Review
- Sapphire Radeon RX 9060 XT Pulse OC 16 GB Review - An Excellent Choice
- Upcoming Hardware Launches 2025 (Updated May 2025)
- AMD Ryzen 7 9800X3D Review - The Best Gaming Processor
- Sapphire Radeon RX 9070 XT Nitro+ Review - Beating NVIDIA
- SCHENKER KEY 18 Pro (E25) Review - Top-Tier Contender
- AVerMedia CamStream 4K Review
TPU on YouTube
Controversial News Posts
- Intel's Core Ultra 7 265K and 265KF CPUs Dip Below $250 (288)
- NVIDIA Grabs Market Share, AMD Loses Ground, and Intel Disappears in Latest dGPU Update (212)
- Some Intel Nova Lake CPUs Rumored to Challenge AMD's 3D V-Cache in Desktop Gaming (140)
- NVIDIA GeForce RTX 5080 SUPER Could Feature 24 GB Memory, Increased Power Limits (115)
- Microsoft Partners with AMD for Next-gen Xbox Hardware (105)
- NVIDIA Launches GeForce RTX 5050 for Desktops and Laptops, Starts at $249 (105)
- Intel "Nova Lake‑S" Series: Seven SKUs, Up to 52 Cores and 150 W TDP (100)
- NVIDIA DLSS Transformer Cuts VRAM Usage by 20% (97)