 10
10
Skyloong GK75 Triple Mode Keyboard Review - Switch to Knobs!
Software »Disassembly
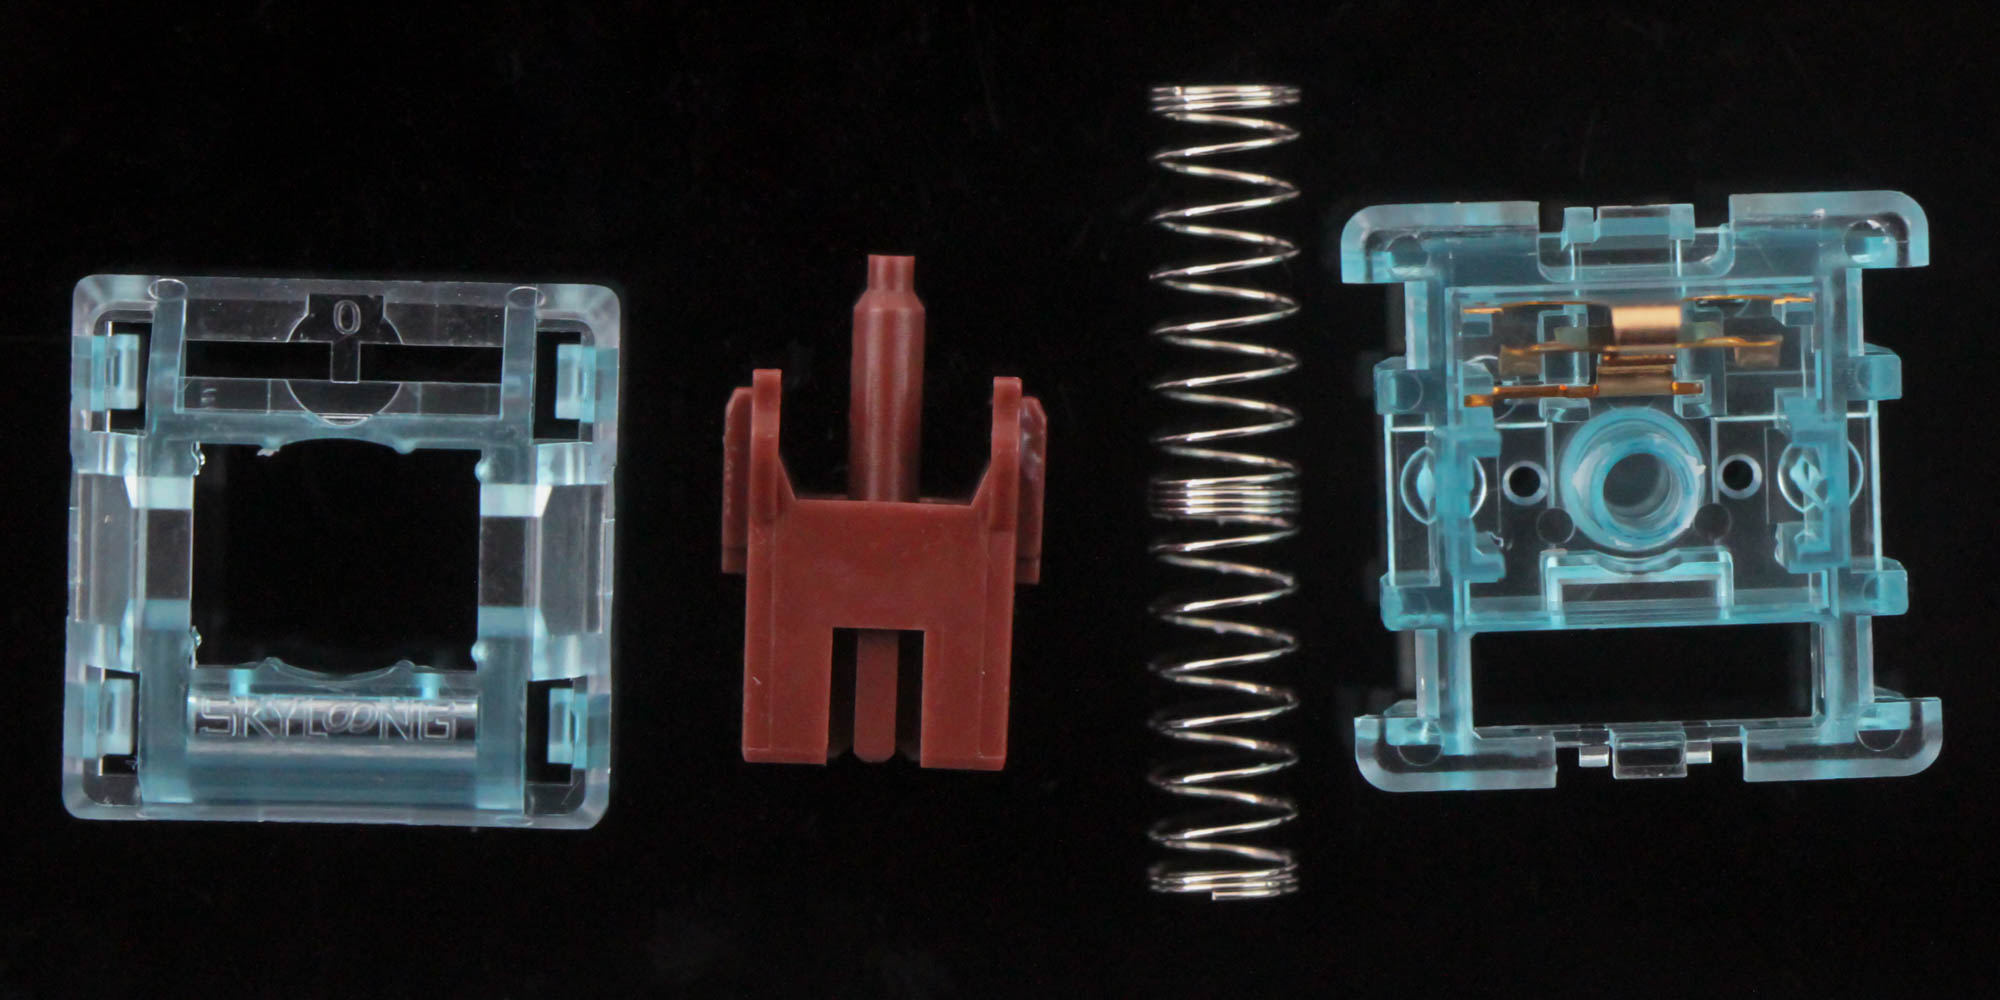

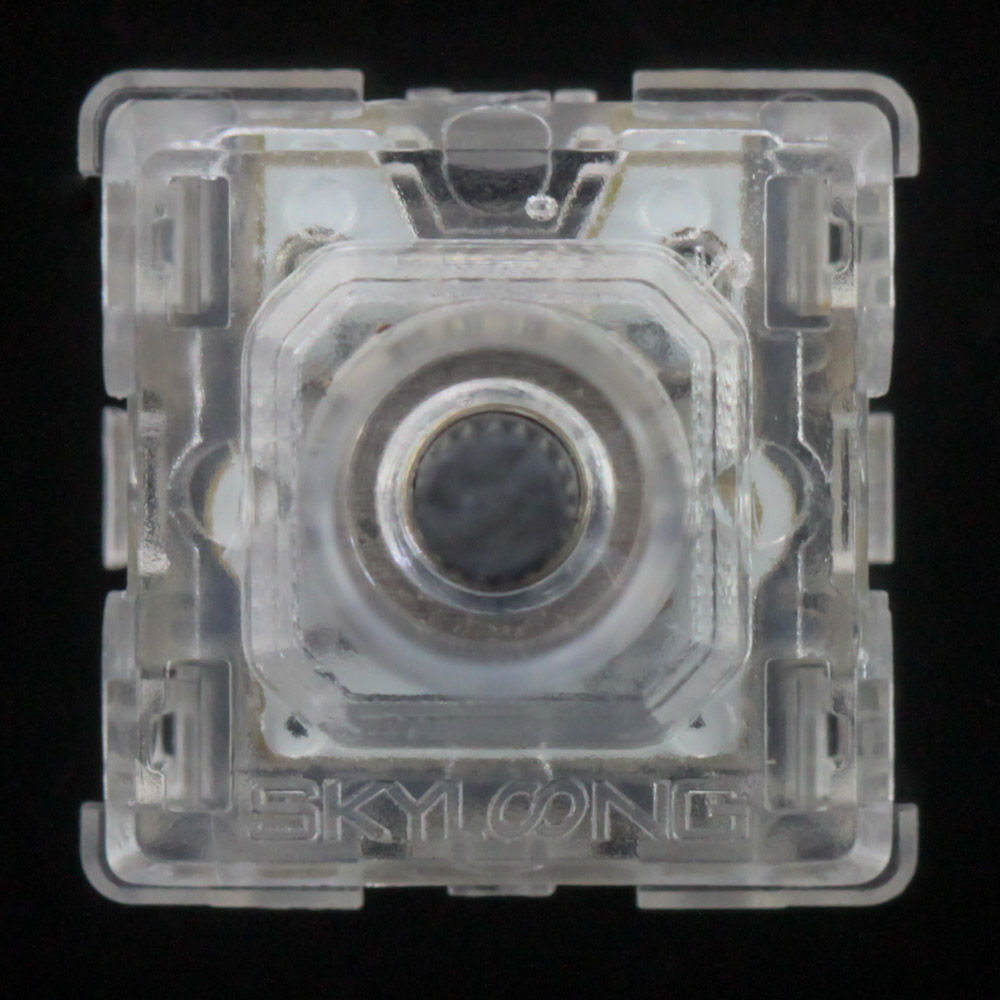
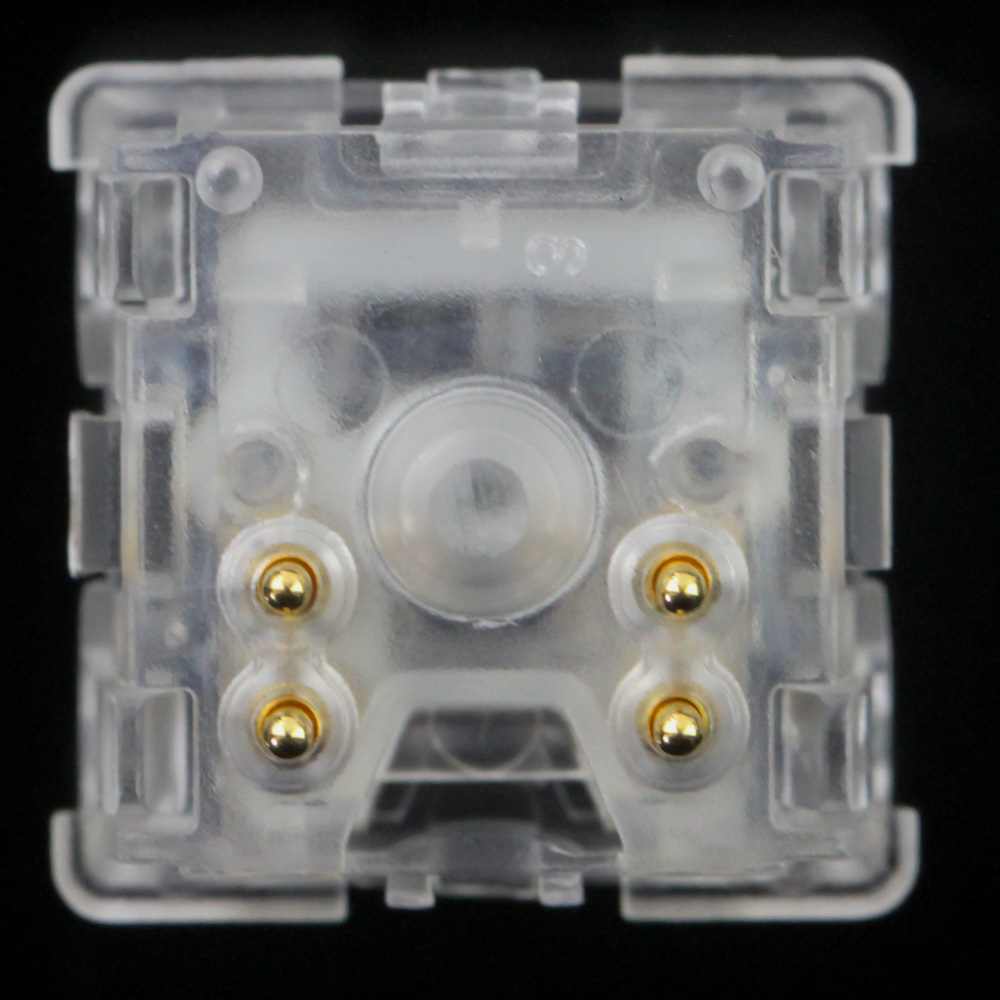
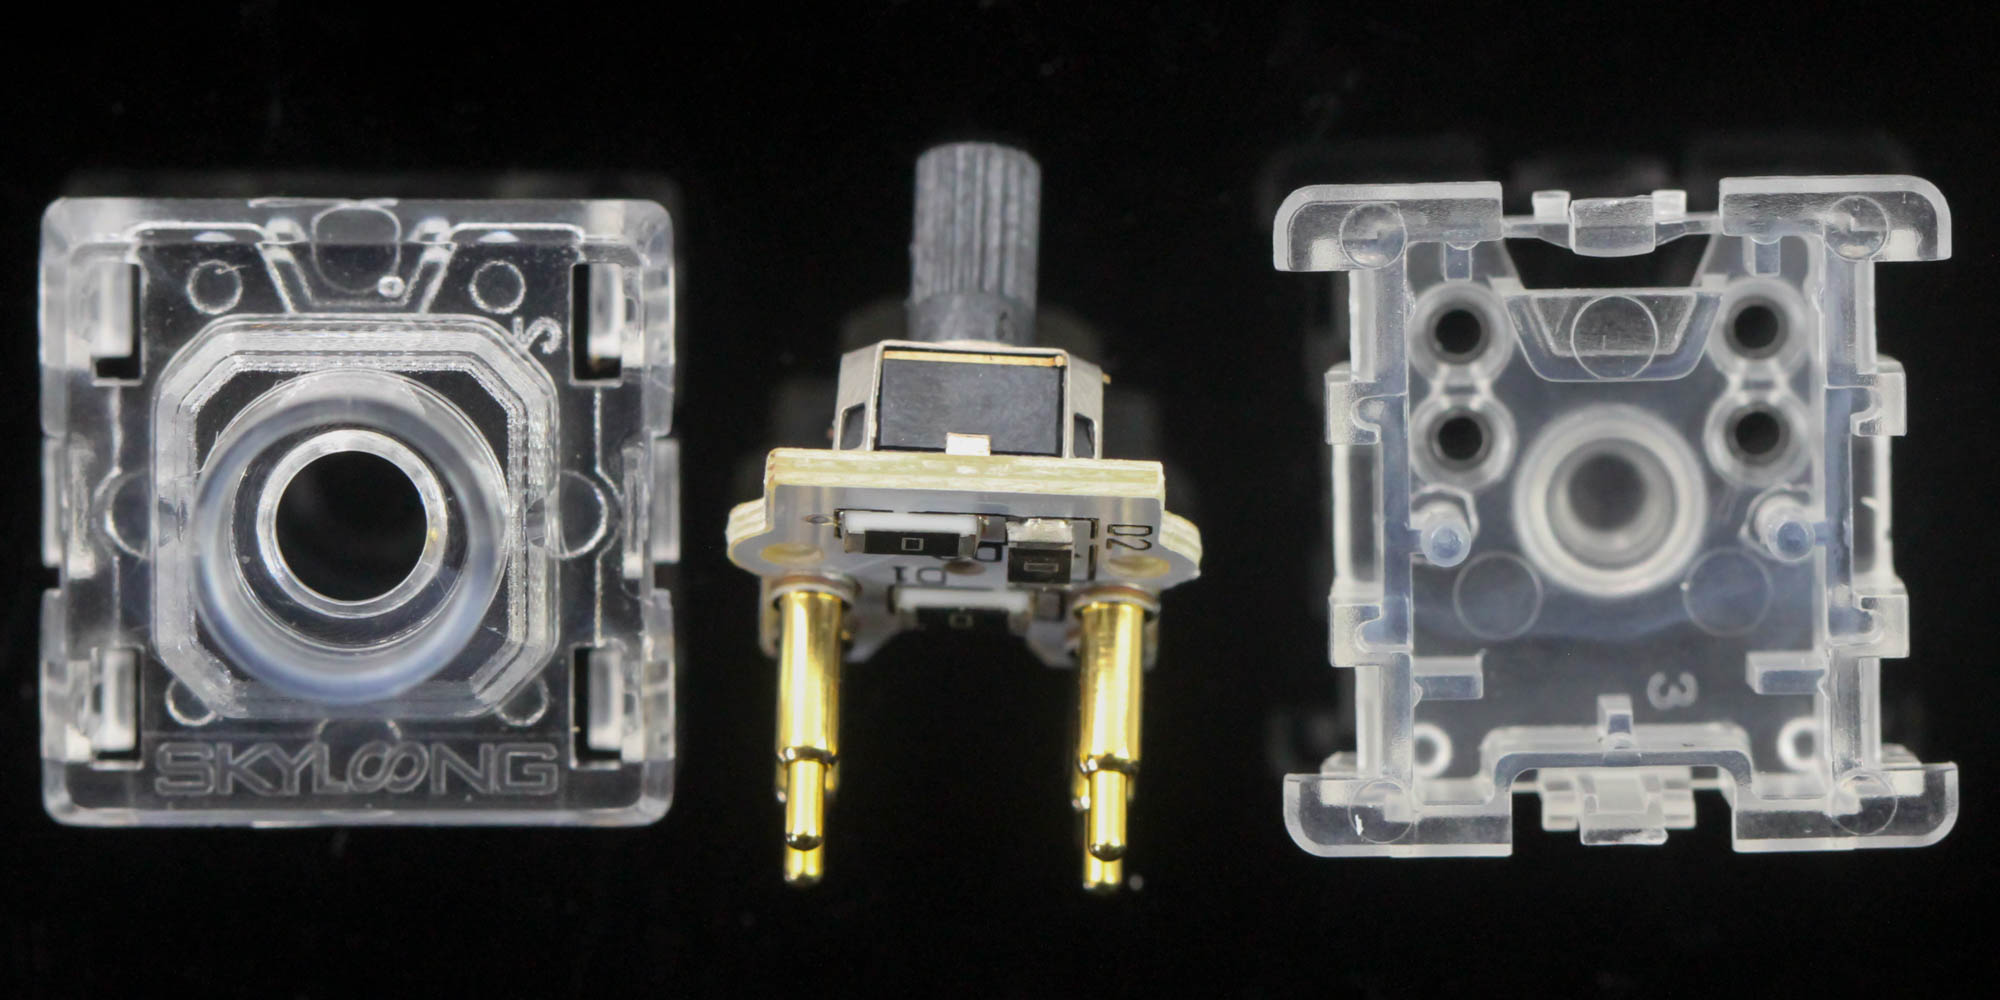
Given the hot-swappable nature of the switches, it only made sense that I take one of the Skyloong Glacier Brown switches apart. This is a 5-pin mechanical switch employing the Cherry MX stem design, so we have the usual construction with the top, crosspoint stem/slider, spring, and housing that also has the metal leaf for the actuation mechanism. The stem is pre-lubed out of the factory, and Skyloong says the tolerances for all the moving parts are held to a higher standard than usual. The metal contacts are also thinly plated with gold, and actuation is similar to other such switches with the bump in the stem pushing the contacts together. There is a second bump here for the tactile feedback itself.
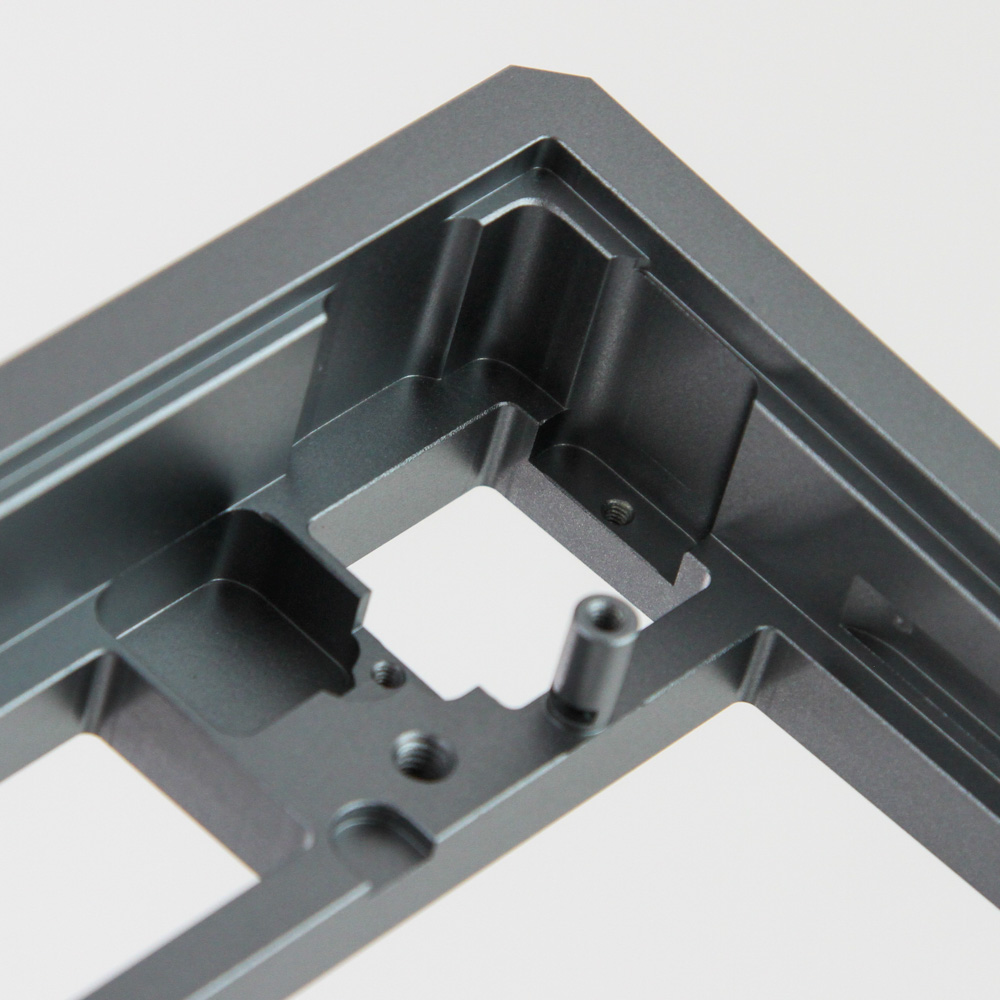
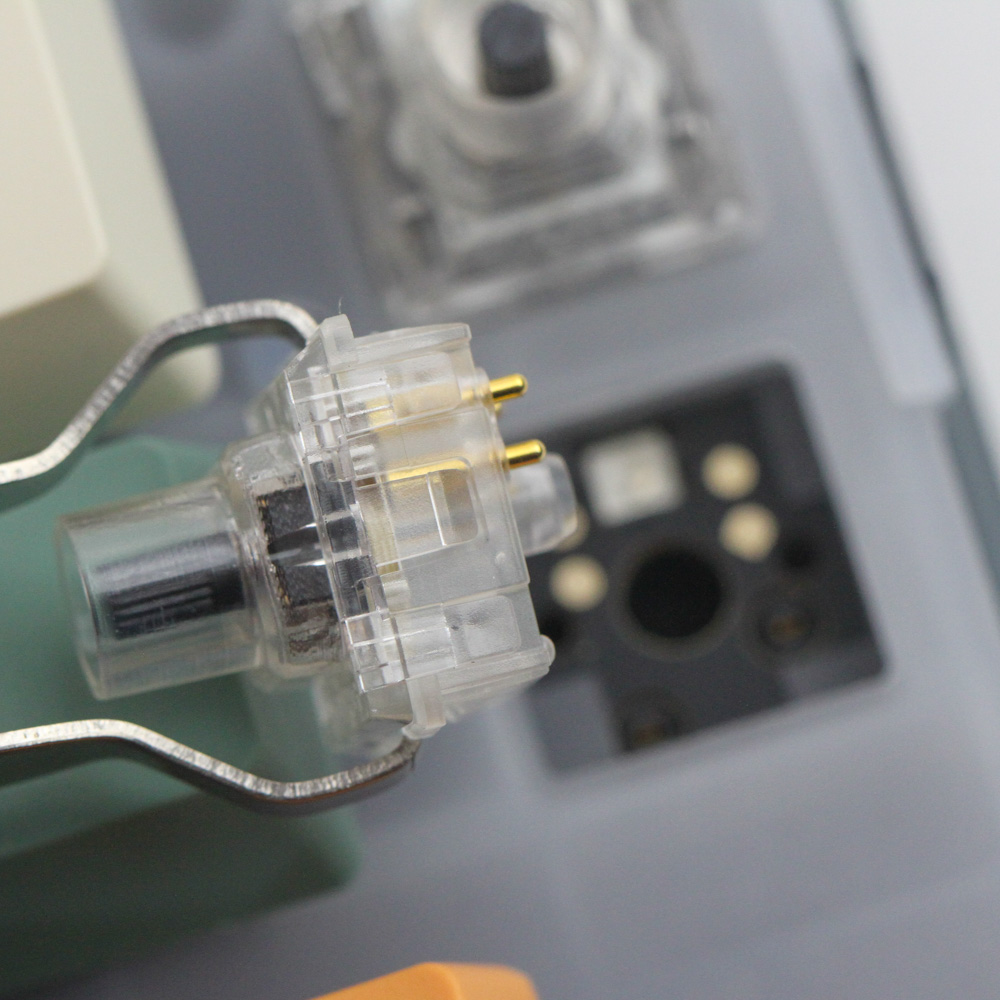
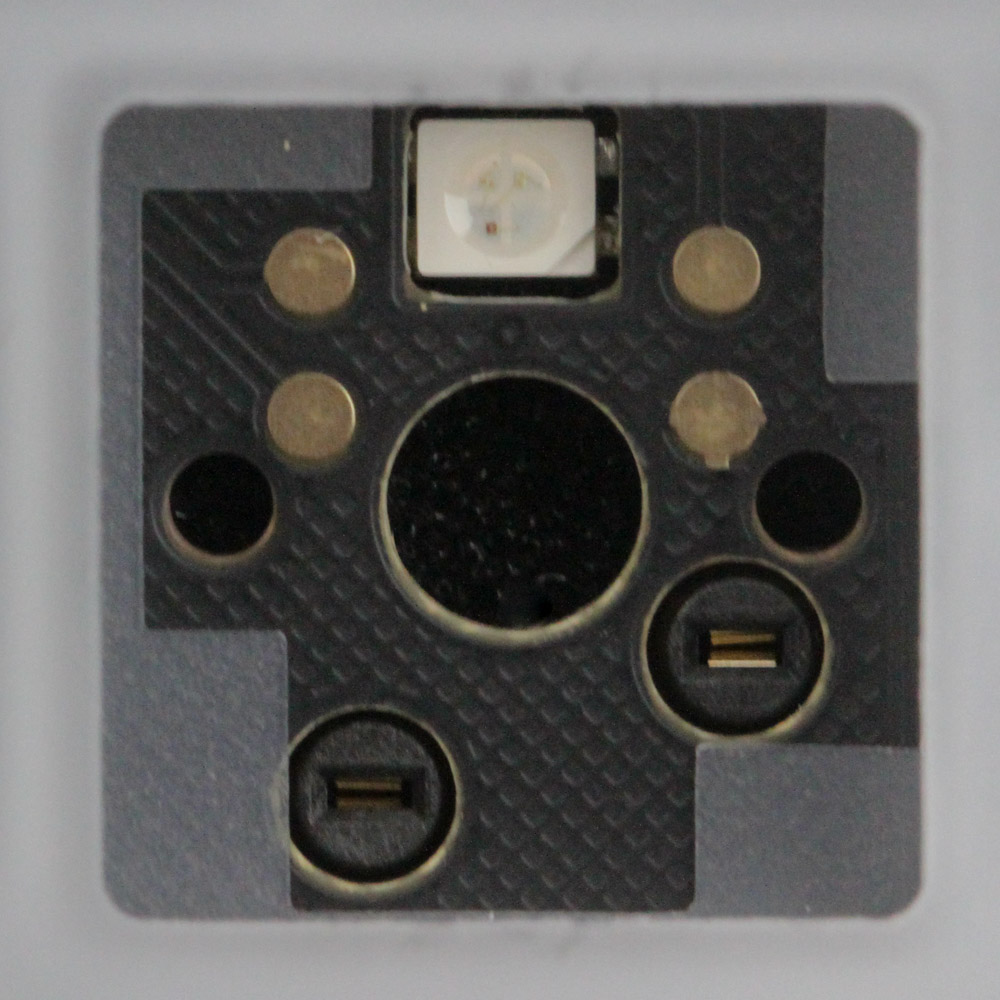
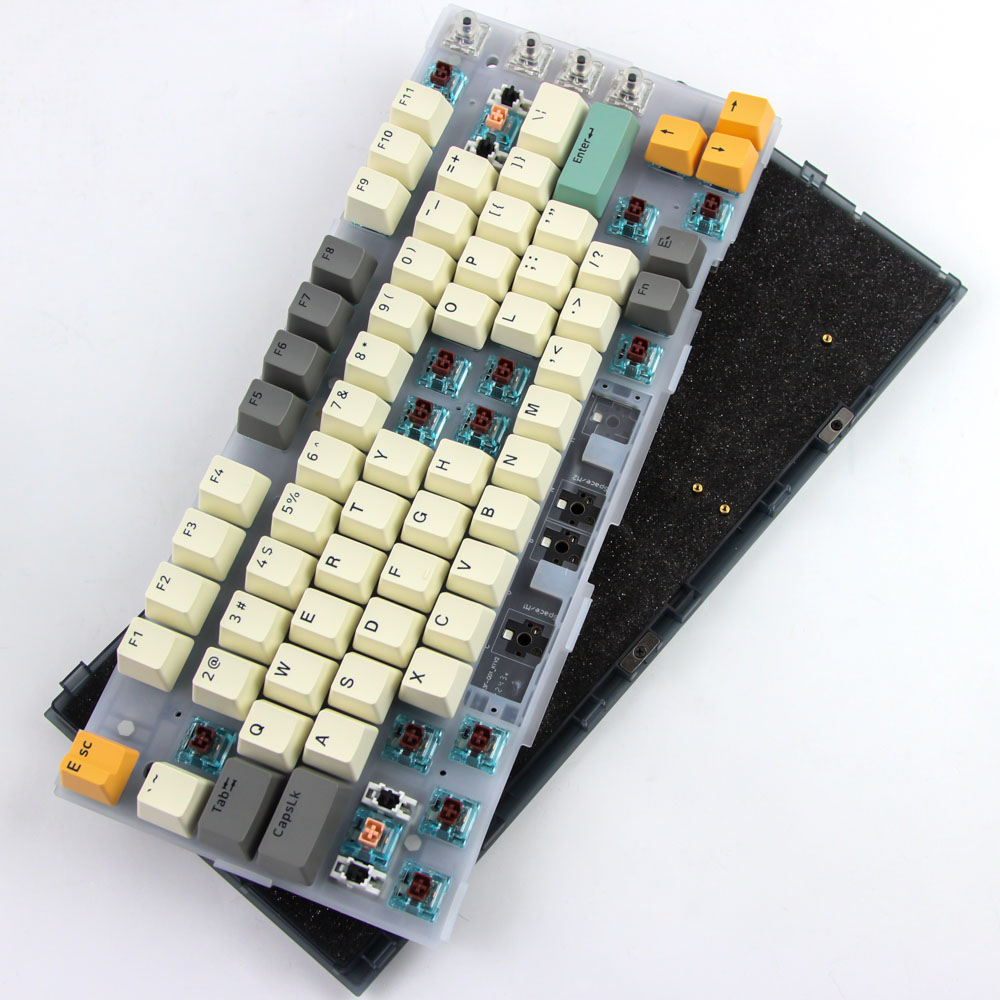
The aluminium top panel is held in place via all of two screws accessed on the back underneath the keyboard feet at the top. To be fair, there is also a friction fit courtesy the various silicone gaskets used here that we will talk about below, but it's still interesting to note something so big and heavy not having more securement points. On the flip side, this allows for users to more easily replace the knob module with switches as seen above. First be sure to pull out the knob covers followed by removing the three individual frames in the top panel as seen above. Then use the switch remover tool to pull out the knob switches themselves which show the use of a clever combination-style hot-swap switch socket that works with both 3/5-pin mechanical switches as well as these lower travel rotary switches.
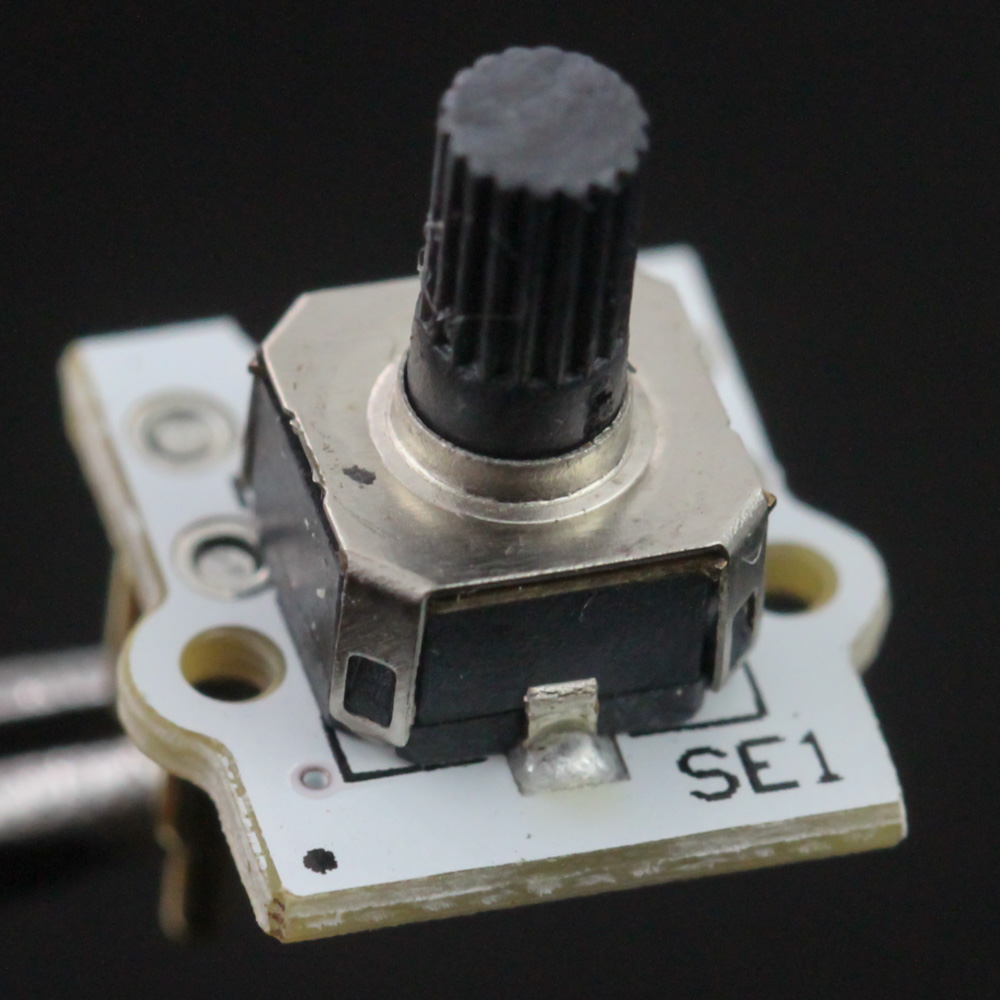
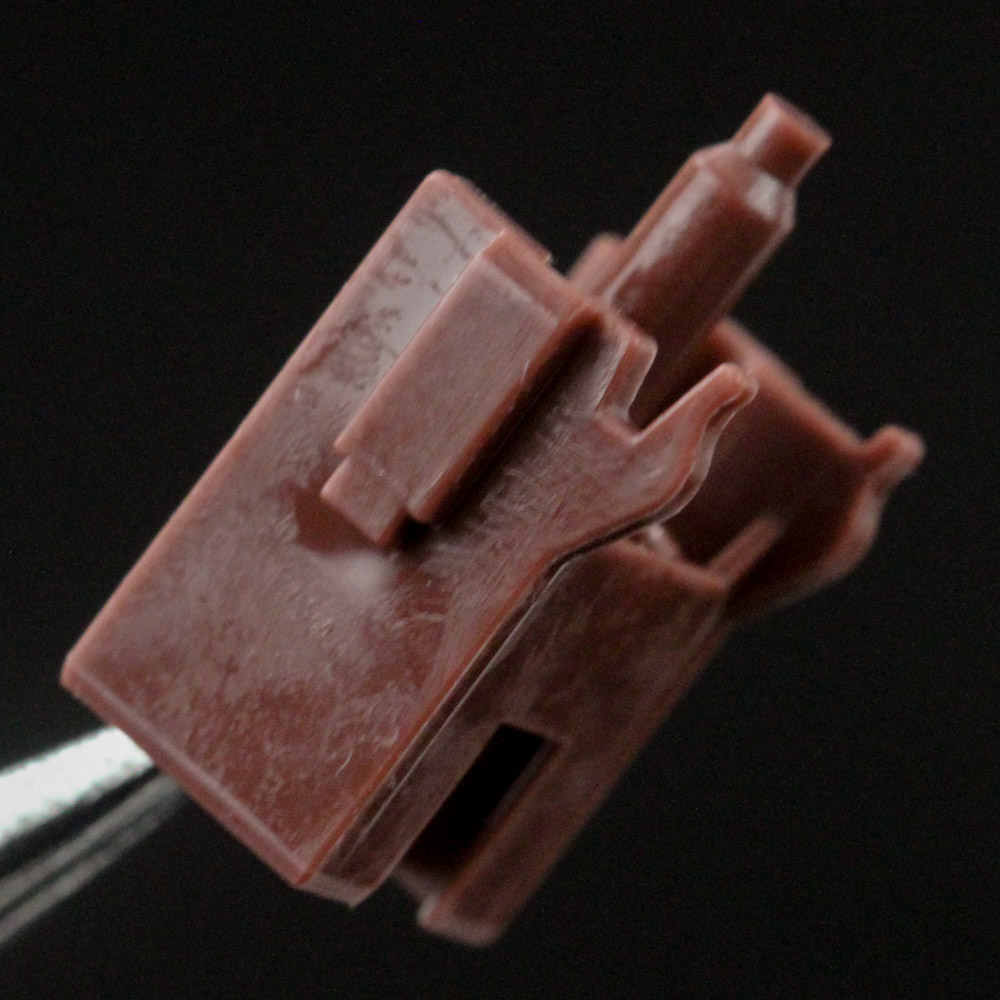
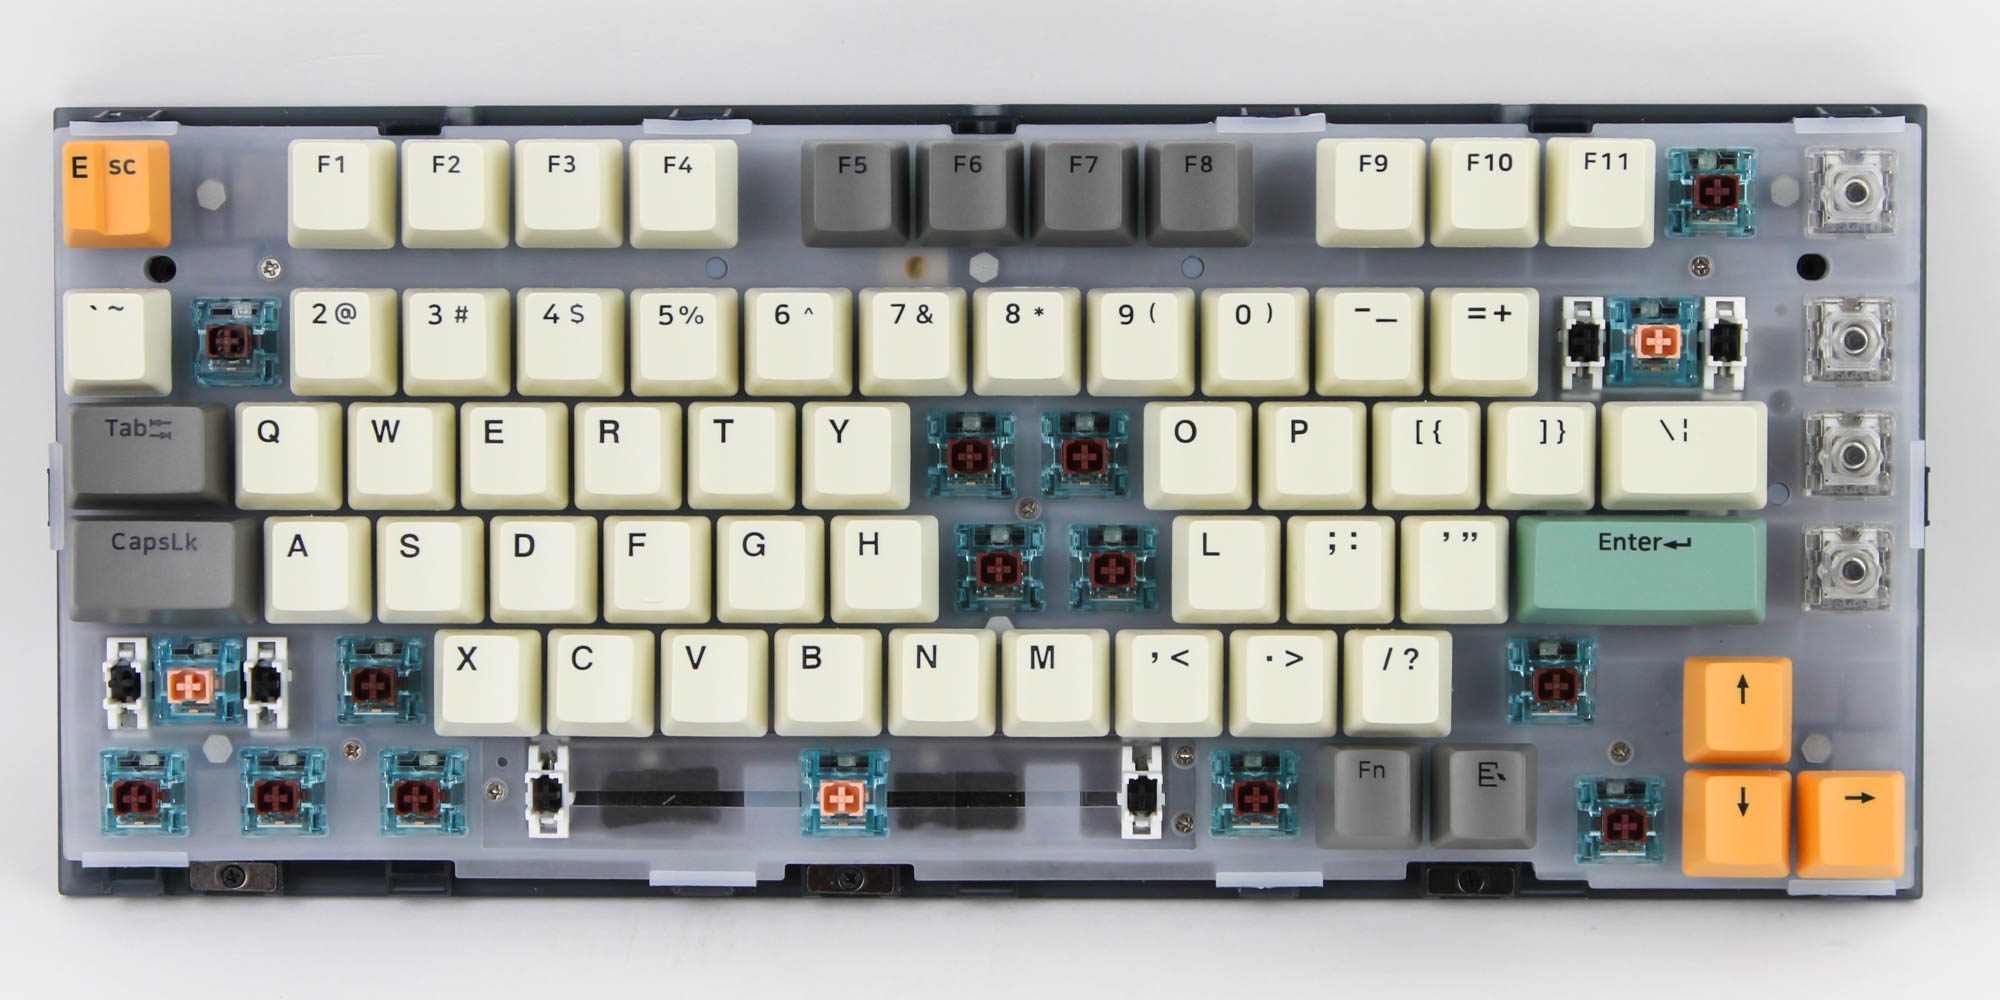
At this point I figured I might as well disassemble one of these switches too with its 4 contacts on the bottom. You can choose to put these back or go with three switches out of the spare switch set provided in the keyboard box to now allow you to add in keycaps and the top panel back in place. Note that the top-most knob is also removable but I chose to keep it here paired with the replacement knob cover to show you a hybrid layout.
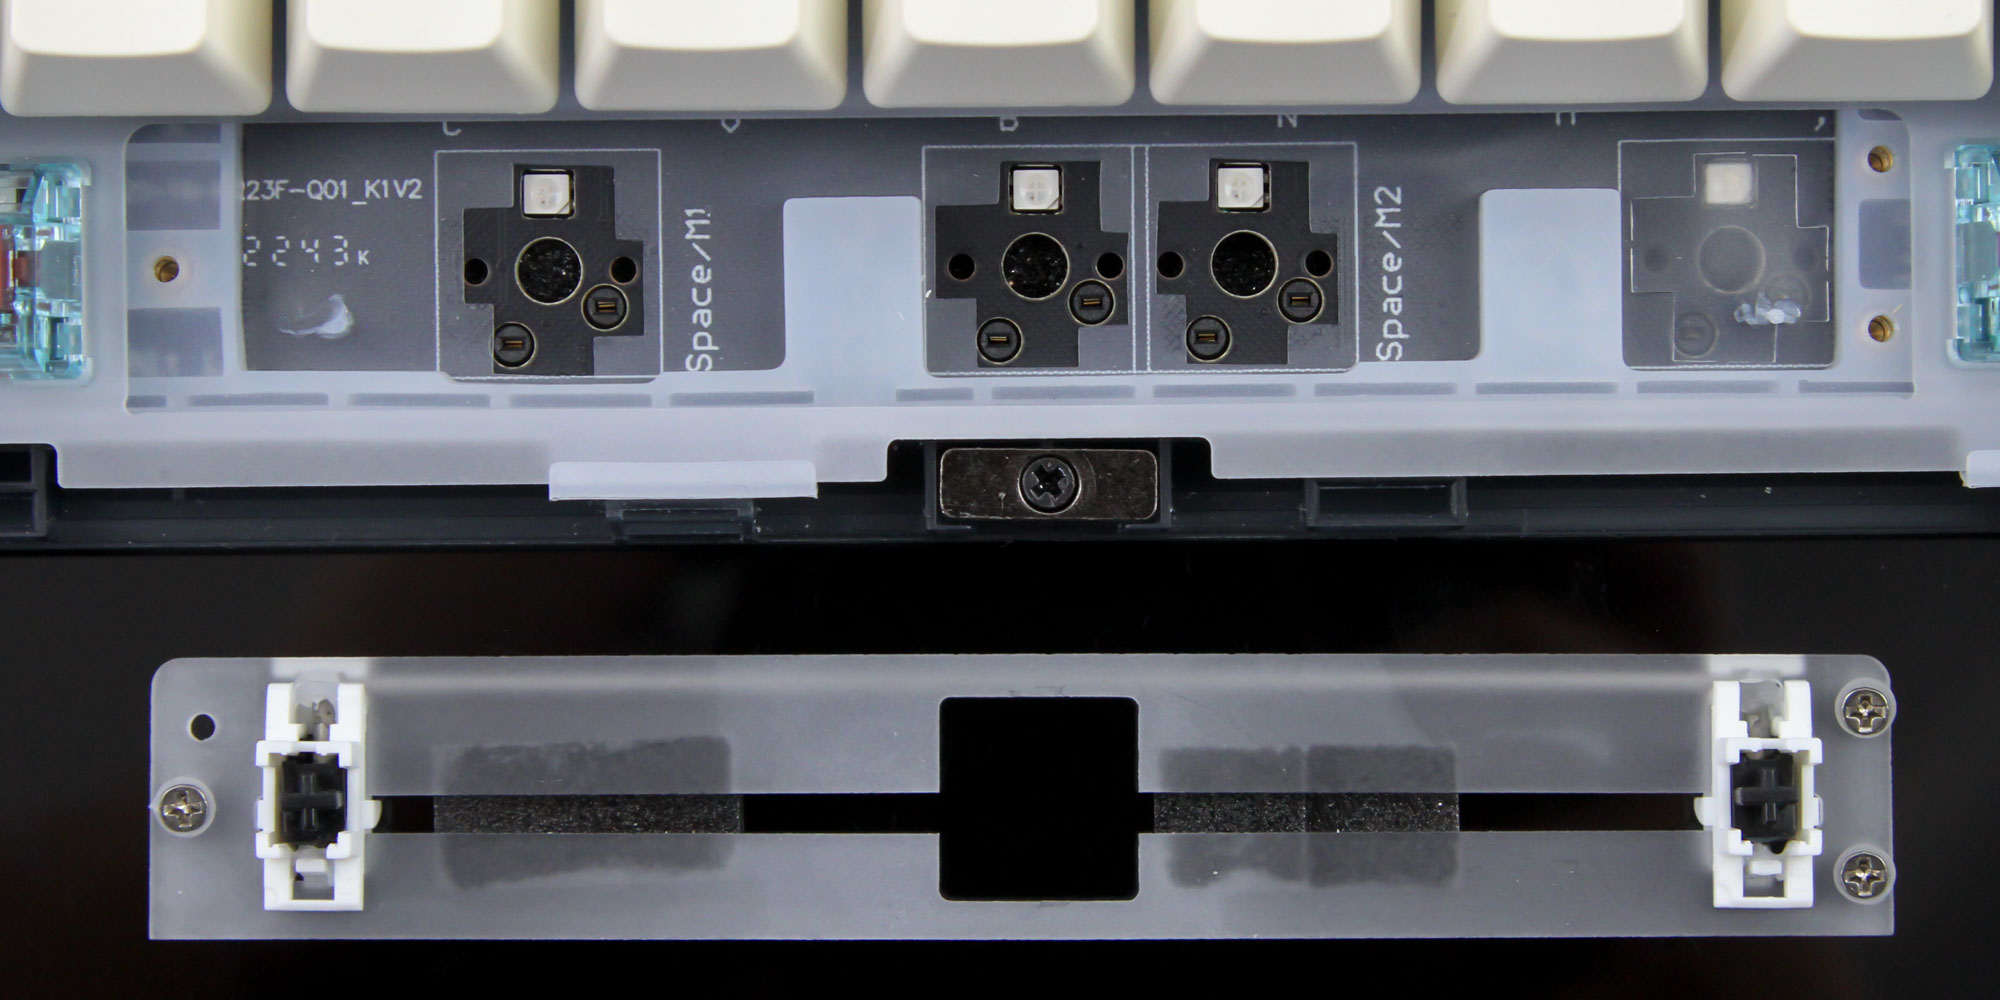
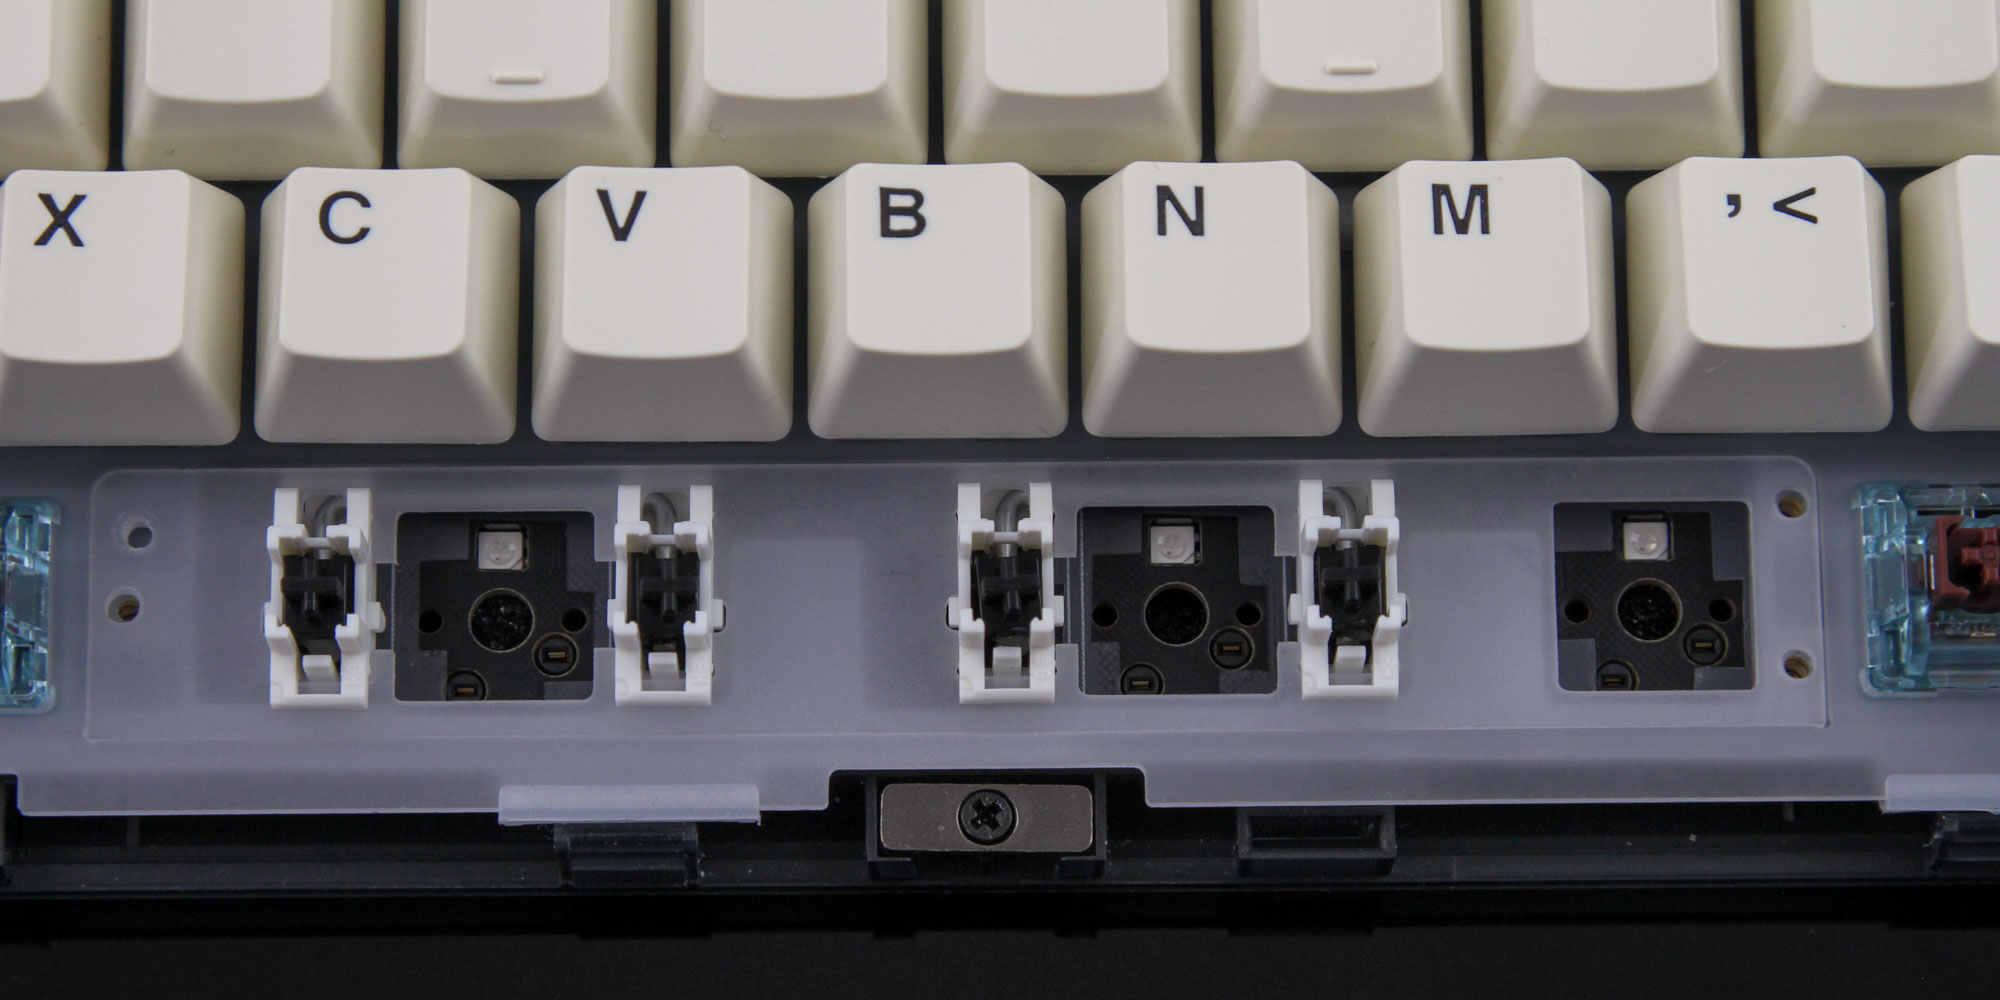
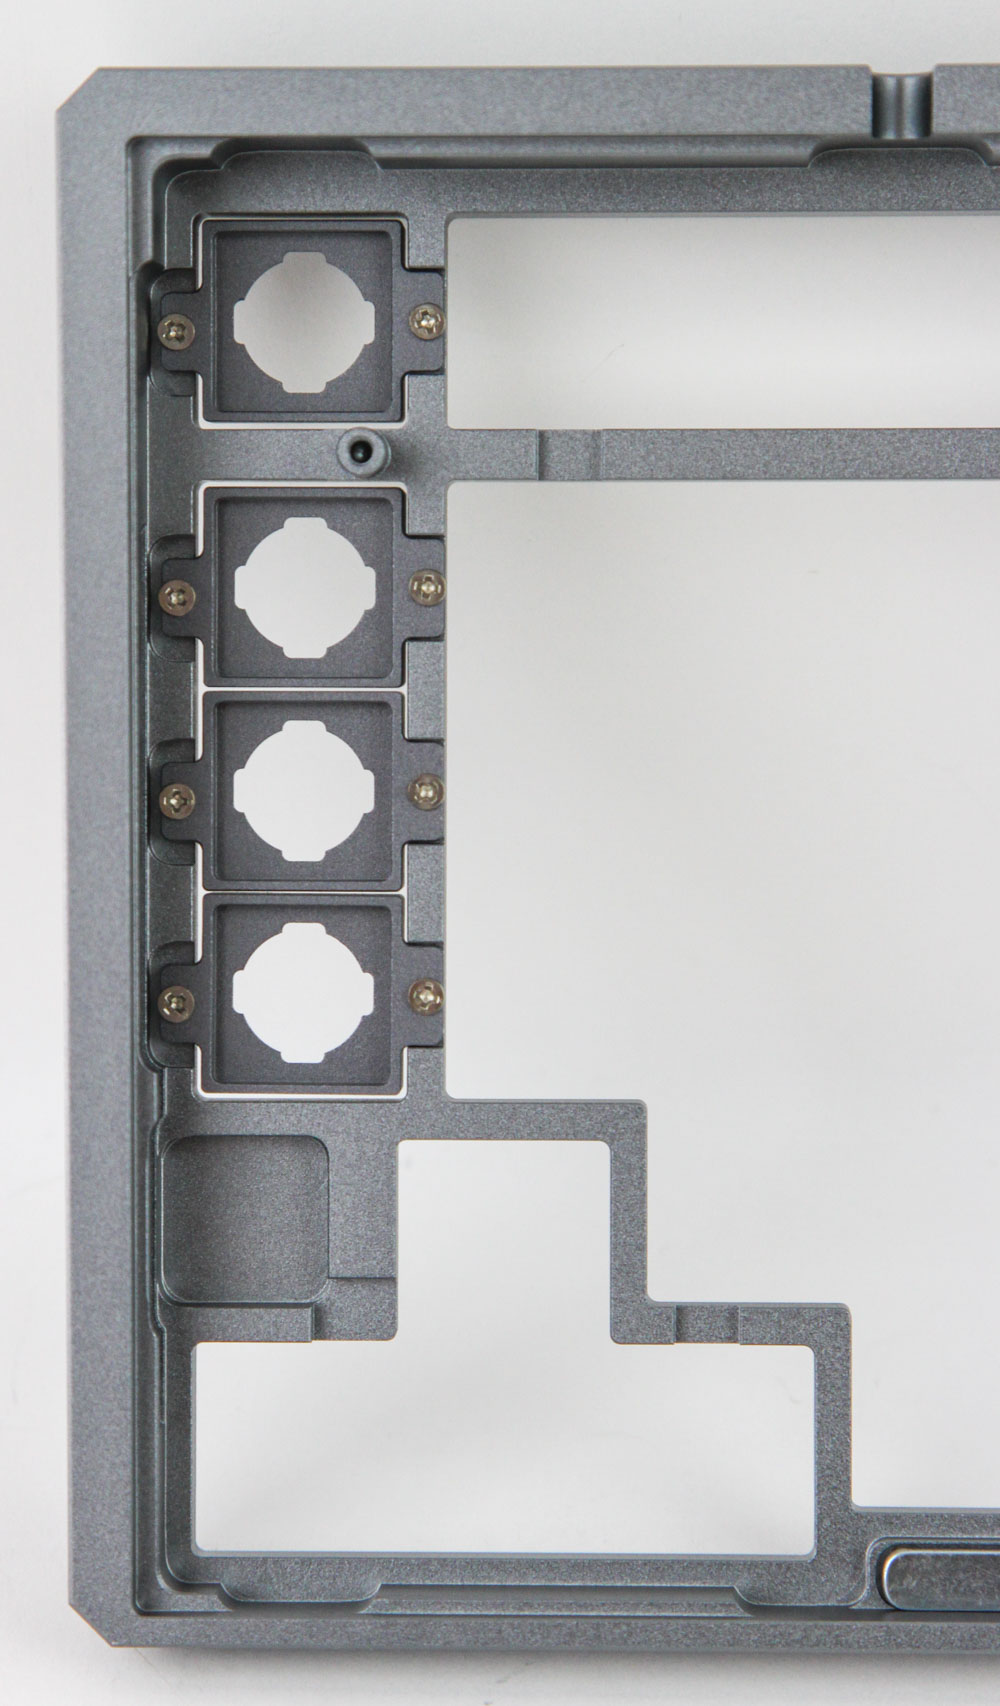
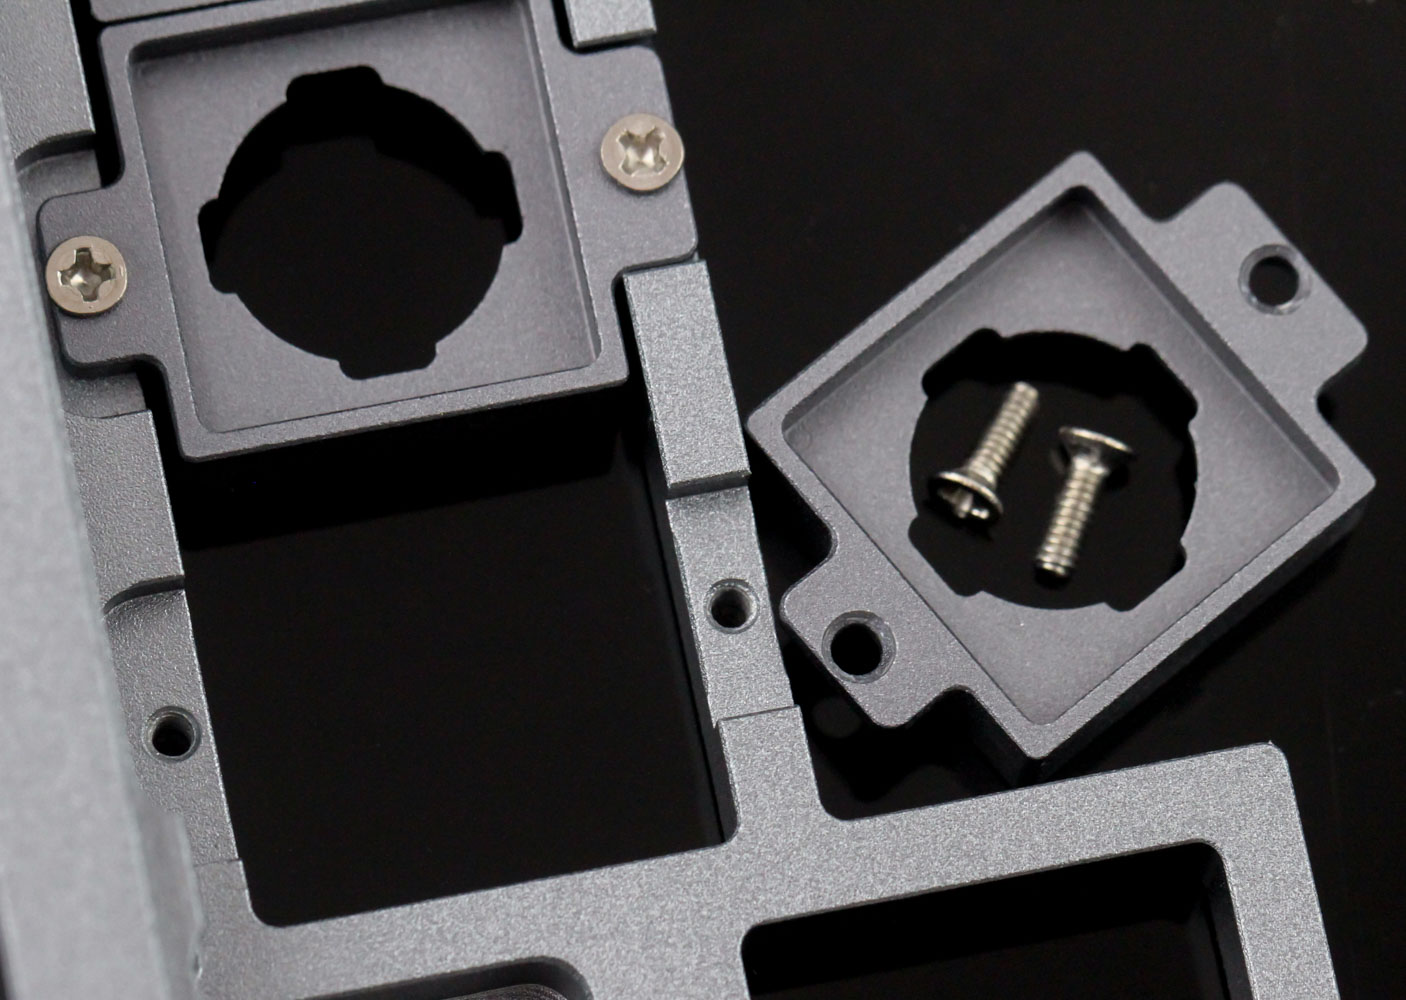
The split space bar key module is easier to use in that you don't even need to remove the top panel piece. Simply remove the space bar keycap along with L.Alt and R.Alt to access the pre-installed default space bar module held in place via three screws. Remove it and now you can add the new one along with the installation kit from before to provide more support on either side if desired, or simply go with the same three switches as seen above. You may have to remove the silicone cutout over the last switch socket but now you get three switches (2.75u/2.25u/1.25u) if you wanted more keys or simply prefer the split space bar route. Needless to say, the Skyloong GK75 is an extremely customizable keyboard!
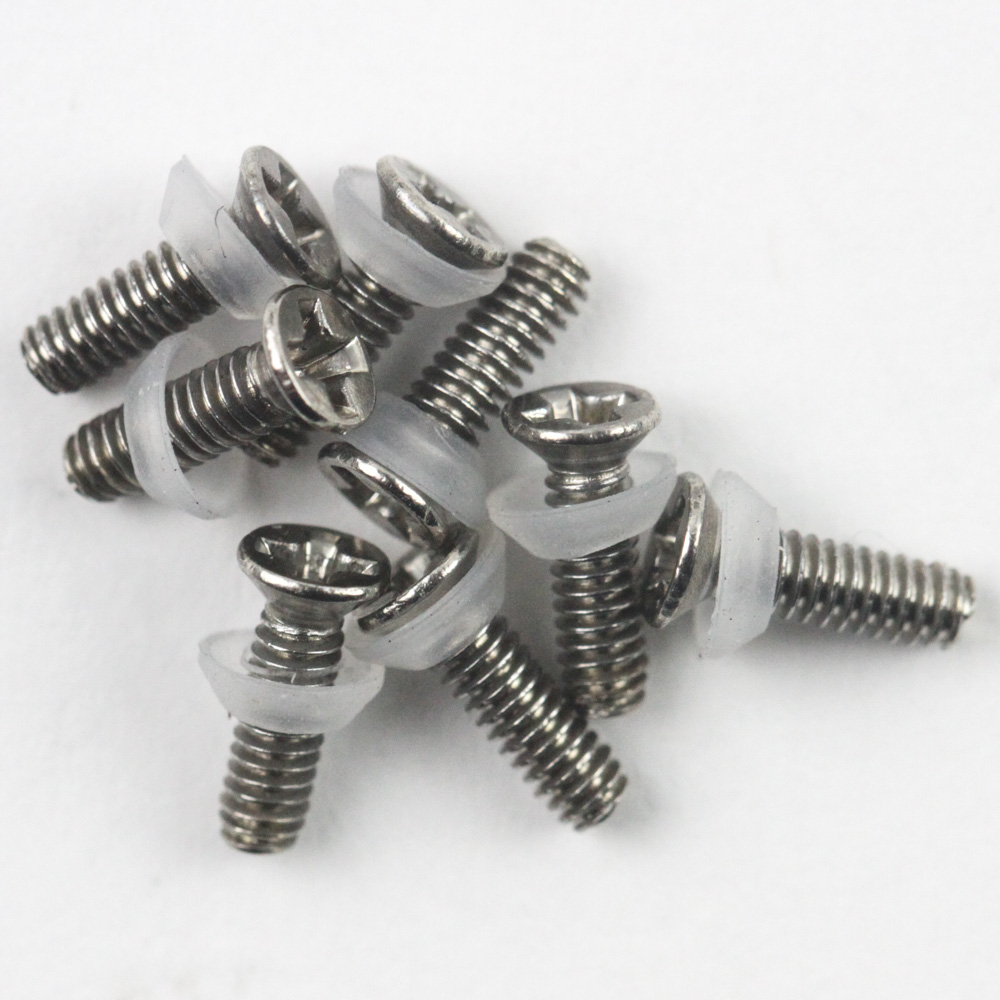
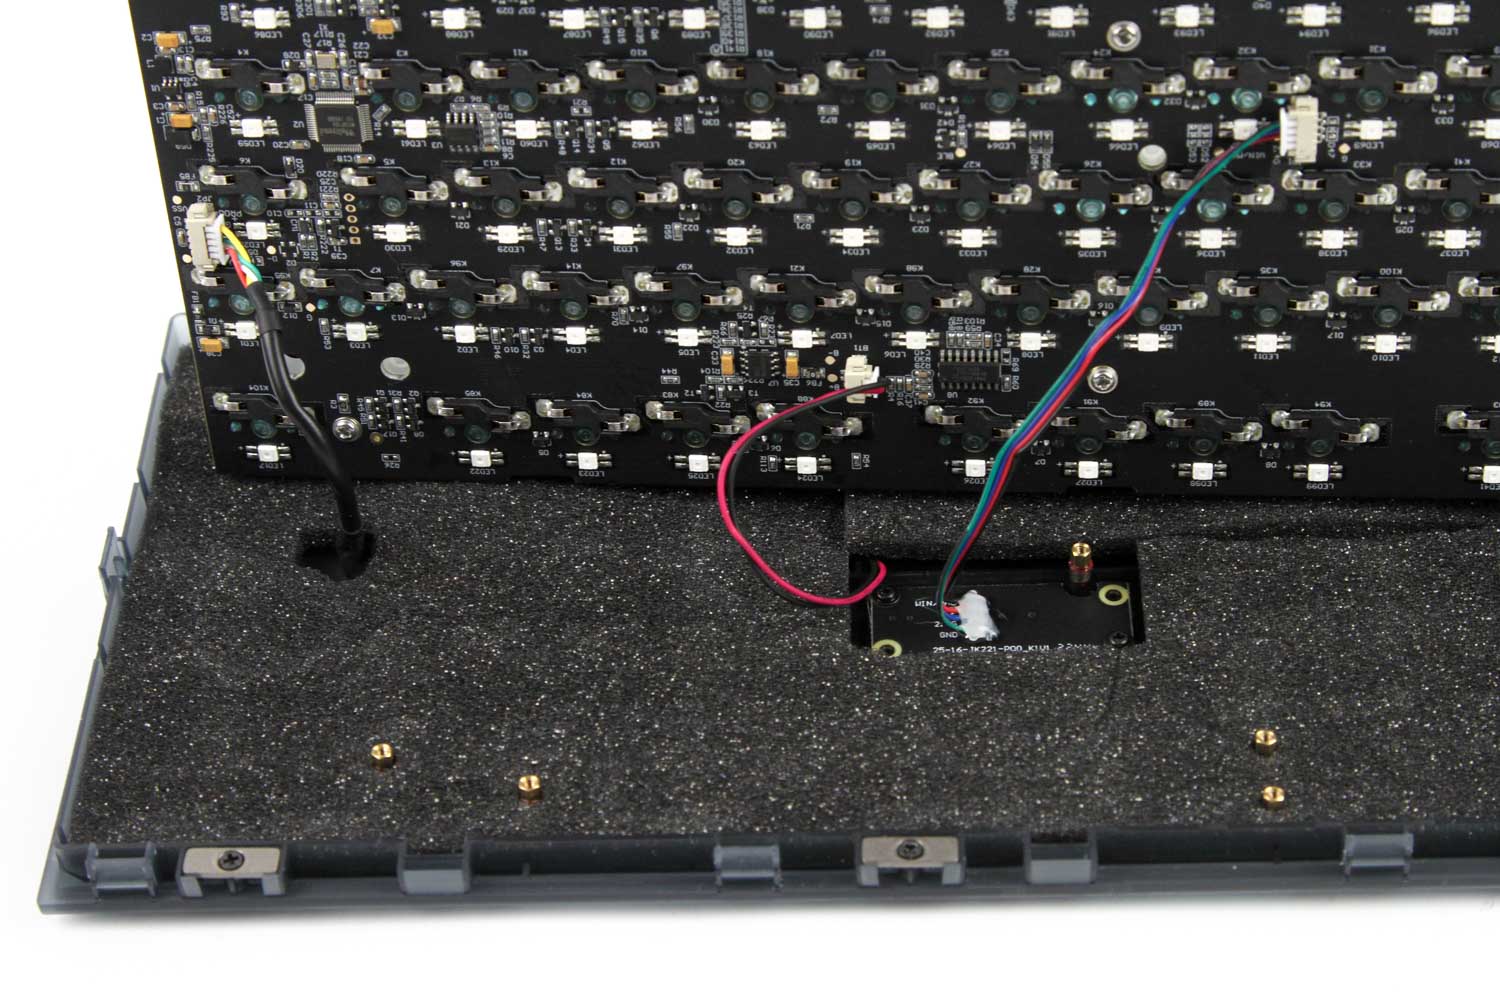
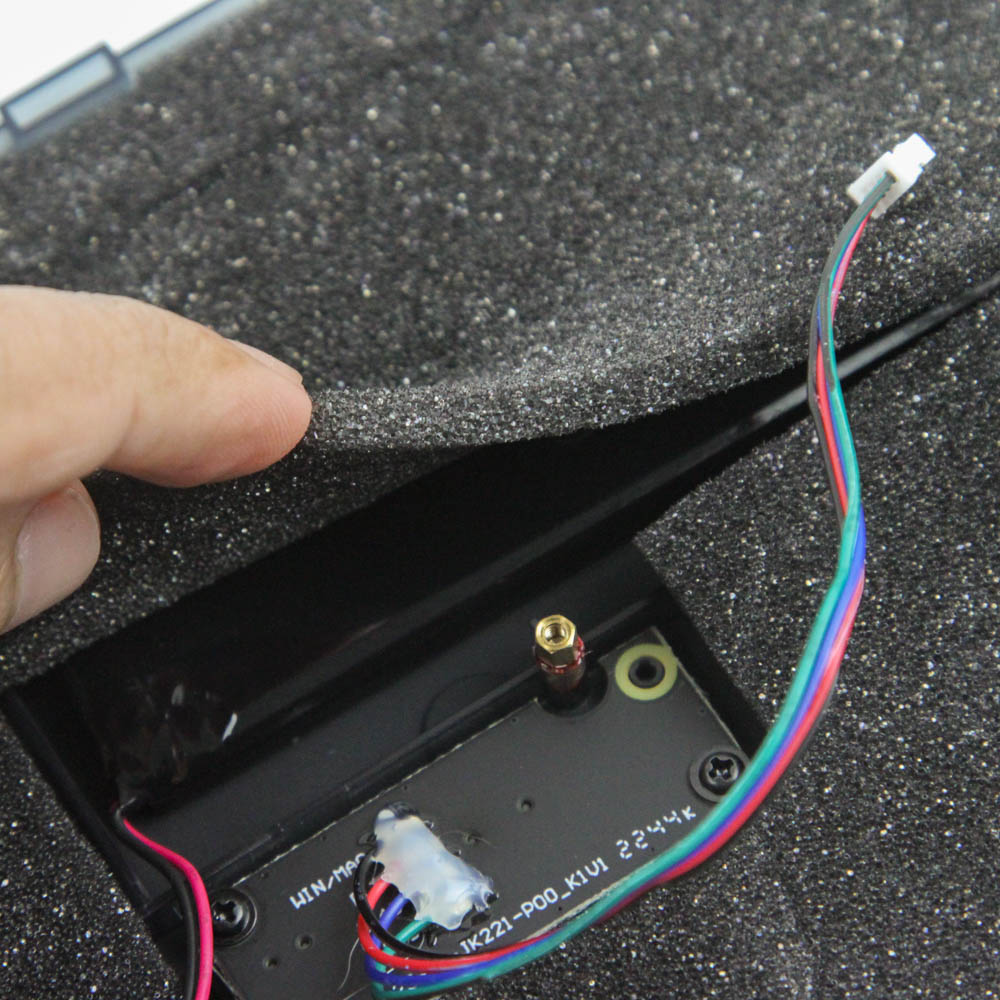
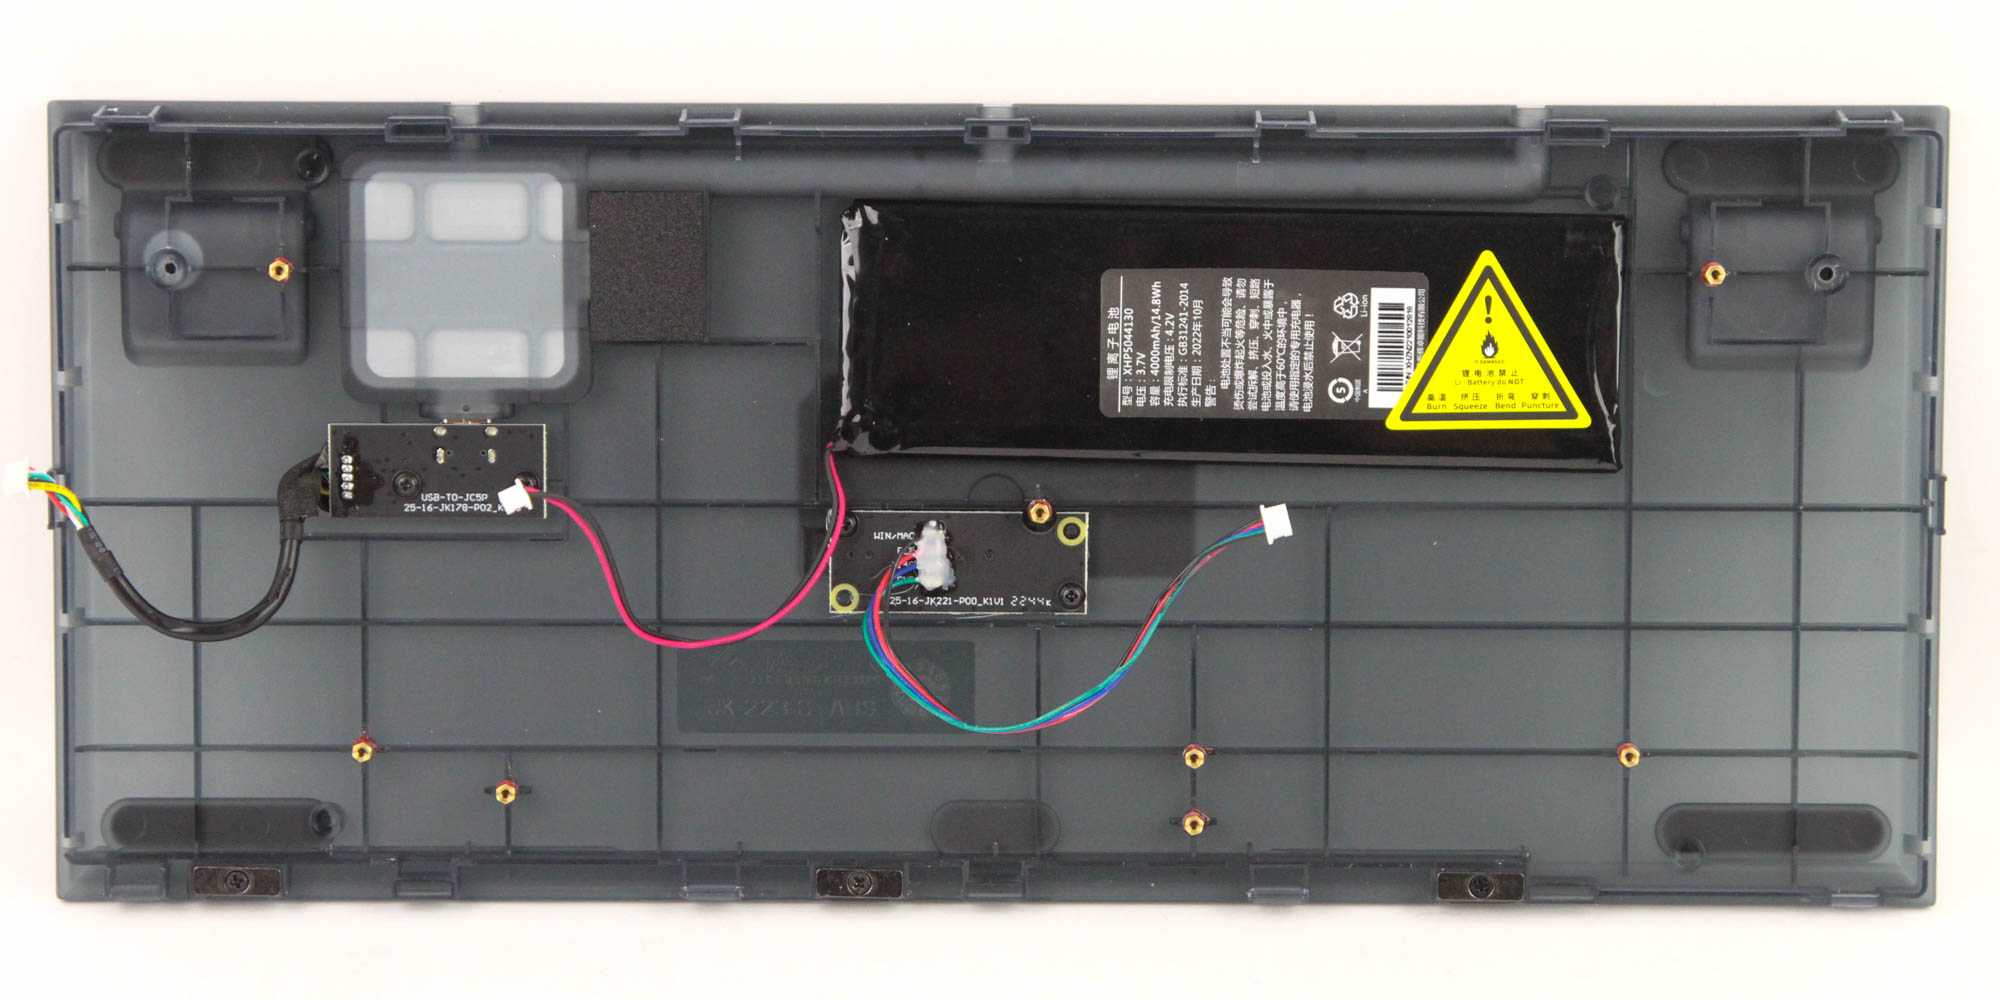
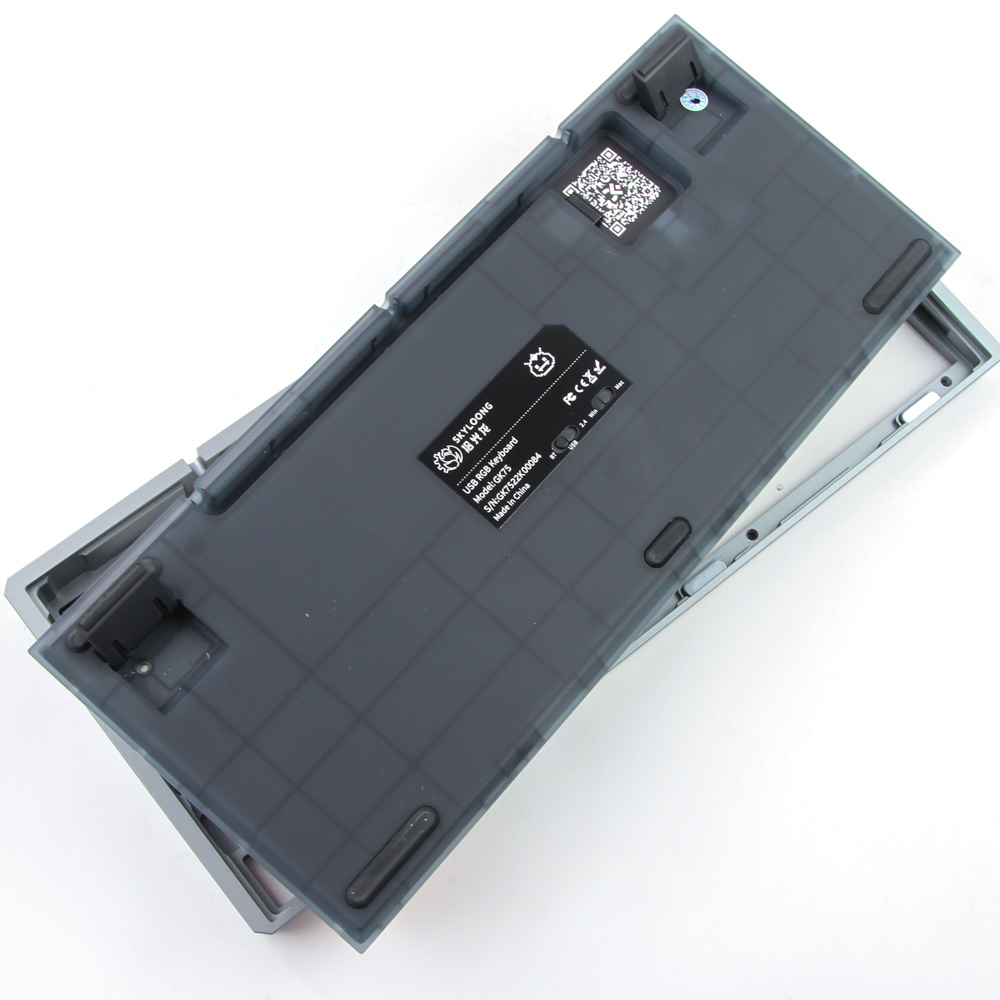
Further disassembly was done purely out of personal interest—there is not much to be gained here. Remove more keycaps to access eight Phillips head screws, including the three on the space bar module, that need to be removed to separate the plate/PCB piece from the bottom case panel. Note the silicone washers used throughout for added dampening. At this point you can separate the two pieces enough to access the three internal cables to be dislodged next. Skyloong has placed a thick foam sheet between the PCB and the plate that is also of custom thickness and has specific cutouts for the various cables and parts including daughter PCBs and the 4000 mAh battery on the ABS plastic bottom panel. There are larger batteries available on keyboards, including the recently reviewed Epomaker EP75 with its mammoth 10,000 mAh battery, but this is still more than respectable.
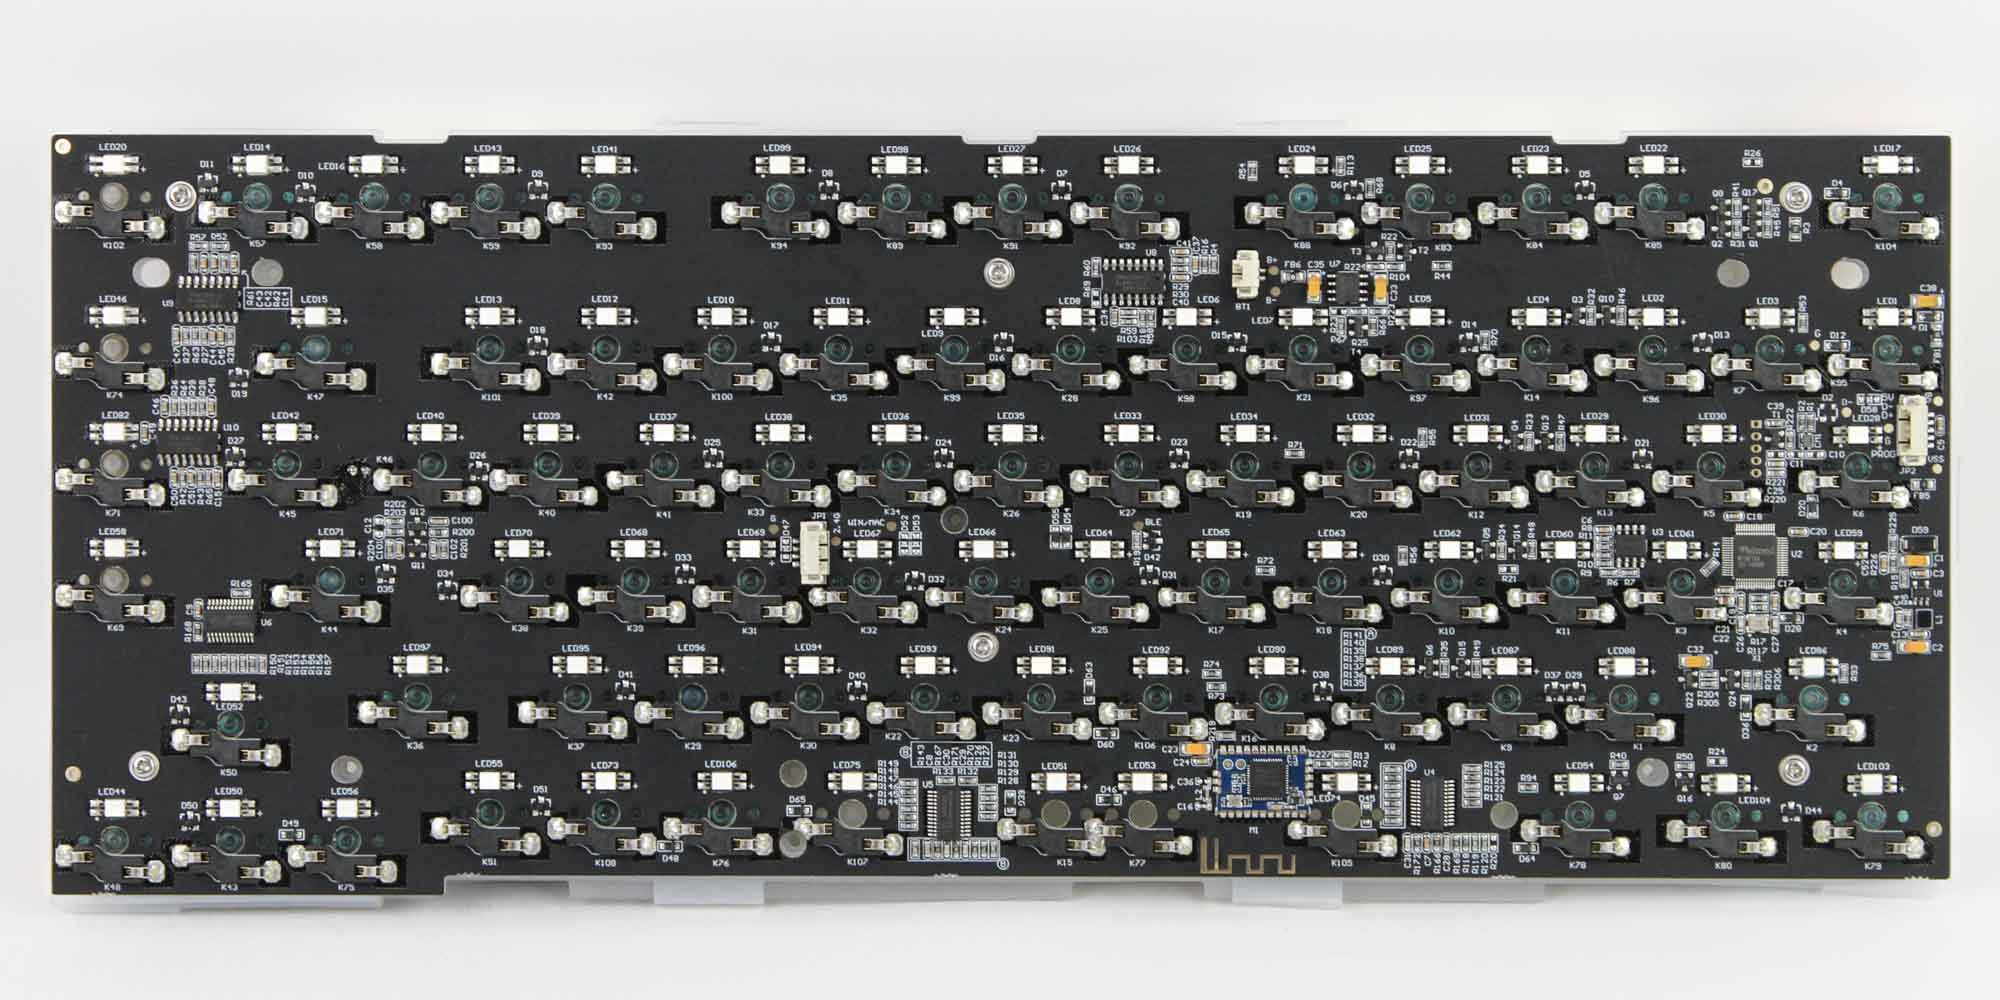
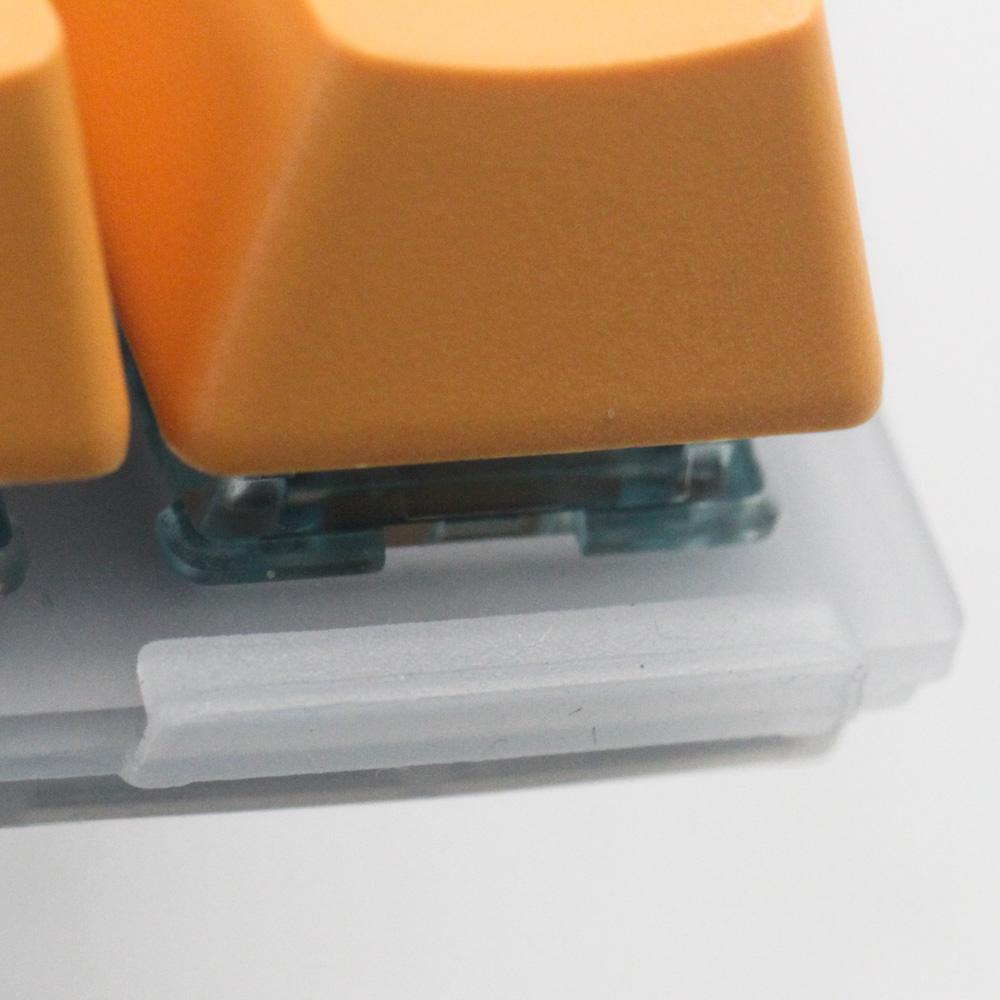
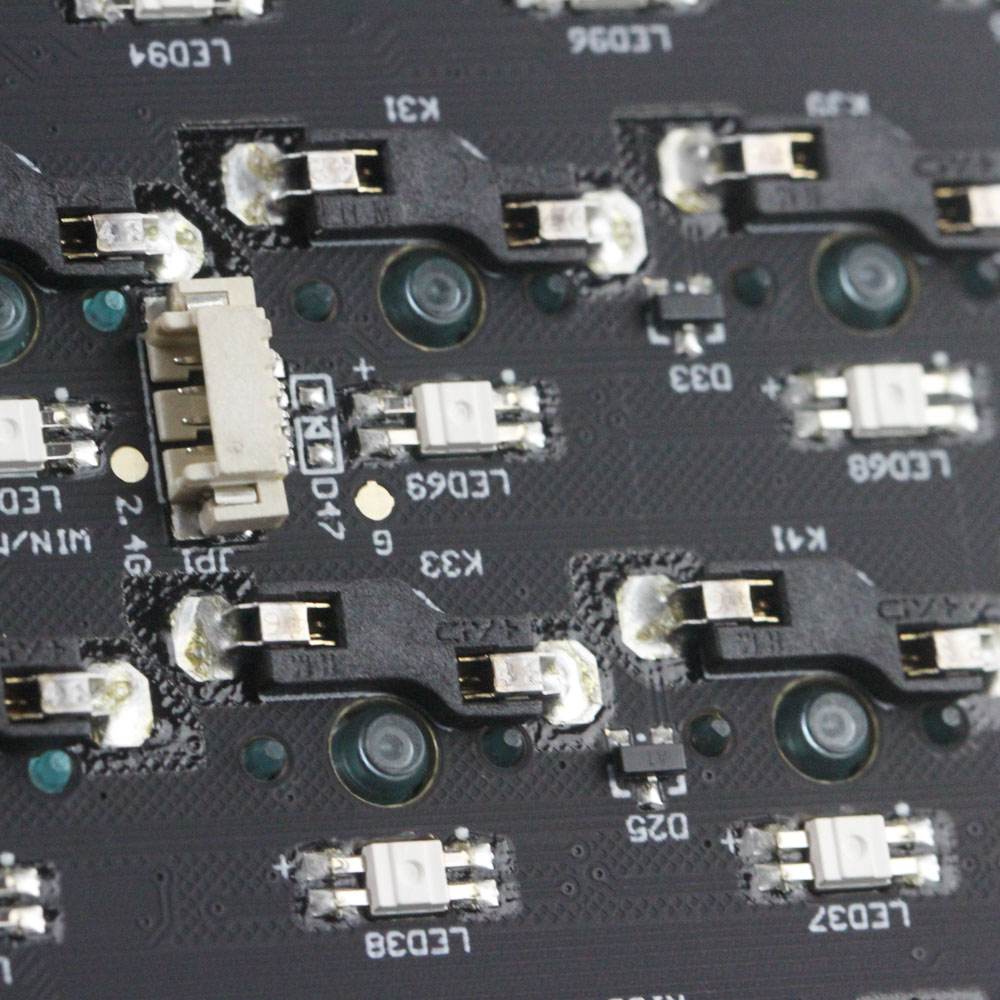
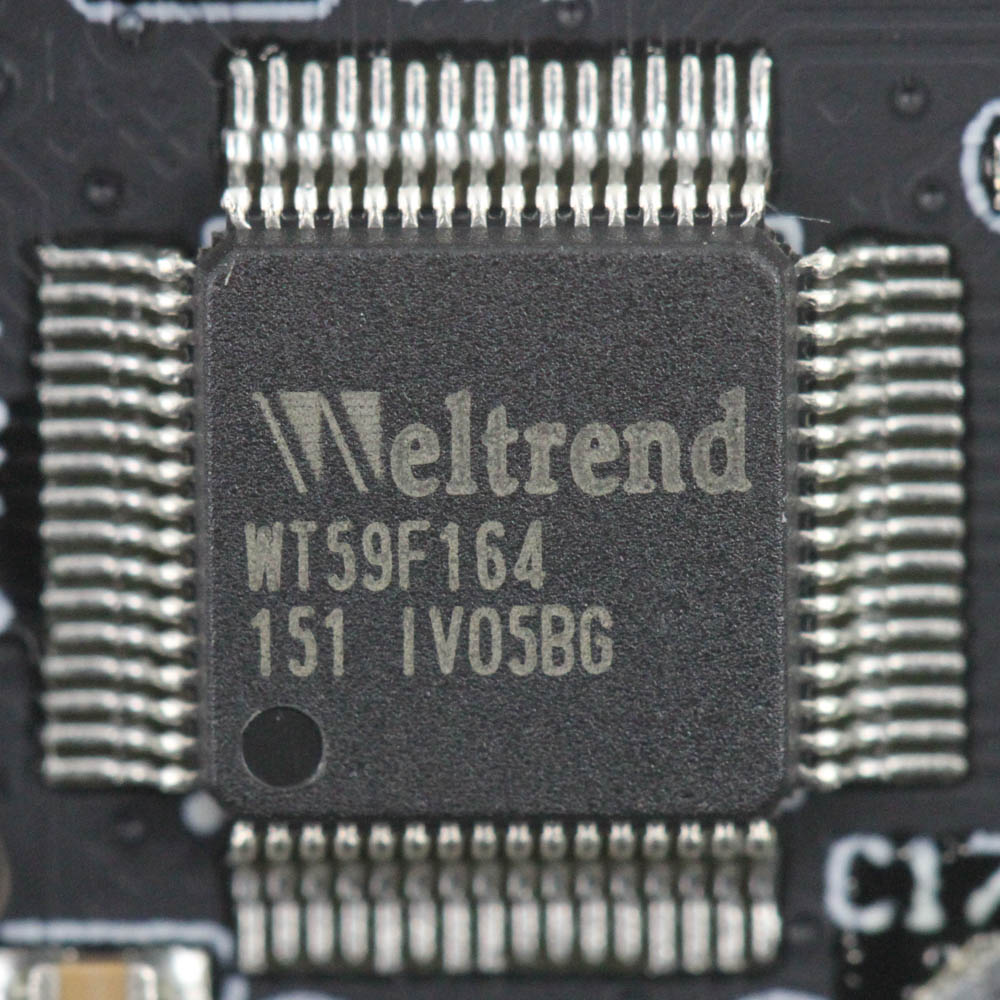
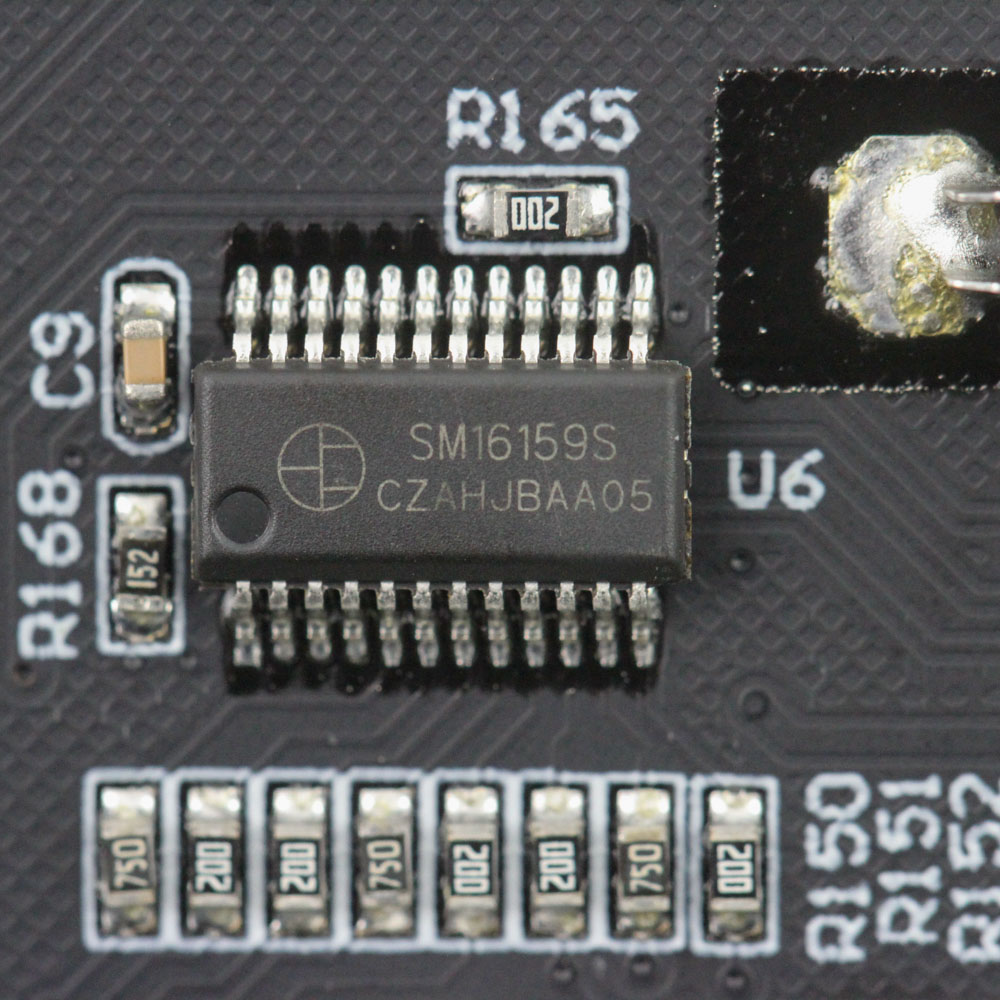
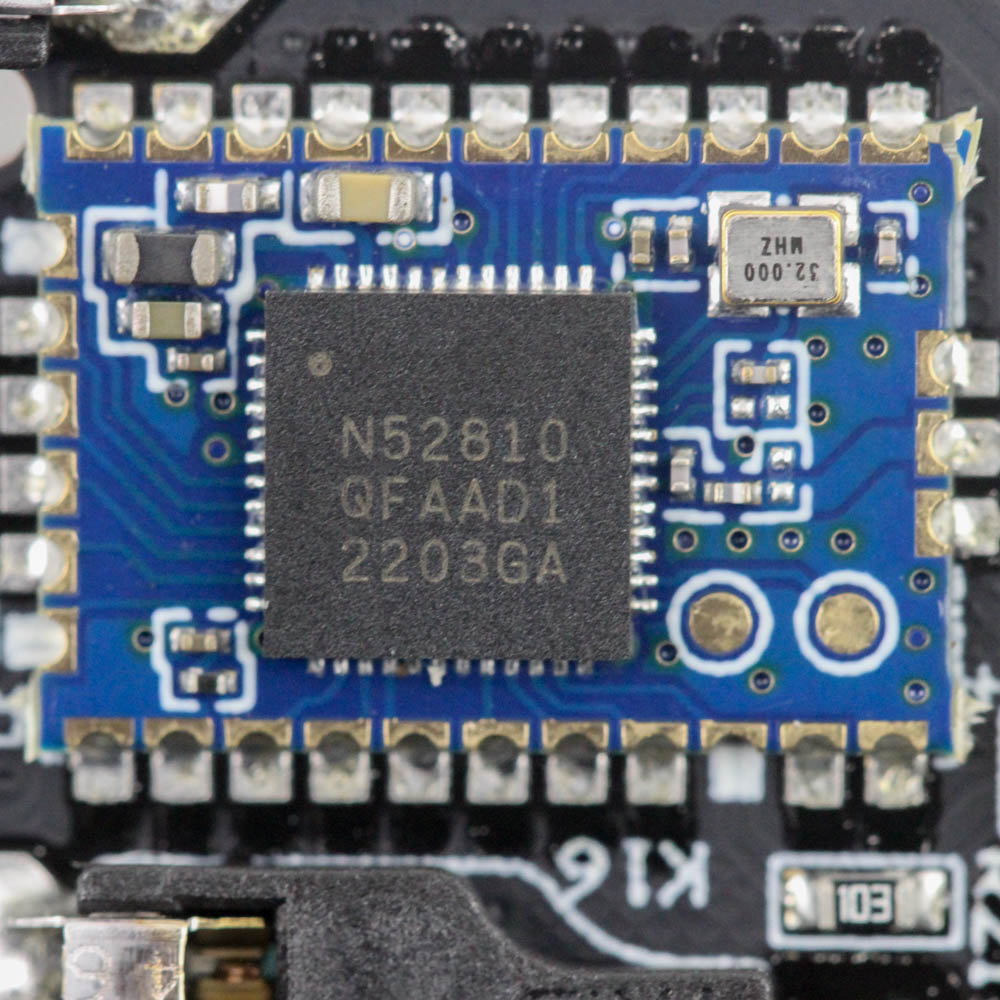
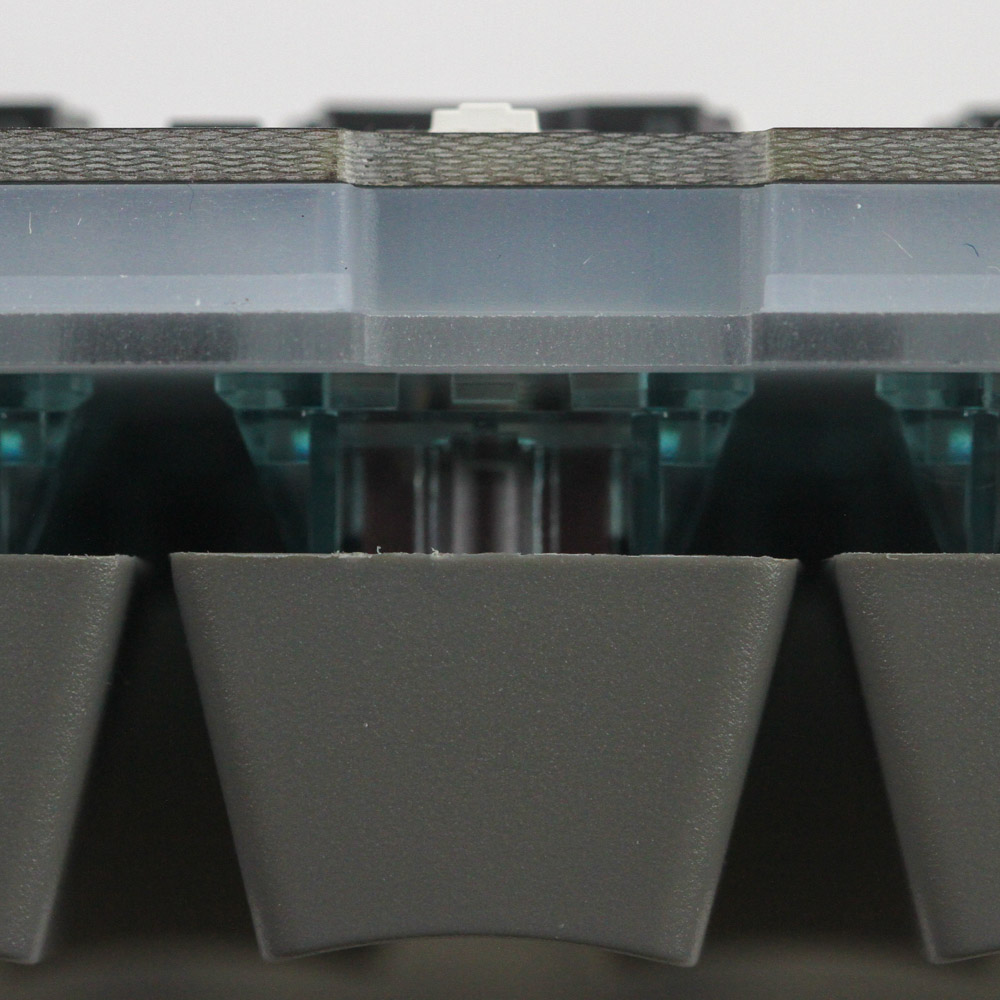
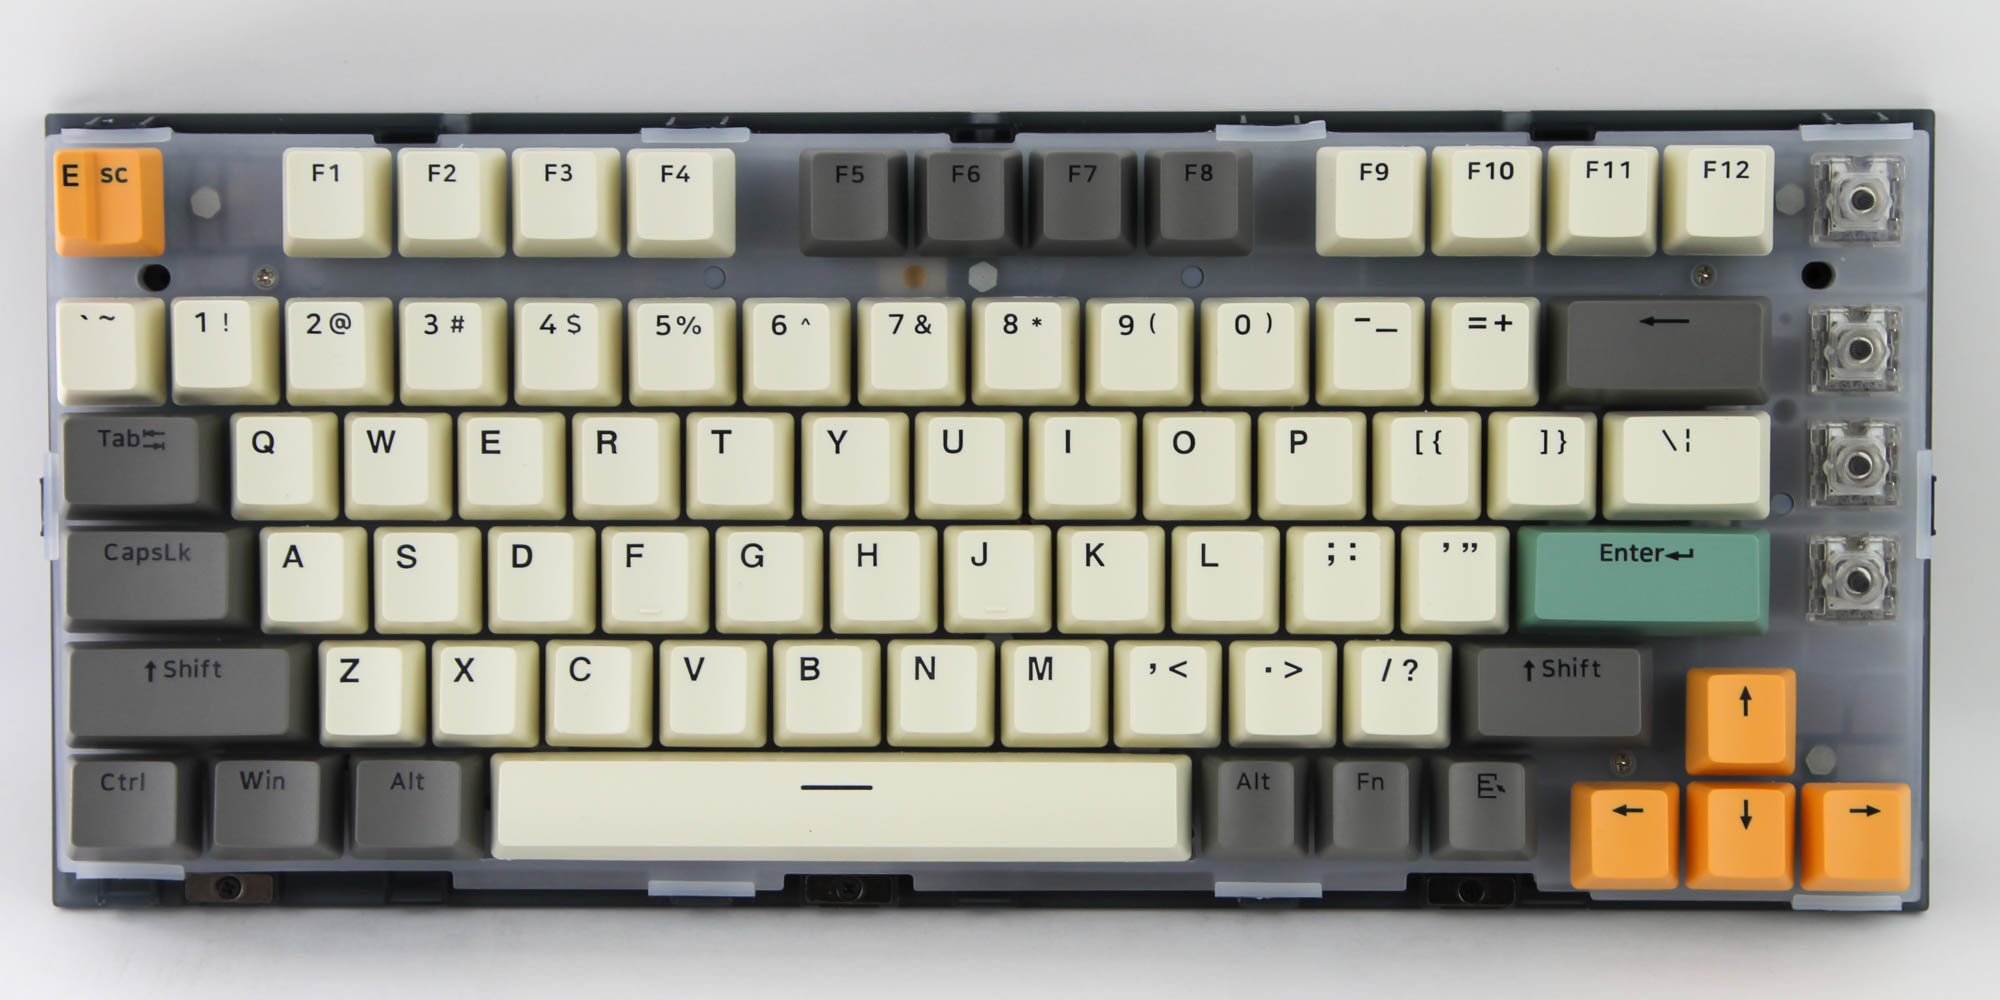
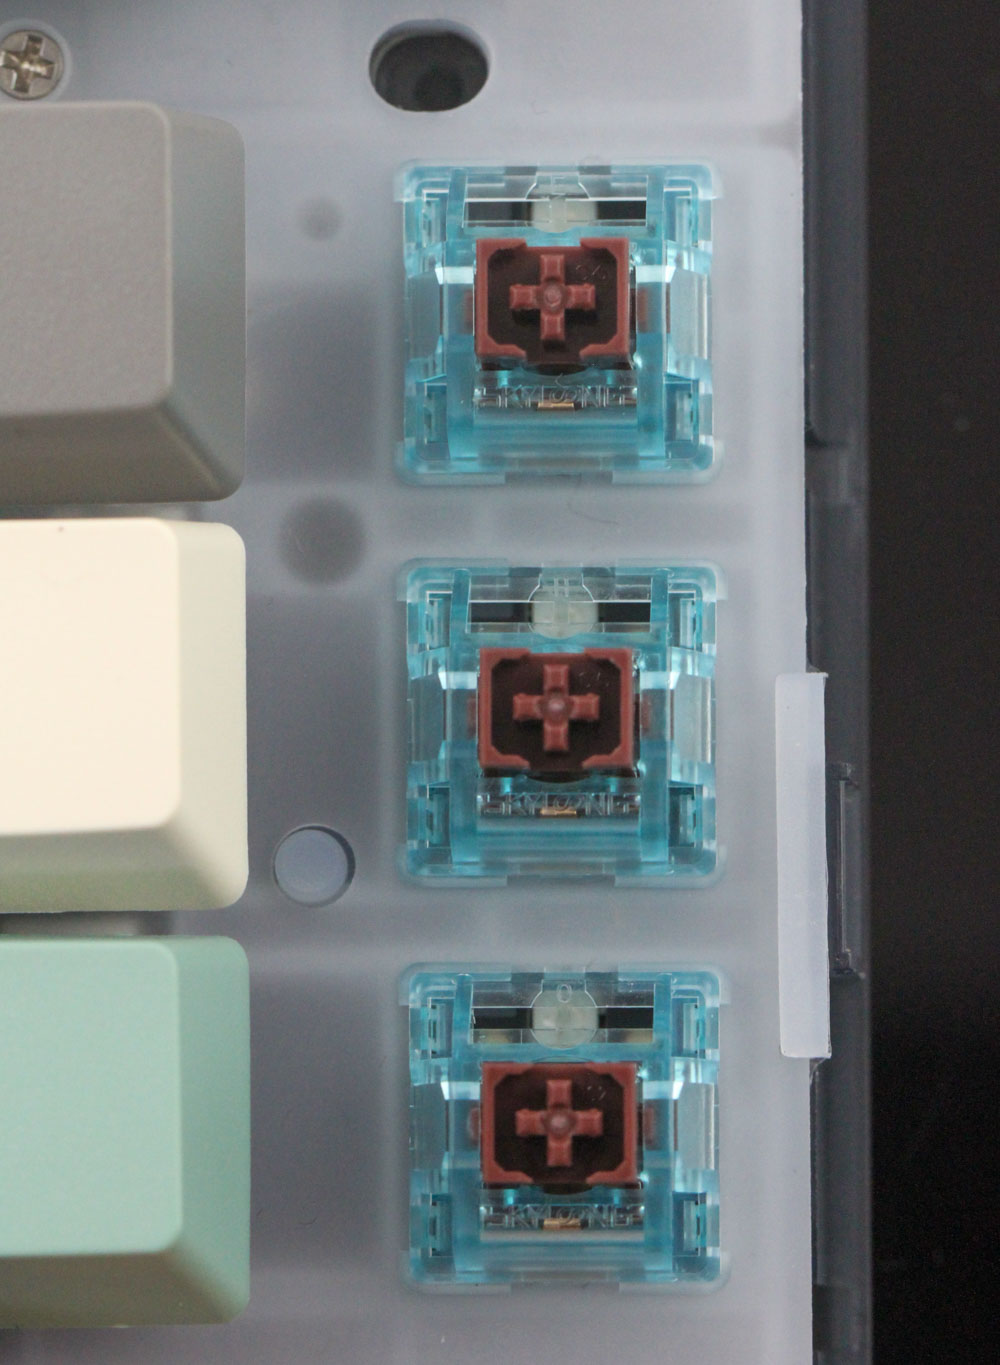
Given the hot-swappable switches on board, you can choose to remove every single keycap and switch to further separate the plate and the PCB. Skyloong sells the GK75 with FR4, steel, or polycarbonate plates and I have the latter here. The different materials will influence the typing feeling and sound to an extent—especially if you bottom out the switches. The GK75 also uses what Skyloong calls a "shallow gasket mount" which we saw on the Epomaker Lite before. There are silicone gaskets placed around the PCB as seen above as opposed to thin foam pieces on the top and bottom which make for a true gasket mount. This still helps support the keystrokes in a similar manner to where I dare say most users looking at this keyboard will be left satisfied. The keyboard uses a black PCB with CIY-branded hot-swap switch sockets. Solder quality is generally good throughout although the pins on the hot-swap sockets could have been more neatly added in place. Powering the GK75 is a Weltrend WT59F164 32-bit USB microcontroller for the wired connectivity option. It is based on the RISC microarchitecture with up to 64 KB flash and 8 KB RAM. There are also six separate Shenzhen Sunmoon SM16159S LED drivers to run all the RGB LEDs on the keyboard. Helping out with the wireless connectivity is a Nordic Semiconductor nRF52810 Bluetooth 5.3 and 2.4 GHz SoC albeit the GK75 is only rated for Bluetooth 5.1 support. As is the norm these days, all the components, including the switch sockets, SMD RGB LEDs, and capacitors, are soldered to a multi-layered PCB. There is a thicker silicone sheet between the steel plate and the PCB to further dampen keystrokes on top of the thinner silicone gaskets.
Before we move on, be advised that disassembly may void the warranty and that TechPowerUp is not liable for any damages incurred if you decide to go ahead and do so anyway.
Jul 5th, 2025 16:19 CDT
change timezone
Latest GPU Drivers
New Forum Posts
- Do you use Linux? (677)
- Optane performance on AMD vs Intel (58)
- Frametime spikes and stuttering after switching to AMD CPU? (521)
- Stalker 2 is looking great. (187)
- b550m aorus elite not posting with new ram (7)
- Gigabyte graphic cards - TIM gel SLIPPAGE problem (131)
- Can you guess Which game it is? (203)
- How do you view TPU & the internet in general? (With poll) (74)
- EVGA XC GTX 1660 Ti 8GB ROM (9)
- What are you playing? (23892)
Popular Reviews
- NVIDIA GeForce RTX 5050 8 GB Review
- Fractal Design Scape Review - Debut Done Right
- Crucial T710 2 TB Review - Record-Breaking Gen 5
- ASUS ROG Crosshair X870E Extreme Review
- PowerColor ALPHYN AM10 Review
- Sapphire Radeon RX 9060 XT Pulse OC 16 GB Review - An Excellent Choice
- Upcoming Hardware Launches 2025 (Updated May 2025)
- AMD Ryzen 7 9800X3D Review - The Best Gaming Processor
- Sapphire Radeon RX 9070 XT Nitro+ Review - Beating NVIDIA
- NVIDIA GeForce RTX 5060 8 GB Review
TPU on YouTube
Controversial News Posts
- Intel's Core Ultra 7 265K and 265KF CPUs Dip Below $250 (288)
- NVIDIA Grabs Market Share, AMD Loses Ground, and Intel Disappears in Latest dGPU Update (212)
- Some Intel Nova Lake CPUs Rumored to Challenge AMD's 3D V-Cache in Desktop Gaming (140)
- NVIDIA GeForce RTX 5080 SUPER Could Feature 24 GB Memory, Increased Power Limits (115)
- Microsoft Partners with AMD for Next-gen Xbox Hardware (105)
- NVIDIA Launches GeForce RTX 5050 for Desktops and Laptops, Starts at $249 (105)
- AMD Radeon RX 9070 XT Gains 9% Performance at 1440p with Latest Driver, Beats RTX 5070 Ti (102)
- Intel "Nova Lake‑S" Series: Seven SKUs, Up to 52 Cores and 150 W TDP (100)