 9
9
ssupd Meshlicious Review - Doubling Down on Mesh
Assembly & Finished Looks »A Closer Look - Inside
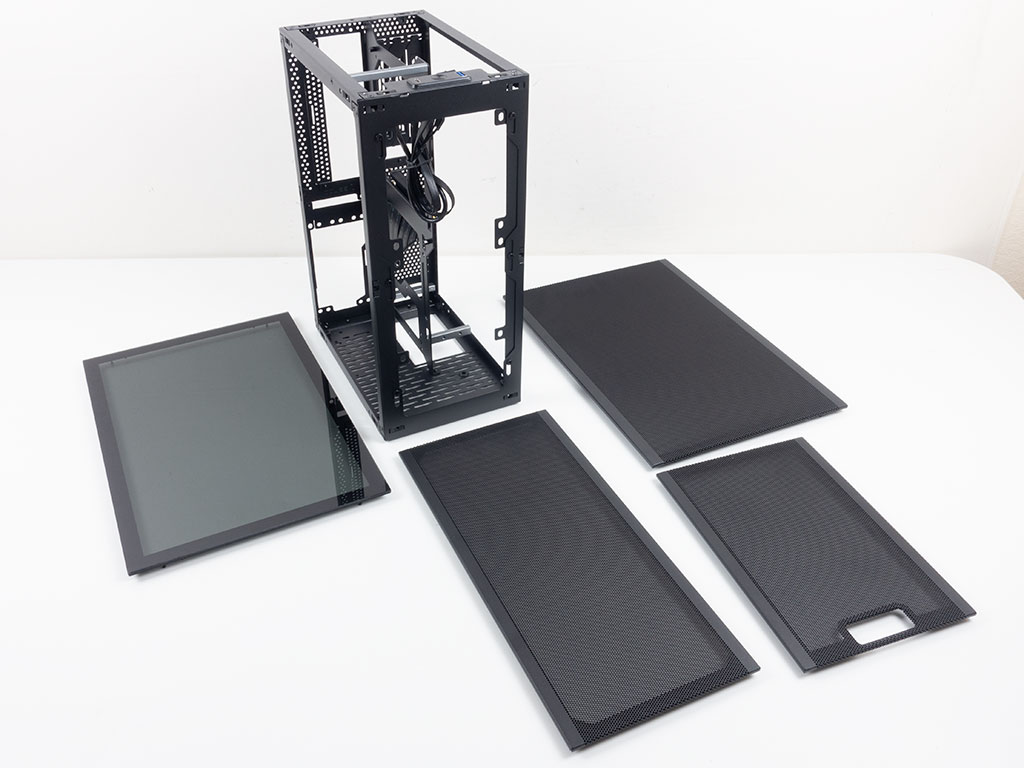

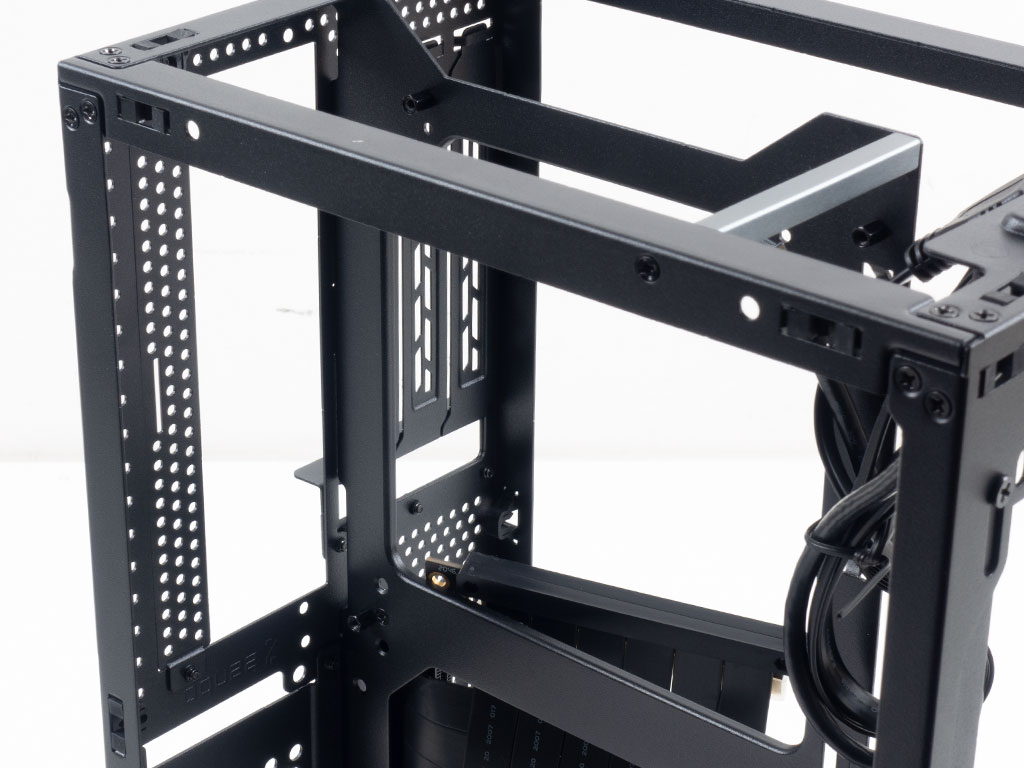
You do not need any tools to take apart the ssupd Meshlicious. Simply pull each of the four panels off and you are left with nothing but the frame. This will make assembly nice and painless. Even without the panels, the frame feels nice and sturdy. In the front, you may mount two 120 or 140 mm fans or a 240 or 280 mm radiator. This is excellent for a case of this size, especially as it is not obstructive and does not really require you to make any component-specific compromises.

On the GPU side, there is not much else by default—we got the variant that comes bundled with the PCIe 4.0 riser cable, which has been folded to accommodate the vertical, long GPU setup out of the box. ssupd also sells the cable separately, just as it does a longer, straight PCIe 3.0 cable for the horizontal, shorter GPU setup, which then allows you to install up to two additional 3.5" drives or four additional 2.5" drives within the Meshlicious.
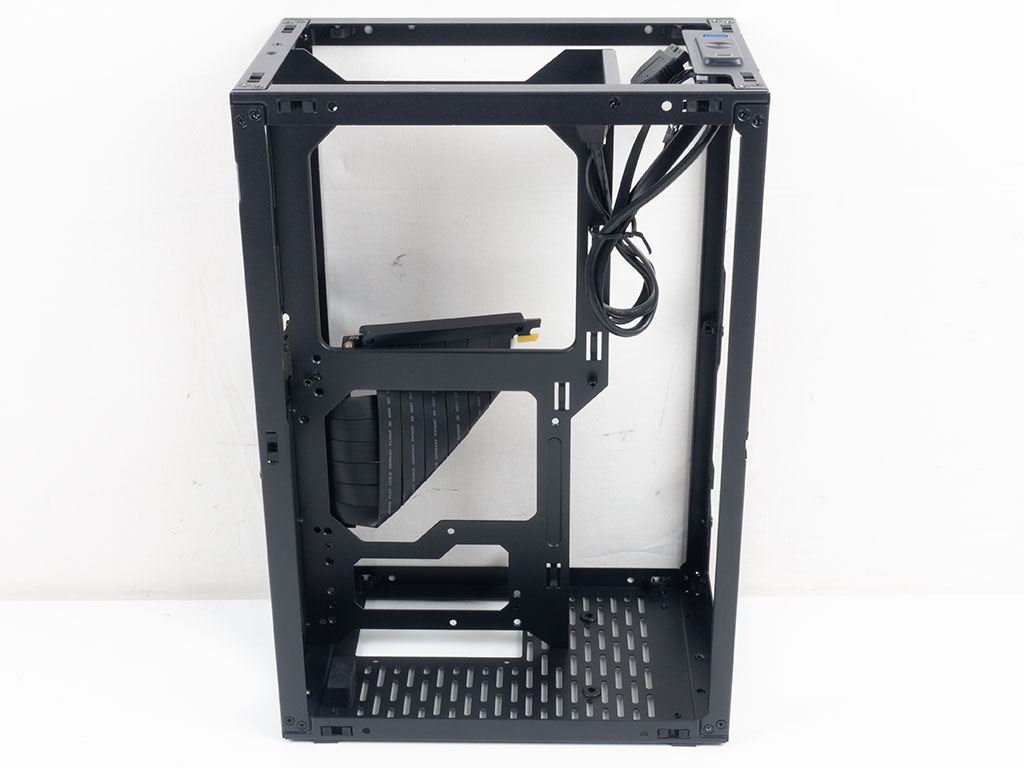
The motherboard side focuses on the brains of the system, along with the power supply below it, with the mounting tray for the board being pretty bare and allowing for cables to reach it from all three sides because of large cutouts.

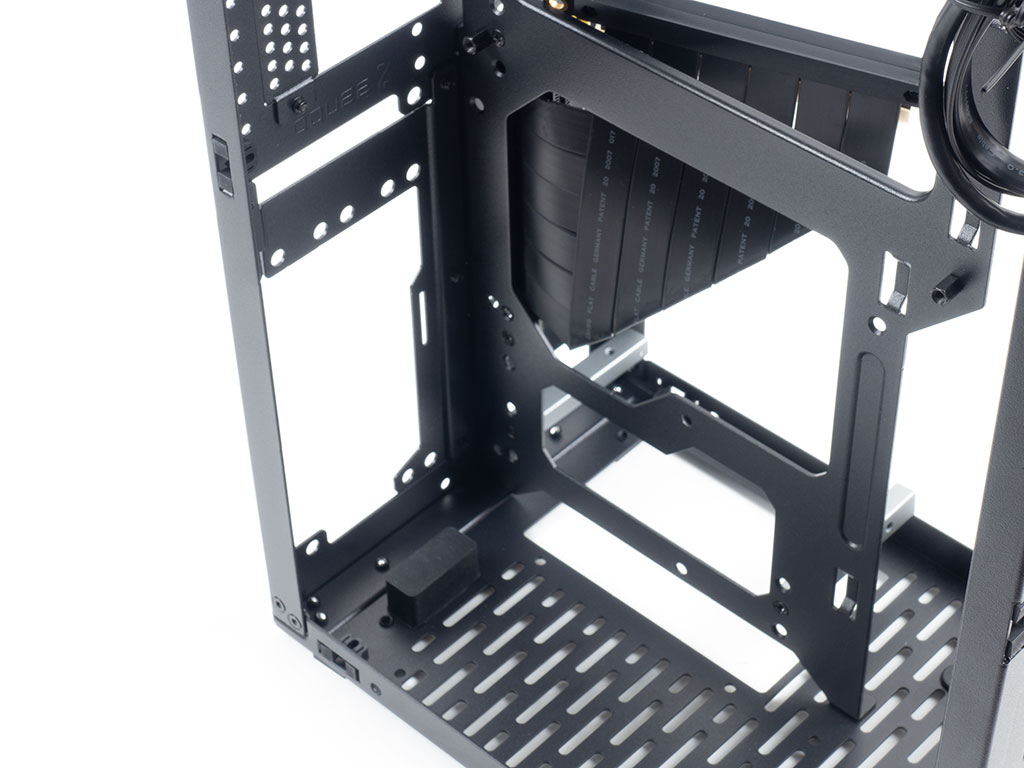
Taking a closer look at the bottom of the GPU side, there are cold blue spacers which act as the mounting points for the vertically mounted GPU. ssupd allows you to install a three-slot card without having to do anything here. If you opt for a vertical mounting of a short GPU, this area is where you will install the frame the additional storage will attach to. If you look closely, you can see that ssupd allows you to move the GPU mounting brackets up or down by offering a total of three mounting holes, which means you have to move the position of the PCIe riser cable as well. We used the top-most position to have as much room for the display cables, which had the PCIe riser cable collide with the motherboard frame when routed through the opening because of the angled 45° corner cutout.
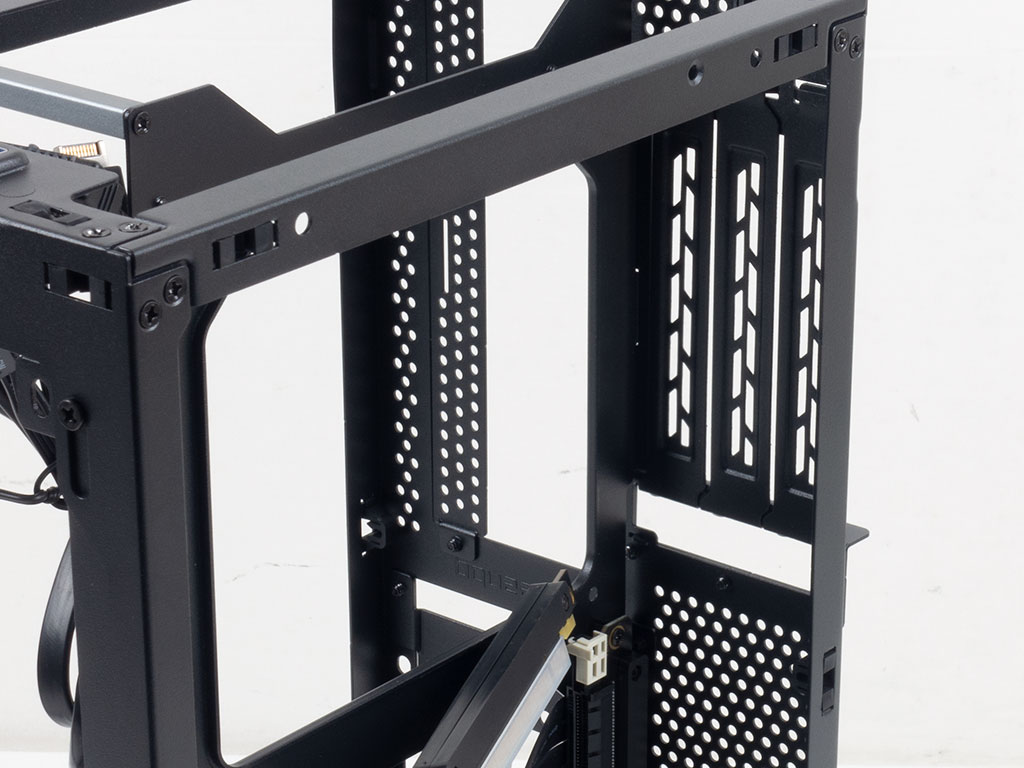
In the top is another set of three expansion slots for just such a configuration. It is not meant to be compatible with the four-slot setup as there are no short GPUs out there that need that space anyways.
Around the PSU bay, you will find a mounting position for an SSD right on the frame, facing the PSU side. This is the one you won't be able to use if going for a full-size ATX PSU. Above that, things look pretty traditional around the motherboard mounting area with the long support beam pre-installed out of the box.
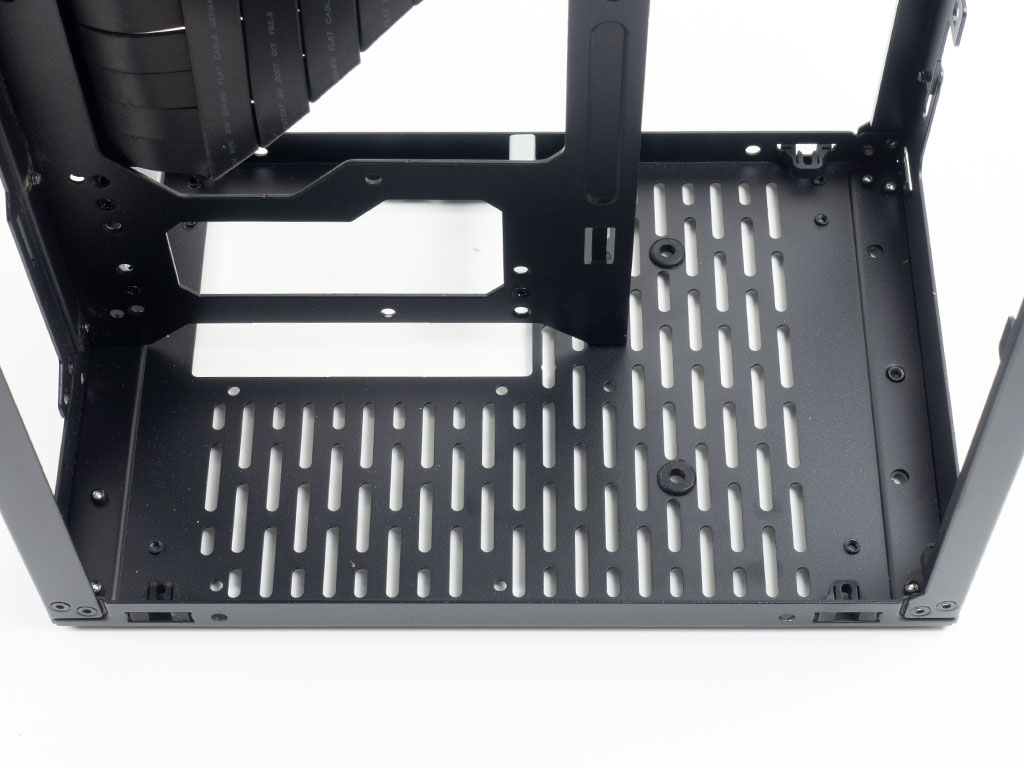
The two 2.5 storage options on the floor will remain usable no matter what, but as we will see later on, the one underneath the PSU will be a bit hard to reach. As you can see, the shorter GPU mounting bracket would go here if you move the whole mounting plate over. Doing so also means you loose some clearance for air coolers, so this setup is really only meant for extreme situations, like when using a GeForce RTX 3090 and liquid cooling on the CPU.

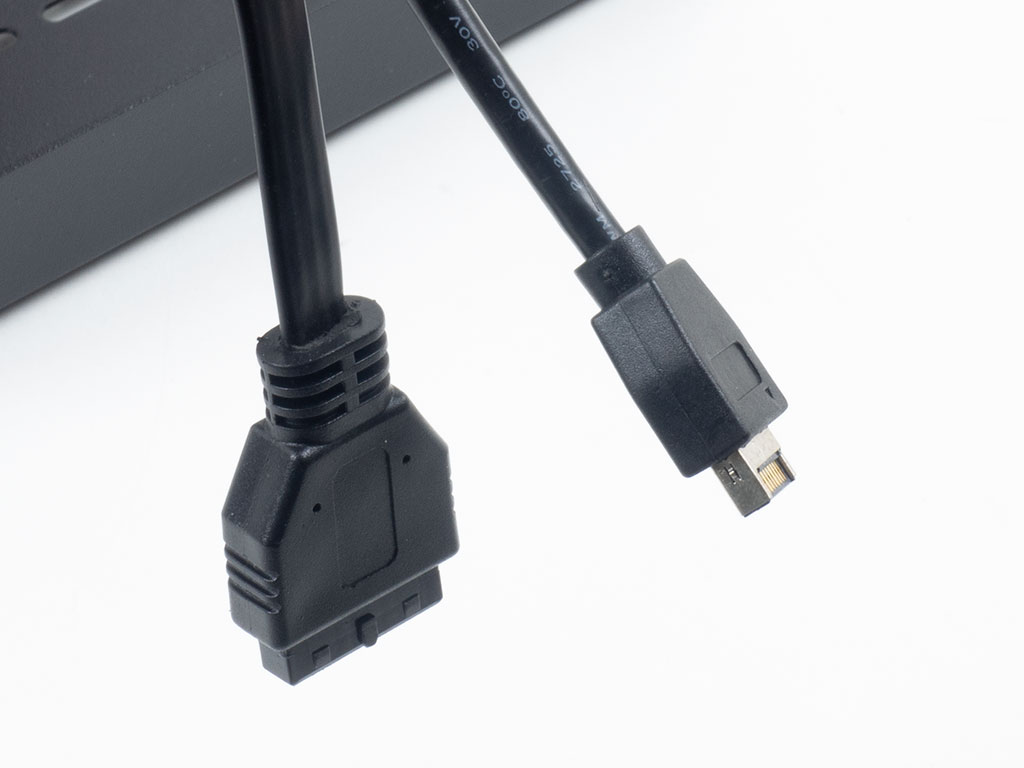
All the cables within the ssupd Meshlicious are sleeved black and of the default variety. The notable difference is the single flat cable for the 3.0 connector, which is in line with the IO you will have access to.
Jun 30th, 2025 20:03 CDT
change timezone
Latest GPU Drivers
New Forum Posts
- [INTEL]-How To Update Your Microcode for Intel HX 13/14th Gen. CPUs Laptops/Mobile Easily. (172)
- Will you buy a RTX 5090? (584)
- The TPU UK Clubhouse (26530)
- Optane and "enable write caching " (27)
- Question about Intel Optane SSDs (87)
- Do you use Linux? (664)
- Remember Fermi? Well here's my EVGA GTX 480 that I picked up for just 19 Euros! (9)
- Can you guess Which game it is? (194)
- Help me choose the right PSU , Cooler Master vs Seasonic (53)
- HOW TO ADD NVMe M.2 SSD SUPPORT TO OLD MOTHERBOARDS WITH AWARD-Phoenix LEGACY SUPPORT? (2)
Popular Reviews
- ASUS ROG Crosshair X870E Extreme Review
- Sapphire Radeon RX 9060 XT Pulse OC 16 GB Review - Samsung Memory Tested
- AVerMedia CamStream 4K Review
- Lexar NQ780 4 TB Review
- AMD Ryzen 7 9800X3D Review - The Best Gaming Processor
- Upcoming Hardware Launches 2025 (Updated May 2025)
- Sapphire Radeon RX 9070 XT Nitro+ Review - Beating NVIDIA
- AMD Ryzen 9 9950X3D Review - Great for Gaming and Productivity
- ASRock Phantom Gaming Z890 Riptide Wi-Fi Review
- NVIDIA GeForce RTX 5060 8 GB Review
TPU on YouTube
Controversial News Posts
- Intel's Core Ultra 7 265K and 265KF CPUs Dip Below $250 (288)
- NVIDIA Grabs Market Share, AMD Loses Ground, and Intel Disappears in Latest dGPU Update (204)
- Some Intel Nova Lake CPUs Rumored to Challenge AMD's 3D V-Cache in Desktop Gaming (140)
- NVIDIA Launches GeForce RTX 5050 for Desktops and Laptops, Starts at $249 (105)
- Microsoft Partners with AMD for Next-gen Xbox Hardware (105)
- Intel "Nova Lake‑S" Series: Seven SKUs, Up to 52 Cores and 150 W TDP (100)
- NVIDIA GeForce RTX 5080 SUPER Could Feature 24 GB Memory, Increased Power Limits (92)
- Reviewers Bemused by Restrictive Sampling of RX 9060 XT 8 GB Cards (88)