 9
9
ssupd Meshlicious Review - Doubling Down on Mesh
Thermal Stress Test »Review System
| System Parts for Case Reviews | |
|---|---|
| Processor: | Intel Core i5-9600K |
| Motherboards: | ASRock B365M-ITX/ac LGA 1151 |
| Graphics Card: | ATX/mATX: Palit GeForce RTX 2080 Gaming Pro OC ITX: ZOTAC GAMING GeForce RTX 3060 Ti Twin Edge OC |
| Memory: | Kingston HyperX Fury 16 GB DDR4 2666 MHz |
| HDD: | Western Digital 320 GB 7200 RPM |
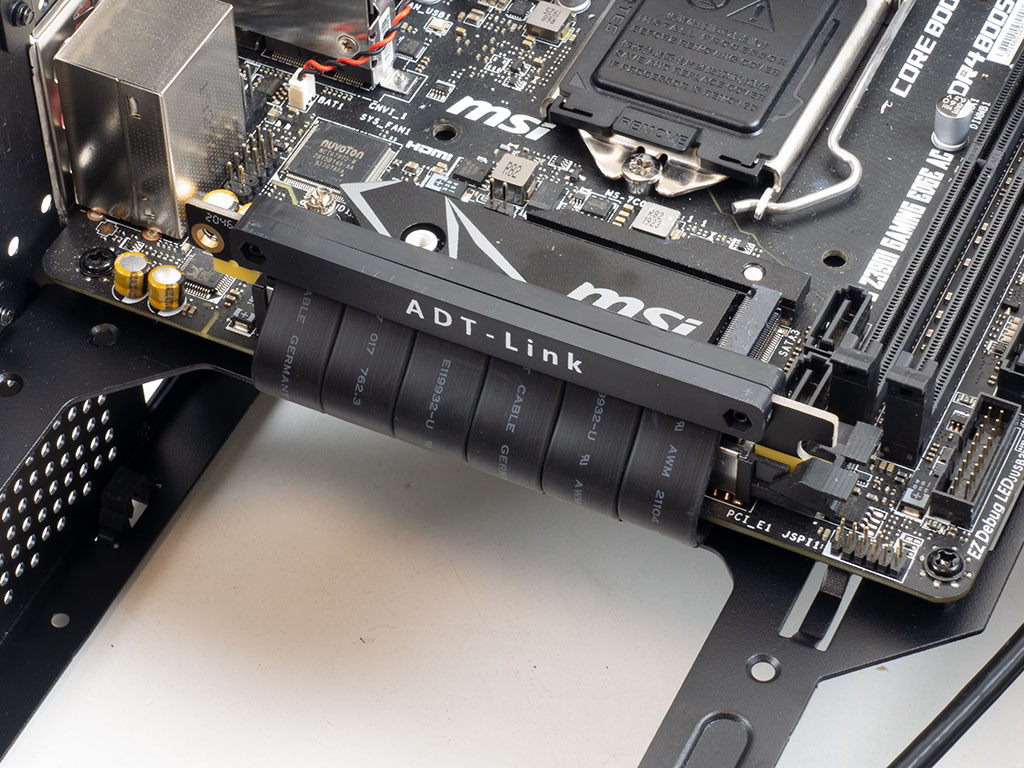
| SSD: | ITX: ADATA Swordfish 256 GB M.2 NVMe SSD mATX: ADATA GAMMIX S11 Pro M.2 256 GB ATX: ADATA SPECTRIX S40G M.2 256 GB ADATA XPG SX850 256 GB ADATA Ultimate SU630 240 GB ADATA Ultimate SU750 256 GB Provided by: ADATA |
| Power Supply: | Fractal Design ION+ 750W 80 Plus Platinum Provided by: Fractal Design |
| Cooling: | Noctua NH-L9x65 Low-Profile CPU Cooler Provided by: Noctua |
Assembly
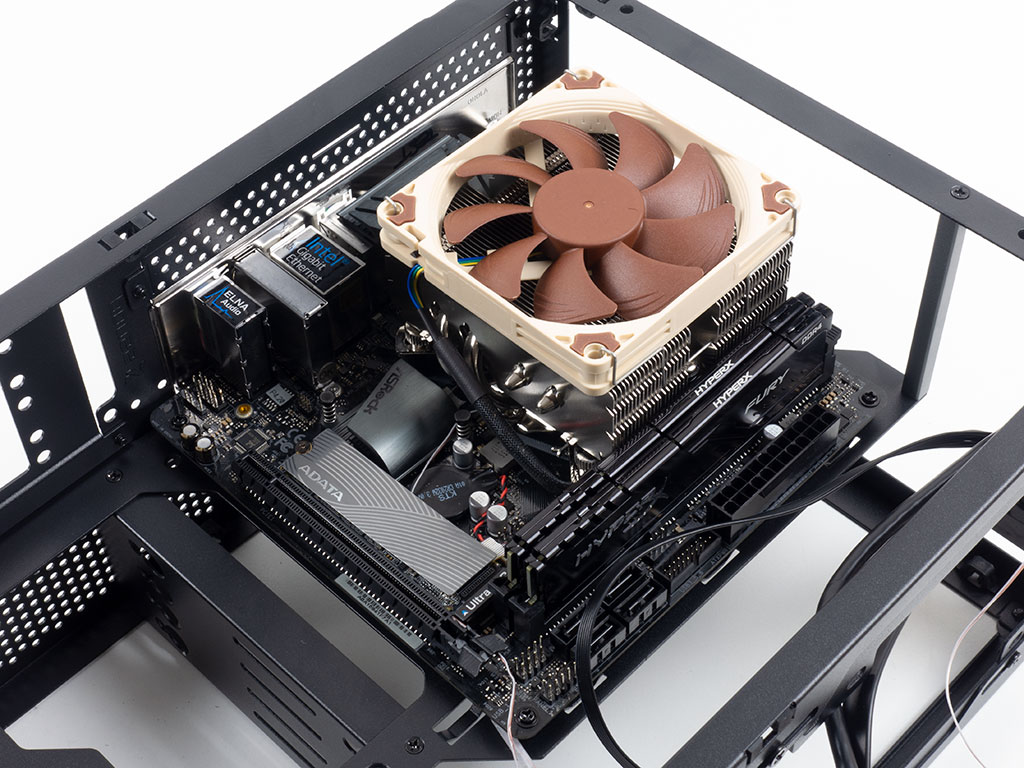
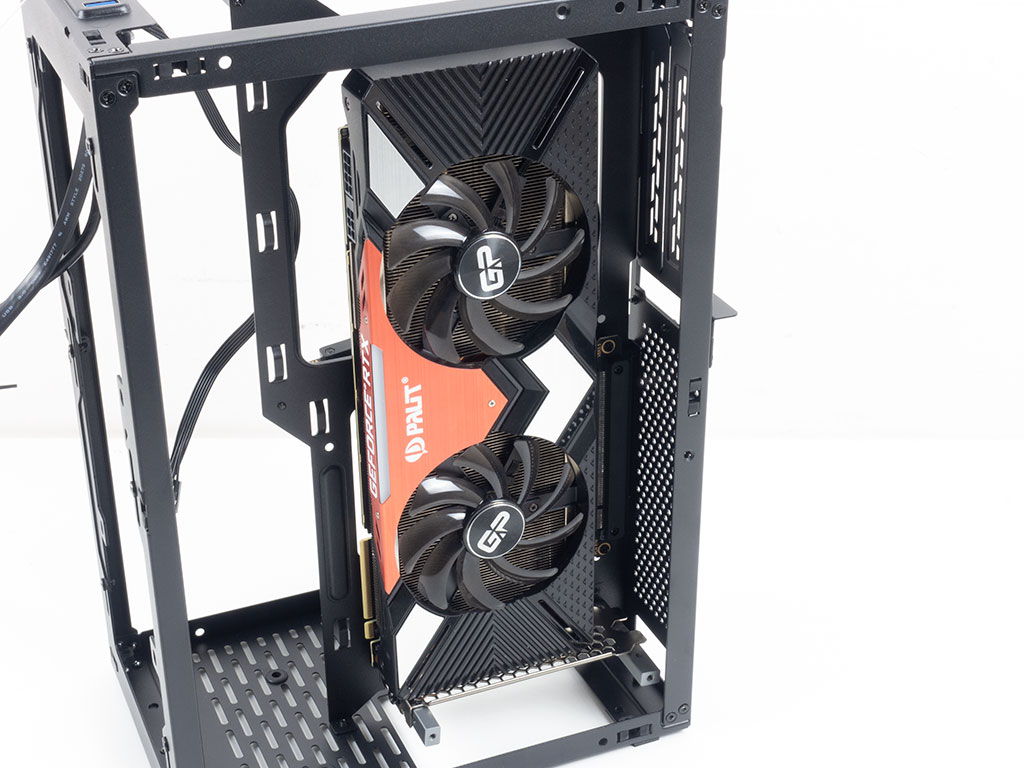
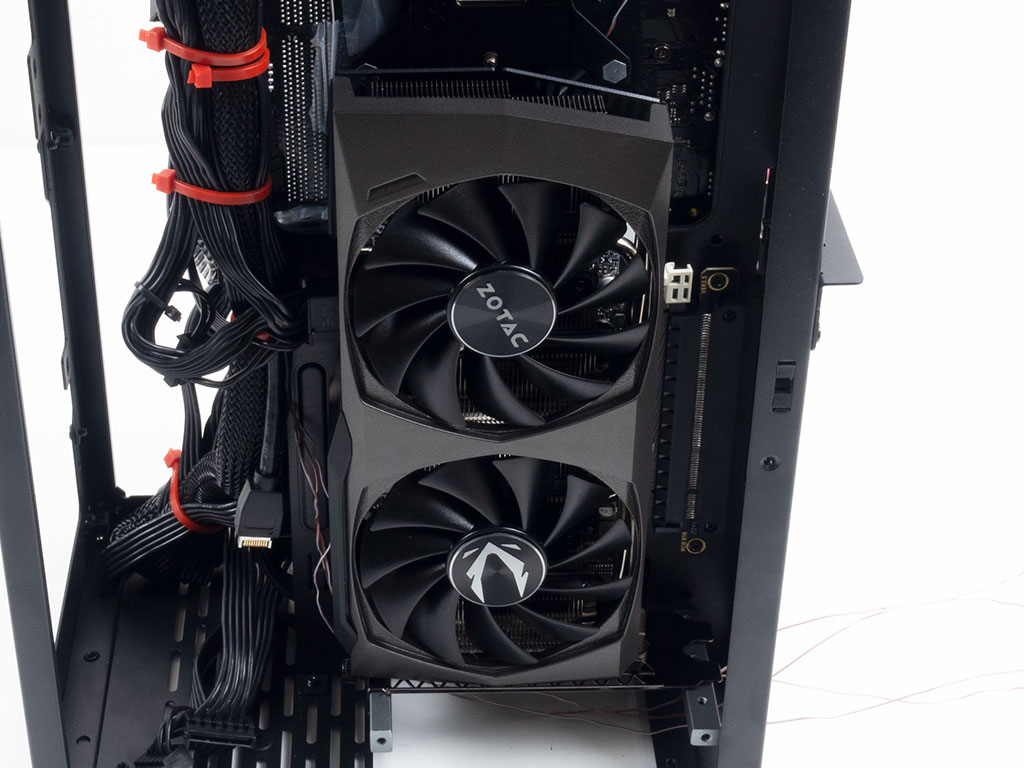
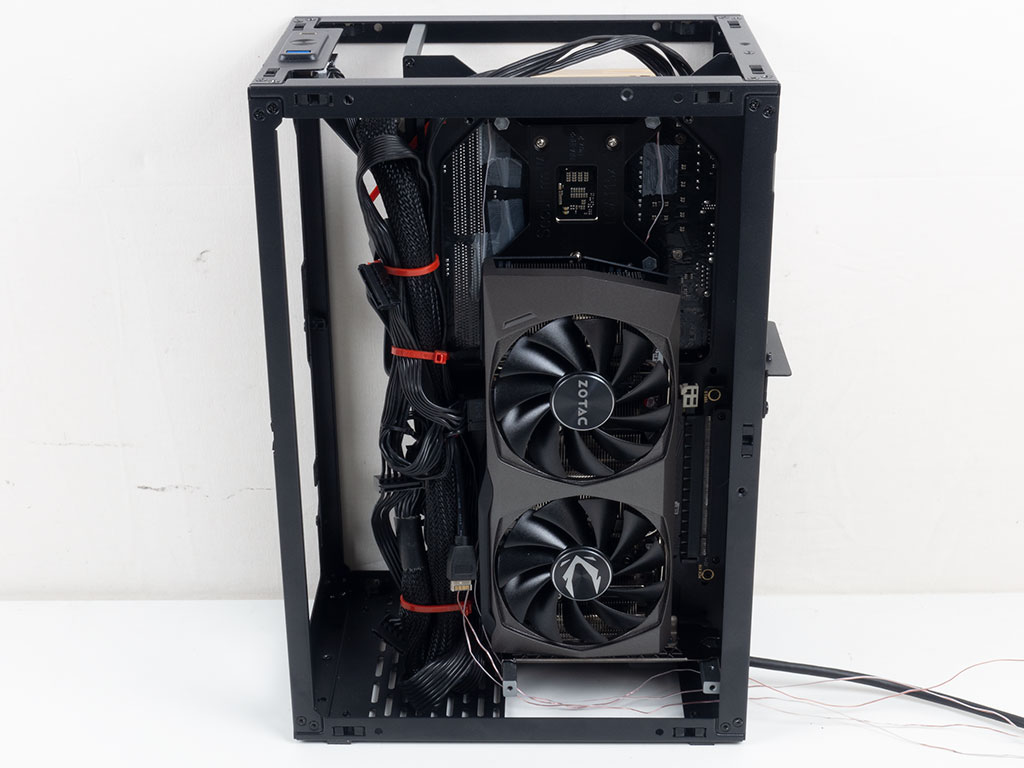
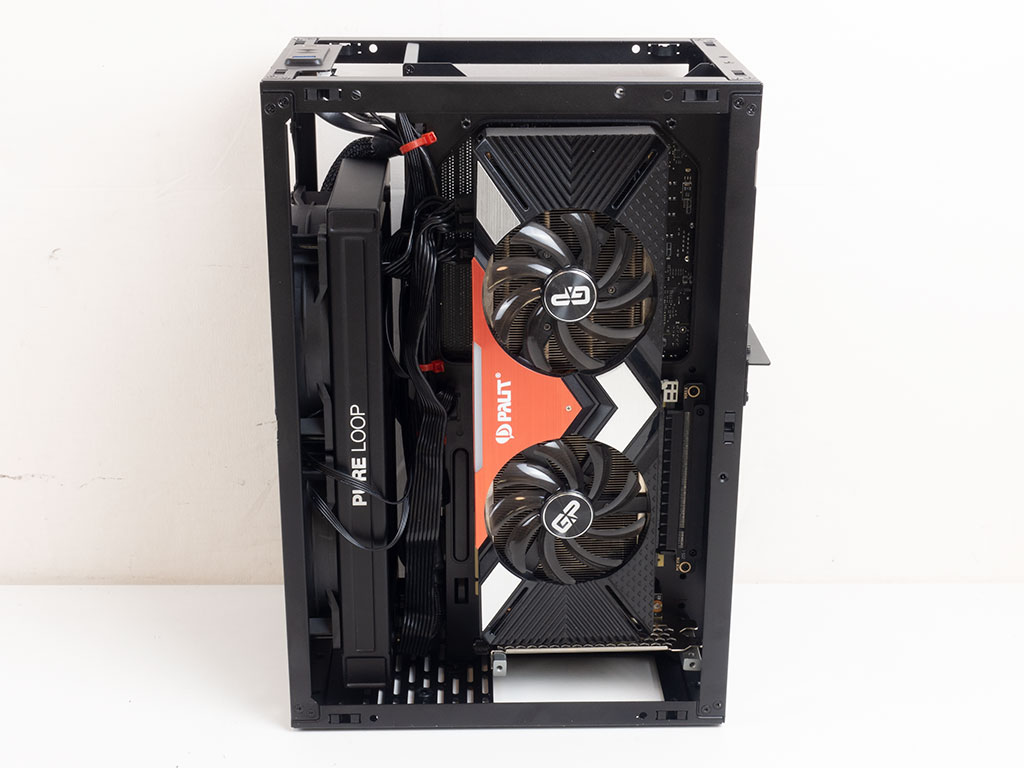
Installing the motherboard is simply done by screwing it into place, and just because the case allows for it, we installed a long GPU in the Palit GeForce RTX 2080 inside the chassis, which fit with ease.
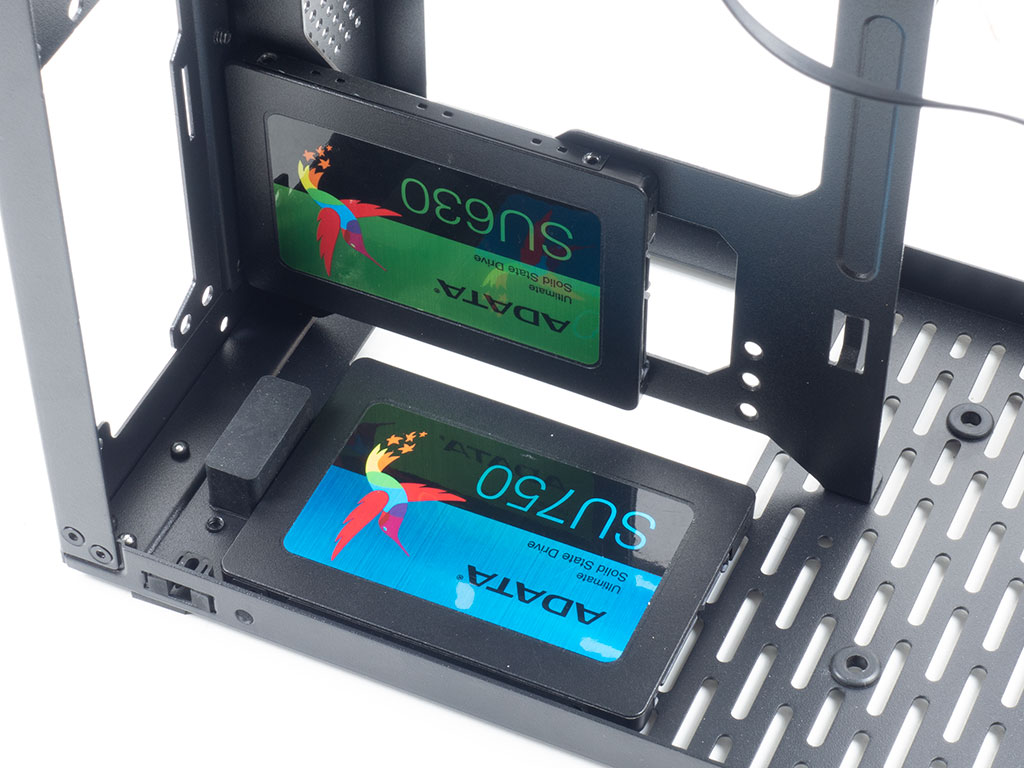
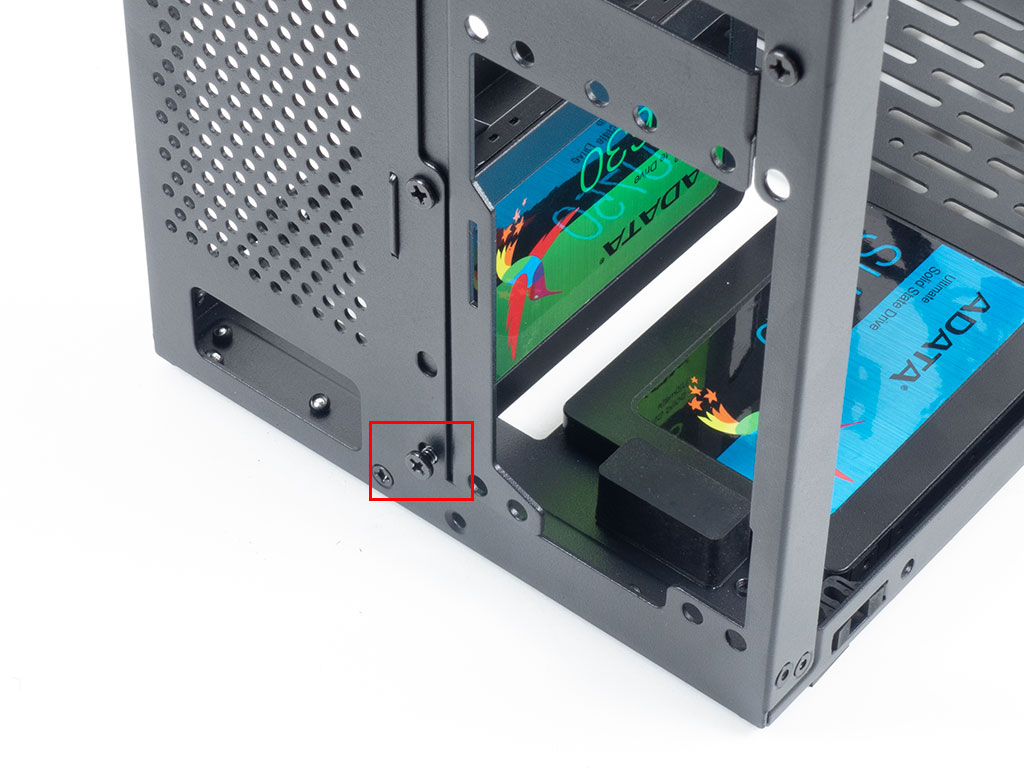
Adding SSDs for an SFX setup works to an extend. A screw in the back of the case holds the ATX to SFX frame in place, which was colliding with the SSD mounted on the center frame. ssupd could easily fix this by simply moving the mounting holes for this SSD 5 mm towards the front of the case. Our fix was to remove that one screw, which a user won't really notice, or miss.

However, when installing an ATX PSU, you have to give up that drive placement anyways. As you can see, even the blue ADATA SSD is hidden away as the power supply sits on top of it. That said, it is not out of reach, and we were able to connect it during the final assembly.
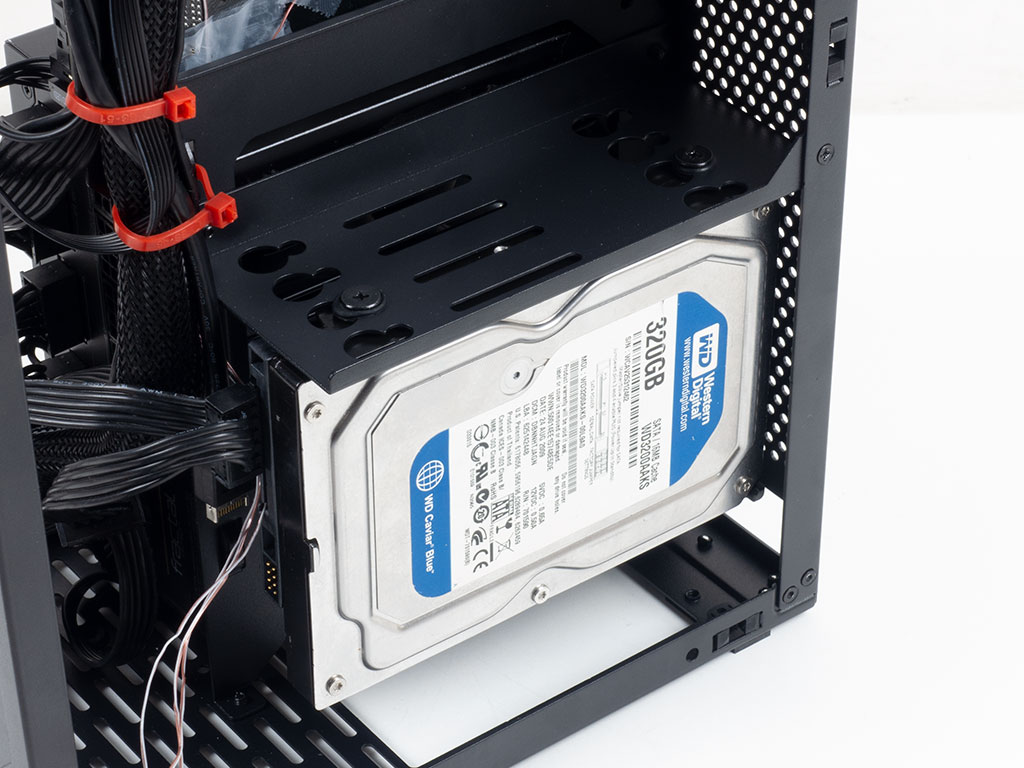

If you like, you may install up to two 3.5" drives within the ssupd Meshlicious and still fit a short GPU. The drives are mounted with screws and rubber rings as an anti-vibration measure. To add that dedicated GPU, route that optional PCIe 3.0 cable up vertically so that the connector faces down from the ceiling, which has the GPU sit upside down and horizontally with the fans facing outward.


This is actually a very interesting way to get both excellent performance and loads of cheap spinning storage into the case. Interestingly enough, ssupd offers a PCIe 4.0 riser cable for vertical mounting both as a bundle for a $60 premium or separately at $75. As a point of comparison, the longer, straight PCIe 3.0 riser cable sells for $35. As there is virtually no performance difference, users may be more inclined to buy the bare case and spend the difference elsewhere.
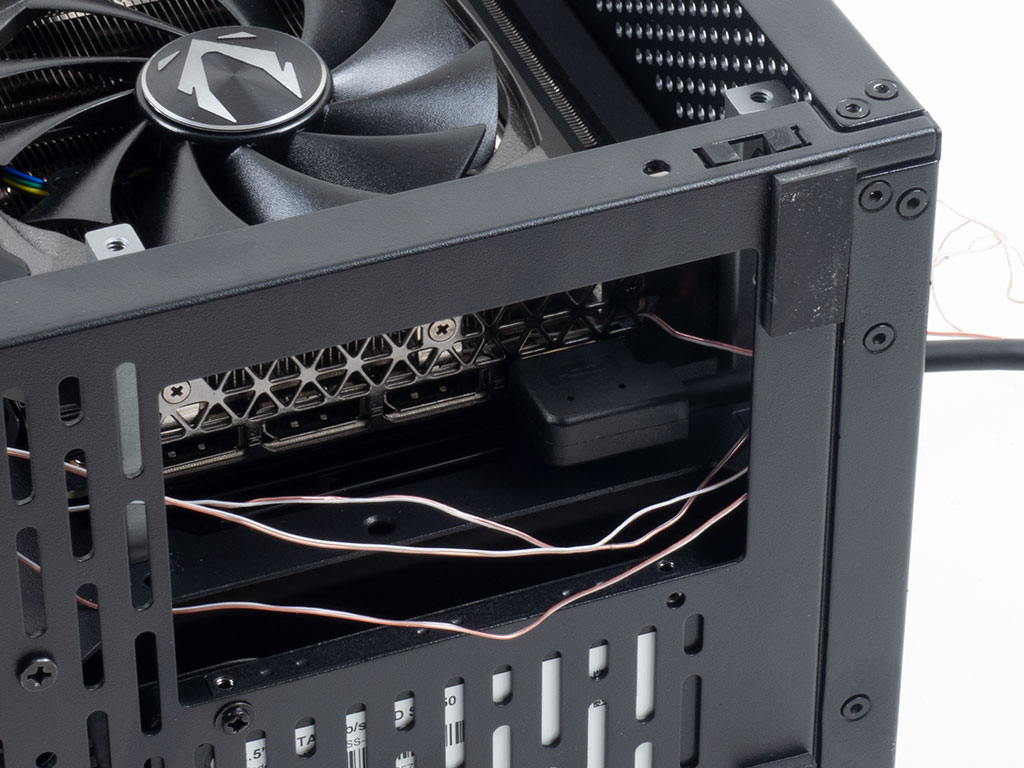
The final setup had us place the GPU vertically with the angled HDMI cable plugged in and run out the back of the chassis. You may also run into some issues here as this setup blocks several display ports, so do plan your setup accordingly.

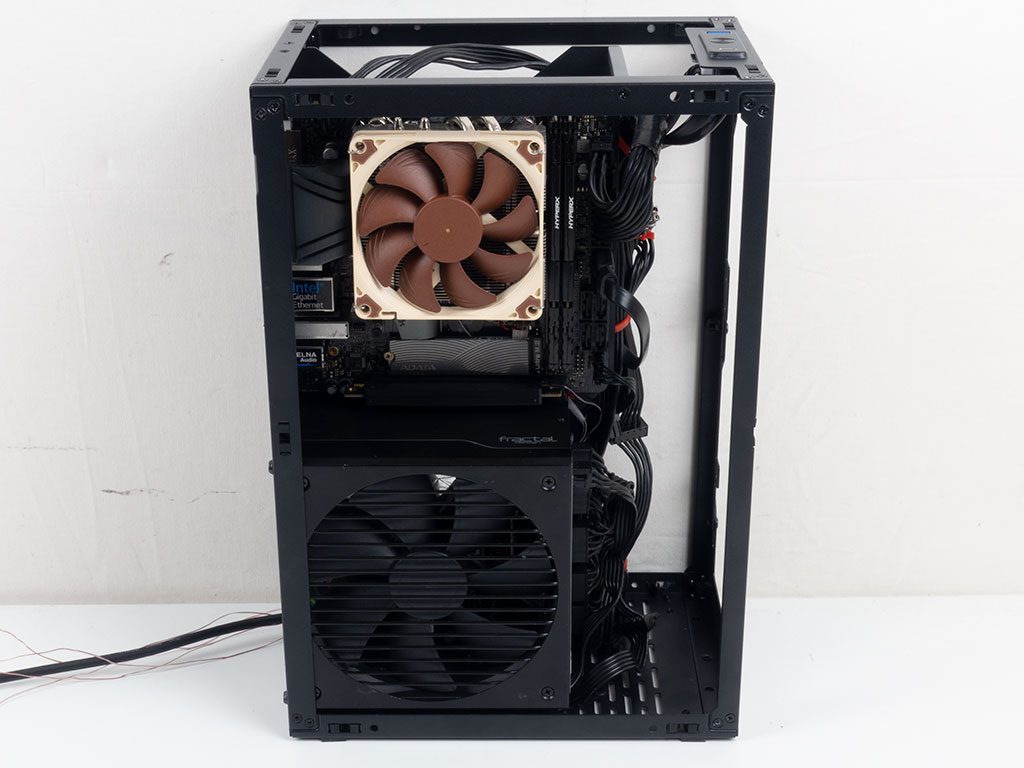
With everything installed, all the cables are bundled up along the front edge of the central mounting plate. While we secured them all, those using an SFX PSU will have shorter leads and thus a cleaner final setup. However, there is still plenty of room for fans in the front, as well as that 240 or 280 mm radiator setup as long as you are a little more diligent with wiring things up than we were.
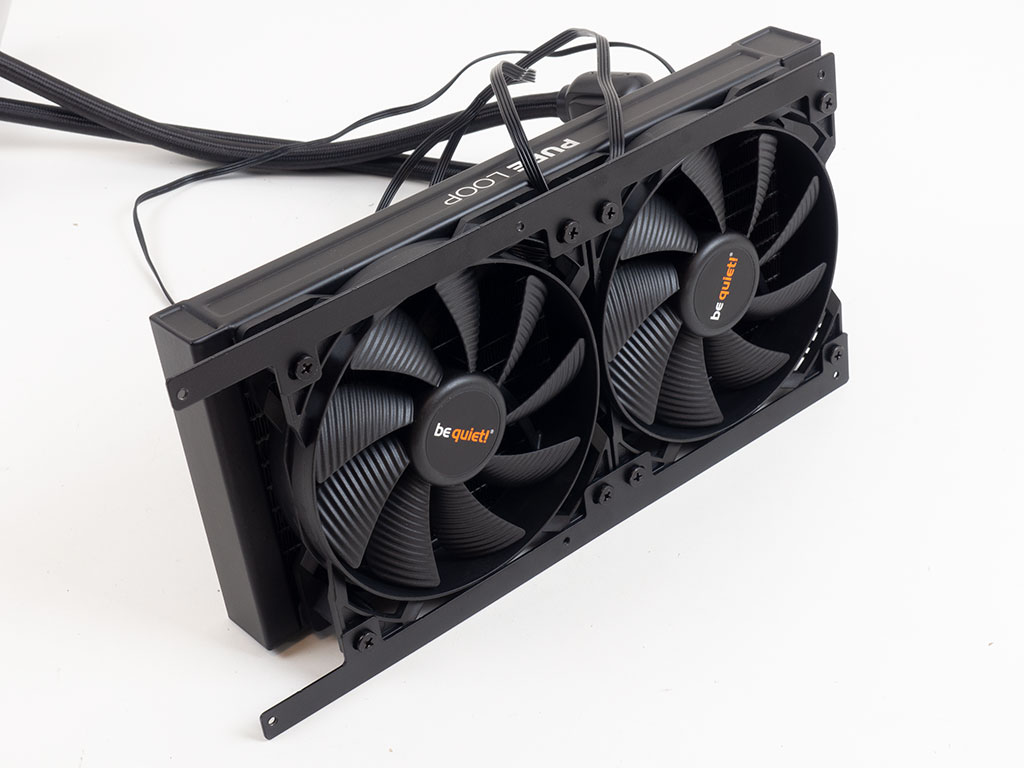
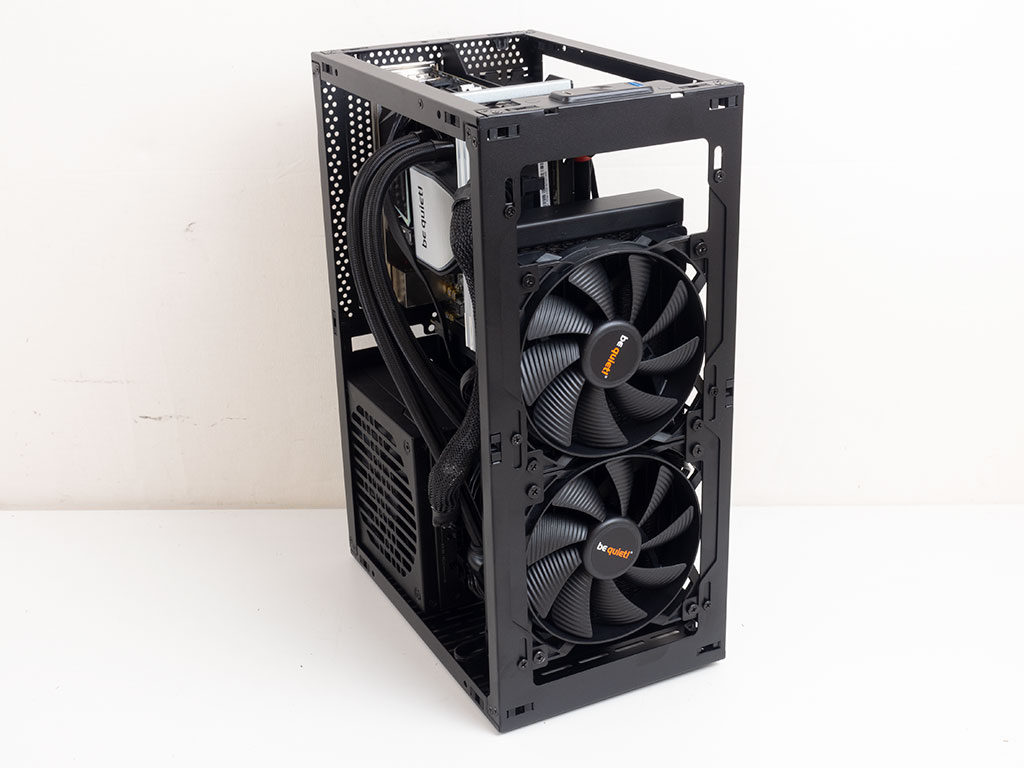
To try the AIO radiator setup, we utilized the be quiet! Pure Loop 240, which barely fits as it sports a uniquely placed pump in line with the tubing that is quite the squeeze. You may assemble your all-in-one outside of the case and then put the whole contraption with the frame back into the system with plenty of space to adjust its horizontal placement.
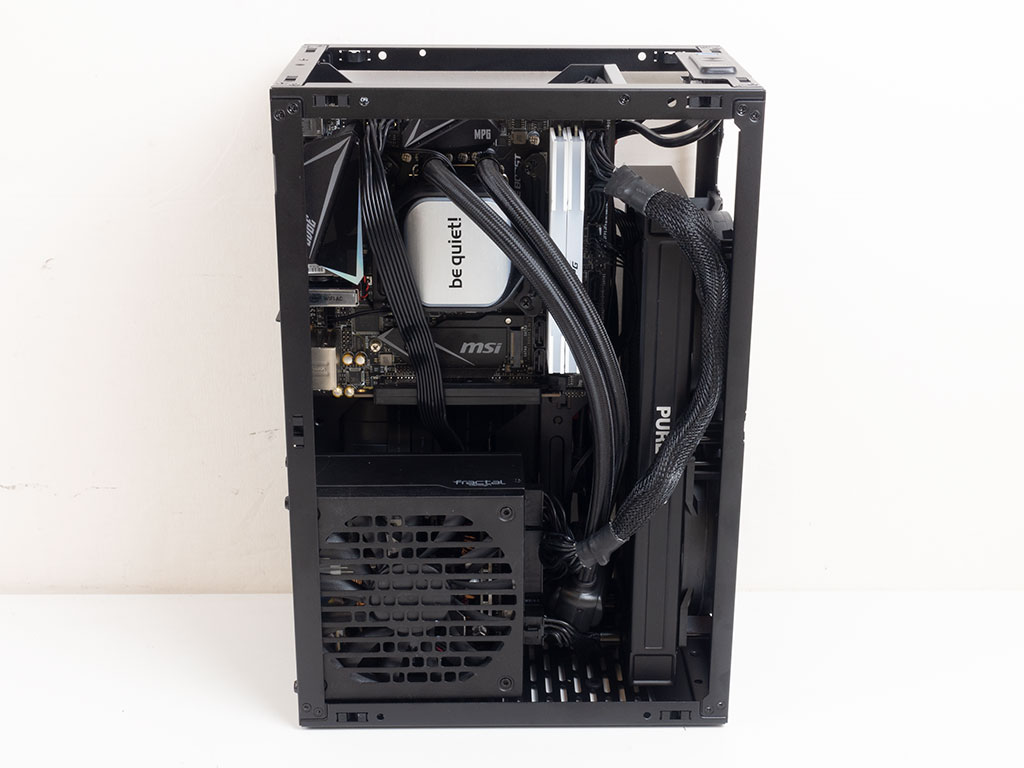
With everything installed, you can see how tight things are, but the GPU area is still clear of cables and you can still reach all the major areas around the motherboard well enough.
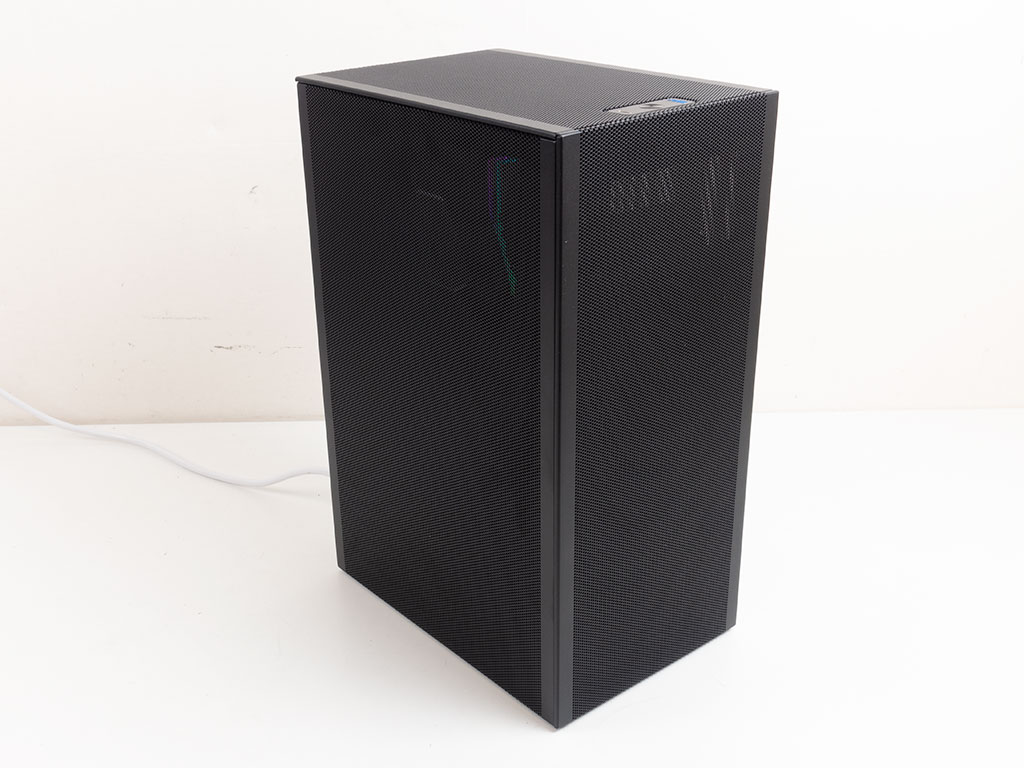
Finished Looks
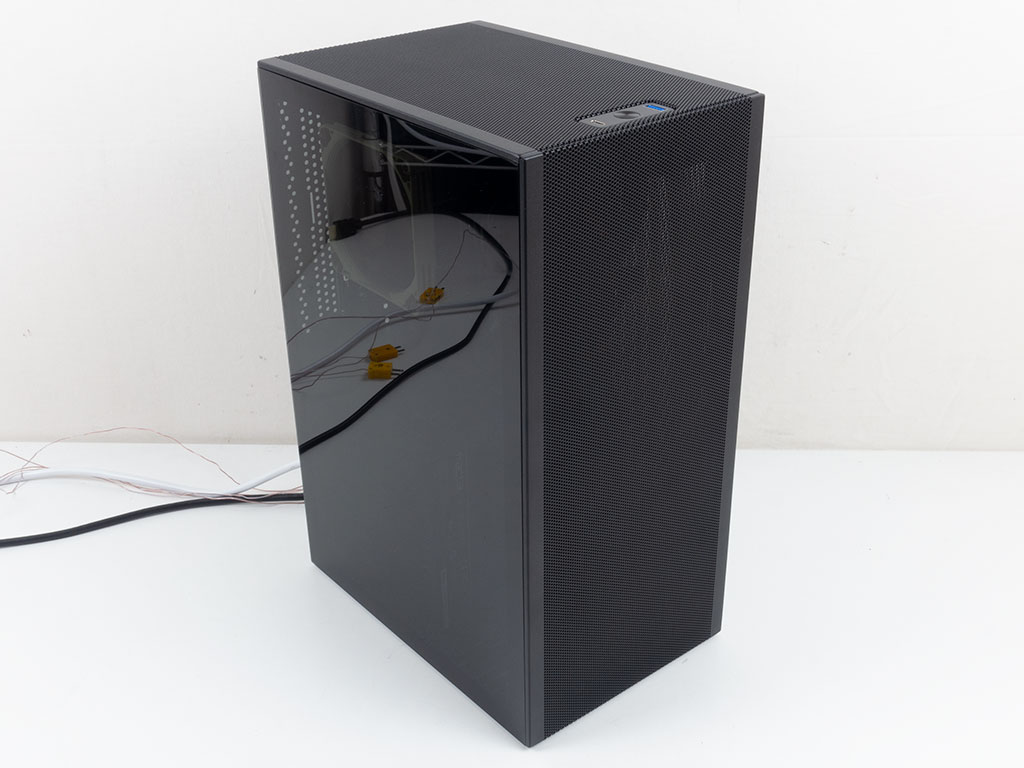
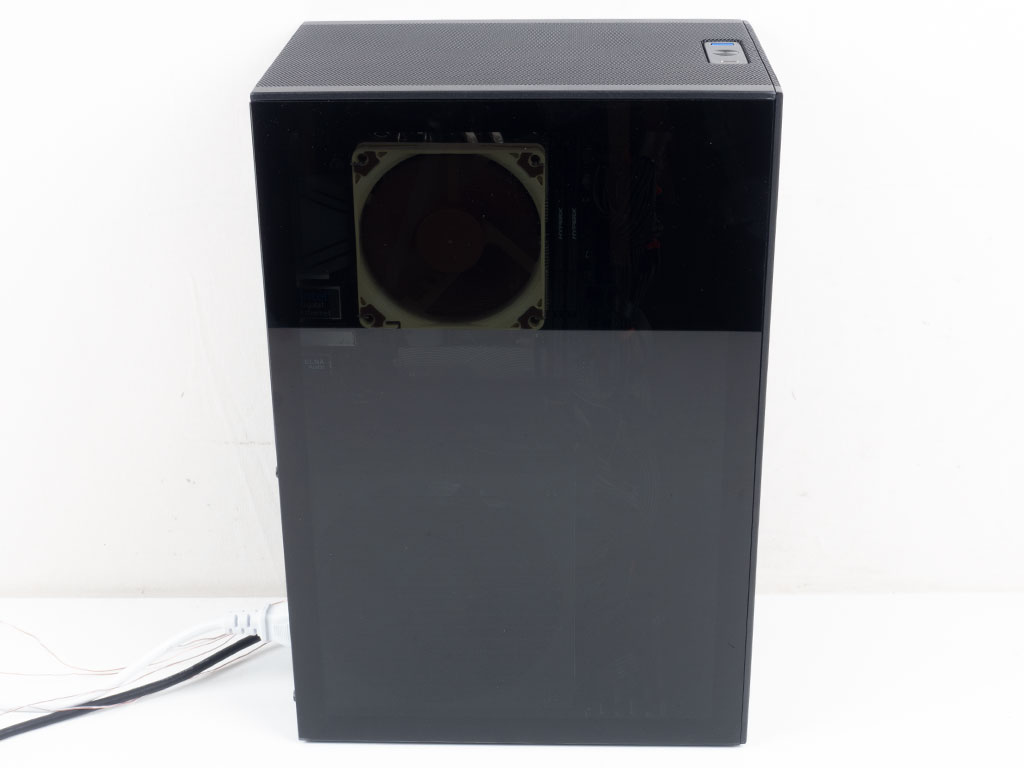
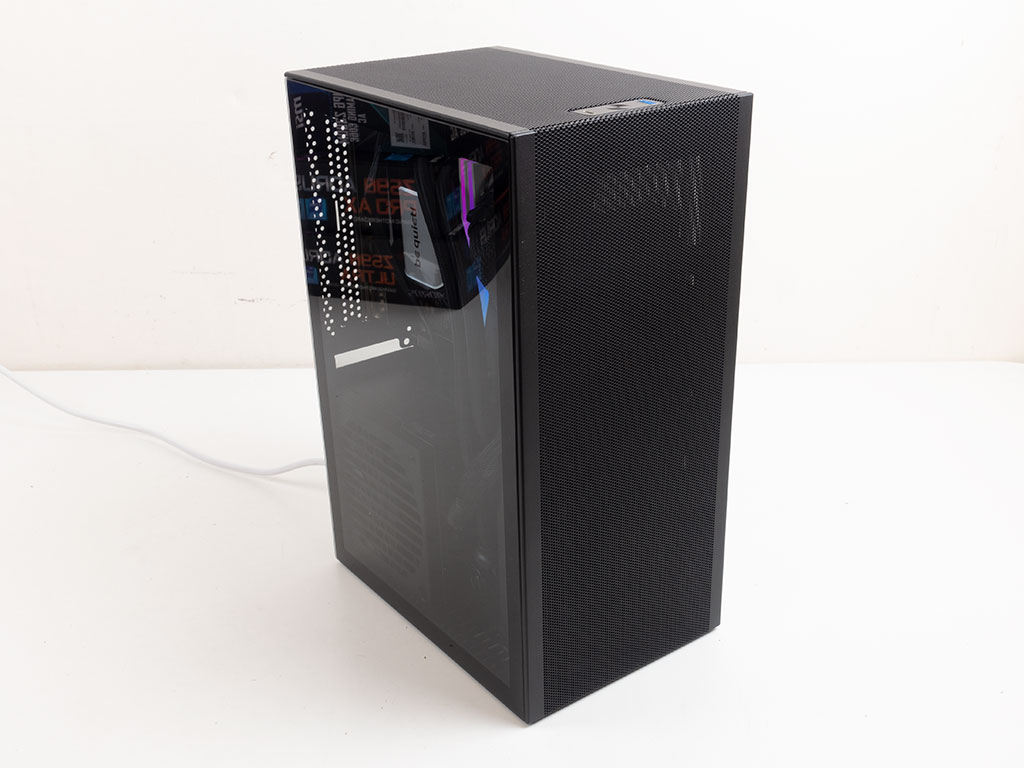
Once finished, the side panels can be placed back onto the chassis just as easily as they came off. As you can see in the images above, the glass panel is on the CPU side, as this is the way the ssupd Meshlicious shipped, but upon consulting ssupd, we also benchmarked it with the glass panel on the GPU side.
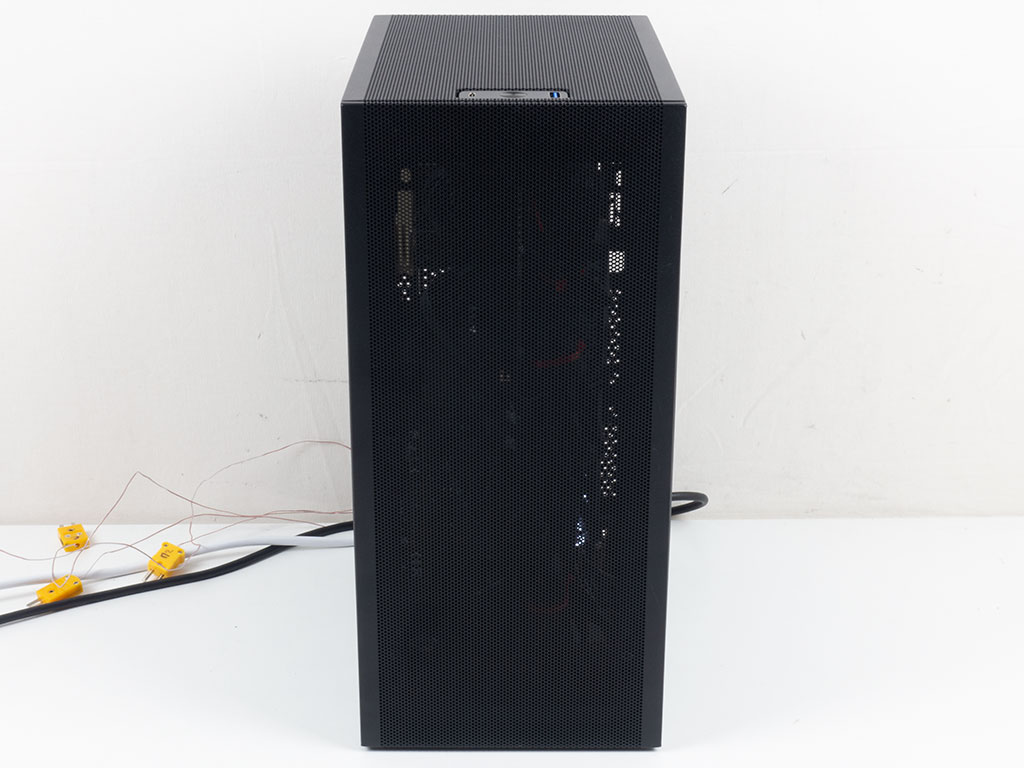
You can still see the GPU through the mesh on both the side and front, while the clear glass panel provides a clear look at the CPU side. This means any ARGB elements your parts may have will be clearly visible as well.
Things look quite nice with the AIO installed as well. Naturally you may again, switch the panels around to either show off the CPU side or the GPU side with the glass panel.
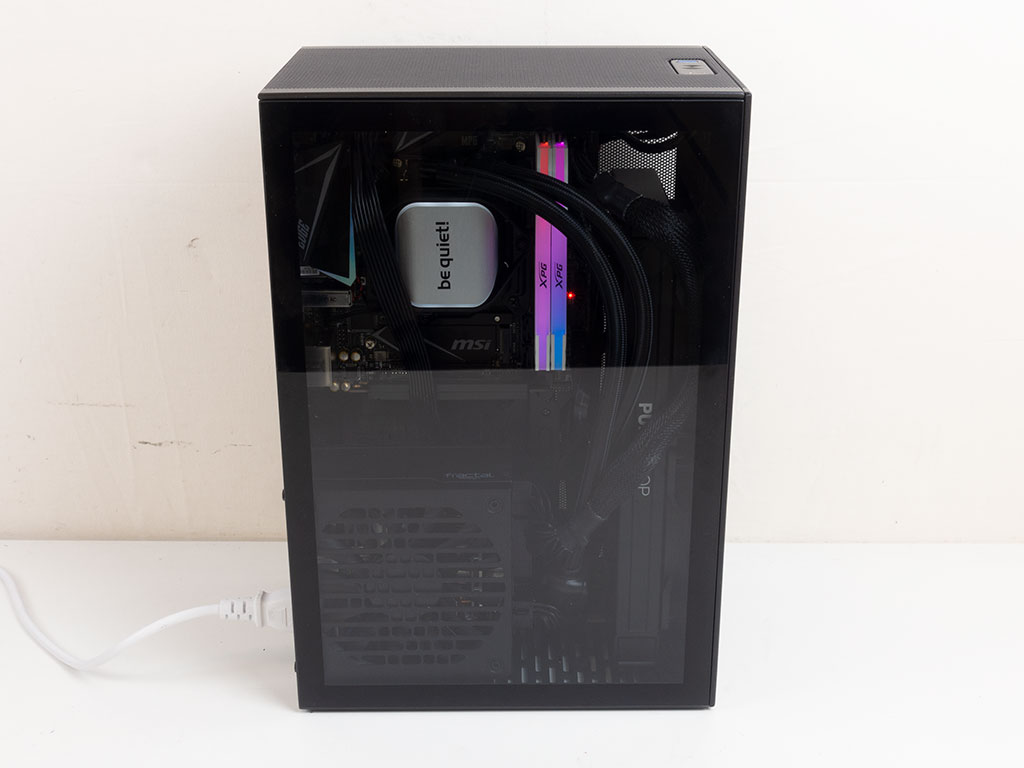
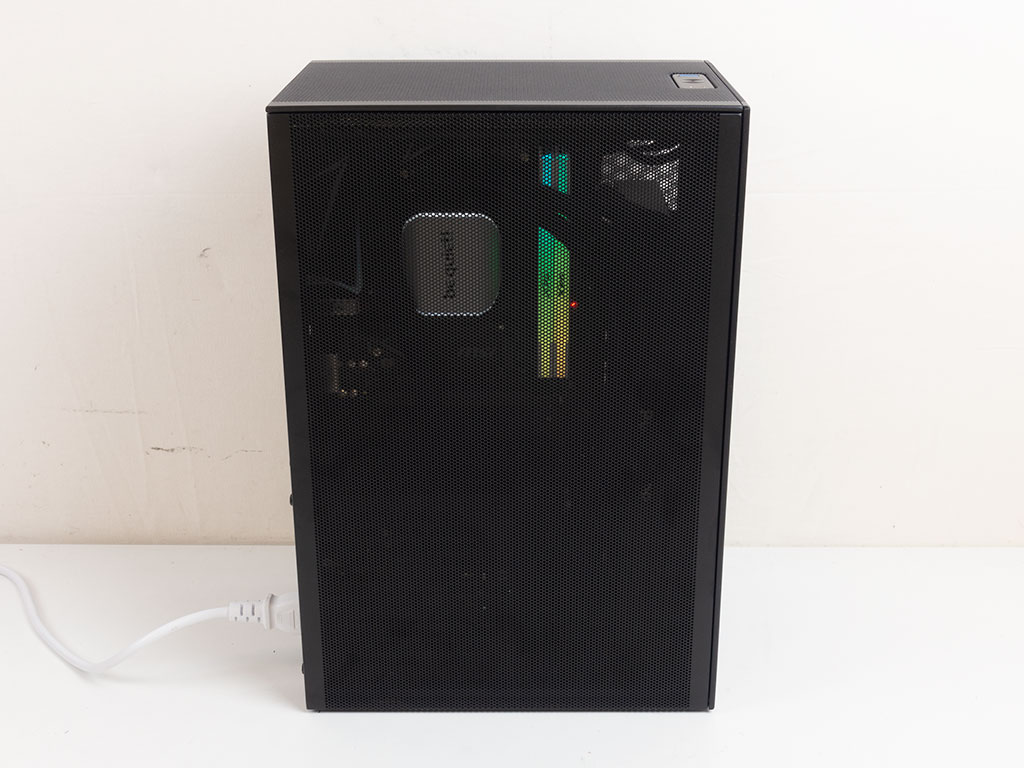
With the glass on the CPU side, you can clearly see all the hardware within it and while our build is not the cleanest, those who want to go the extra mile will surely be able to do a better job. But, even so, it is nice seeing the system being cooled with an AIO. Even with the metal mesh cover, you can still see the glow of the cooling unit and the RGB of the memory.
Jul 11th, 2025 23:55 CDT
change timezone
Latest GPU Drivers
New Forum Posts
- Can you guess Which game it is? (217)
- Quick charging your USB devicesUSB 3.2 Gen 2x2 Type-C® front-panel. (1)
- NVIDIA RTX PRO 6000 Workstation Runs Much Hotter Than 5090 FE (21)
- GTX 1050 GPU Owners Club (12)
- ASUS ProArt GeForce RTX 4060 Ti OC Edition 16GB GDDR6 Gaming - nvflash64 VBIOS mismatch (2)
- Will you buy a RTX 5090? (640)
- No offense, here are some things that bother me about your understanding of fans. (33)
- What are you playing? (23919)
- Best motherboards for XP gaming (102)
- Amazon Prime days sale (3)
Popular Reviews
- Fractal Design Epoch RGB TG Review
- Corsair FRAME 5000D RS Review
- Lexar NM1090 Pro 4 TB Review
- NVIDIA GeForce RTX 5050 8 GB Review
- NZXT N9 X870E Review
- Sapphire Radeon RX 9060 XT Pulse OC 16 GB Review - An Excellent Choice
- AMD Ryzen 7 9800X3D Review - The Best Gaming Processor
- Upcoming Hardware Launches 2025 (Updated May 2025)
- Chieftec Iceberg 360 Review
- Sapphire Radeon RX 9070 XT Nitro+ Review - Beating NVIDIA
TPU on YouTube
Controversial News Posts
- Intel's Core Ultra 7 265K and 265KF CPUs Dip Below $250 (288)
- Some Intel Nova Lake CPUs Rumored to Challenge AMD's 3D V-Cache in Desktop Gaming (140)
- AMD Radeon RX 9070 XT Gains 9% Performance at 1440p with Latest Driver, Beats RTX 5070 Ti (131)
- NVIDIA Launches GeForce RTX 5050 for Desktops and Laptops, Starts at $249 (119)
- NVIDIA GeForce RTX 5080 SUPER Could Feature 24 GB Memory, Increased Power Limits (115)
- Microsoft Partners with AMD for Next-gen Xbox Hardware (105)
- Intel "Nova Lake‑S" Series: Seven SKUs, Up to 52 Cores and 150 W TDP (100)
- NVIDIA DLSS Transformer Cuts VRAM Usage by 20% (97)