 4
4
Wooting One Keyboard Review
Disassembly »Closer Examination
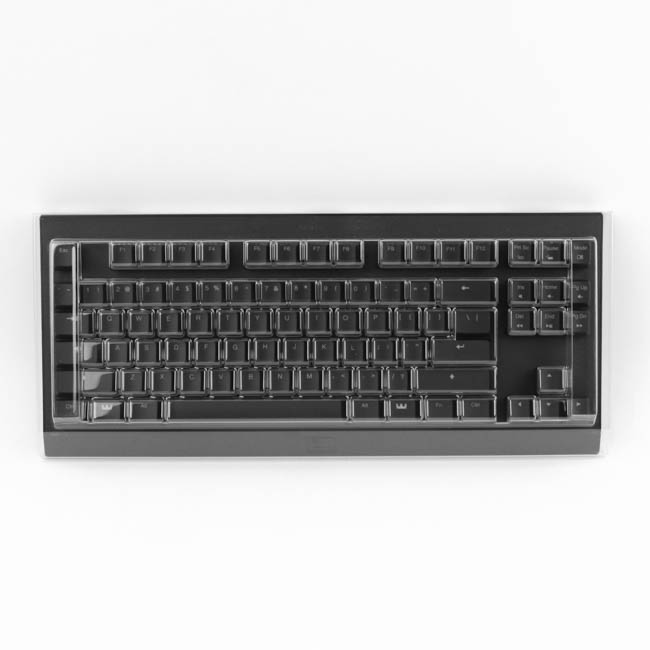

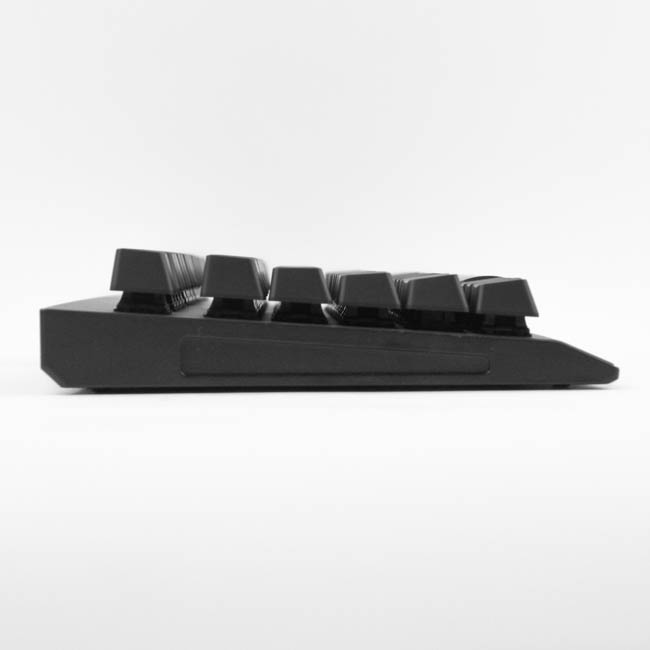
The keyboard comes inside a shaped plastic blister inlay, and between this and the plastic wrap on the product box, you can rest assured that you will get a brand-new product looking as pristine as can be out of the box. As we saw before, the Wooting One is a TKL keyboard, and the sample I have here uses the US ANSI layout with 87 keys. With an all-black color scheme, Wooting wants to give you a keyboard that is clean-looking and hardly beset by logos at all. Indeed, the Wooting logo too is barely visible in the bottom bezel; bent downward, which helps with transportation, it isn't long enough to be a wrist rest. The bezels are on the larger size of average overall, especially at the top and bottom - but nowhere near enough so to be a concern for desk-space consumption.
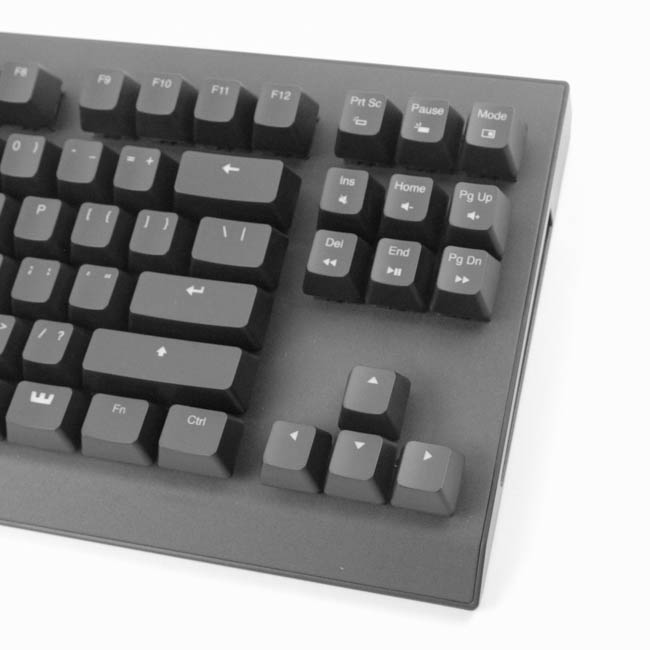
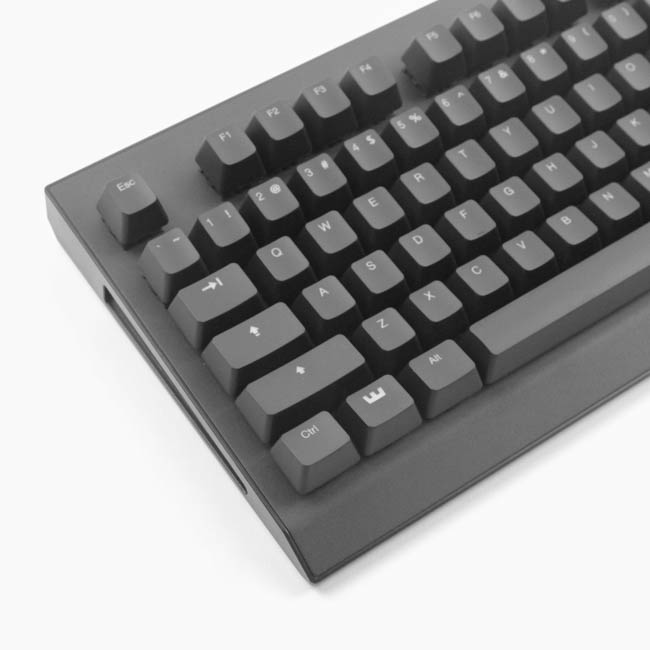
The top plate uses "aircraft-grade aluminum", which really means that it is made out of aluminum 6000 series alloy. Wooting has given it a matte finish, which looks and feels nice, but has scratches show up quickly, and it can be wiped off just as quickly. It can easily be removed for the switches to be swapped if you have another set or want to mod the current one, and Wooting does draw attention to this as well. Perhaps we will see optional colors or finishes in due time from them. As far as keycap legends go, single-legend placement is in the top center for all the keycaps, with the font size on the larger side of average for easier visibility. The secondary legends are placed below the primary ones, which indicates that the LEDs are above the switches as seen from the front. The typeface itself is very clean too, fitting in well with the rest of the keyboard, and this helps it fit into any environment you plan to use it in.
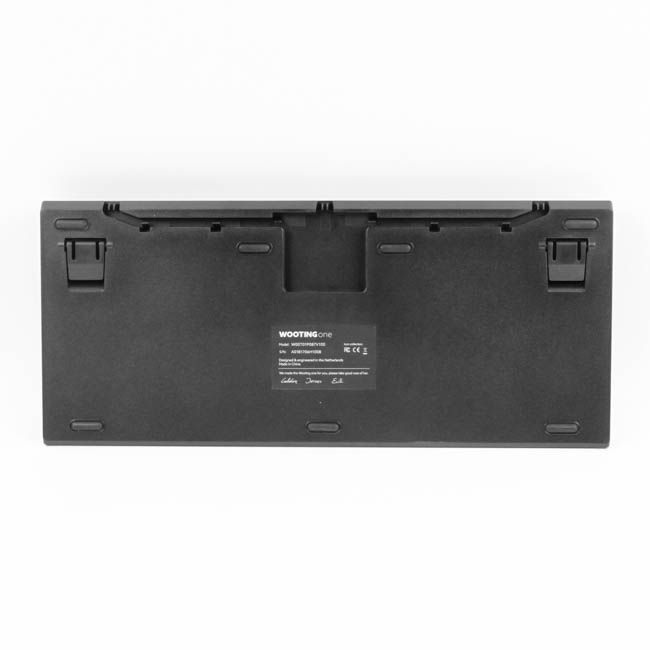
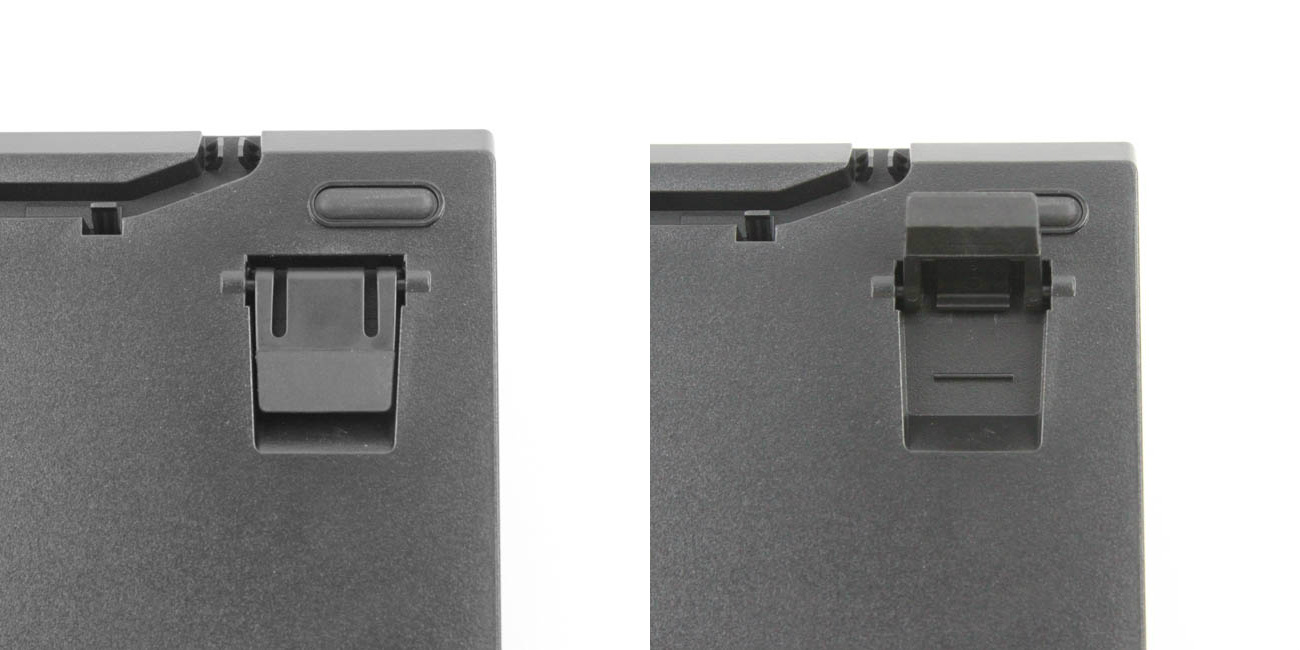
Flipping the keyboard around, we see the ABS plastic bottom panel with a certification sticker in the middle. There are multiple rubber pads at the top and bottom for some friction against a desk's surface, which prevents the keyboard from sliding around. There are two case feet at the top as well, and these can be raised to elevate the keyboard. Keeping up with the attention to detail here, the bottom of each foot has a rubber pad as well, so they won't scratch up when used. We also see that there are cable-routing cutouts in the back to allow users to route the keyboard's cable in a direction of their choosing and away from the mouse.
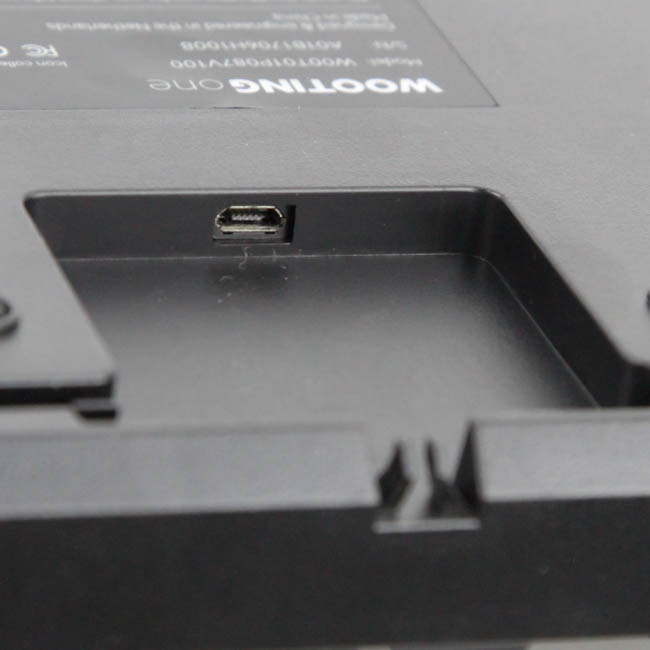
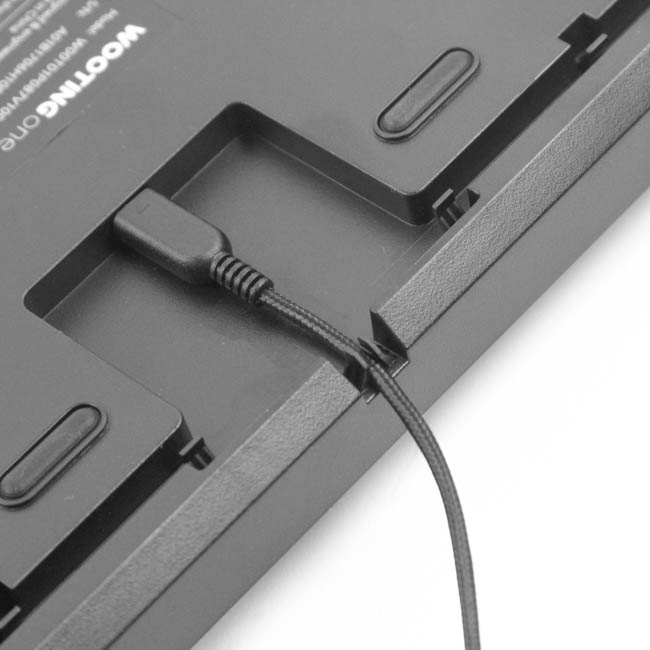
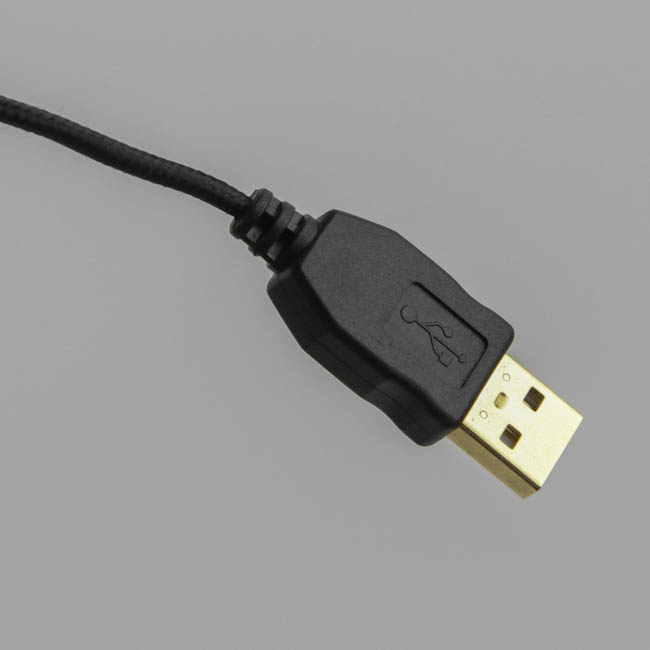
The female micro-USB port is inset into the body of the keyboard, but the port itself is flush with the surface, so any USB Type-A to micro-USB cable, a phone cable, for example, will work fine here. The provided cable is nicely braided and does not feel like the braiding will come off anytime soon, and it is also of the right size to fit into the cable-routing options on the back, which have nibs to keep the cable in place. The keyboard requires a single USB port on your computer, and USB 3.0 (3.1 Gen 1) is recommended to ensure no power issues with the RGB LEDs.
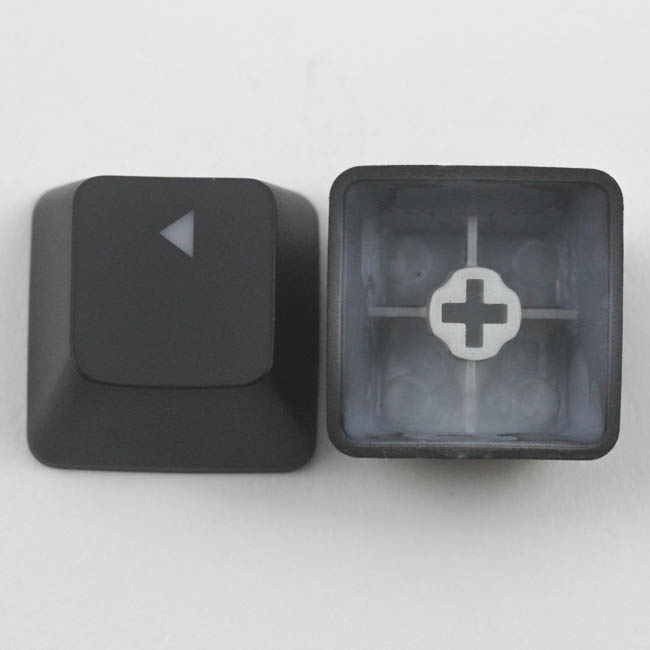
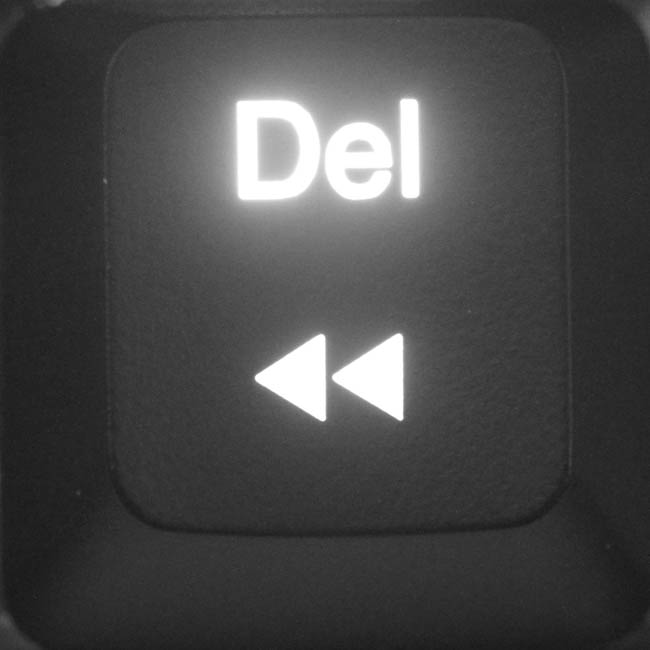
Wooting is using the tried and tested OEM profile with the keycaps here, with the usual slanted rows and concave surfaces on top. The keycaps are compatible with the standard MX stem design from Cherry, and this and the standard layout make it compatible with the vast majority of aftermarket keycap sets as well. The stock keycaps are made out of ABS plastic with an average wall thickness of 1.14 mm (measured for twenty keycaps), with both primary and secondary legends laser-etched in. Wall thickness aside, these are no different from most stock keycaps and will show signs of wear sooner rather than later. The primary legends will also get illuminated better than the secondary legends here since the LED is at the top of each switch.
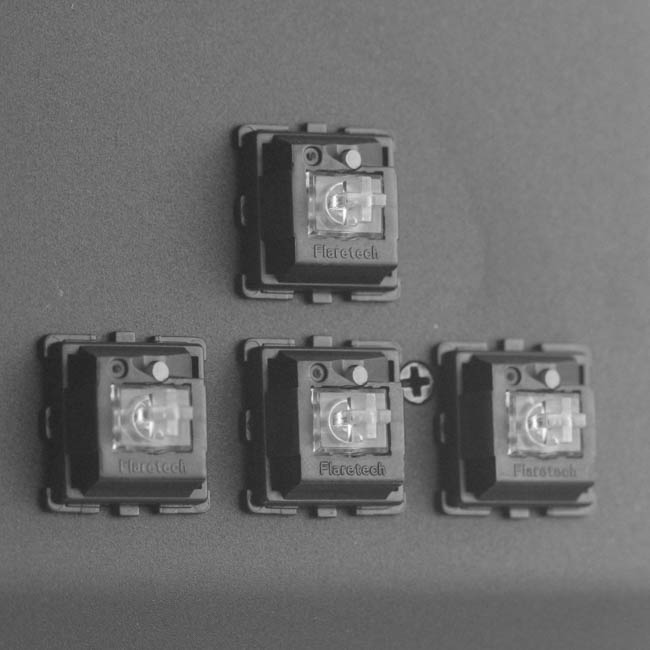
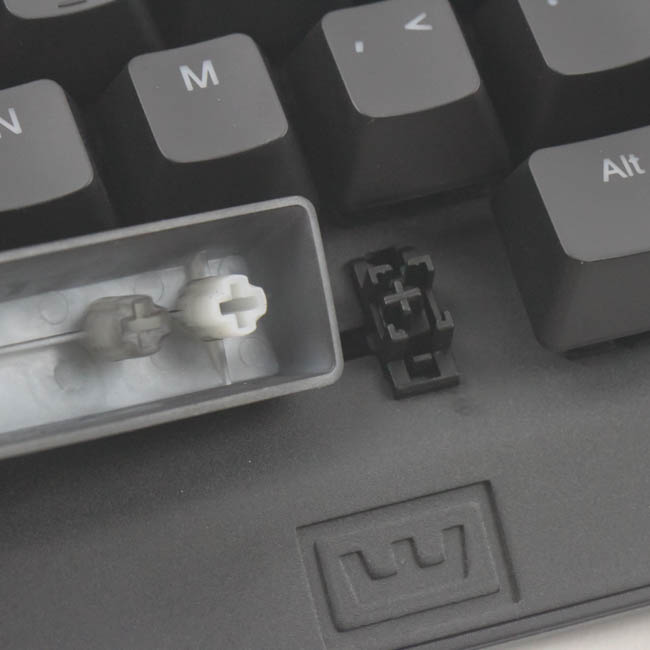
The sample I received had the linear Flaretech Red switches which, as we saw before, does not really have a red stem as with other implementations of mechanical switches with the name. The larger switches have Cherry stabilizers on them too, although they are lubed well out of the box and feel very good in use. This, coupled with the floating keycap design, makes removing the keycaps for cleaning purposes easy, though it does introduce the potential for some light bleed as well.
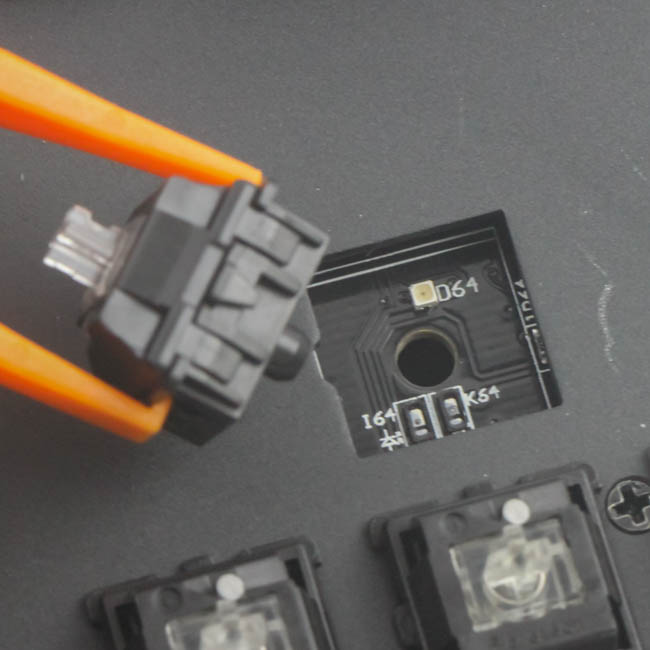
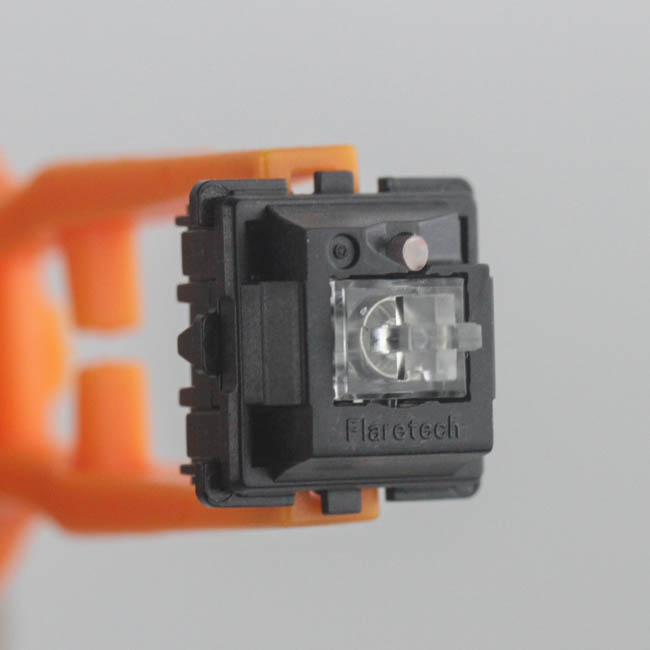
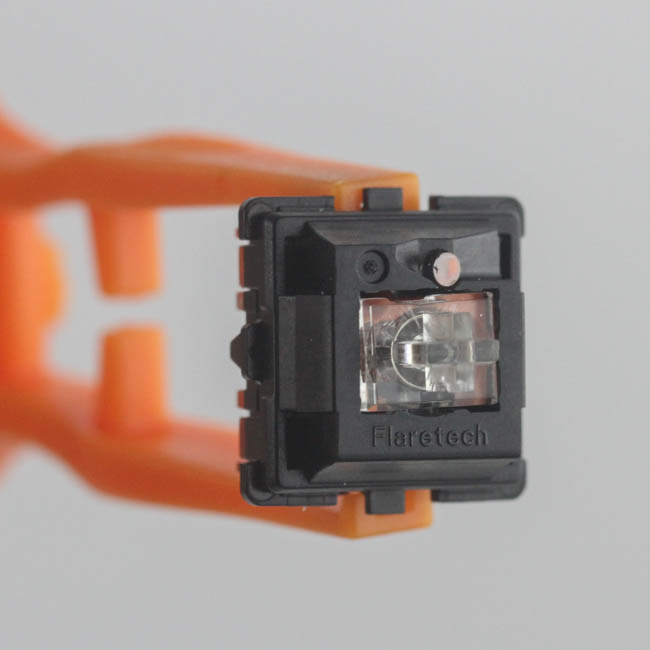
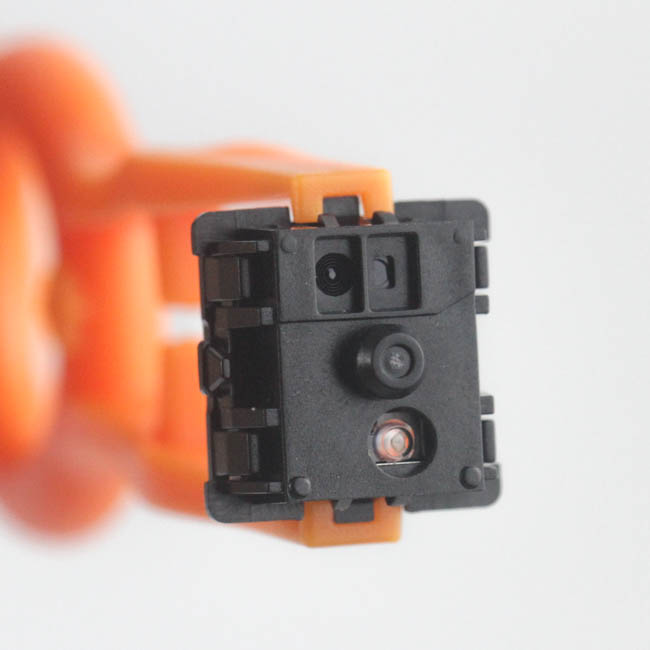
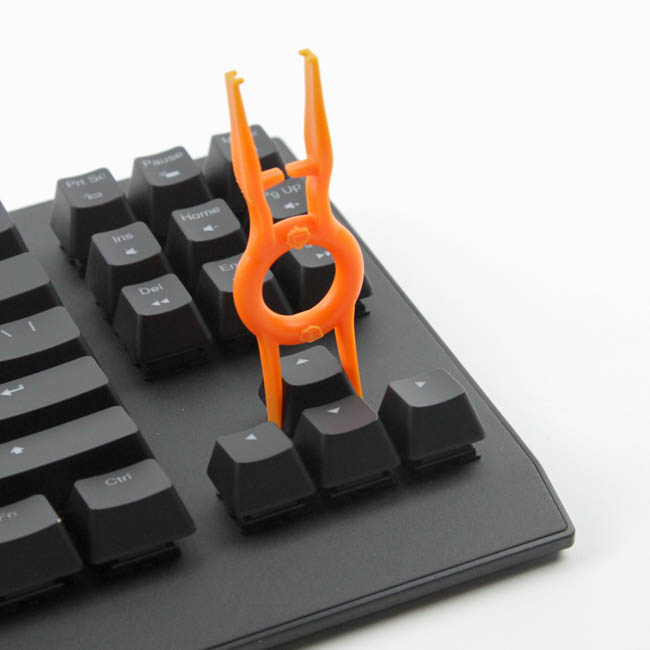
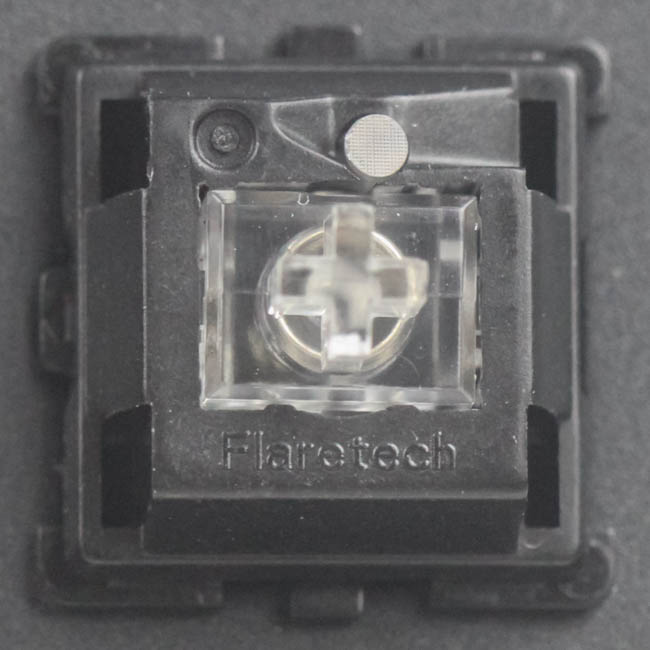
The provided tool for removal works fine for keycap removal, but is also for removing the switches that are swappable. We can see the LEDs under the switch here, with a diffuser built into the switch itself. The body of these switches incorporates openings for the laser that passes through to detect both the actuation and position of the stem along the height (depth) axis, which in turn helps with the analog control implementation here.
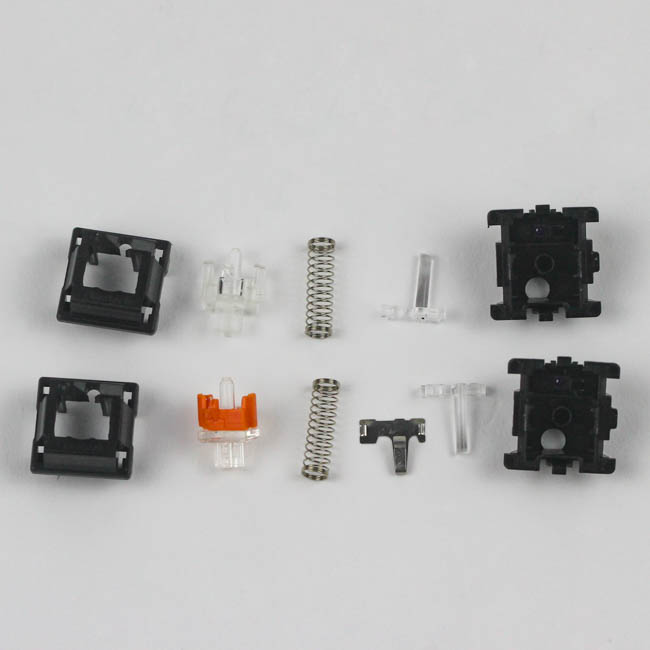
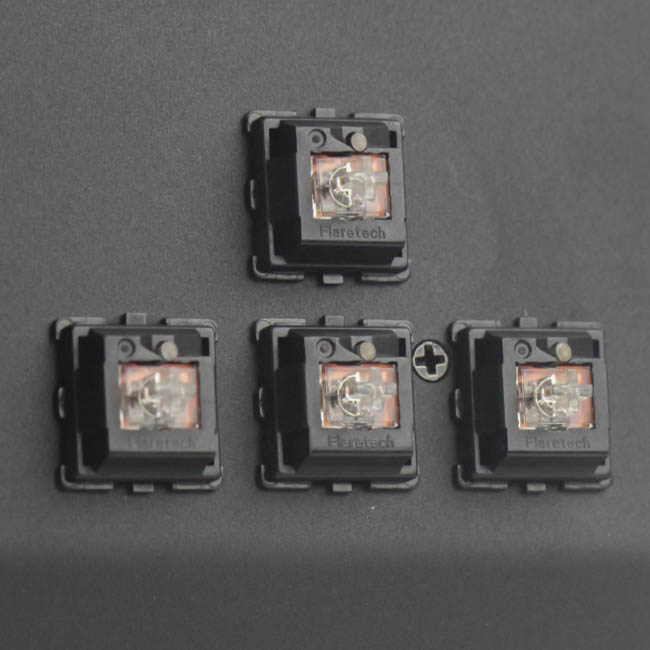
Both Flaretech switches are nearly similar structurally, with the obvious difference being that the Flaretech Blue has a click bar that provides the tactile and clicky feedback. I preferred the Flaretech Red switches for linear, analog control here, although the provision of spare switches means that you can try out both by, say, having the other switch type on your arrow keys, or WASD cluster if you prefer it the other way around.
Jul 1st, 2025 22:48 CDT
change timezone
Latest GPU Drivers
New Forum Posts
- PCMA2305 Phase Change Metal Alloy (PCMA) (7)
- Best motherboards for XP gaming (18)
- What would you buy? (32)
- Is my m2 possibly fake ? and possible laptop hardware damage ? (28)
- HP Zbook 15 G2 GPU Upgrade (4)
- Help me overclocking my GSkill Ripjaws 3200MHz CL 16 DDR4 RAMs. (20)
- MACPRO 3,1 booting windows (0)
- My PCIe5 SSD is slow. Samsung 9100 PRO (29)
- Steering wheels, I think I had a mea culpa! (0)
- My PSU died.. (1)
Popular Reviews
- ASUS ROG Crosshair X870E Extreme Review
- Crucial T710 2 TB Review - Record-Breaking Gen 5
- Sapphire Radeon RX 9060 XT Pulse OC 16 GB Review - An Excellent Choice
- AVerMedia CamStream 4K Review
- Upcoming Hardware Launches 2025 (Updated May 2025)
- AMD Ryzen 7 9800X3D Review - The Best Gaming Processor
- Lexar NQ780 4 TB Review
- Sapphire Radeon RX 9070 XT Nitro+ Review - Beating NVIDIA
- AMD Ryzen 9 9950X3D Review - Great for Gaming and Productivity
- NVIDIA GeForce RTX 5060 8 GB Review
TPU on YouTube
Controversial News Posts
- Intel's Core Ultra 7 265K and 265KF CPUs Dip Below $250 (288)
- NVIDIA Grabs Market Share, AMD Loses Ground, and Intel Disappears in Latest dGPU Update (208)
- Some Intel Nova Lake CPUs Rumored to Challenge AMD's 3D V-Cache in Desktop Gaming (140)
- NVIDIA GeForce RTX 5080 SUPER Could Feature 24 GB Memory, Increased Power Limits (112)
- Microsoft Partners with AMD for Next-gen Xbox Hardware (105)
- NVIDIA Launches GeForce RTX 5050 for Desktops and Laptops, Starts at $249 (105)
- Intel "Nova Lake‑S" Series: Seven SKUs, Up to 52 Cores and 150 W TDP (100)
- NVIDIA DLSS Transformer Cuts VRAM Usage by 20% (91)