Sleeving a Fan with Expandable Sleeving |
|
|
Author: t_ski
Date: 2006-06-15 13:58:53
|
|
Inserting the Wires
Now the wires can be inserted into the sleeving.
If there is a spot where there is too much resistance, you can bunch up the sleeving and inch it along until it is in the right place.

When you are done it should look like this:

Don’t remove the electrical tape just yet, as we will now need to put the heatshrink tubing on to hold the sleeving in place. With your scissors cut two pieces of tubing, each about 1.5” in length.
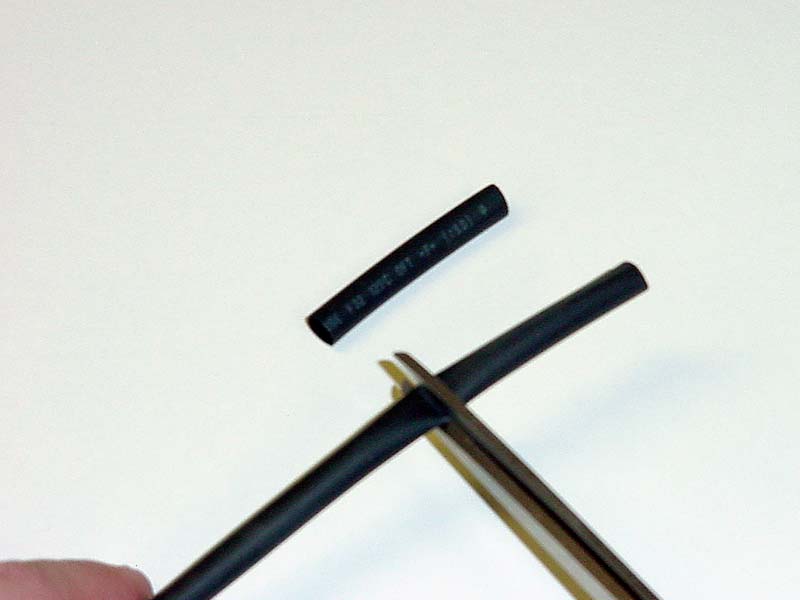
Push these on over the sleeving, with the first piece going closest to the fan.

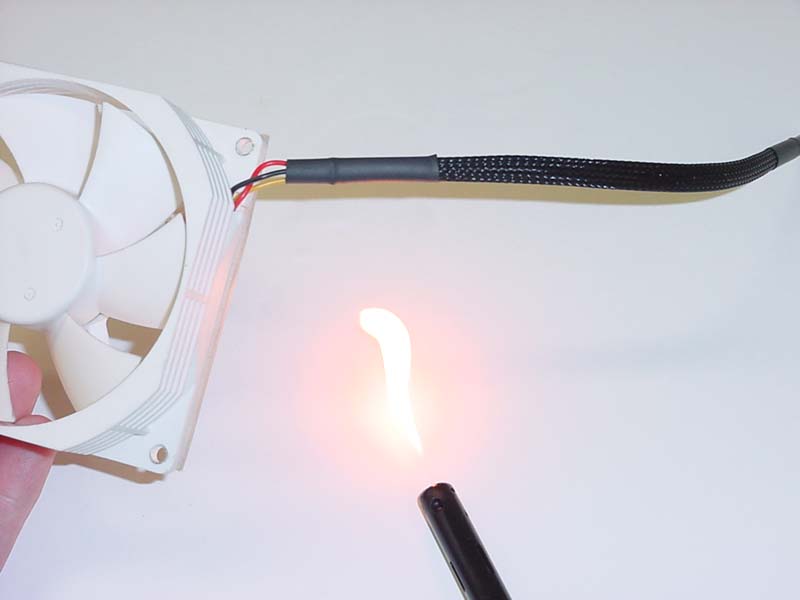
Now we need to shrink the tubing to fit properly. This can be done with your lighter, but be careful not to burn the heatshrink (especially if using the cheaper glossy kind).
Finishing Up
At this point you are ready to insert the pins back into the connector, but before you do, inspect them carefully. You may need to pry the tab upwards so that it will engage in the connector once in place.
Using the drawing or photo you utilized in the first step, insert the wires back into the connector. When done correctly it will line up with the power source.

It doesn’t hurt to double check your work by powering up the fan with a separate power source before plugging it in to your motherboard.
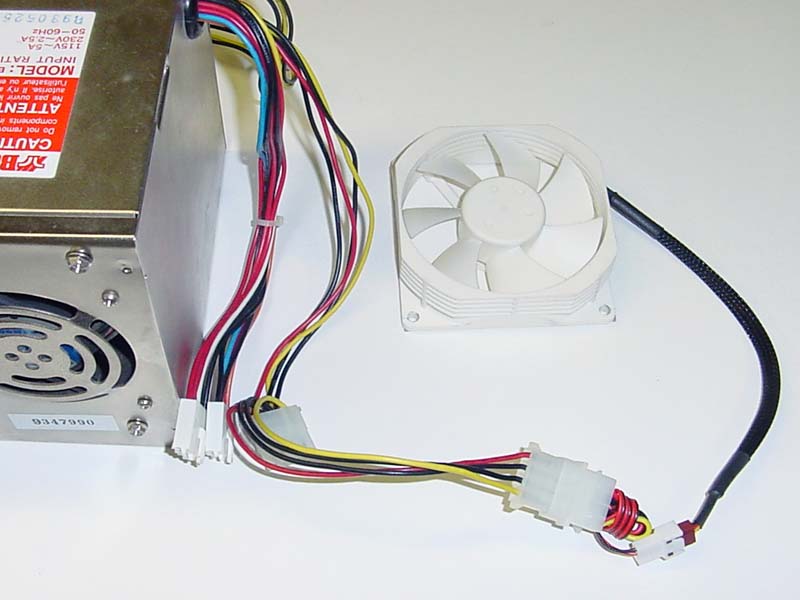
When everything is OK, you can re-install the fan onto your heatsink. Your case is now neater and more organized. Continue to do the rest of your fans to match and it will be ready to show off at your next LAN party.

Special thanks to Darksaber for his photographic assistance.
Jul 18th, 2025 19:07 CDT
change timezone
Latest GPU Drivers
New Forum Posts
- What's your latest tech purchase? (24305)
- AI Job Losses: let's count the losses up, total losses to AI so far 94,000 and counting (35)
- lower score 5070Ti after replacing the PSU (0)
- TPU's Nostalgic Hardware Club (20539)
- 3DMARK "LEGENDARY" (329)
- Hatsune Miku x ASUS TUF Gaming Build (67)
- Anime Nation (13051)
- Ferrari themed mod cont. 4070s repaste (7)
- Stalker 2 is looking great. (213)
- Share your CPU-X Benchmarks! (6)
Popular Reviews
- Razer Blade 16 (2025) Review - Thin, Light, Punchy, and Efficient
- SilverStone SETA H2 Review
- Thermal Grizzly WireView Pro Review
- Pulsar X2 Crazylight Review
- MSI GeForce RTX 5060 Gaming OC Review
- Our Visit to the Hunter Super Computer
- NVIDIA GeForce RTX 5080 Founders Edition Review
- NVIDIA GeForce RTX 5050 8 GB Review
- Sapphire Radeon RX 9060 XT Pulse OC 16 GB Review - An Excellent Choice
- Upcoming Hardware Launches 2025 (Updated May 2025)
TPU on YouTube
Controversial News Posts
- Intel's Core Ultra 7 265K and 265KF CPUs Dip Below $250 (288)
- Some Intel Nova Lake CPUs Rumored to Challenge AMD's 3D V-Cache in Desktop Gaming (140)
- AMD Radeon RX 9070 XT Gains 9% Performance at 1440p with Latest Driver, Beats RTX 5070 Ti (131)
- NVIDIA Launches GeForce RTX 5050 for Desktops and Laptops, Starts at $249 (124)
- NVIDIA GeForce RTX 5080 SUPER Could Feature 24 GB Memory, Increased Power Limits (115)
- Microsoft Partners with AMD for Next-gen Xbox Hardware (105)
- NVIDIA DLSS Transformer Cuts VRAM Usage by 20% (99)
- AMD Sampling Next-Gen Ryzen Desktop "Medusa Ridge," Sees Incremental IPC Upgrade, New cIOD (97)