 2
2
AC Ryan PlayOn!HD2 Review
Performance, Power Consumption & Noise Level »A Look at the Interface
Once you hit the power on button on the remote, or the button on the face of the player, a PlayOn! logo welcomes you and you have to wait for about 33 sec until you see the player's main menu. Quite a long time, we expected much less from a media player.

The new GUI is completely different from the old one. Here we must note that with the recent software upgrade the new GUI is also available to the owners of the older PlayOn!HD. From the main menu you have access to seven sub-menus or you can play the most recently added music or videos immediately.


From the movies, music and photo submenus you have access to the respective folders on the internal HDD. Via the Files Manager option you can explore all attached, local or remote, devices. Internet Media gives you access to the online services that the PlayOn!HD2 supports. For easier access you can connect a keyboard and a mouse, but unfortunately there is no visible cursor, crippling the mouse's usability. The supported online media services include the famous Facebook, Twitter, Flickr, YouTube, Picasa, Buddy Link, Video Podcasts etc.
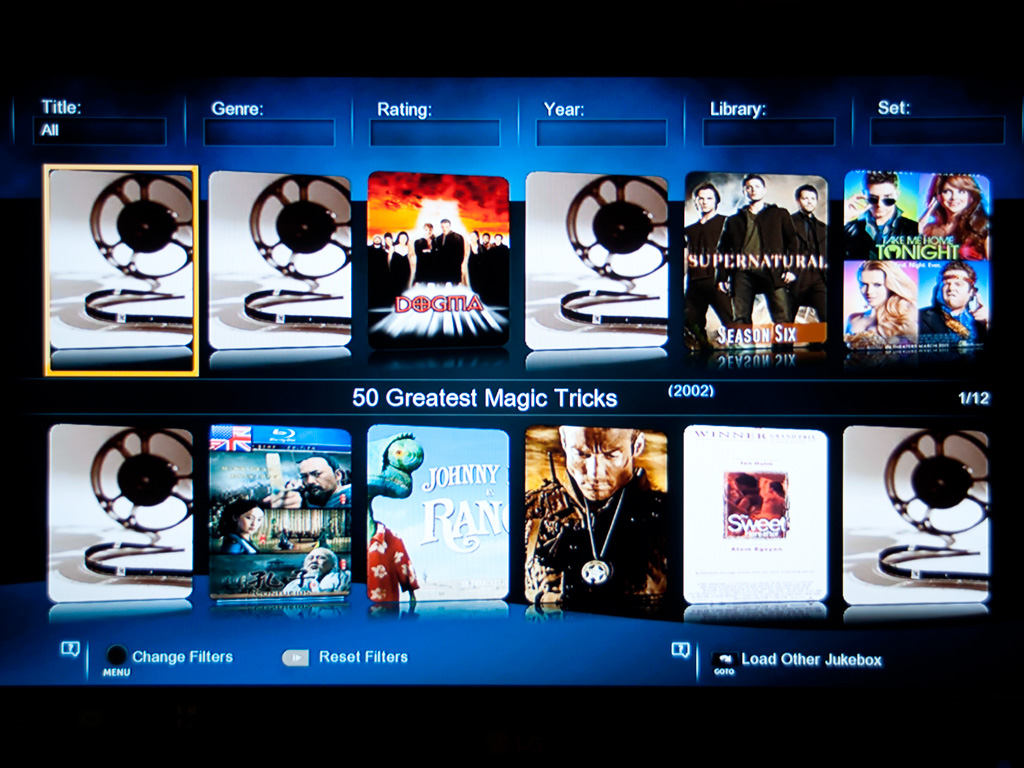
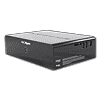
Continuing our trip to the main menu, next we find the Jukebox option. Through Jukebox you get many interesting details for your stored movies like covers, rating, actor names, brief summary, details about the movie format etc. In order to setup Jukebox on your player or on a remote network share you need to install YAMJ (Yet Another Movie Jukebox) and follow these instructions.
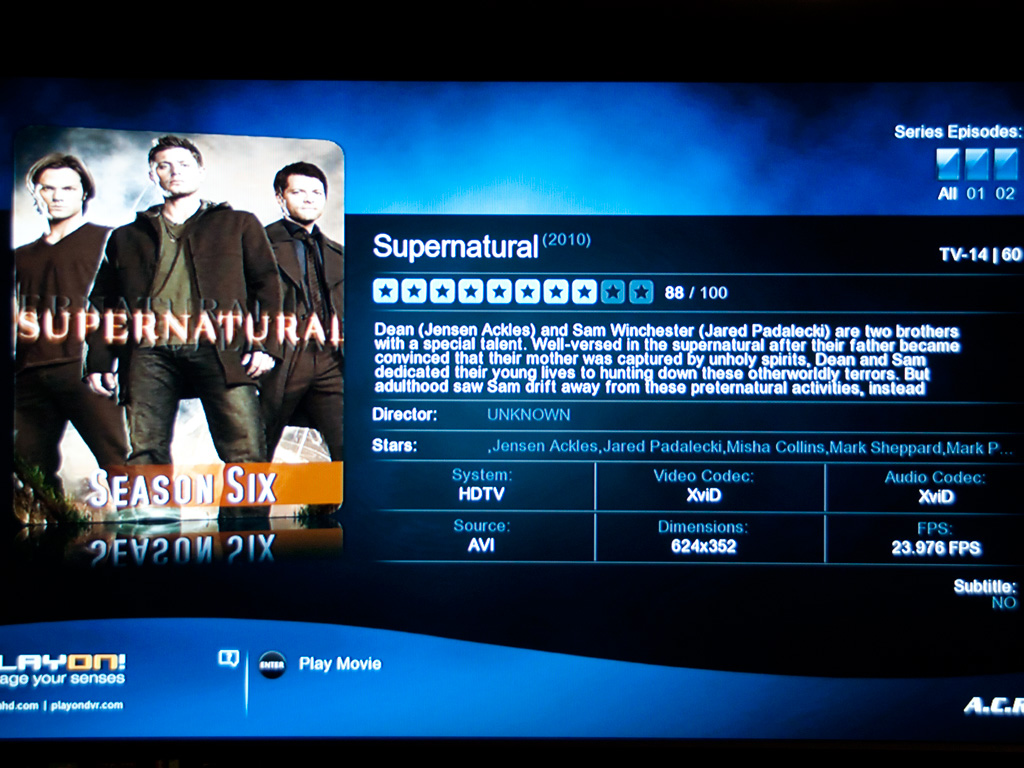
The next option in the main menu is the most crucial since through this you can setup the player. In the Setup option we find several submenus with system, audio, video, network and misc settings. For each submenu we will refer to the most vital settings.

Through system settings you can choose the menu language, text encoding, system fonts, set the time after which the screen saver will be enabled, scan storage for media files, format the internal HDD etc.

In audio settings you can enable night mode and set the HDMI and SPDIF outputs. If you have connected the player to a Dolby Surround amplifier through optical or coaxial SPDIF then you must select Passthrough at SPDIF output.
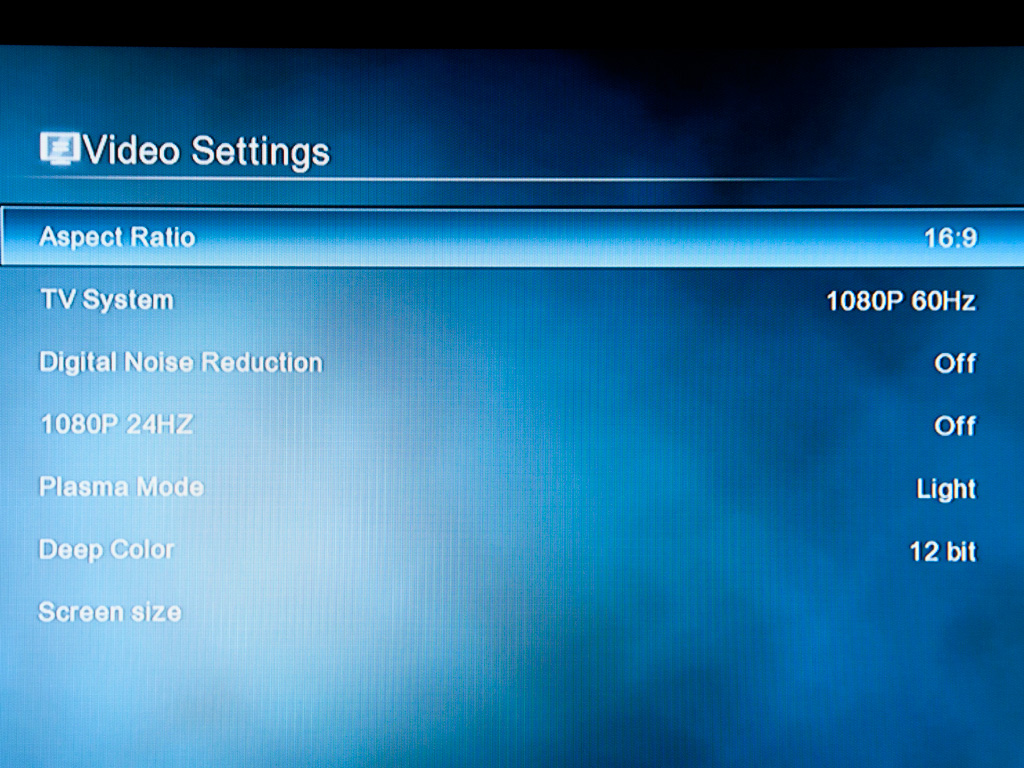
Through video settings you can set the aspect ratio, the resolution and refresh rate according to the TV set that the player is connected, enable Plasma mode, set the screen size etc.

Wired or wireless network connections can be configured through Network settings. You will also find some interesting features there like FTP server, Samba, UPnP Server, PPPoE setup and transmission.
Transmission exists in the newer firmaware (r3966) and substitutes the previous BitTorrent client. After you enable it through your favorite browser on a smartphone/PC/laptop, enter the IP address of the player followed by port 9091, for example: 192.168.1.20:9091. Then you will be redirected to the transmission page where you can add / remove torrents to download. Attention, in order to download torrents you need to have a HDD installed in the media player. As it seems you cannot send the torrents you want to download to a network share but only download them straight to internal storage and move them afterwards. Also we noticed that while transmission verifies the downloaded data of a torrent file, the menu response becomes really sluggish, rendering it unusable. However the playback of an 80 mbps MKV file, from the internal drive, while downloading with 1.2 MB/sec speed was excellent without any shutters.

Lastly, through misc settings you can get various info about the player like its version & network info, upgrade it through a USB stick, set a password, enable folder access protection etc.
Finally, to give you an idea of the PlayOn!HD2 in action we made the following video.
Jul 14th, 2025 19:04 CDT
change timezone
Latest GPU Drivers
New Forum Posts
- AMD 7Ghz? This keeps popping up on my feeds! (25)
- No offense, here are some things that bother me about your understanding of fans. (119)
- Cryptocoin Value and Market Trend Discussion (1657)
- System stutters with Ryzen 7 9800X3D. (1)
- Dual GPU Motherboard for home VFX (1)
- i7 2860QM how to raise power limit? (24)
- Large Format Plotter WiFi / LAN issue on Laptop (2)
- Is there a WIFI chip I should get? (3)
- How about AMD instead of Intel? (40)
- AI Job Losses: let's count the losses up, total losses to AI so far 94,000 and counting (7)
Popular Reviews
- Lexar NM1090 Pro 4 TB Review
- MSI GeForce RTX 5060 Gaming OC Review
- Our Visit to the Hunter Super Computer
- Fractal Design Epoch RGB TG Review
- NVIDIA GeForce RTX 5050 8 GB Review
- Corsair FRAME 5000D RS Review
- Sapphire Radeon RX 9060 XT Pulse OC 16 GB Review - An Excellent Choice
- Chieftec Iceberg 360 Review
- AMD Ryzen 7 9800X3D Review - The Best Gaming Processor
- Upcoming Hardware Launches 2025 (Updated May 2025)
TPU on YouTube
Controversial News Posts
- Intel's Core Ultra 7 265K and 265KF CPUs Dip Below $250 (288)
- Some Intel Nova Lake CPUs Rumored to Challenge AMD's 3D V-Cache in Desktop Gaming (140)
- AMD Radeon RX 9070 XT Gains 9% Performance at 1440p with Latest Driver, Beats RTX 5070 Ti (131)
- NVIDIA Launches GeForce RTX 5050 for Desktops and Laptops, Starts at $249 (122)
- NVIDIA GeForce RTX 5080 SUPER Could Feature 24 GB Memory, Increased Power Limits (115)
- Microsoft Partners with AMD for Next-gen Xbox Hardware (105)
- Intel "Nova Lake‑S" Series: Seven SKUs, Up to 52 Cores and 150 W TDP (100)
- NVIDIA DLSS Transformer Cuts VRAM Usage by 20% (97)