 9
9
Antec P380 Review
Assembly & Finished Looks »A Closer Look - Inside
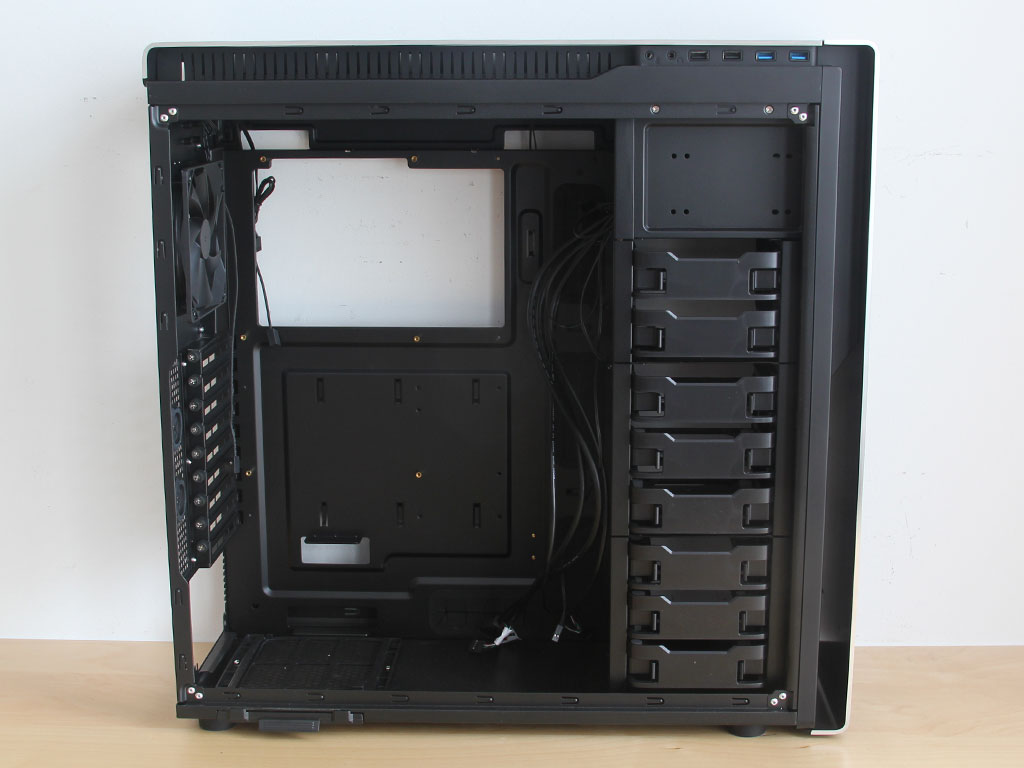
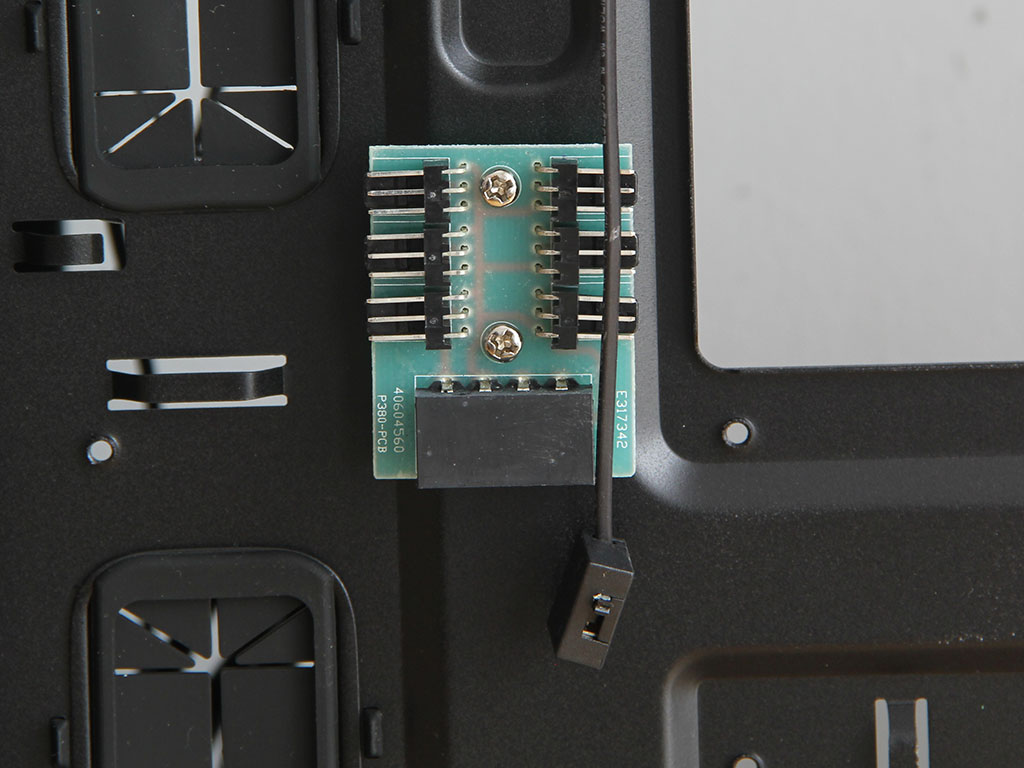
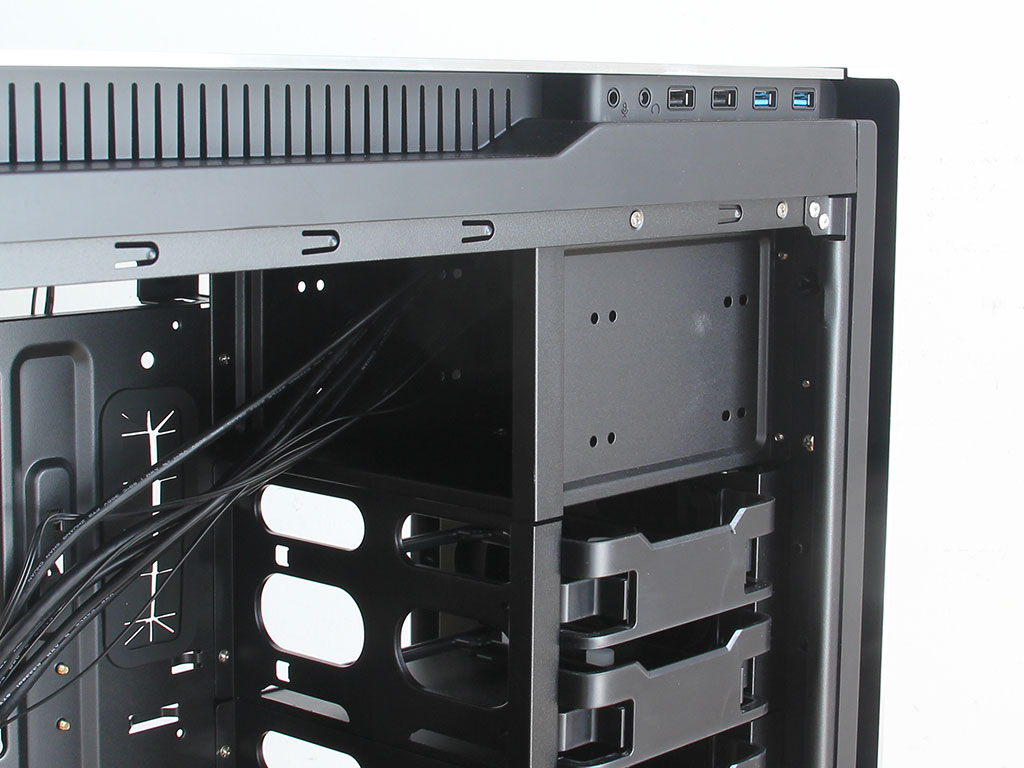
To access the interior, simply remove the thumbscrews holding each panel in place. At first sight, the interior is actually quite simple, but it does bear a few nice surprises. Behind the motherboard tray is a green PCB that allows for up to six 3-pin fans to be powered. It requires a Molex lead from the PSU to pass on the juice. There are plenty of hooks for zip ties to ensure that things are nice and tidy in the end. Most openings are also covered with grommets, and the CPU area of the board is free and clear, which should make accessing your cooler's backplate a breeze.
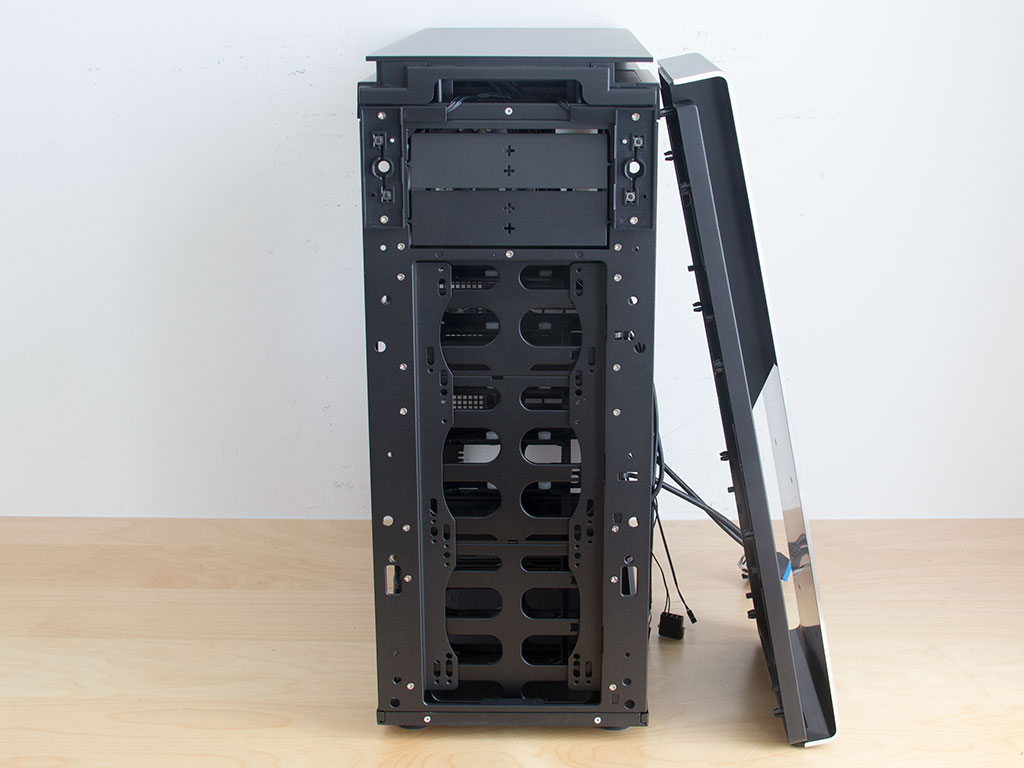
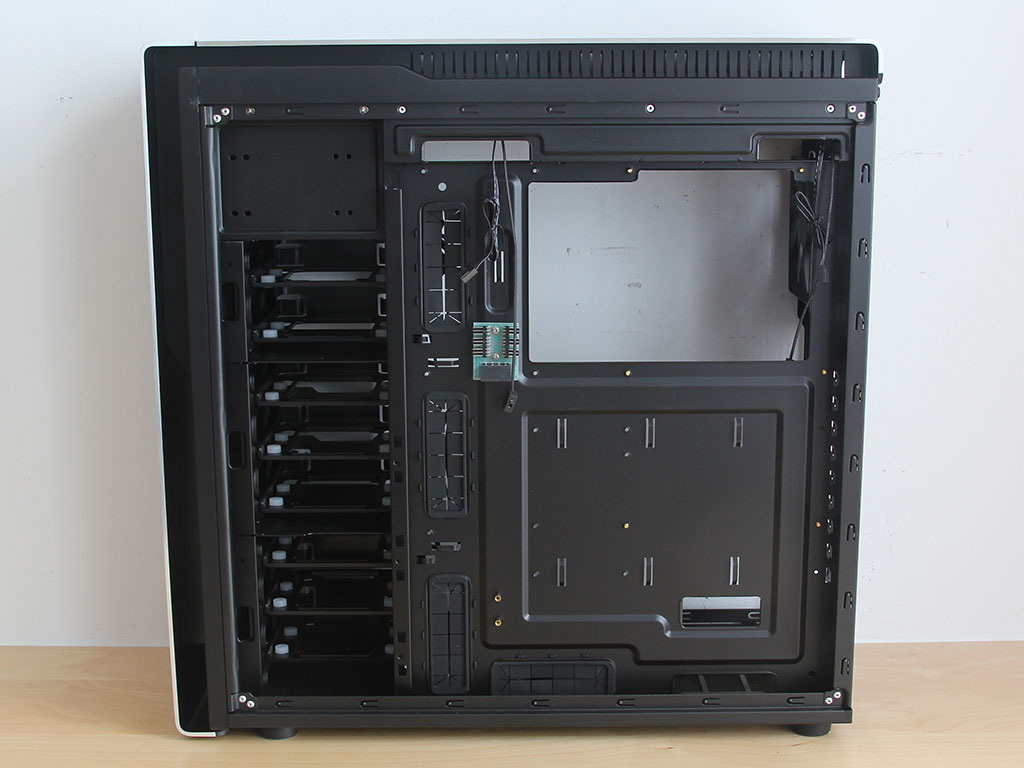
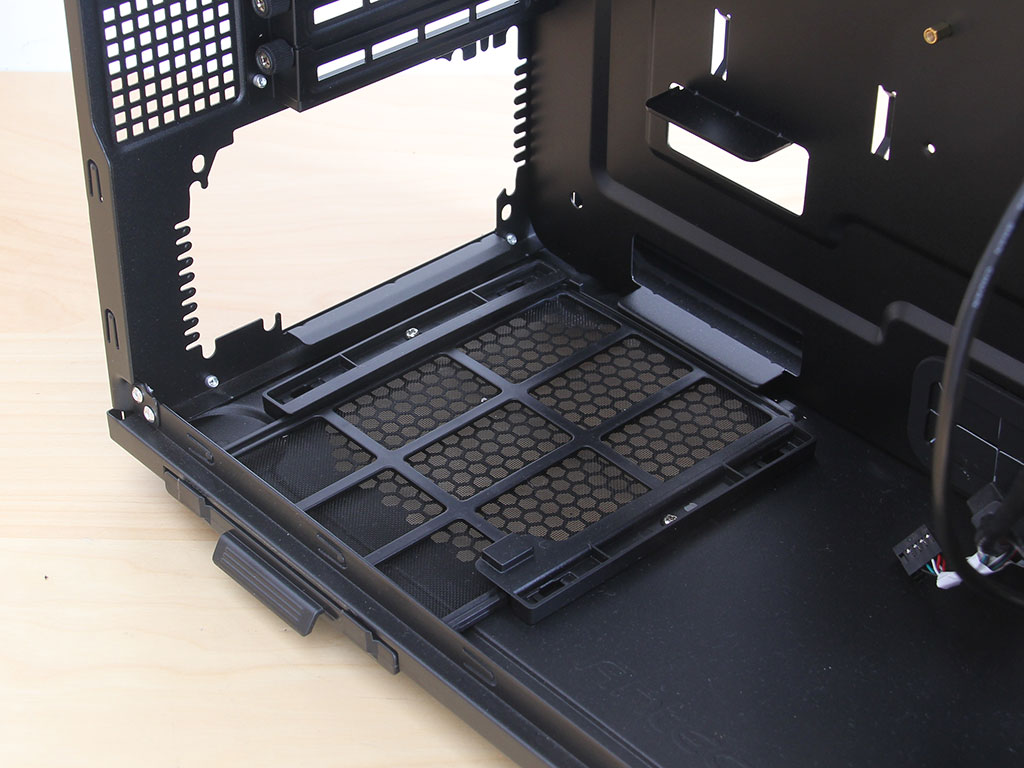
The plain front cover actually holds a few surprises as well, which become apparent when you remove it. However, you first have to unscrew six screws and yank it off with considerable force, which in my opinion amounts to a bit too much caution on Antec's part. Once removed, you will see the dust filter that covers the entire front. It may be pulled out through the bottom of the P380 without having to remove the front panel, but there is enough room for two 140 mm or 120 mm fans behind the panel. In addition, the hard-drive cages may also be removed, which makes installing a liquid-cooling system here by sacrificing some storage space possible. The downside is that doing so is a bit of work as you have to remove numerous screws before the cages come loose. Once again, Antec has gone a bit overboard - but better too much than too little, that is for sure.
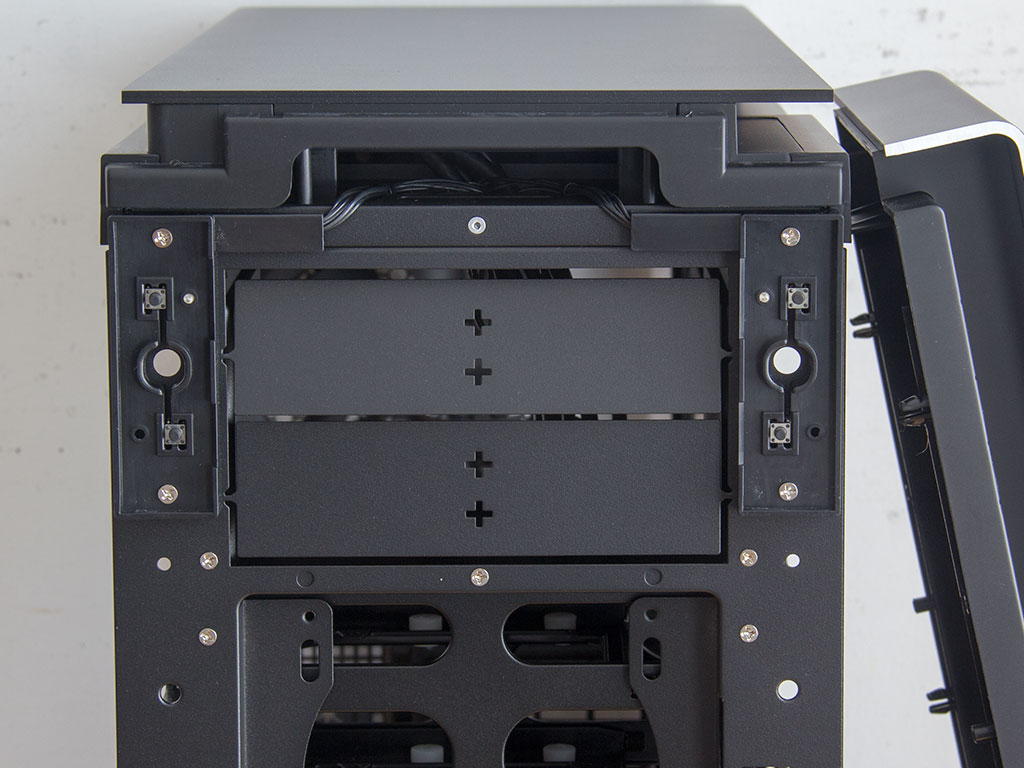
Another feature that may not be as apparent are the power and reset buttons. You may have noticed by now that I have not mentioned them in our look at the exterior of the chassis. They are actually hidden behind the aluminum front panel, but here comes the kicker: Antec placed a set of them on the left and right edges of the front panel, which makes accessing them readily regardless of your workspace setup possible.

Taking a look at the interior, it may look simple, but with the modular cages in mind, the P380 is actually quite the flexible case. In the very top are two 5.25" drive bays that are not accessible through the front. This means that Antec has taken the layout from a different chassis and has chosen to keep a bit of the original tooling. Naturally, it would haven been best if these bays were actual hard-drive bays instead.
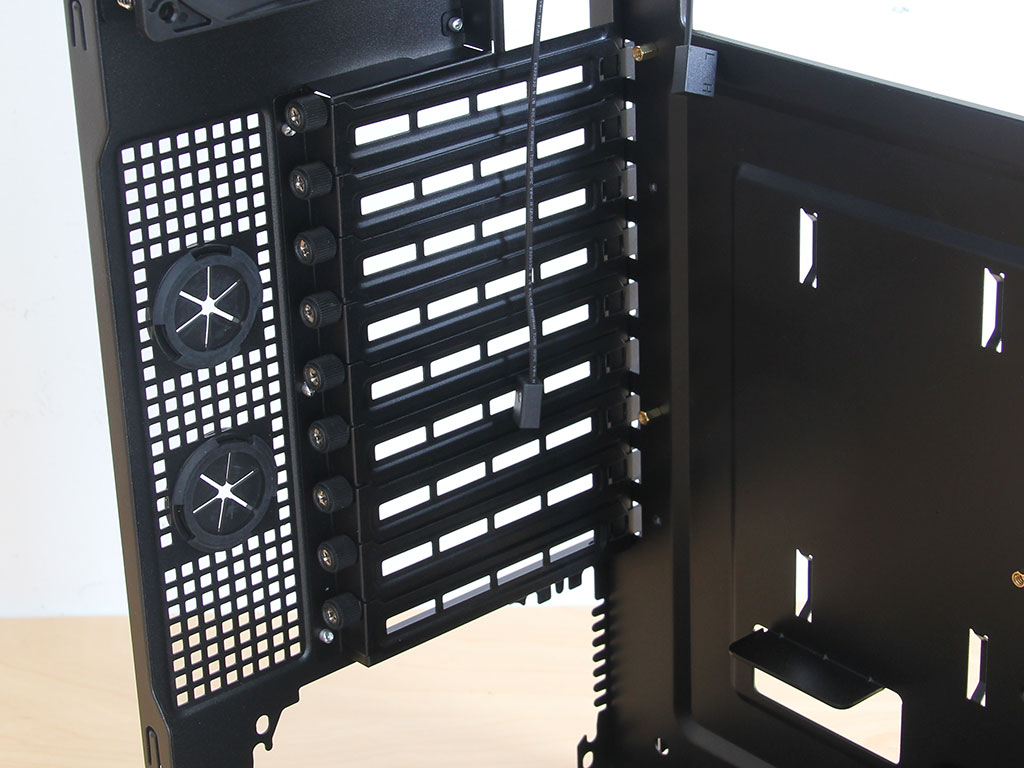
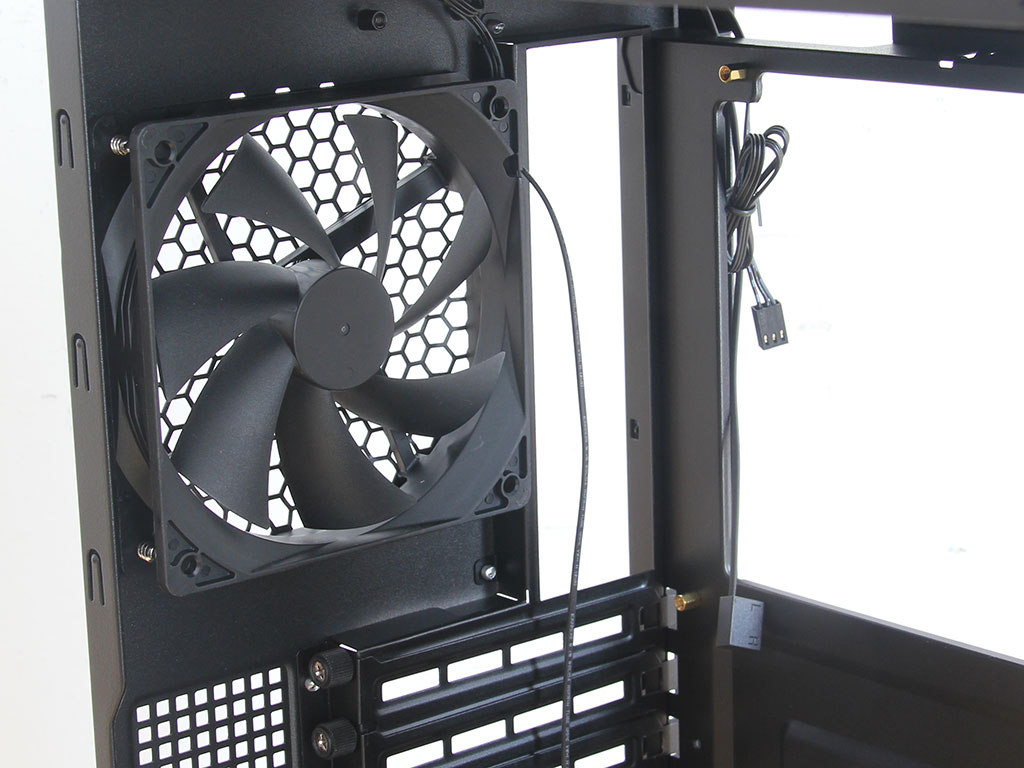
The chassis looks quite traditional because of the PSU bay in the bottom. The power supply rests on two metal lips, and the bay sports a removable dust filter you may pull out through the chassis' left side for added convenience. Above that are the aforementioned nine expansion slots, each protected by individual, reusable covers that are held in place by thumbscrews. Note the high/low switch dangling around in the picture: It is firmly attached to the fan so that you may adjust its rotational speed. The 120 mm exhaust fan in the very top is completely black - including its cable leading to the 3-pin connector.
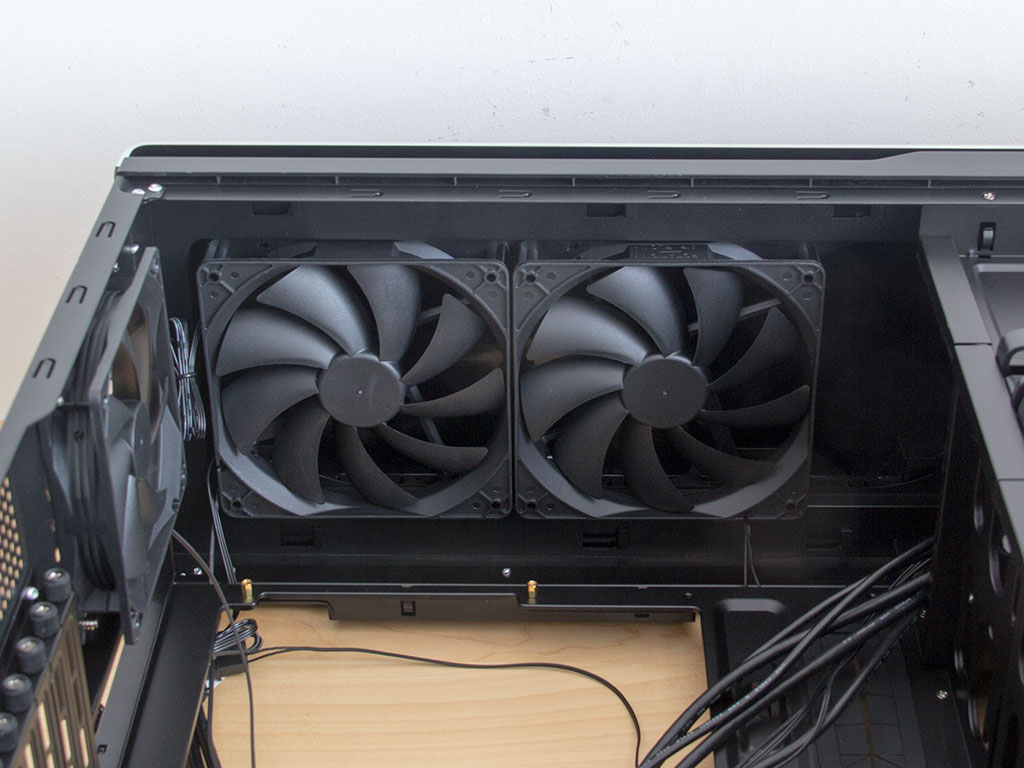
The two pre-installed 140 mm fans in the top also come with the same setup of 3-pin plugs and individual high/low switches. It is good of Antec to include such a control element since they would otherwise run at full speed when plugged into the green PCB on the back of the motherboard tray.

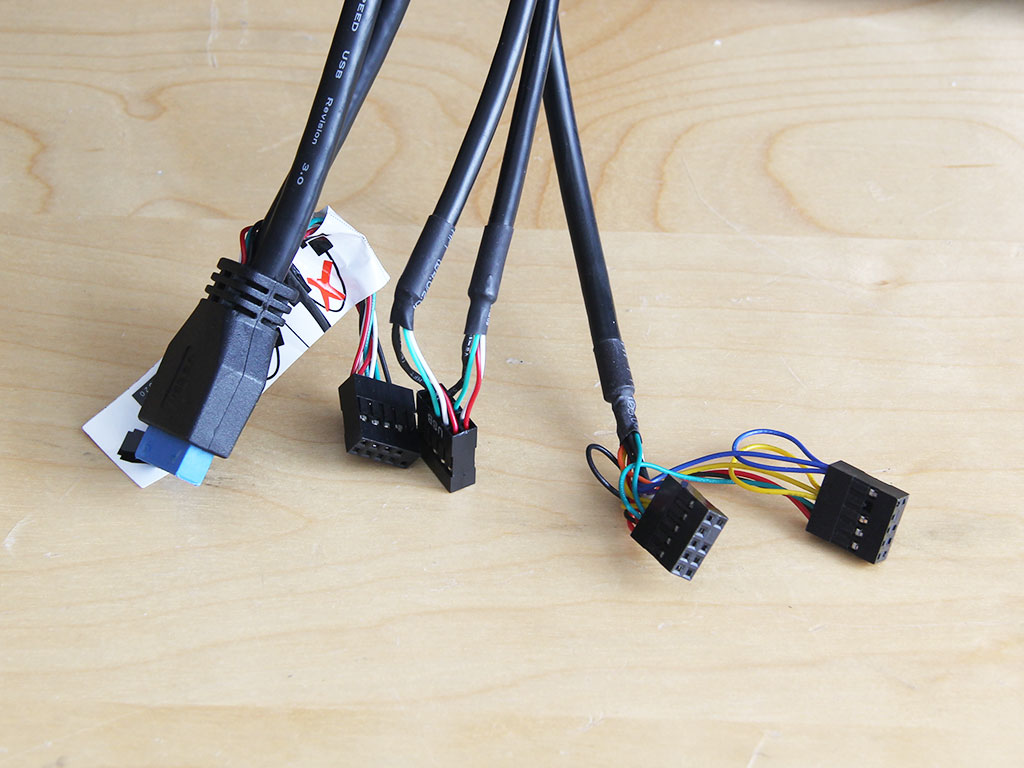
All the cables within the Antec P380 except for the power LED lead are of the default variety. Here, Antec has chosen to go for a Molex connector instead. You also will not find a cable for a HDD activity LED since there is no such lighting element.
Jan 6th, 2025 21:34 EST
change timezone
Latest GPU Drivers
New Forum Posts
- B580 tanks performance with low end CPUs (106)
- 12VHPWR ATX3.0 PCI-E 5.0 Power Modular Adapter 600W will be enough for RTX 5090? (23)
- Are game requirements and VRAM usage a joke today? (605)
- MSI RX580 8g ARMOR OC (15)
- anyone buy a high end gpu from a mining rig? got screwed, or was happy? (43)
- The TPU UK Clubhouse (25494)
- Potential Problems on ASUS B550 PLUS AC-HES (36)
- Need a 4k curved monitor (20)
- Clock speeds doesn't show at the end of furmark's benchmark? (2)
- Sturdy wireless headphones with ANC and "good" sound (2)
Popular Reviews
- DDR5 Thermal Testing & Analysis
- Klevv Genuine G560 2 TB Review
- SCYROX V8 Review
- AMD Ryzen 7 9800X3D Review - The Best Gaming Processor
- GPU Test System Update for 2025
- Intel Arc B580 Review - Excellent Value
- Upcoming Hardware Launches 2024 (Updated Nov 2024)
- Arrow Lake Retested with Latest 24H2 Updates and 0x114 Microcode
- HIFIMAN Arya Unveiled Headphones Review - The Next Best?
- INTUAURA Lakeview In-Ear Monitors Review - The Power of DSP!
Controversial News Posts
- AMD Debuts Radeon RX 9070 XT and RX 9070 Powered by RDNA 4, and FSR 4 (210)
- AMD Radeon RX 9070 XT Alleged Benchmark Leaks, Underwhelming Performance (204)
- NVIDIA GeForce RTX 5090 Features 575 W TDP, RTX 5080 Carries 360 W TDP (200)
- 32 GB NVIDIA RTX 5090 To Lead the Charge As 5060 Ti Gets 16 GB Upgrade and 5060 Still Stuck With Last-Gen VRAM Spec (173)
- Potential RTX 5090 and RTX 5080 Pricing in China Leaks (173)
- AMD Radeon RX 9070 XT Boosts up to 3.10 GHz, Board Power Can Reach up to 330W (167)
- NVIDIA GeForce RTX 5070 Ti Leak Tips More VRAM, Cores, and Power Draw (161)
- NVIDIA GeForce RTX 5070 and RTX 5070 Ti Final Specifications Seemingly Confirmed (152)