 14
14
ASUS ROG Strix Flare Keyboard Review
Driver »Disassembly
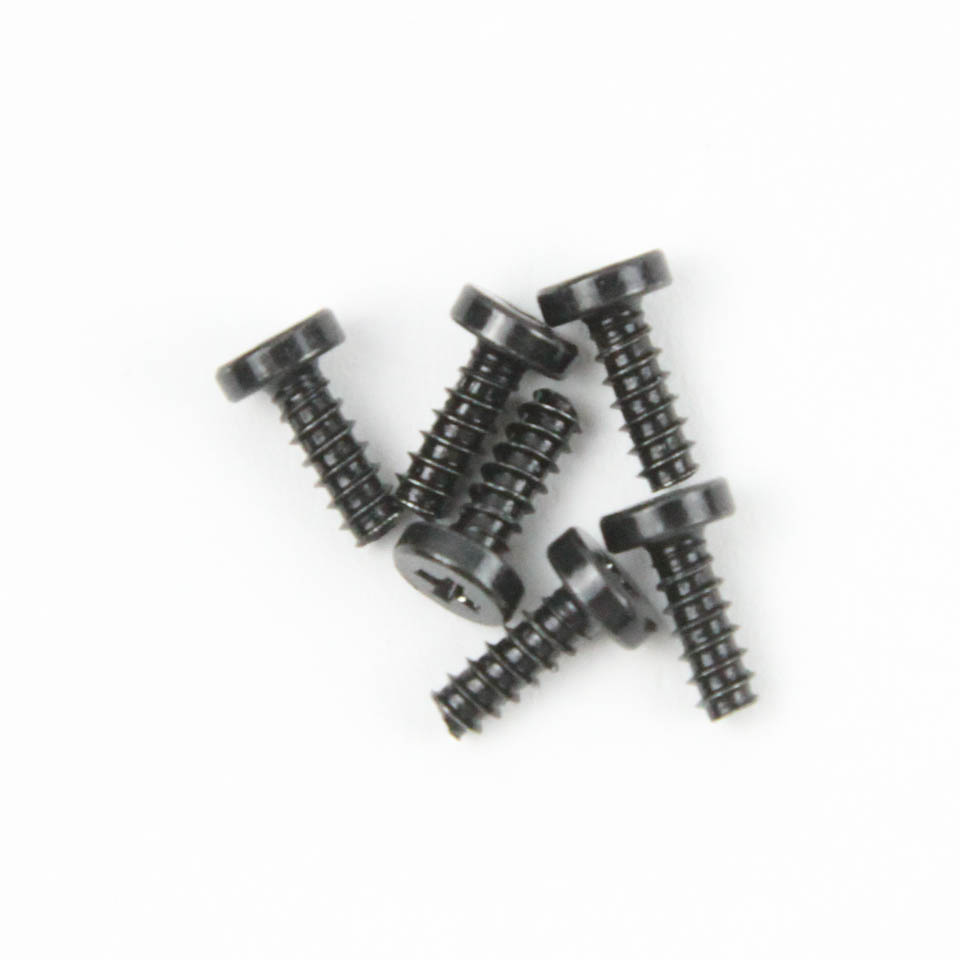


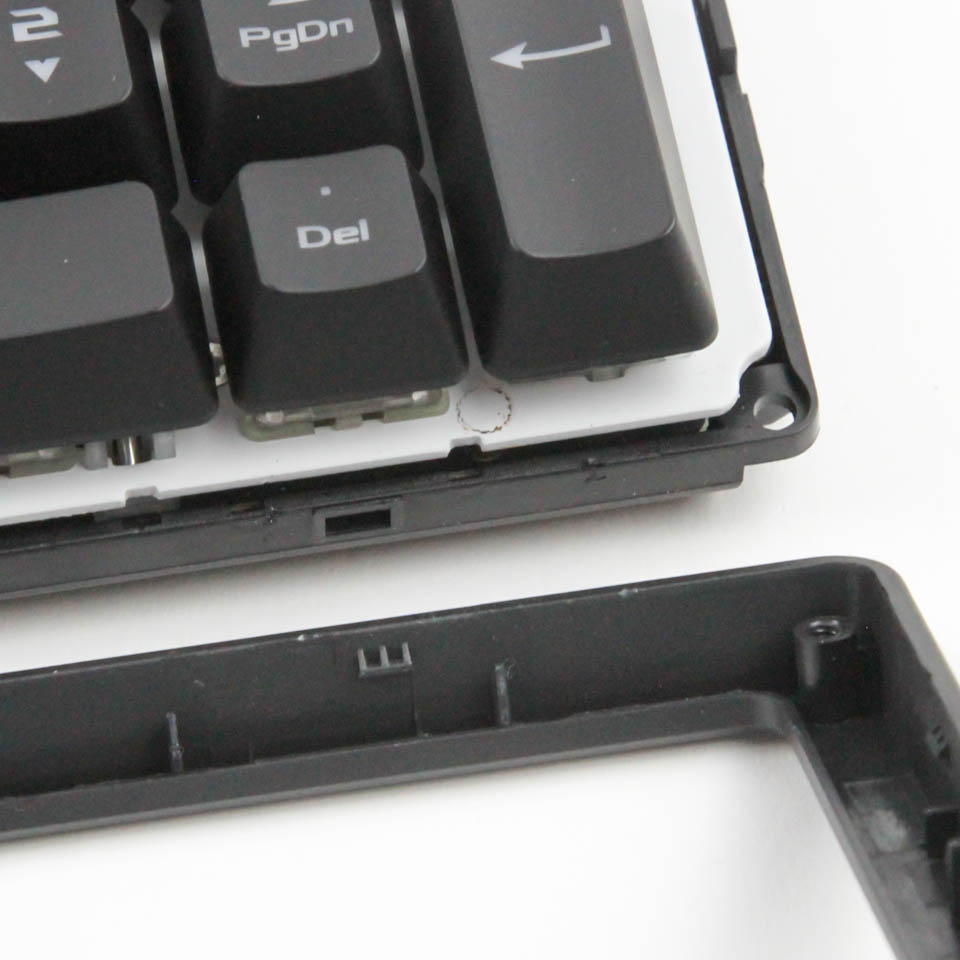
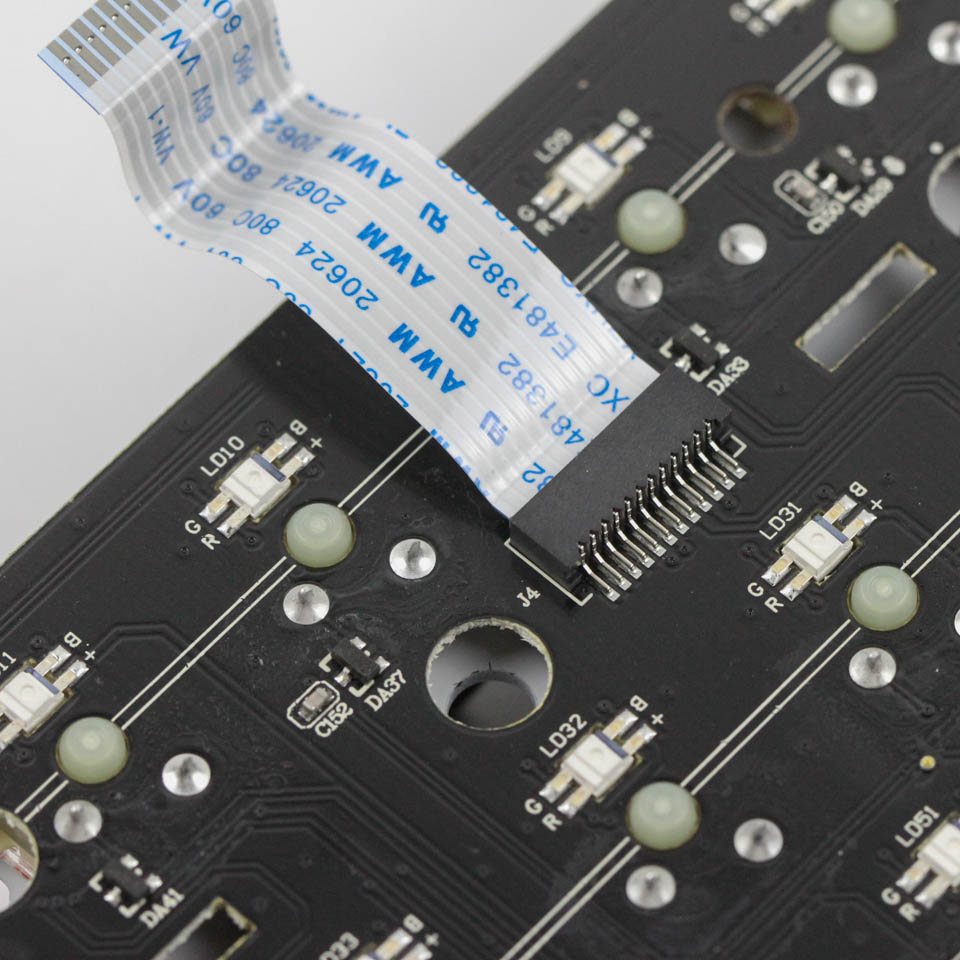
Disassembly of the ASUS ROG Strix Flare keyboard is fairly involved because of all the extra keys and lighting in combination with the two-piece case design. There are six accessible Phillips-head screws on the back. Once removed, you will have to pry the top case panel off the rest of the keyboard with a thin, flat object to separate several interconnecting plastic tabs. This provides enough room to lift the top panel up by enough to reveal a ribbon cable that connects the primary PCB to a daughter PCB on this piece. Disconnect the cable and the ABS plastic top panel can be fully taken off.


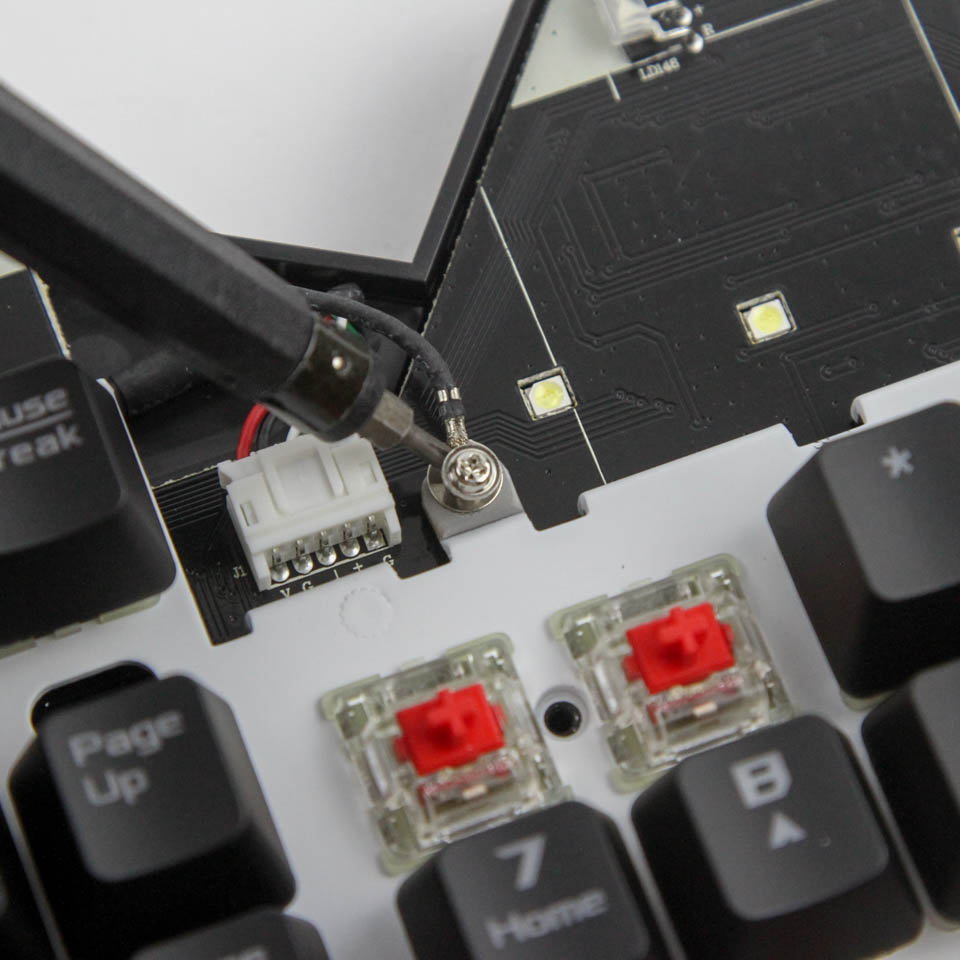

But wait, there is more! There remain more daughter PCBs, this time on the bottom case panel, connected to the primary PCB. These need to be removed, or at least disconnected, to allow the PCB/steel plate piece to come off. There are also specific keycaps that need to be removed to access more screws on the front, which reveals the two screws used to ground the daughter/primary PCBs, and the two internal cables on the right.
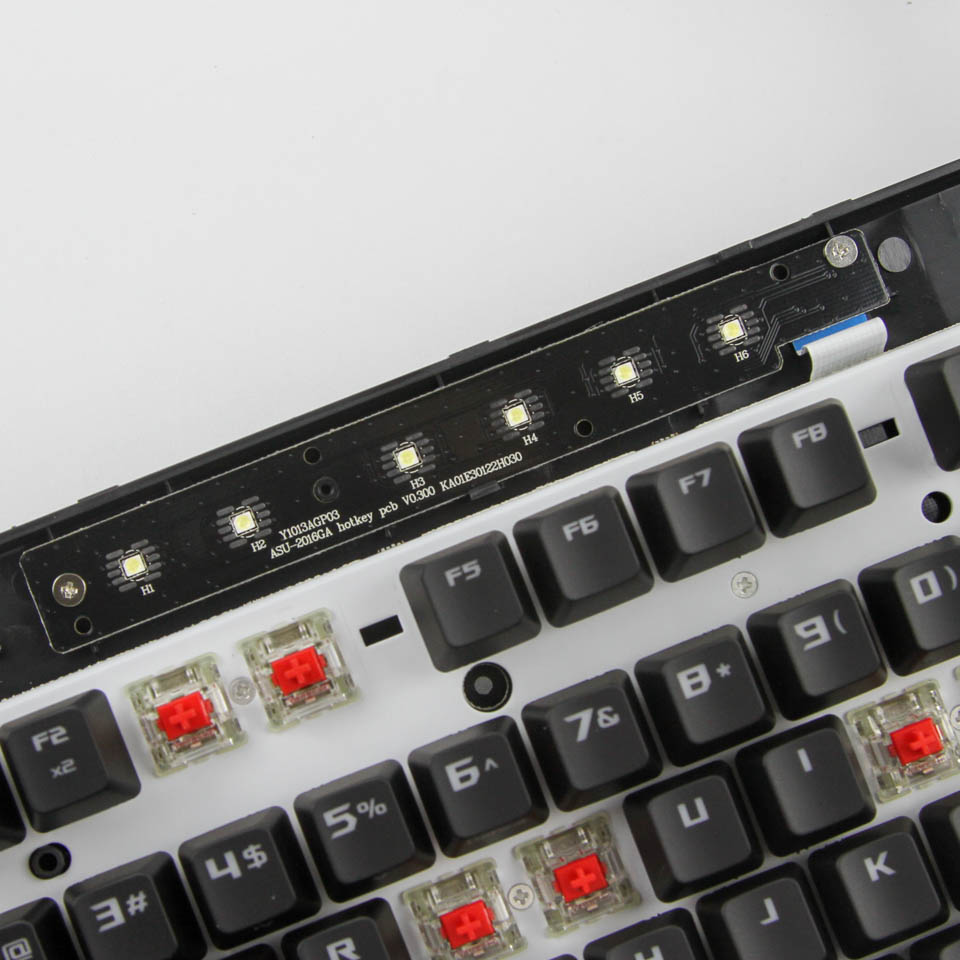
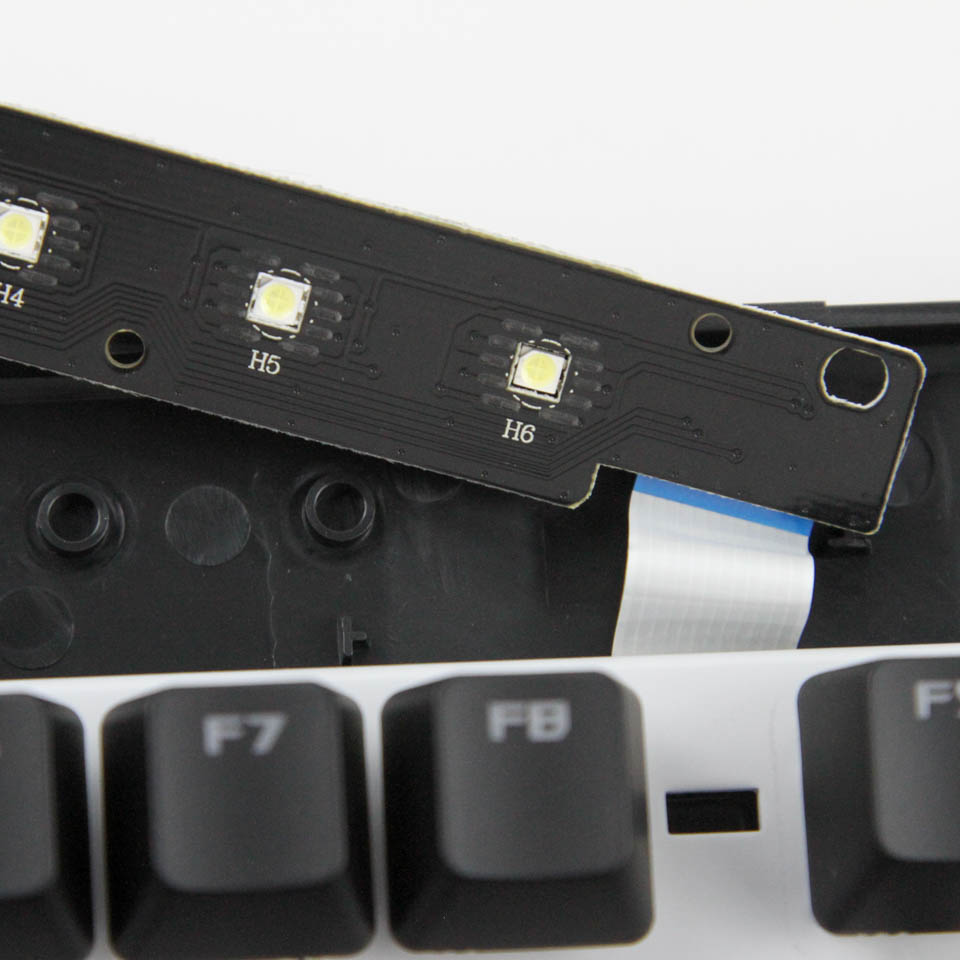
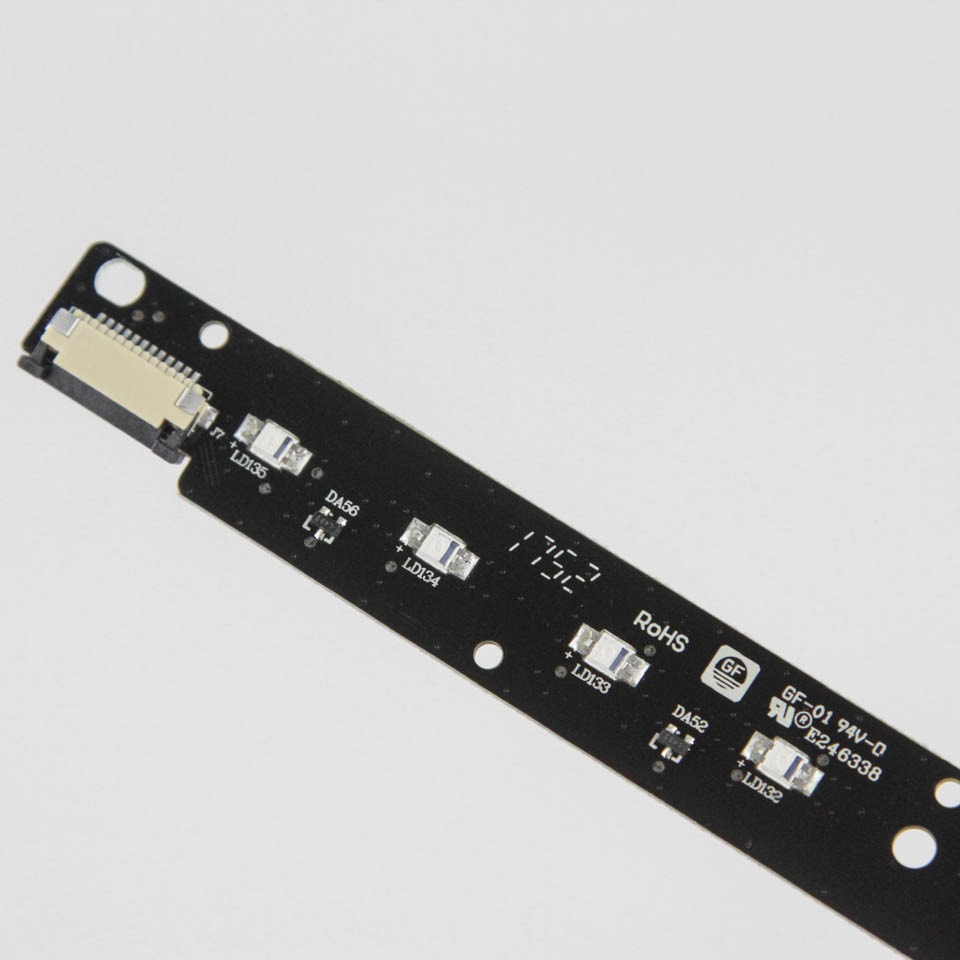
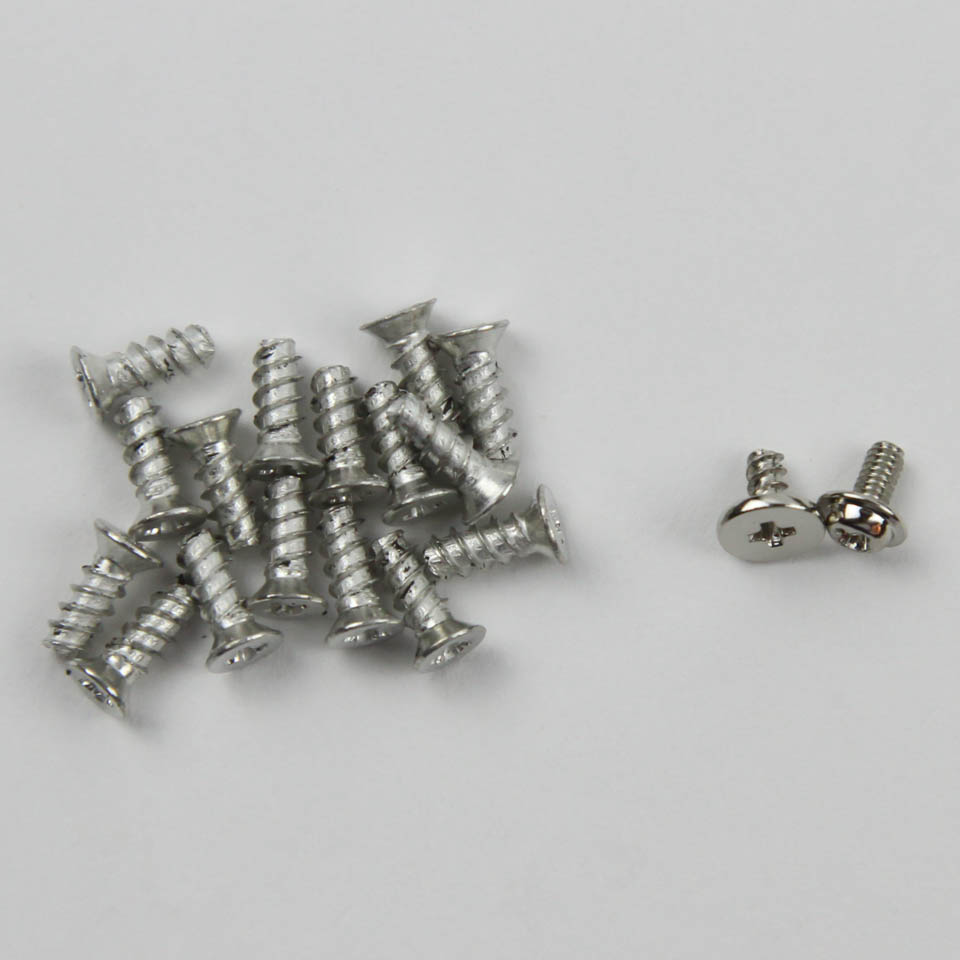
Did I say daughter PCBs yet? There is another, connected by a riser cable hidden underneath, and it simply has to be screwed out and lifted up by enough to disconnect the cable. This particular daughter PCB houses the dedicated media control keys we saw before, along with the associated RGB LEDs. It is at this point that you remove all other screws on the front, including the two grounding screws from before.

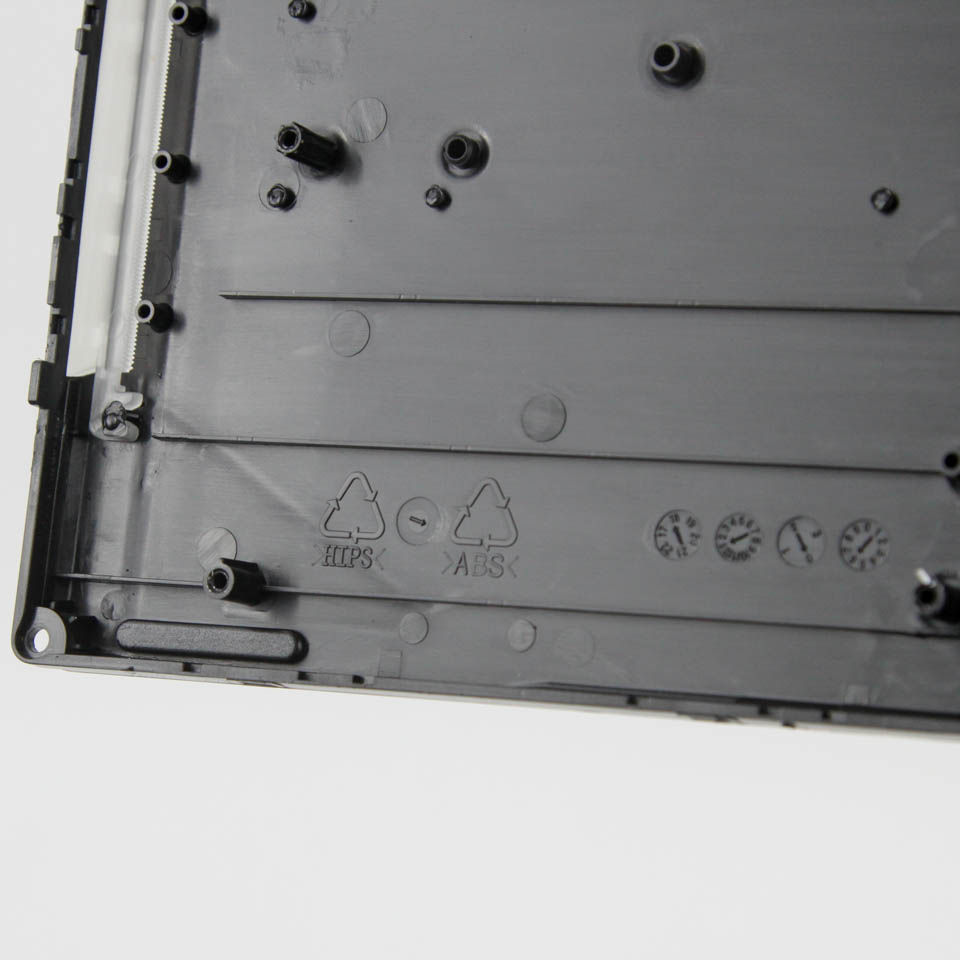
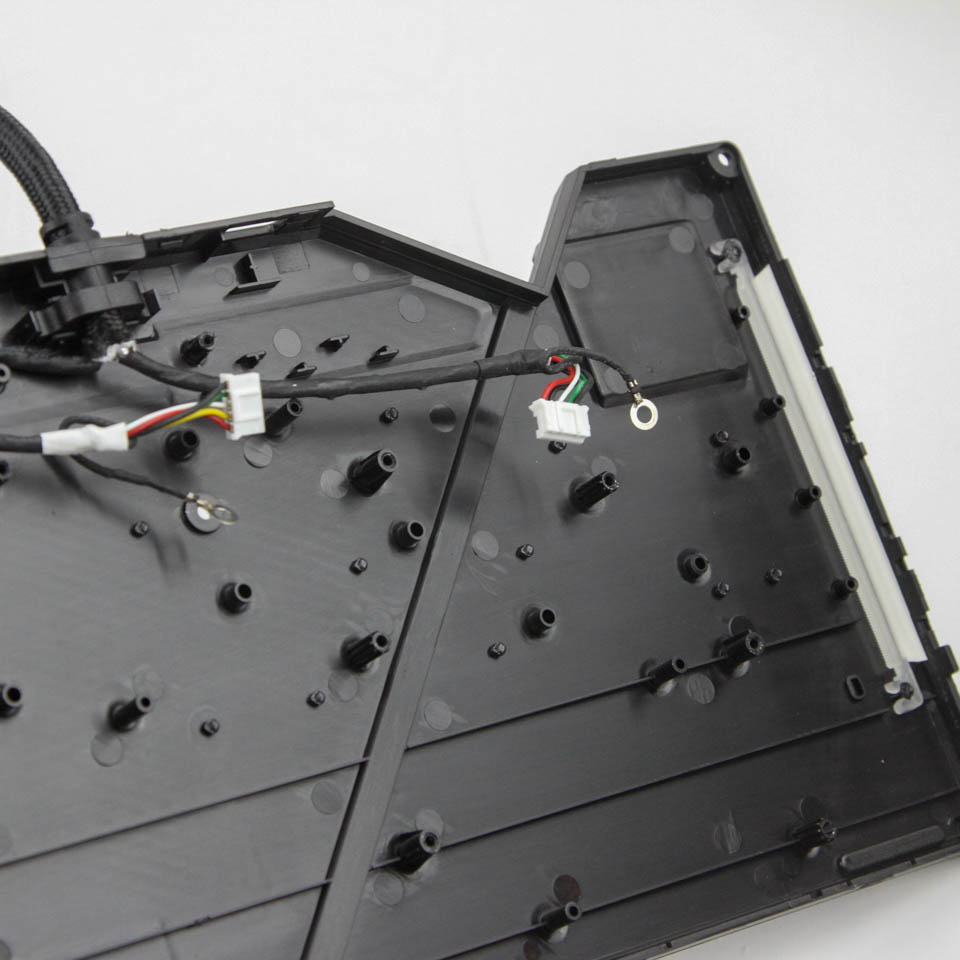
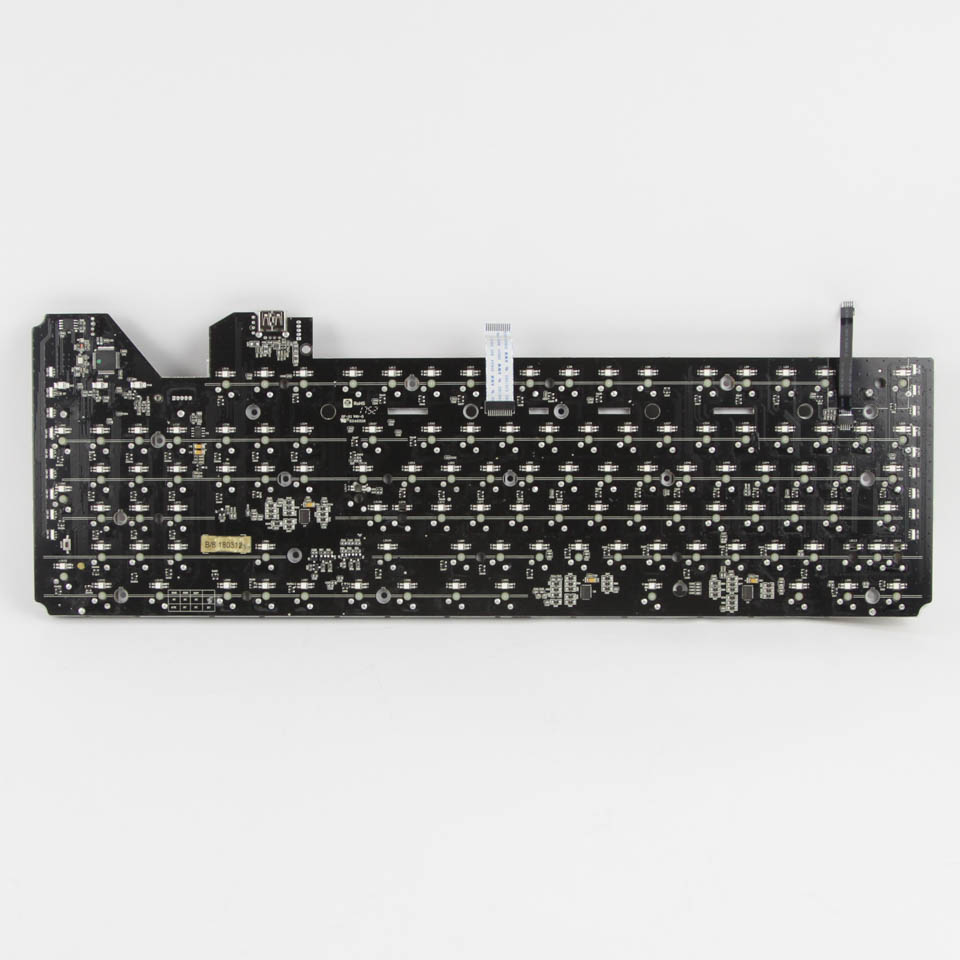
With all screws removed and cables disconnected, the bottom case panel can be completely removed. Markings confirm this too is made out of ABS plastic, and there are two translucent, frosted plastic pieces on the sides that allow for the side/underglow lighting available with the ROG Strix Flare. The primary PCB is now fully visible for us to see, and as with the other PCBs employed here, it is black in color.
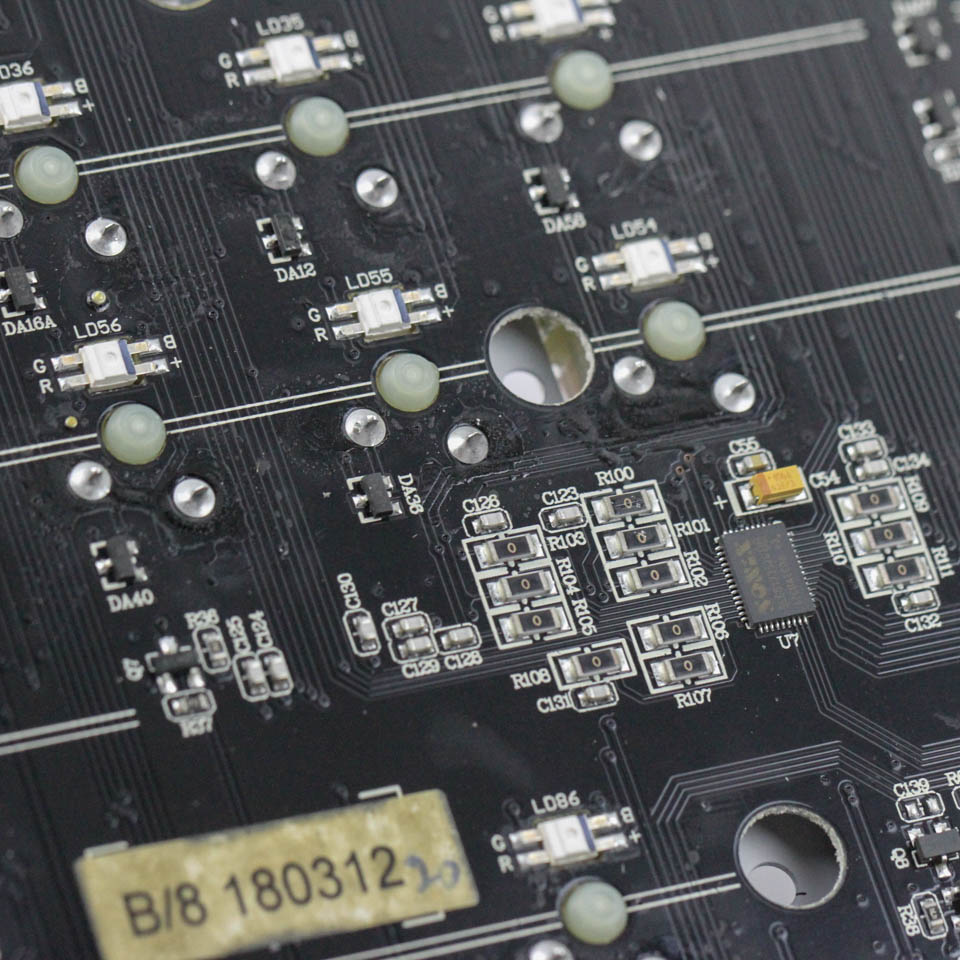
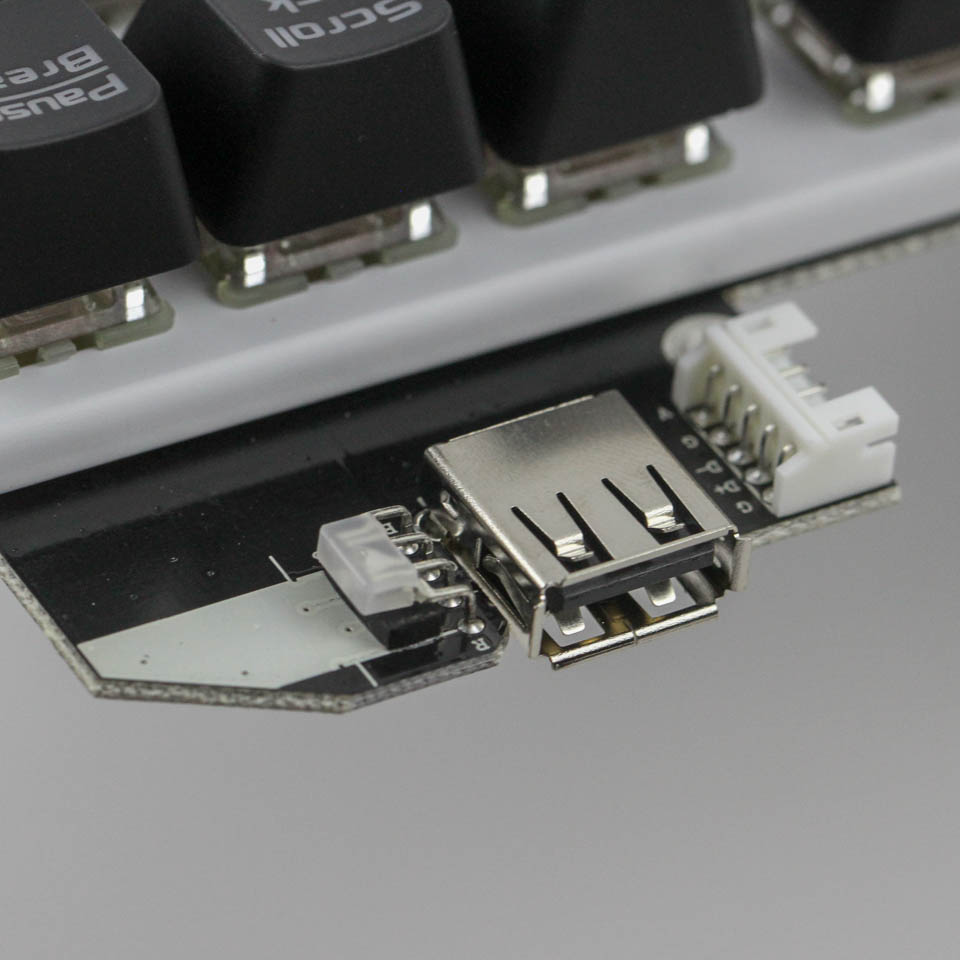
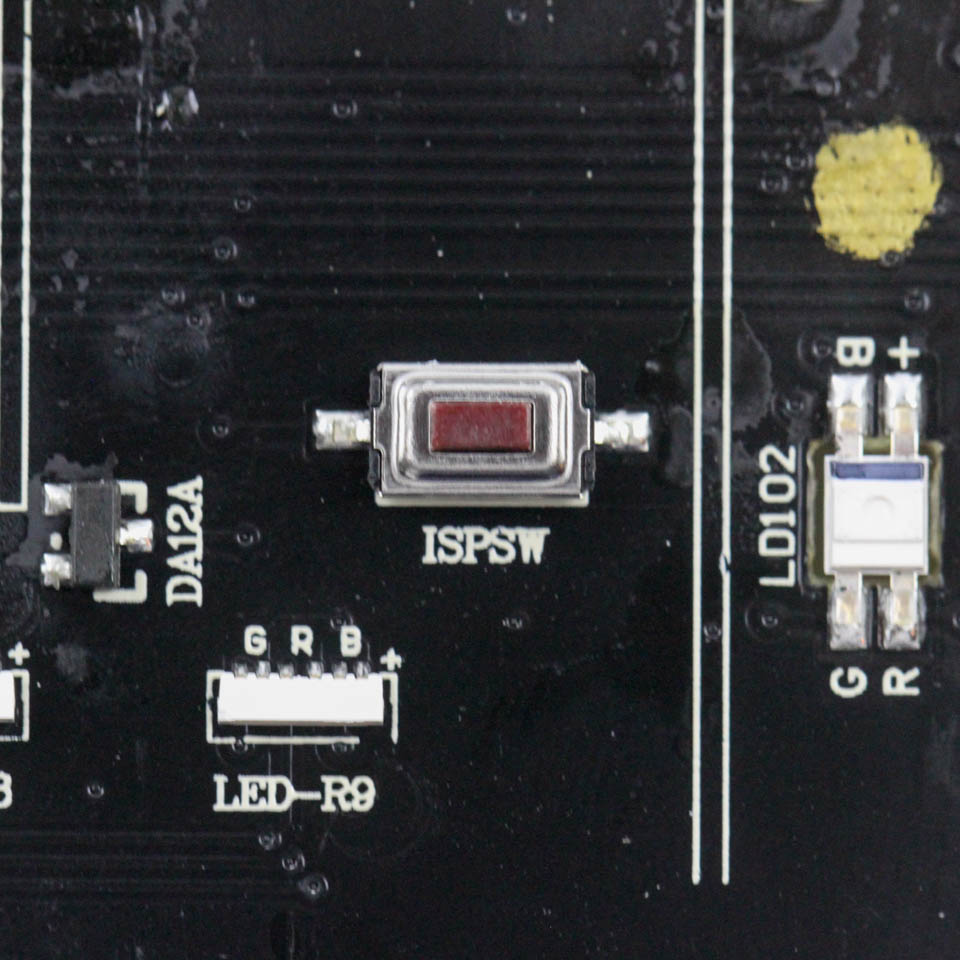
Solder quality is really good, and likely machine-assembled given the volumes ASUS deals in. The USB pass-through port, as well as the two LEDs for the badge insert lighting, are on the primary PCB, which accounts for the non-rectangular shape of said PCB (something ASUS has some experience with already if their APEX series of motherboards is anything to go by!). There is also a sneaky hidden reset button to the left of the PCB, although there are software and onboard resets available as well—more on those on the next page.
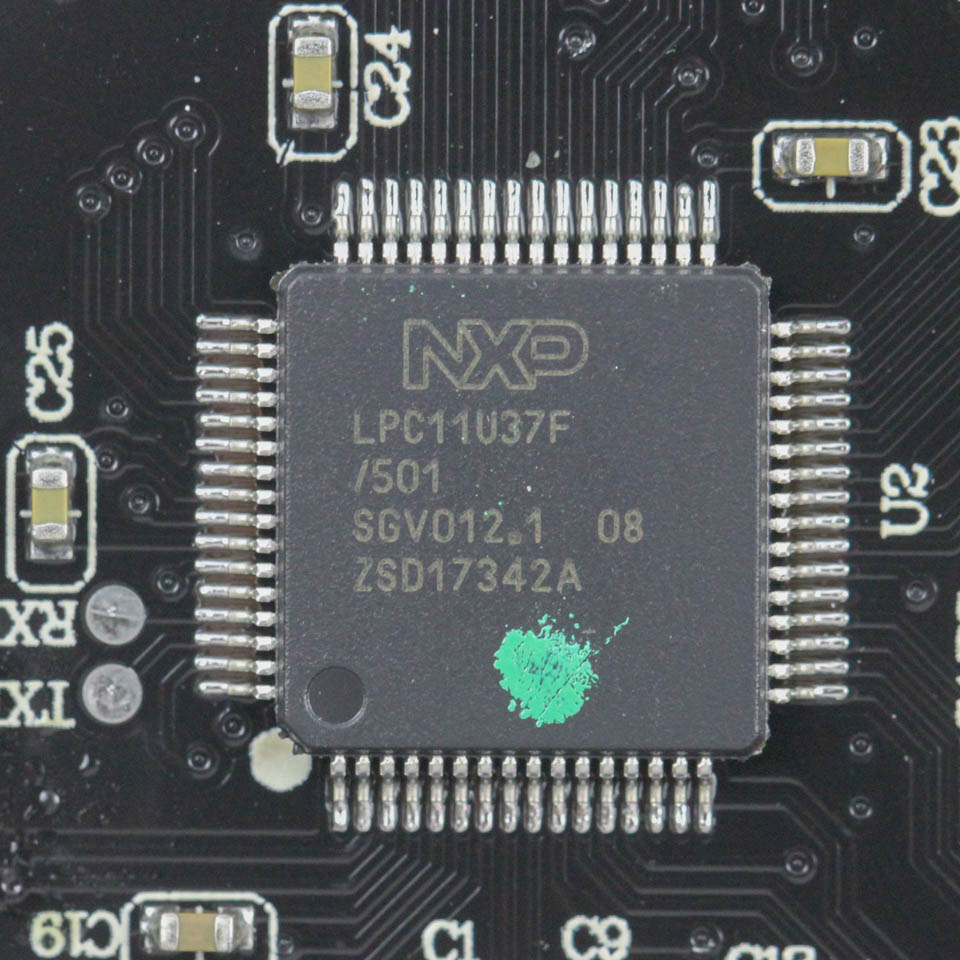
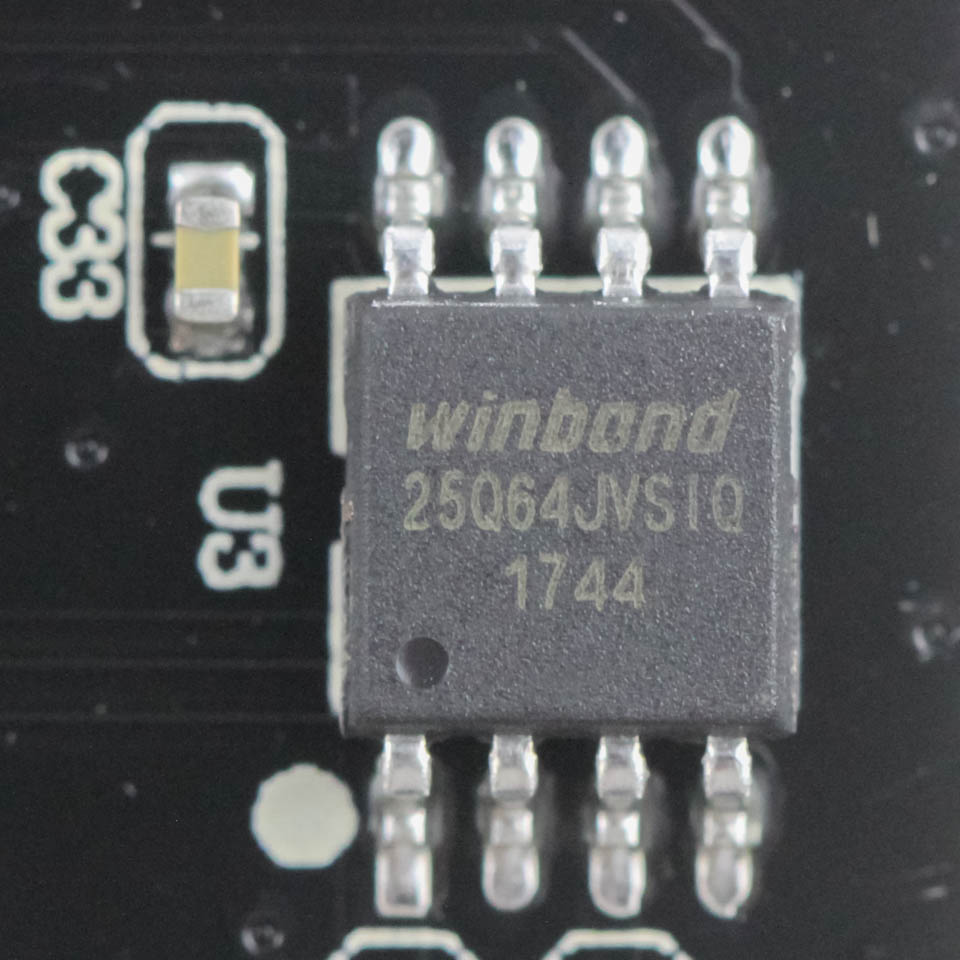
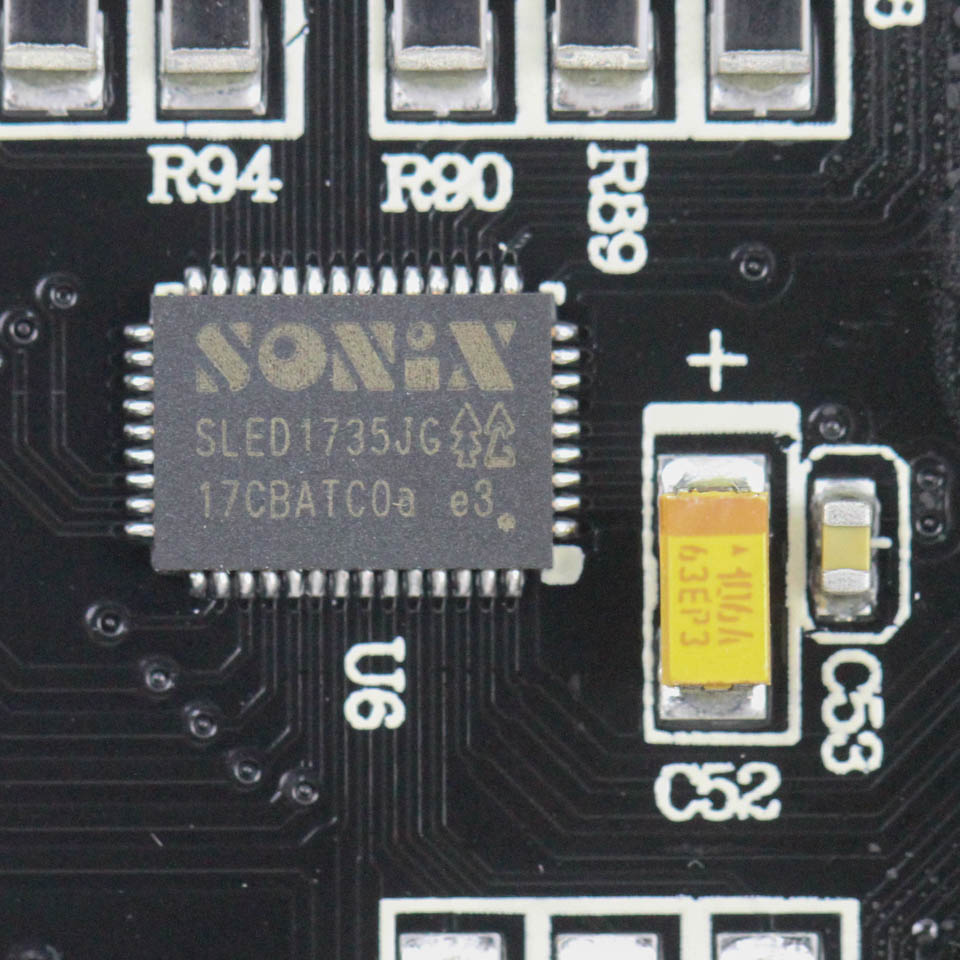
Powering the ROG Strix Flare is an NXP LPC11U37F 32-bit ARM Cortex-M0 USB microcontroller with up to 128 KB on-board flash memory, 12 KB SRAM, and 4 KB EEPROM. There is also a Winbond W25Q64JV 8 MB flash memory module to store all the pre-programmed functions, and three Sonix SLED1735 RGB LED drivers that are collectively more than capable of running the various RGB LEDs onboard. All the components, including the switches, LEDs, and capacitors, are soldered to a multi-layered PCB.
Before we move on, be advised that disassembly may void the warranty and that TechPowerUp is not liable for any damages incurred if you decide to go ahead and do so anyway.
Apr 3rd, 2025 05:36 EDT
change timezone
Latest GPU Drivers
New Forum Posts
- Since all gpu's models perform the same, why review dozen of different models? (15)
- RX 9000 series GPU Owners Club (120)
- Help with System Recommendations (9)
- A slightly strange problem with a GPU (11)
- NZXT N9 X870E is out (despite their website still saying: coming soon) (9)
- Mllse 6600s that are locked at 500 mhz. (1)
- Is RX 9070 VRAM temperature regular value or hotspot? (298)
- TechPowerUp Screenshot Thread (MASSIVE 56K WARNING) (4266)
- Windows 11 General Discussion (5917)
- Montech KING 95 - your opinions? (14)
Popular Reviews
- DDR5 CUDIMM Explained & Benched - The New Memory Standard
- Sapphire Radeon RX 9070 XT Pulse Review
- SilverStone Lucid 04 Review
- PowerColor Radeon RX 9070 Hellhound Review
- Sapphire Radeon RX 9070 XT Nitro+ Review - Beating NVIDIA
- Palit GeForce RTX 5070 GamingPro OC Review
- ASRock Phantom Gaming B850 Riptide Wi-Fi Review - Amazing Price/Performance
- Pwnage Trinity CF Review
- AMD Ryzen 7 9800X3D Review - The Best Gaming Processor
- Samsung 9100 Pro 2 TB Review - The Best Gen 5 SSD
Controversial News Posts
- MSI Doesn't Plan Radeon RX 9000 Series GPUs, Skips AMD RDNA 4 Generation Entirely (146)
- Microsoft Introduces Copilot for Gaming (124)
- AMD Radeon RX 9070 XT Reportedly Outperforms RTX 5080 Through Undervolting (119)
- NVIDIA Reportedly Prepares GeForce RTX 5060 and RTX 5060 Ti Unveil Tomorrow (115)
- Over 200,000 Sold Radeon RX 9070 and RX 9070 XT GPUs? AMD Says No Number was Given (100)
- NVIDIA GeForce RTX 5050, RTX 5060, and RTX 5060 Ti Specifications Leak (96)
- Retailers Anticipate Increased Radeon RX 9070 Series Prices, After Initial Shipments of "MSRP" Models (90)
- China Develops Domestic EUV Tool, ASML Monopoly in Trouble (88)