 11
11
The ASUS TUF Gaming Alliance Revisited
Finished Looks, Value & Conclusion »The ASUS TUF Gaming Build
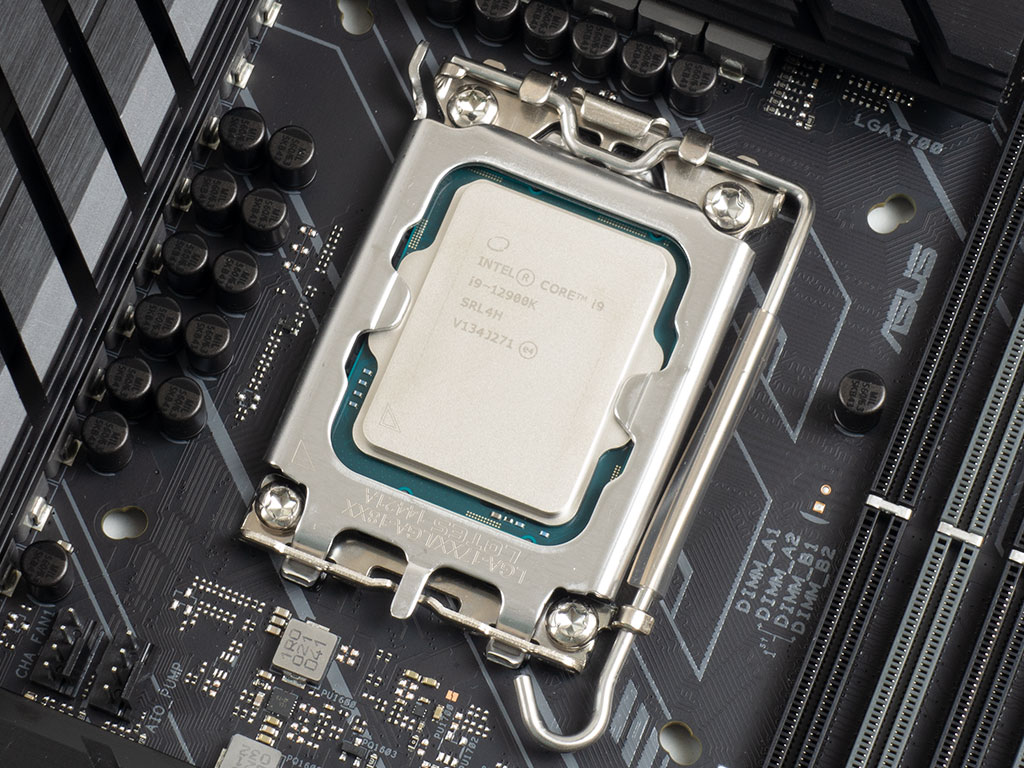
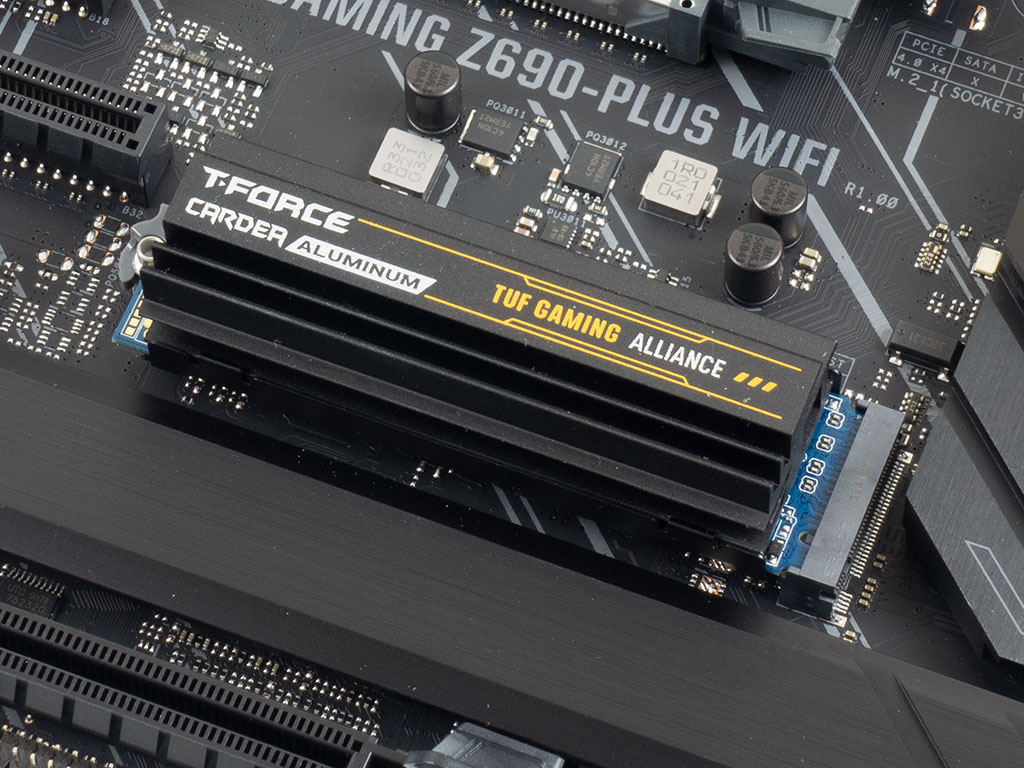
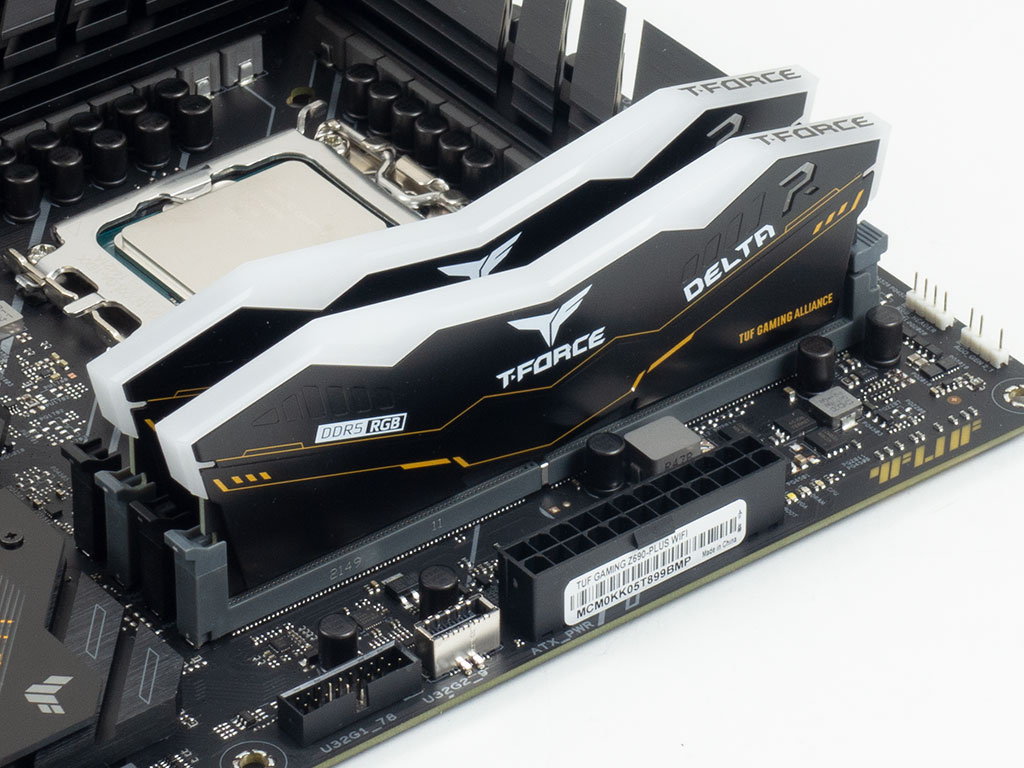
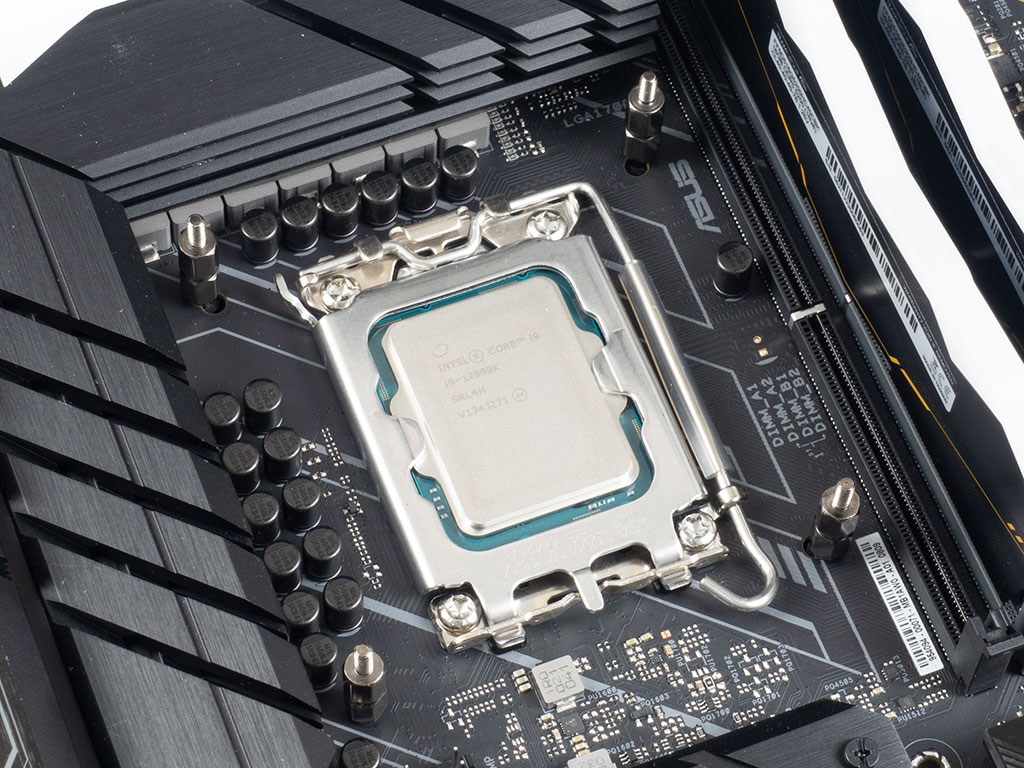
Now that we have covered all the parts of the build, it is on to the fun stuff. Adding the Intel Core i9-12900K to the board elicits feelings of awe, knowing of the processing power being inserted. Slotting in the SSD and making sure the heatsink is upright so that one can easily read the branding gives you a first glimpse of how the parts will end up fitting together. The same goes for the DDR5 memory with its orange highlights on black heatspreaders.
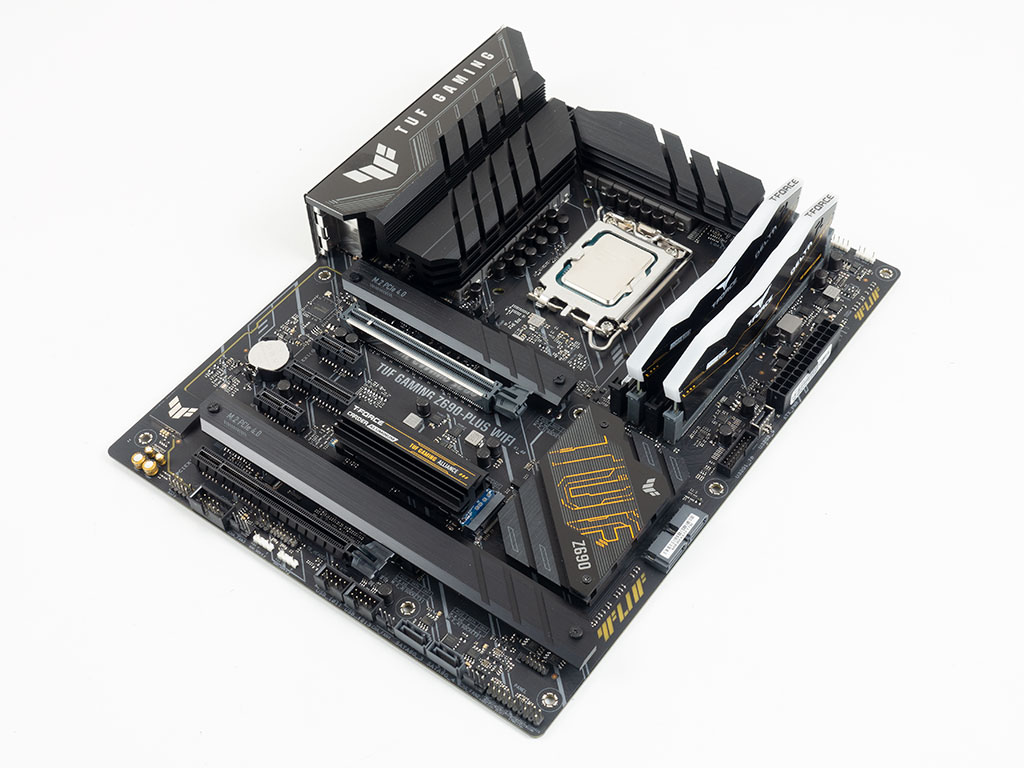
With the core of the system assembled, all the parts already make a very cohesive impression, and after a brief pause to admire the progress so far, it is on to prepping the unit with the LG1700 mounting kit from the TUF AIO.
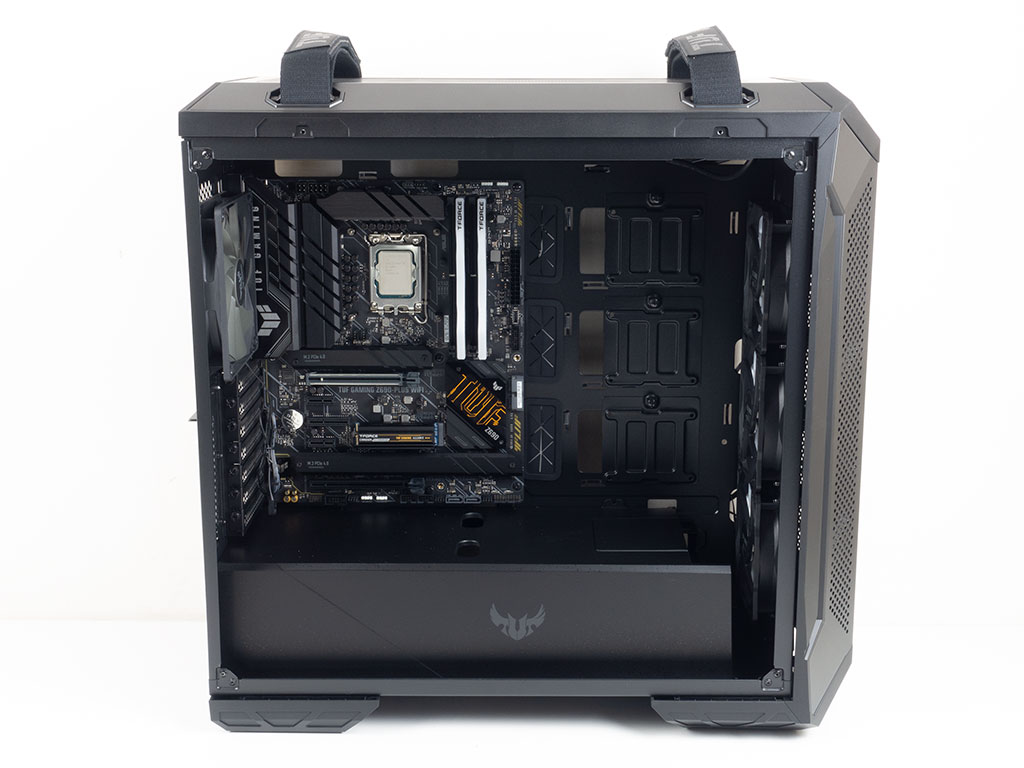
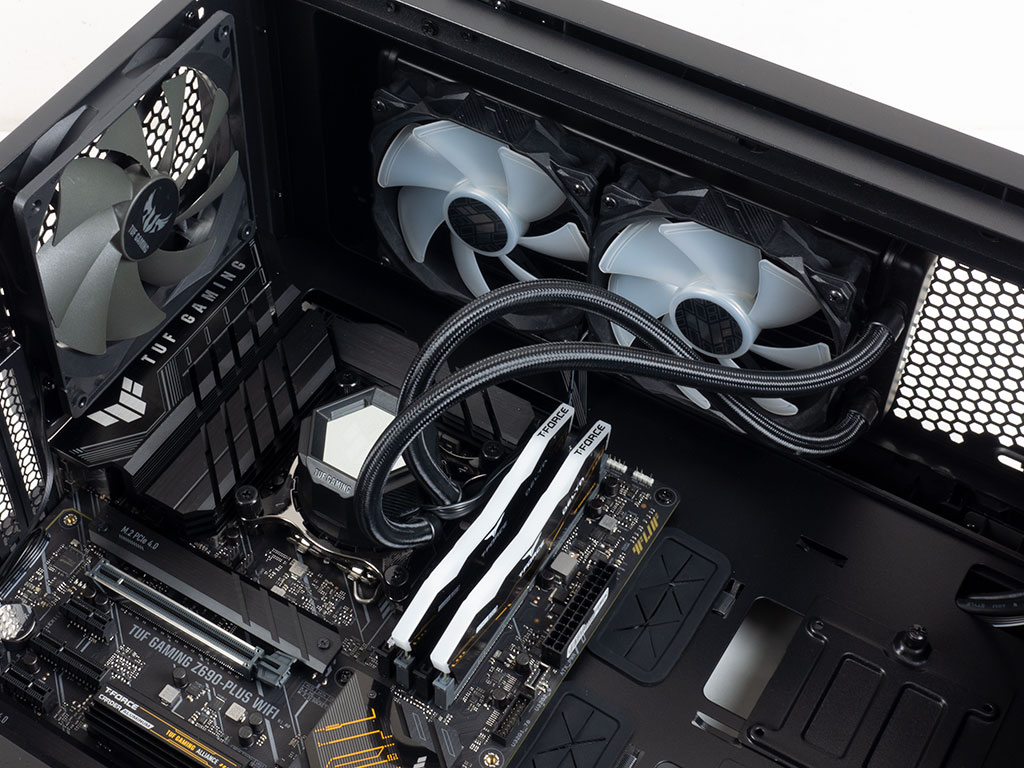
Once that whole setup is inserted into the chassis, how spacious the TUF Gaming GT501 is shows. The 240 mm AIO seems a little small, but while it won't beat out bigger units and thus won't wrestle the Intel Core i9-12900K down to the lowest-possible temperature, it will be perfectly fine and functional.
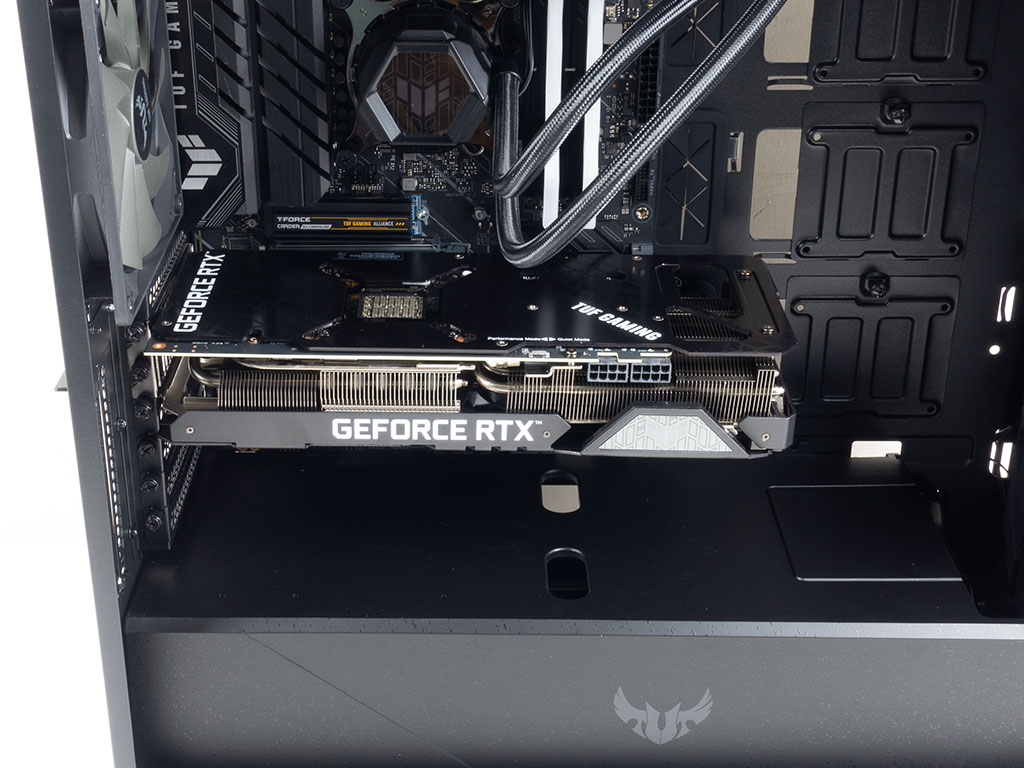
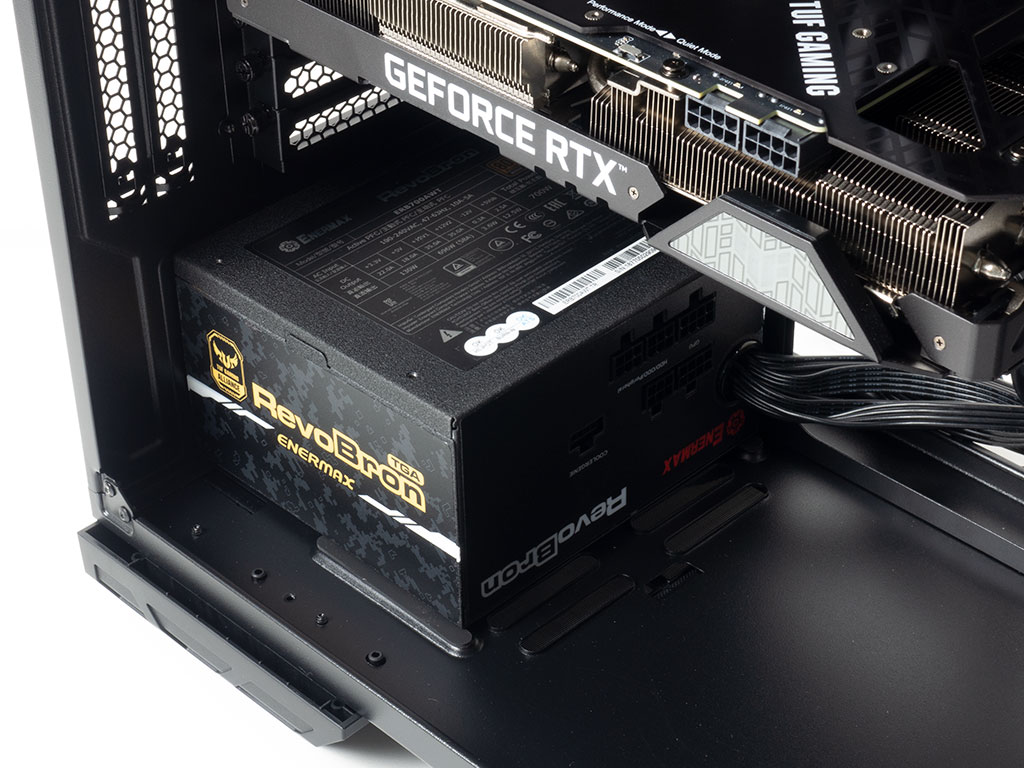
Adding the GPU and thus 6th TUF-branded component to the mix makes that the GT501 is a roomy chassis even more apparent. And even though you won't see the Enermax PSU once the shroud is re-installed, the PSU bay also offers lots of room without getting close to the two hard-drive trays.
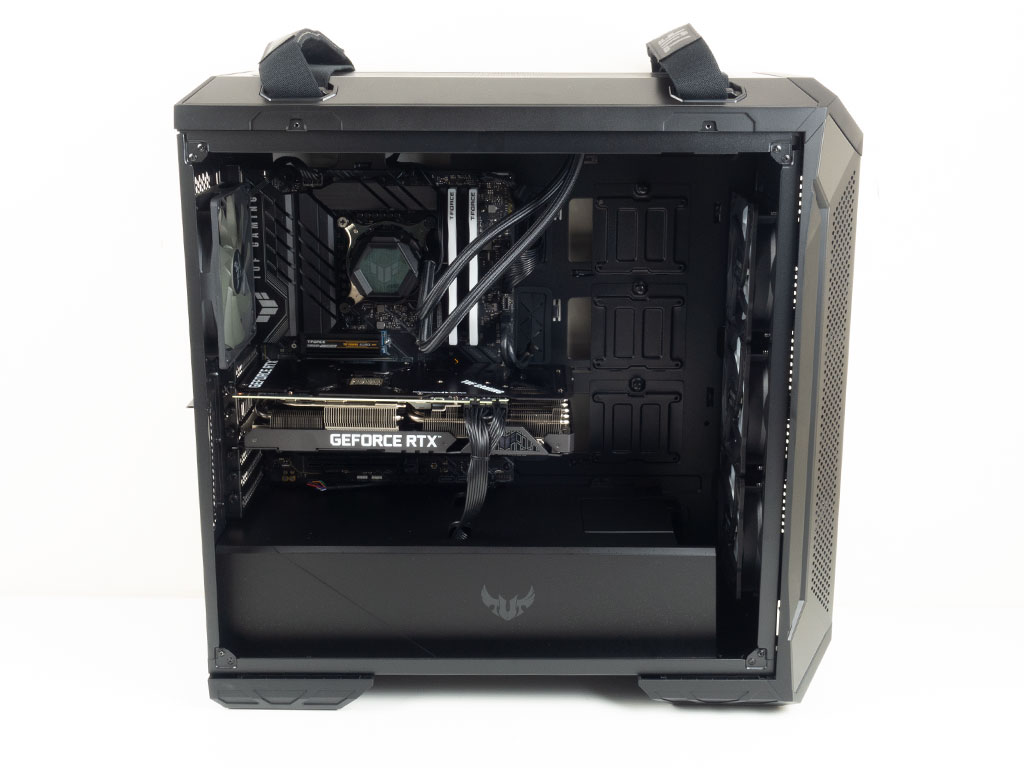
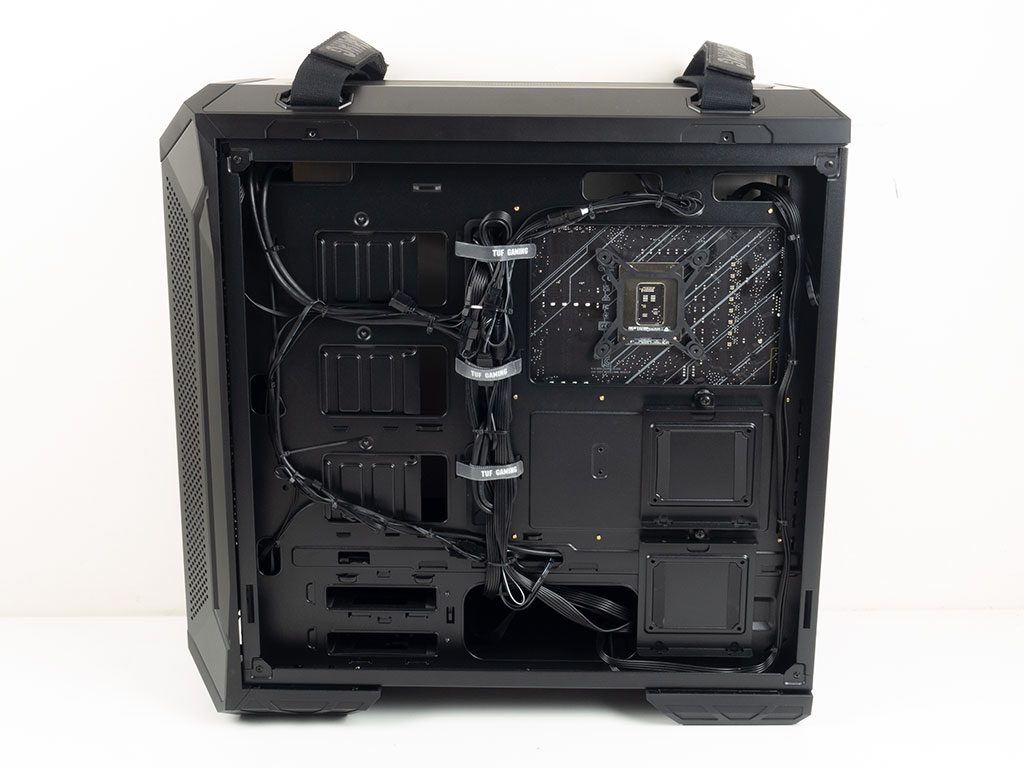
With all the TUF branded parts installed, the interior looks really cool. While plenty of people build color-coordinated systems, there are far fewer options to get the same branding on all the parts, which is possible with the TUF Gaming Alliance. On the back of the chassis, all the cables are neatly packed up and held in place by the three Velcro strips.
Jul 5th, 2025 18:33 CDT
change timezone
Latest GPU Drivers
New Forum Posts
- [GPU-Z Test Build] New Kernel Driver, Everyone: Please Test (69)
- How do you view TPU & the internet in general? (With poll) (80)
- EVGA XC GTX 1660 Ti 8GB ROM (11)
- Rx580 subsystem id (0)
- What are you playing? (23893)
- Do you use Linux? (677)
- Optane performance on AMD vs Intel (58)
- Frametime spikes and stuttering after switching to AMD CPU? (521)
- Stalker 2 is looking great. (187)
- b550m aorus elite not posting with new ram (7)
Popular Reviews
- NVIDIA GeForce RTX 5050 8 GB Review
- Fractal Design Scape Review - Debut Done Right
- Crucial T710 2 TB Review - Record-Breaking Gen 5
- ASUS ROG Crosshair X870E Extreme Review
- PowerColor ALPHYN AM10 Review
- Sapphire Radeon RX 9060 XT Pulse OC 16 GB Review - An Excellent Choice
- Upcoming Hardware Launches 2025 (Updated May 2025)
- AMD Ryzen 7 9800X3D Review - The Best Gaming Processor
- Sapphire Radeon RX 9070 XT Nitro+ Review - Beating NVIDIA
- NVIDIA GeForce RTX 5060 8 GB Review
TPU on YouTube
Controversial News Posts
- Intel's Core Ultra 7 265K and 265KF CPUs Dip Below $250 (288)
- NVIDIA Grabs Market Share, AMD Loses Ground, and Intel Disappears in Latest dGPU Update (212)
- Some Intel Nova Lake CPUs Rumored to Challenge AMD's 3D V-Cache in Desktop Gaming (140)
- NVIDIA GeForce RTX 5080 SUPER Could Feature 24 GB Memory, Increased Power Limits (115)
- Microsoft Partners with AMD for Next-gen Xbox Hardware (105)
- NVIDIA Launches GeForce RTX 5050 for Desktops and Laptops, Starts at $249 (105)
- AMD Radeon RX 9070 XT Gains 9% Performance at 1440p with Latest Driver, Beats RTX 5070 Ti (102)
- Intel "Nova Lake‑S" Series: Seven SKUs, Up to 52 Cores and 150 W TDP (100)