The AVerMedia Live Gamer Ultra 2.1 boasts UVC support, meaning it should be recognized and fully operational with no special driver requirements. This was true in Windows 11, which I used for testing. The entire experience was plug-and-play, although you do have to know your way around OBS or similar streaming/recording software to get the card to successfully capture video.
Performance
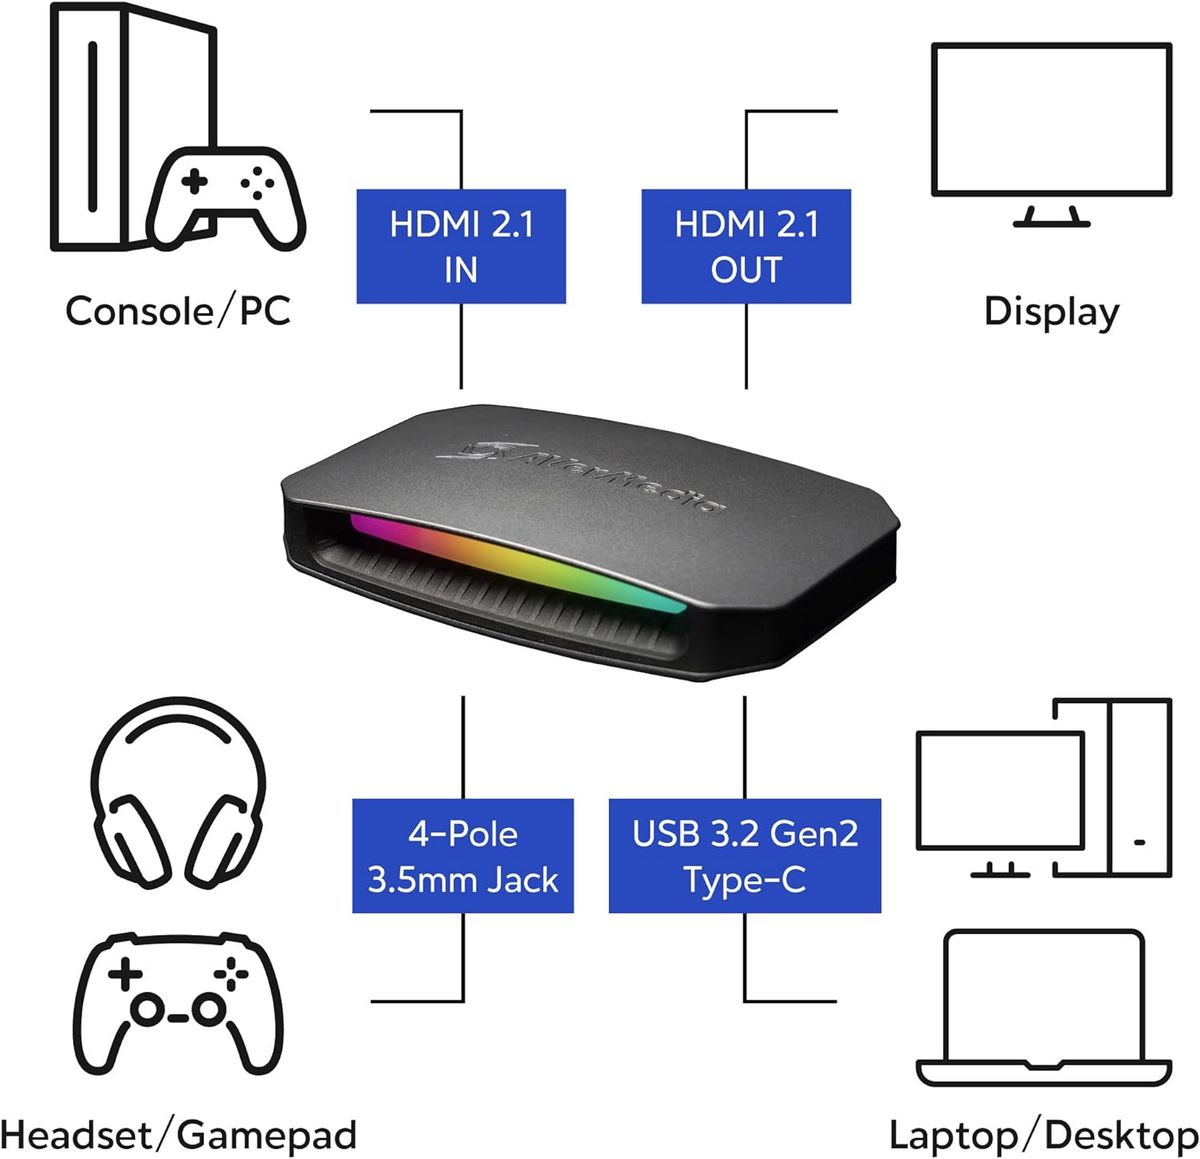
The AVerMedia Live Gamer Ultra 2.1 can be used to capture video from any device with a HDMI output. The general idea is to connect the HDMI output of your source, such as your PC or console, to the card's HDMI input, and then connect the card's HDMI output to your monitor's or TV's HDMI input. Connecting the headset to the AVerMedia Live Gamer Ultra 2.1 and passing audio through to your gamepad is entirely optional but should be done when you want to capture audio from the microphone you're using to communicate with your teammates.
The beauty of having HDMI 2.1 ports on both the HDMI input and output side of the AVerMedia Live Gamer Ultra 2.1 is that you can stream and record video in 4K resolution at 60 FPS, and simultaneously pass it through to your monitor or TV in 4K resolution at 120 or 144 Hz, with HDR and VRR included. In 1440p, the AVerMedia Live Gamer Ultra 2.1 is capable of 120, 144, and 240 Hz passthrough, again with HDR and VRR included. In 1080p, the passthrough refresh rate is bumped up to 360 Hz. In other words, with the AVerMedia Live Gamer Ultra 2.1, you no longer have to sacrifice your gaming experience (and capabilities) to be able to stream and record in up to 4K60.
The HDMI passthrough latency is almost nonexistent. This is visible from my input lag measurements, but also in practice; I didn't notice any difference while gaming with my PlayStation 5 or PC connected directly to the monitor compared to going through the capture card. The entire experience was excellent on the LG C1 OLED TV (4K120) and the Gigabyte M32U monitor (4K144). The only place where the AVerMedia Live Gamer Ultra 2.1 fell short in terms of passing the video signal through was when I connected it to the Corsair Xeneon Flex 45WQHD240 ultrawide monitor. 3440x1440 displays are currently limited to 60 Hz passthrough, which of course hinders the aforementioned 240 Hz beast quite severely. AVerMedia announced a mid-November firmware update that's going to push the ultrawide passthrough refresh rate to 120 Hz, so at least there's that.
As for the video capture capabilities of the AVerMedia Live Gamer Ultra 2.1, they're primarily dependent on the type of USB interface you connect it to. If you can provide the card with a 10 Gbps USB interface, it will happily capture 4K60, 1440p120, and 1080p120 video. If you want to capture content in HDR, a 10 Gbps USB connection is mandatory and you're limited to 4K30, 1440p60, and lower. In case your PC only has 5 Gbps USB ports, you'll be able to capture video in 4K30, 1440p60, and 1080p120.
Supported encoding formats are NV12 with 4:2:0 chroma subsampling at 4K60, as well as YUY2 (4:2:2) and P010 at 4K30. For 1440p60, 1080p120, and below we get uncompressed 4:4:4 RGB24, YUY2, and P010 encoding.
To demonstrate the performance of the AVerMedia Live Gamer Ultra 2.1 capture card, I captured a bit of gameplay from my PC. Take a look at the following video montage of the clips I recorded. Do keep in mind that YouTube butchered the quality of recorded footage to some extent. Still, since the stuff recorded by this capture card will regularly end up on YouTube anyway, the video provides a relevant demonstration of AVerMedia's capture card's real-life performance.
The overall performance of the AVerMedia Live Gamer Ultra 2.1 capture card is outstanding. The colors of the recording look vibrant, and there are no apparent motion or compression artifacts, or pixelization. Anything that might look off in my example video is added by YouTube's compression algorithm, and not the capture card itself. I had similarly great results in other supported capture resolutions and framerates, with absolutely no passthrough-related issues at all. AVerMedia created a great-performing USB capture card and one that's proven to be very reliable in my testing, which is just as if not more important than the picture quality.
Software
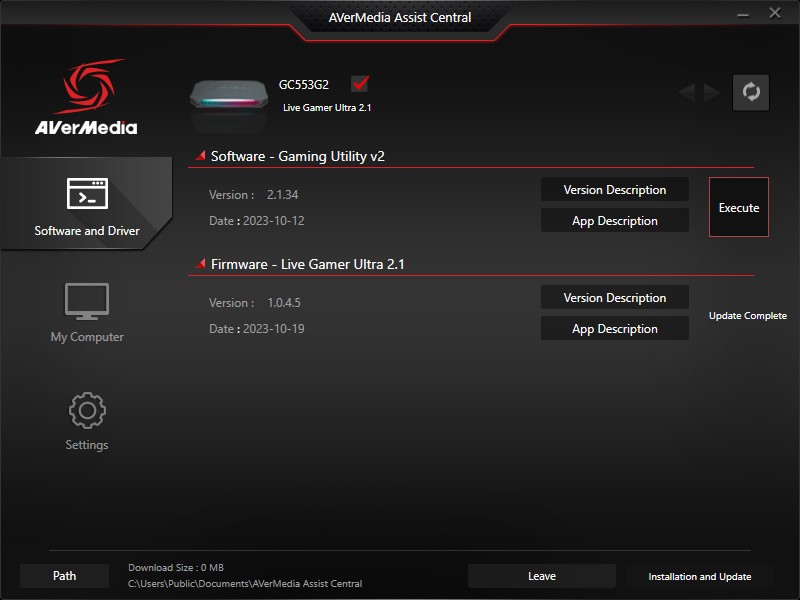
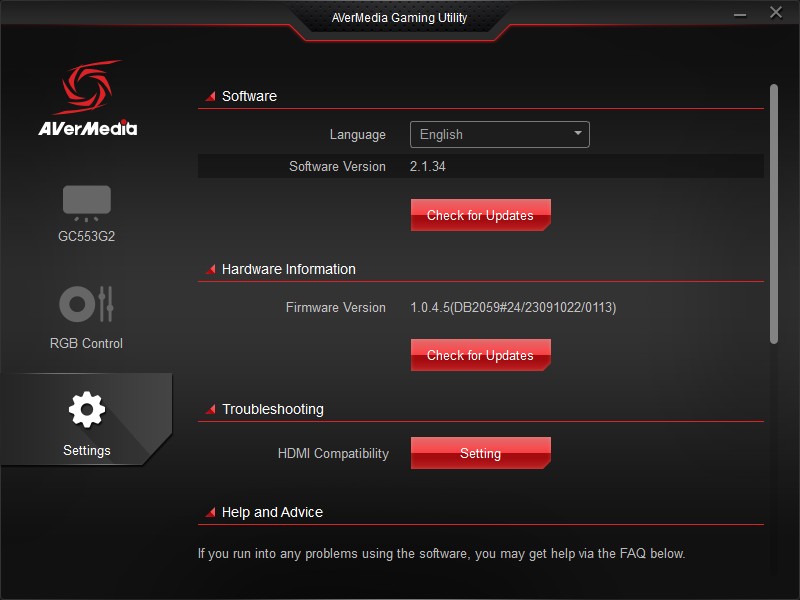
The official software package consists of two Windows utilities: the AVerMedia Gaming Utility and AVerMedia Assist Central.
The AVerMedia Assist Central is a tool that checks, downloads and installs firmware updates and the Gaming Utility.
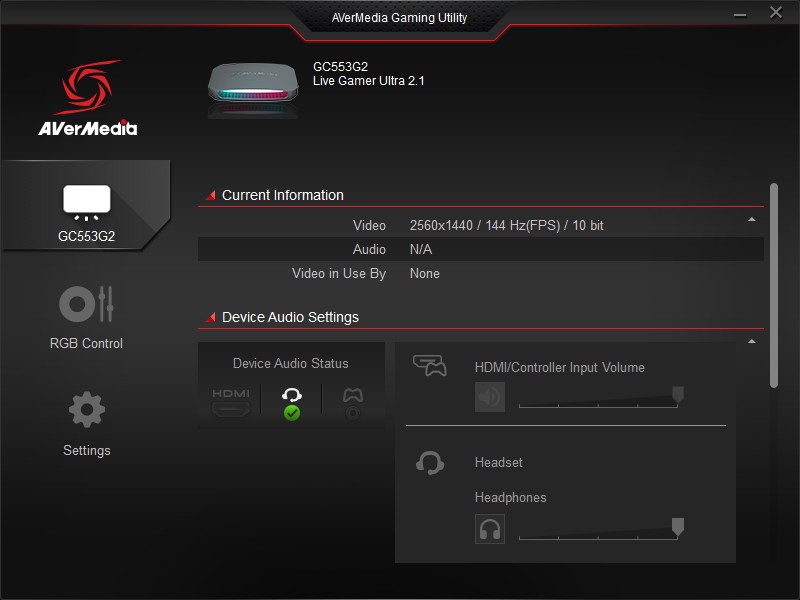
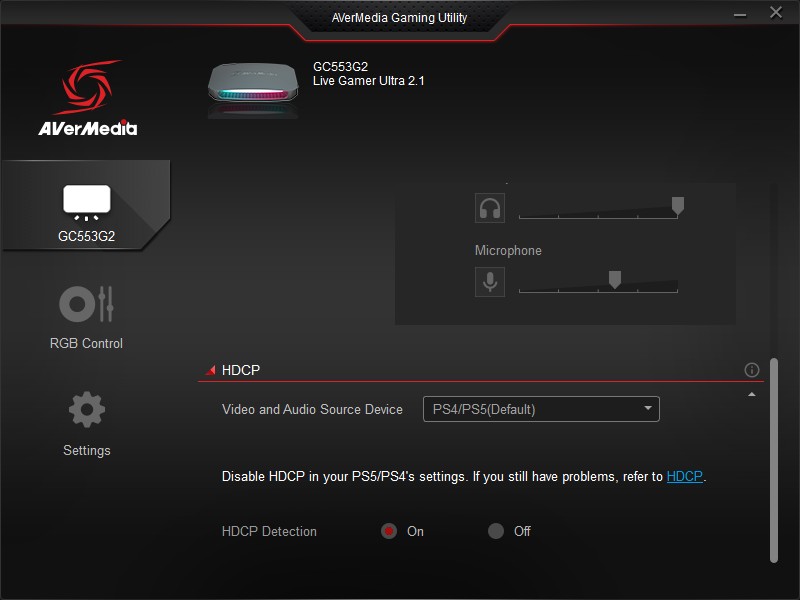
The AVerMedia Gaming Utility is very handy, as it gives you various relevant information about the capture card, such as the input signal resolution, framerate and the audio status of the device. You can also use it to adjust the volume levels for HDMI input, headphones and microphone, and to control the RGB effects, and update firmware. It's a nifty tool that helps with troubleshooting the device, should any issues arise.
OBS Setup
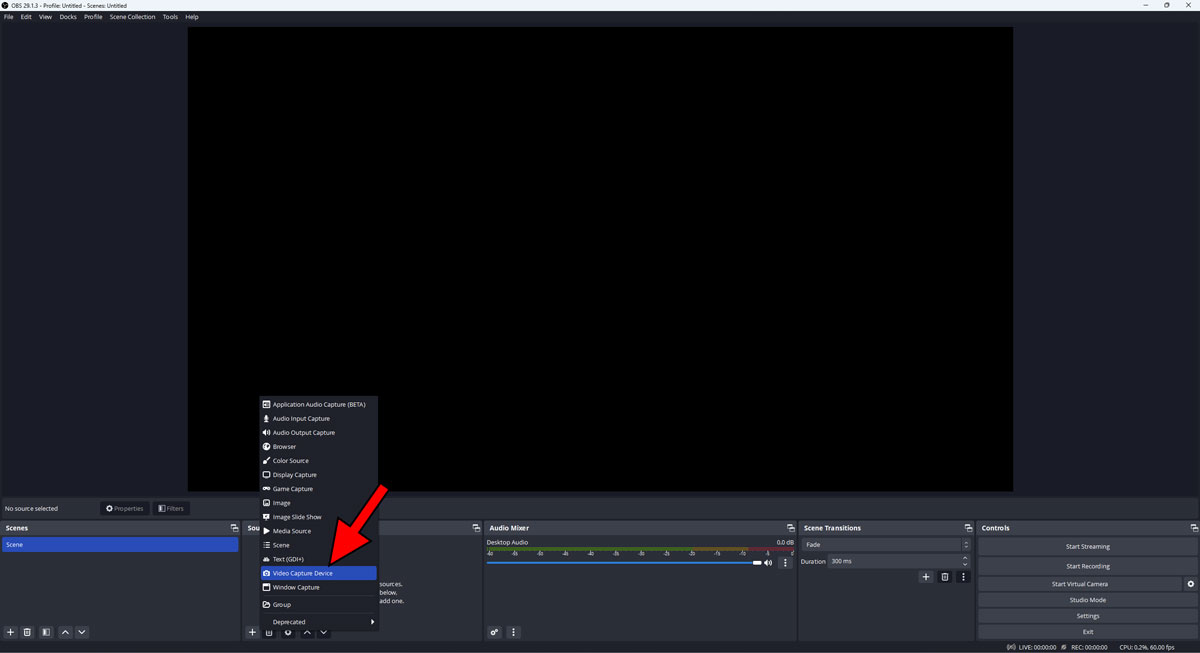
To configure the AVerMedia Live Gamer Ultra 2.1 in OBS after connecting everything as needed, open OBS, create a scene, and add a Video Capture Device as a source.
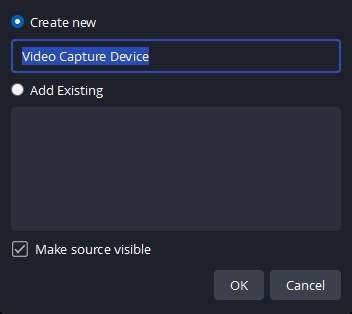
Select "Create new" and give it a name.
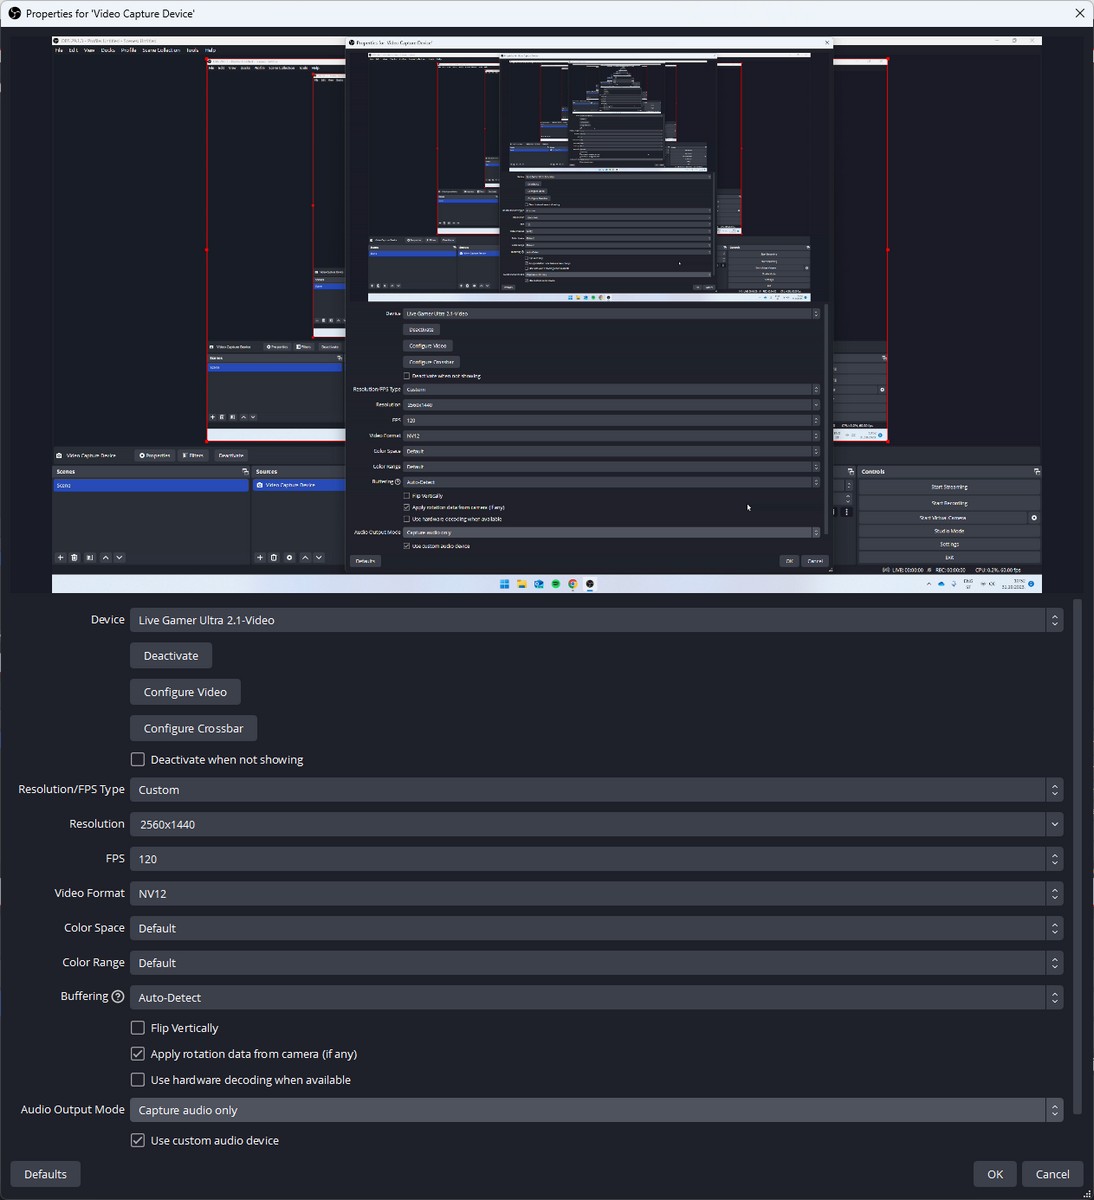
The capture card should already be detected and show a picture in the preview window. If not, simply select the "Live Gamer Ultra 2.1-Video" from the Device dropdown menu. If you don't see that option, something went wrong when connecting the capture card to your PC. Try a different USB port and make sure you're using the supplied cable. While you're welcome to leave the "Resolution/FPS Type" setting at Device Default and be on your way, by switching it to Custom you can adjust the settings such as resolution, framerate, and video format (NV12, YUY2…) on your own, making them in line with your preferred stream settings. For example, if you're streaming at 4K60, here you can select the appropriate settings. In case you can't get the capture card to show anything after switching it from Device Default to Custom, or you have a very limited selection of resolutions and framerates, this is again down to the USB connection between the capture card and your PC. I cannot stress this enough: a 10 Gbps USB 3.2 Gen 2 port and a good quality USB cable, such as the supplied one, are mandatory.
After setting everything up as described above, you should have your source's output visible in OBS. Now you can move on to add other sources, such as your webcam input, lower thirds, overlays, and everything else you might want to use for your stream. The capture card will, of course, be visible in the Audio Mixer as well, so you can easily adjust its volume, making your gameplay capture quieter in your stream without lowering the volume of what you're hearing while gaming.
The aforementioned setup procedure is nearly identical in any other recording/live streaming app, and it doesn't differentiate when using other video inputs either. In essence, any signal you bring to the AVerMedia Live Gamer Ultra 2.1 capture card via HDMI will be captured and displayed in OBS in up to 4K60 and simultaneously passed through to the TV or monitor you've connected to the capture card's HDMI output at up to 4K144.
 6
6