 0
0
BitFenix Phenom Mini-ITX Review
Value & Conclusion »Assembly
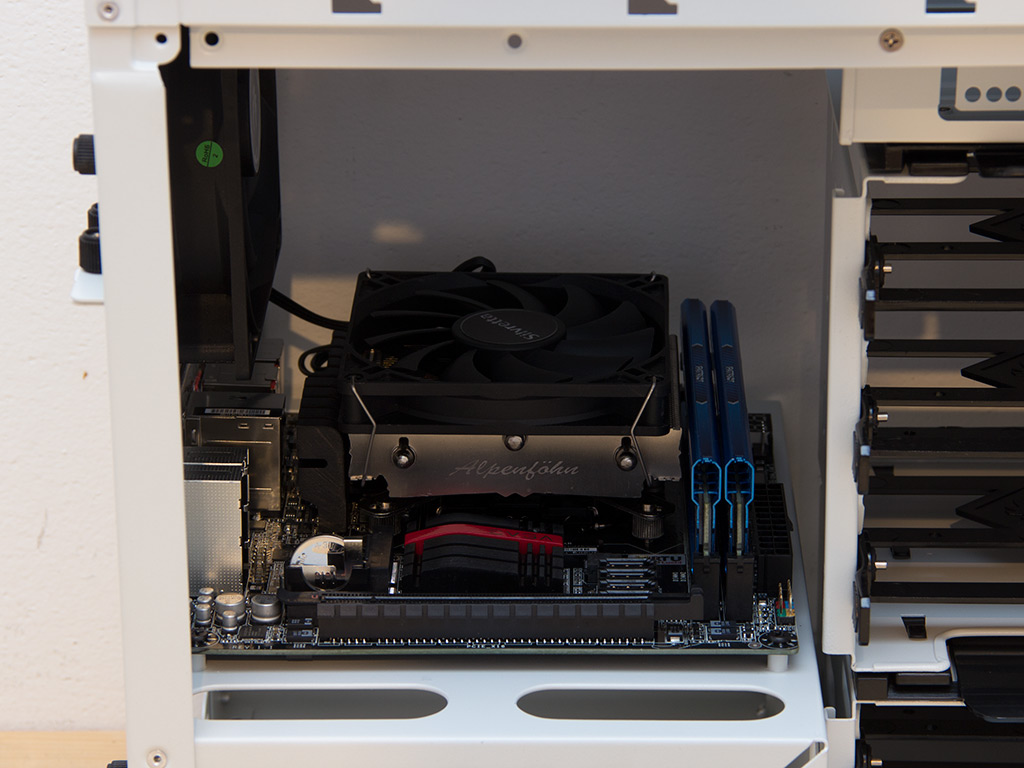
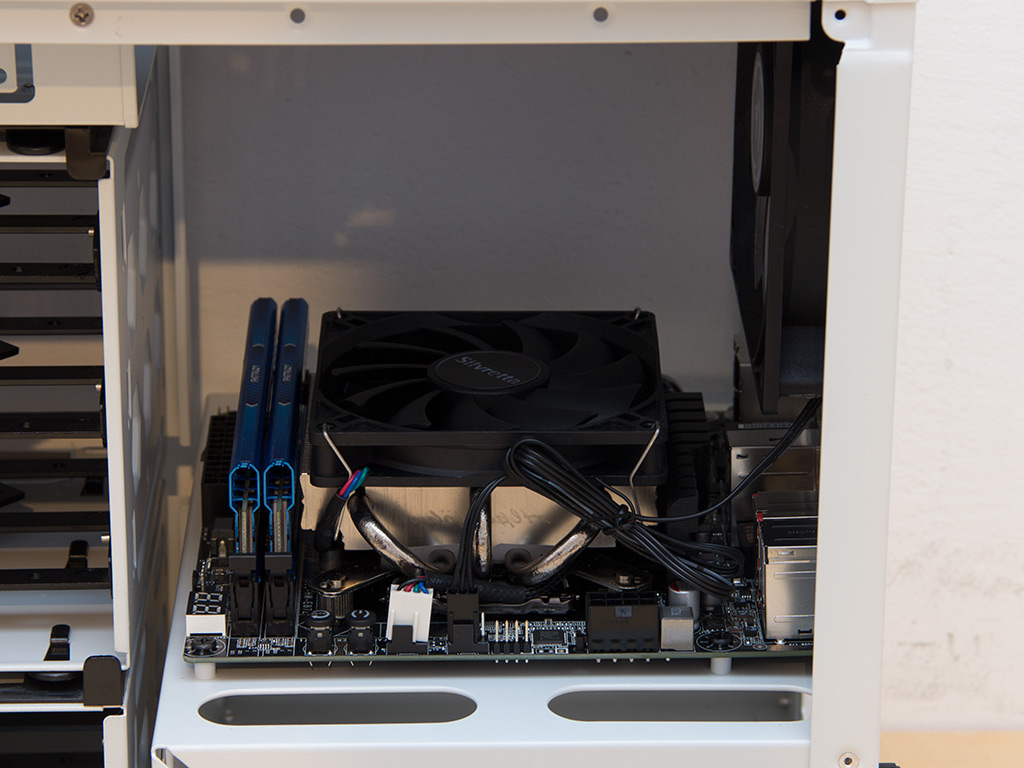
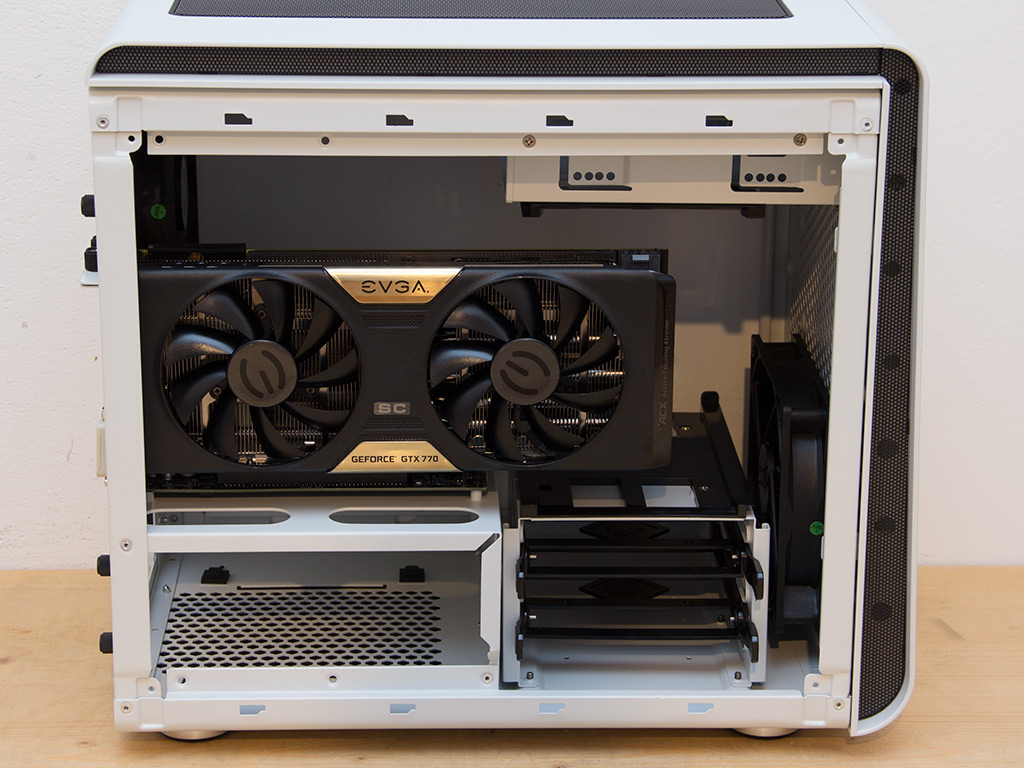
Given its compact dimensions, you had better attach the cooler to the motherboard before placing both within the chassis. Lowering coolers through the top is also an option with more compact coolers, and EVGA was kind enough to loan us the Z87 Stinger ITX board and a long graphics card to show you how their items fit into a case of this size.
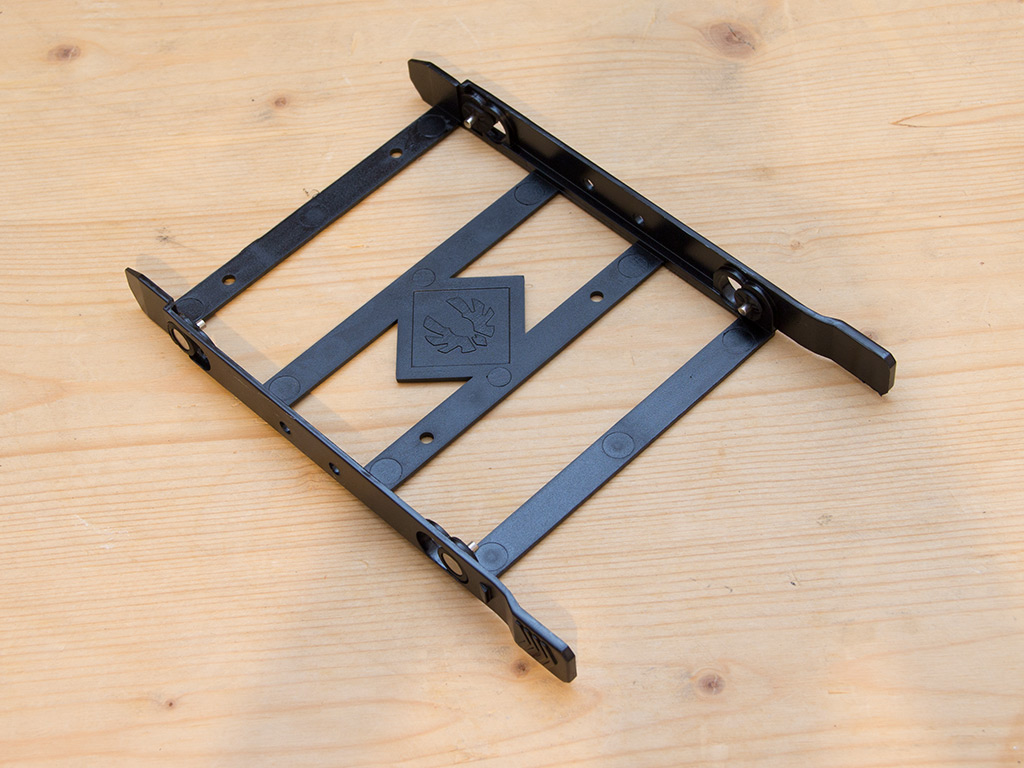
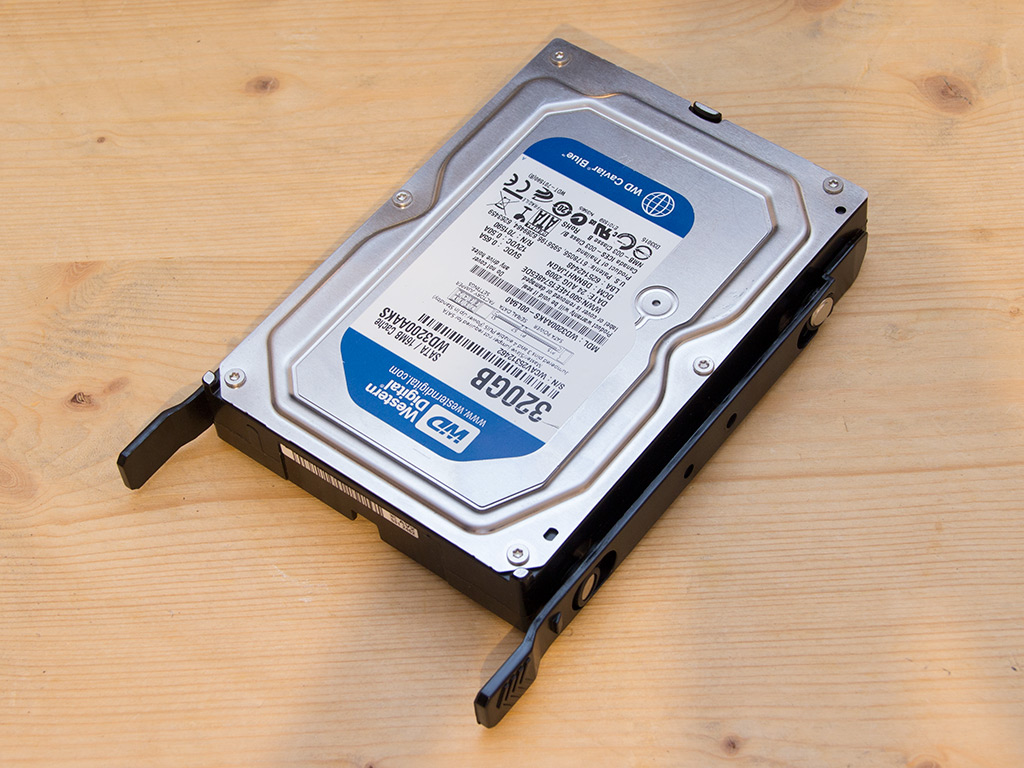
Adding 3.5'' drives to the chassis is done in a fashion common to most other BitFenix cases. The trays allow for a tool-less installation and actually work well, but their rubber-ringed pins tend to pop out if you squeeze a drive into position with too much force. The rings are put back into place easily enough, but make things a tad bit more complicated.
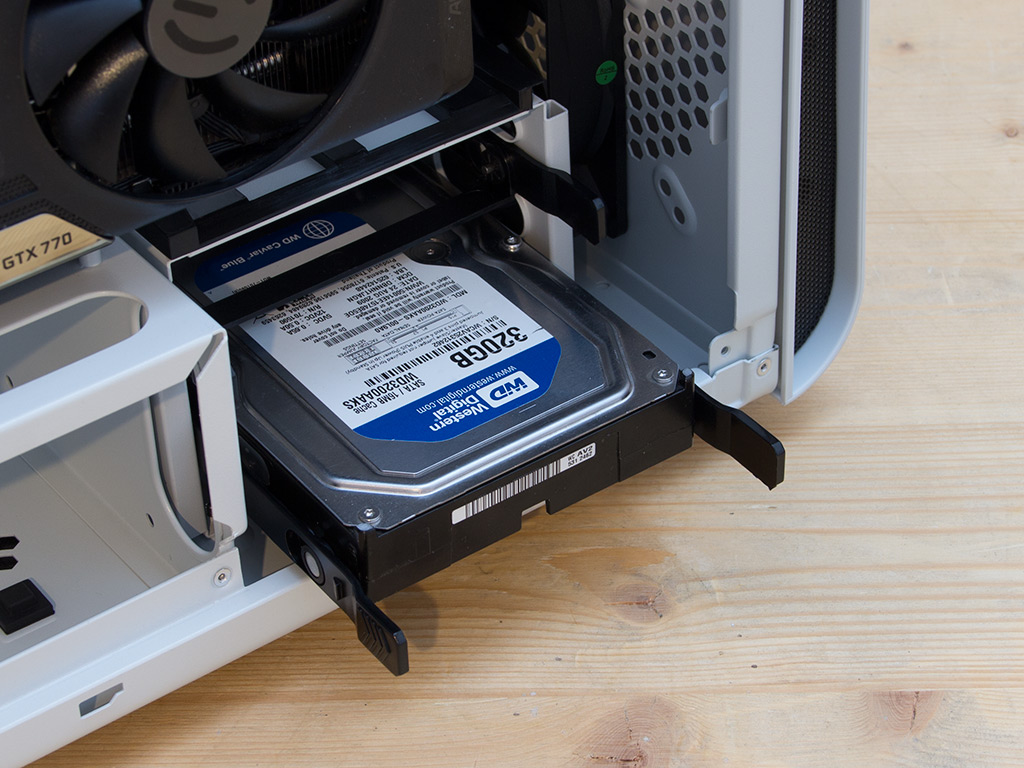

Once in place, simply slide the tray in until it snaps into place - no tools or screws are needed.

The other possibility uses the plastic tray and traditional hard-drive screws which are sunk into either the side or underside of the drive, and one has to slide and screw the drive into the 5.25" bay from within the chassis once it has been placed onto the tray. Holes are missing on one side of the tray, which only barely allowed me to attach it as the remaining holes were hard to see. You could pull the front of the chassis off and remove the metal frame's cover for more space during drive installation, though, so this impediment is one I could have easily avoided.

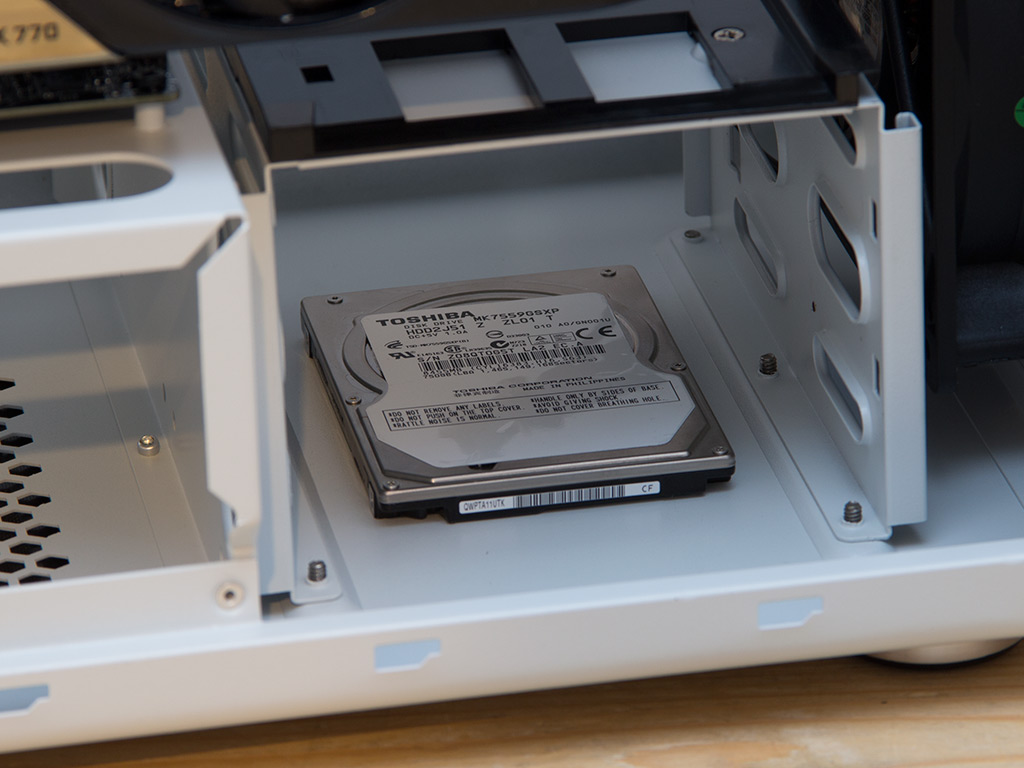
I filled the location inside the chassis and on the side panel to show you where your 2.5'' variants can be installed. Both require the use of traditional screws to hold their drive(s) in place. This means that you can, not counting the individual hard-drive bays, install up to five 2.5" drives.
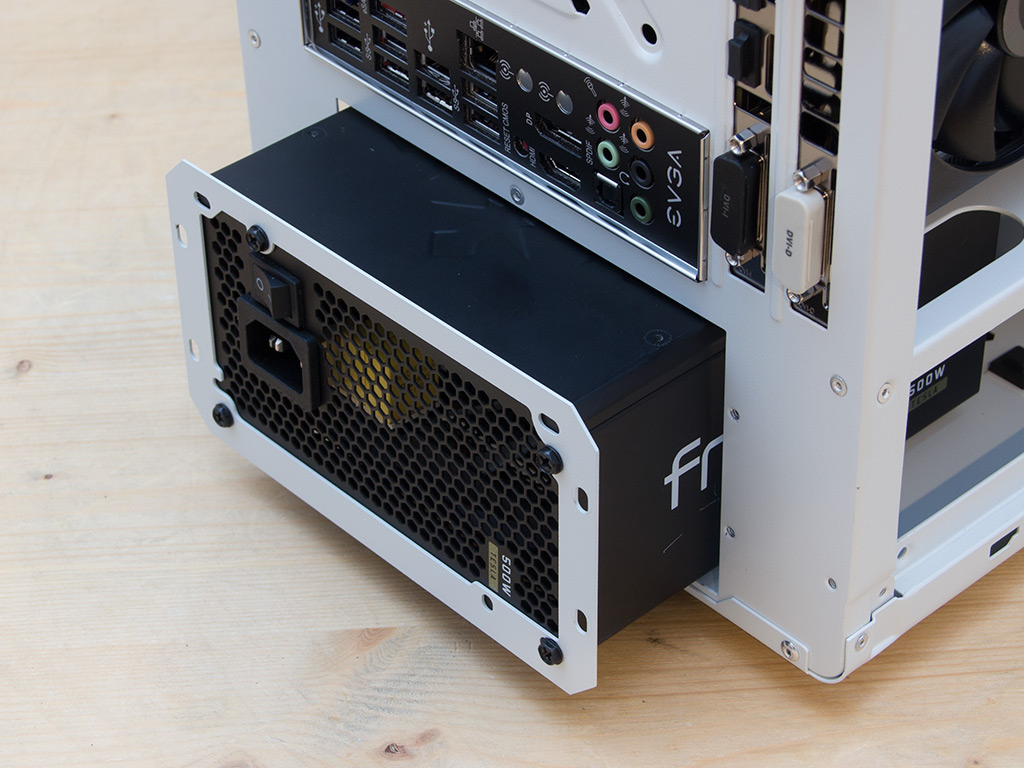
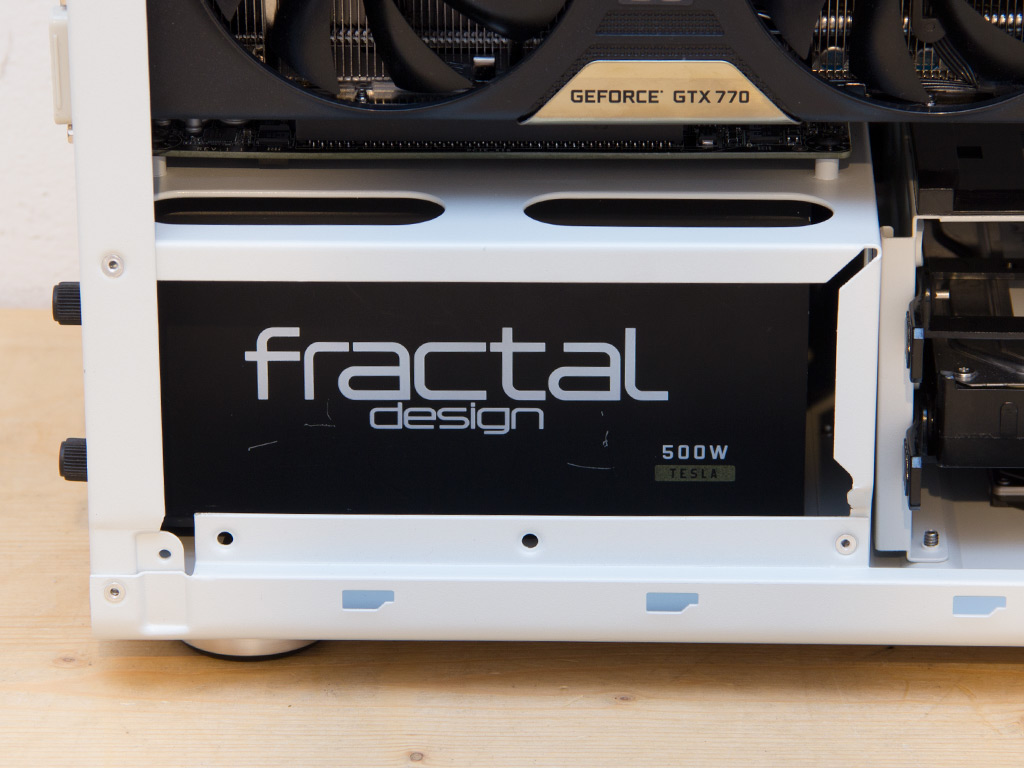
Installing the PSU is a bit tricky. While preparing the unit and routing its cables is easy, Fractal's PSU barely fits, and that is with some tough love on my part. So it is good to see that BitFenix offers an extension you can use to install bigger units.

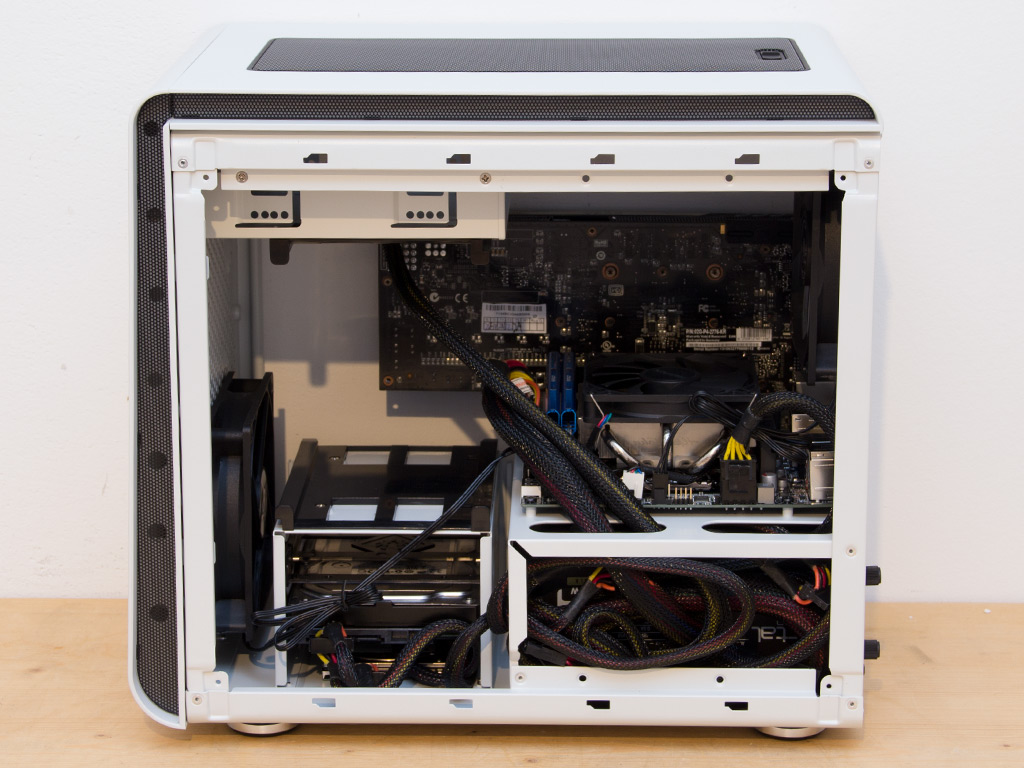
With everything in place, the Phenom Mini-ITX makes a really good impression, even though my cable management is pretty basic. Those looking to get the most out of their case should invest in short and possibly even sleeved cables. BitFenix should also include some zip ties, which are sorely missed.
Finished Looks
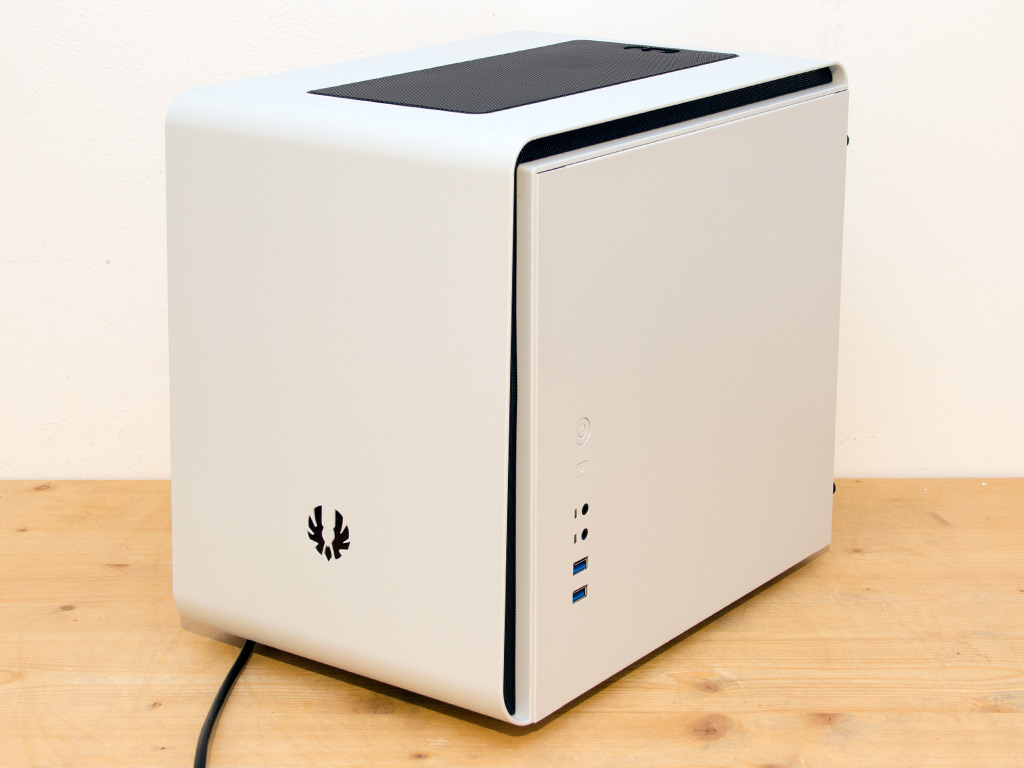
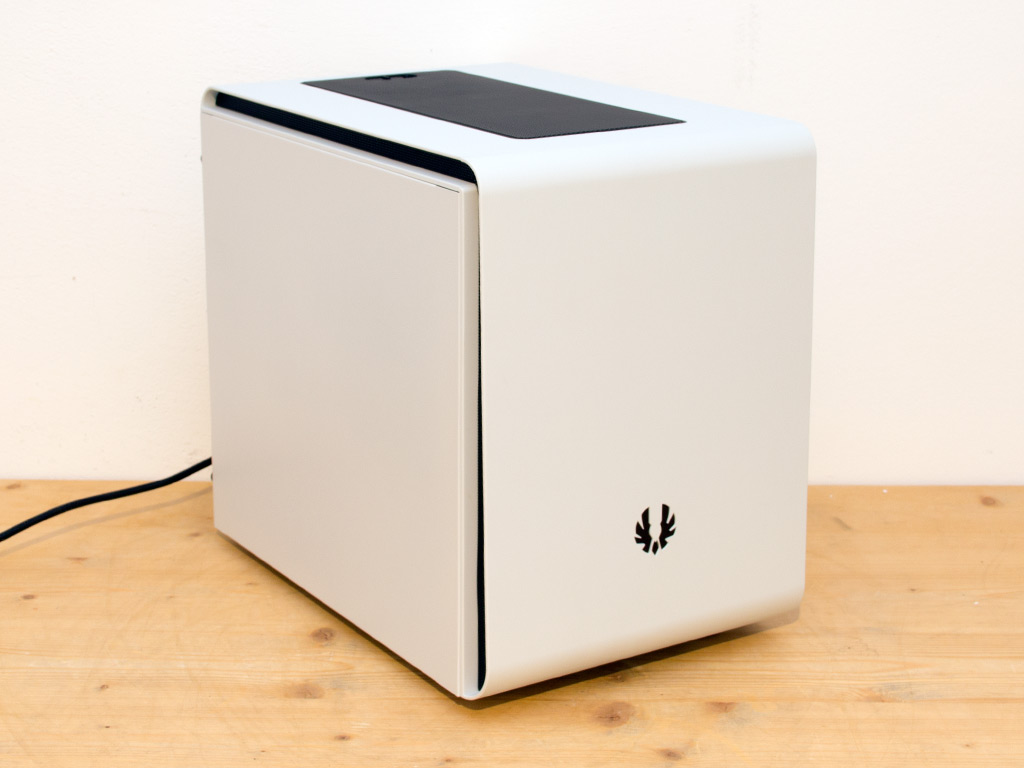
With everything in place, the chassis makes a great impression. As all the side panels are solid, only noise output and the power LED will let you know if the system is up and running. Considering the chassis is meant to be used for storage purposes or as a steam box, for example, such a configuration is quite alright.

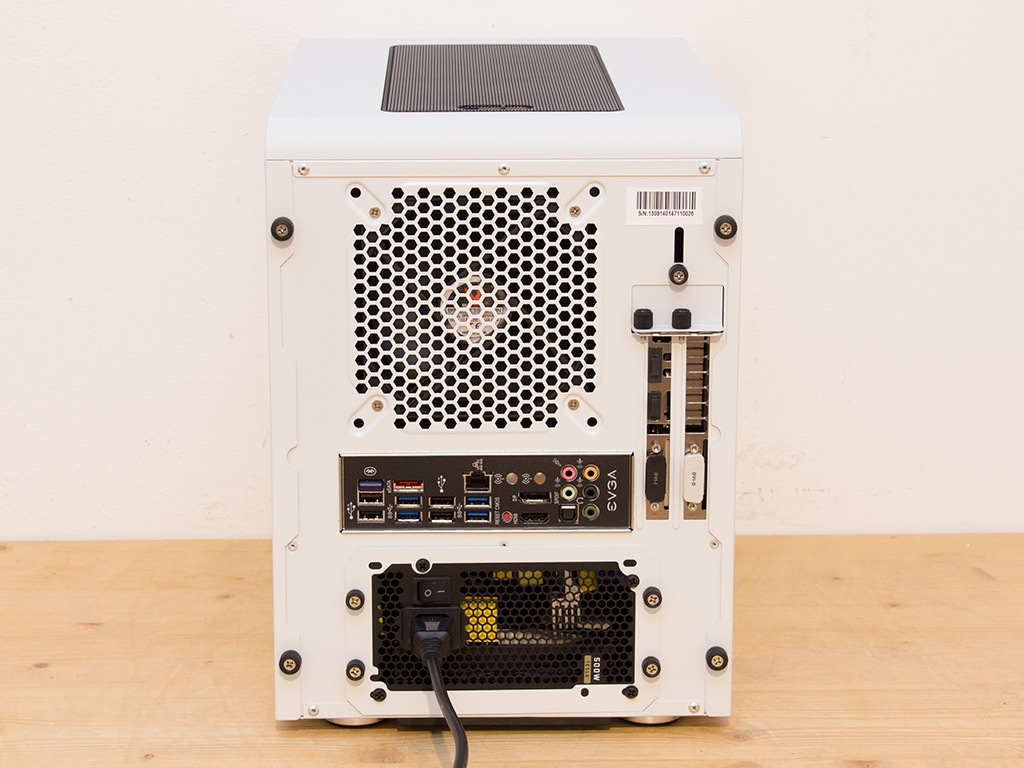
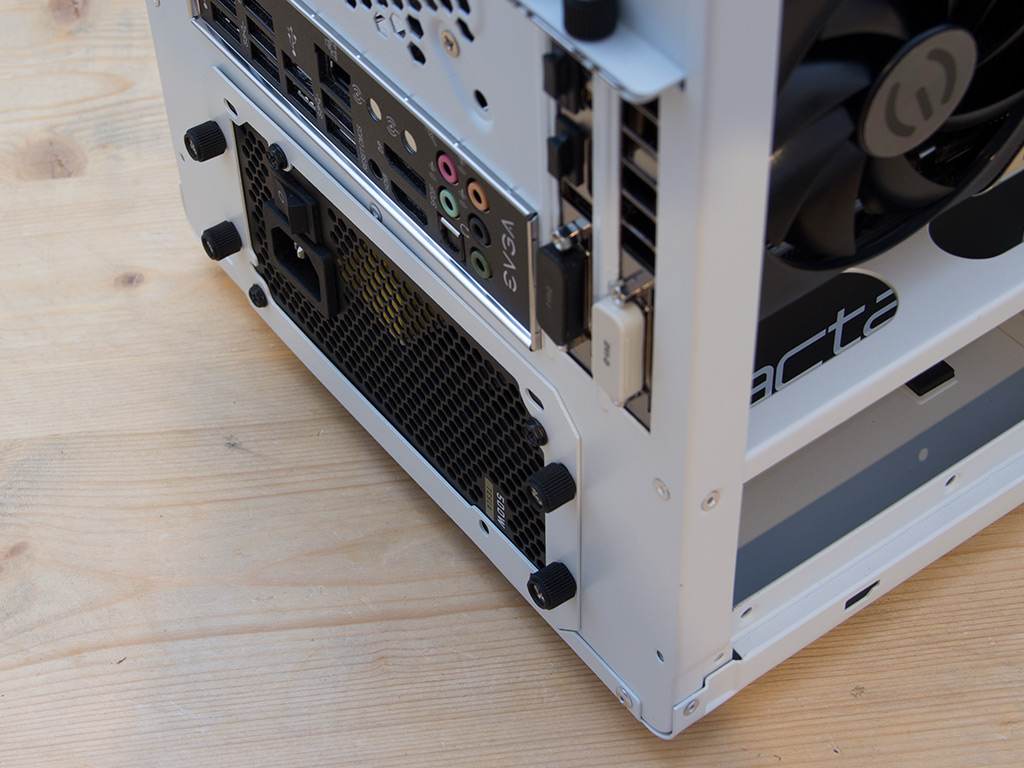
A blue LED lights up on the side after you turn your system on, and all the parts at the back of the Phenom Mini-ITX are easily accessible.
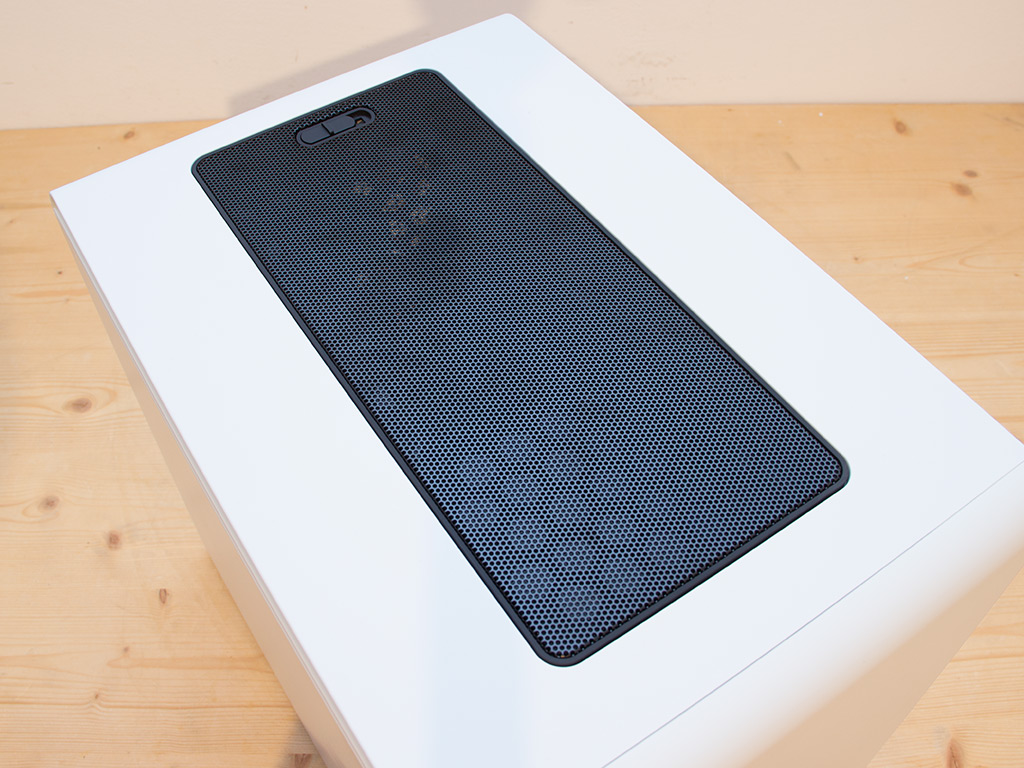
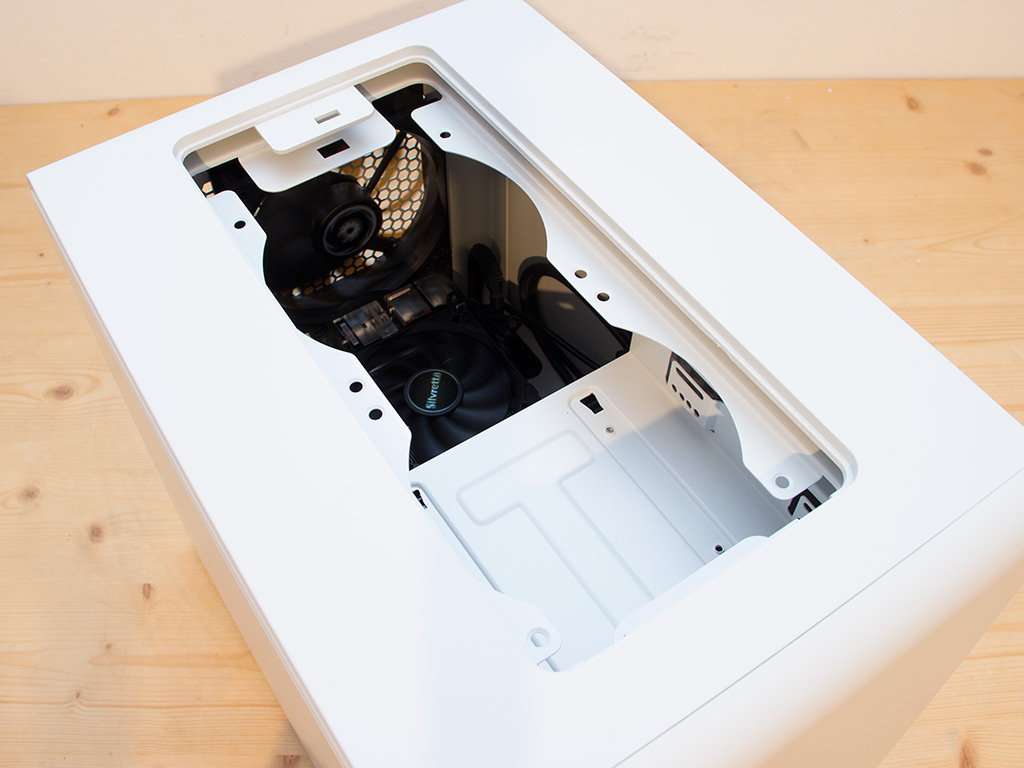
Taking a quick look at the top of the chassis, there is loads of space, so those looking to go with liquid-cooling units can easily do so.
Jul 12th, 2025 11:07 CDT
change timezone
Latest GPU Drivers
New Forum Posts
- Swapping existing router w/ a replacement; any issues? (15)
- No offense, here are some things that bother me about your understanding of fans. (46)
- Stupid buggy POS Realtek WiFi RTL8852BE (13)
- 6.15.6 MITIGATION_TSA // Intel CPU Users can skip this topic (0)
- 14700t vs 14600k for gaming system (2)
- New build airflow question (6)
- Tired of consumer grade networking hardware, need suggestions… (2)
- ASUS Intel ROG Maximus Z890 Hero & ASUS Intel ROG Maximus Z890 Extreme. Cooling. (33)
- What you guys think I should do in terms of upgrades? (10)
- CPU Scaling with 9070 XT / 5070 (0)
Popular Reviews
- Fractal Design Epoch RGB TG Review
- Lexar NM1090 Pro 4 TB Review
- Corsair FRAME 5000D RS Review
- NVIDIA GeForce RTX 5050 8 GB Review
- NZXT N9 X870E Review
- Our Visit to the Hunter Super Computer
- Sapphire Radeon RX 9060 XT Pulse OC 16 GB Review - An Excellent Choice
- AMD Ryzen 7 9800X3D Review - The Best Gaming Processor
- Upcoming Hardware Launches 2025 (Updated May 2025)
- Chieftec Iceberg 360 Review
TPU on YouTube
Controversial News Posts
- Intel's Core Ultra 7 265K and 265KF CPUs Dip Below $250 (288)
- Some Intel Nova Lake CPUs Rumored to Challenge AMD's 3D V-Cache in Desktop Gaming (140)
- AMD Radeon RX 9070 XT Gains 9% Performance at 1440p with Latest Driver, Beats RTX 5070 Ti (131)
- NVIDIA Launches GeForce RTX 5050 for Desktops and Laptops, Starts at $249 (119)
- NVIDIA GeForce RTX 5080 SUPER Could Feature 24 GB Memory, Increased Power Limits (115)
- Microsoft Partners with AMD for Next-gen Xbox Hardware (105)
- Intel "Nova Lake‑S" Series: Seven SKUs, Up to 52 Cores and 150 W TDP (100)
- NVIDIA DLSS Transformer Cuts VRAM Usage by 20% (97)