 3
3
Building a Keyboard 11: Epomaker Mini Cat 64 Kit + Kitty PBT Keycaps + TTC Heart Switches
(3 Comments) »Assembly and Testing
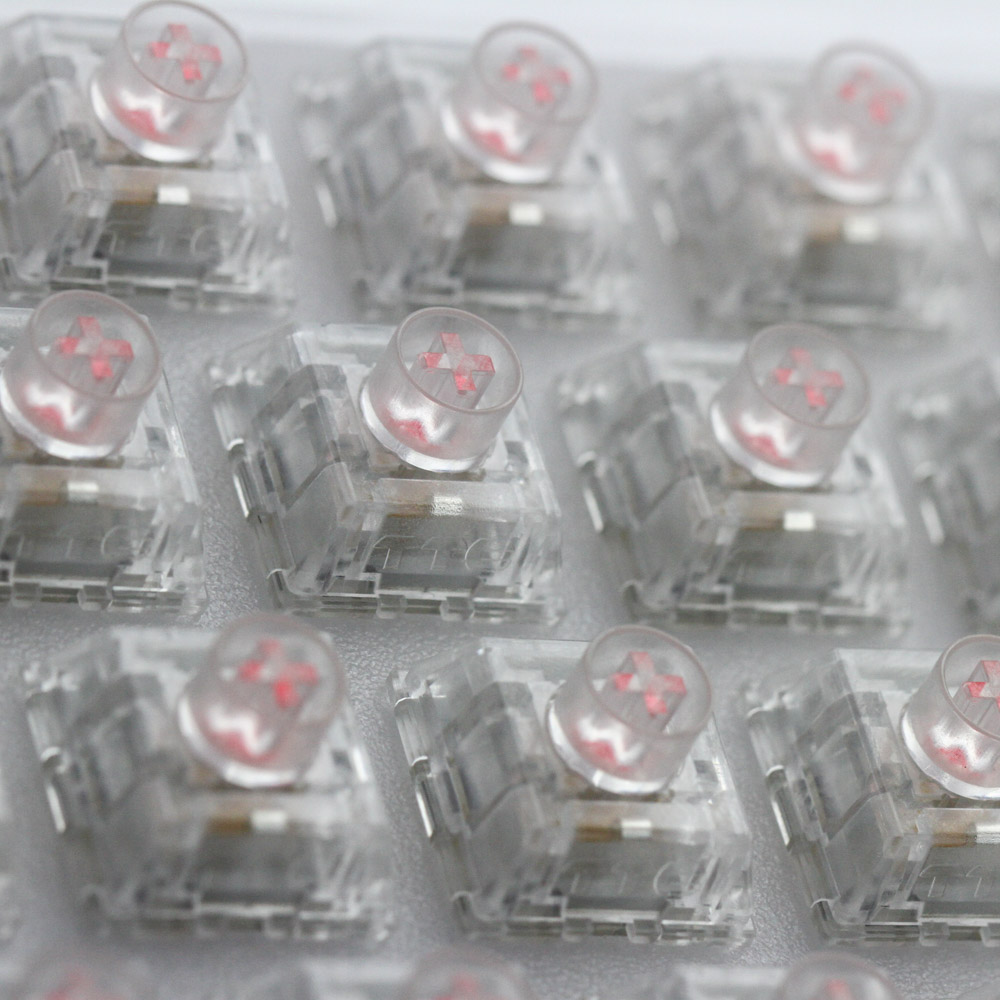
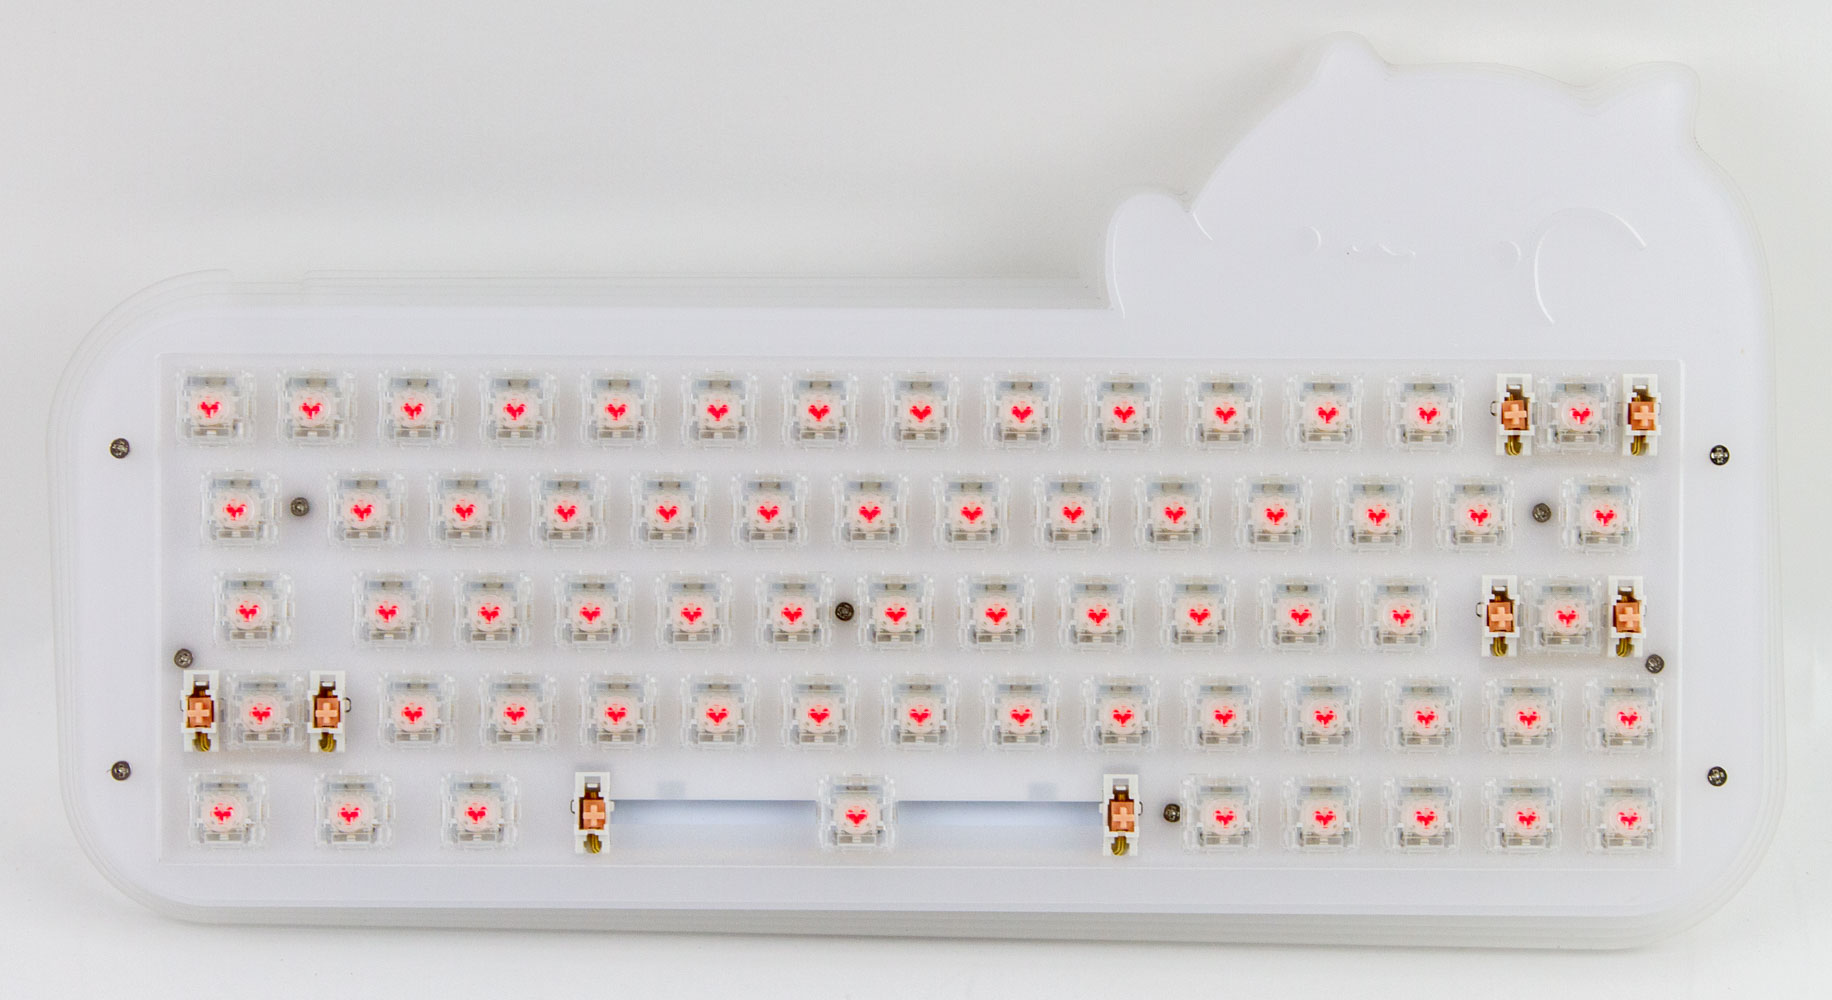
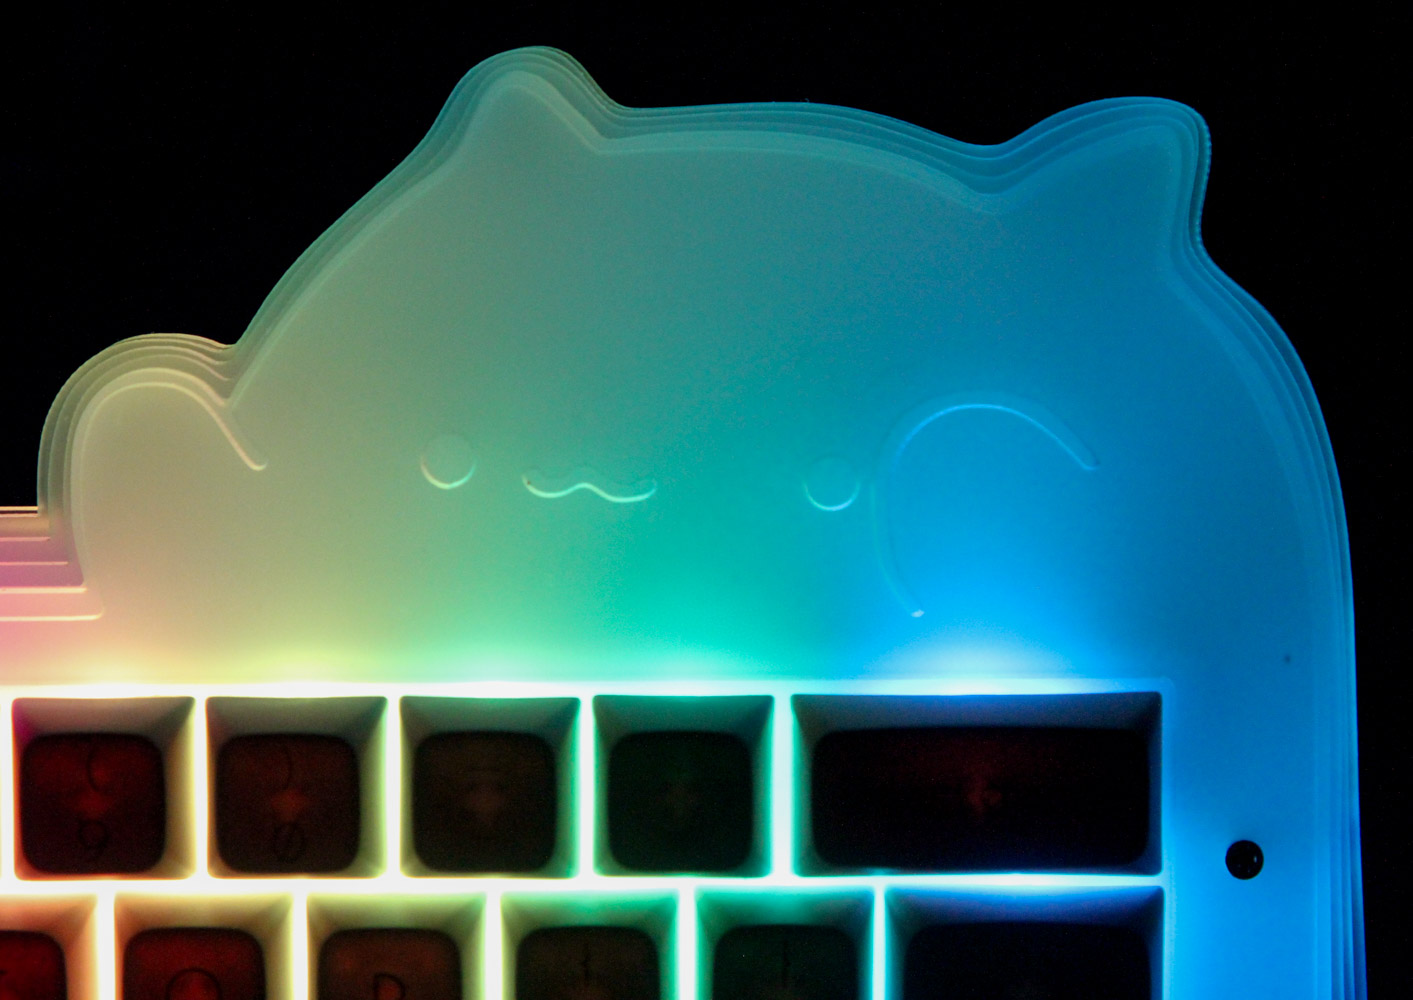
Since I only have one of each type going into this keyboard build, I decided to separate the assembly page and conclude here accordingly. Using the TTC Heart switches on the Epomaker Mini Cat 64 kit is simple enough, just orient the pins with the switch socket and press down vertically. I did not have a single bent pin during this process and this is a testament to the relatively thick and sturdy pins used by TTC. The walls around the stem also make for added surface area to hold onto the switch, before inserting. The clear housing on the switches works well with the acrylic case, where you just end up with a bunch of hearts looking back at you along with that larger cat face seemingly pouncing down on them.

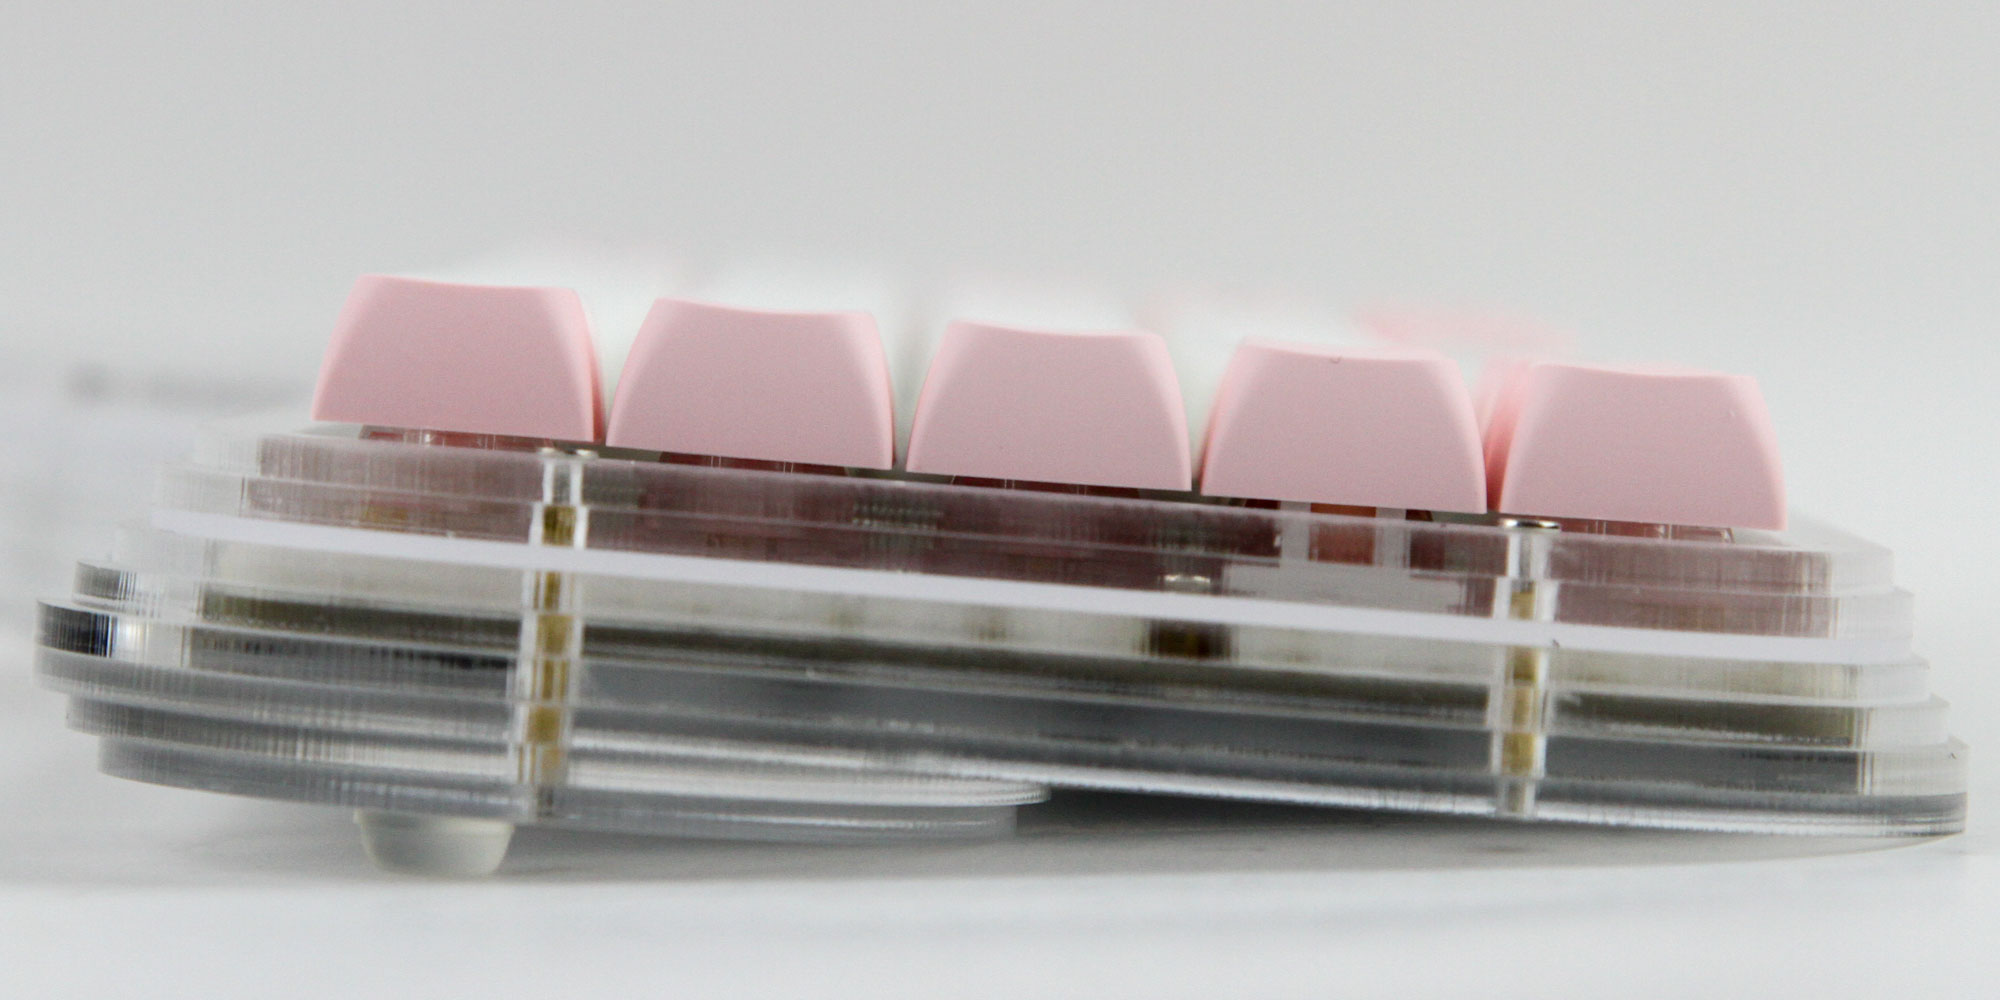
Here is a look at the keyboard fully assembled with the Epomaker Kitty keycaps installed in the default configuration. Note that I initially had a different key configuration, especially on the bottom row with the actual modifiers, as opposed to these novelty keycaps, but I was convinced this was the way to go based on first-party photos. Given the absence of other opportunities to try out the novelty keycaps in this build article, I figured this was also a nice compromise. I do like the colorway of the keycaps, and the white and pink set nicely matches the clear and white acrylic case. There are plenty of novelty keycaps to choose from, but there isn't much room to use them on this 65% keyboard kit, already necessitating a shorter R.Shift than usual. Checking from the side confirms the relatively low XDA keycap profile mentioned before. For those unfamiliar with keycap profiles, do look up different examples before committing your money to a set you like, since they heavily influence the typing experience. I have mixed thoughts on this keycap set, since I would have liked some contouring to the various rows, but it does fall in line with most low profile sets. One benefit the set does bring to the table, is that this combination is easier to type on in the absence of a wrist rest, since the case itself is not as elevated at the top relative to the bottom.
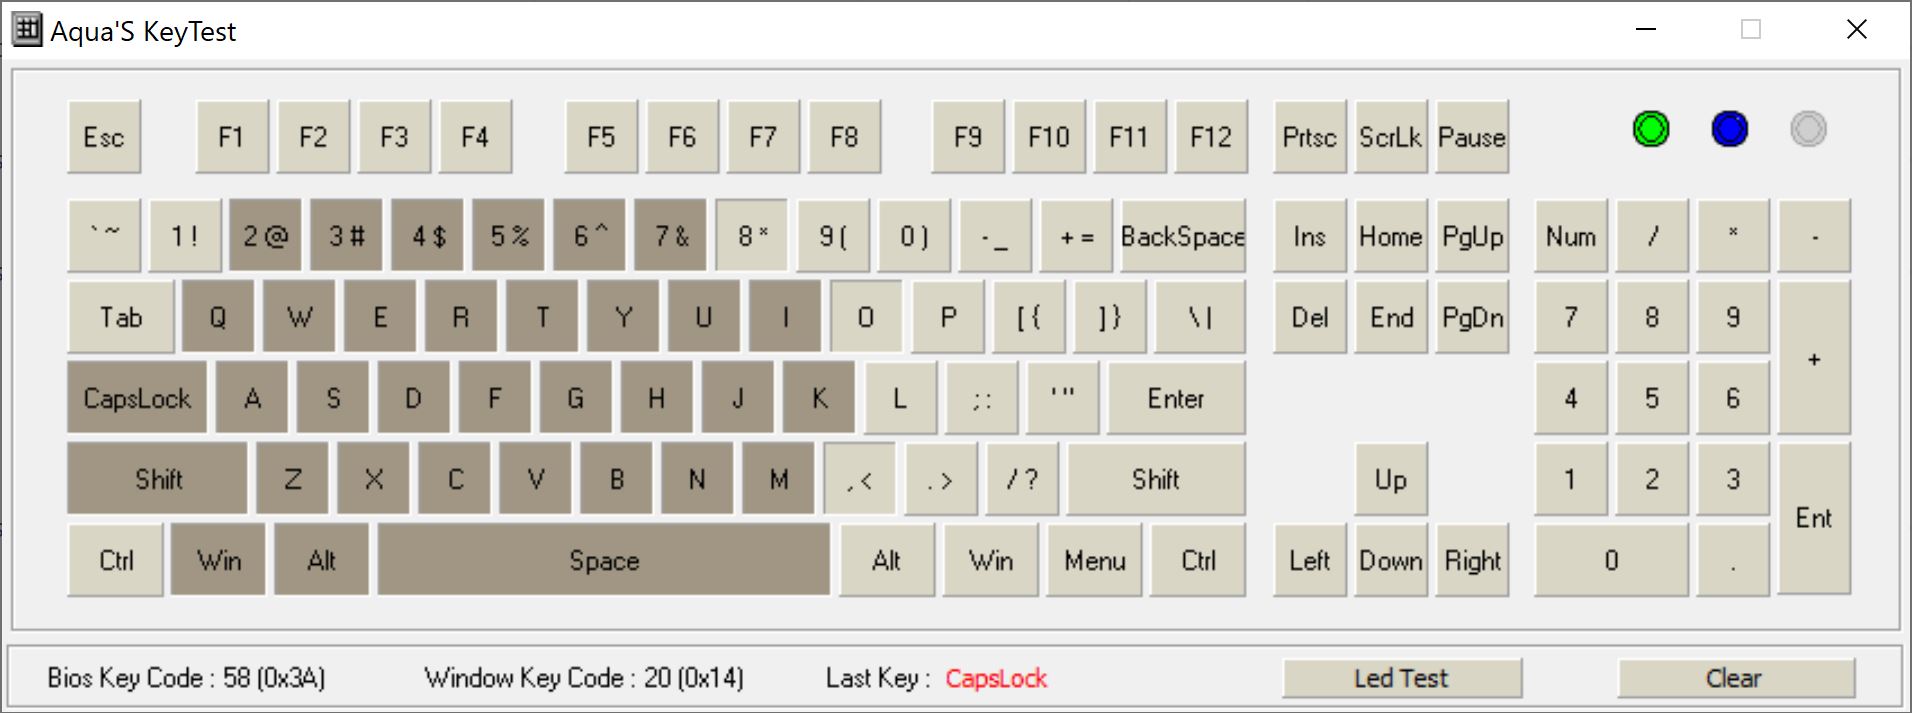
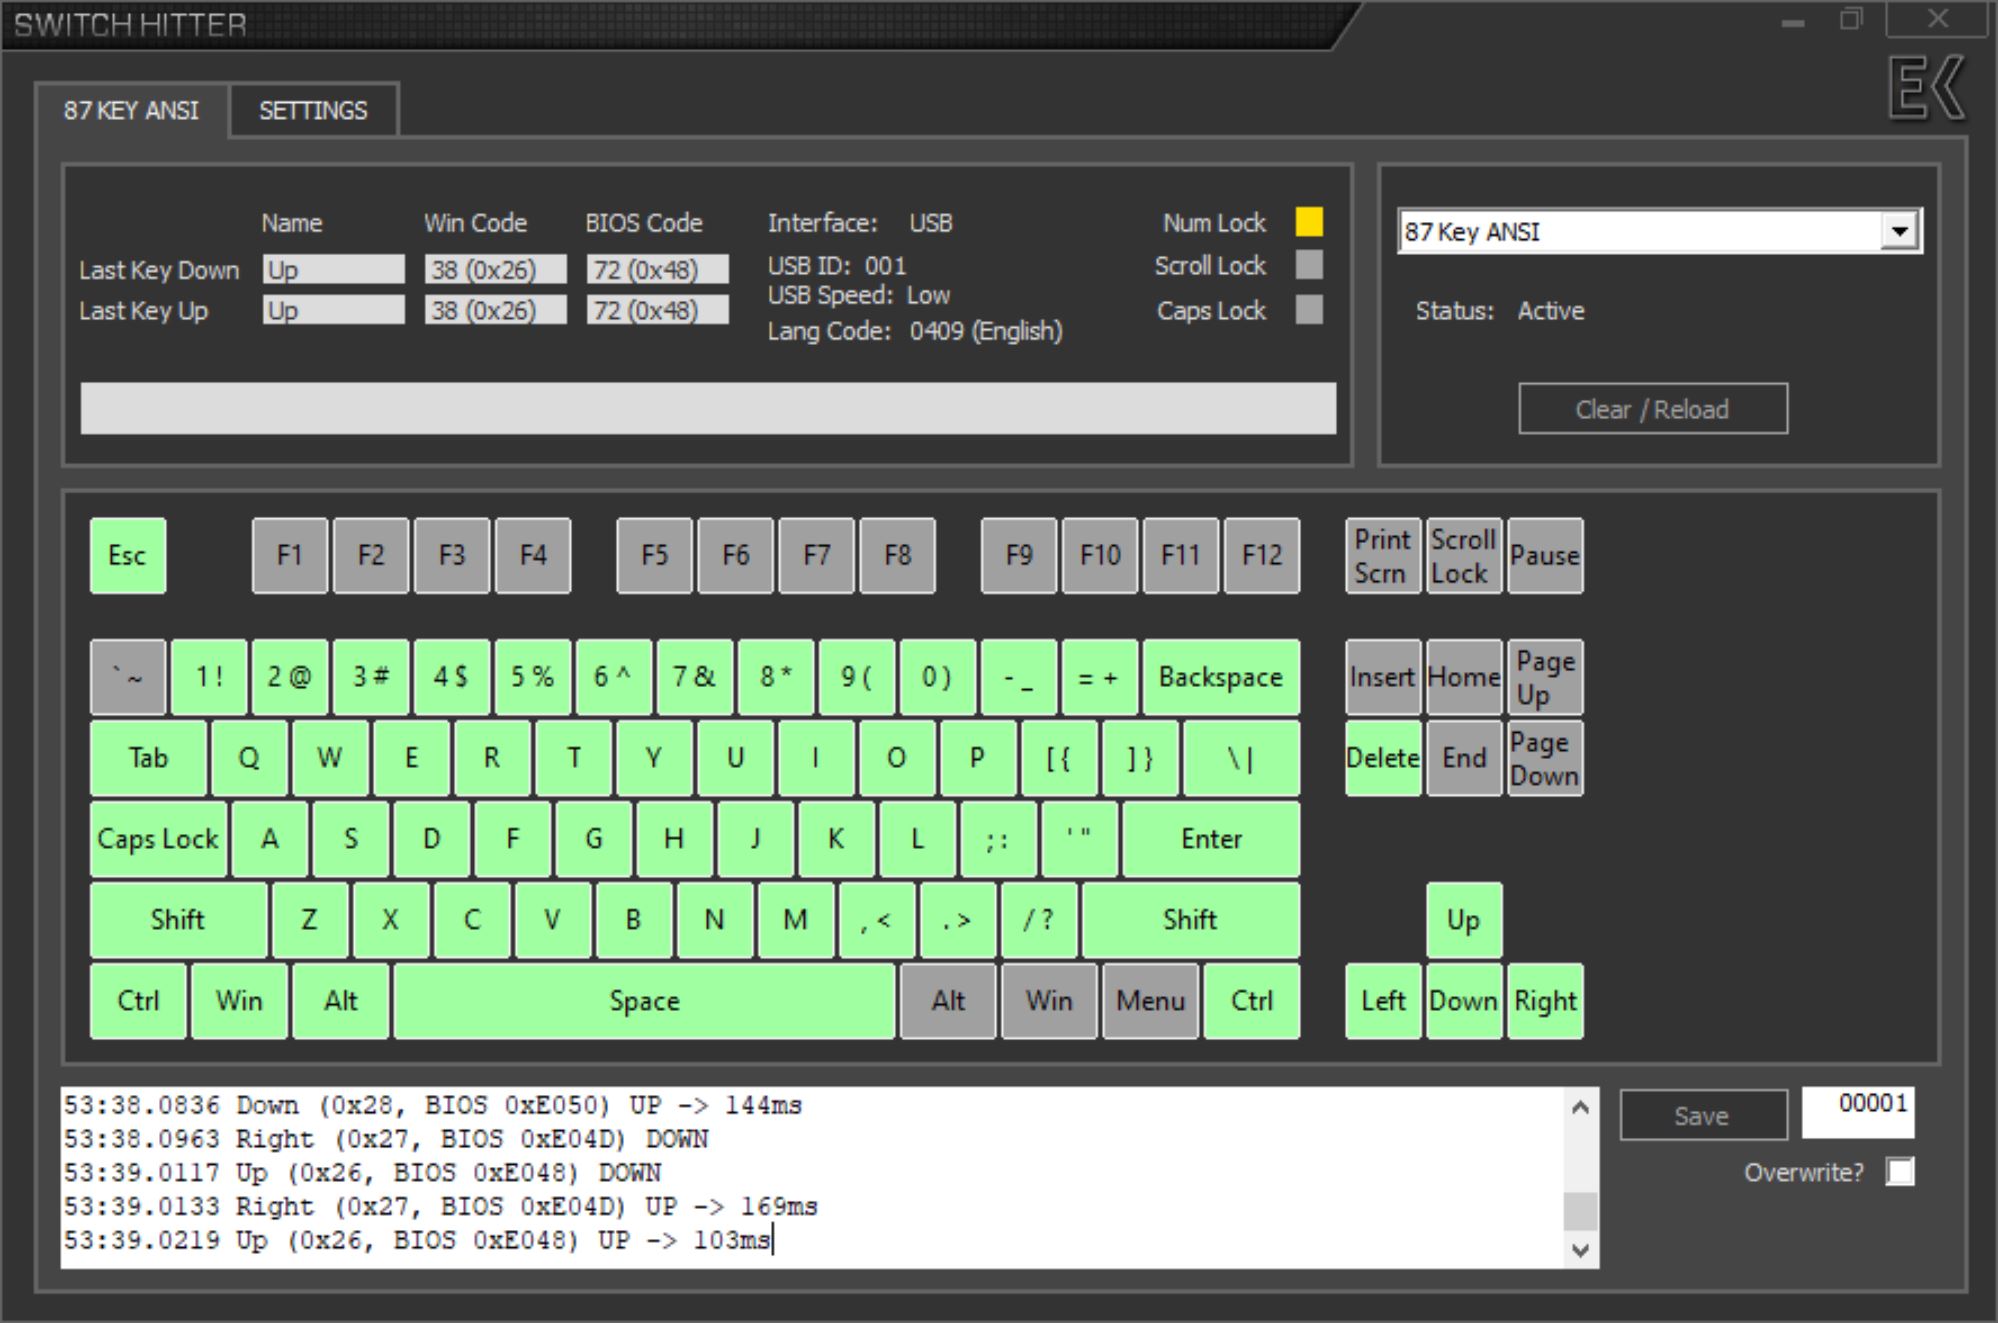
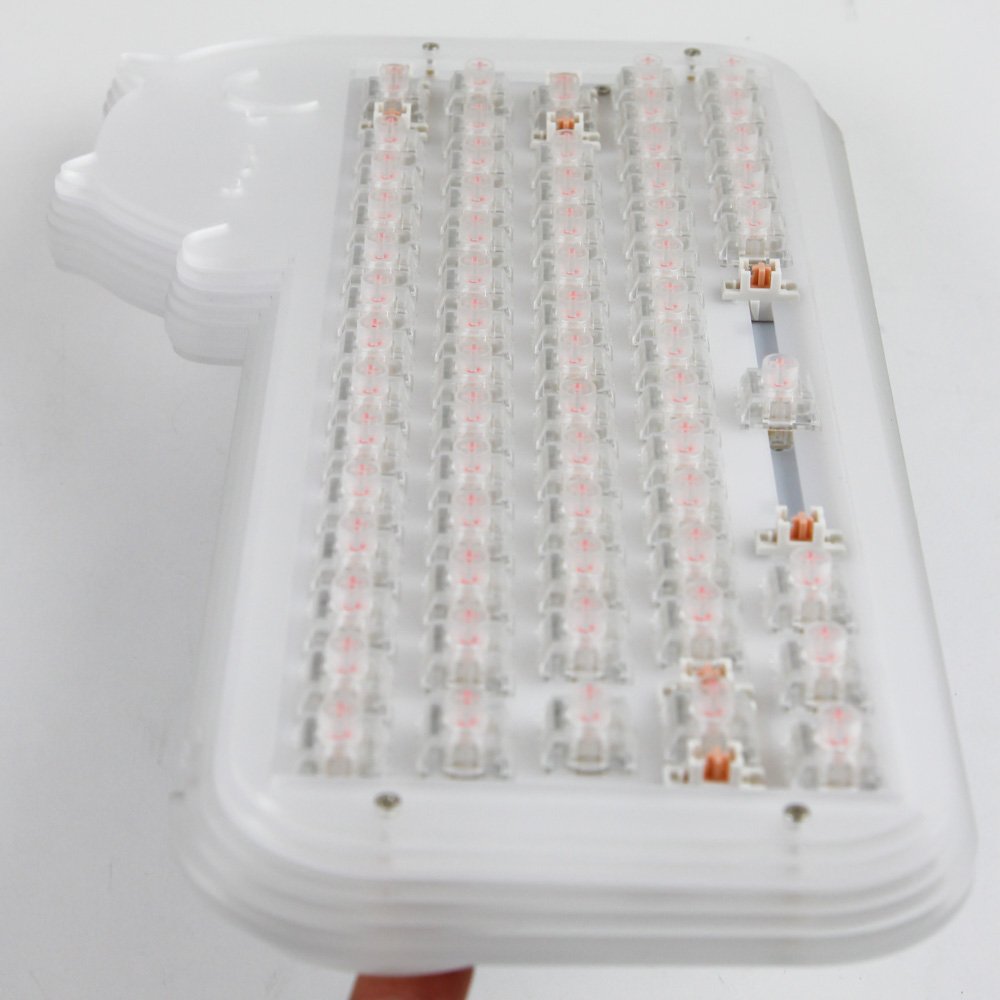
Once fully assembled, plug the keyboard in and ensure all switches work. The LEDs on the PCB might well light up anyway, but that is not necessarily indicative of the switch pins making contact. Tools such as Switch Hitter come in handy, as they also confirm the base functionality of the switches assigned on the PCB, when you are not sure which keys are what, especially on the right side of the keyboard on this 65% form factor kit. Given the kit only supports wired connectivity, things are simple via the plug-and-play nature of the keyboard.

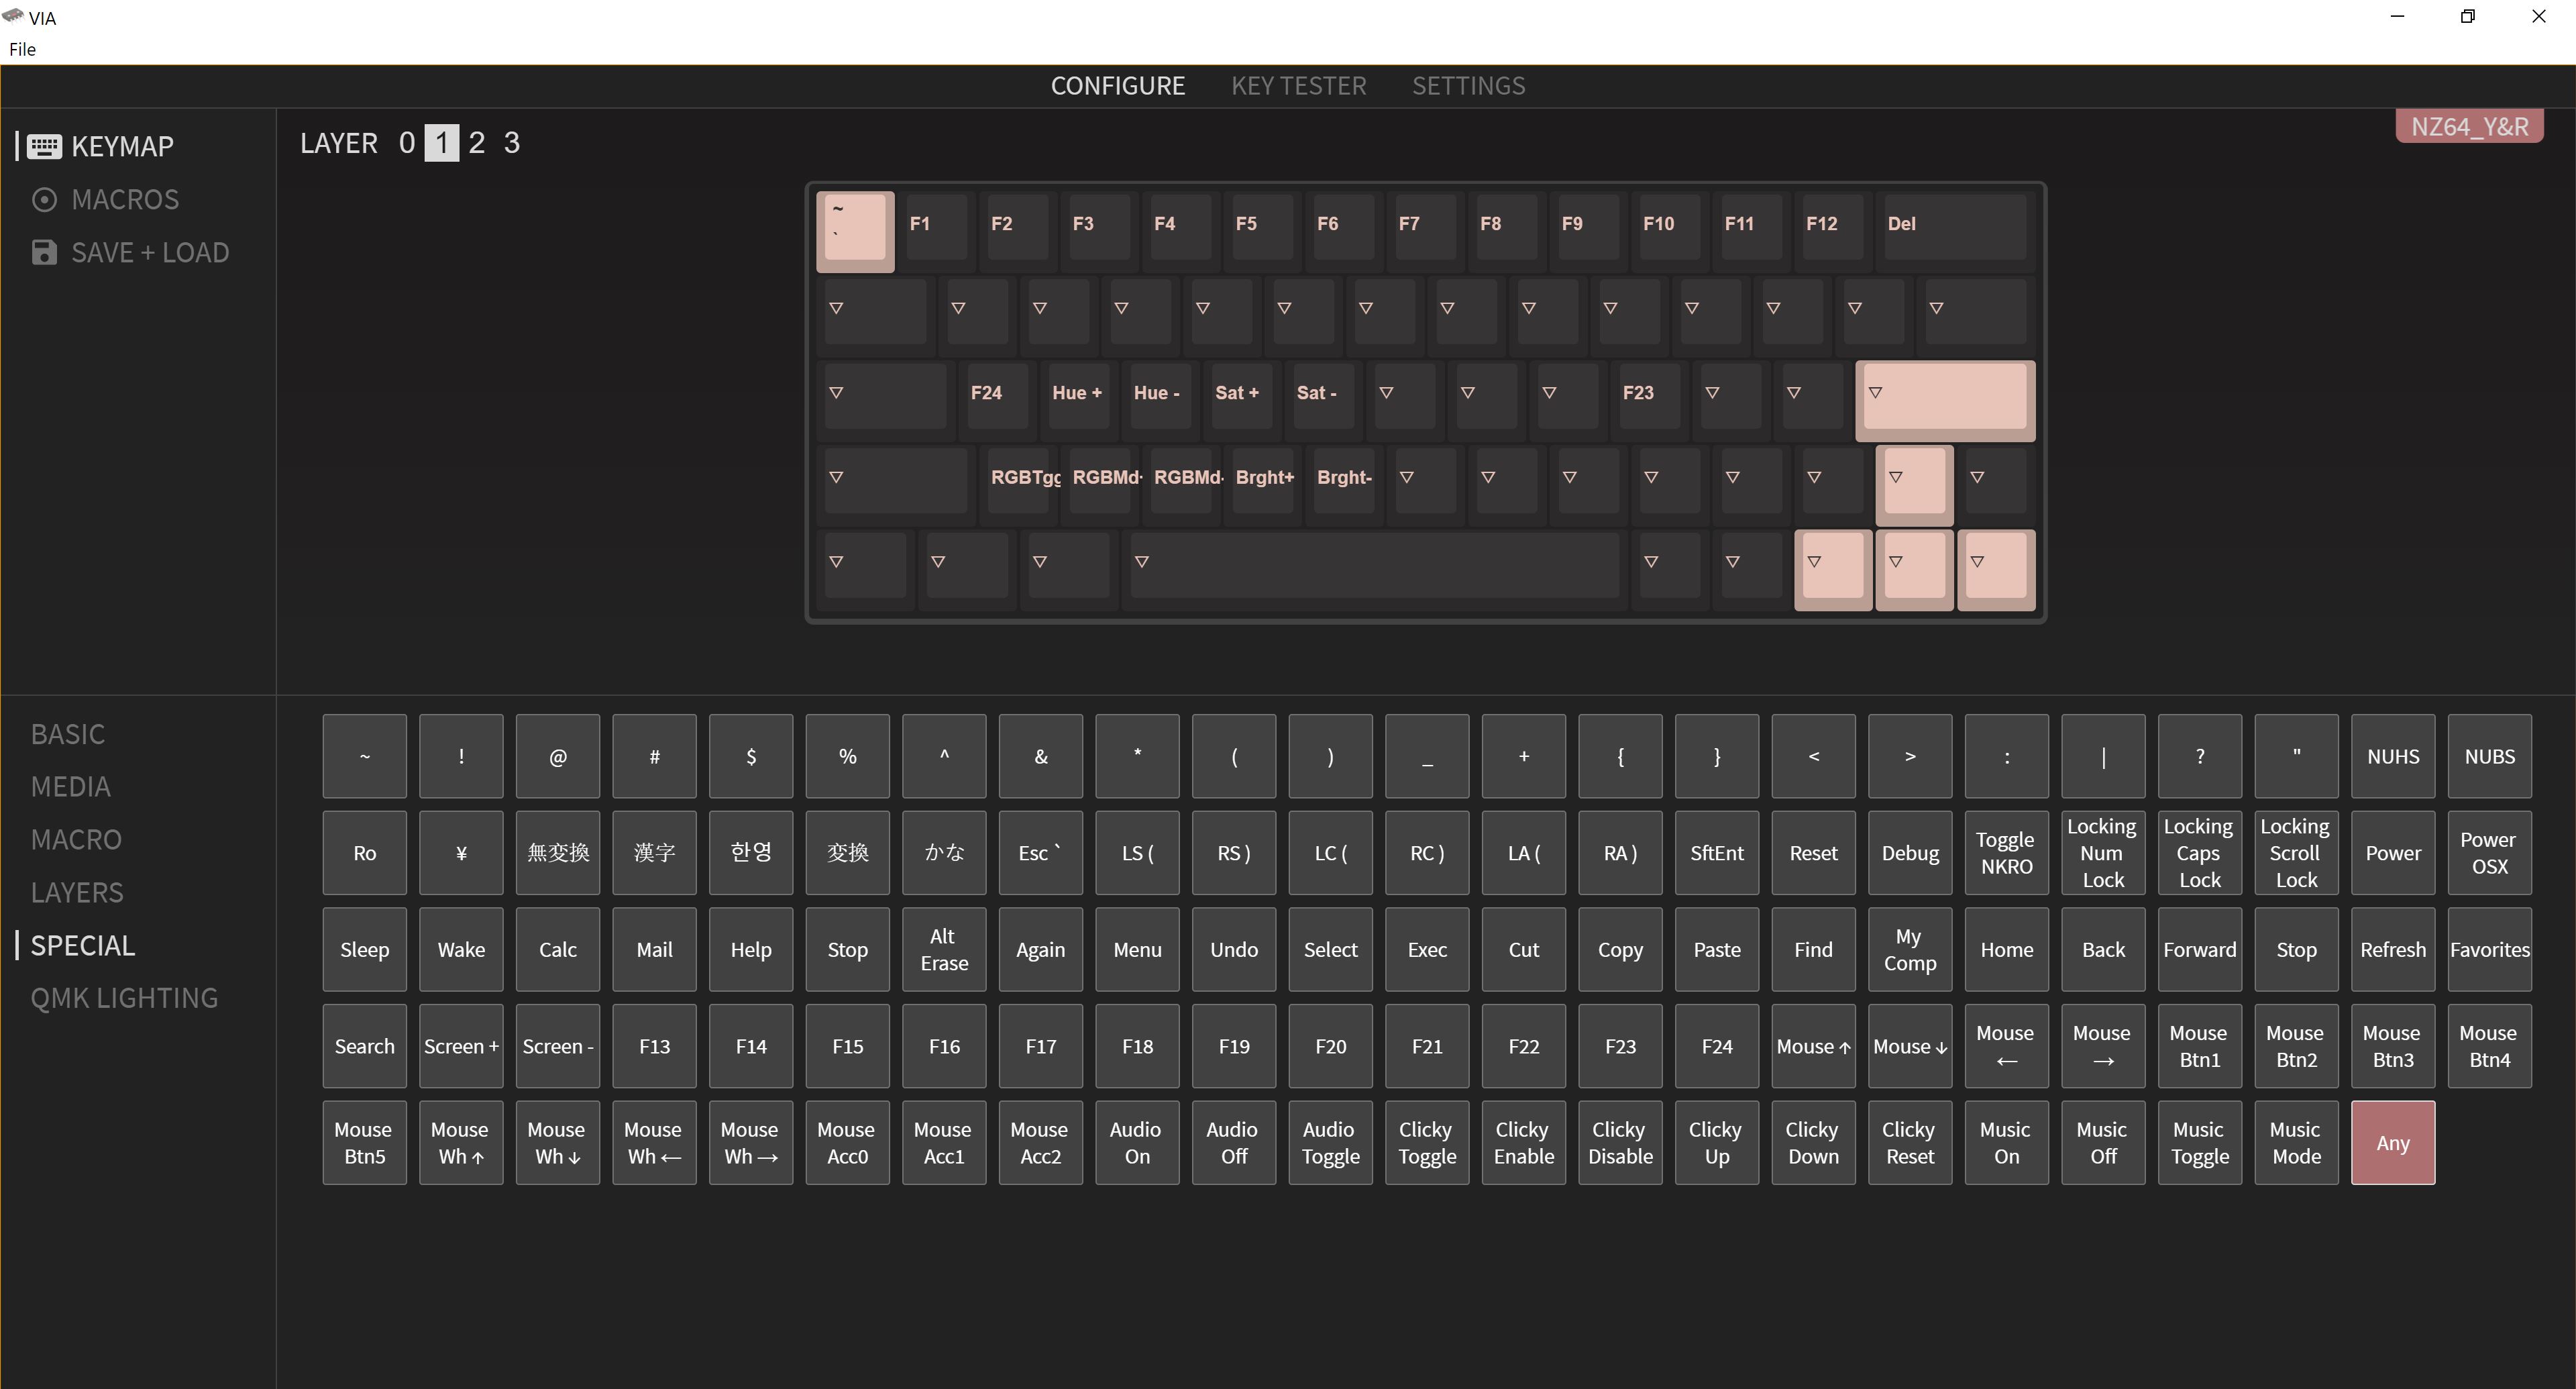
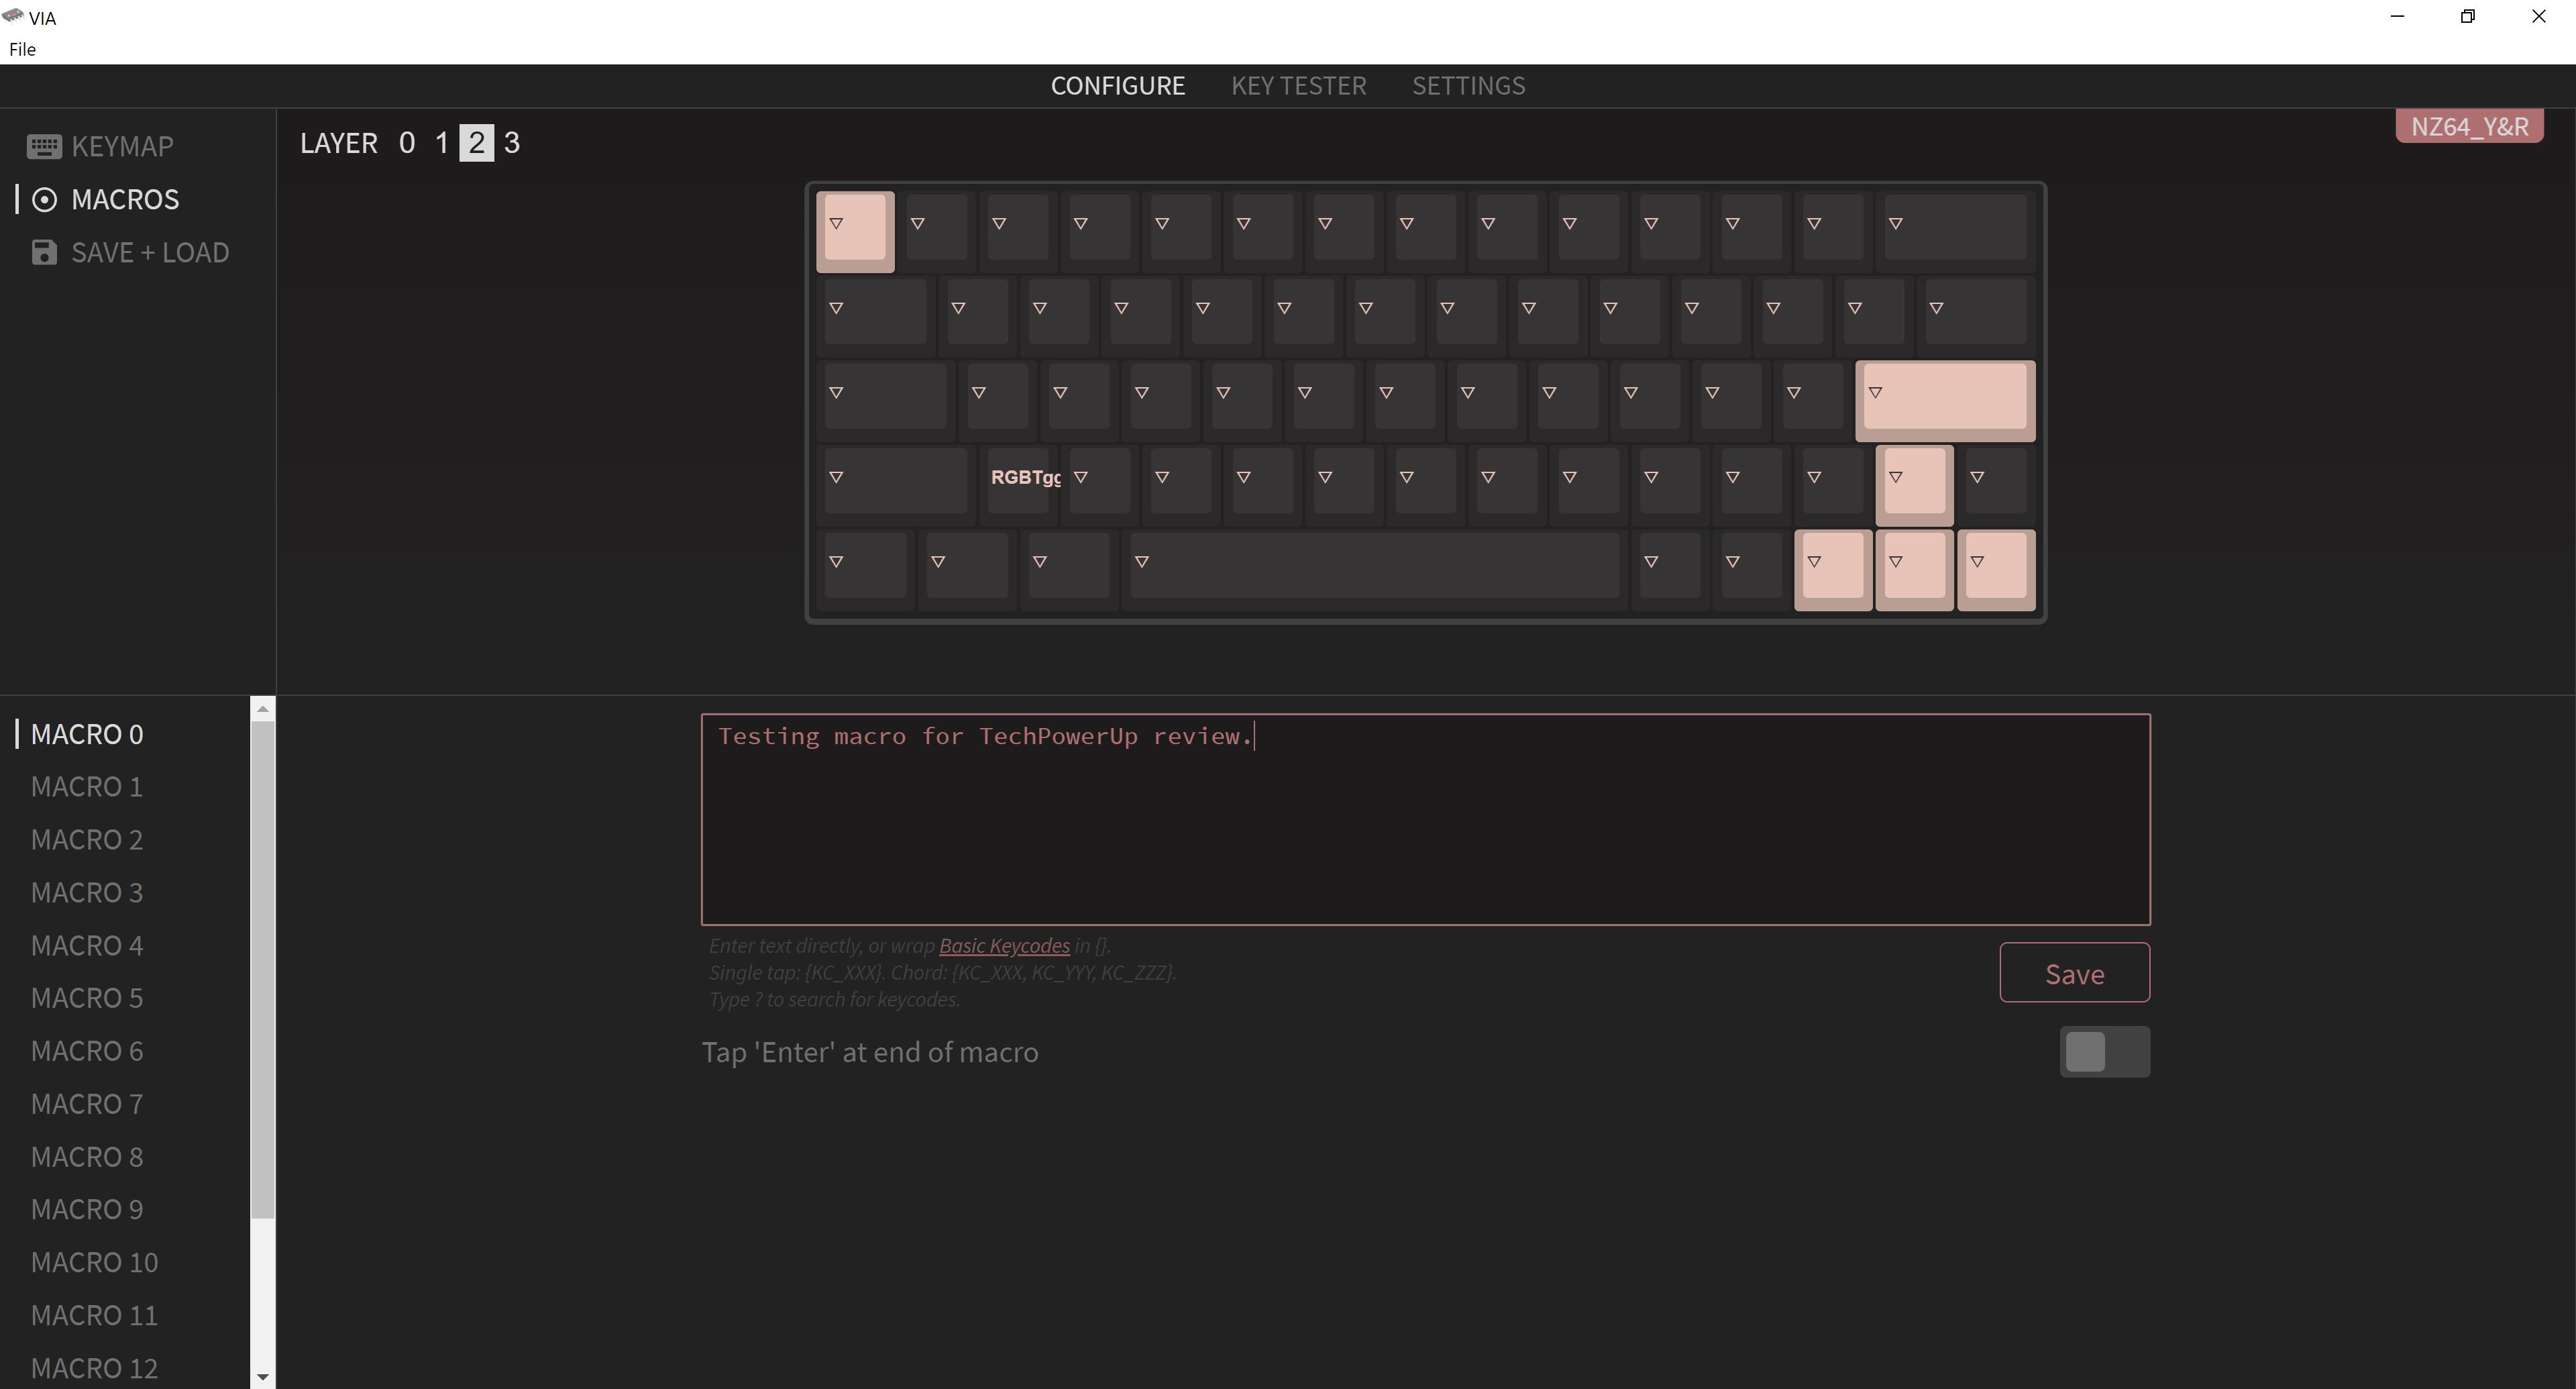
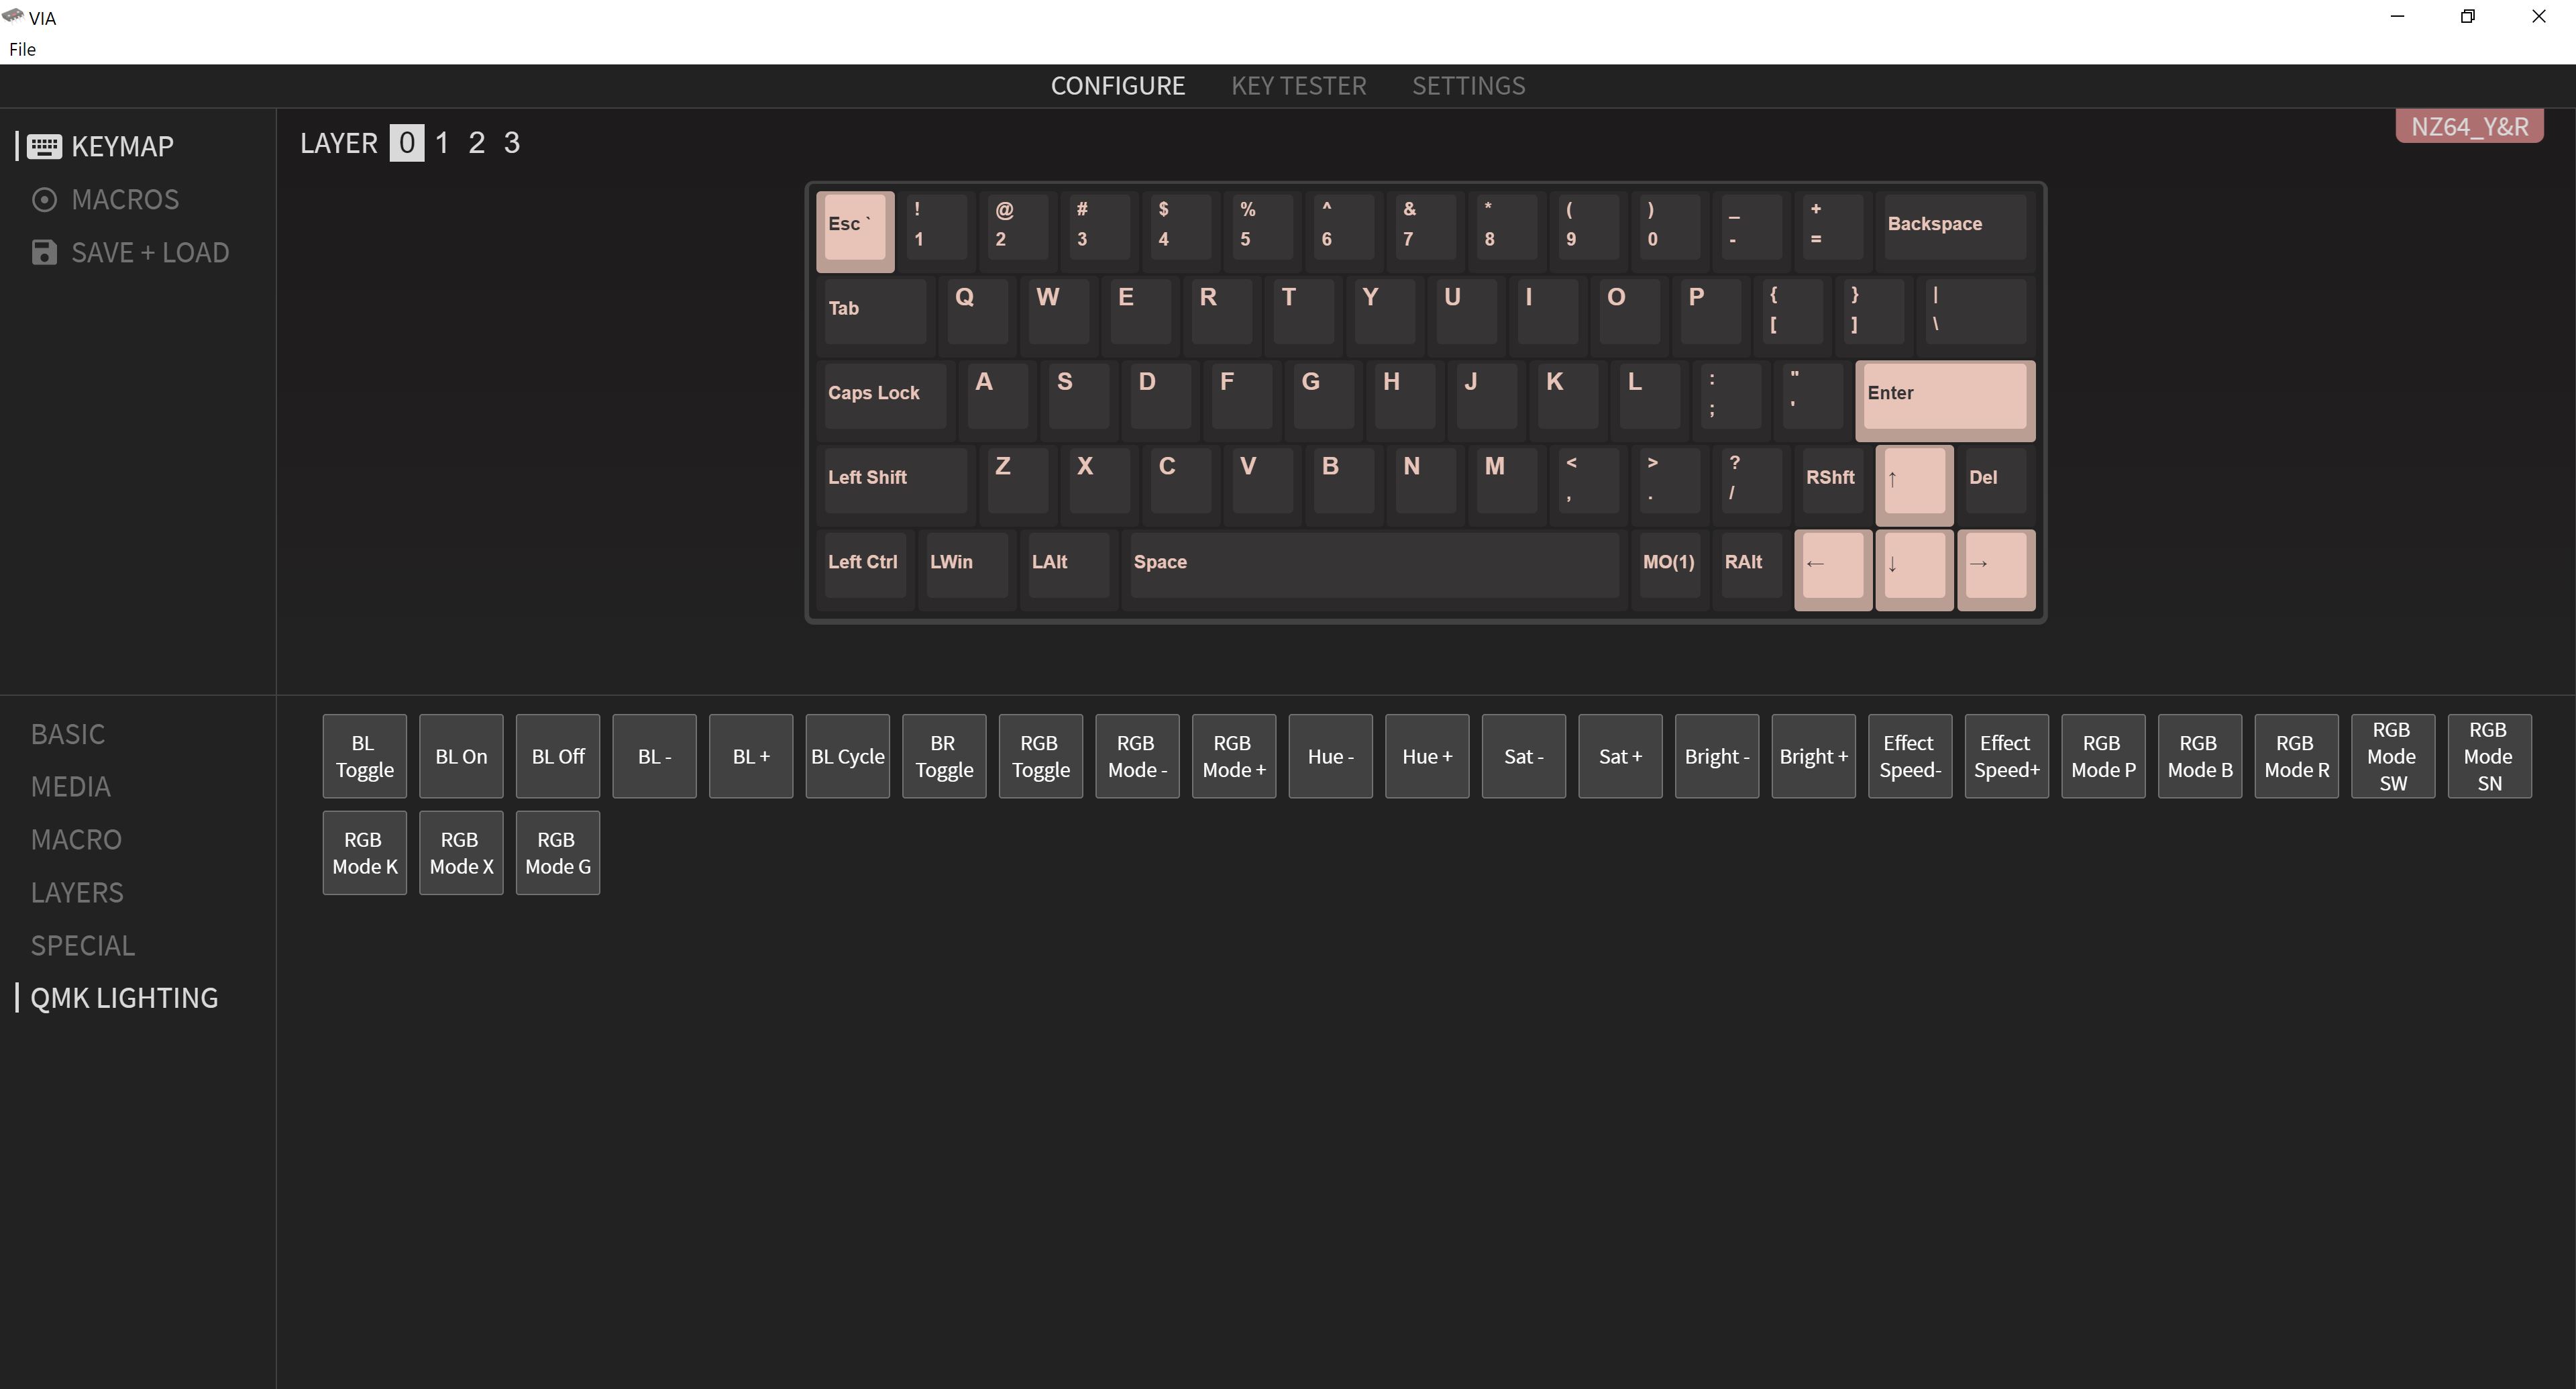
Scroll down past mid-way on the product page to find the drivers for the Epomaker Mini Cat 64. I mentioned before how it supports VIA, and presumably also QMK, based on a single mention of it, the generic VIA drivers recognize the keyboard while providing you customization options in the form of layers, key mapping, macros, and LED control. It's not the most user-friendly program and the lack of detailed instructions don't help much either—especially once you realize the whole JSON file part to get the changes to be programmed on to the keyboard. But you are able to finally use something other than Epomaker's janky GK6XPlus so I can't complain too much.

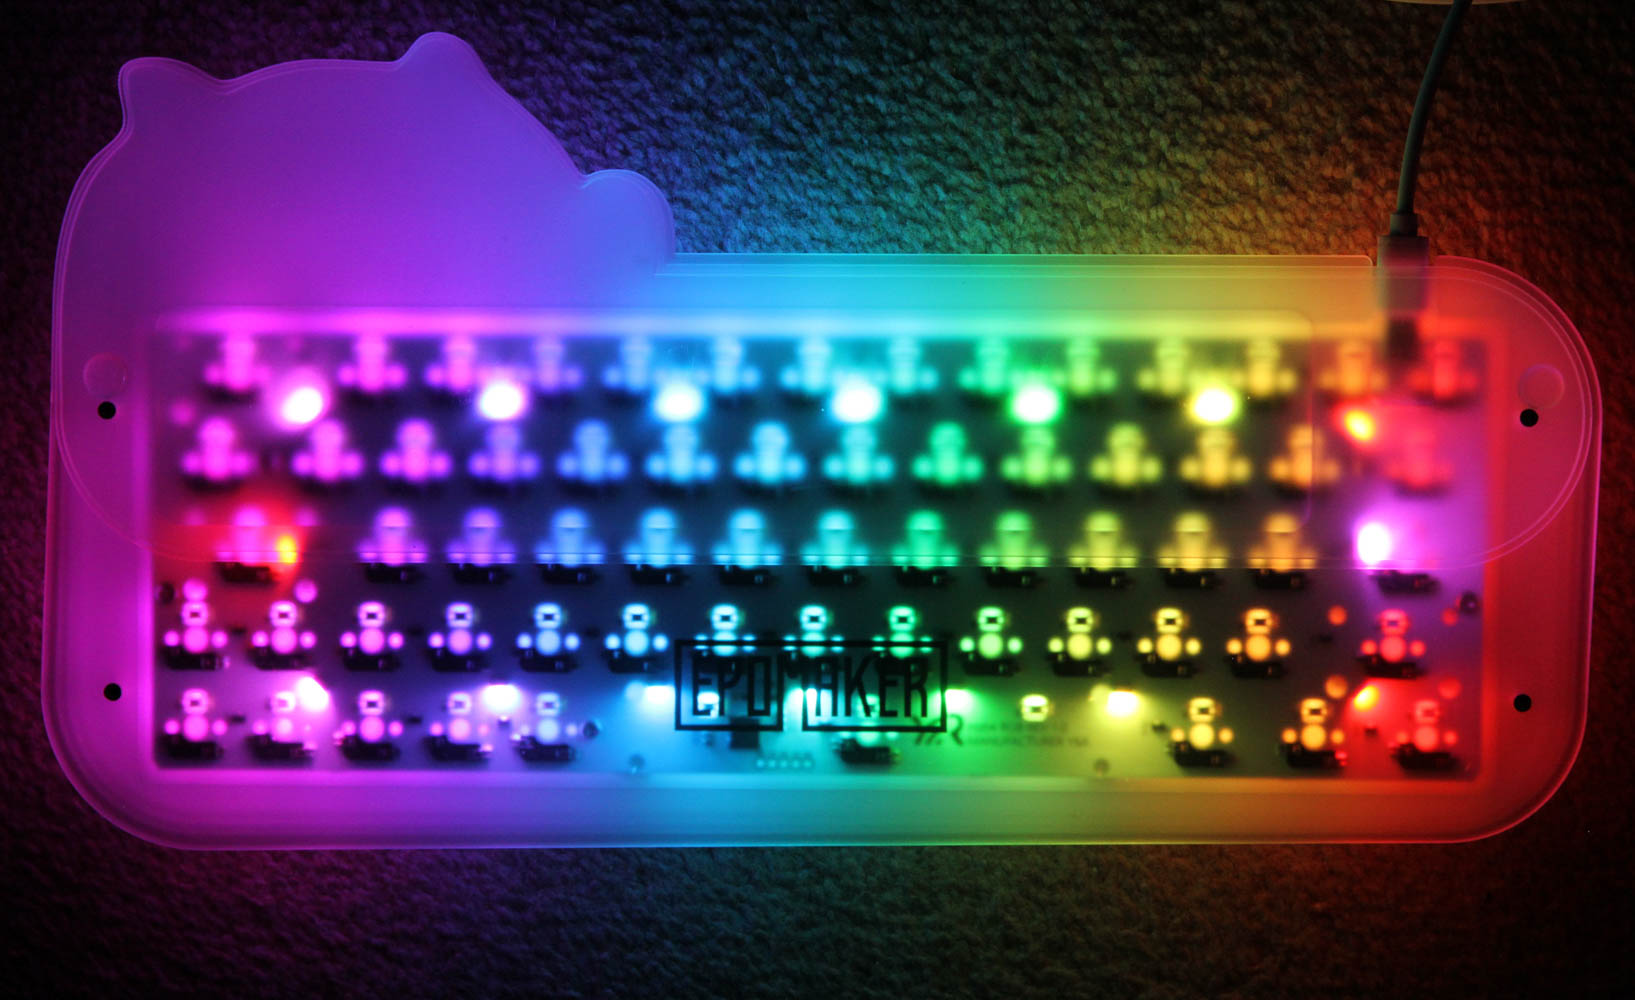
Here is a look at the keyboard, all lit up in the default rainbow wave effect. As we saw above, the VIA drivers provide for a few different lighting effects to choose from. You are also able to use any compatible open-source VIA program for further customization as necessary. The opaque keycaps here means the RGB LEDs are mostly going to light up the case, making for a striking presence on your desk.
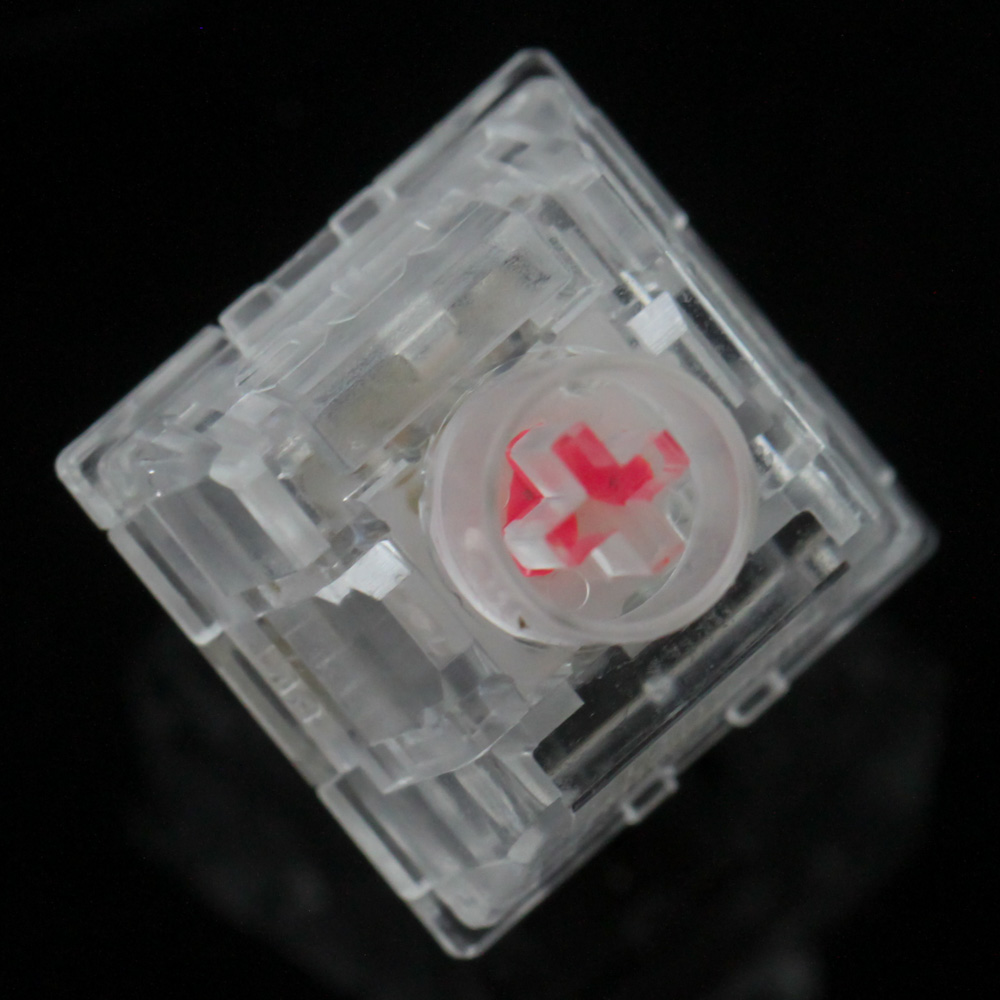


The switches are pretty neat if I say so myself. I am slowly being turned over to linear switches—especially silent linear switches for use in a shared work environment—and the TTC Heart comes closer to besting the Kailh BOX Deep Sea switch in this regard. It is also a full-size mechanical switch with actuation (pre-travel) at 2 +/-0.4 mm and with a rated actuation force of 42 gf. This follows a total travel of 3.8-4.0 mm and a peak force just shy of 50 gf. You are almost guaranteed to bottom out here thus and so it is a good thing there are bumpers present, which are also well-executed, not making for a mushy feedback on the downstroke. Instead you get a fairly smooth and consistent linear travel on a medium force switch here. The keycaps are fine to use as well, unfortunately the same can't be said for the kit that has too much flex at the top if you are a forceful typist.
As always, the sound of a keyboard is based on more than just the switch type. So when comparing sound clips, consider the keyboard assembly as a whole. In this case, I have provided above an example sound clip of me typing on the Epomaker Mini Cat 64 kit with the Epomaker XDA profile PBT keycaps and TTC Heart switches at ~90 WPM. For context, you can find sound clips from other keyboards here, including those with linear switches. The foam underneath the plate in the kit, along with the inherent quiet nature of the switches makes this an almost silent keyboard with dampened keystrokes. The PBT keycaps also assist in a bassier response than usual, and the stacked acrylic also minimizes reverberations. But the kit is still the weak point here, and the stabilizers are not very uniform. The backspace key in particular was pinging off the plate, resulting in a higher frequency sound in use as heard towards the end of the recording here. These switches and keycaps on a proper gasket-mount keyboard would be very nice!
Prices
- The Epomaker Mini Cat 64 acrylic kit is a recent release up for pre-order and costs $74.99 from the Epomaker web shop, as of the date of this article.
- The Epomaker Kitty XDA profile PBT keycap set costs $29.99 from the Epomaker web shop.
- The TTC Heart switches come in a 35-pack SKU only that costs $39.99 from the Epomaker web shop.
Jul 18th, 2025 19:04 CDT
change timezone
Latest GPU Drivers
New Forum Posts
- lower score 5070Ti after replacing the PSU (0)
- AI Job Losses: let's count the losses up, total losses to AI so far 94,000 and counting (34)
- TPU's Nostalgic Hardware Club (20539)
- 3DMARK "LEGENDARY" (329)
- Hatsune Miku x ASUS TUF Gaming Build (67)
- What's your latest tech purchase? (24304)
- Anime Nation (13051)
- Ferrari themed mod cont. 4070s repaste (7)
- Stalker 2 is looking great. (213)
- Share your CPU-X Benchmarks! (6)
Popular Reviews
- Razer Blade 16 (2025) Review - Thin, Light, Punchy, and Efficient
- SilverStone SETA H2 Review
- Thermal Grizzly WireView Pro Review
- Pulsar X2 Crazylight Review
- MSI GeForce RTX 5060 Gaming OC Review
- Our Visit to the Hunter Super Computer
- NVIDIA GeForce RTX 5080 Founders Edition Review
- NVIDIA GeForce RTX 5050 8 GB Review
- Sapphire Radeon RX 9060 XT Pulse OC 16 GB Review - An Excellent Choice
- Upcoming Hardware Launches 2025 (Updated May 2025)
TPU on YouTube
Controversial News Posts
- Intel's Core Ultra 7 265K and 265KF CPUs Dip Below $250 (288)
- Some Intel Nova Lake CPUs Rumored to Challenge AMD's 3D V-Cache in Desktop Gaming (140)
- AMD Radeon RX 9070 XT Gains 9% Performance at 1440p with Latest Driver, Beats RTX 5070 Ti (131)
- NVIDIA Launches GeForce RTX 5050 for Desktops and Laptops, Starts at $249 (124)
- NVIDIA GeForce RTX 5080 SUPER Could Feature 24 GB Memory, Increased Power Limits (115)
- Microsoft Partners with AMD for Next-gen Xbox Hardware (105)
- NVIDIA DLSS Transformer Cuts VRAM Usage by 20% (99)
- AMD Sampling Next-Gen Ryzen Desktop "Medusa Ridge," Sees Incremental IPC Upgrade, New cIOD (97)