 13
13
Building a Keyboard 3: Glorious GMMK PRO, Ocean PBT Keycaps & Panda Switches
Glorious Ocean PBT Keycaps »GMMK PRO: Disassembly


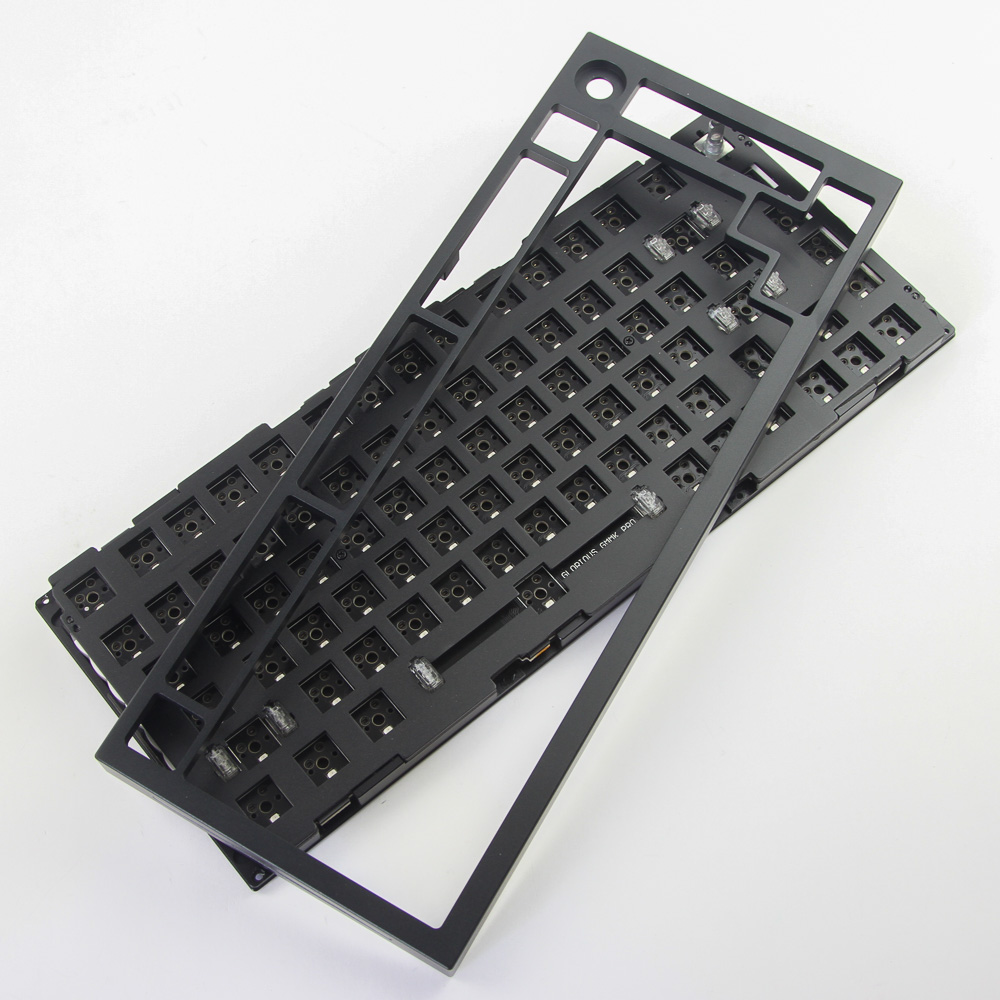
The GMMK PRO is marketed for enthusiasts and advertises customization throughout. We saw there are two color options for the kit, and three colors for the rotary knobs. But there is more ongoing in terms of functionality, which a disassembly will help shed light on. Begin by pulling off the rotary knob, which reveals the encoder wheel with the notch used to guide the two back together. This helps for when you want to take the top panel off, which in turn necessitates the removal of all eight Phillips-head screws on the back that we saw before. It might feel like the top panel is still held in place by something, but it will eventually pull off.
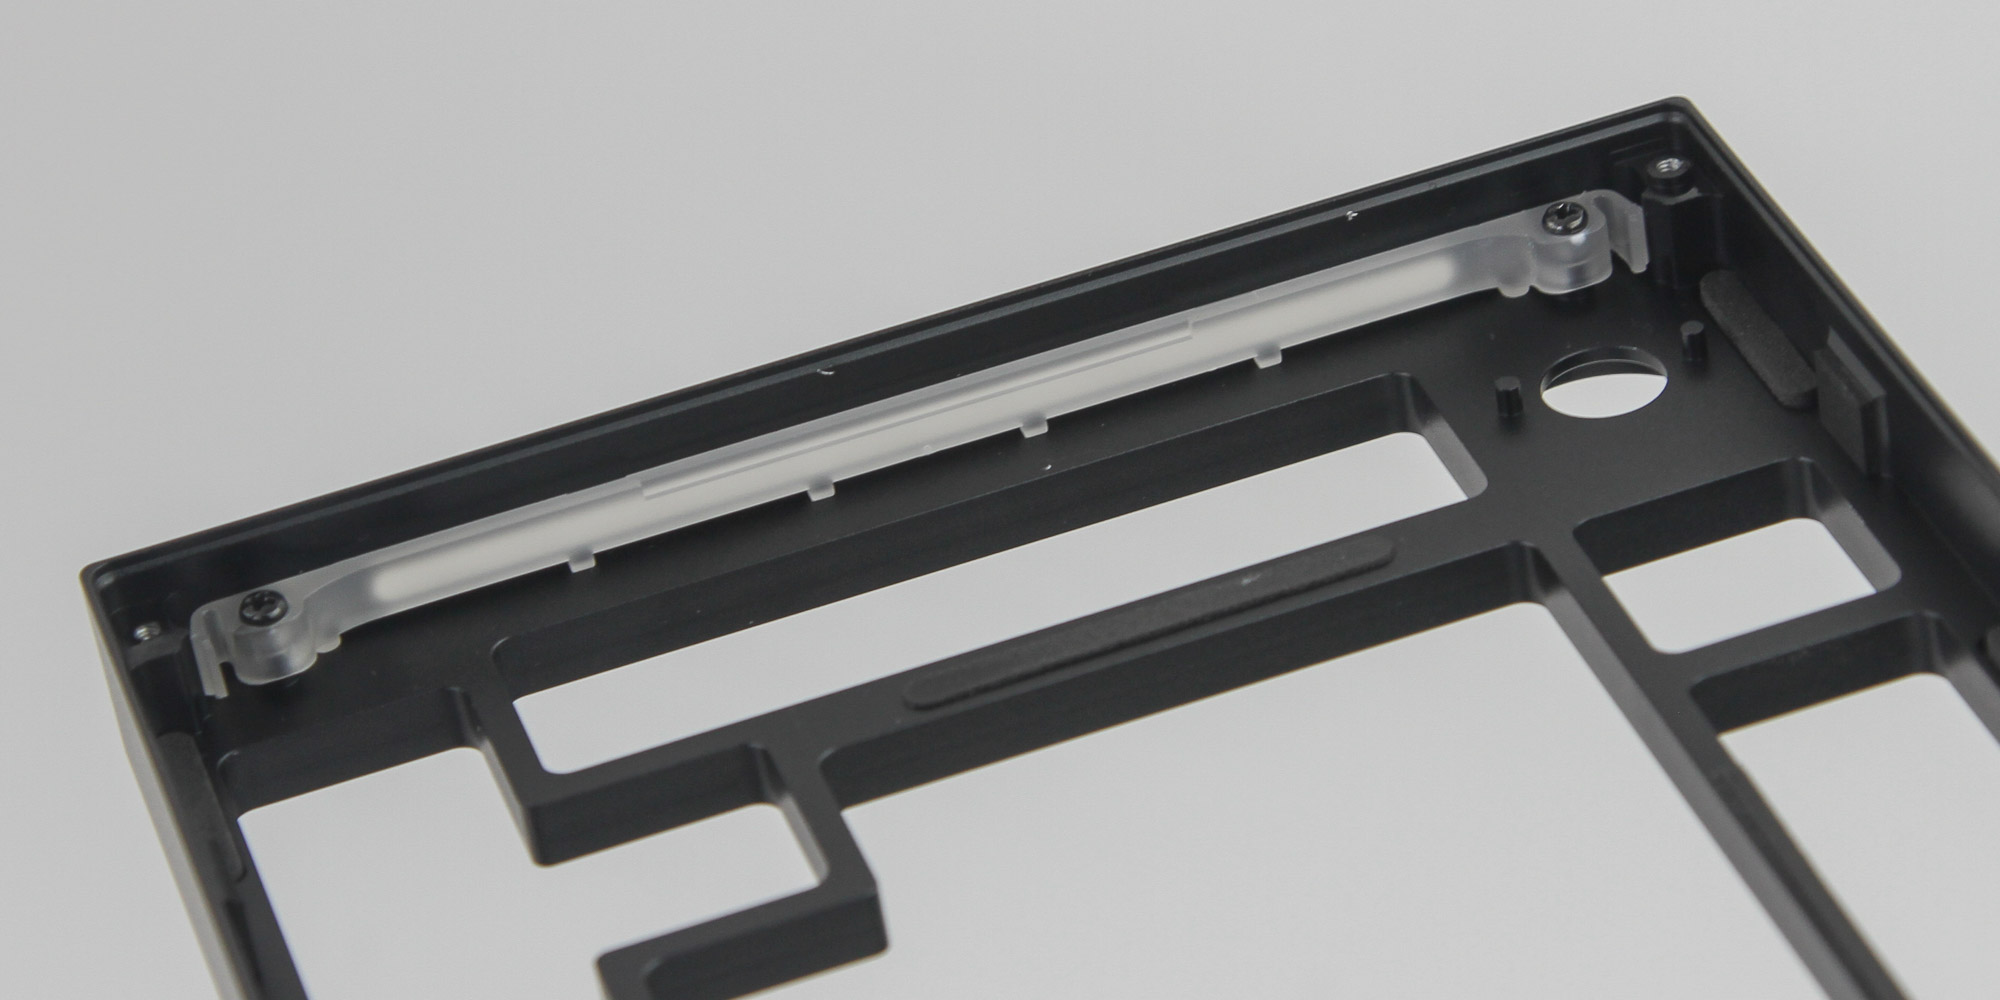
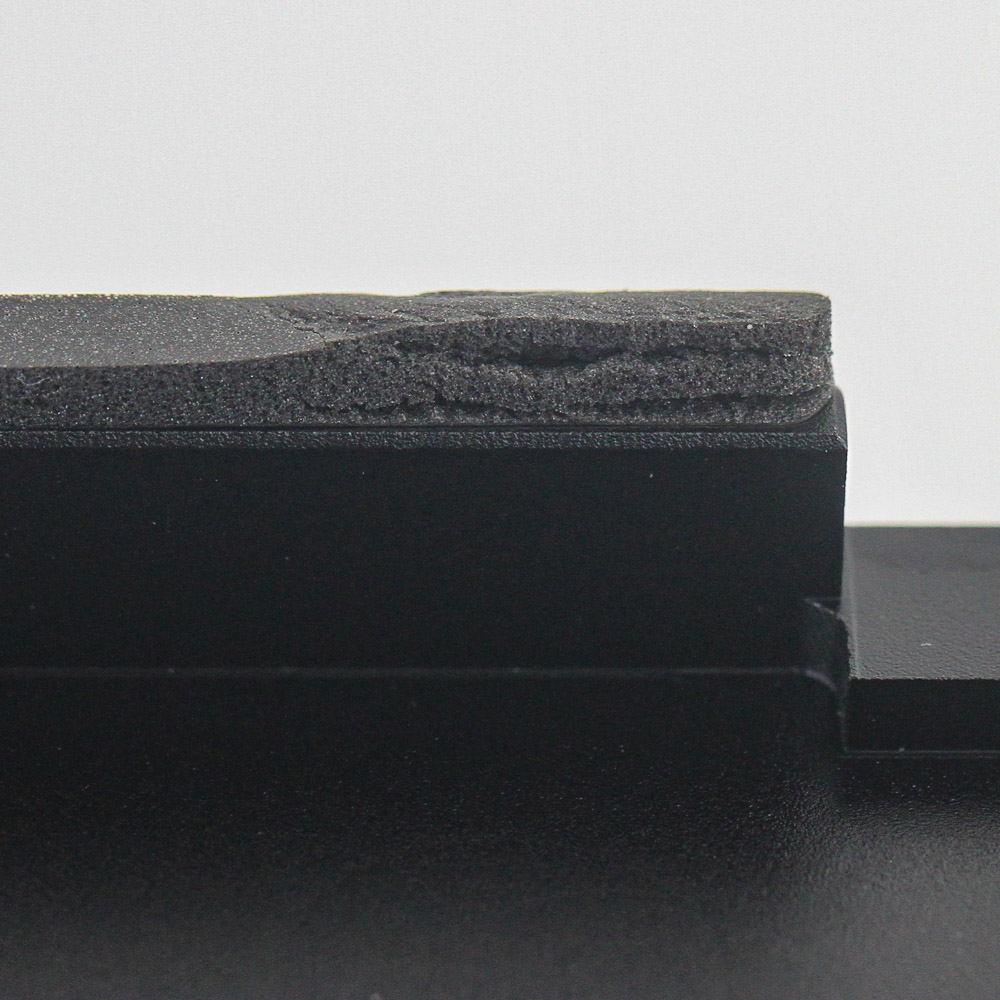
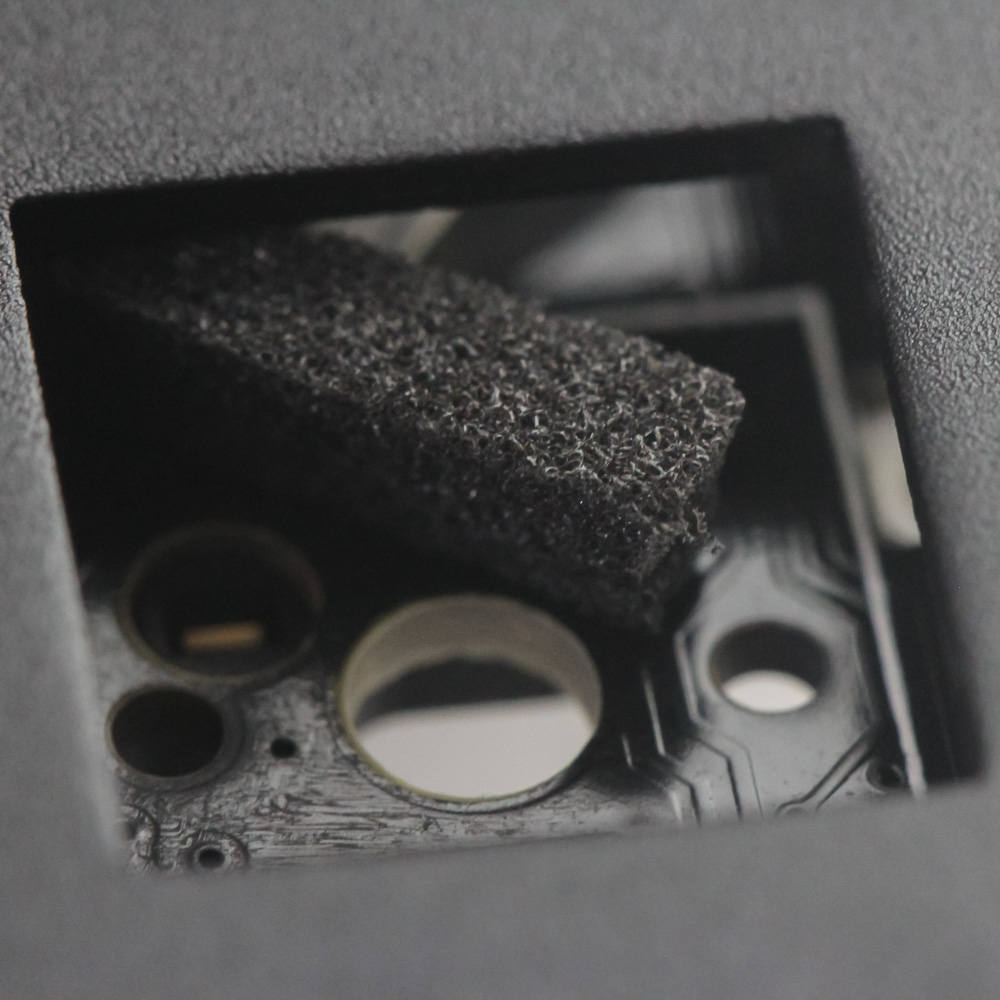
Now we know why the top panel remained in place, with the GMMK PRO employing gaskets pretty much everywhere! This involves the use of soft rubber gaskets to dampen the contacts between mating surfaces, including on the underside of the top aluminium panel, and helps soften any resistance when typing on the keyboard, but also softens the sound experience, making it less high-pitched. The replacement gaskets that ship with the box can be used if the factory-applied ones are damaged for some reason, and this makes the GMMK PRO one of the more novel offerings in its price range. A look at the side also shows the diffuser plate for the side lighting.
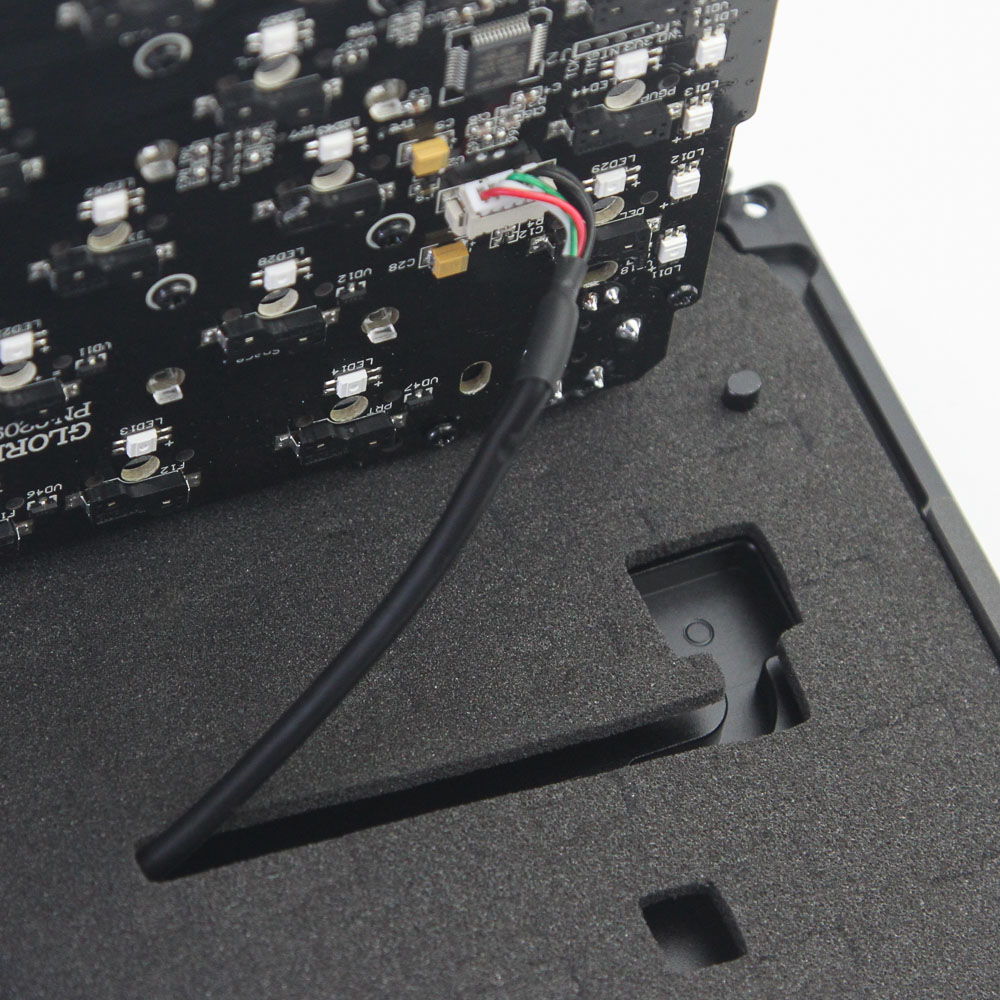
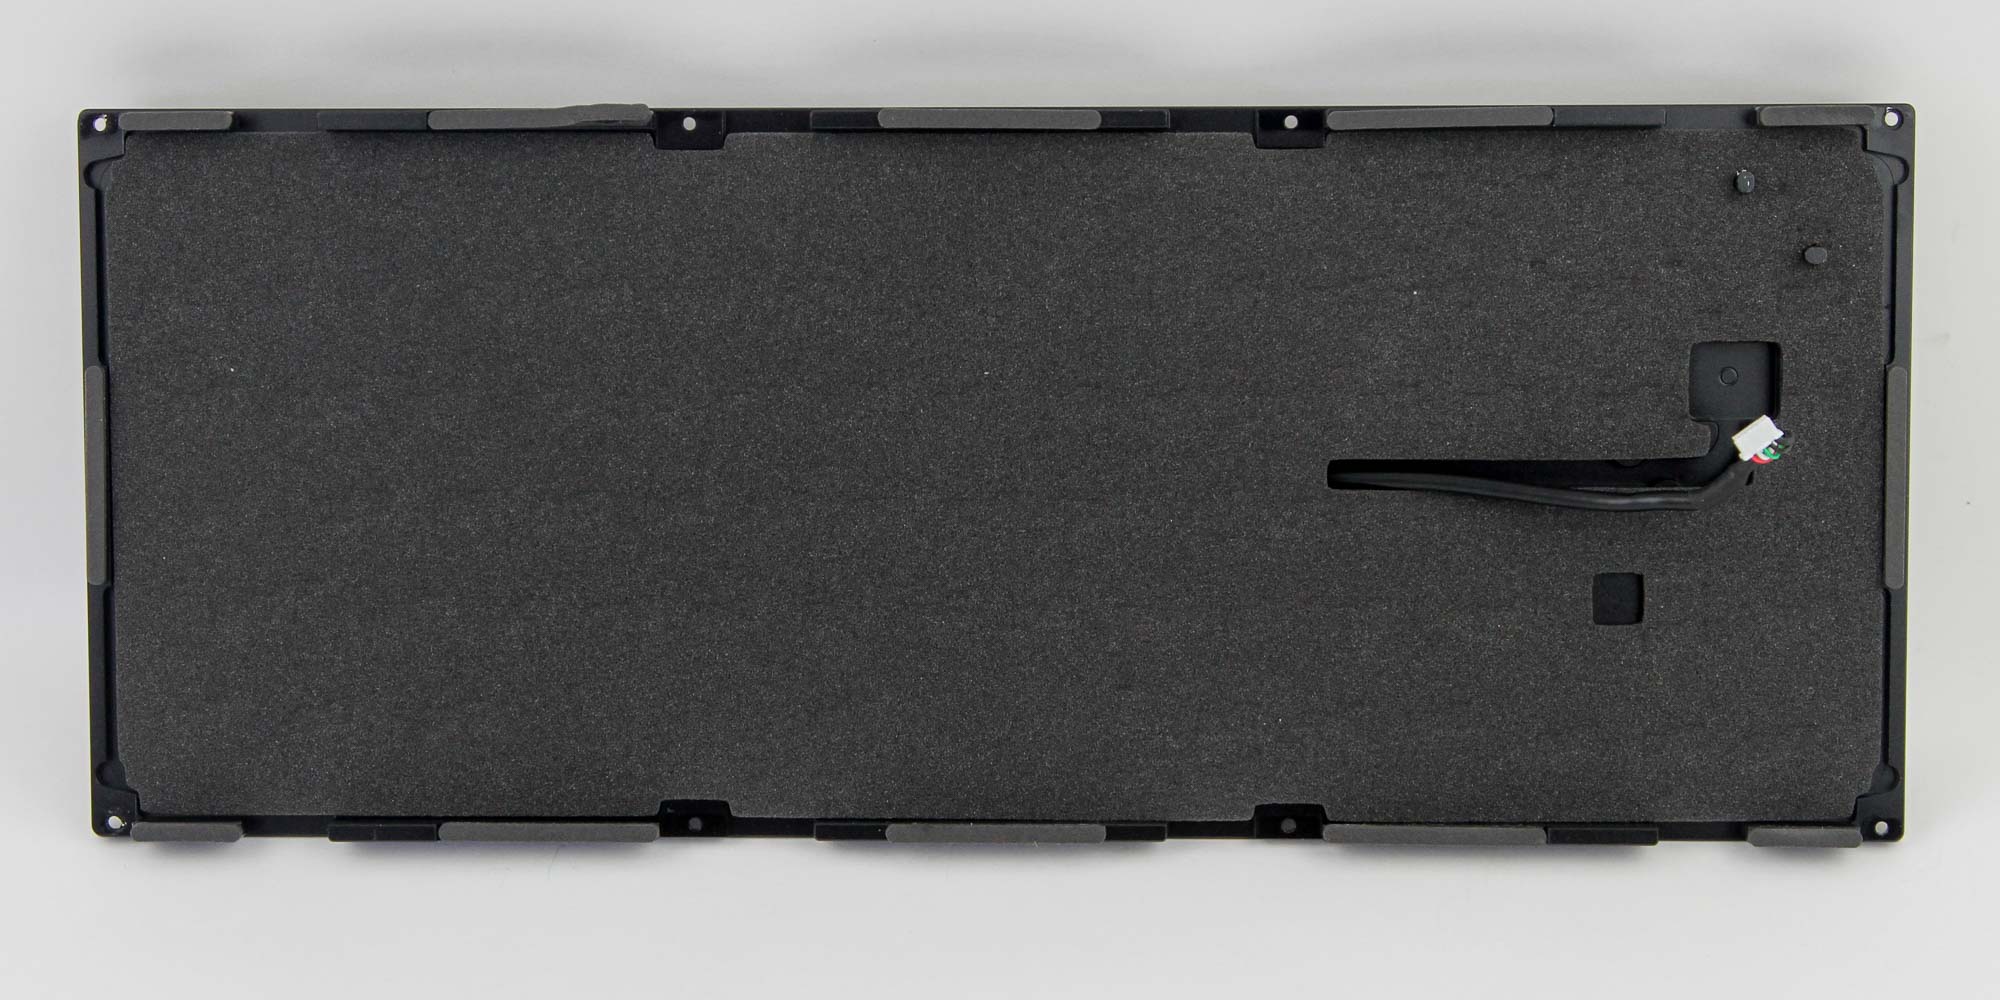
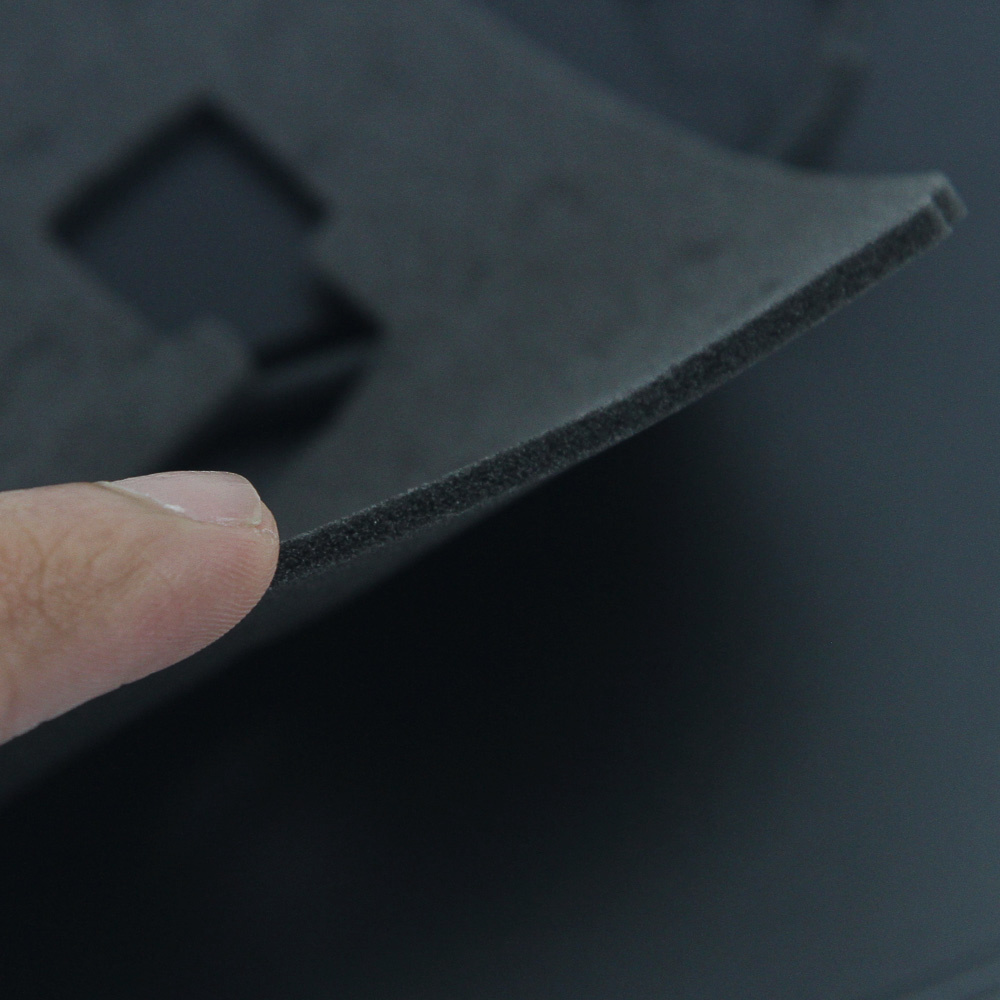
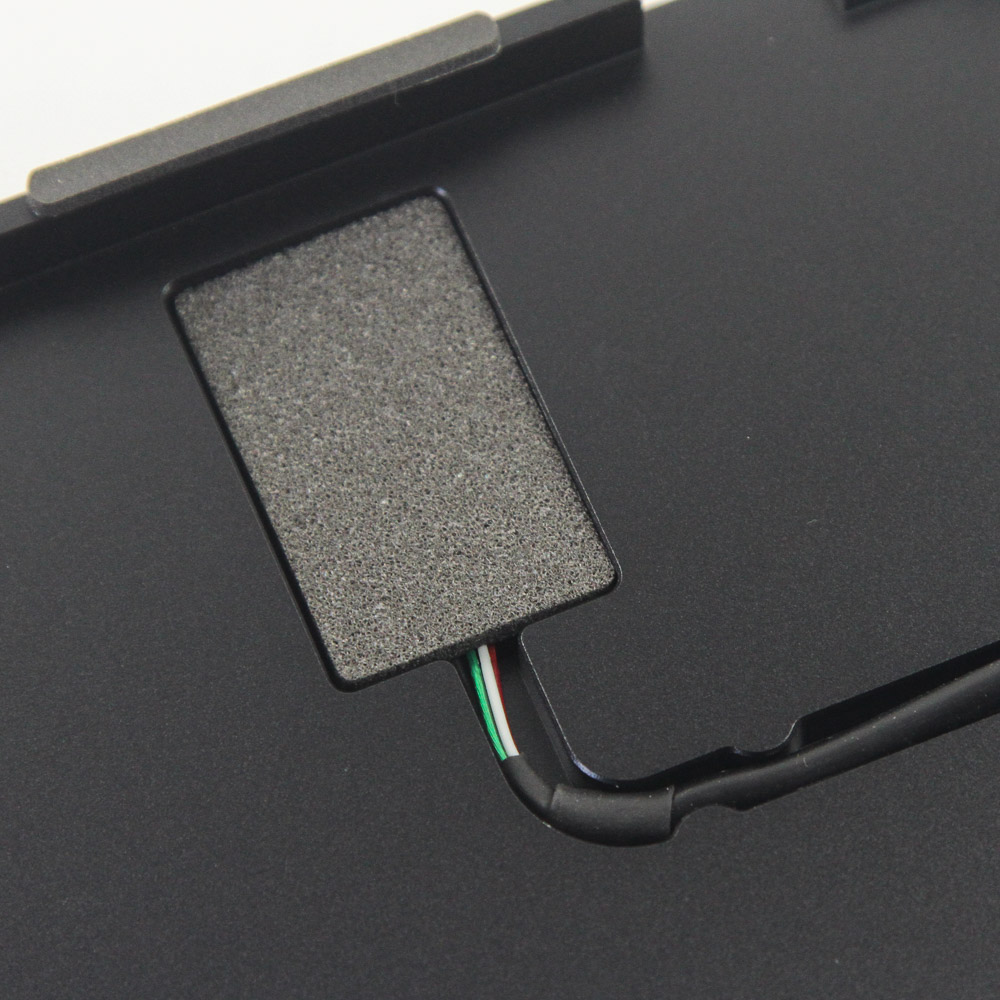
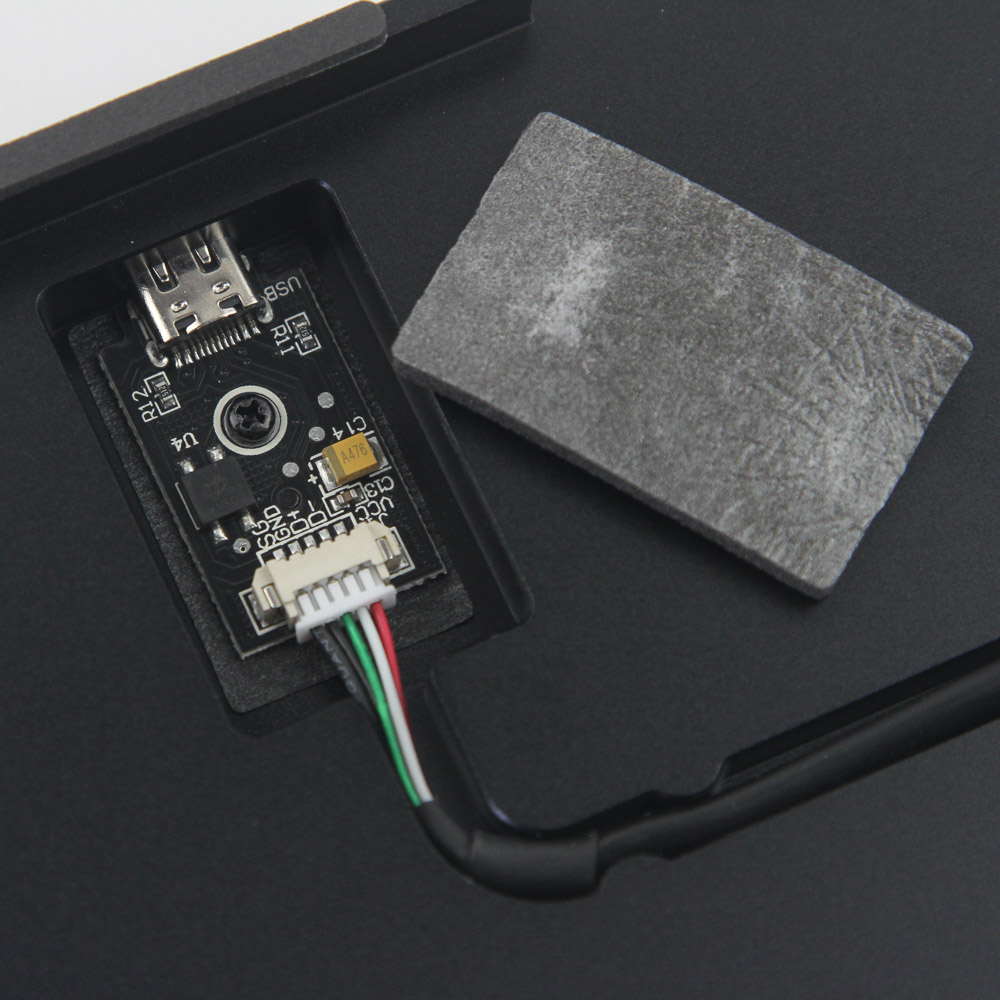
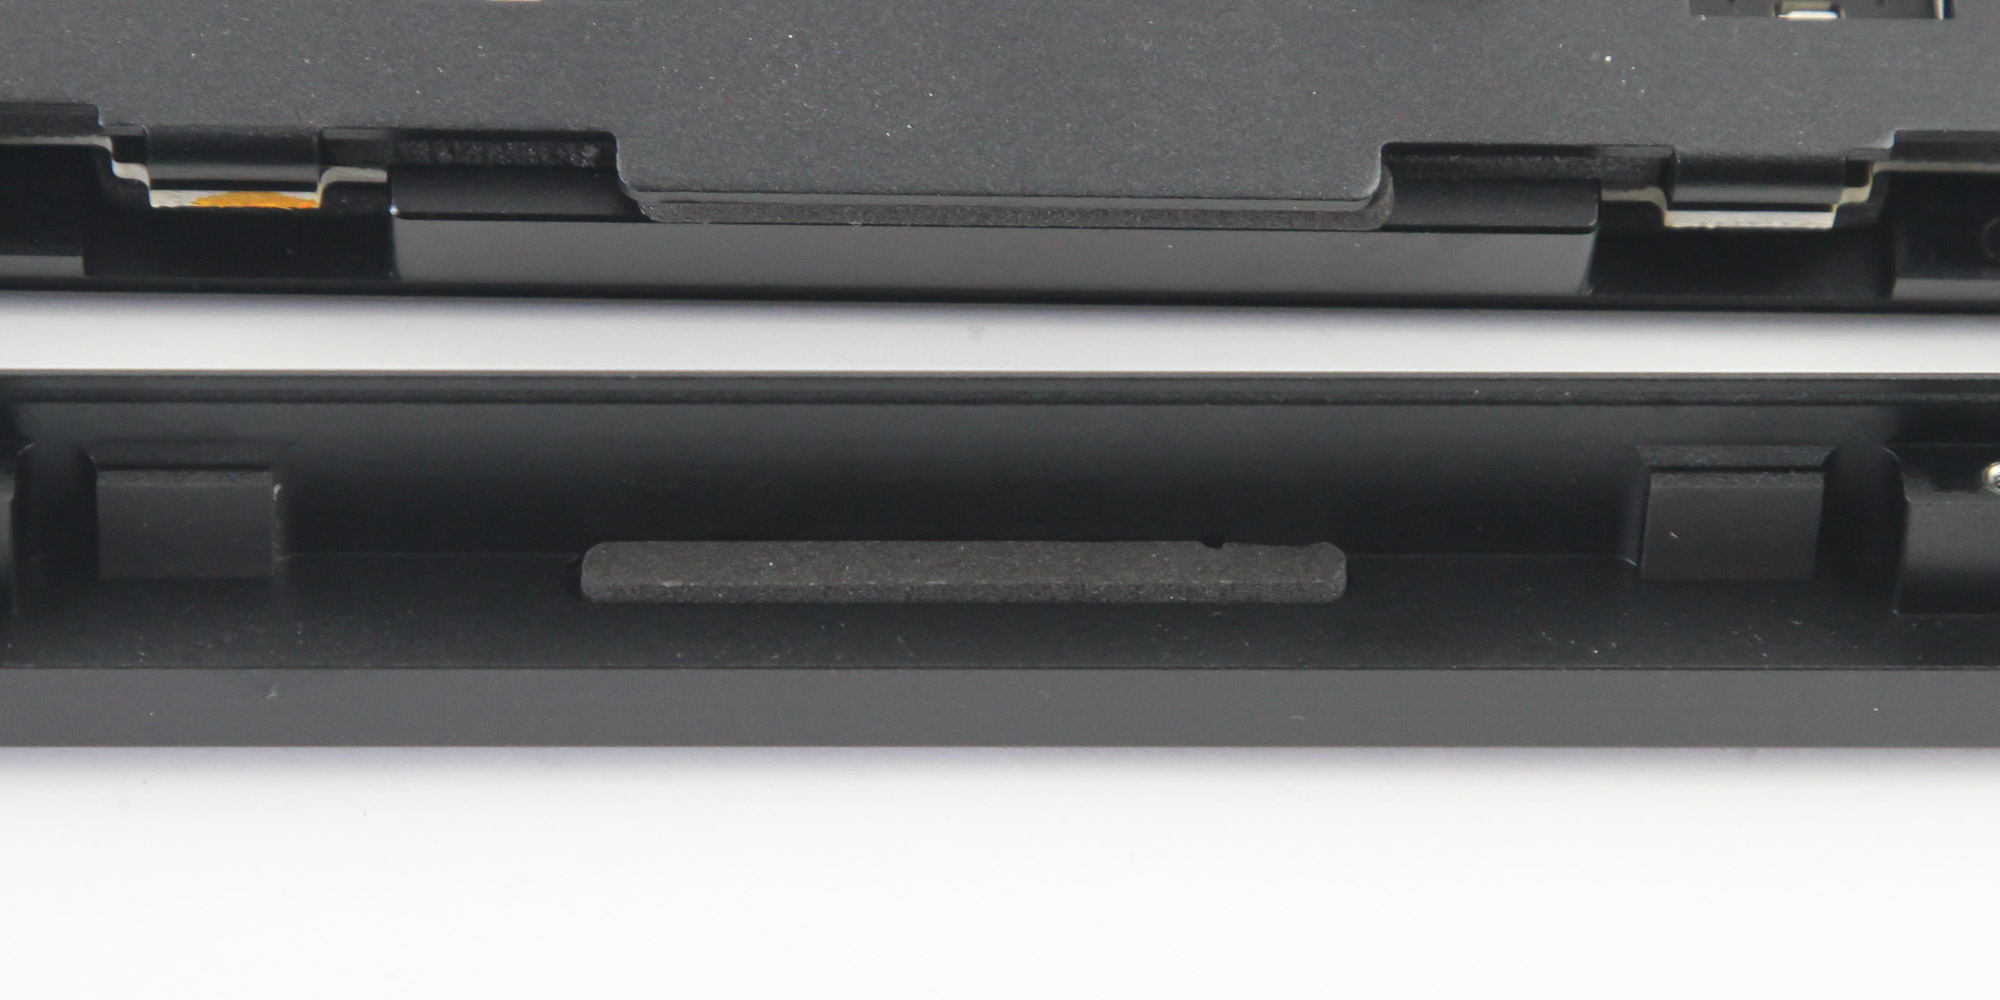
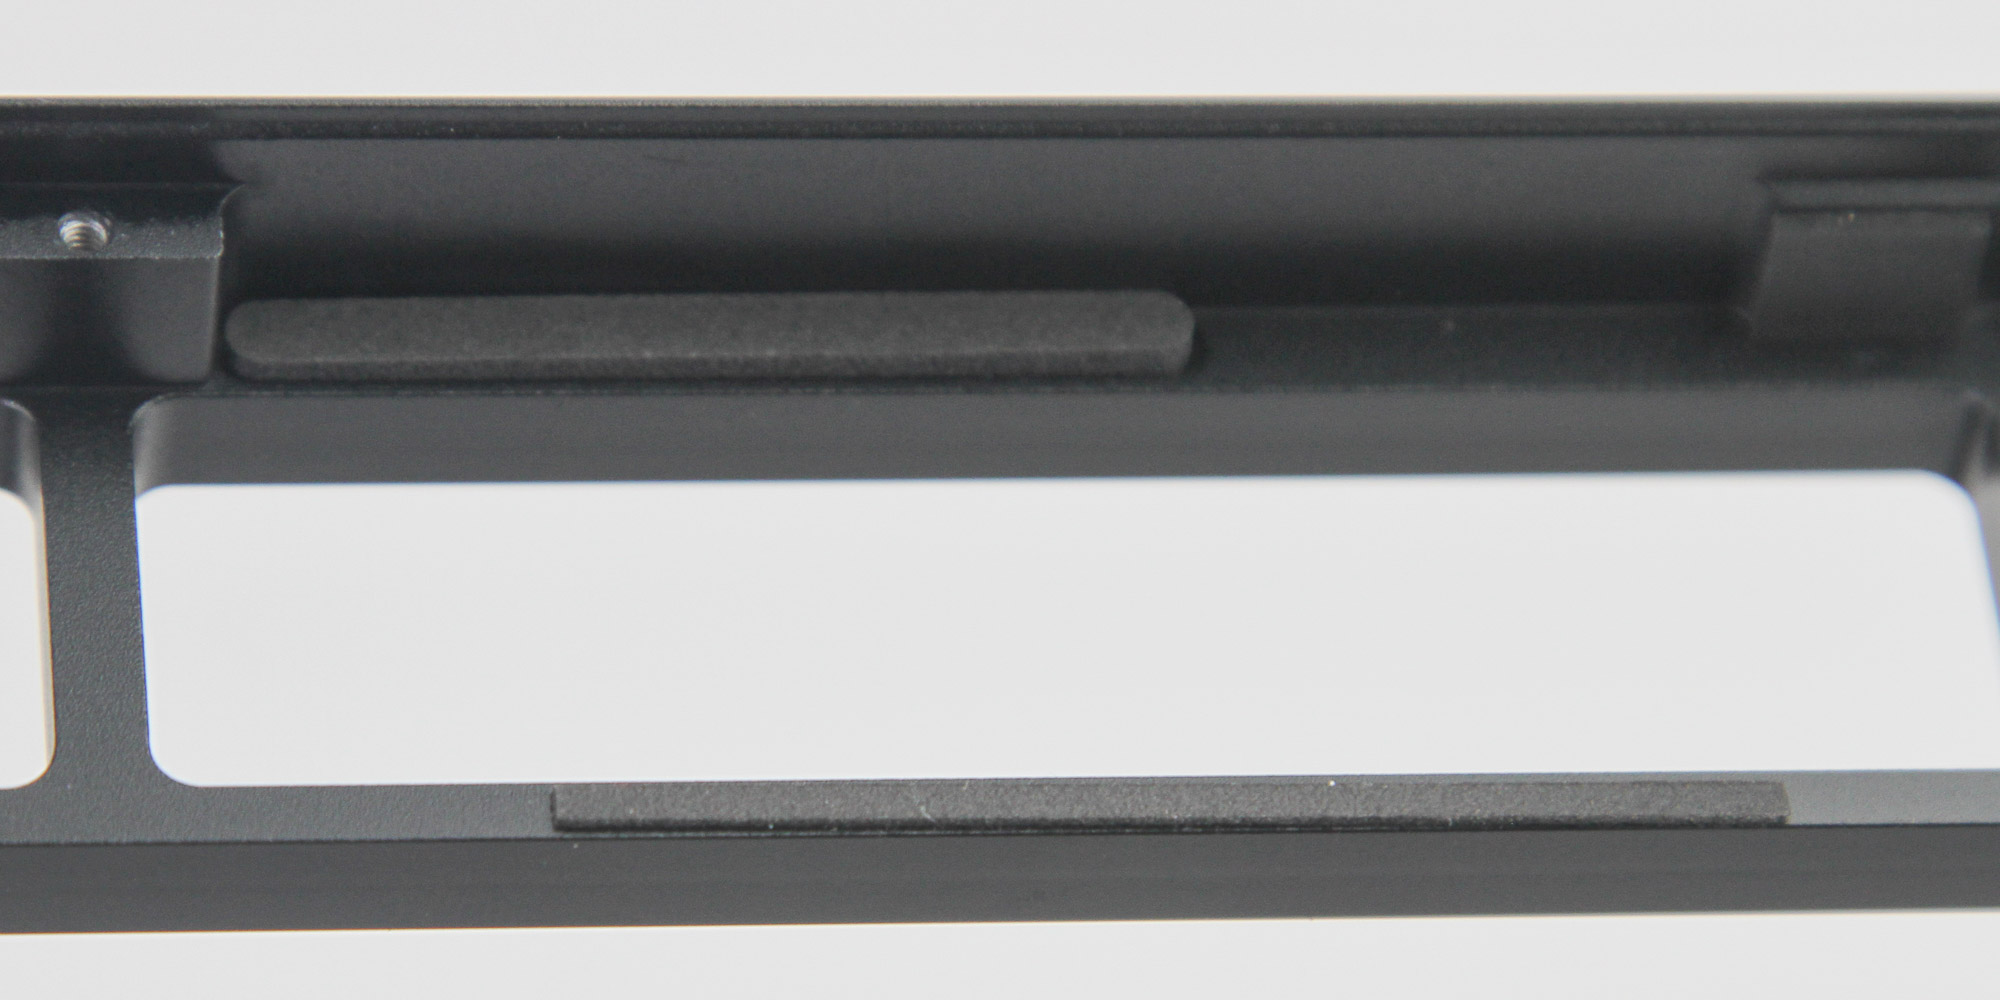
The plate/PCB section can be lifted off the bottom panel at this time since those eight screws kept it all together thus far. There is an internal USB cable to disconnect first, which comes from the Type-C port on a daughter PCB in the bottom panel. The bigger story is the foam used everywhere, including on the daughter PCB. The larger piece with the cutout for the cable helps dampen any reverberation when typing, and further dampens the noise to a generally more pleasing sound signature. There are more gaskets here, meaning the PCB is gasket-mounted too, which is really where it mitigates the downstroke noise and pings the most. One of the gaskets was clearly applied at an angle, so I quickly replaced it with a spare from before.
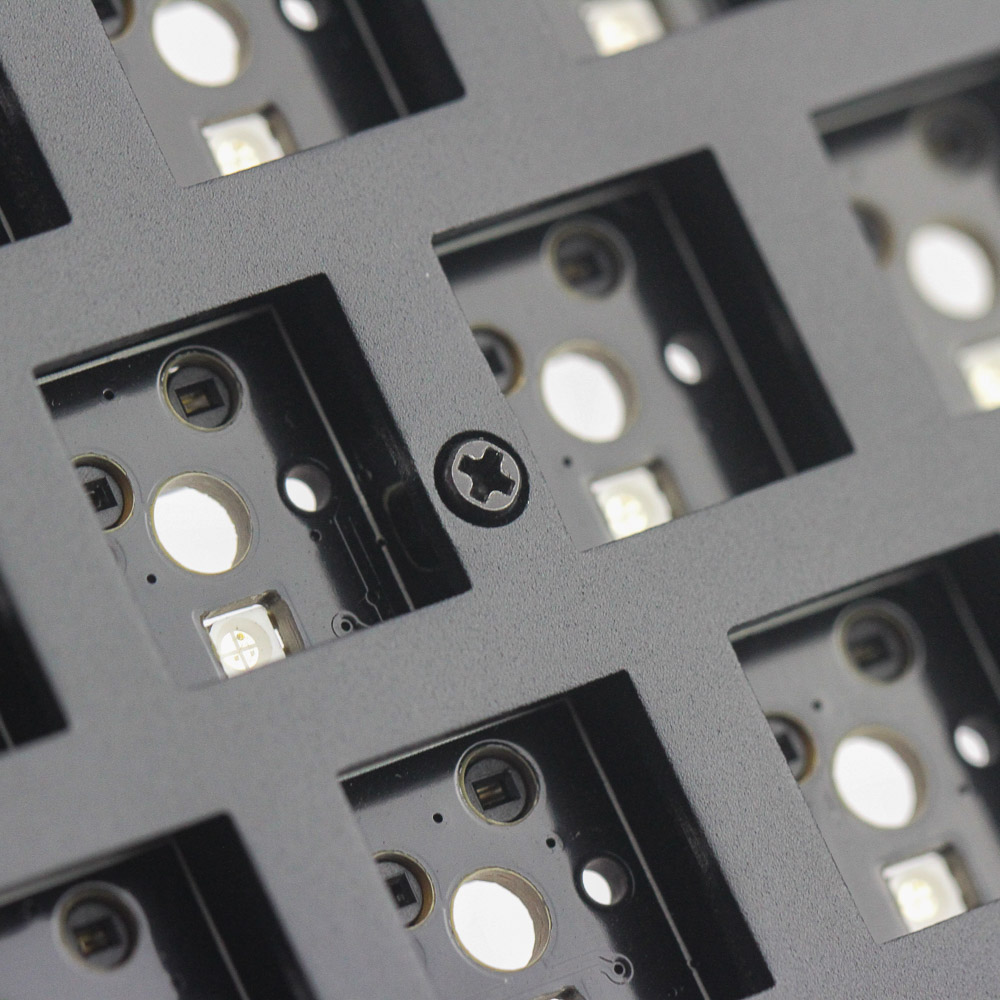
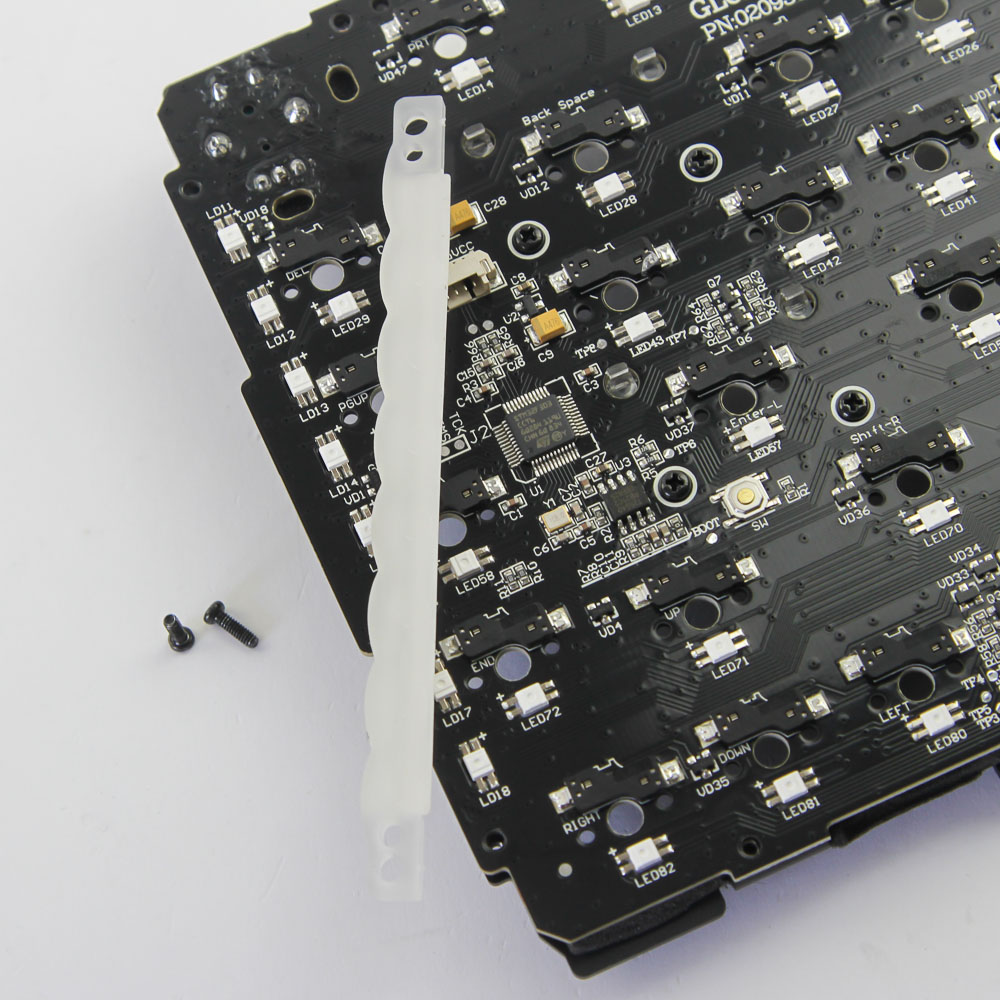
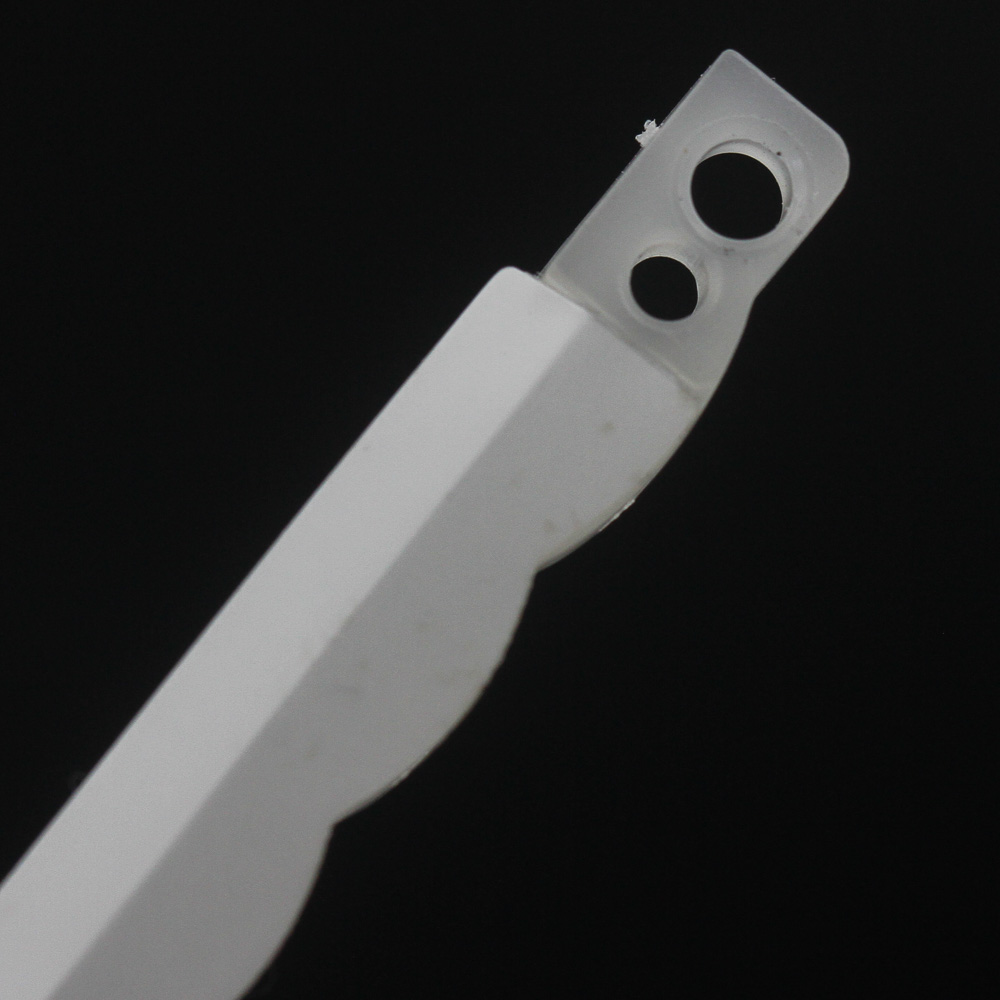
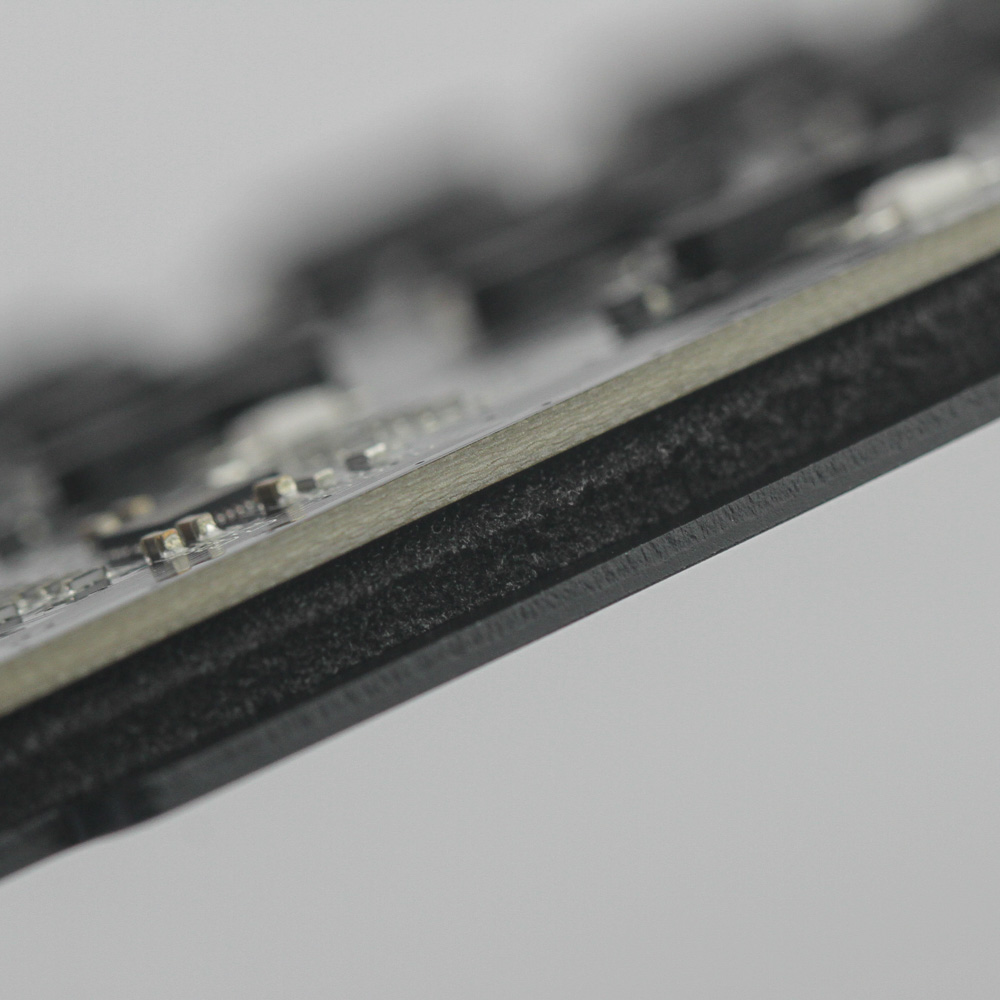
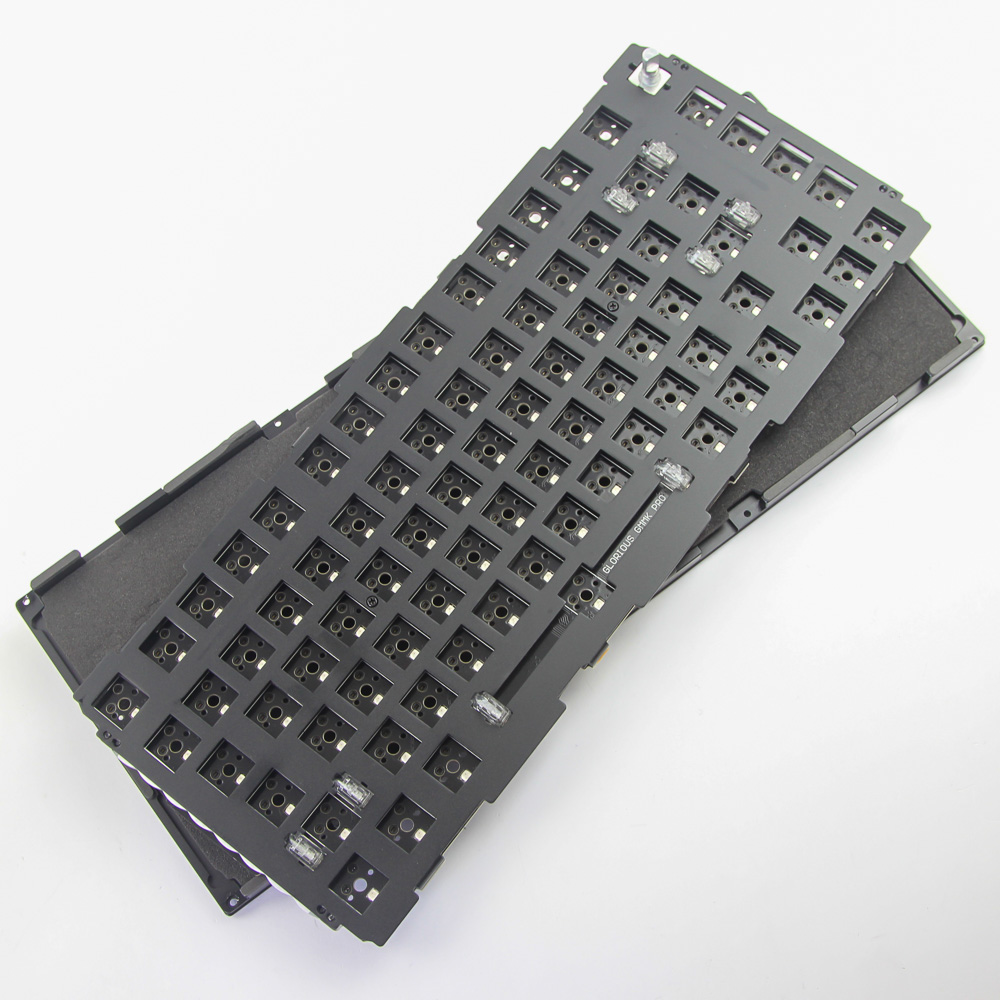
The plate and PCB can be fully separated as well, with several more Phillips head screws on the back and two more on the front going through a threaded plastic insert you need to account for and store carefully since you may see them fall off or forget where they came from. This is how you can replace the stock plate with any other, especially if you want to change the material or color to, say, brass or polycarbonate. Of course, Glorious has these as replacement options too—you may even switch from US ANSI to International ISO layouts. You may also take off the second set of diffuser pieces for a closer look, and also remove the stabilizers to clean them out, lube them, or swap them entirely for something else. I did not bother doing so since wiping the excess off was sufficient and I do not have other spare stabilizers either, but we see that more foam is used between the plate and PCB.
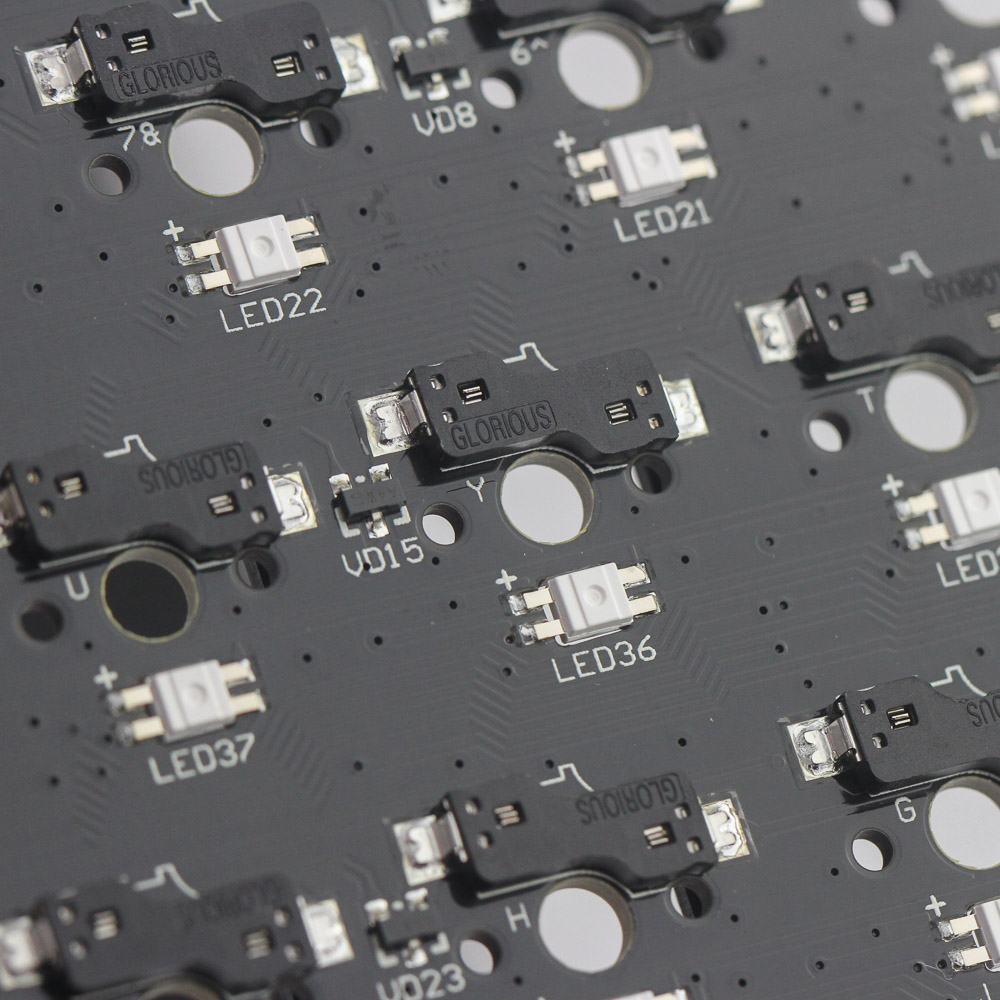
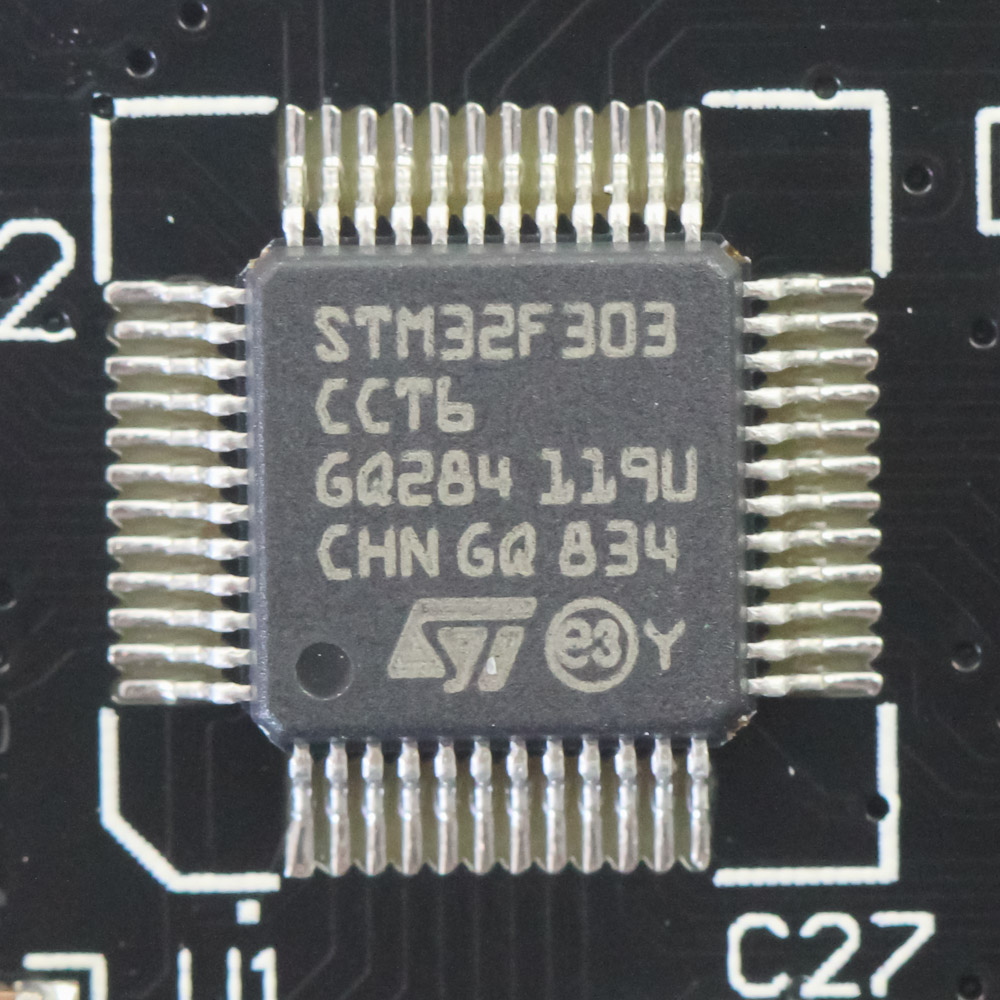
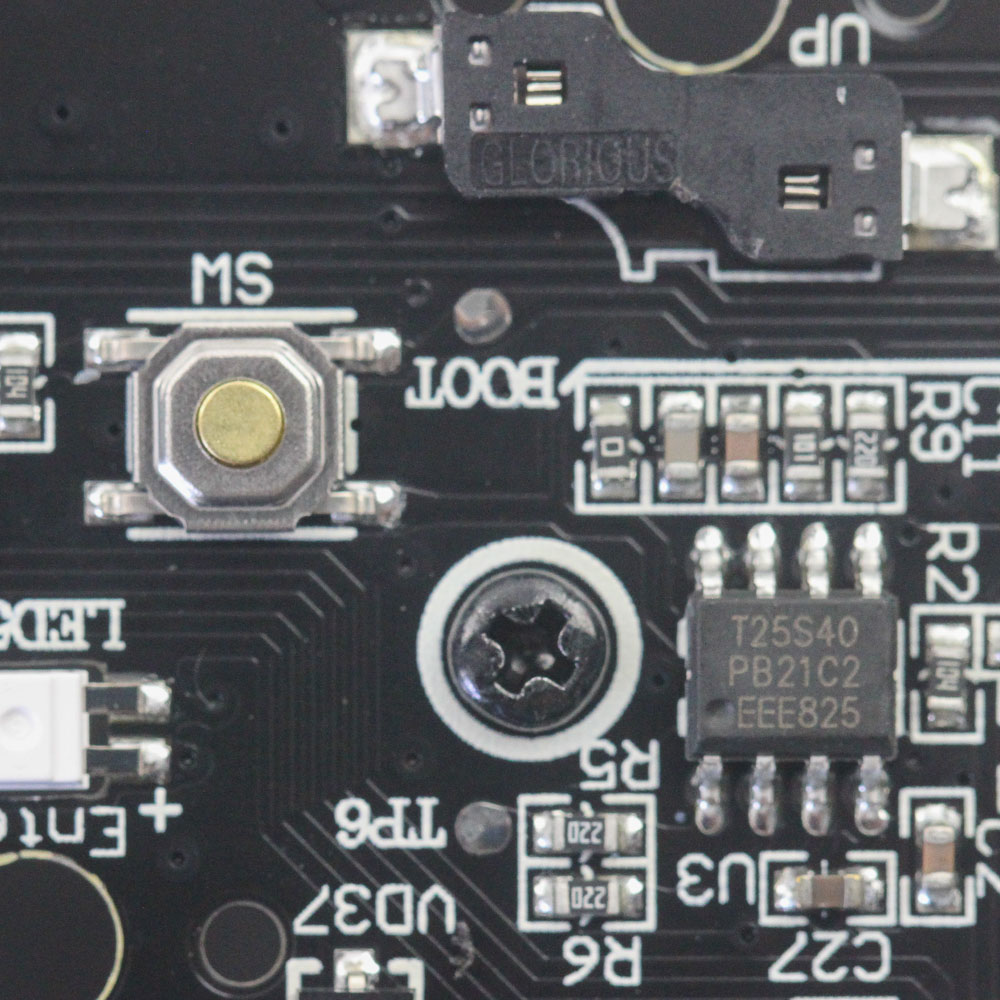
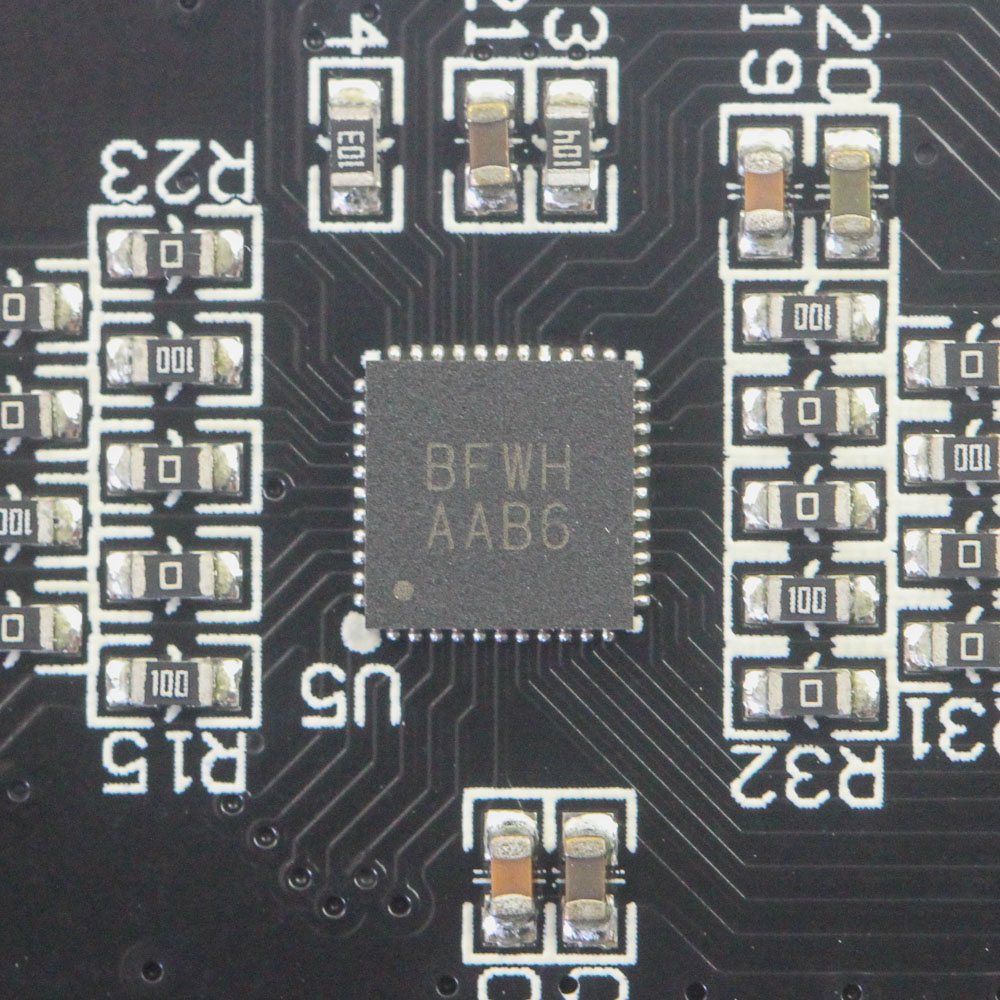
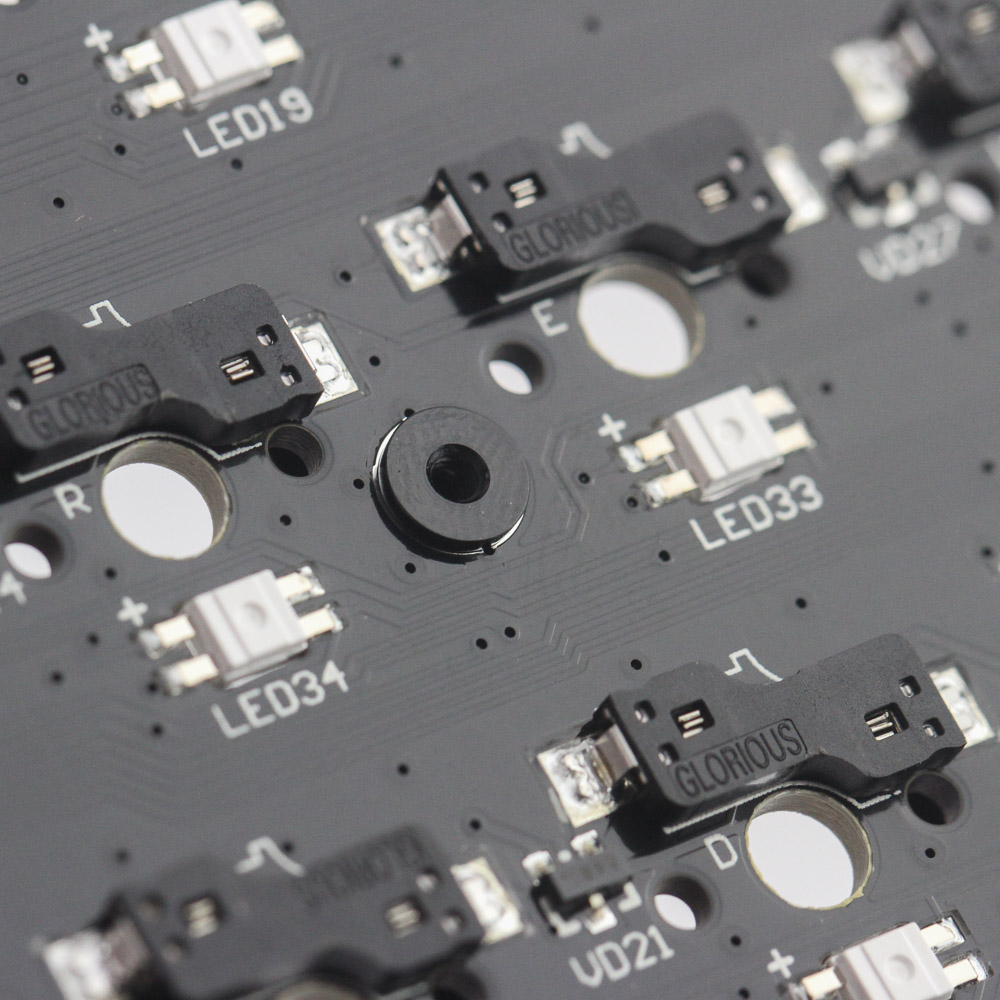
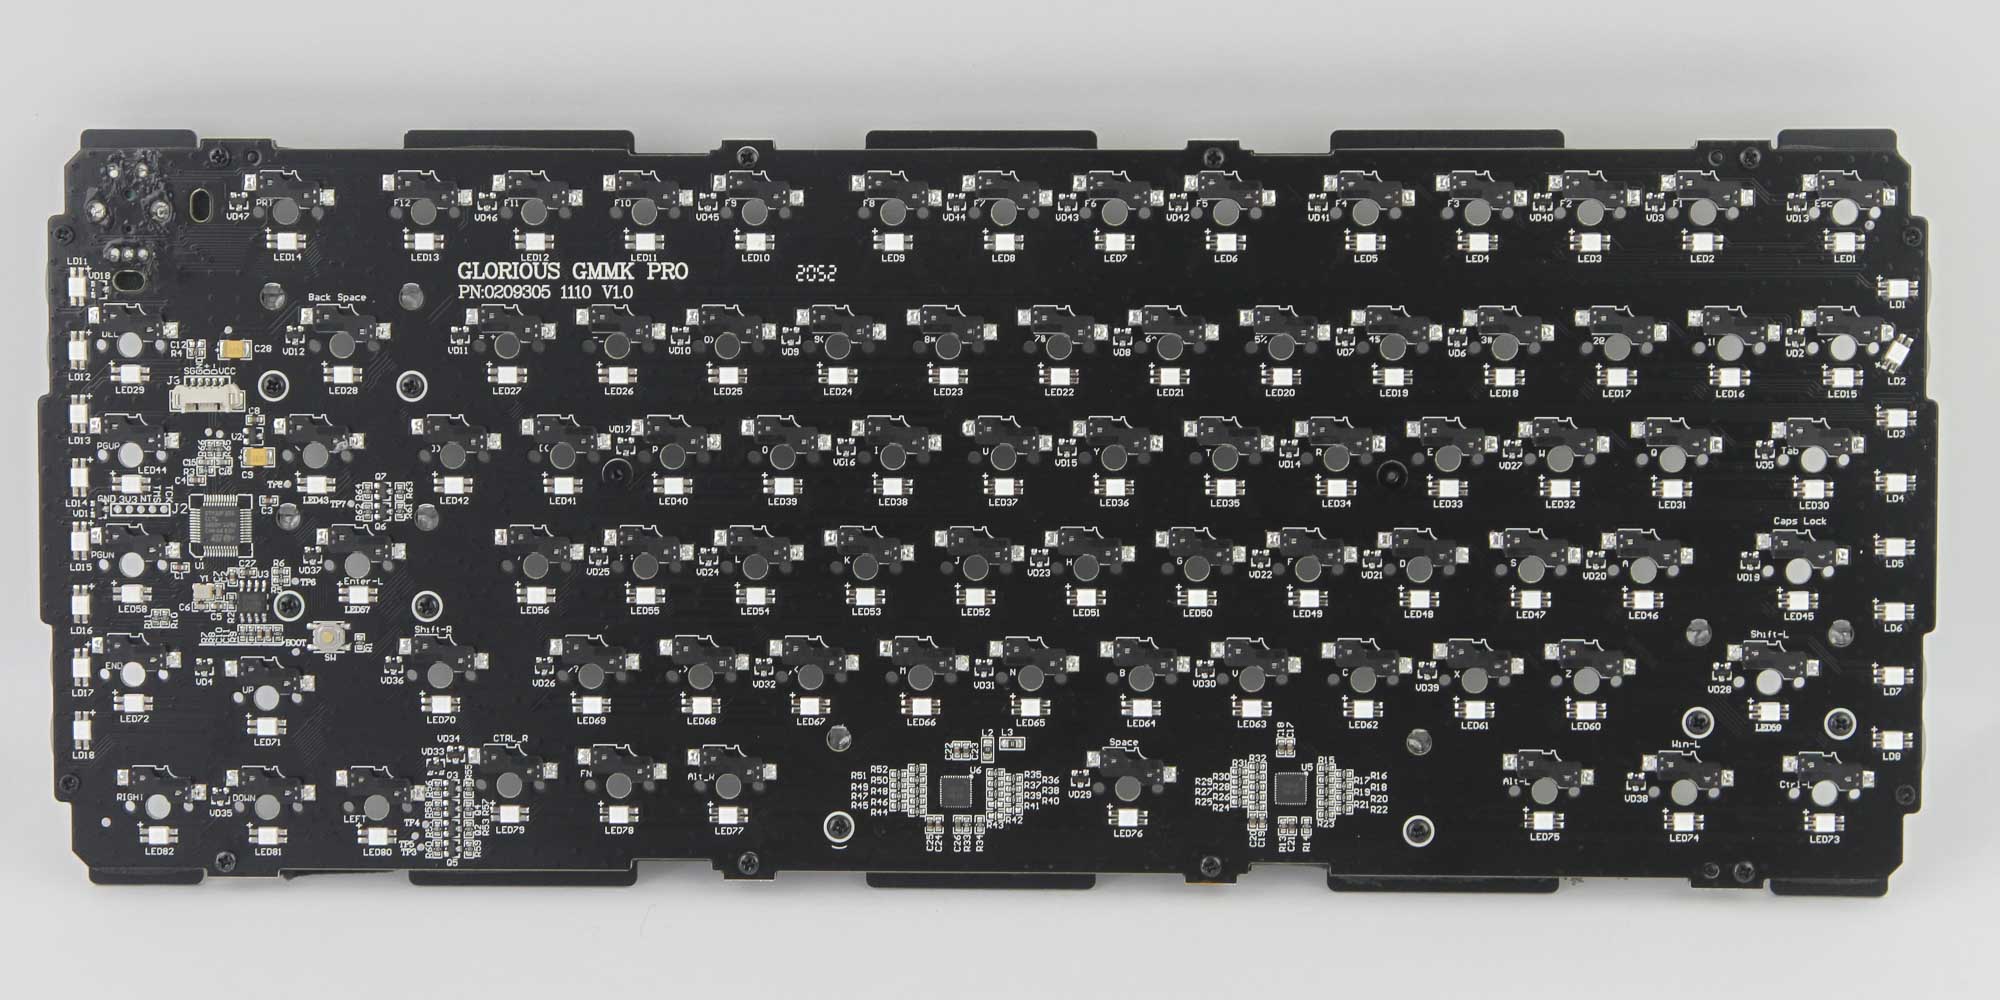
The PCB is black, and there are still some soldered components, including the Glorious-labeled hot-swap switch sockets. For lighting customization, each switch also has an SMD 5050 RGB LED. The LEDs are south-facing, however, which is something to note since most keycap sets have legends on the top for backlighting uniformity. On the flip side, the south-facing LEDs will not interference with some thick Cherry-profile PBT keycap sets, if that is more to your preference. Powering the keyboard is an ST Microelectronics STM32F303 32-bit ARM Cortex-M4 microcontroller with up to 512 KB of onboard flash memory and 80 KB SRAM for all the pre-programmed functions and customization. This is a bitter-sweet moment, however, since these chips are highly scarce now, and Glorious has already made a post on how it will affect their keyboard. Basically, the GMMK PRO was set out to offer full open-source QMK firmware support with future VIA support. The current STM chip does that, but a replacement chip may not have QMK working by default. This means future batches may be affected by the absence of one of the bigger features of the GMMK PRO, at least until the company itself adds support to the subsequently chosen hardware drivers. We see also a hardware reset button on the PCB, which otherwise has multiple layers as is the norm these days.
Jul 12th, 2025 09:11 CDT
change timezone
Latest GPU Drivers
New Forum Posts
- Stupid buggy POS Realtek WiFi RTL8852BE (10)
- 'NVIDIA App' not usable offline? (13)
- Chrome has removed uBlock Origin 1.64.0 (remove google search suggestions) (12)
- Share your AIDA 64 cache and memory benchmark here (3097)
- The Official Linux/Unix Desktop Screenshots Megathread (778)
- No offense, here are some things that bother me about your understanding of fans. (35)
- [GPU-Z Test Build] New Kernel Driver, Everyone: Please Test (90)
- Gigabyte graphic cards - TIM gel SLIPPAGE problem (150)
- NVIDIA App (55)
- Looking for a new m.2 drive that is suitable for livestreams, multi browsing, easy encoding/rendering, NOT gaming! Budget: €300 (30)
Popular Reviews
- Fractal Design Epoch RGB TG Review
- Lexar NM1090 Pro 4 TB Review
- Corsair FRAME 5000D RS Review
- NVIDIA GeForce RTX 5050 8 GB Review
- NZXT N9 X870E Review
- Our Visit to the Hunter Super Computer
- Sapphire Radeon RX 9060 XT Pulse OC 16 GB Review - An Excellent Choice
- AMD Ryzen 7 9800X3D Review - The Best Gaming Processor
- Upcoming Hardware Launches 2025 (Updated May 2025)
- Chieftec Iceberg 360 Review
TPU on YouTube
Controversial News Posts
- Intel's Core Ultra 7 265K and 265KF CPUs Dip Below $250 (288)
- Some Intel Nova Lake CPUs Rumored to Challenge AMD's 3D V-Cache in Desktop Gaming (140)
- AMD Radeon RX 9070 XT Gains 9% Performance at 1440p with Latest Driver, Beats RTX 5070 Ti (131)
- NVIDIA Launches GeForce RTX 5050 for Desktops and Laptops, Starts at $249 (119)
- NVIDIA GeForce RTX 5080 SUPER Could Feature 24 GB Memory, Increased Power Limits (115)
- Microsoft Partners with AMD for Next-gen Xbox Hardware (105)
- Intel "Nova Lake‑S" Series: Seven SKUs, Up to 52 Cores and 150 W TDP (100)
- NVIDIA DLSS Transformer Cuts VRAM Usage by 20% (97)