 10
10
CaseLabs Merlin SM8 Review
Assembly & Finished Looks »A Closer Look - Inside


The interior of the Merlin SM8 is all black and completely empty. Its modular approach allows you to include only what you want. This is great but means that you have to invest a tad more work into configuring the drive bays, for example. However, you do have two 3.5" and 2.5" hard-drive bays under the solid side panel, which also means that there is around 30 mm worth of space to route cables behind the motherboard tray. Various routing holes on three sides of the internal wall also allow for clean cable routing inside the case.
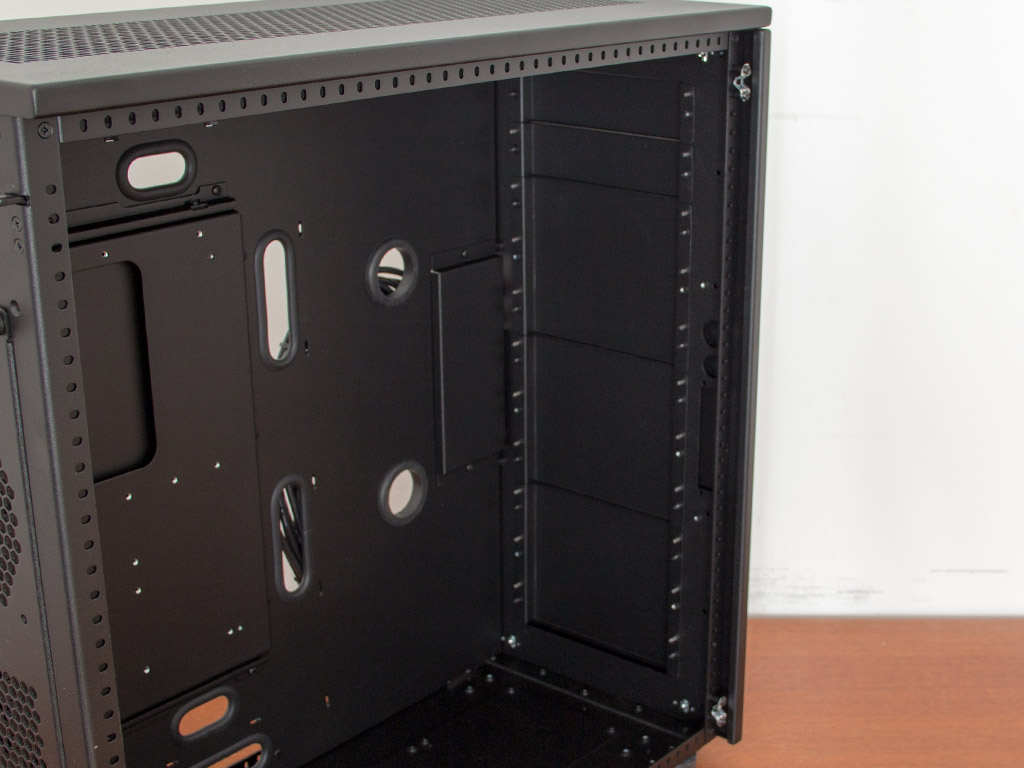
The front has two single 5.25" and three double-height covers. To fit the interior perfectly, you may configure these in any order. Our optional component will also allow you to install any radiator of up to 480 mm into the case, making this the first of many crazy water-cooling options within the Merlin SM8.

The second such area can be found on the floor of the chassis. You may install up to four fans or another 480 mm radiator here if you relocate the PSU to the ceiling. The Merlin SM8 can still hold a 240 mm variant with ease if you leave things as they are.


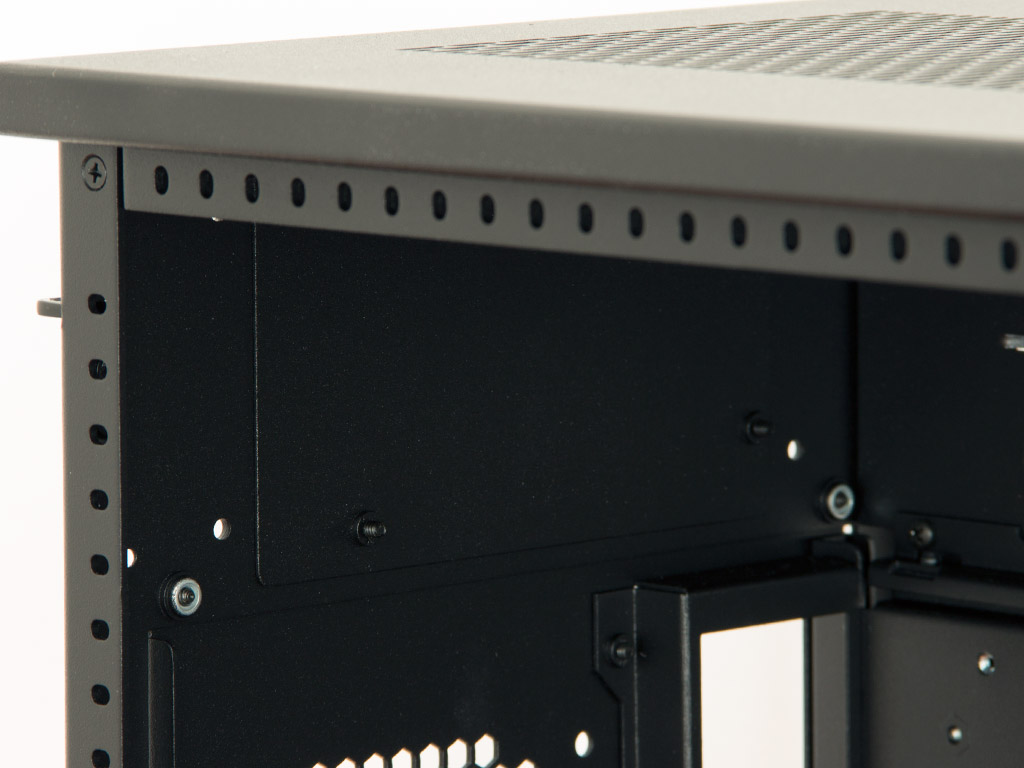
The PSU tray also supports the installed unit as the bottom floor covers need a bit of room due to the screws. Above that are the eight motherboard-expansion slots. Each cover is held in place by a thumbscrew for ease of access. You may also install a 120 mm fan in the very top of the motherboard tray since the CaseLabs chassis does not include any cooling units. Just under the ceiling is the secondary PSU bay. This one does not come with a tray, but you can purchase such components separately.
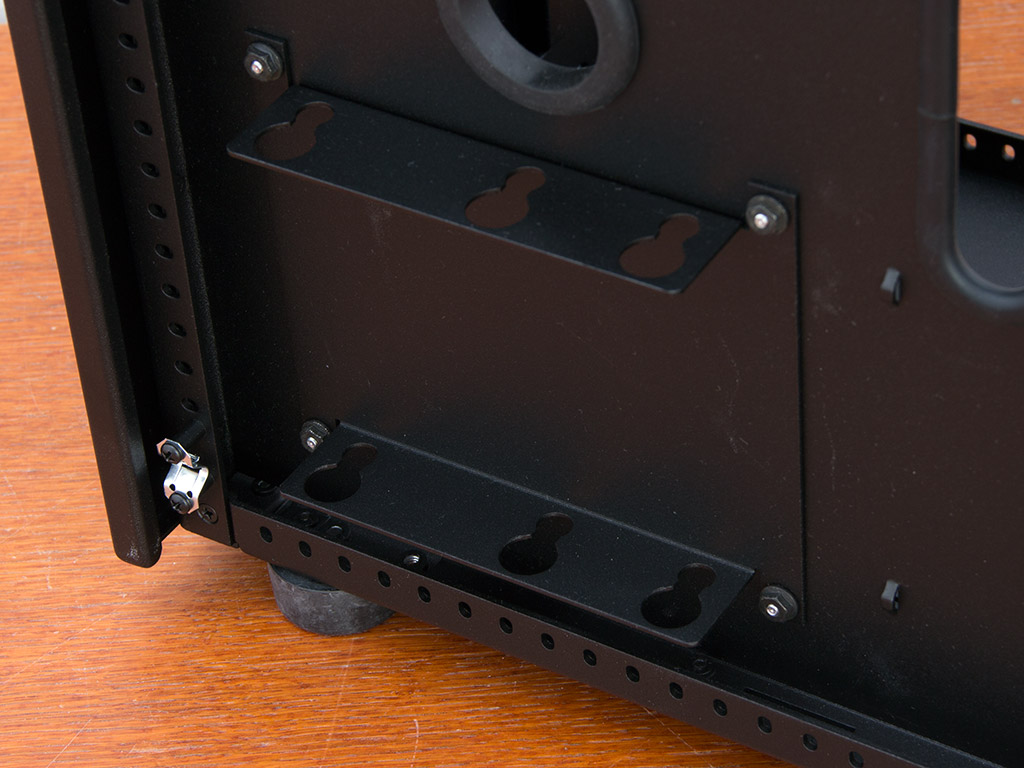
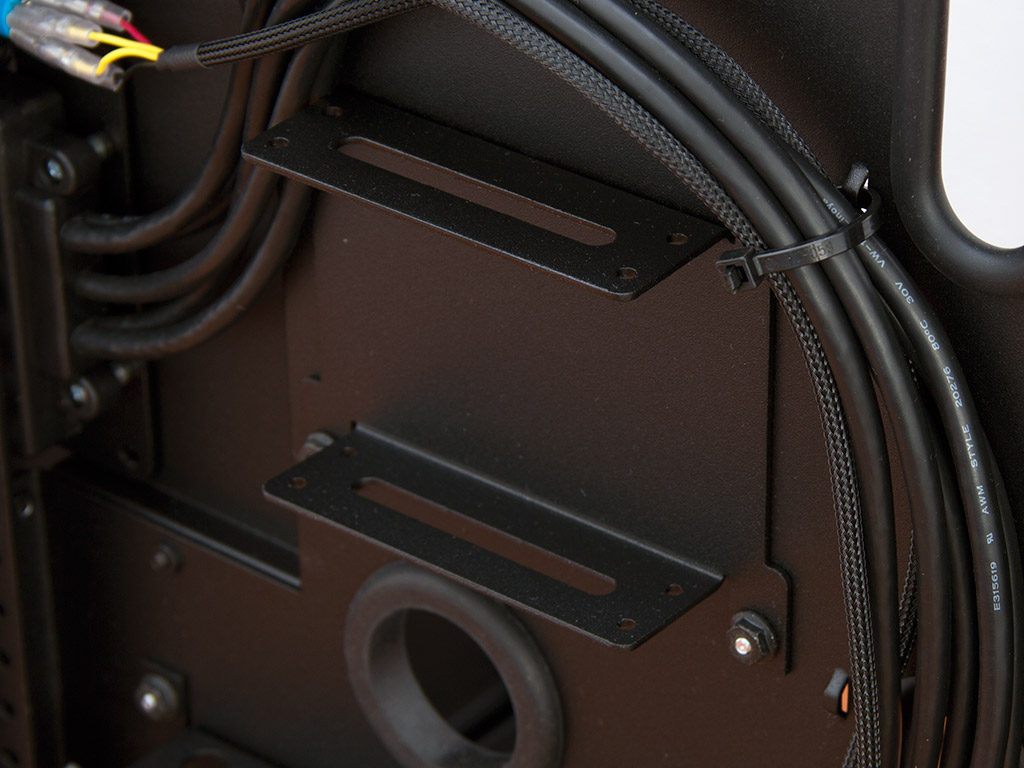

Three hard-drive trays can be found on the backside of the chassis. These are held in place by lugs. You will need to procure the right tools to remove them if you want to fill them up. Each 3.5" tray is meant to be used with the supplied rubber rings as an anti-vibration measure, but the single tray for two 2.5" drives makes do with traditional screws.
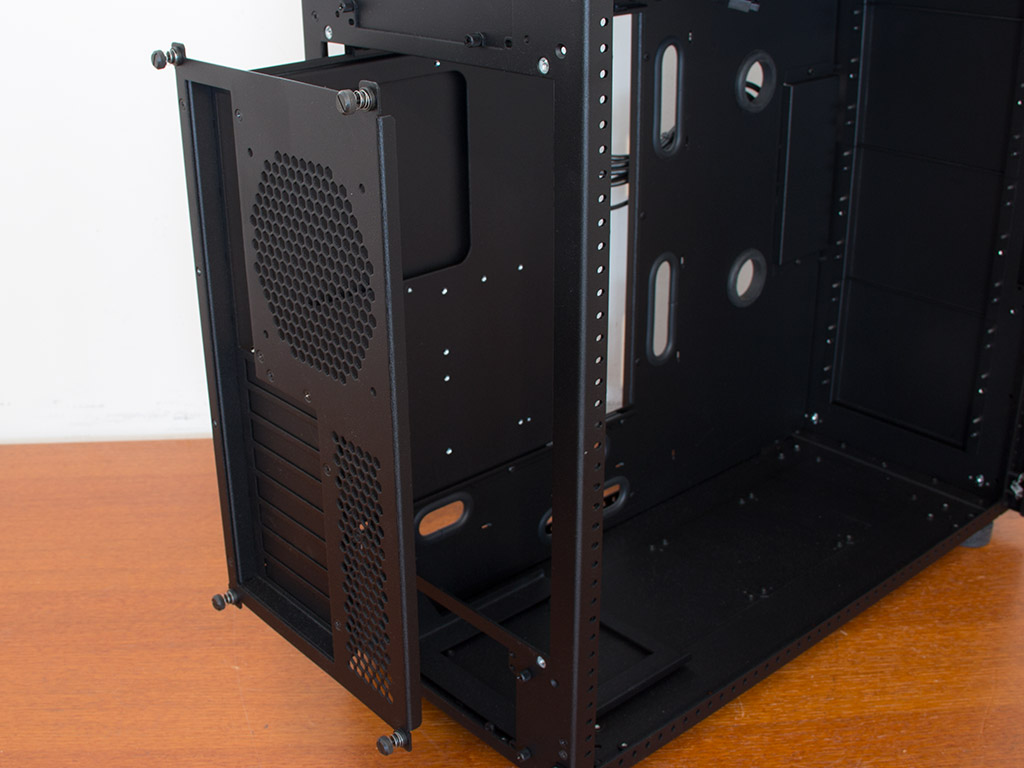
You will first have to unscrew four spring-loaded thumbscrews to release the motherboard tray. These are constructed in such a way as to not fall off the tray and are among the best thumbscrews I have ever seen used in a chassis. Once detached, simply pull the entire tray out through the back of the Merlin SM8.


All the cables within the chassis are sleeved black to go with the rest of the chassis. Both the case connectivity for power/reset/LED and the I/O are of the standard variety, so you won't have to worry about any compatibility issues.
Jul 14th, 2025 16:02 CDT
change timezone
Latest GPU Drivers
New Forum Posts
- AAF Optimus Modded Driver For Windows 10 & Windows 11 - Only for Realtek HDAUDIO Chips (578)
- i7 2860QM how to raise power limit? (21)
- AMD 7Ghz? This keeps popping up on my feeds! (6)
- Stupid things one has done with hardware (49)
- No offense, here are some things that bother me about your understanding of fans. (111)
- Choosing the right motherboard (5)
- Best motherboards for XP gaming (151)
- Which CPU to Choose for a 7900 XT? Ryzen 7 7700 or Ryzen 5 9600X? (43)
- Bent pins on an AM5 mobo, any way to test them and also find which ones were on the schematic? (6)
- Arc 770a 16gb money pit (9)
Popular Reviews
- Lexar NM1090 Pro 4 TB Review
- Our Visit to the Hunter Super Computer
- MSI GeForce RTX 5060 Gaming OC Review
- Fractal Design Epoch RGB TG Review
- NVIDIA GeForce RTX 5050 8 GB Review
- Corsair FRAME 5000D RS Review
- Sapphire Radeon RX 9060 XT Pulse OC 16 GB Review - An Excellent Choice
- Chieftec Iceberg 360 Review
- AMD Ryzen 7 9800X3D Review - The Best Gaming Processor
- Upcoming Hardware Launches 2025 (Updated May 2025)
TPU on YouTube
Controversial News Posts
- Intel's Core Ultra 7 265K and 265KF CPUs Dip Below $250 (288)
- Some Intel Nova Lake CPUs Rumored to Challenge AMD's 3D V-Cache in Desktop Gaming (140)
- AMD Radeon RX 9070 XT Gains 9% Performance at 1440p with Latest Driver, Beats RTX 5070 Ti (131)
- NVIDIA Launches GeForce RTX 5050 for Desktops and Laptops, Starts at $249 (122)
- NVIDIA GeForce RTX 5080 SUPER Could Feature 24 GB Memory, Increased Power Limits (115)
- Microsoft Partners with AMD for Next-gen Xbox Hardware (105)
- Intel "Nova Lake‑S" Series: Seven SKUs, Up to 52 Cores and 150 W TDP (100)
- NVIDIA DLSS Transformer Cuts VRAM Usage by 20% (97)