 12
12
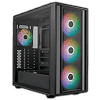
Cooler Master MasterBox 600 Review
Review System Setup »A Closer Look - Inside
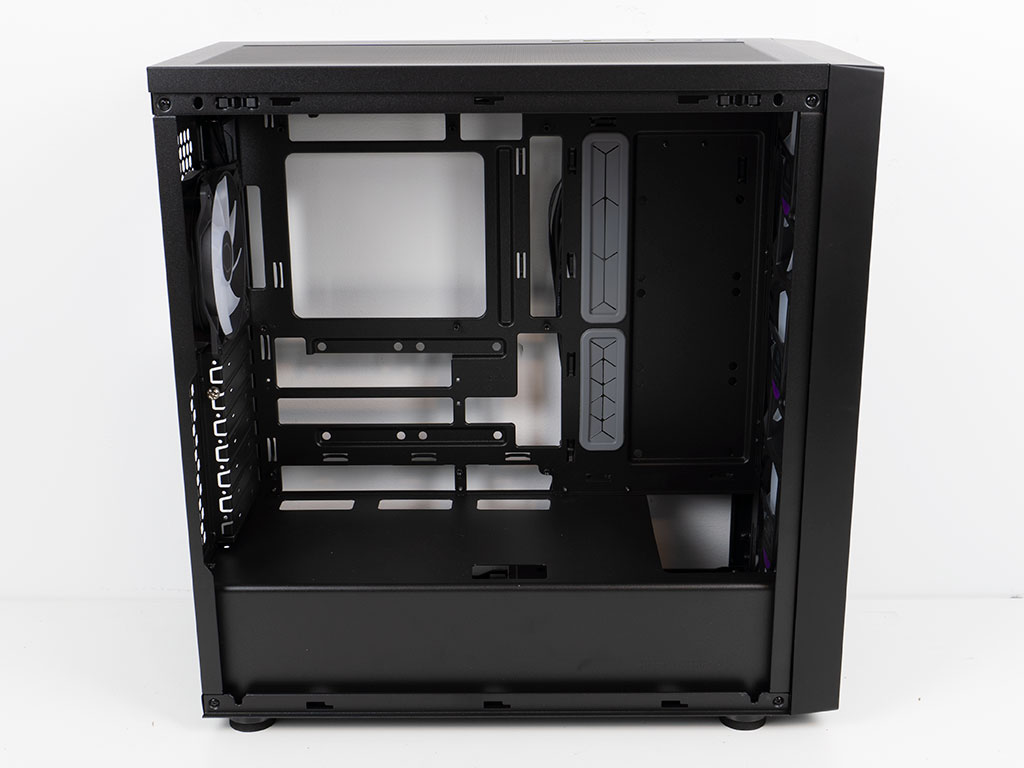
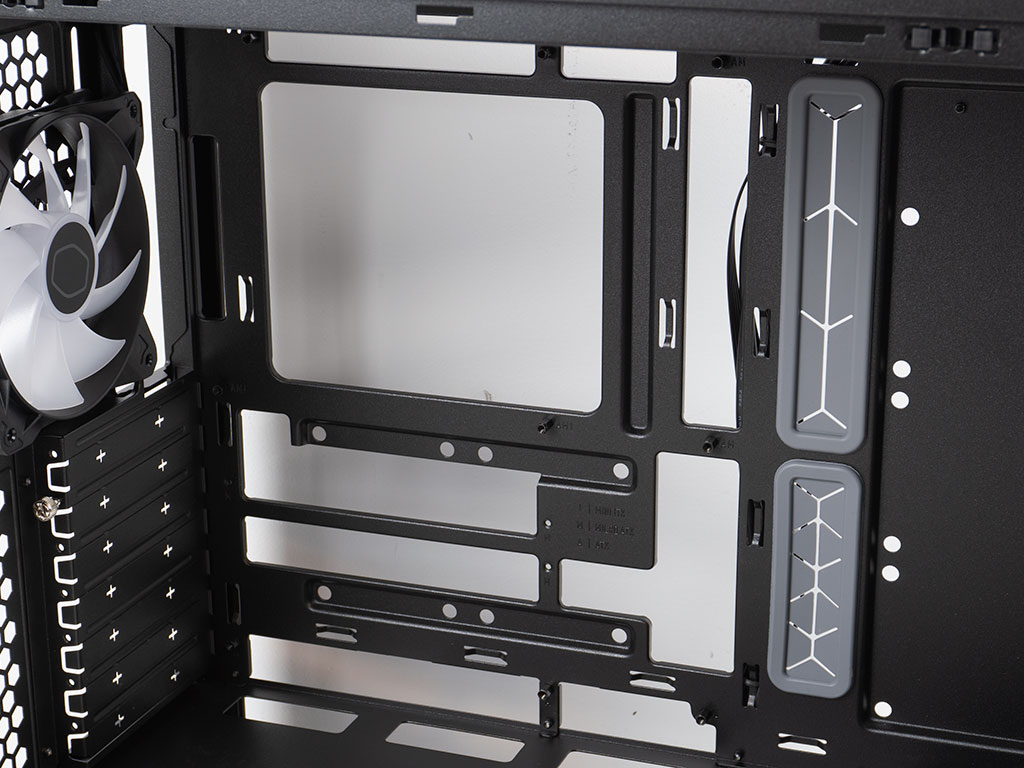
To gain access to the inside, simply detach the non-captive thumb screws and pull off the covers. The interior of the MasterBox 600 has all the fixings of a mainstream chassis and feels quite sturdy. The gray grommets at the right edge of the motherboard are a nice touch as they continue the color scheme found on the exterior of the chassis. The Cooler Master MasterBox 600 is also able to take on a BTF motherboard from Asus or MSI for example. Meaning that you can build your system with the connectors hidden away for the most part. On the bottom, you will find a solid metal shroud with an opening for the GPU power cable. It would have been nice to have a grommet on here, as it is quite visible for the user. Behind the motherboard tray, the wiring has been arranged quite cleanly out of the box, so you could just go on and build on that.
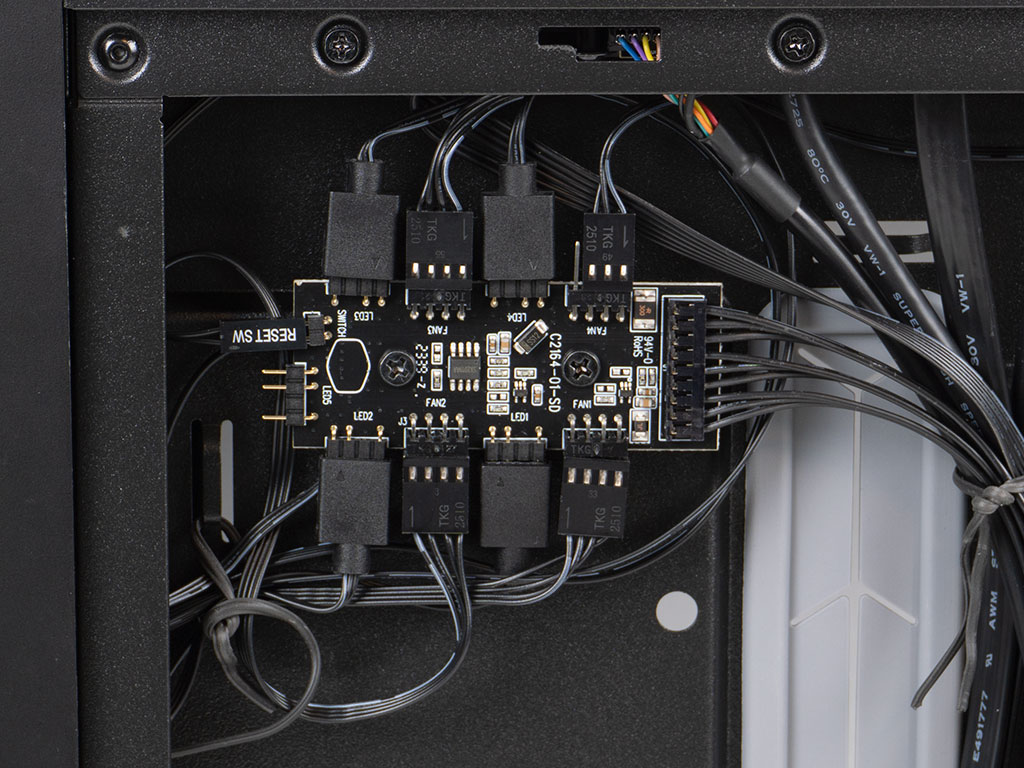
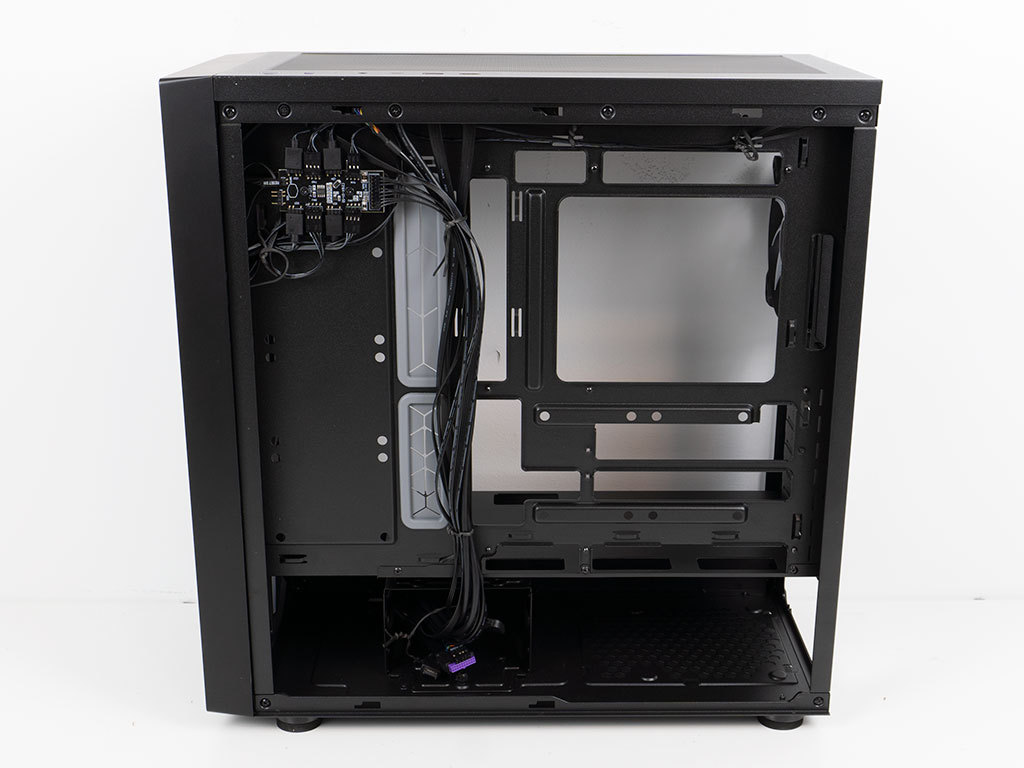
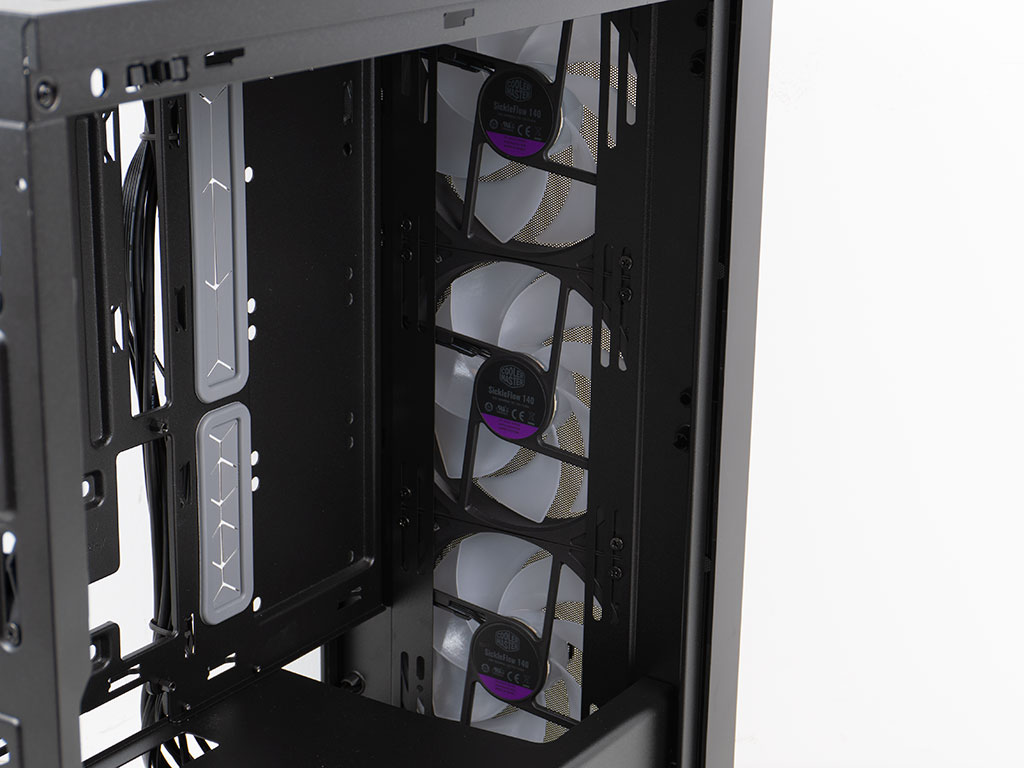
The built-in controller in the top left corner sports four ARGB and four PWM connectors. As you can see, for some reason the rear fan inside the case is RPM based whereas the rest utilize PWM. This means the rear fan will act weirdly if it remains connected to what is essentially a PWM hub. While we will test the thermals as it ships, you should really plug in the rear fan unto a separate motherboard header on your board. Alternatively, Cooler Master could have included a PWM fan in the rear - even if it isn't one of their SickleFlow variant. The reset wire, clearly still labeled as such, is used to allow for control over the color hues of the four fans.
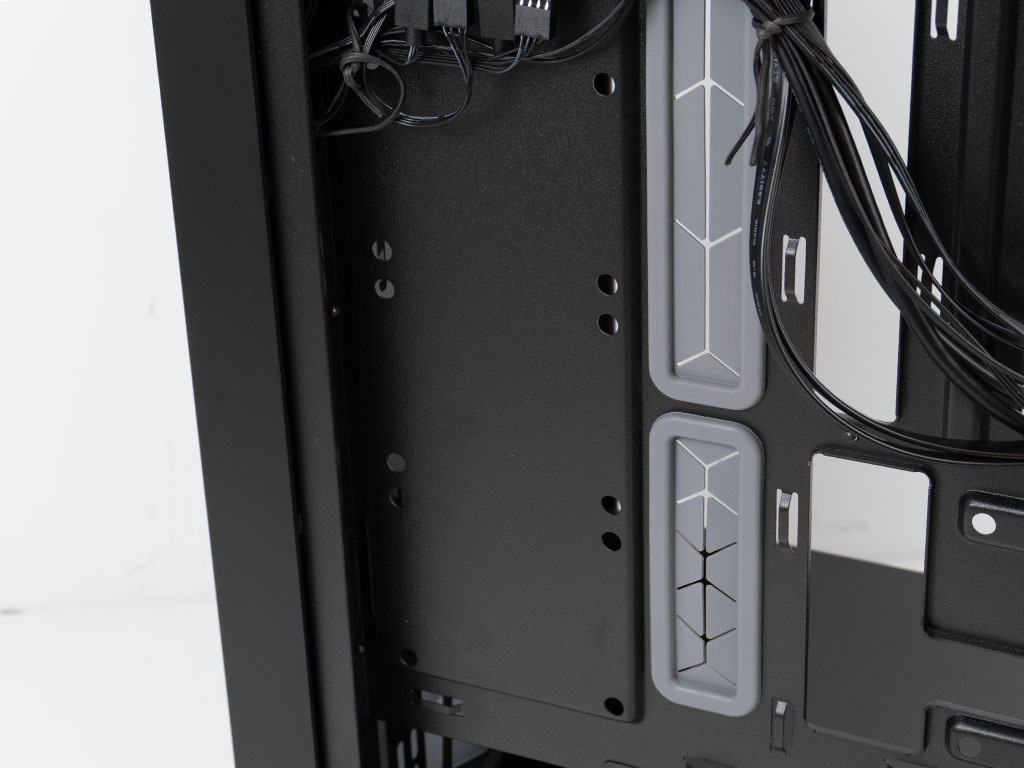
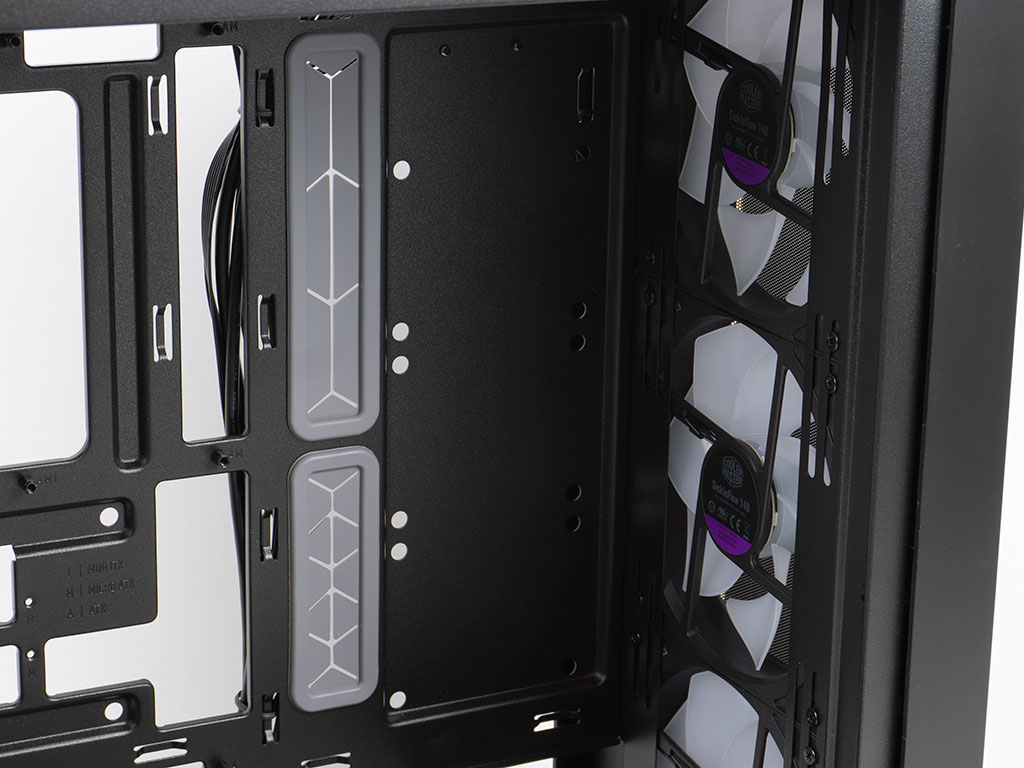
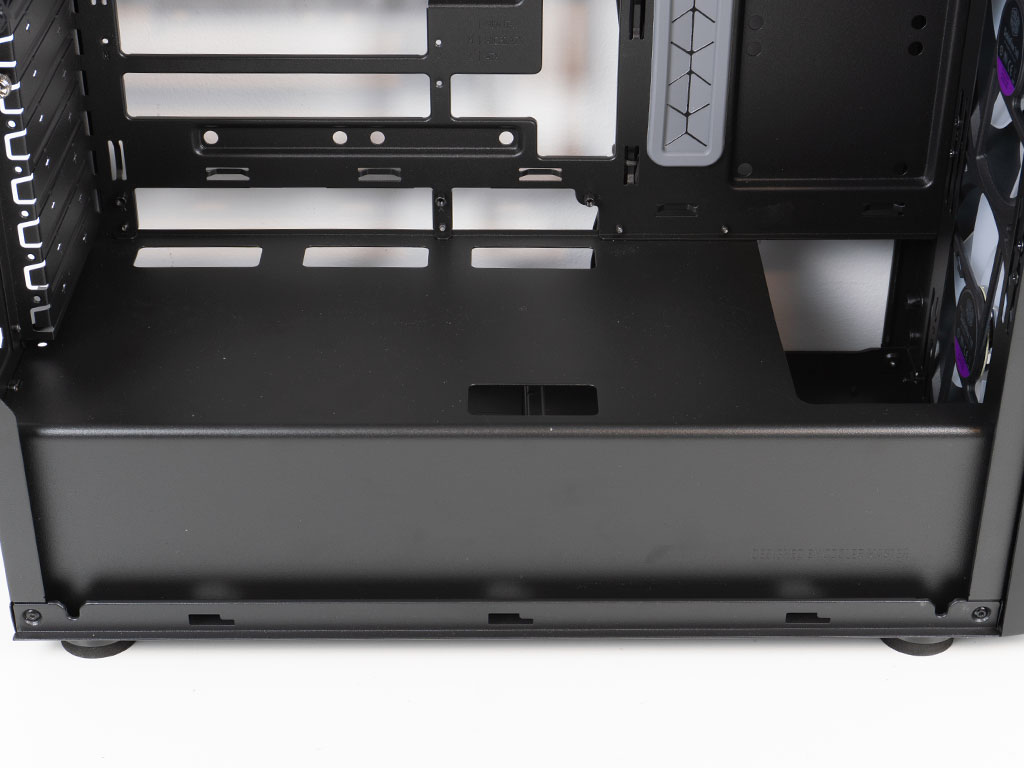
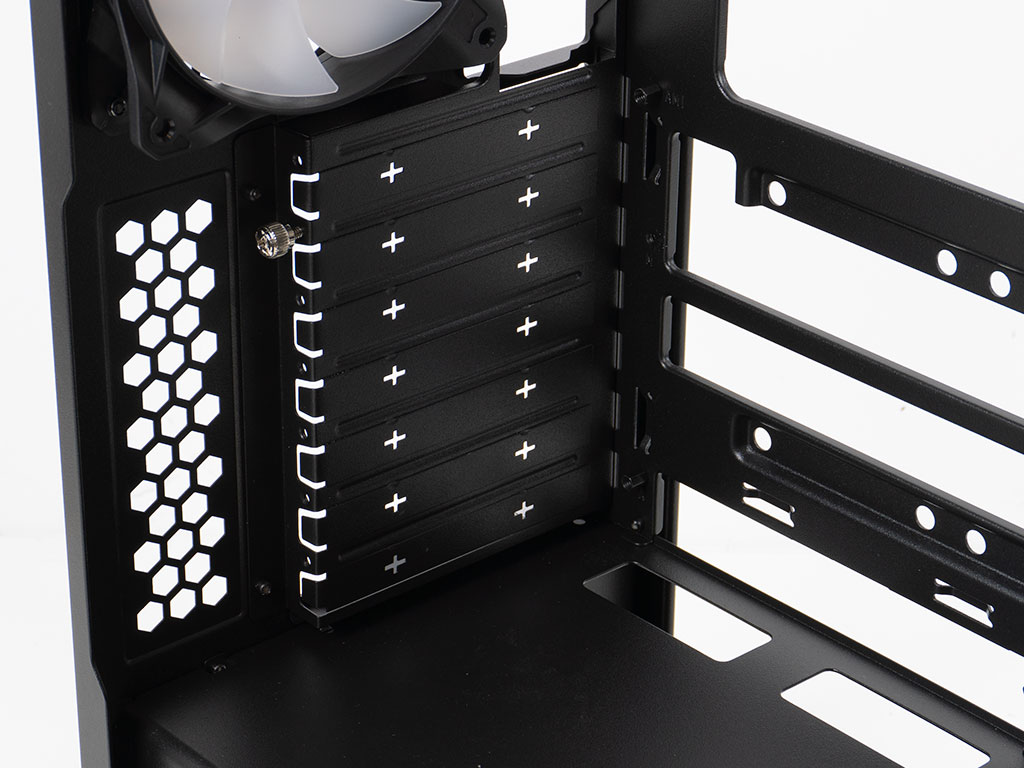
Below the PCB you have three sets of holes for 2.5" drives with two more on the backside of the motherboard. It is really great having the ability to install a whopping five such drives inside the MasterBox 600. Unfortunately, Cooler Master only provides mounting materials for two, thus artificially limiting you. These repeated cost-cutting aspects should not be this drastic for a case of this tier, and the ability to market a case with above average storage options should clearly outweigh the few cents it costs to include the right amount of rubber grommets and screws.
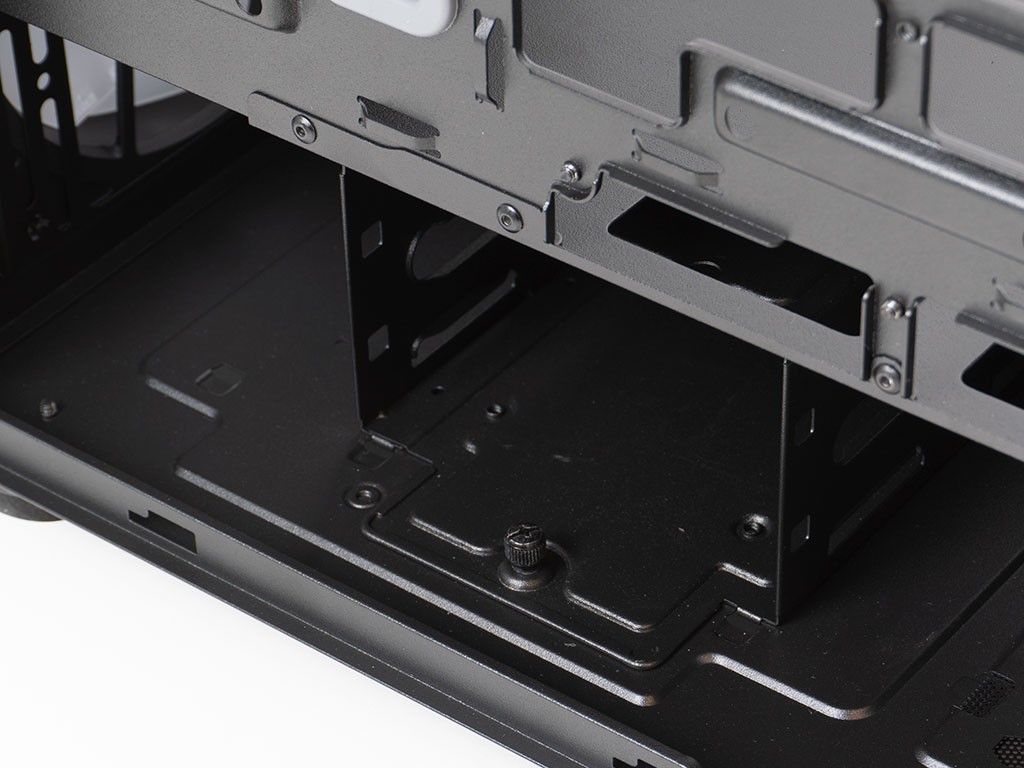
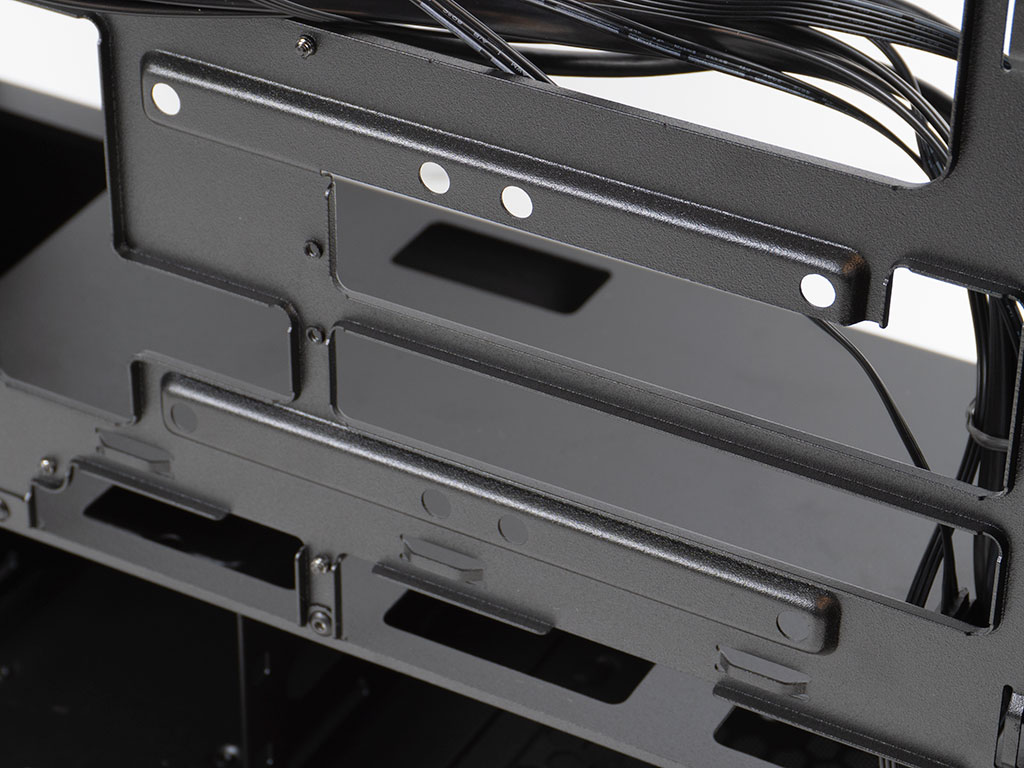
Under the shroud, the HDD cage for two 3.5" drives is secured by a black thumb screw (Editor's note: instead of a silver one). There are two positions for the cage, so that you can accommodate either a long PSU or an extra thick radiator setup in the front of the chassis. If you look really closely, there is a sixth 2.5" drive position on top of the cage, adding a bit of sting to the fact that Cooler Master only provides screws for two. As the three fans in the front sit in front of the frame, there is lots of room to go wild with such cooling systems without having to worry about interfering with long GPUs either. Because Cooler Master is trying to accommodate all motherboard sizes in both the ATX and BTF variants, the motherboard tray is riddled with holes. Even so, thanks to some smart folding of the edges on these cuts, the tray doesn't flex and there are still plenty of well-placed hooks for zip ties.
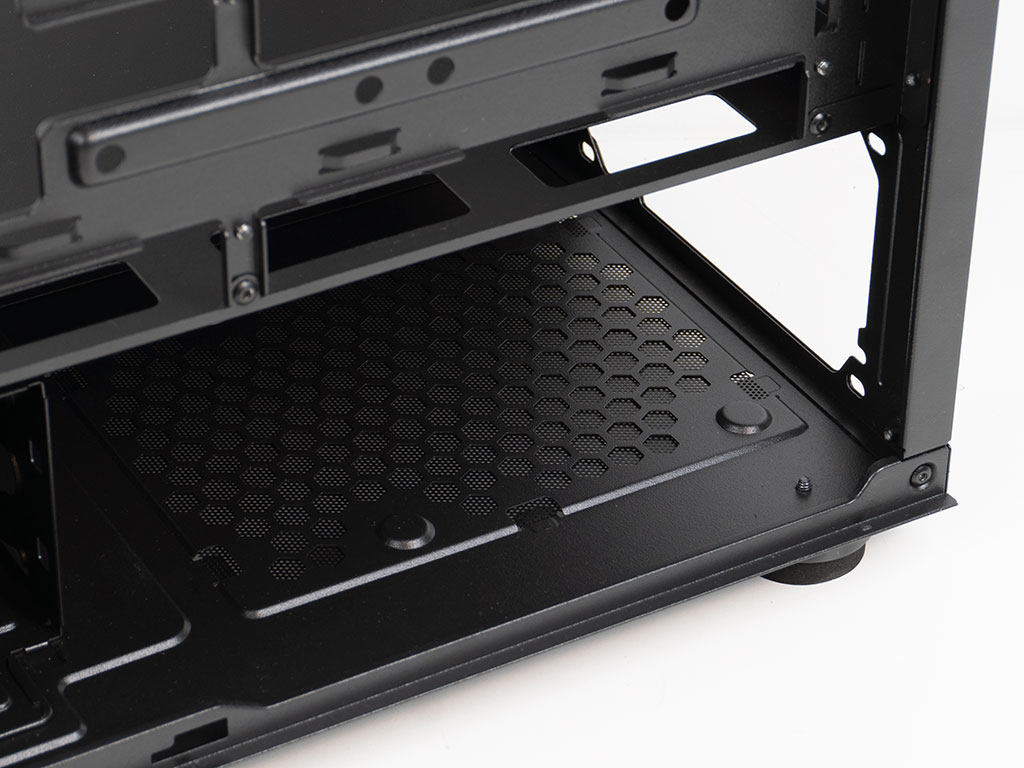
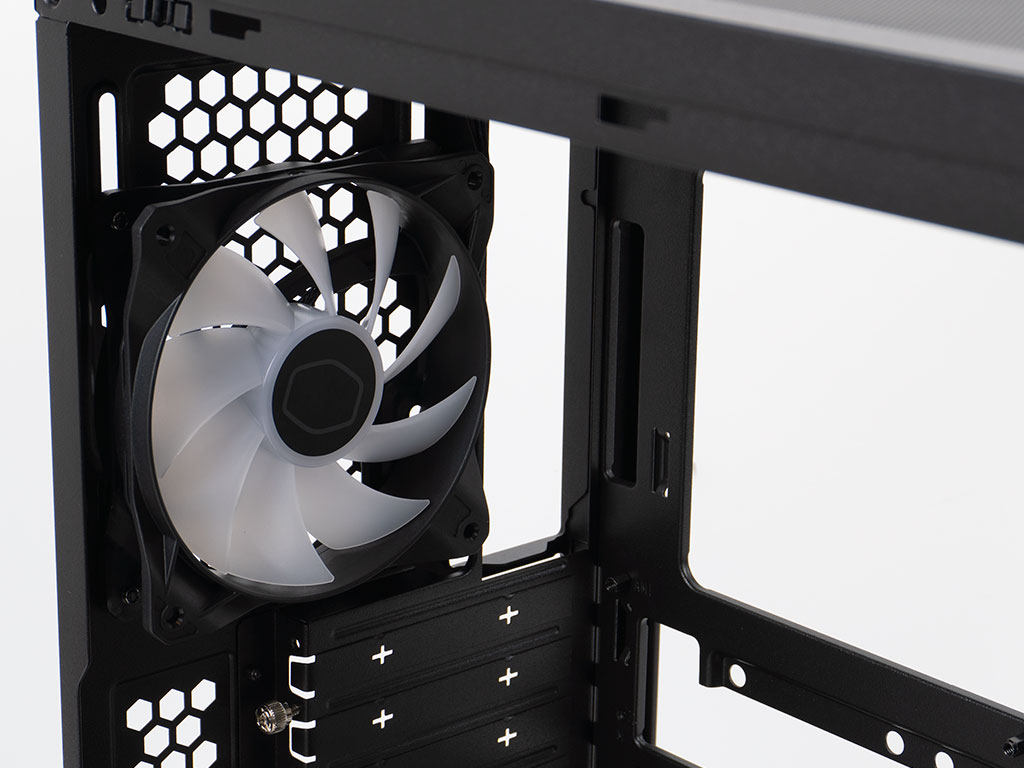
In the back, under the shroud, there is the PSU bay which is quite straight forward with sufficient room for a quality mainstream unit, even with the HDD cage in the rear position. Above that, there are the seven expansion slots. Cooler Master only includes a single silver thumbscrew here. While it is unfortunate that there are no thumb screws for all seven slots, consistency feels more important - so at the bare minimum, this should have matched the color. At the very top, there is that more generic 120 mm ARGB equipped exhaust fan, in our sample the sticker on the hub was a bit of a misprint with the brand logo off-center.
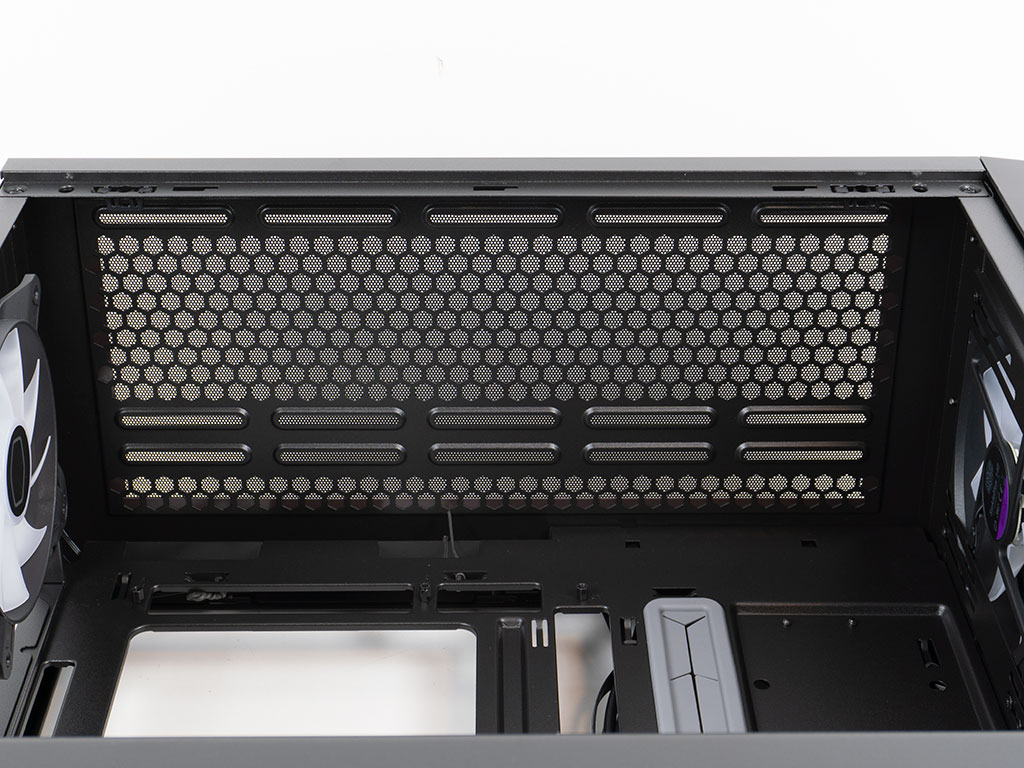
The ceiling is all about cooling and thanks to the IO lining up on the side, there are no such things to get in the way either. The Cooler Master MasterBox 600 will be able to take liquid cooling setups of classic thickness (27 mm radiator + 25 mm fans), but especially 140 mm wide variants will make routing cables a bit more difficult. Naturally anything thicker than 52 mm may end up colliding with the motherboard components. As such, for thick setups, you will likely have to focus on 120 mm wide variants instead. This should not come as a surprise, as the rear fan width is usually a pretty solid indicator of what can also fit in the ceiling and at the same time clear motherboard components.
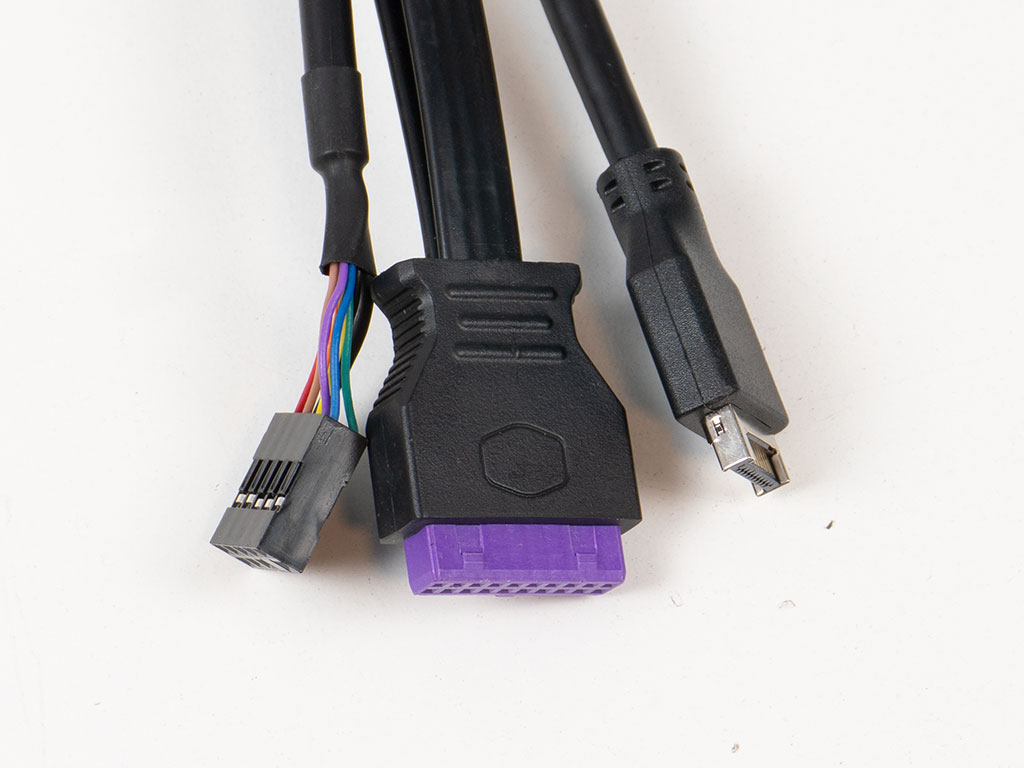
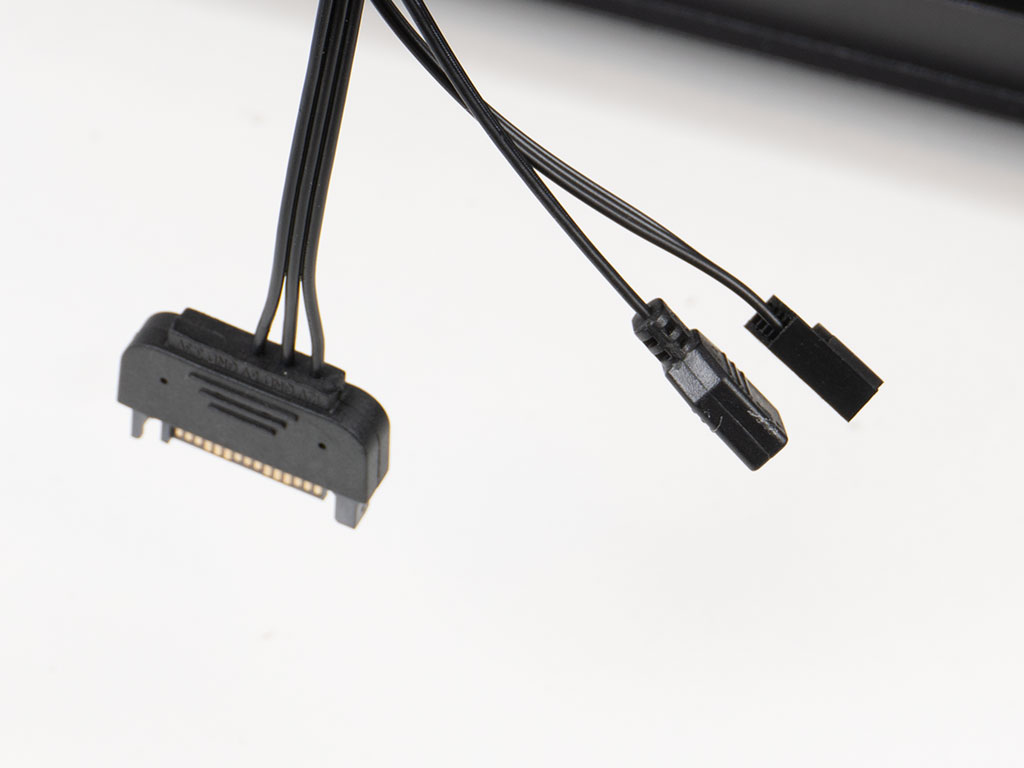
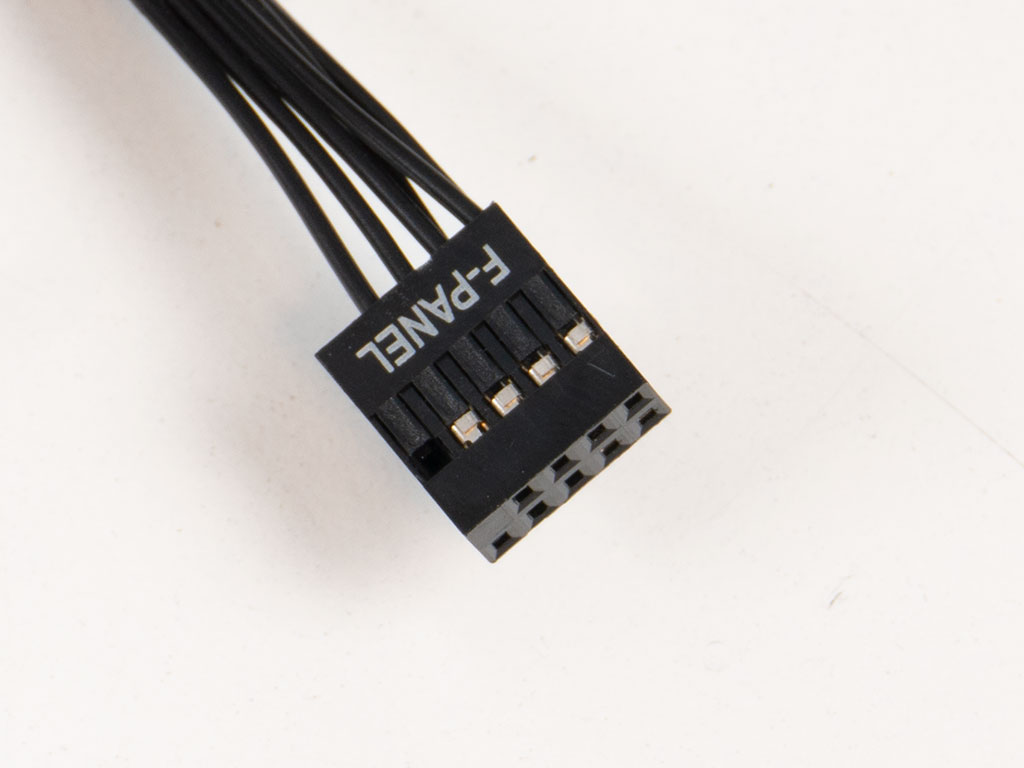
Cooler Master continues to employ a USB 3.0 wire with their signature purple color plug. All the wires are sleeved black, with the PCB utilizing a SATA port with generic ARGB and PWM connectors to allow for motherboard control. The front panel connector is one unified block, making this step of assembly a breeze - surely something system integrators will appreciate as well.
Jul 14th, 2025 16:01 CDT
change timezone
Latest GPU Drivers
New Forum Posts
- AAF Optimus Modded Driver For Windows 10 & Windows 11 - Only for Realtek HDAUDIO Chips (578)
- i7 2860QM how to raise power limit? (21)
- AMD 7Ghz? This keeps popping up on my feeds! (6)
- Stupid things one has done with hardware (49)
- No offense, here are some things that bother me about your understanding of fans. (111)
- Choosing the right motherboard (5)
- Best motherboards for XP gaming (151)
- Which CPU to Choose for a 7900 XT? Ryzen 7 7700 or Ryzen 5 9600X? (43)
- Bent pins on an AM5 mobo, any way to test them and also find which ones were on the schematic? (6)
- Arc 770a 16gb money pit (9)
Popular Reviews
- Lexar NM1090 Pro 4 TB Review
- Our Visit to the Hunter Super Computer
- MSI GeForce RTX 5060 Gaming OC Review
- Fractal Design Epoch RGB TG Review
- NVIDIA GeForce RTX 5050 8 GB Review
- Corsair FRAME 5000D RS Review
- Sapphire Radeon RX 9060 XT Pulse OC 16 GB Review - An Excellent Choice
- Chieftec Iceberg 360 Review
- AMD Ryzen 7 9800X3D Review - The Best Gaming Processor
- Upcoming Hardware Launches 2025 (Updated May 2025)
TPU on YouTube
Controversial News Posts
- Intel's Core Ultra 7 265K and 265KF CPUs Dip Below $250 (288)
- Some Intel Nova Lake CPUs Rumored to Challenge AMD's 3D V-Cache in Desktop Gaming (140)
- AMD Radeon RX 9070 XT Gains 9% Performance at 1440p with Latest Driver, Beats RTX 5070 Ti (131)
- NVIDIA Launches GeForce RTX 5050 for Desktops and Laptops, Starts at $249 (122)
- NVIDIA GeForce RTX 5080 SUPER Could Feature 24 GB Memory, Increased Power Limits (115)
- Microsoft Partners with AMD for Next-gen Xbox Hardware (105)
- Intel "Nova Lake‑S" Series: Seven SKUs, Up to 52 Cores and 150 W TDP (100)
- NVIDIA DLSS Transformer Cuts VRAM Usage by 20% (97)