 22
22
Corsair AXi Series 1500 W Review
Voltage Regulation, Hold-up Time & Inrush Current »A Look Inside & Component Analysis
Before reading this page, we strongly suggest a look at this article, which will help you understand the internal components of a PSU much better. Our main tool for the disassembly of the PSU is a Thermaltronics TMT-9000S soldering and rework station. It is of extreme quality and is equipped with a matching de-soldering gun. With such equipment in hand, breaking apart every PSU is like a walk in the park!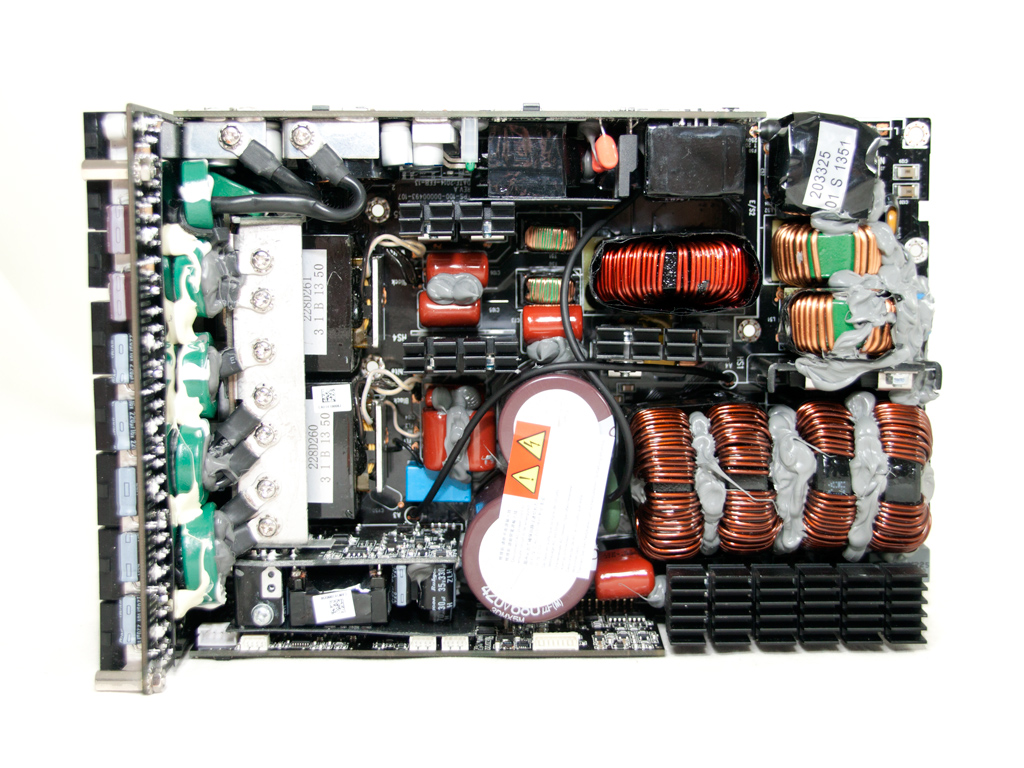


Like other AXi units, this one is by Flextronics, and its platform shares many similarities with that the AX1200i utilizes because the AX1500i uses a Digital Signal Processor or DSP, which collects digital data from various components of the unit, analyzes everything, and makes proper adjustments to achieve the best possible performance, instead of a PFC/PWM controller and a supervisor IC. This also means that all the aforementioned steps are executed much faster than in a traditional PSU because there is no need to feed a PFC/PWM controller analog signals. To further increase efficiency, an LLC resonant converter is used with a high-end topology in the primary side. The topology consists of four main switchers in total.
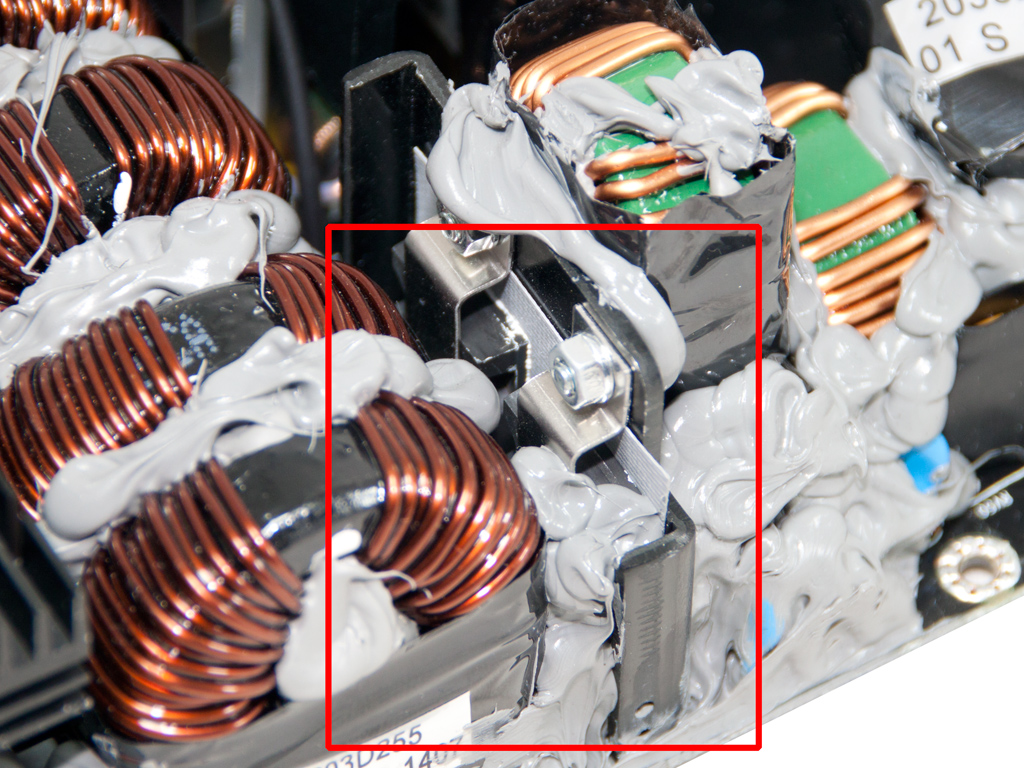
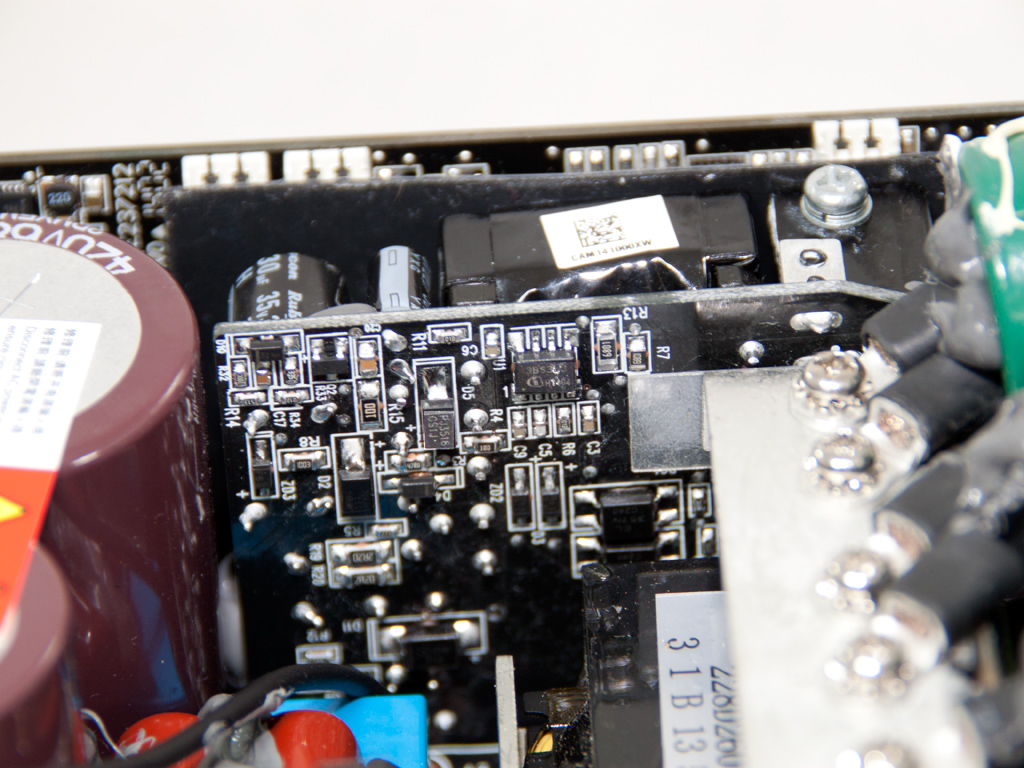
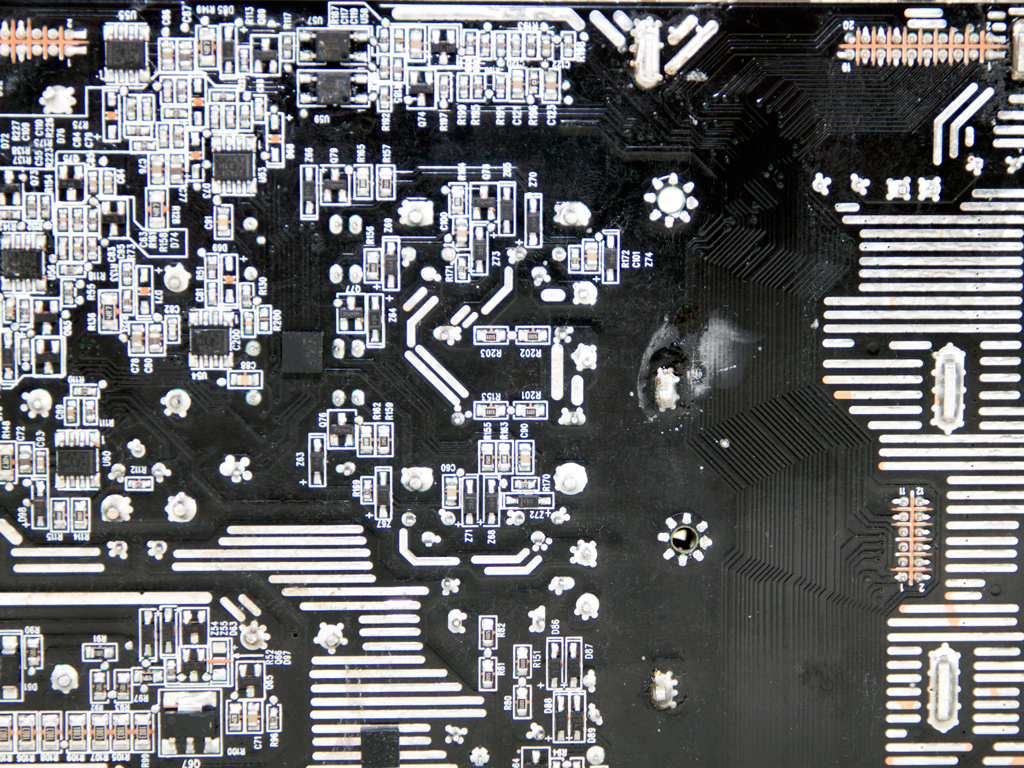
Contrary to the AX1200i, this 1500 W monster doesn't includes a server-grade EMI filter. The AC receptacle only hosts a couple Y caps. However, the rest of the EMI filter is on the main PCB, and while there is a ton of glue to make the unit coil-whine proof, we managed to identify three CM chokes, two pairs of Y caps, five X caps (one sits right behind the bridge rectifiers), and an MOV. Overall, the EMI/transient filter is more than complete.
Instead of bridge rectifiers this PSU uses two mosfets in this stage with both of them bolted to the same heatsink. Unfortunately identifying them was impossible because of the excessive amount of glue used.


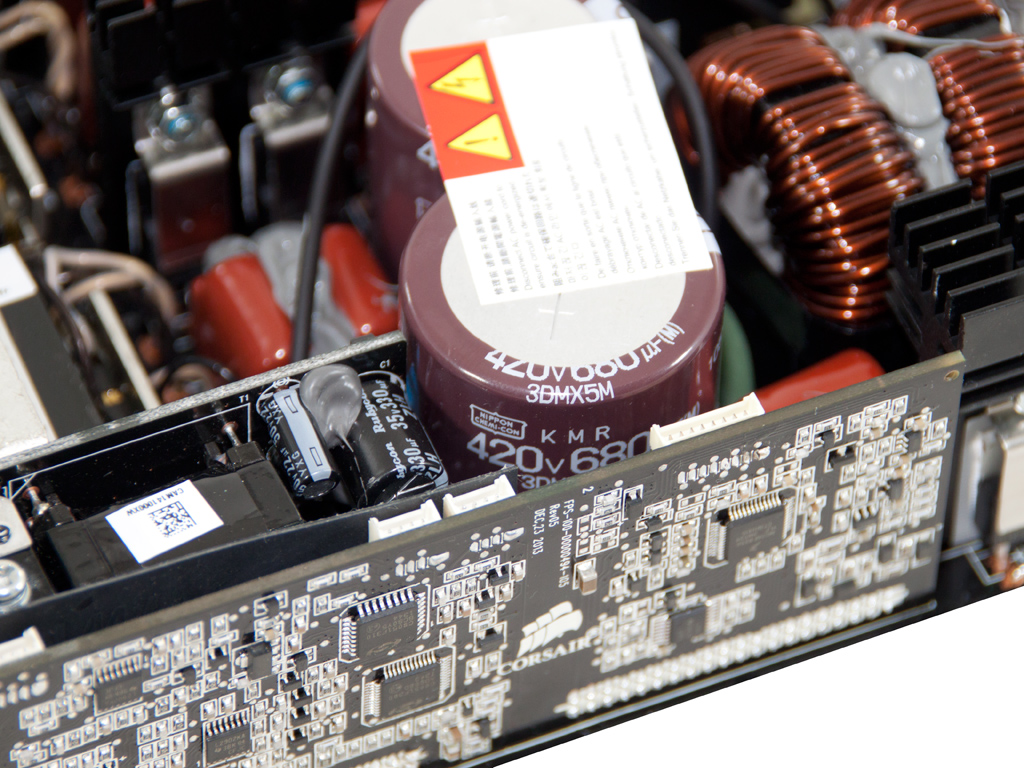
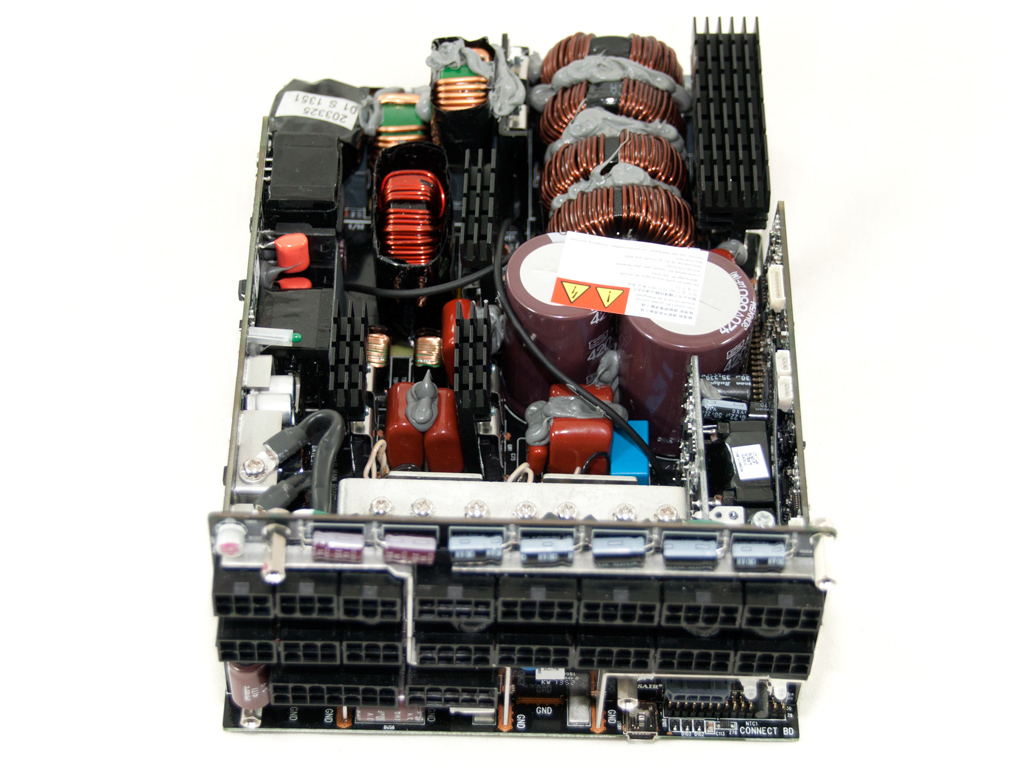
We find four chokes, four C3D06060A boost diodes, and four fets in the APFC. The two parallel hold-up caps are provided by Nippon Chemi-Con (680 µF and 470 µF or 1150 µF combined, 450V, 105°C, KMR series).

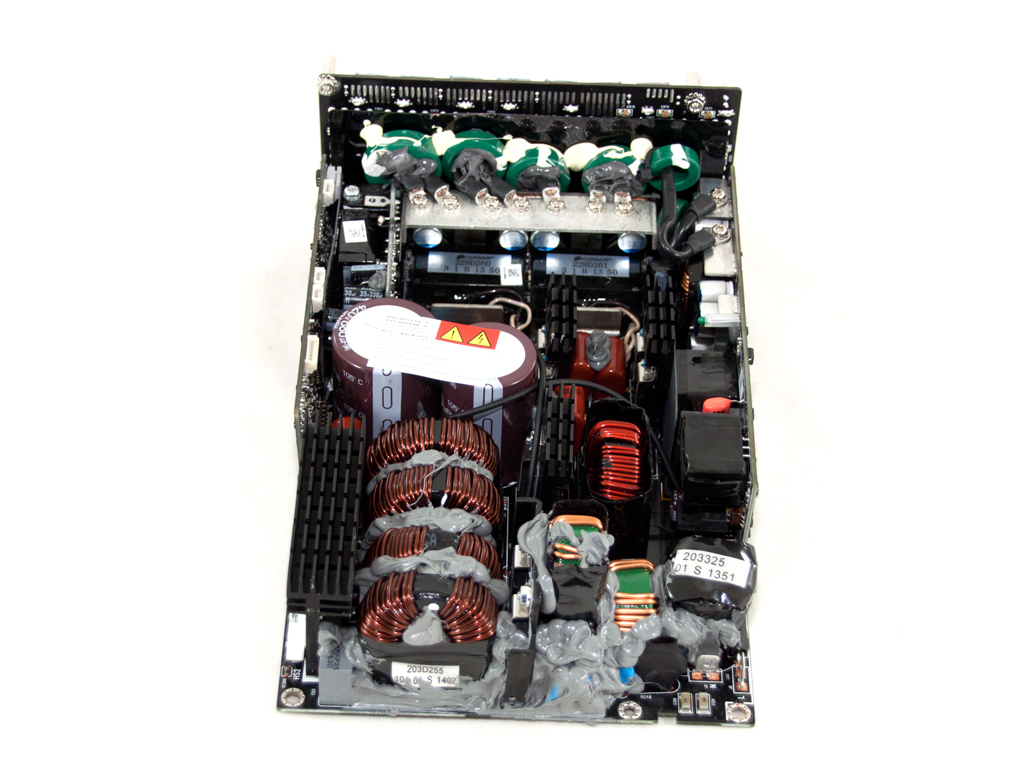
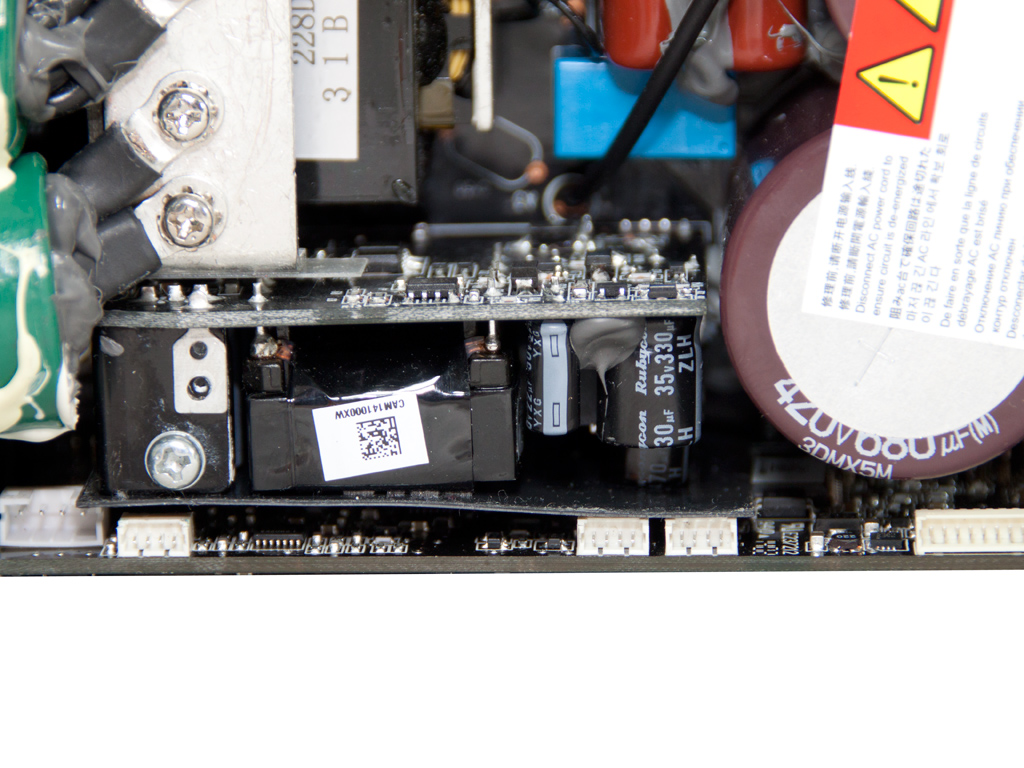
The thermistor, responsible for inrush current protection, and the relay that isolates it from the circuit once the start-up phase finishes.

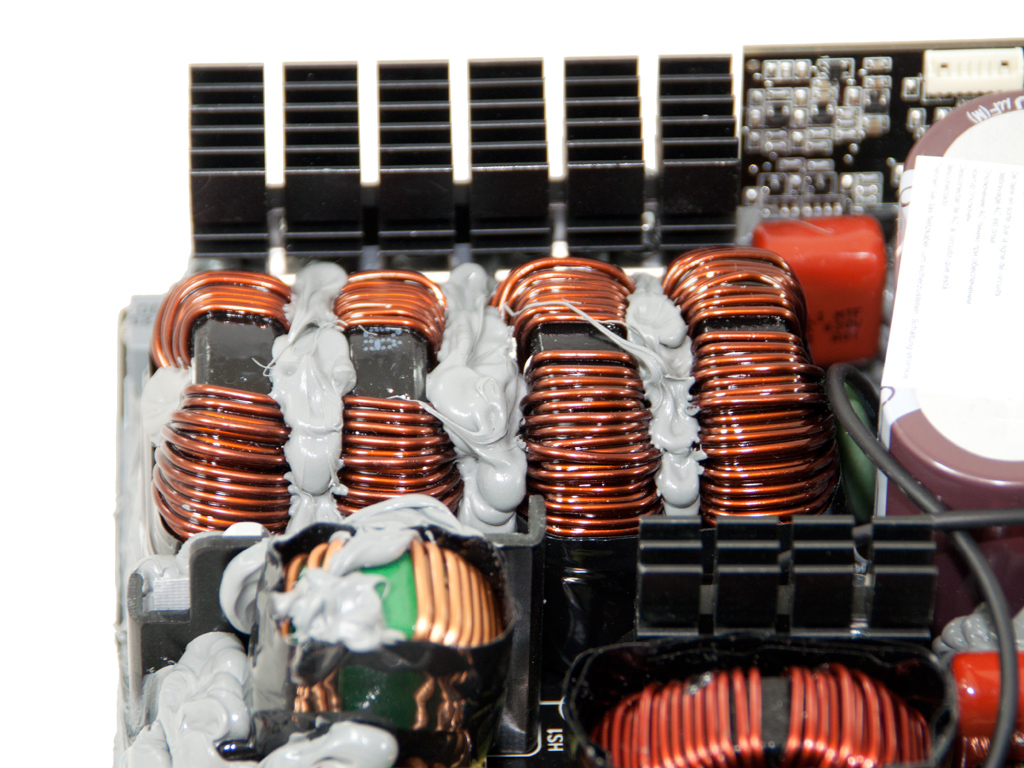
This heatsink holds a buck mosfet and a diode. In front of these is the intermediate buck inductor.

Two heatsinks hold the main switchers. Another indication of top-notch engineering, all mosfets and diodes in this unit are held in place by metal clips to ensure they firmly touch the heatsinks, which leads to better thermal dissipation.
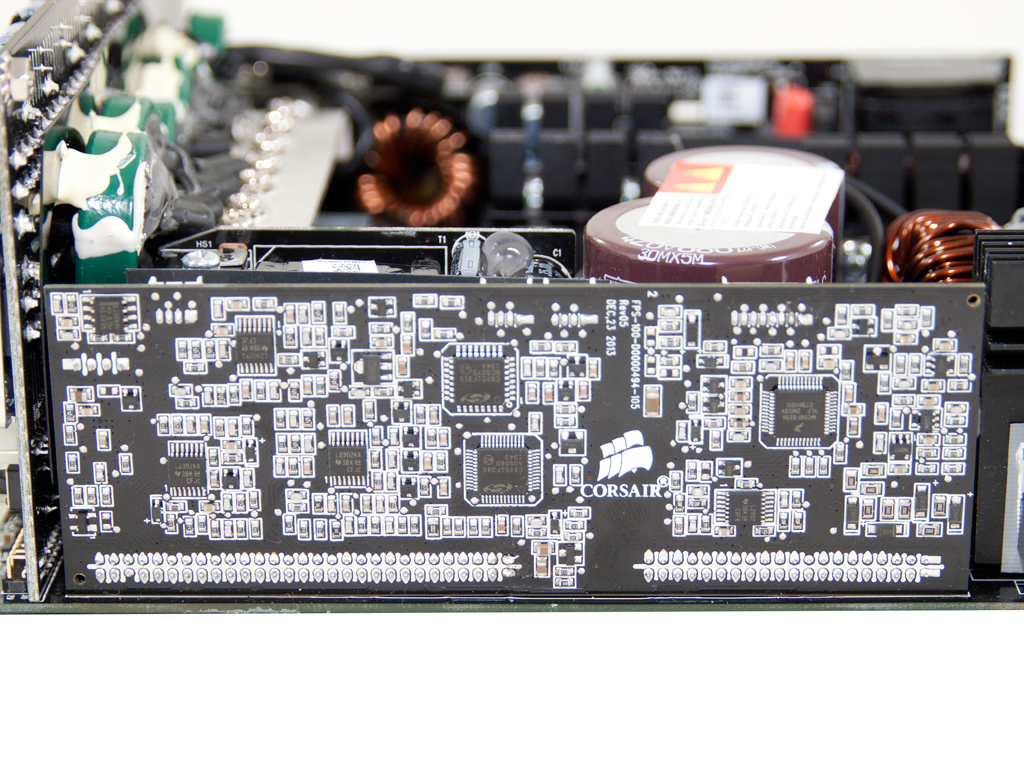
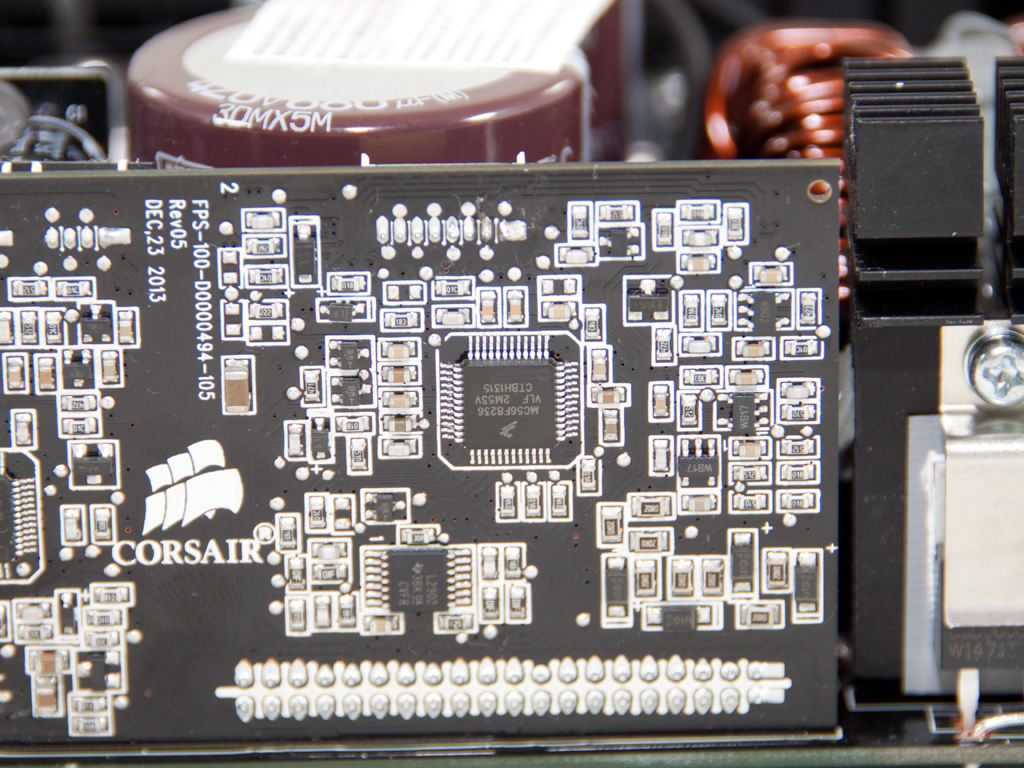


The control board holding the DSP looks identical to the one in the AX1200i; however, we spotted some differences we will list below. On it are several LM2902K quadruple operational amplifiers and an MC56F8236 Freescale DSC (Digital Signal Controller) for which we didn't find any documentation online. Here, the AX1200i uses a 56F8014 DSC instead. The board also houses two fully integrated, mixed-signal System-on-a-Chip MCUs from Silicon Lab, which also play the role of a DSP with higher clock speeds. Their model numbers are C8051F310 and C8051F380. Both use the same 8051 µC core, but the core in the C8051F380 is clocked higher. The same MCU also includes a USB 2.0 controller.
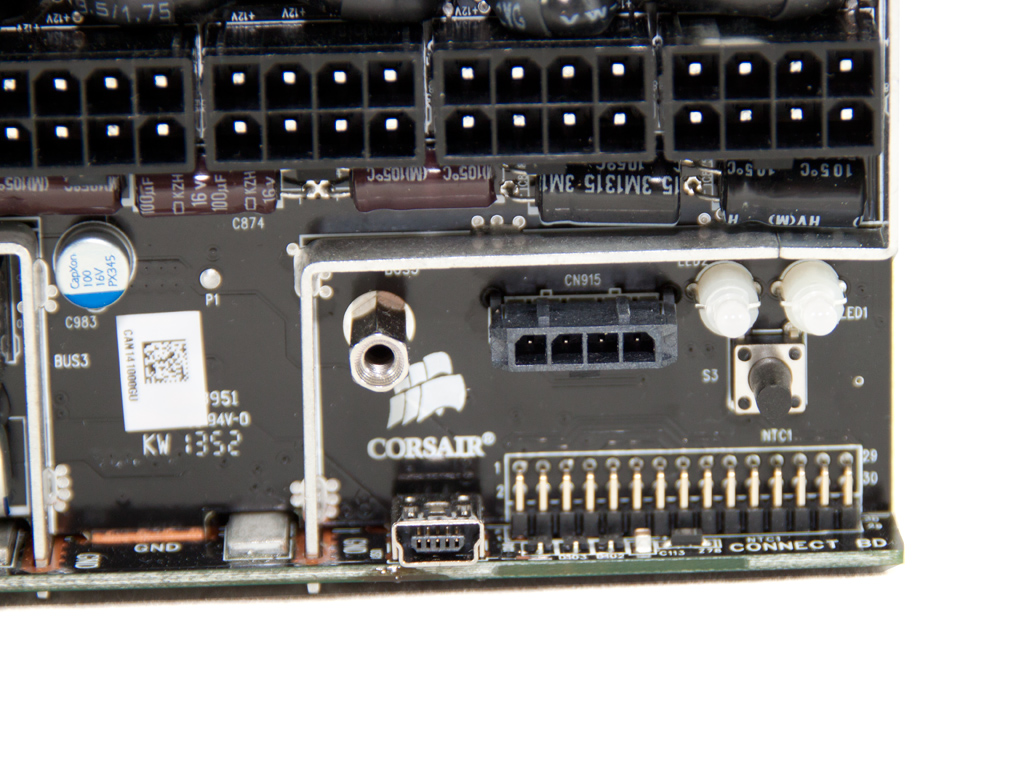
The front of the control board includes a small vertical daughter-board that holds the 5VSB converter.

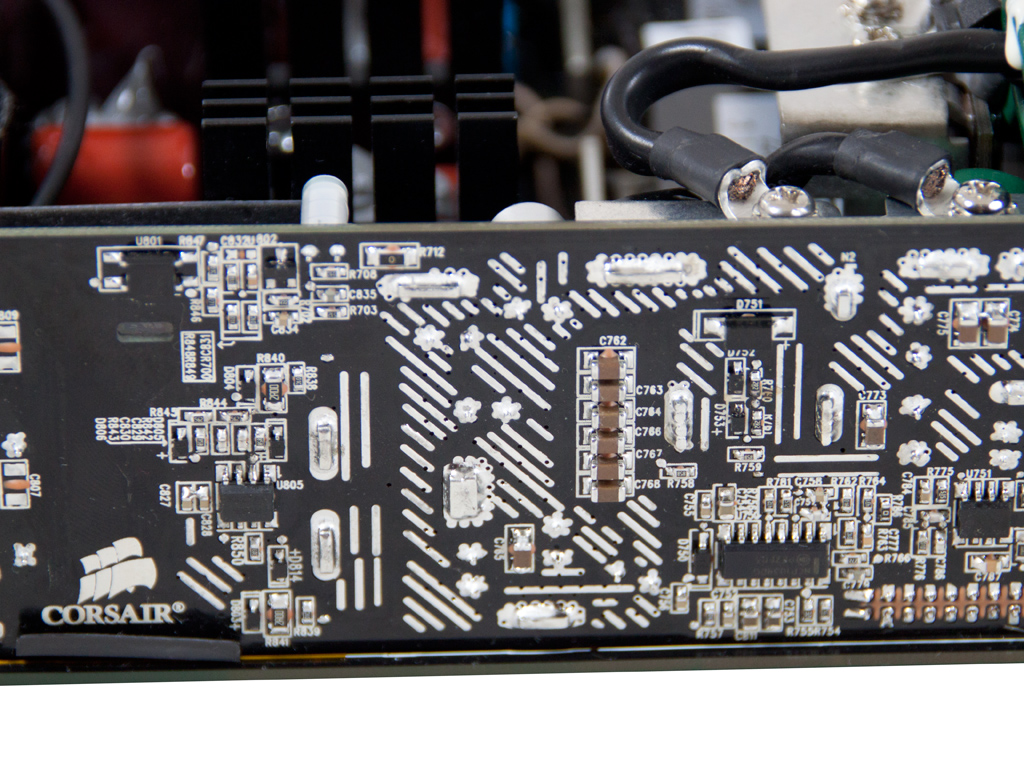


This PCB houses the DC-DC converters for the 5V, 3.3V, and -12V rails, and Corsair even says the -12V rail to be generated by a DC-DC converter. We spotted an NCP1034DG buck PWM controller toward the rear of the same PCB.
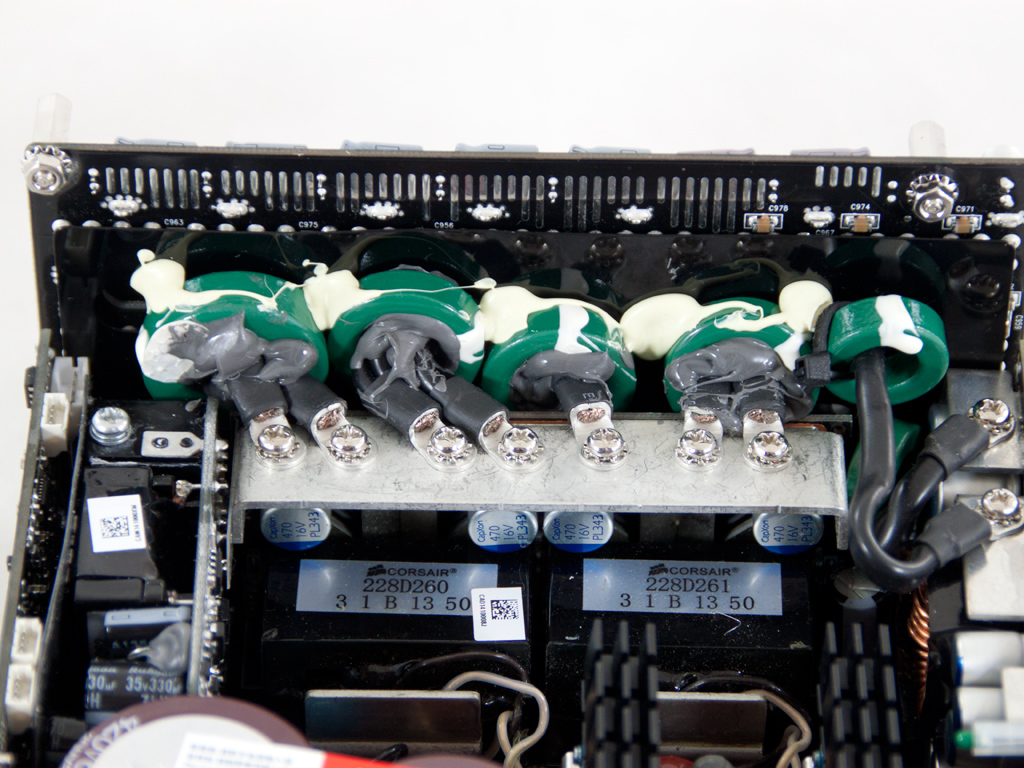
The two parallel main transformers hide the PCB that holds the fets which rectify +12V. On the same PCB are four CapXon polymer caps on a metal bar. Above them, seven thick and short wires transfer the +12V rail to the modular PCB. Some ferrite rings are used on the wires to suppress electronic EMI/RFI noise.
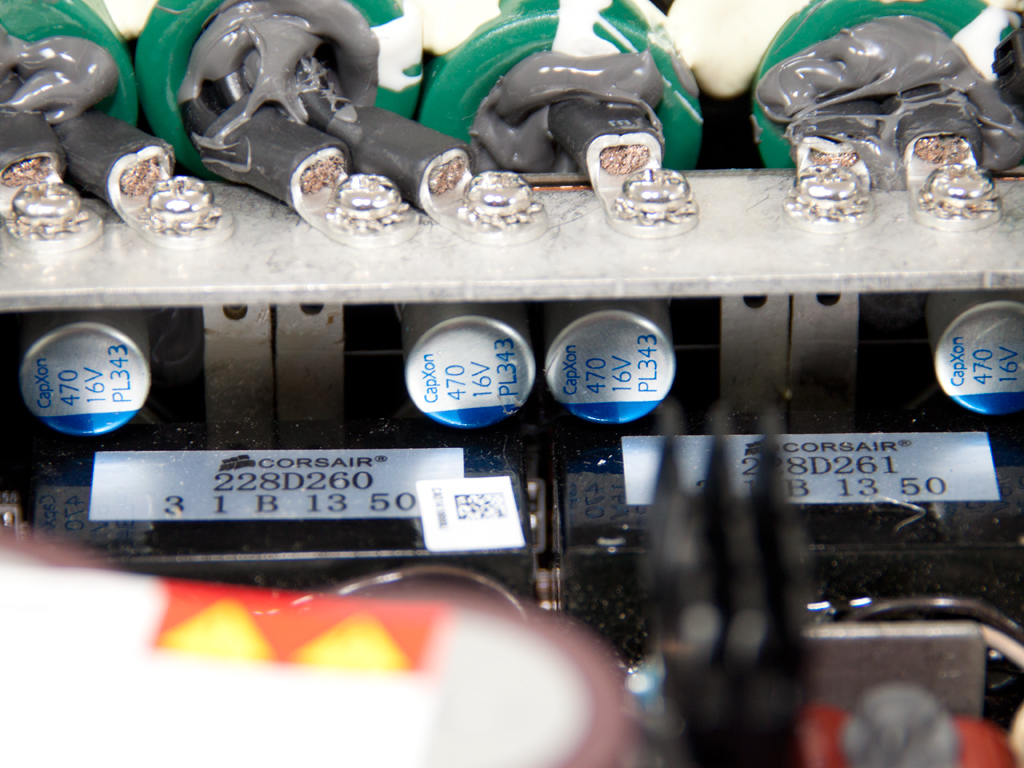
Several CapXon polymer caps are used to filter ripple on the +12V rail. Since they are polymer and not electrolytic caps, we won't whine about them a lot.


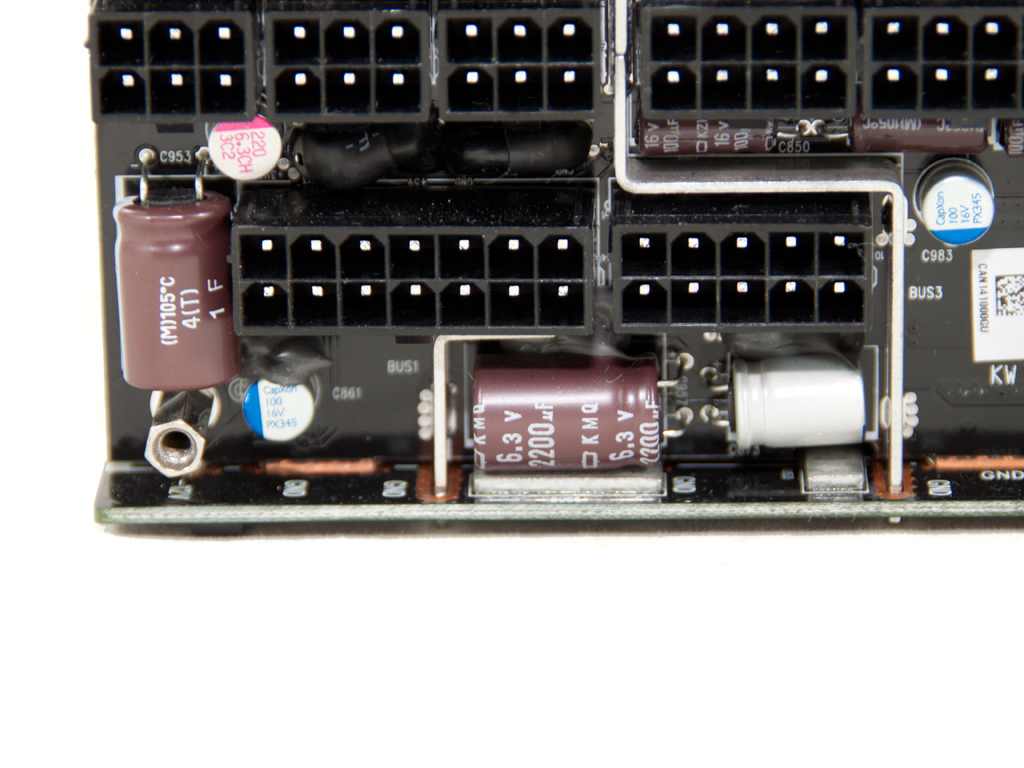
The PCB's front holds many small Chemi-Con, Rubycon, and Nichicon electrolytic caps. These provide some extra ripple filtering, along with several small polymer caps by CapXon and either G-LUXON or Teapo.


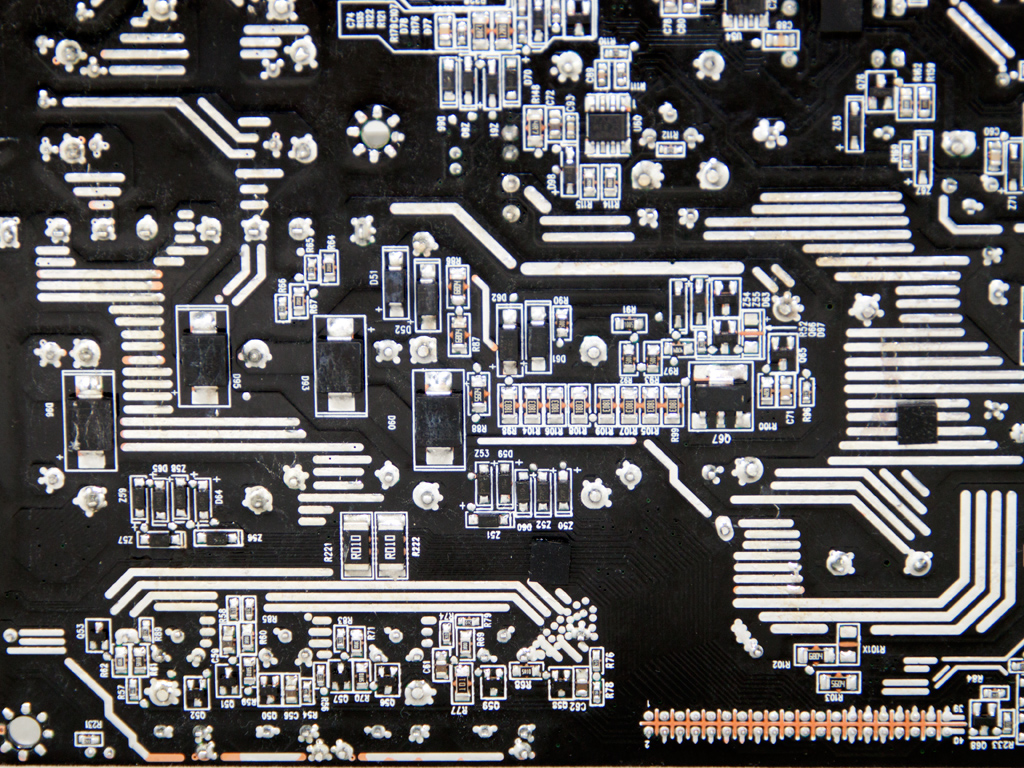
Soldering quality on the main PCB is definitely good, although not up to the levels we expect from Flextronics. This is probably an early production unit, or the production line hasn't matured yet. We spotted some traces with peeled-off spots, and the PCB's finish wasn't that good in some areas.
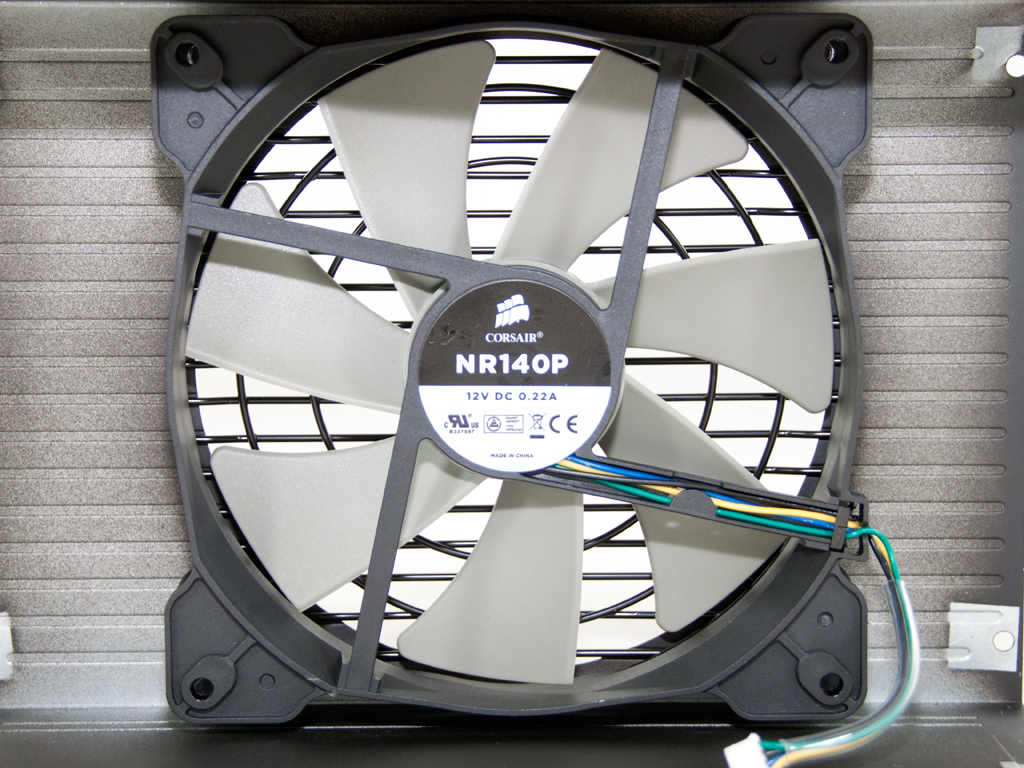

The fan uses Fluid Dynamic Bearings, which are considered the best money can buy today; that is, in terms of reliability and noise output. Its model number is NR140P according to Corsair's sticker, but we think that it is a Hong Hua HA1425M12Y.
Jul 16th, 2025 04:24 CDT
change timezone
Latest GPU Drivers
New Forum Posts
- AI Job Losses: let's count the losses up, total losses to AI so far 94,000 and counting (10)
- What's your latest tech purchase? (24282)
- TPU's Nostalgic Hardware Club (20515)
- Best motherboards for XP gaming (159)
- Choosing the right motherboard (13)
- [GPU-Z Test Build] New Kernel Driver, Everyone: Please Test (98)
- Is this dual channel or async? (4)
- Need a new webhost, any suggestions? (7)
- 6400c30 vs 8000c36 Ryzen 9800X3D (28)
- Game Informer magazine is back! (17)
Popular Reviews
- MSI GeForce RTX 5060 Gaming OC Review
- SilverStone SETA H2 Review
- Our Visit to the Hunter Super Computer
- Lexar NM1090 Pro 4 TB Review
- NVIDIA GeForce RTX 5050 8 GB Review
- Fractal Design Epoch RGB TG Review
- Sapphire Radeon RX 9060 XT Pulse OC 16 GB Review - An Excellent Choice
- AMD Ryzen 7 9800X3D Review - The Best Gaming Processor
- Upcoming Hardware Launches 2025 (Updated May 2025)
- Corsair FRAME 5000D RS Review
TPU on YouTube
Controversial News Posts
- Intel's Core Ultra 7 265K and 265KF CPUs Dip Below $250 (288)
- Some Intel Nova Lake CPUs Rumored to Challenge AMD's 3D V-Cache in Desktop Gaming (140)
- AMD Radeon RX 9070 XT Gains 9% Performance at 1440p with Latest Driver, Beats RTX 5070 Ti (131)
- NVIDIA Launches GeForce RTX 5050 for Desktops and Laptops, Starts at $249 (122)
- NVIDIA GeForce RTX 5080 SUPER Could Feature 24 GB Memory, Increased Power Limits (115)
- Microsoft Partners with AMD for Next-gen Xbox Hardware (105)
- Intel "Nova Lake‑S" Series: Seven SKUs, Up to 52 Cores and 150 W TDP (100)
- NVIDIA DLSS Transformer Cuts VRAM Usage by 20% (99)