 9
9
CORSAIR Hydro X Series XC9 RGB CPU Water Block Review
Installation & Lighting »Closer Examination

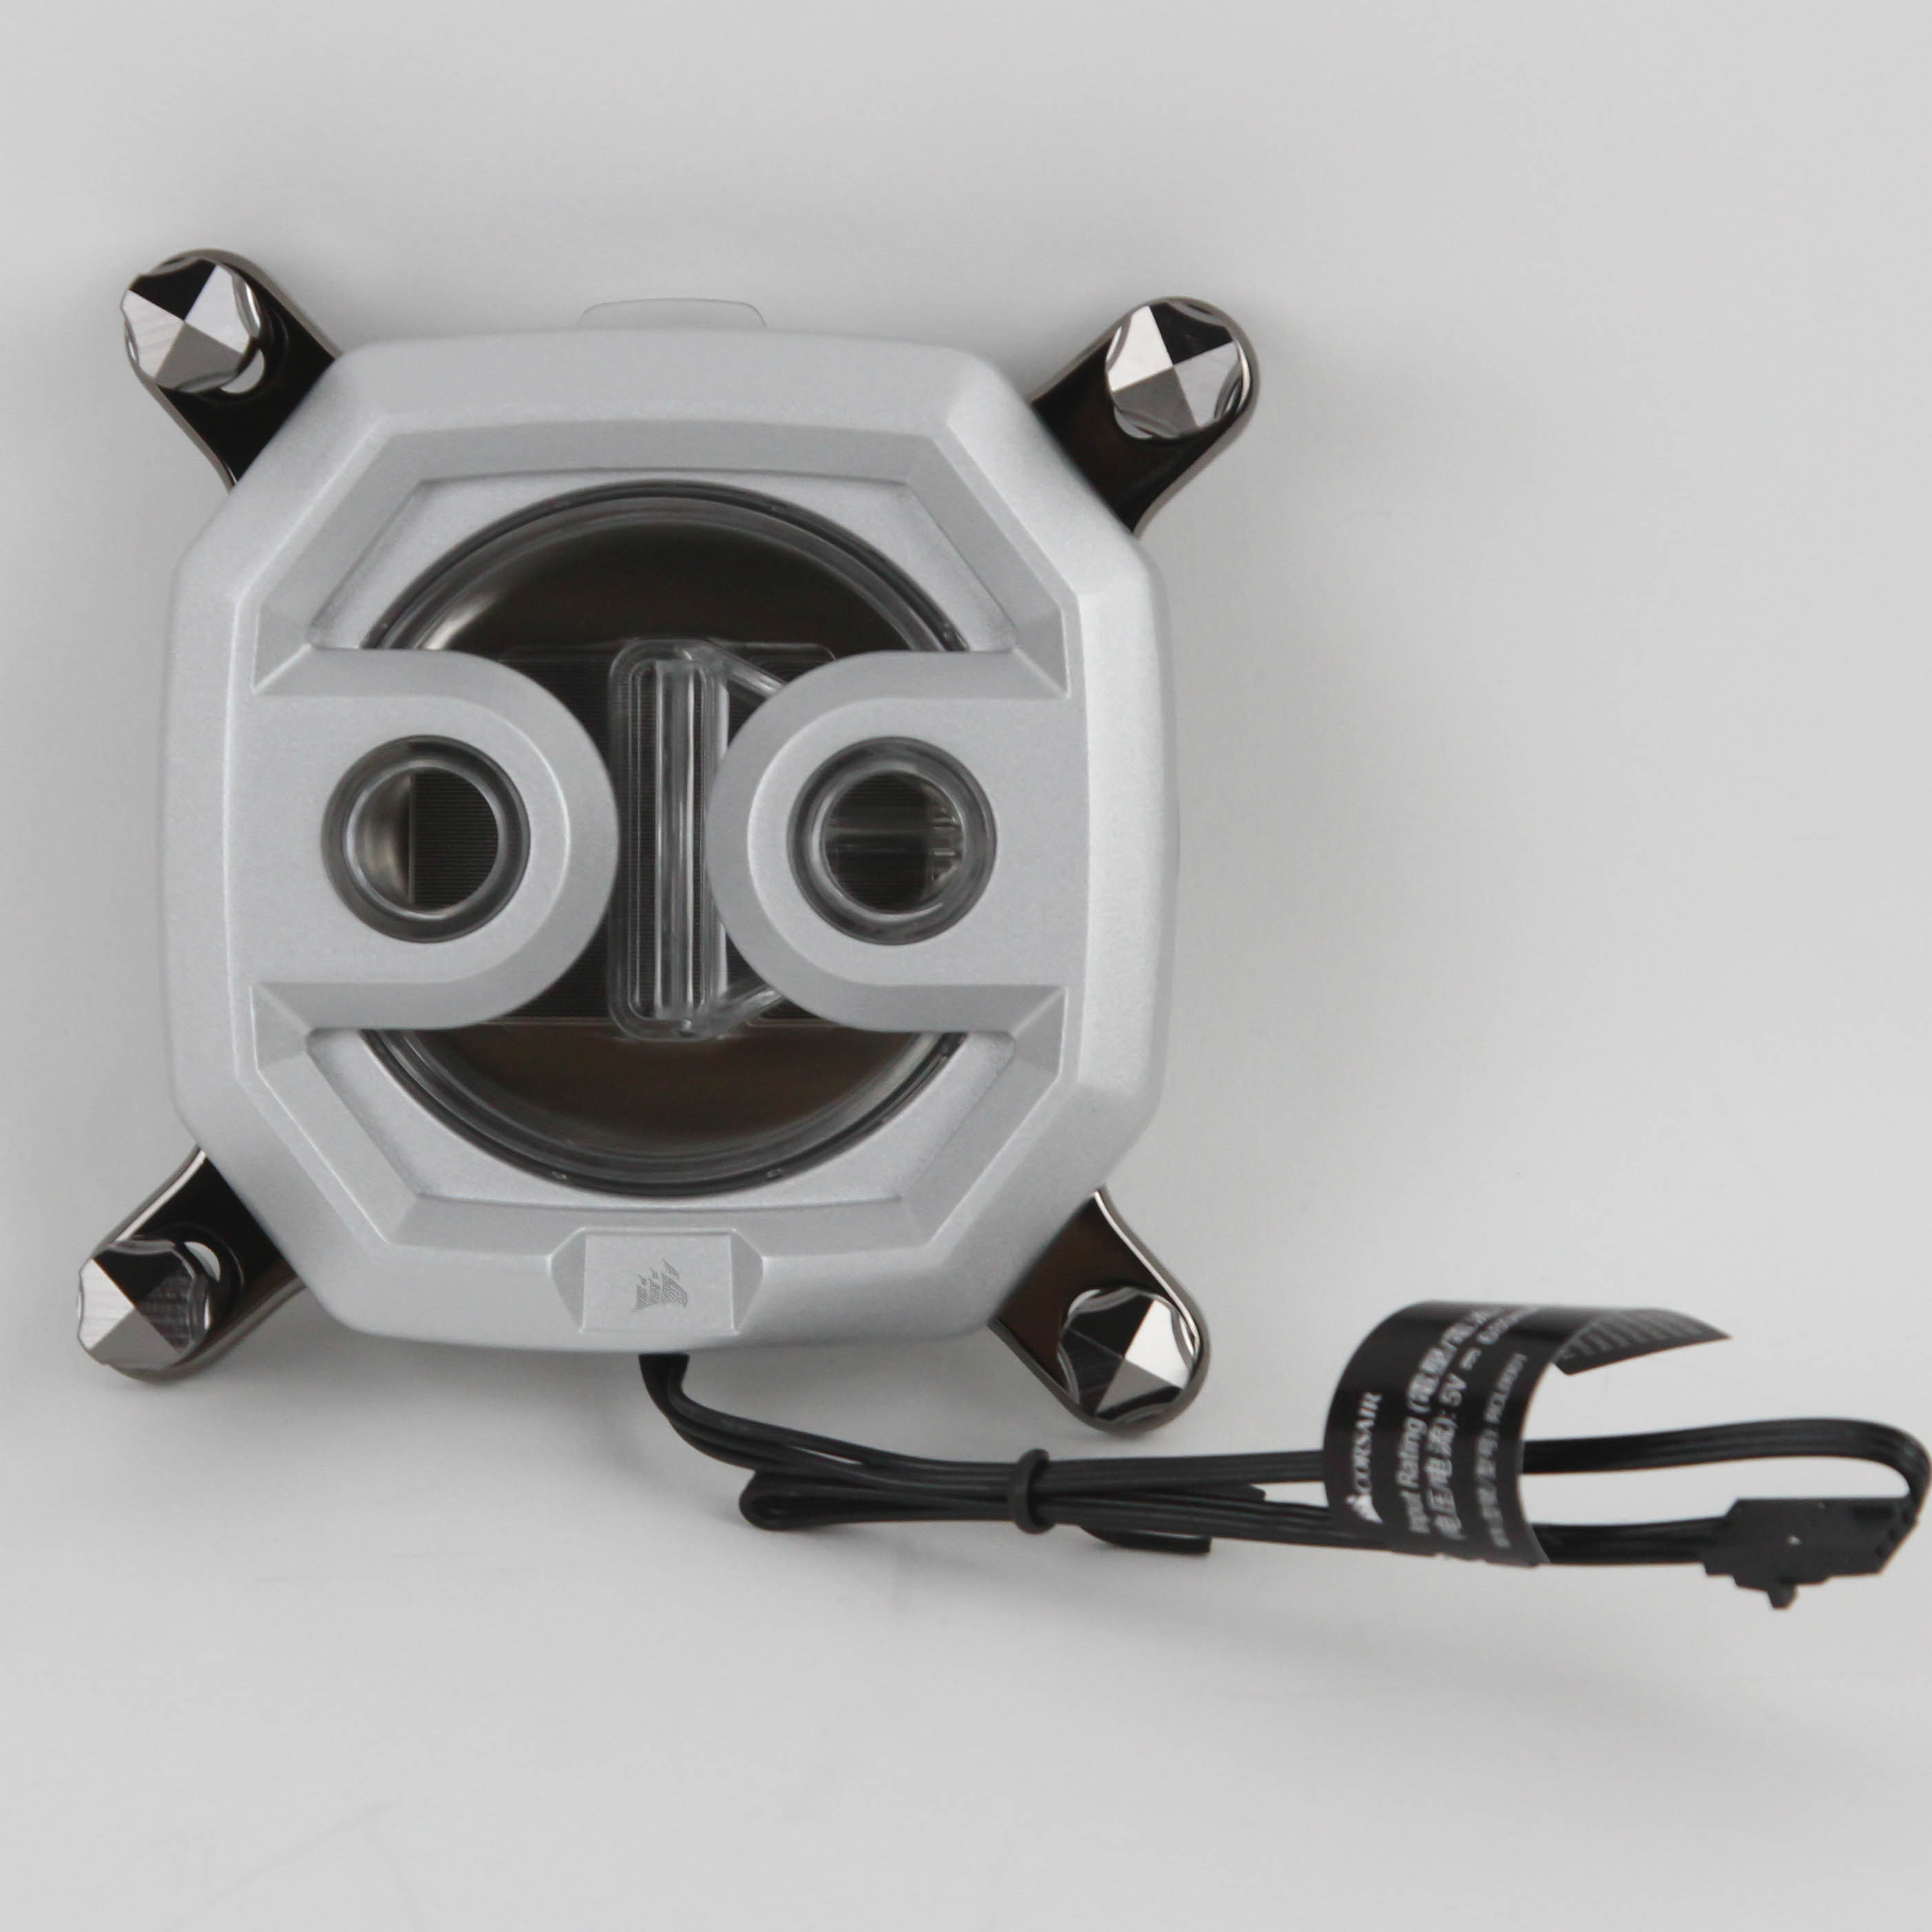

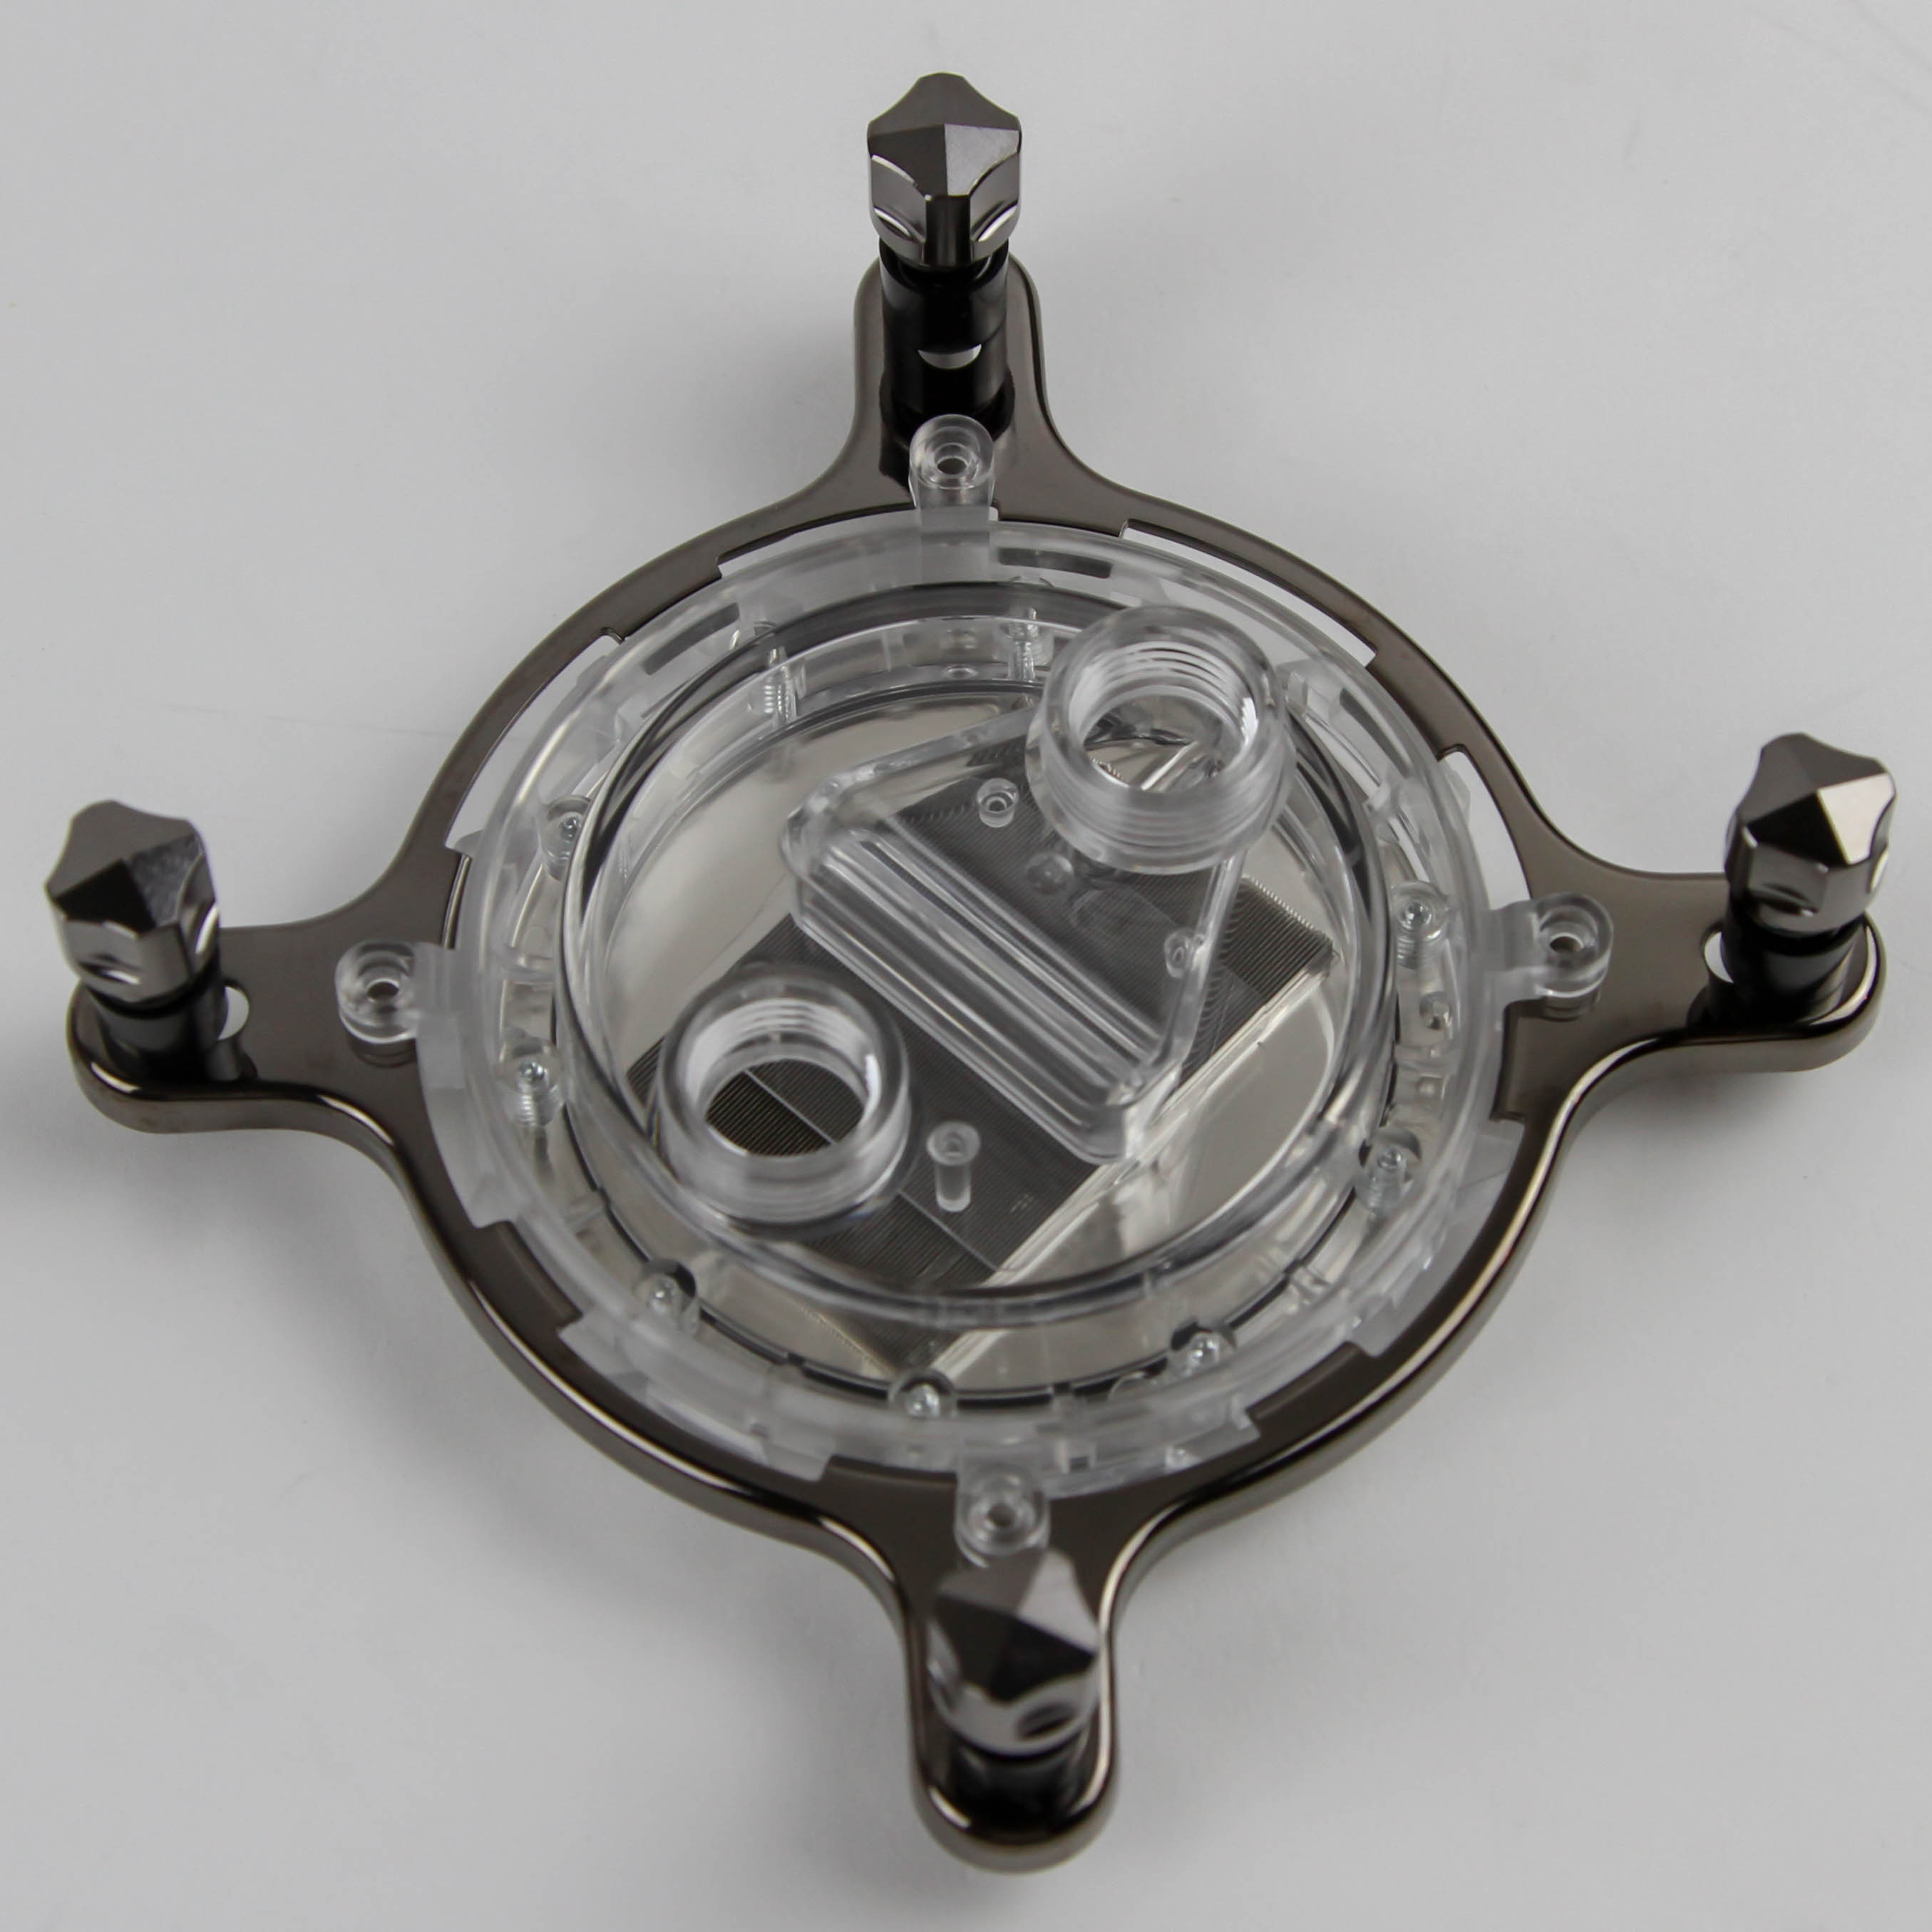
CORSAIR has made an interesting choice by offering two tiers of CPU water blocks, segregated partially by CPU socket compatibility in addition to the usual top/cooling engine changes. Indeed, the Hydro X Series XC9 is only compatible with the recent Intel and AMD HEDT platforms, has a sandblasted silver aluminium trim, and a more complex cooling engine via a larger number of fins for heat transfer than the XC7 that gets a plastic trim, fewer fins on the cold plate, and increased CPU compatibility. We will examine the XC7 separately at a later date, especially given an updated test setup for CPU blocks is coming. The ID of the XC9 is definitely reminiscent of CORSAIR's Hydro series CPU AIO cooling solutions, with the top and mounting bracket especially familiar to anyone who has used their Asetek-based coolers before.
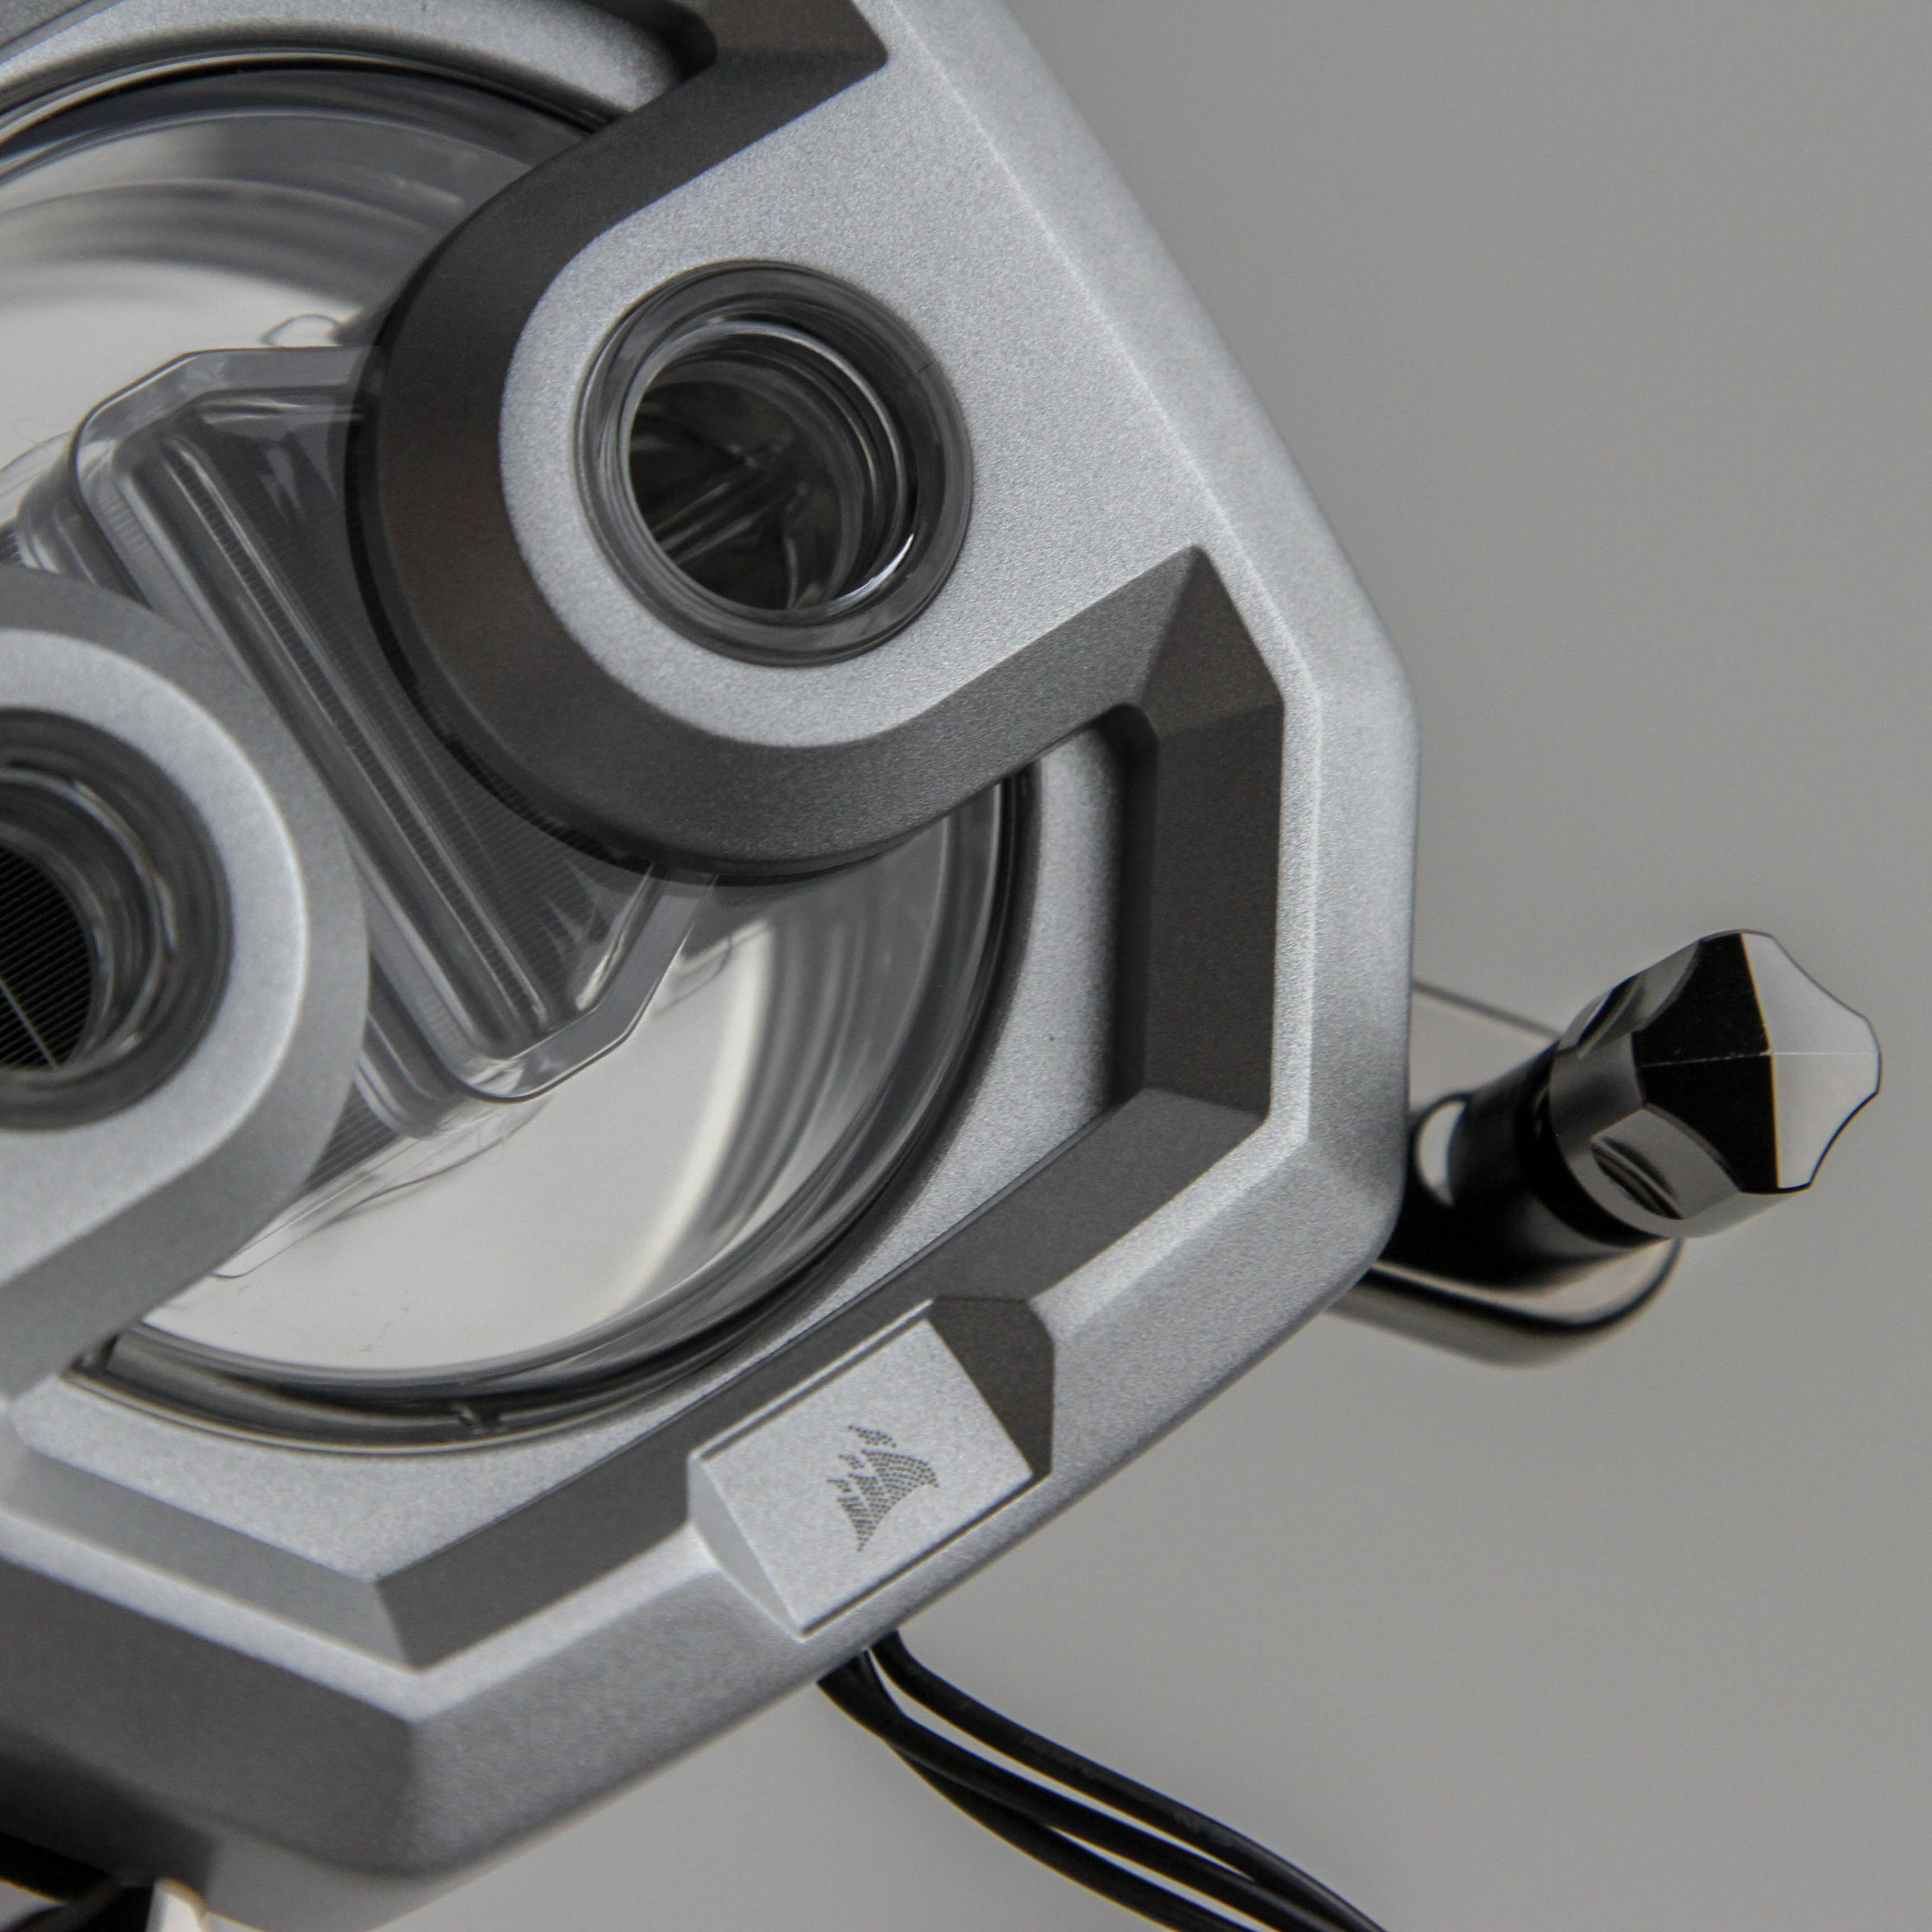
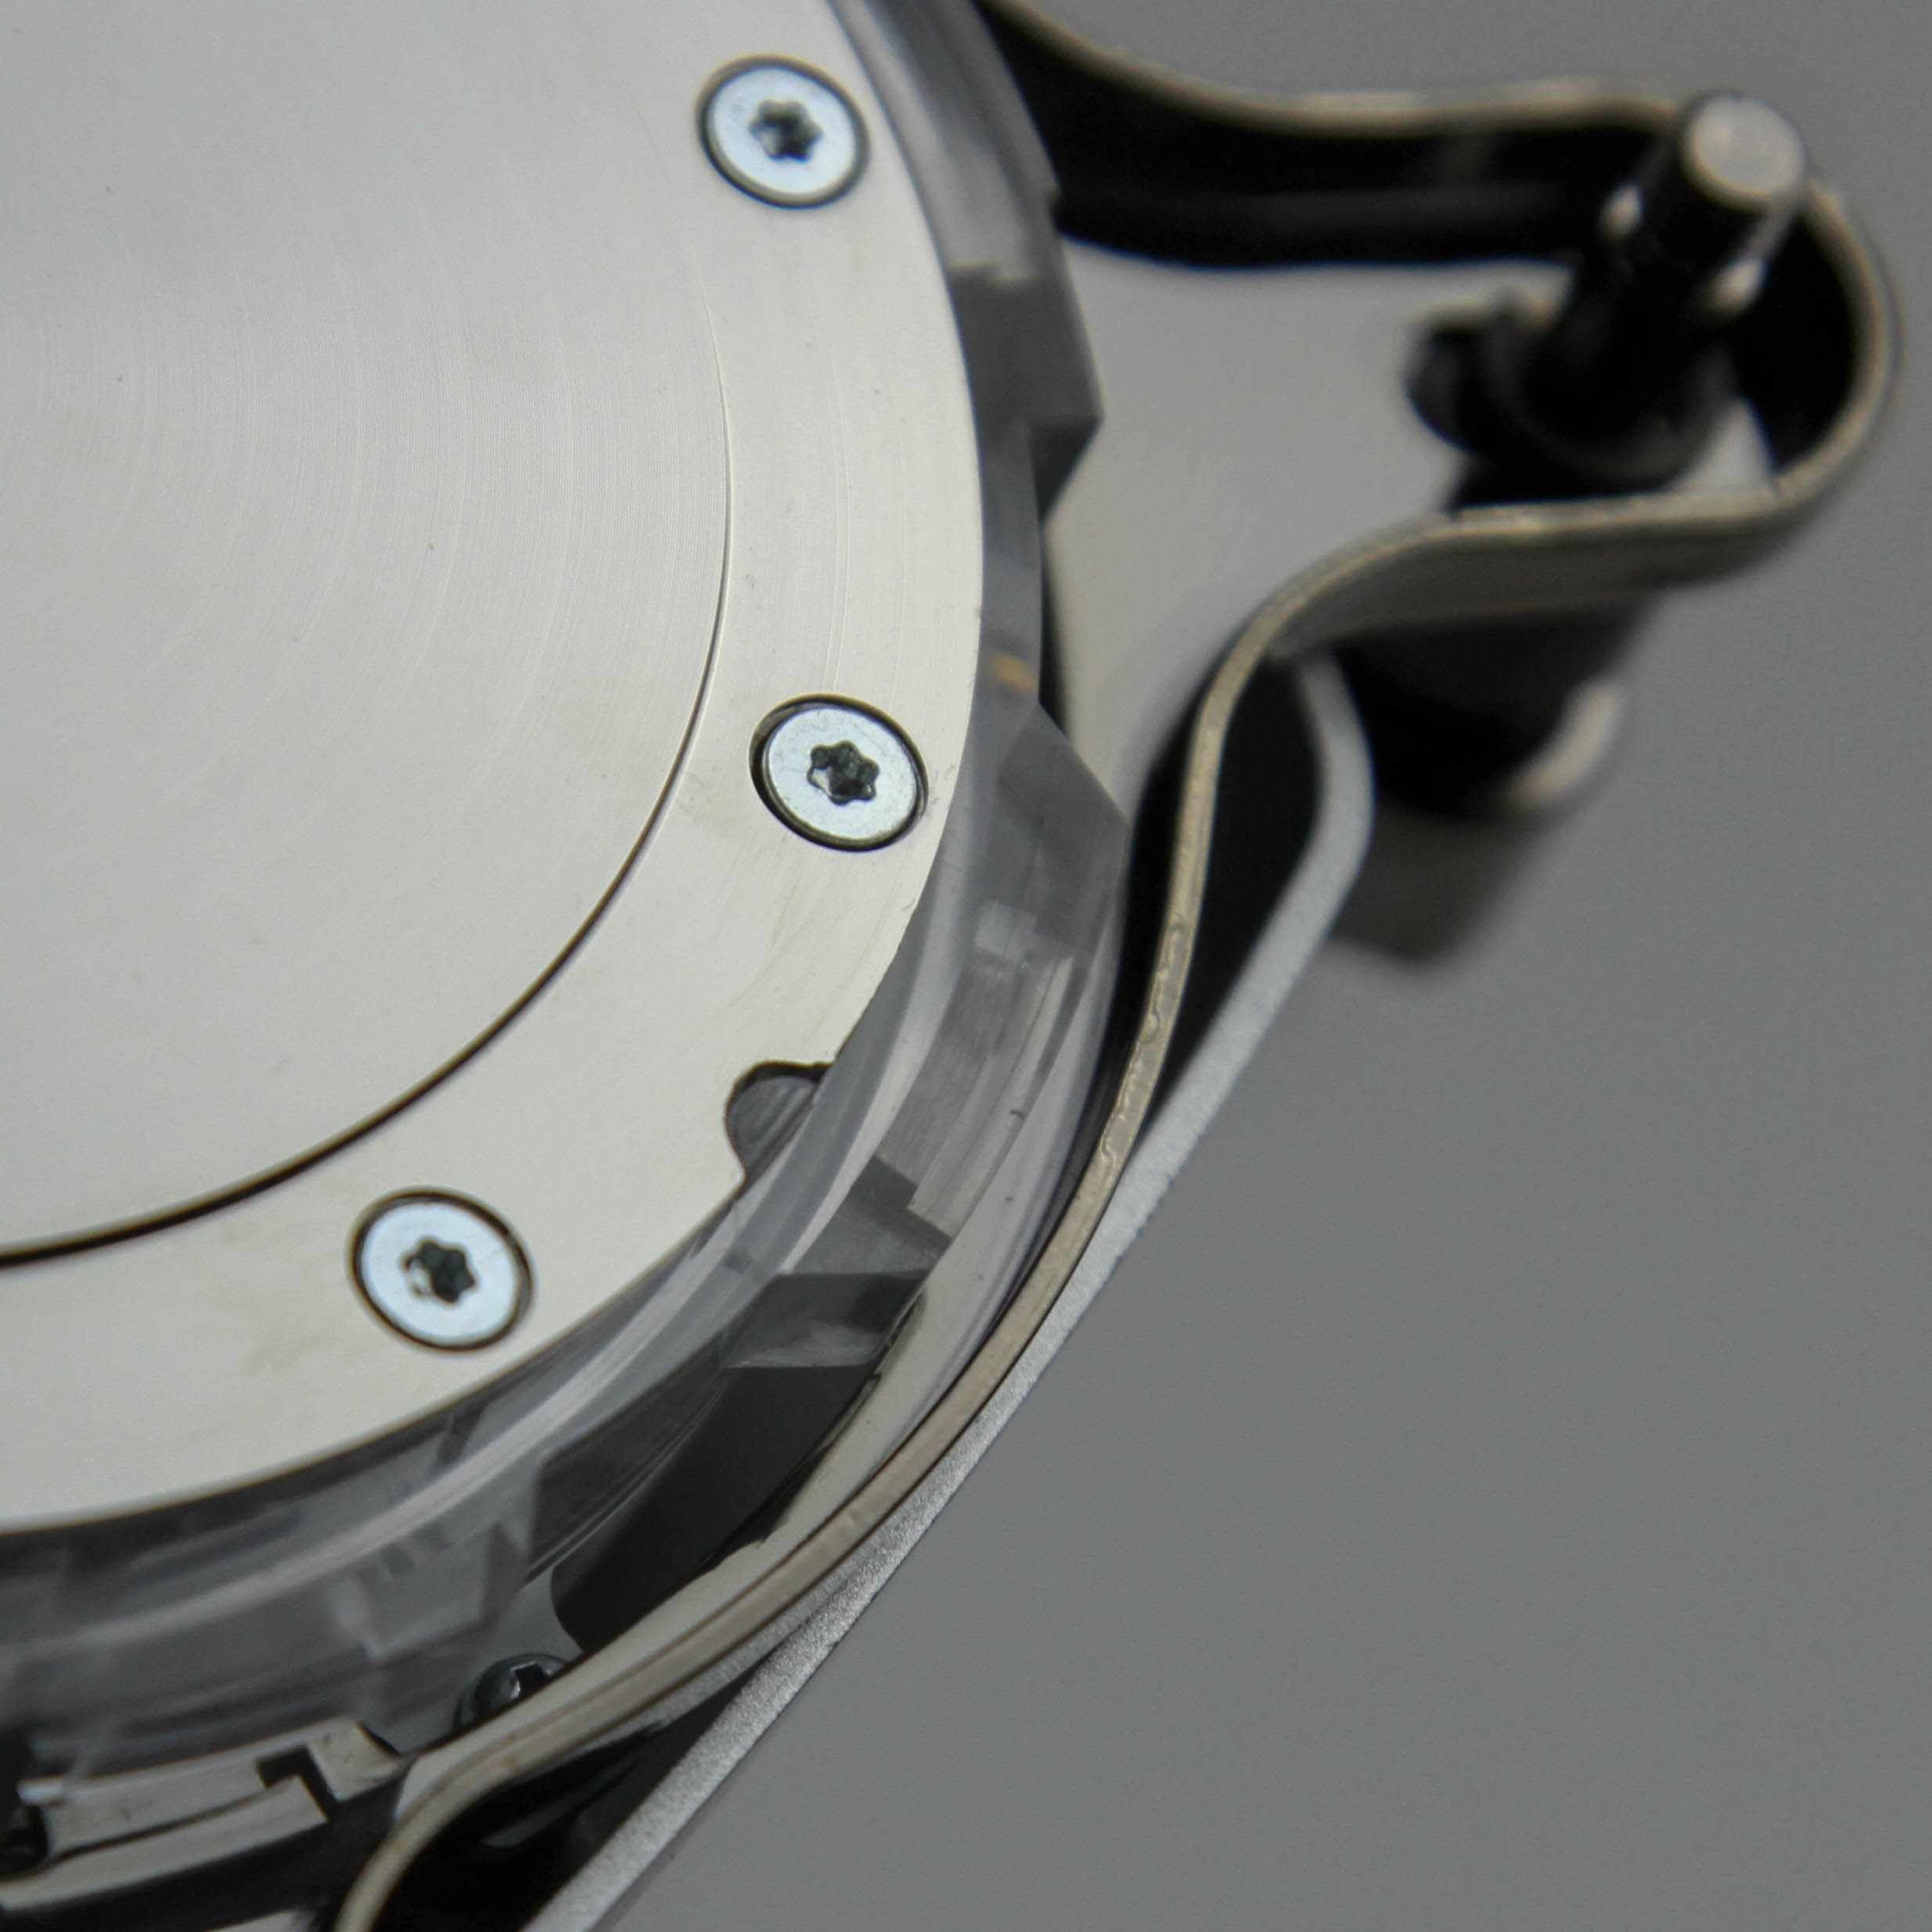
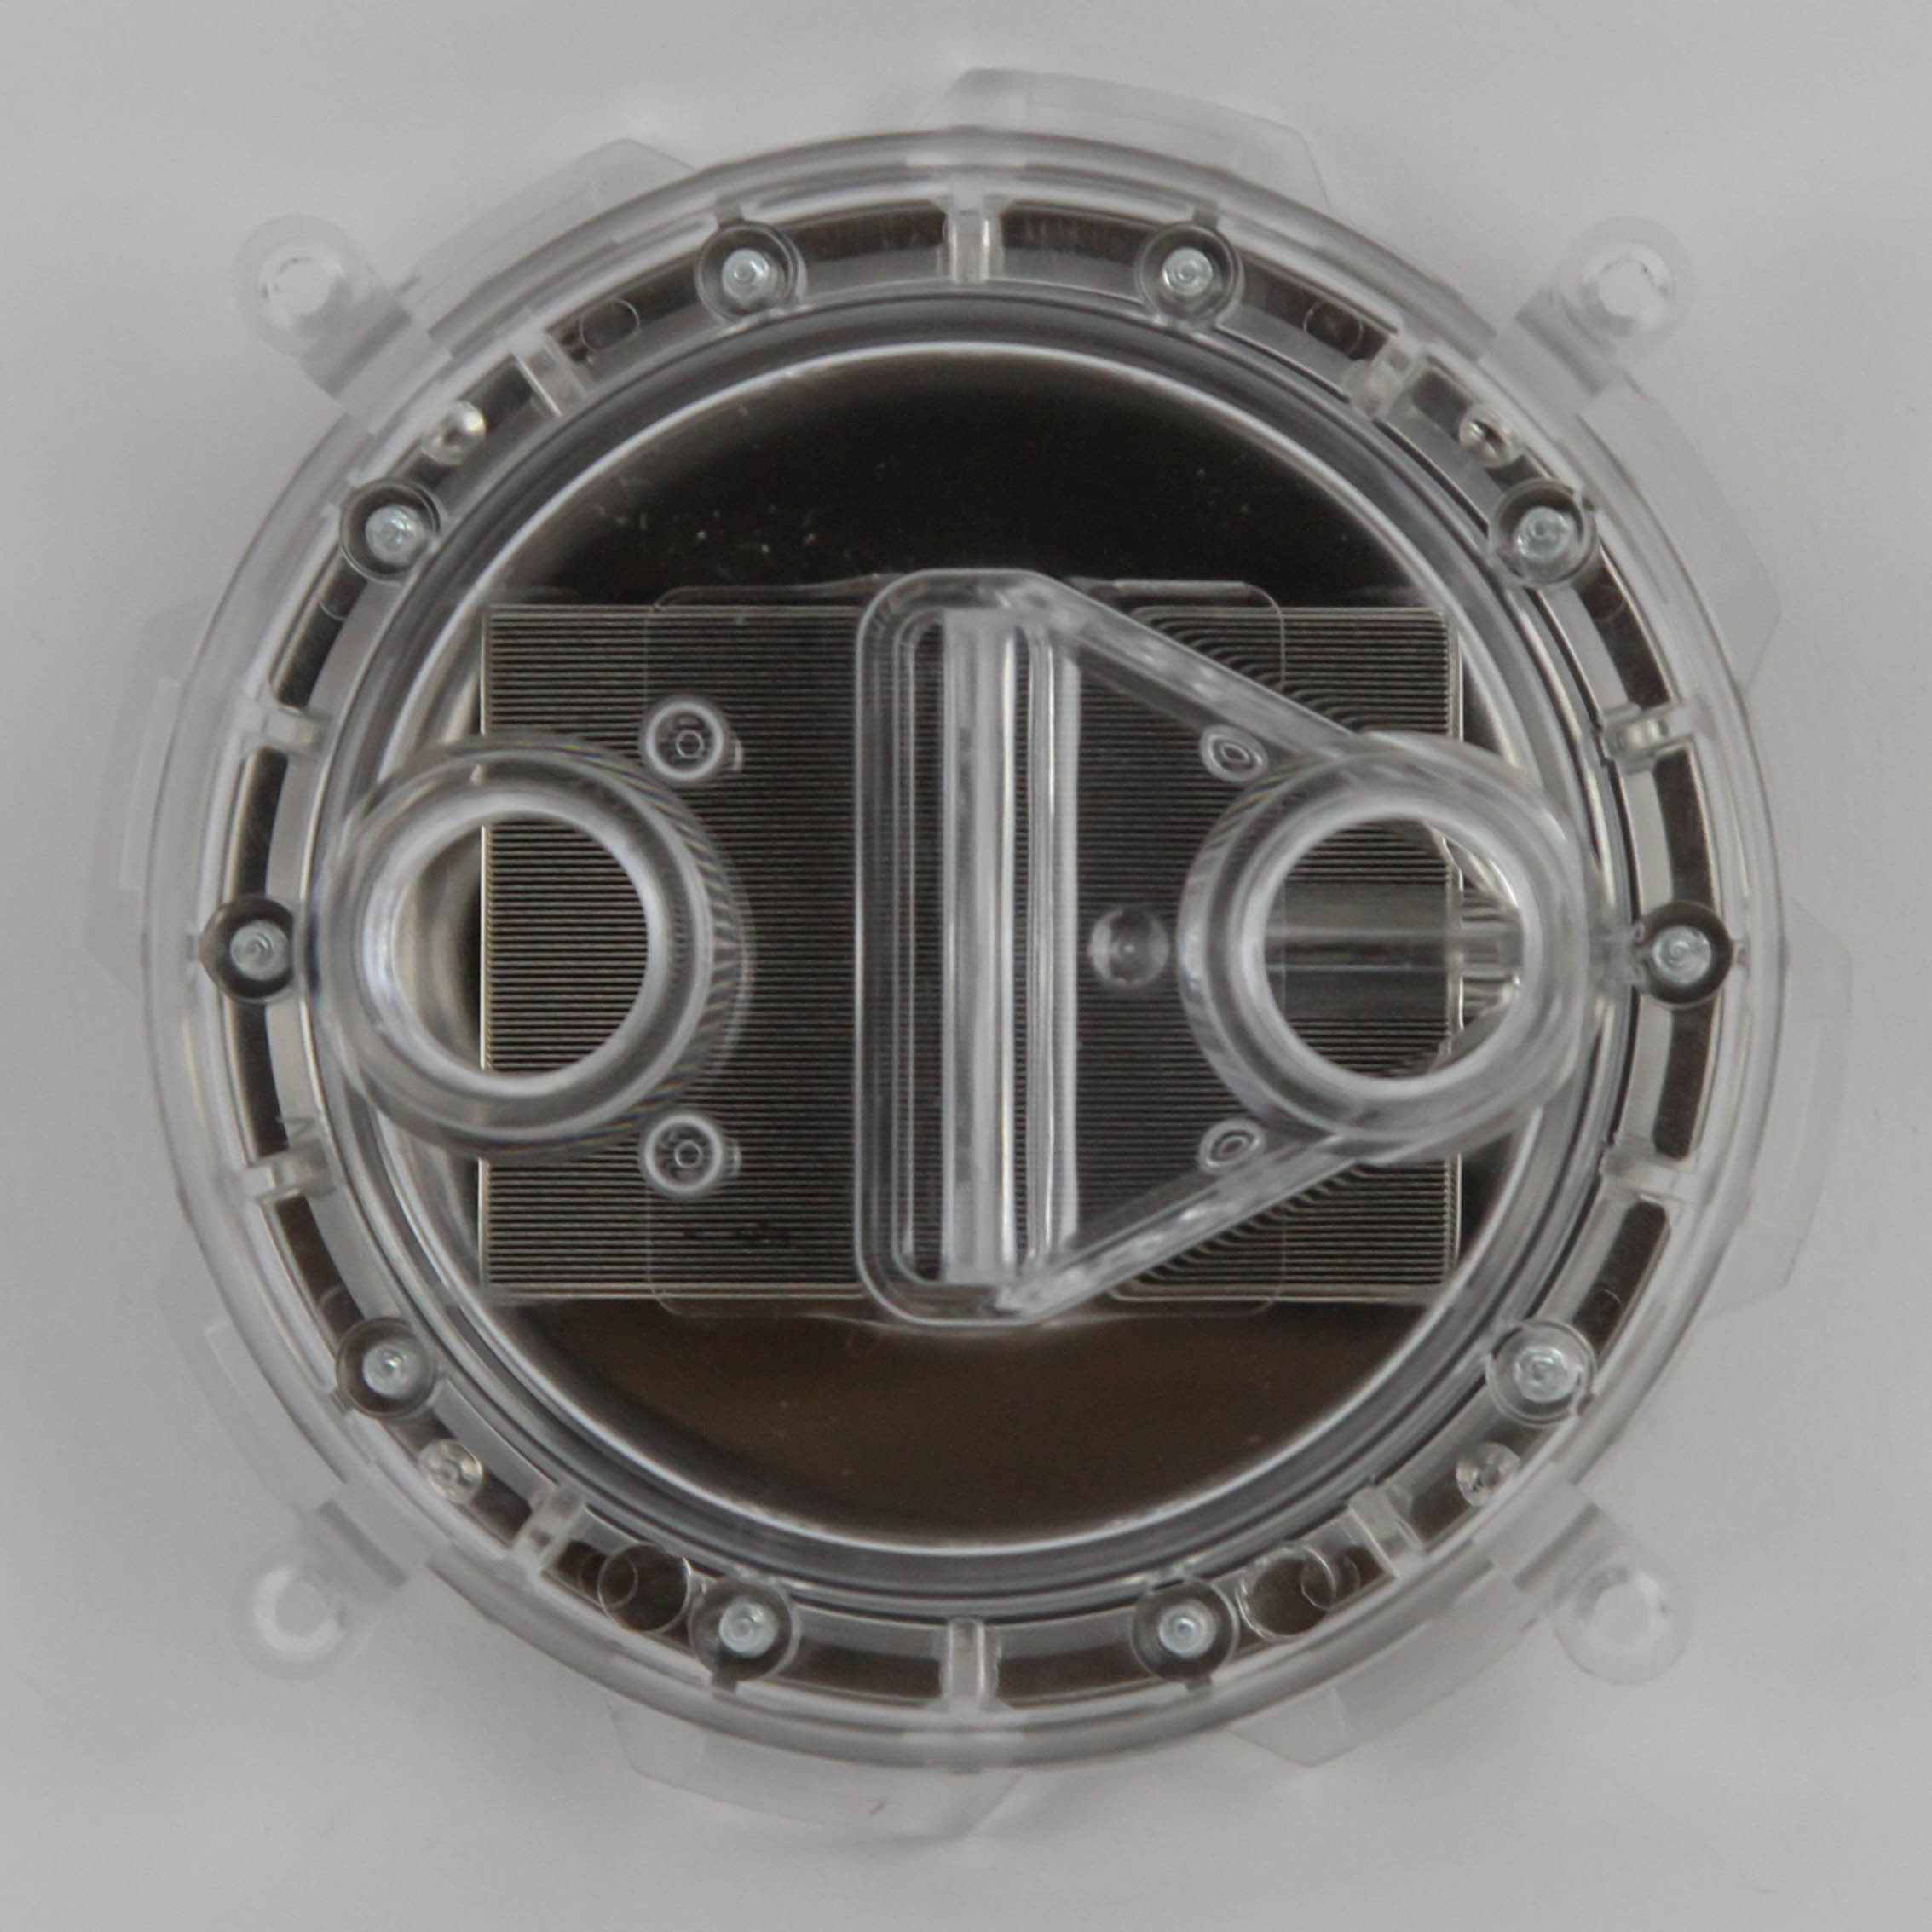
There is a small CORSAIR logo on the bottom, which helps with figuring out the intended orientation of the block. On top are also two BSP G1/4" threaded ports, spaced such that all but the largest of fittings used in this market will fit without issues. The recent trend is to go with smaller tubing and fittings compared to even a few years ago (think 12–14 mm vs. 16–19 mm before), and those will work just fine here. There are no arrows or signs to indicate any preferred inlet or outlet ports. Ideally, you would want the port with the CORSAIR logo at the bottom, on the right, as the inlet port, but you won't lose out on much performance if you have to swap things around for a better plumbing layout. The Intel mounting bracket with mounting hardware pre-installed out of the box provides for a subtle contrast to the silver trim, and we see enough of the transparent nylon top to where a colored coolant will look nice here. Given the nature of the RGB lighting support, however, CORSAIR recommends using a clear coolant and customizing the color scheme via the RGB LEDs instead.
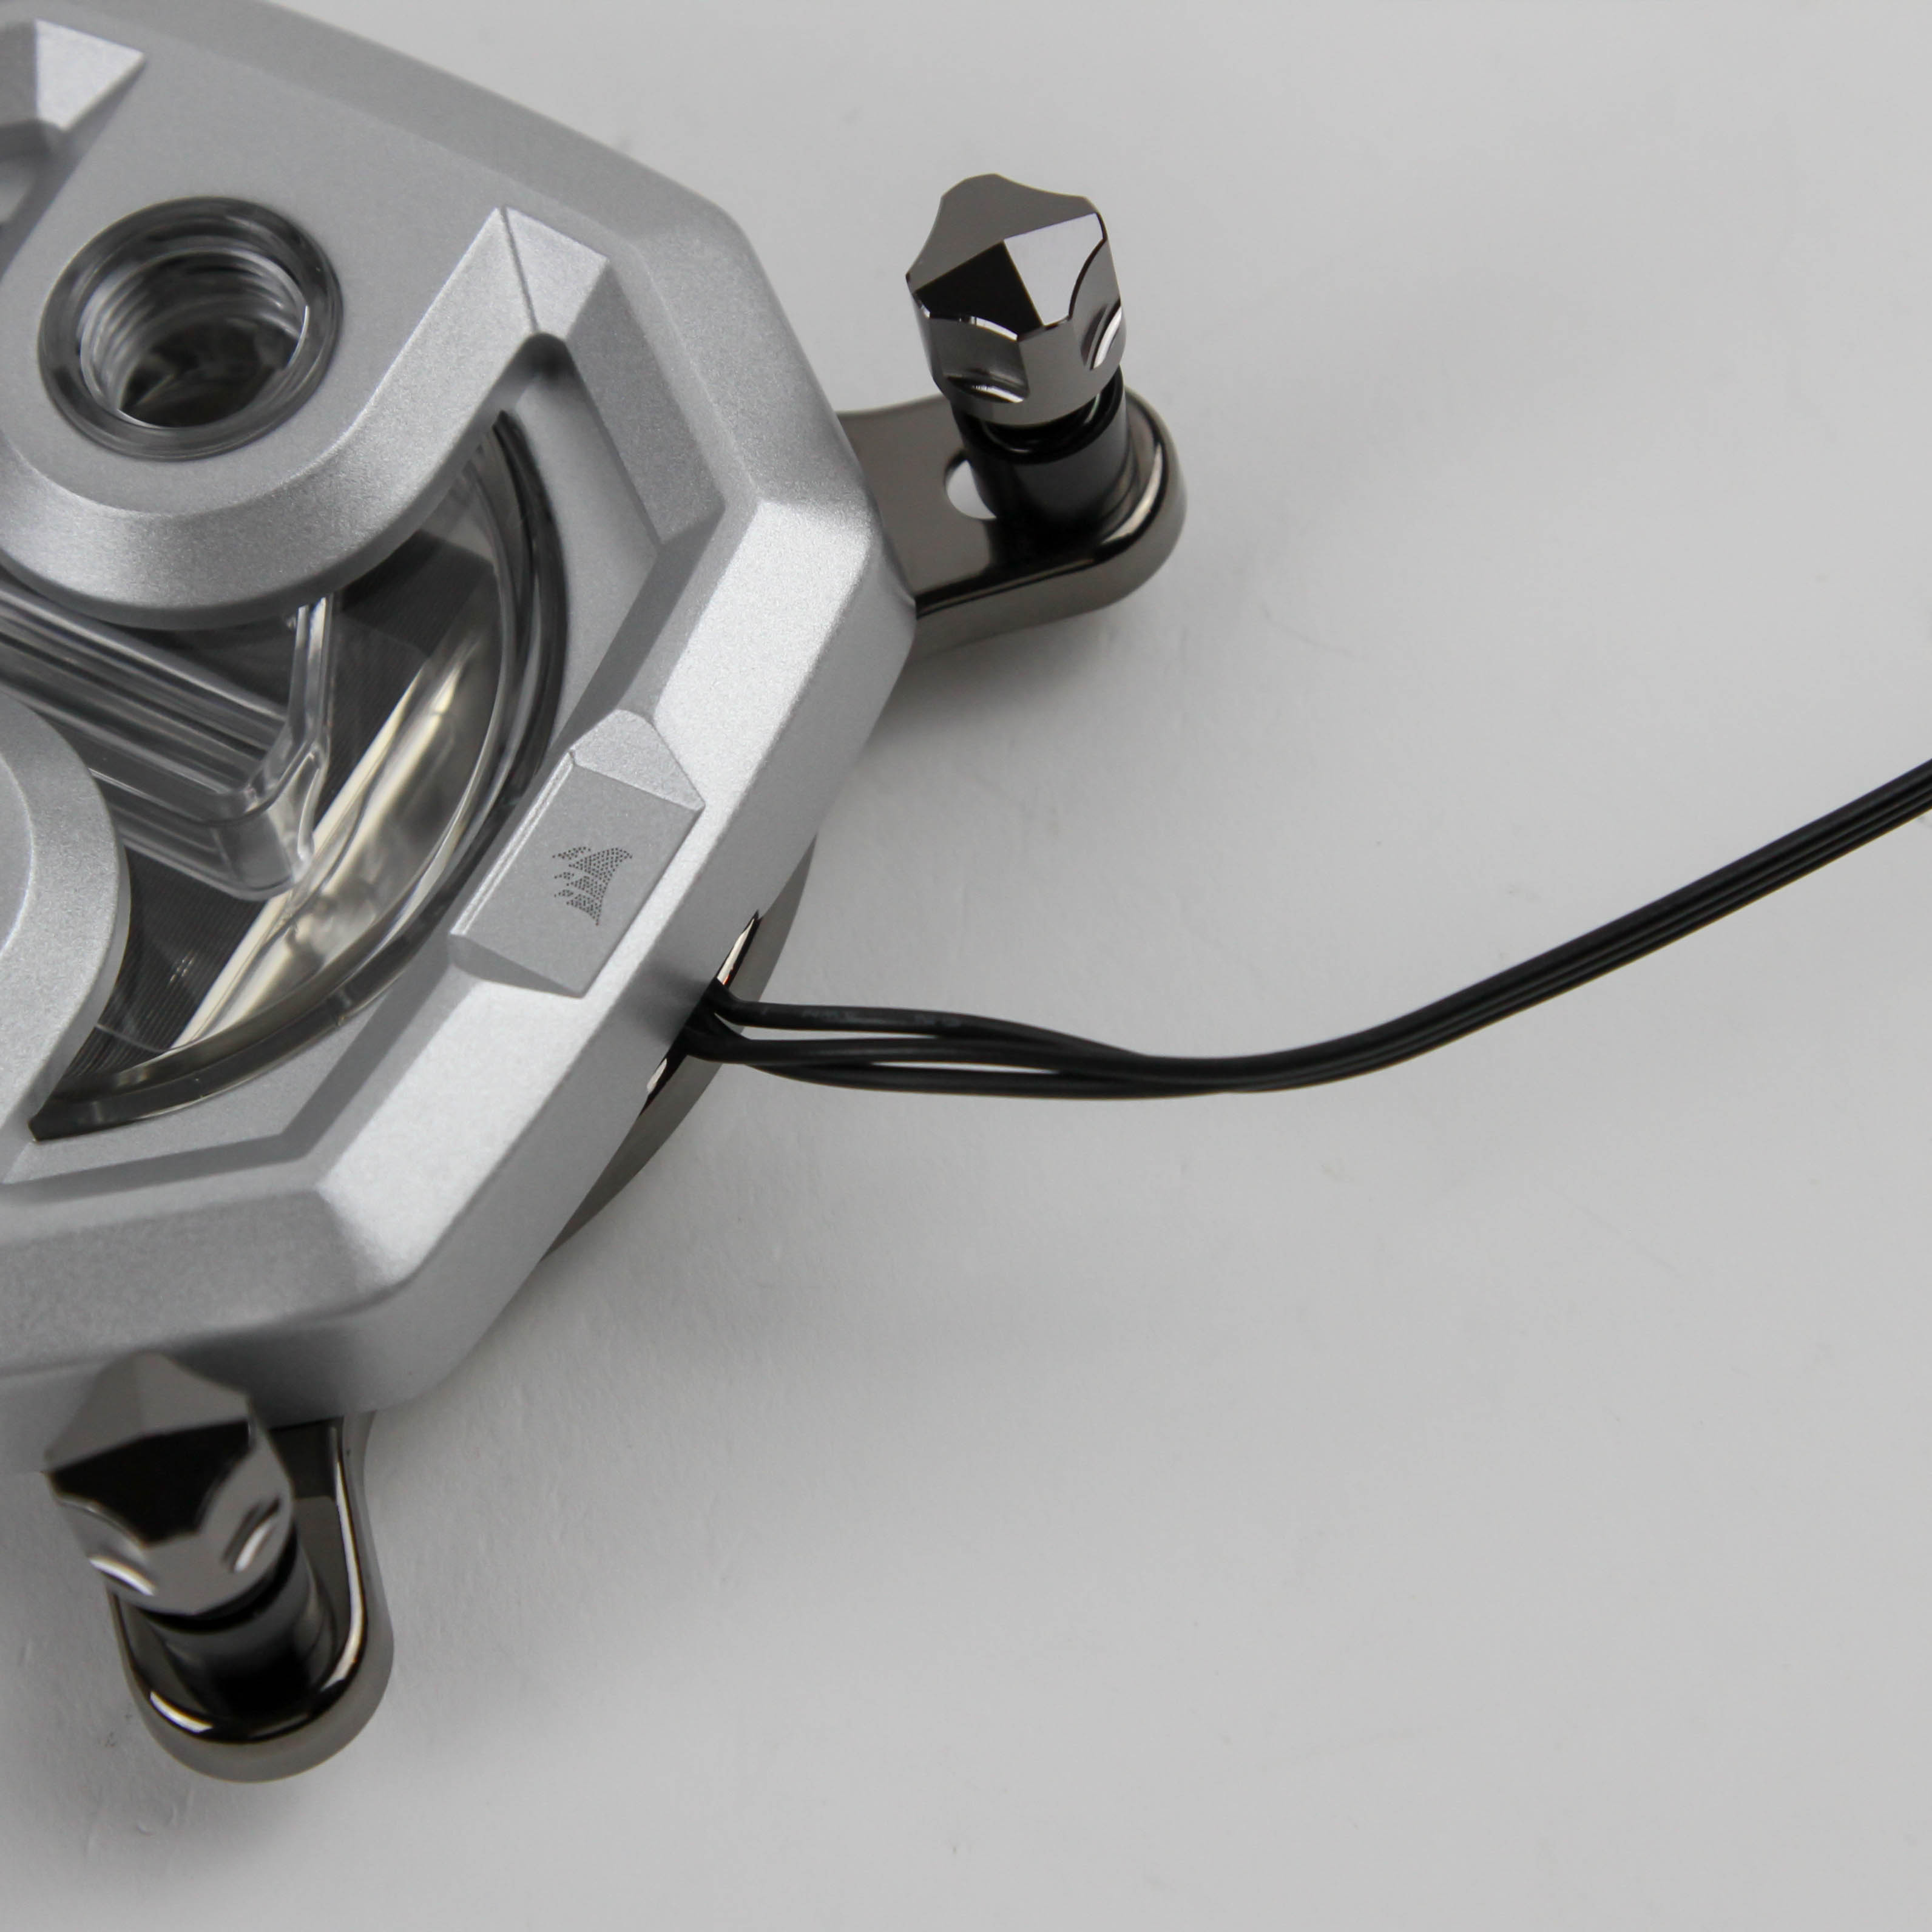
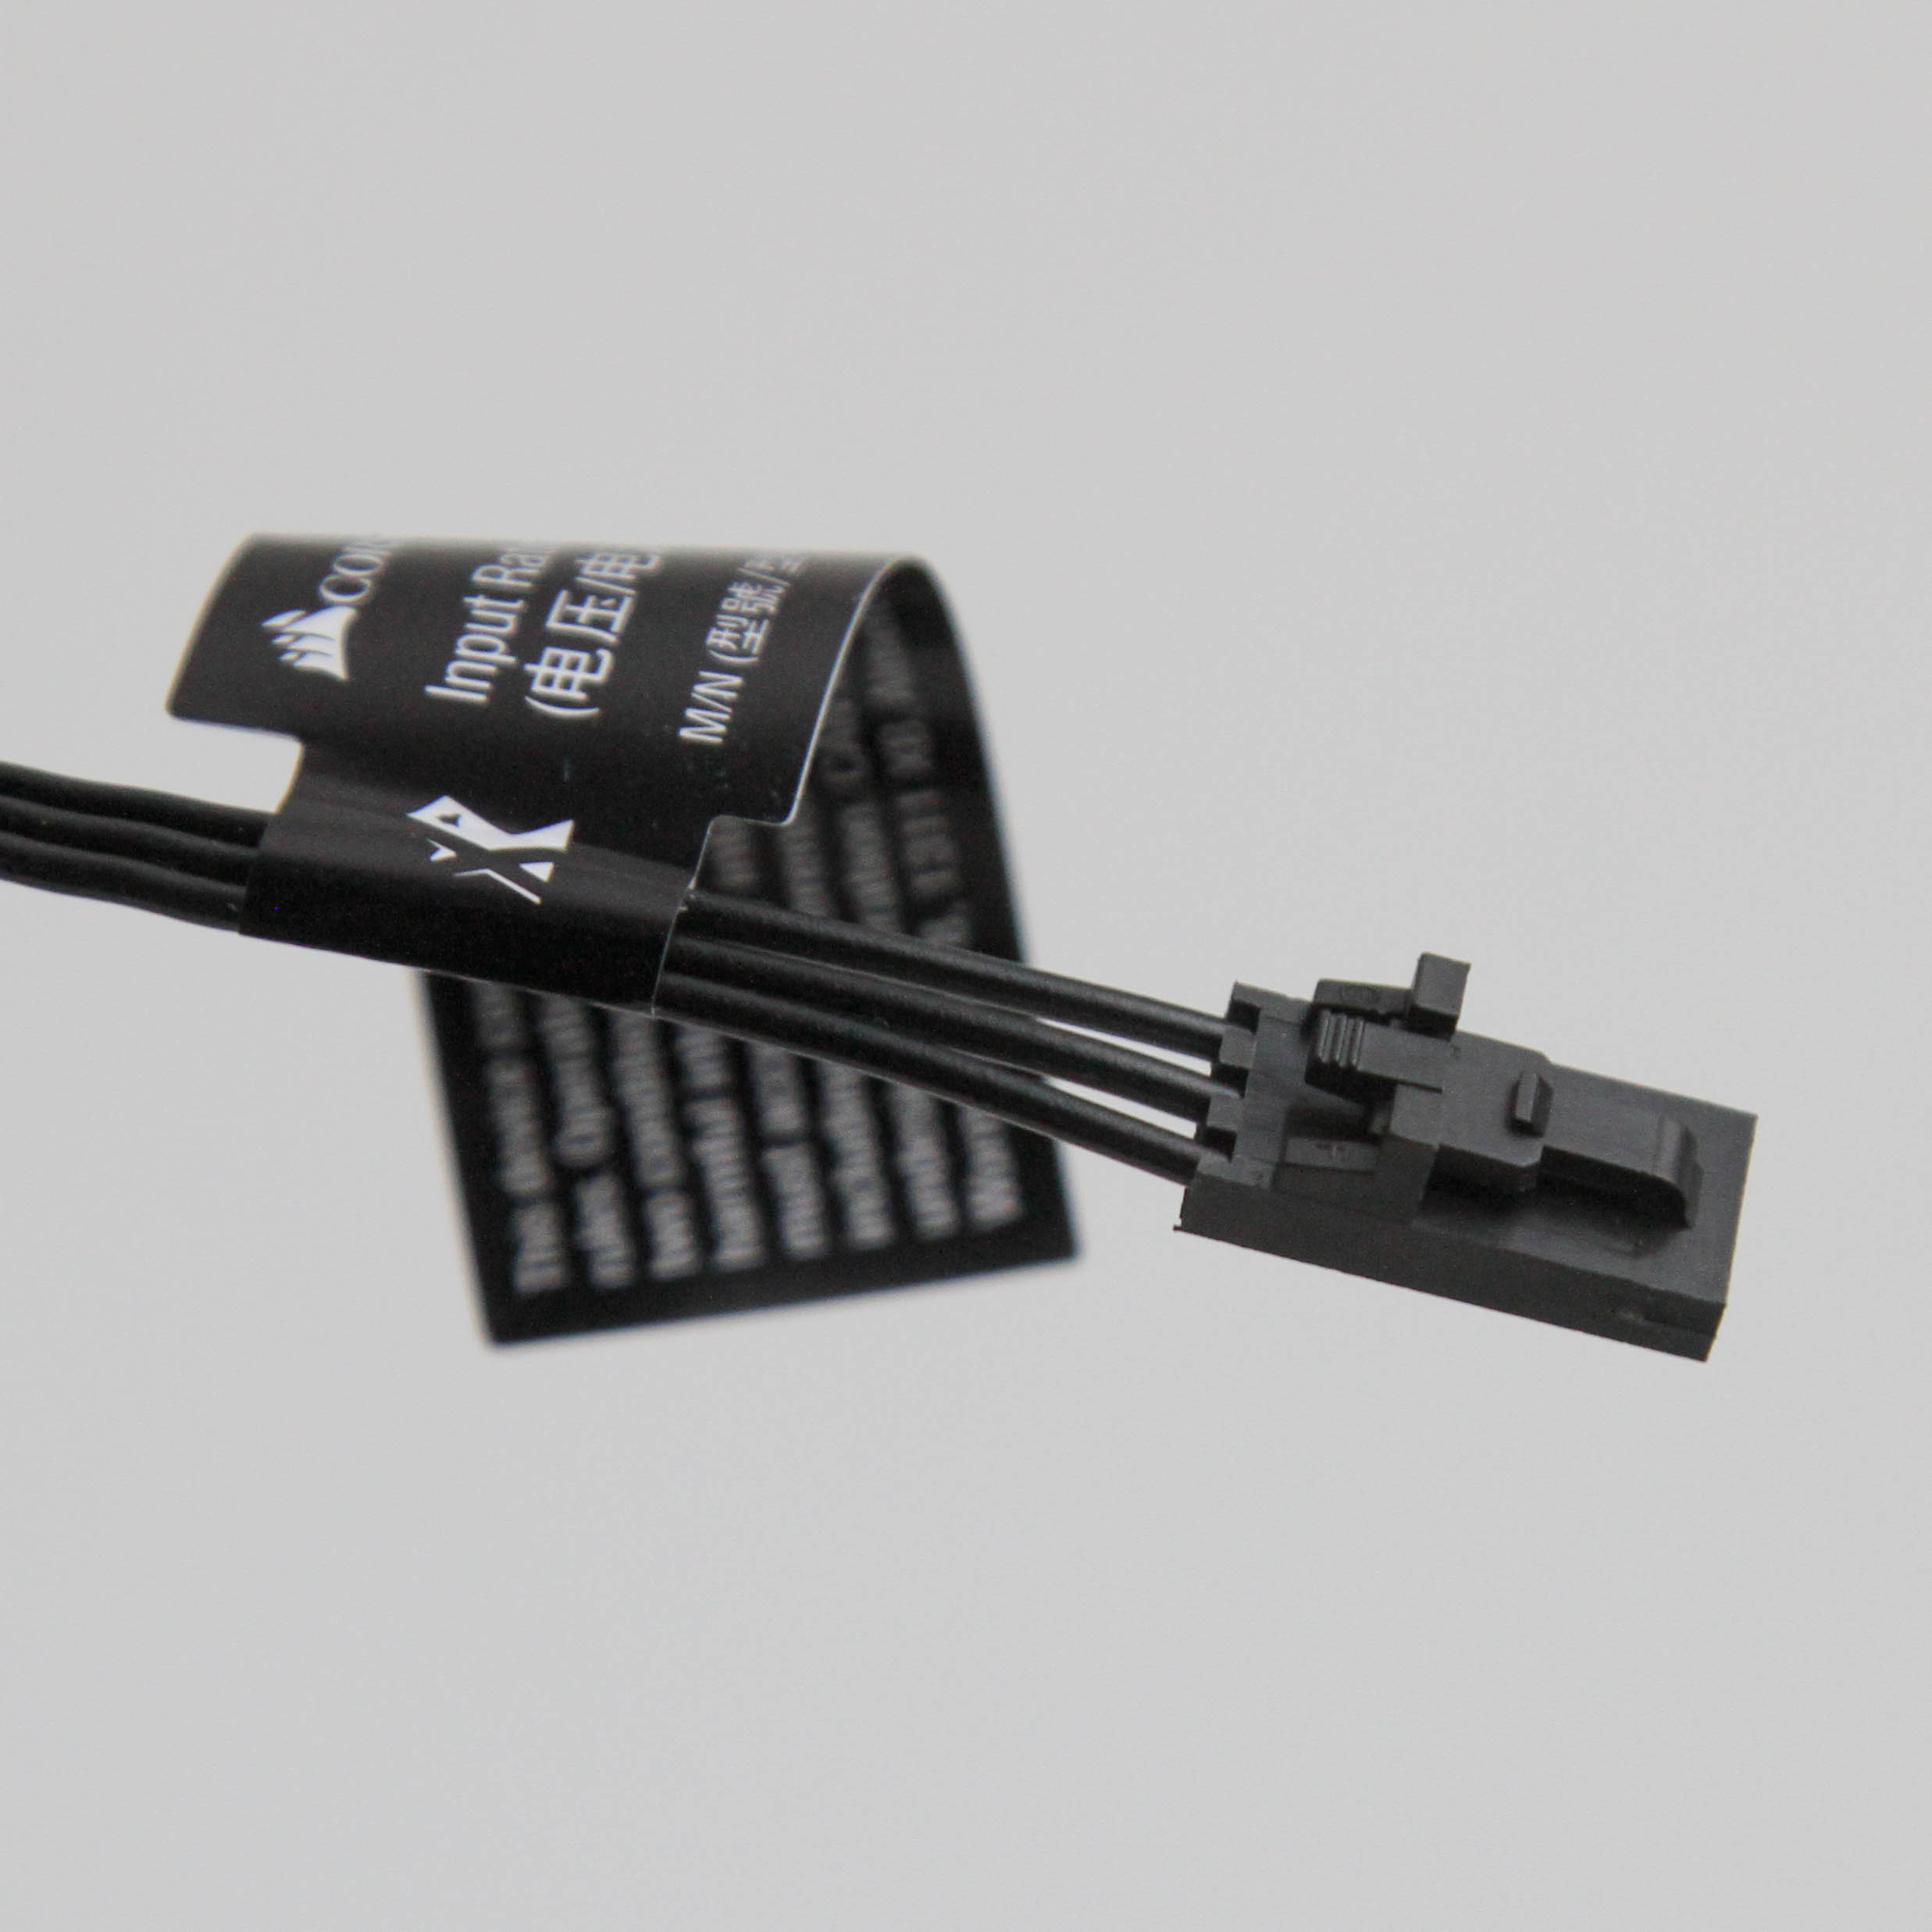
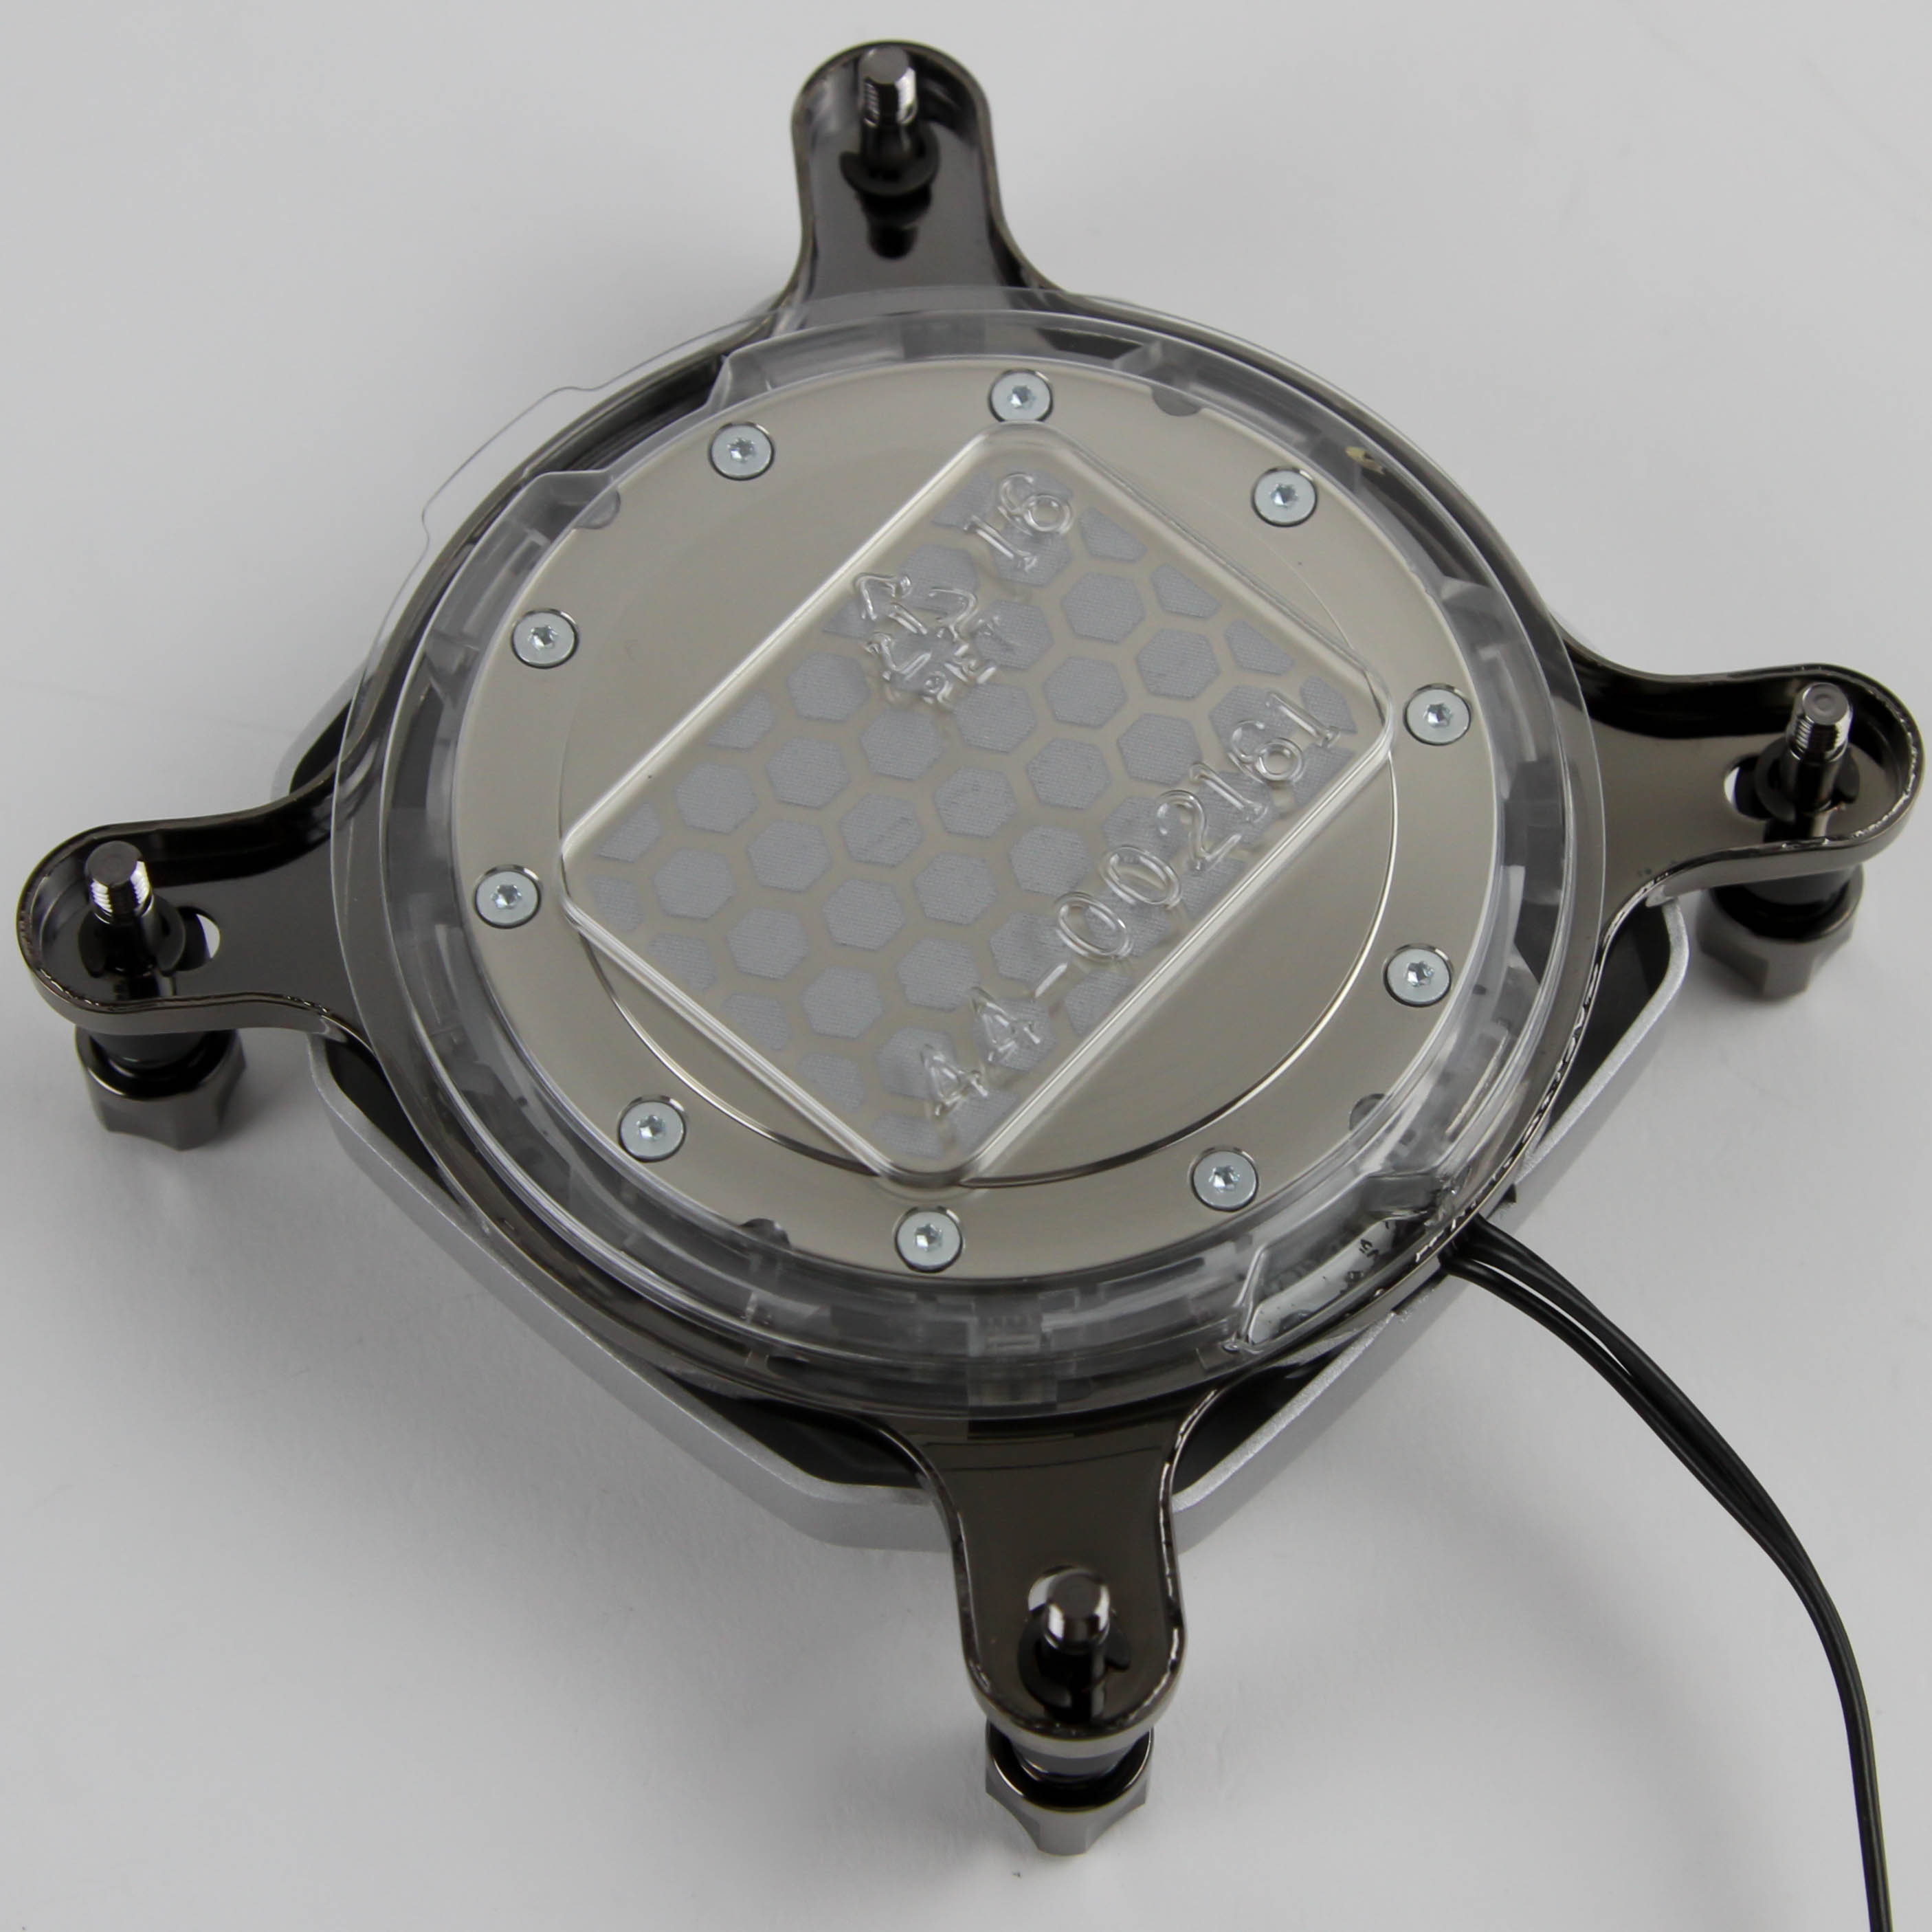
The presence of the LEDs is why we also see a cable with three wires in black insulation jut out on the side—a ribbon-style cable, it is easier than a regular cable to route/hide accordingly as well. It terminates in a connector specifically meant for CORSAIR's Commander PRO or Lighting Node PRO instead of an addressable 5 V RGB header on your motherboard as you may have thought. CORSAIR wants to have people in their own ecosystem, which arguably is big and polished enough to merit consideration, but giving people the option to use it with a motherboard would be nice, especially since the CORSAIR solution is an additional purchase.
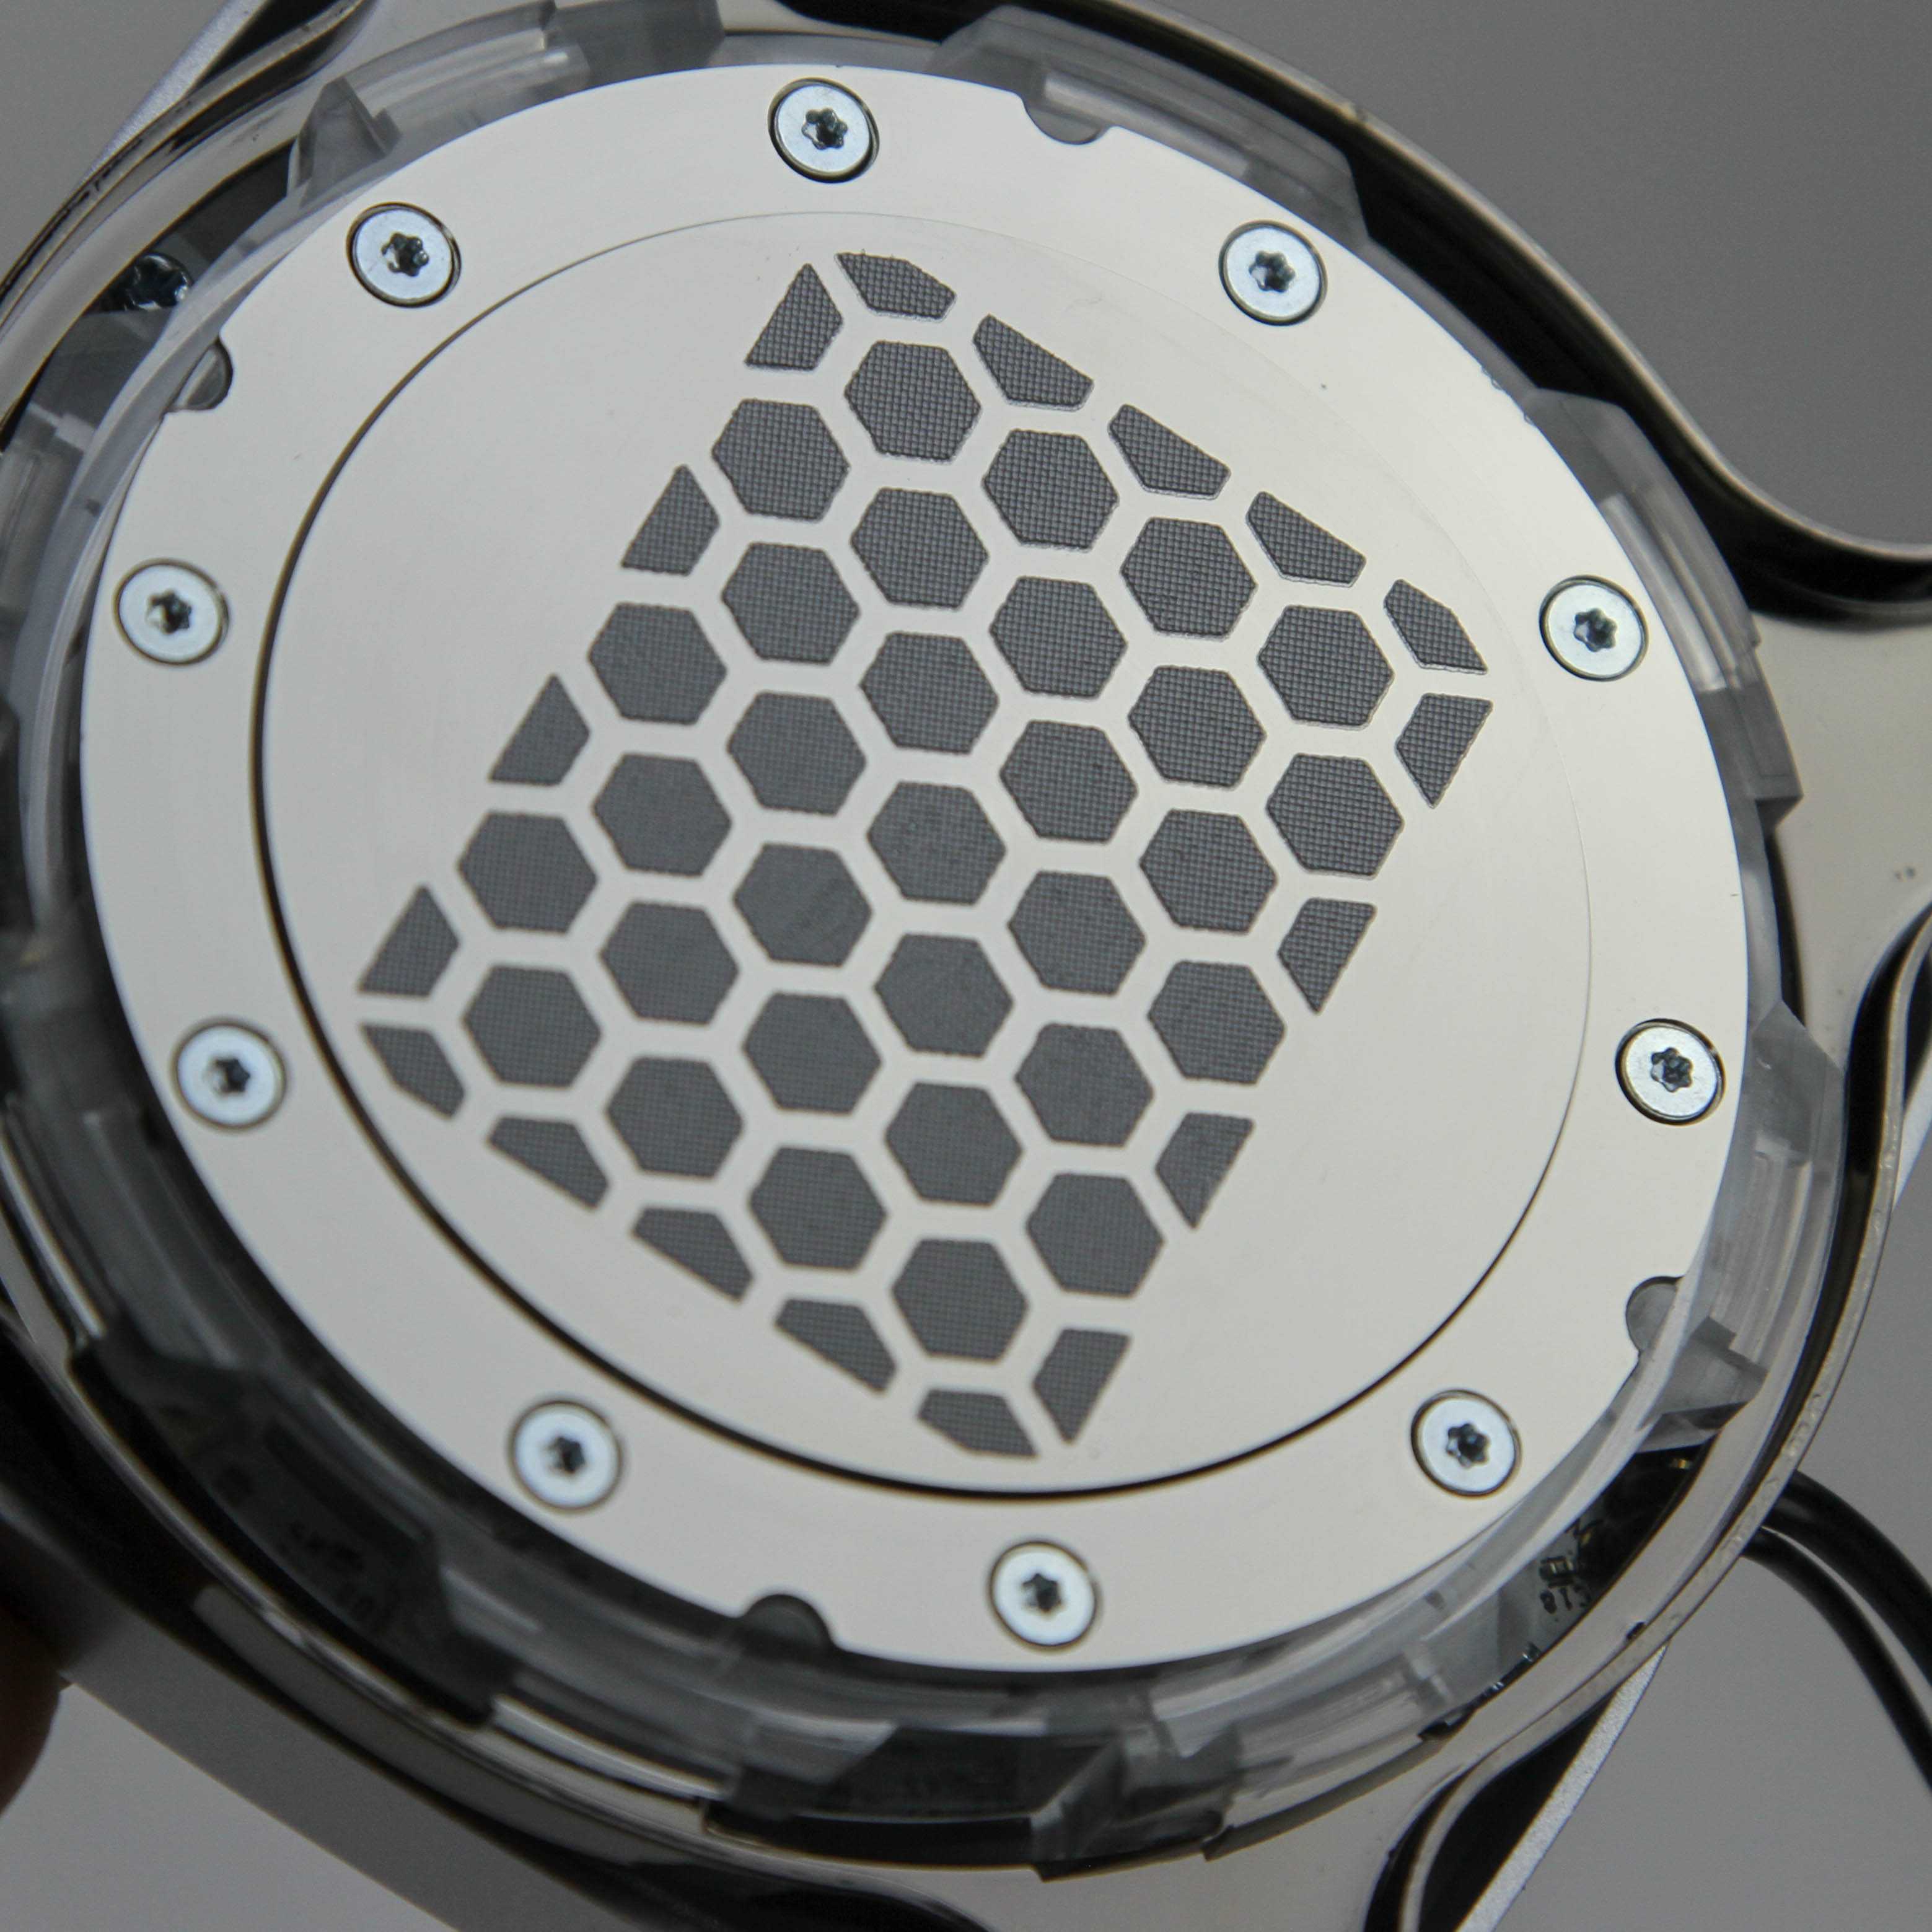
Flipping the block over, we see a plastic cover to help protect the cold plate during transit. The cold plate also has pre-applied thermal paste in a hexagonal fashion with gaps in between, such that the gaps would fill out as you install and apply pressure on the cold plate. This does mean you have a one-time application only and would need to buy thermal paste separately if you mess it up, do maintenance on the watercooling loop, or simply switch hardware later on.
Given I test each CPU water block multiple times for statistical accuracy and to negate any individual mounting errors, I had to remove the pre-applied thermal paste, which resulted in a better look at the cold plate surface that touches the CPU IHS. It is on the larger side of things as far as CPU blocks go. There is no mirror finish here, which really is immaterial as long as the two surfaces mate well, and the entire design takes cues from Asetek in more ways than one. This includes the notches and twists to help install/remove the mounting bracket in a very similar manner, which keeps things easy for the average user, but does result in some give.

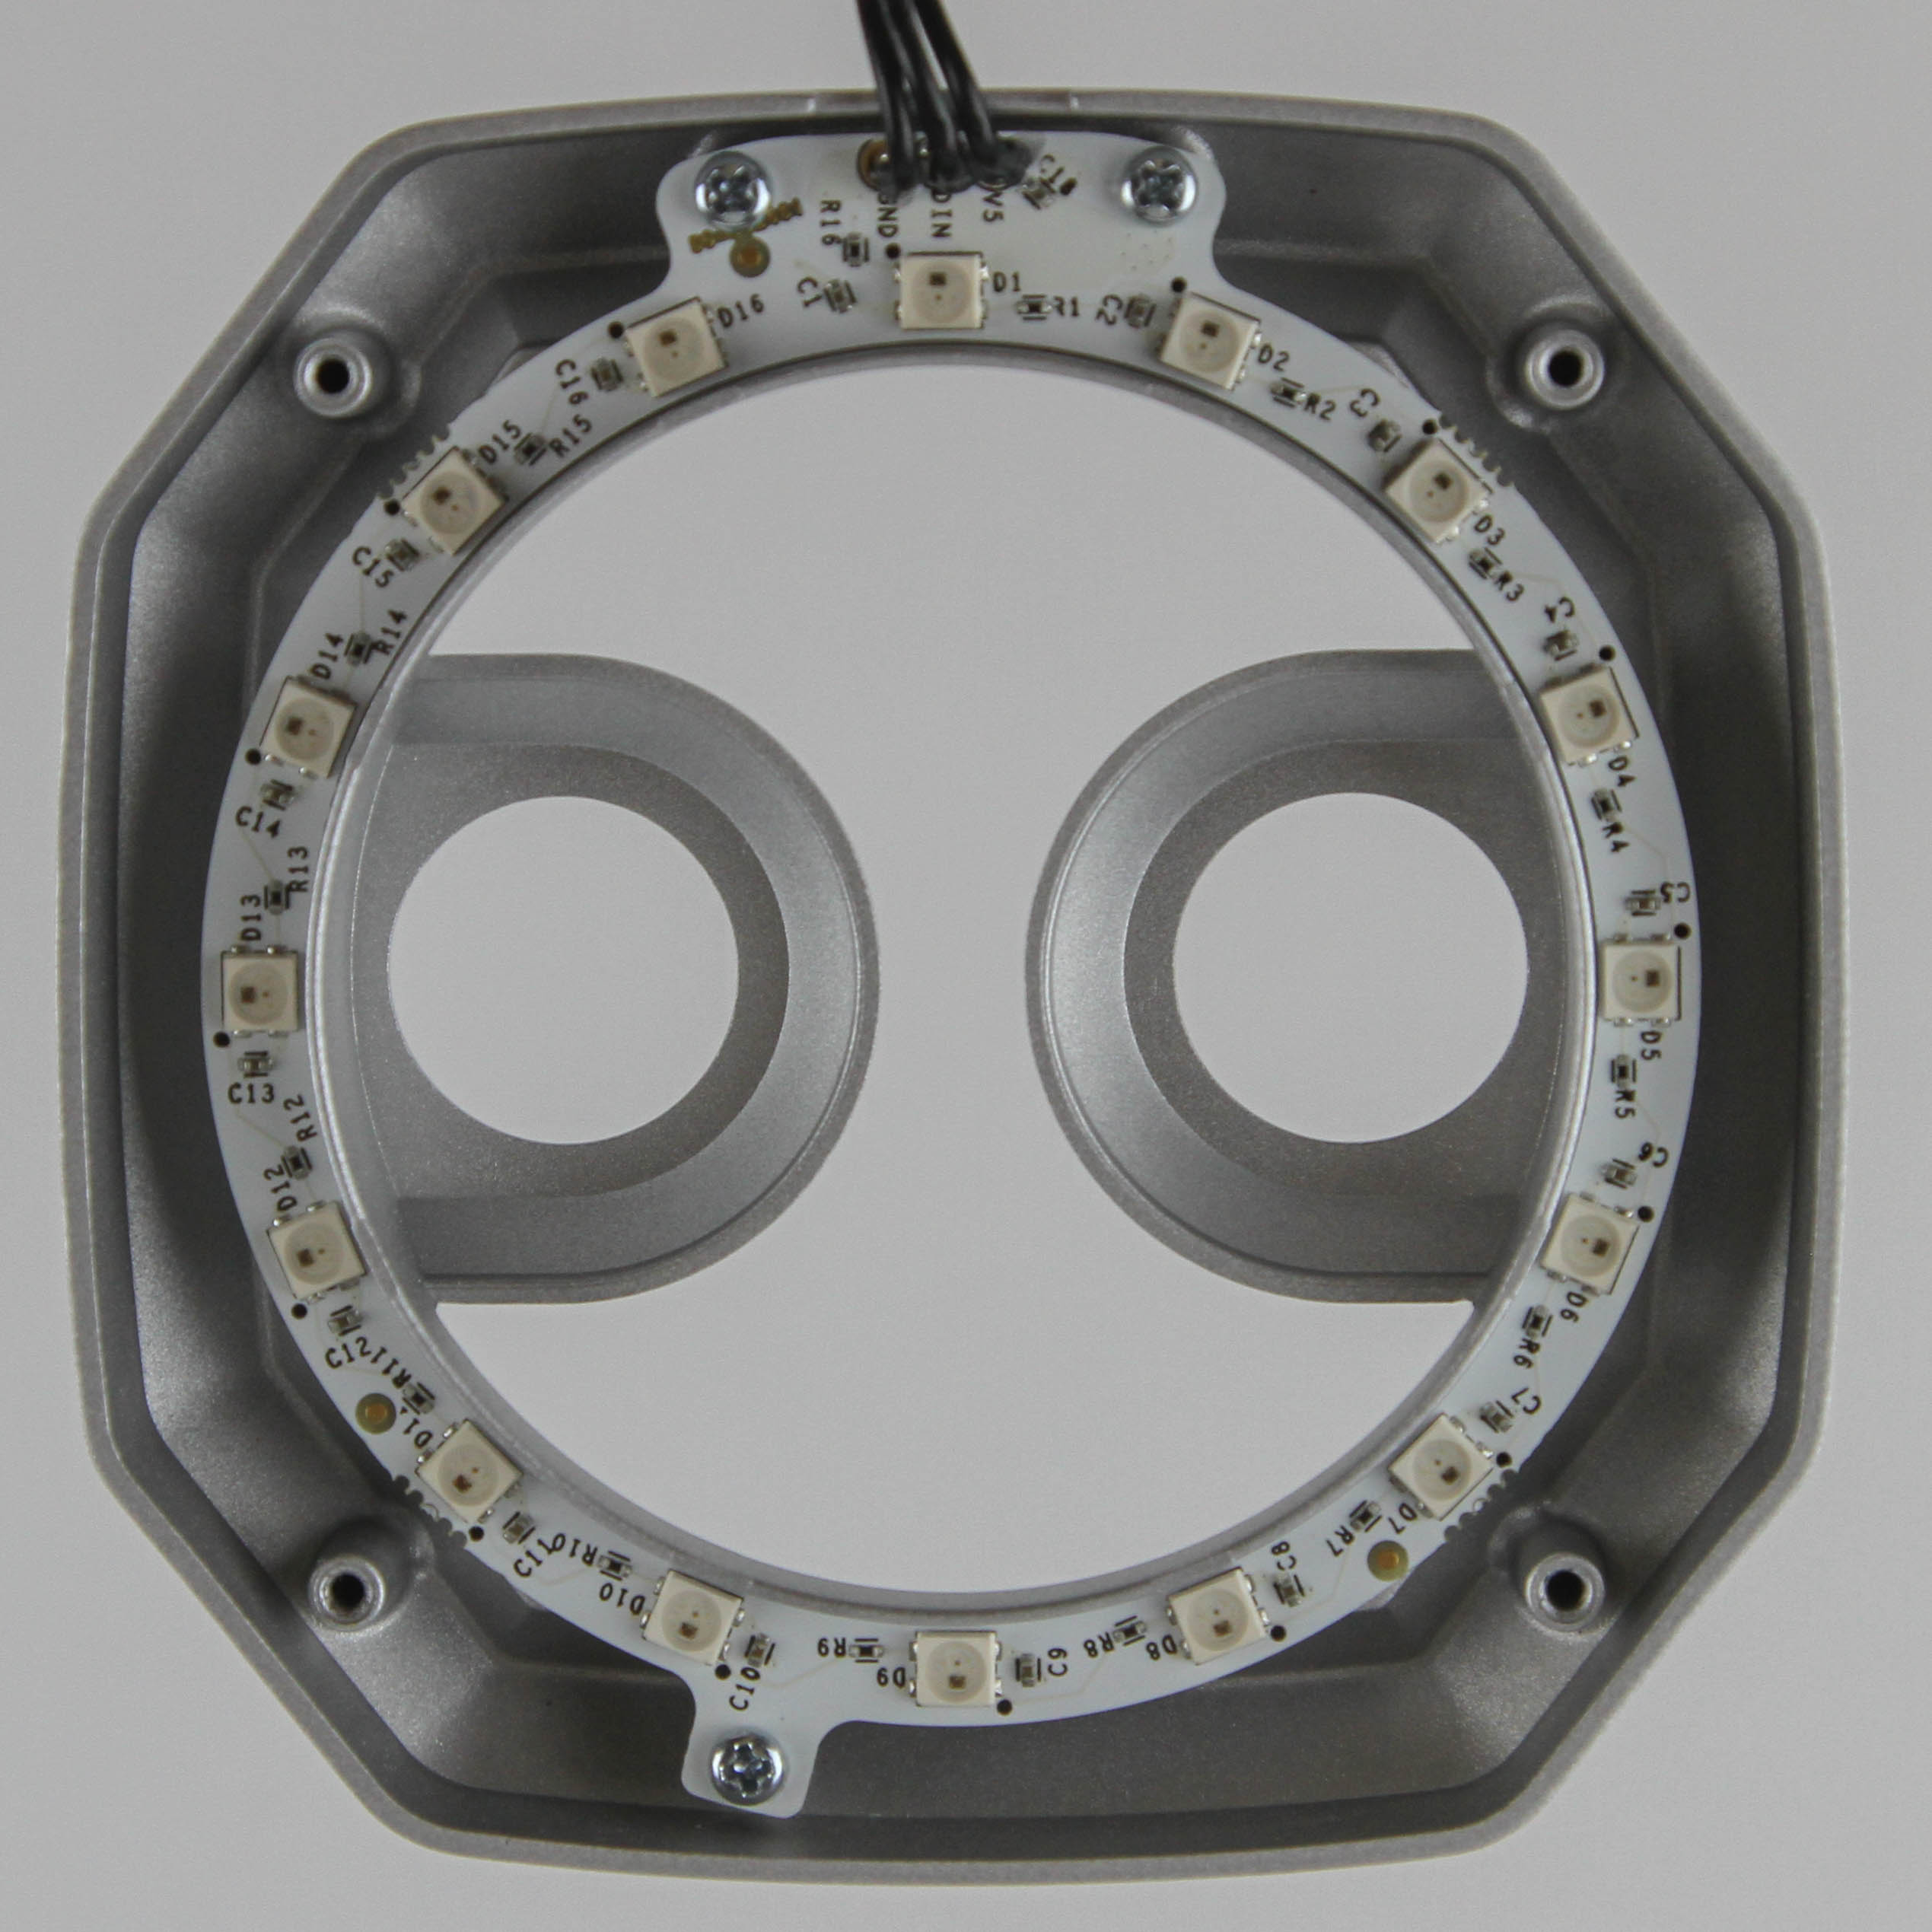
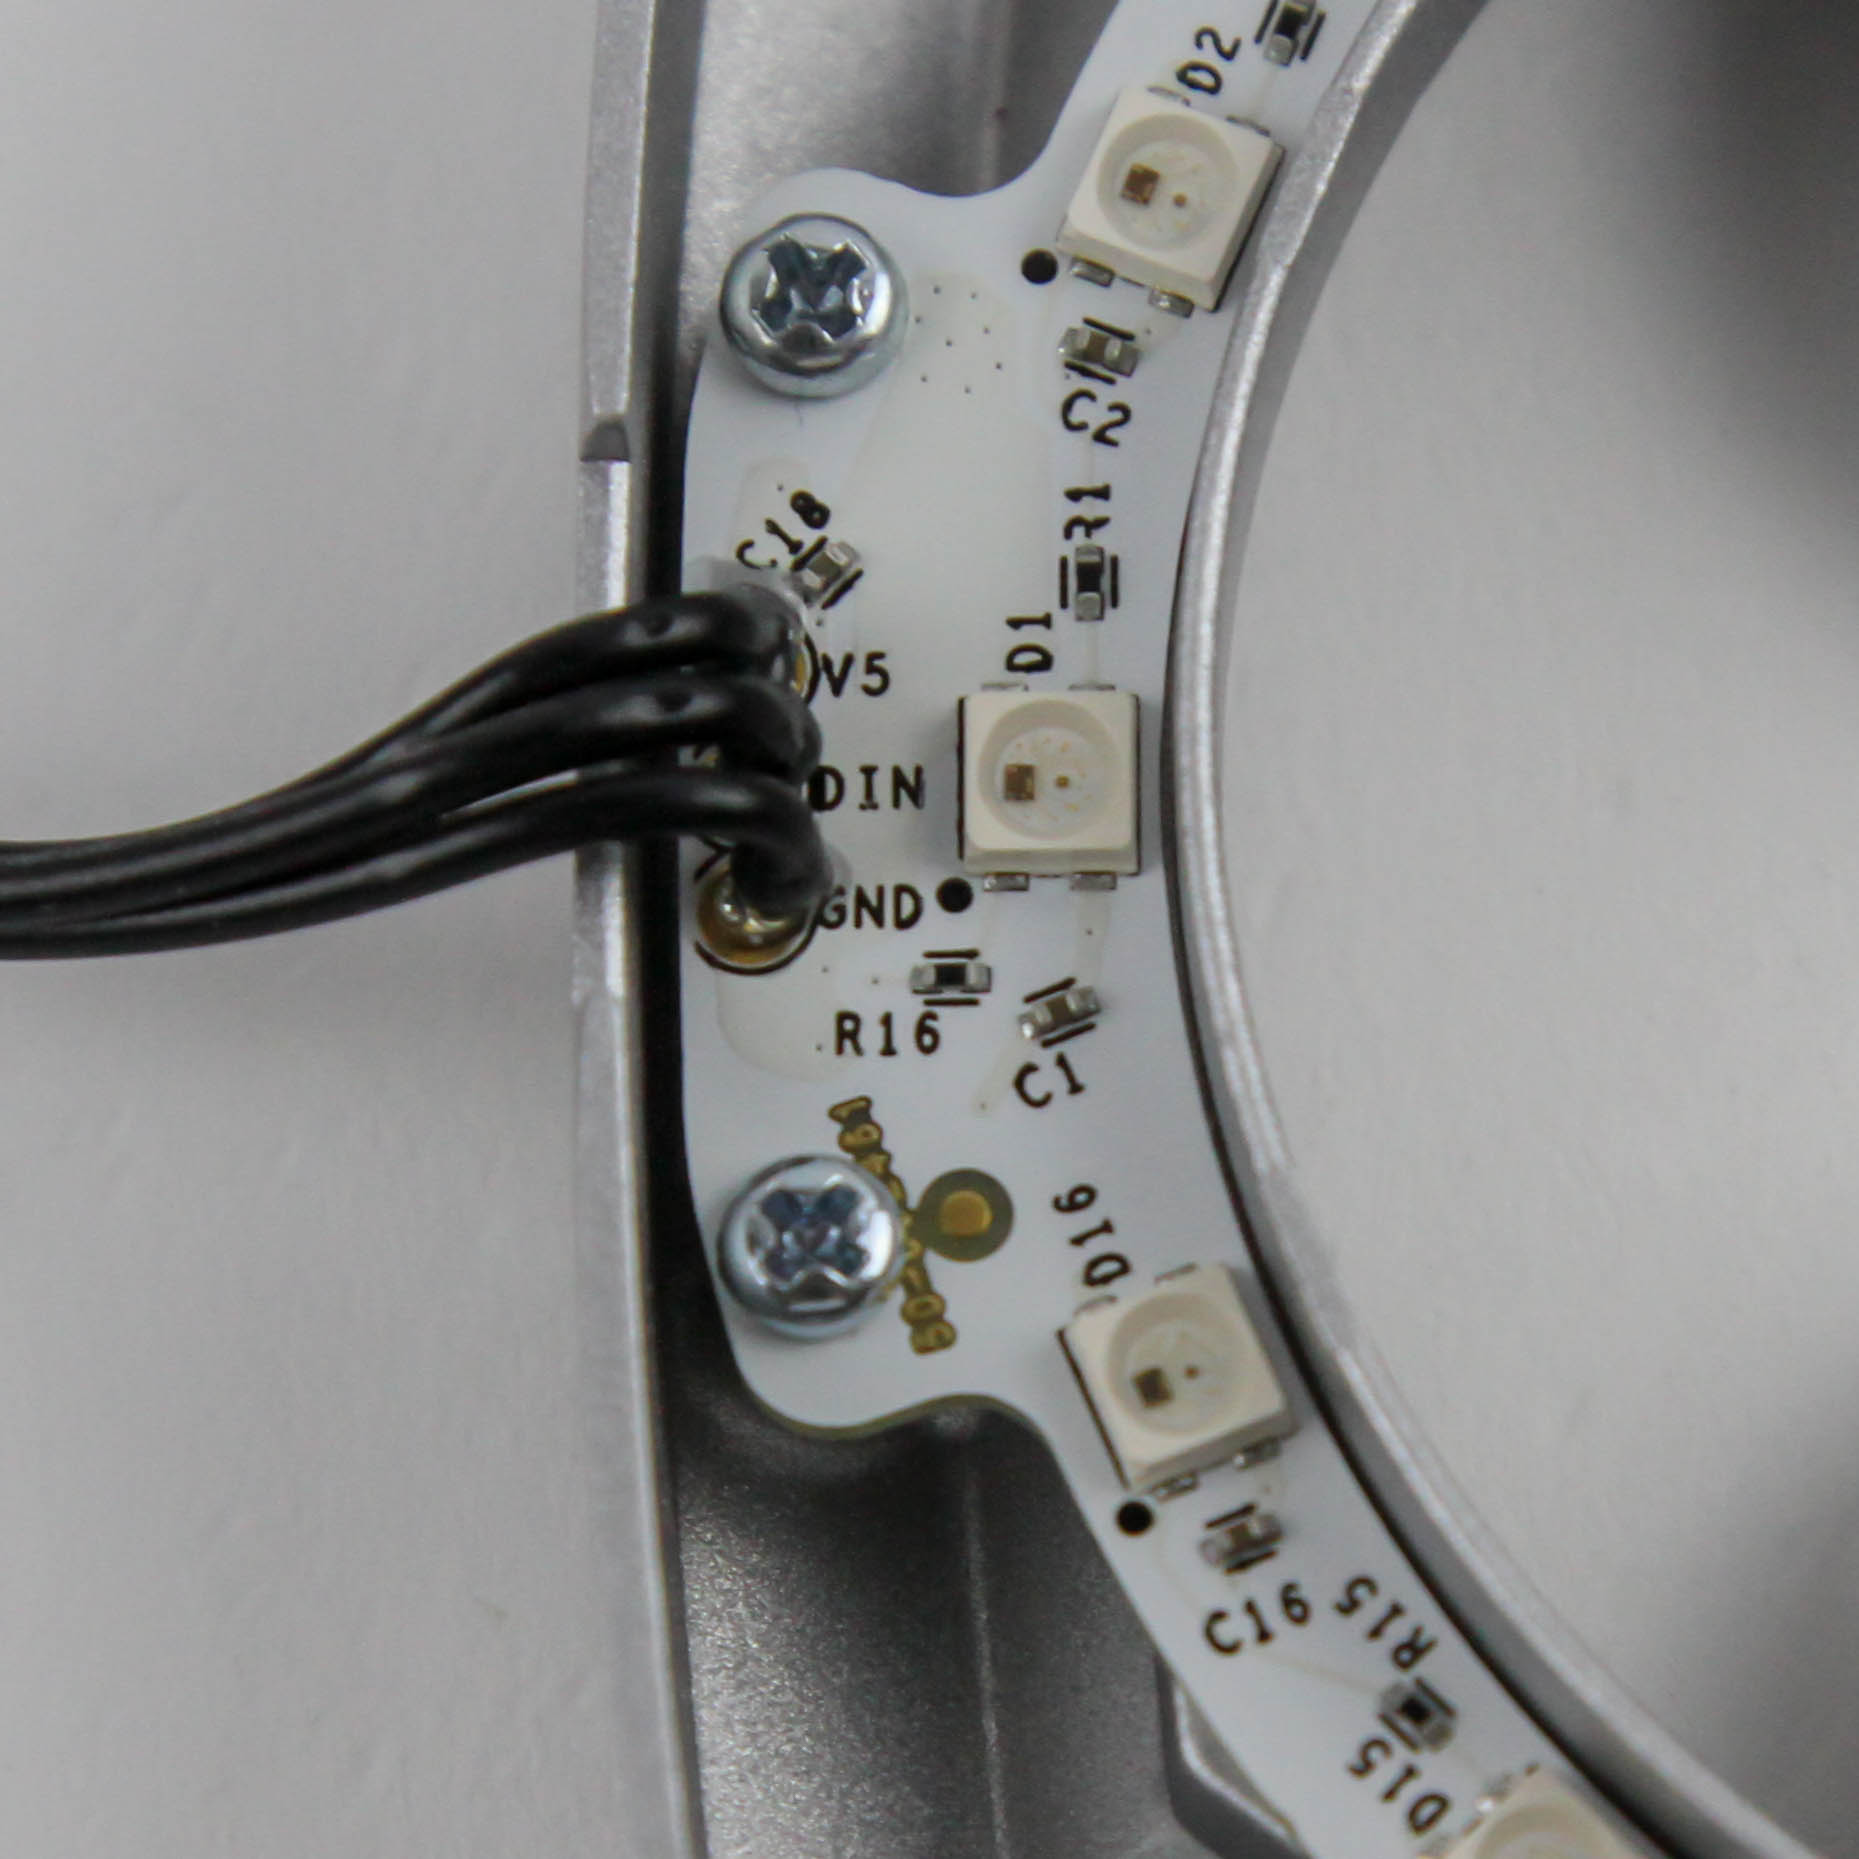
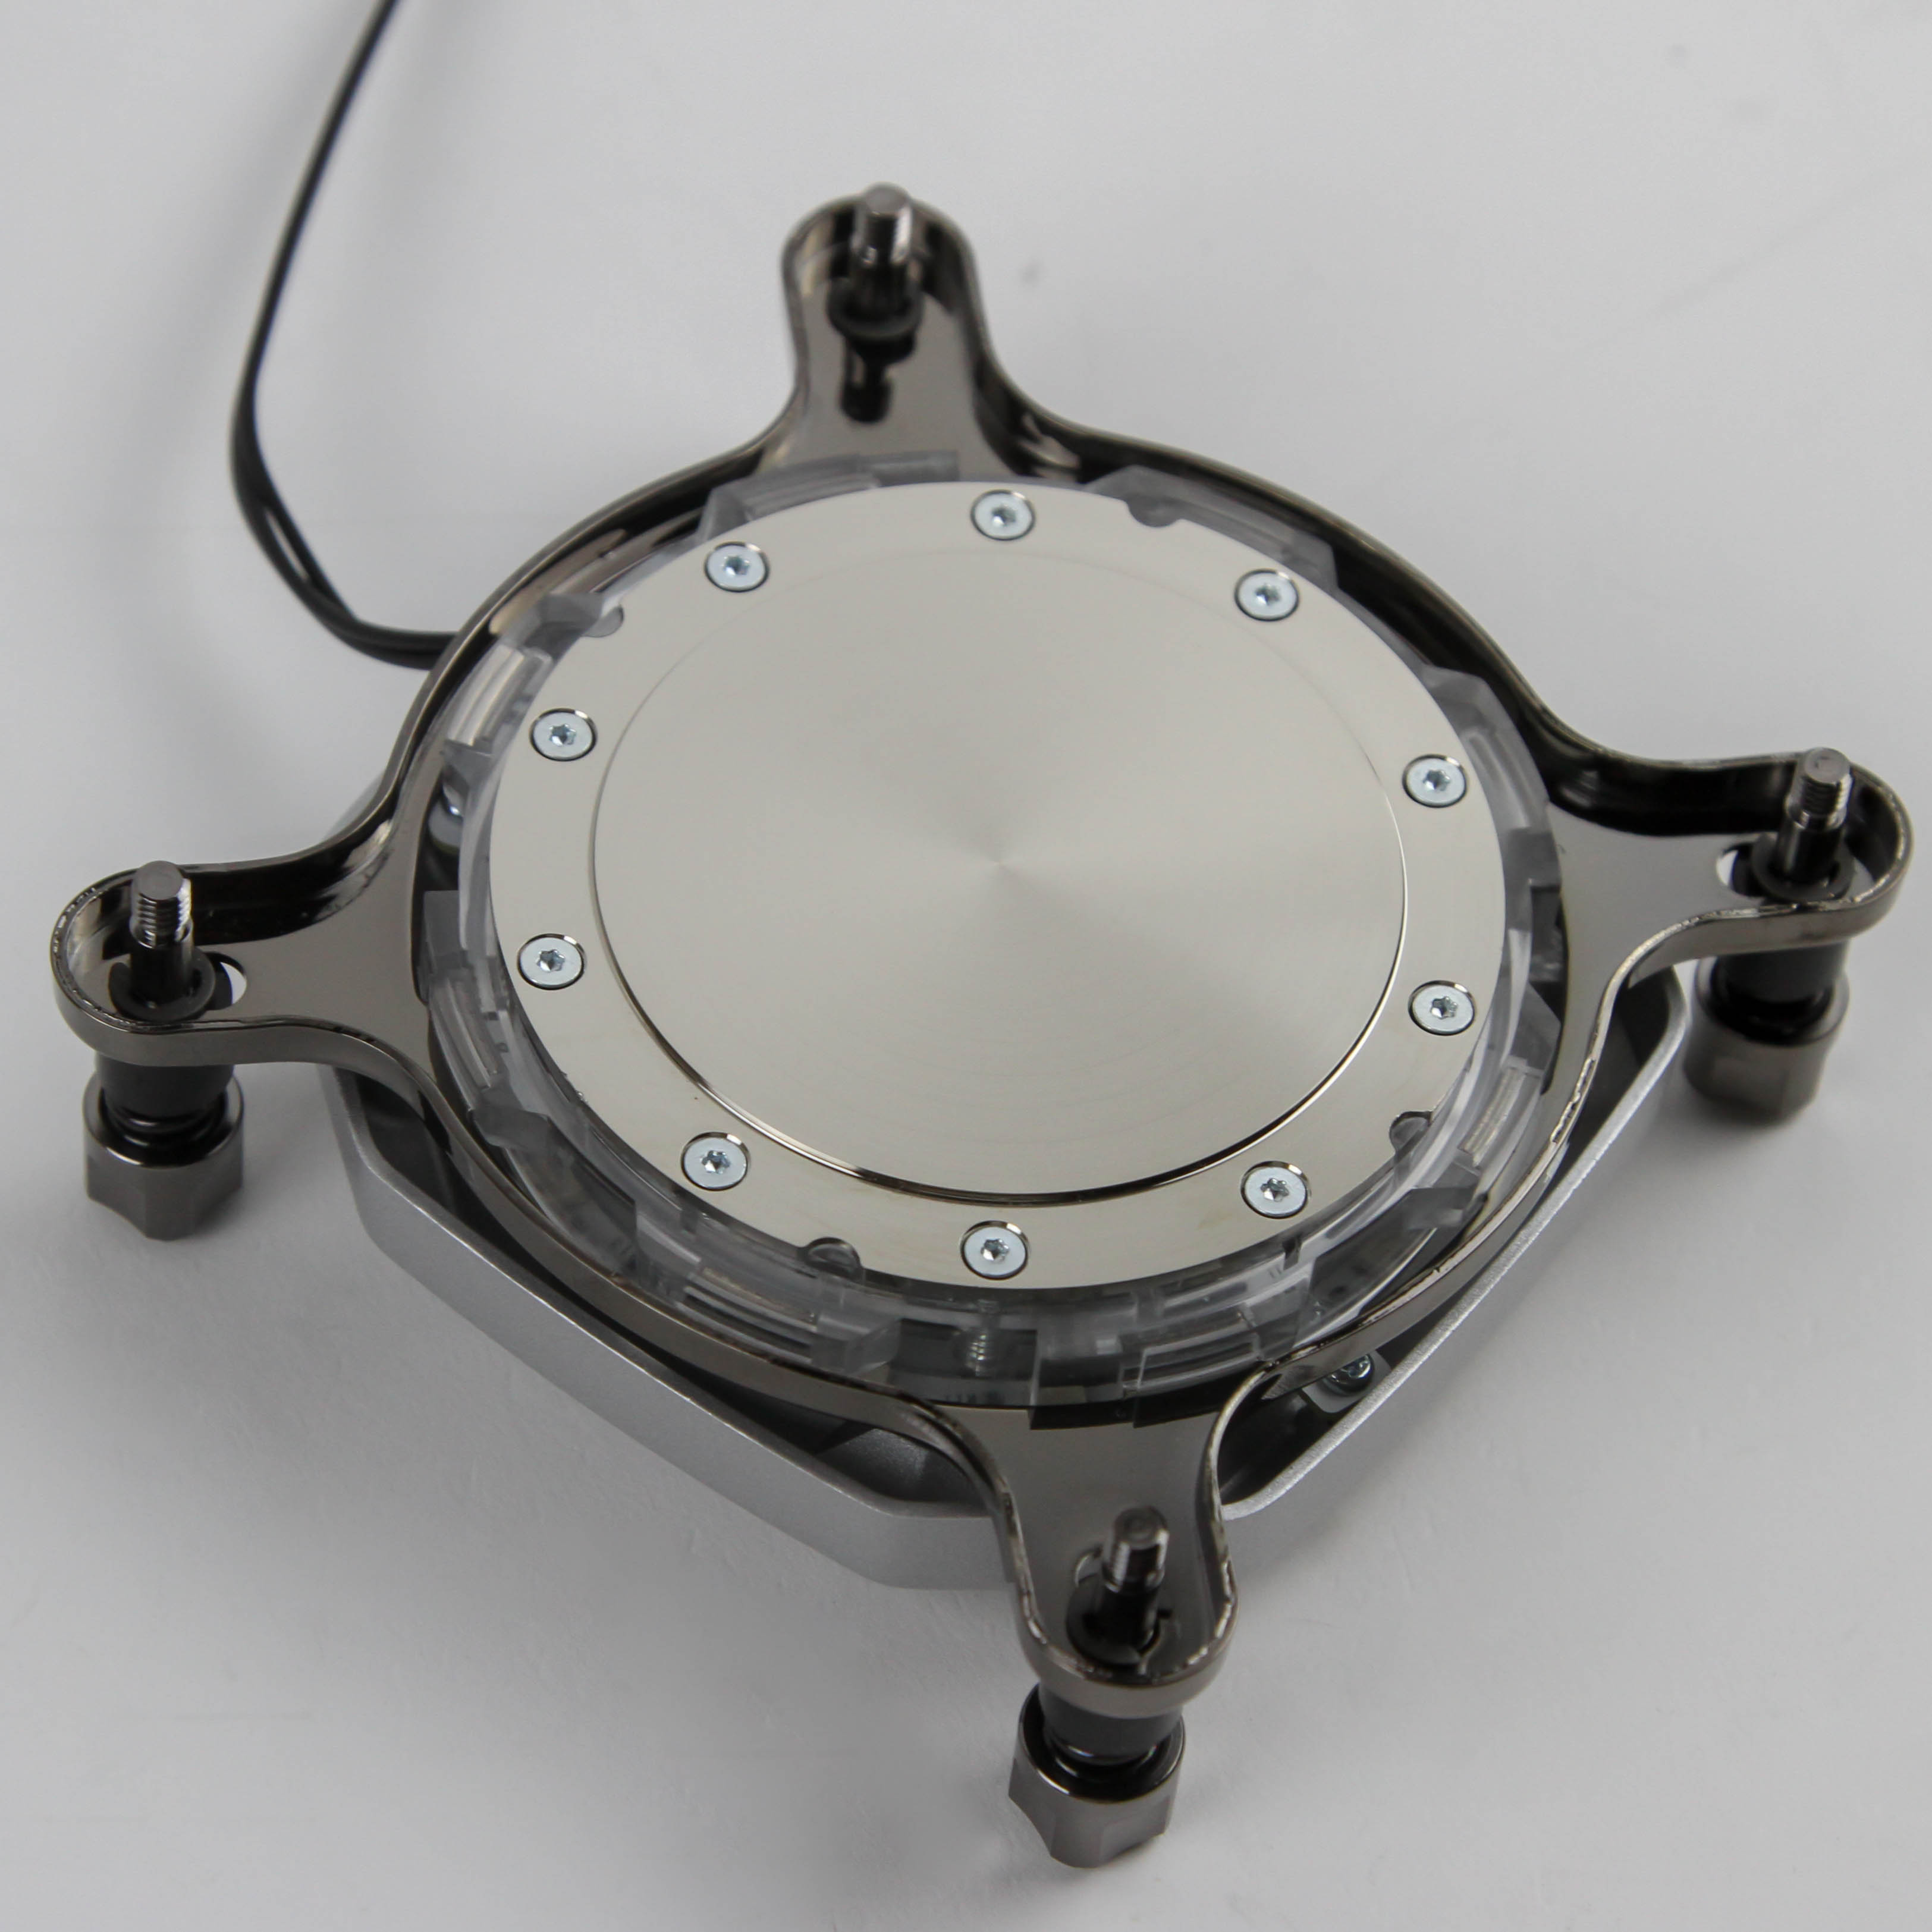
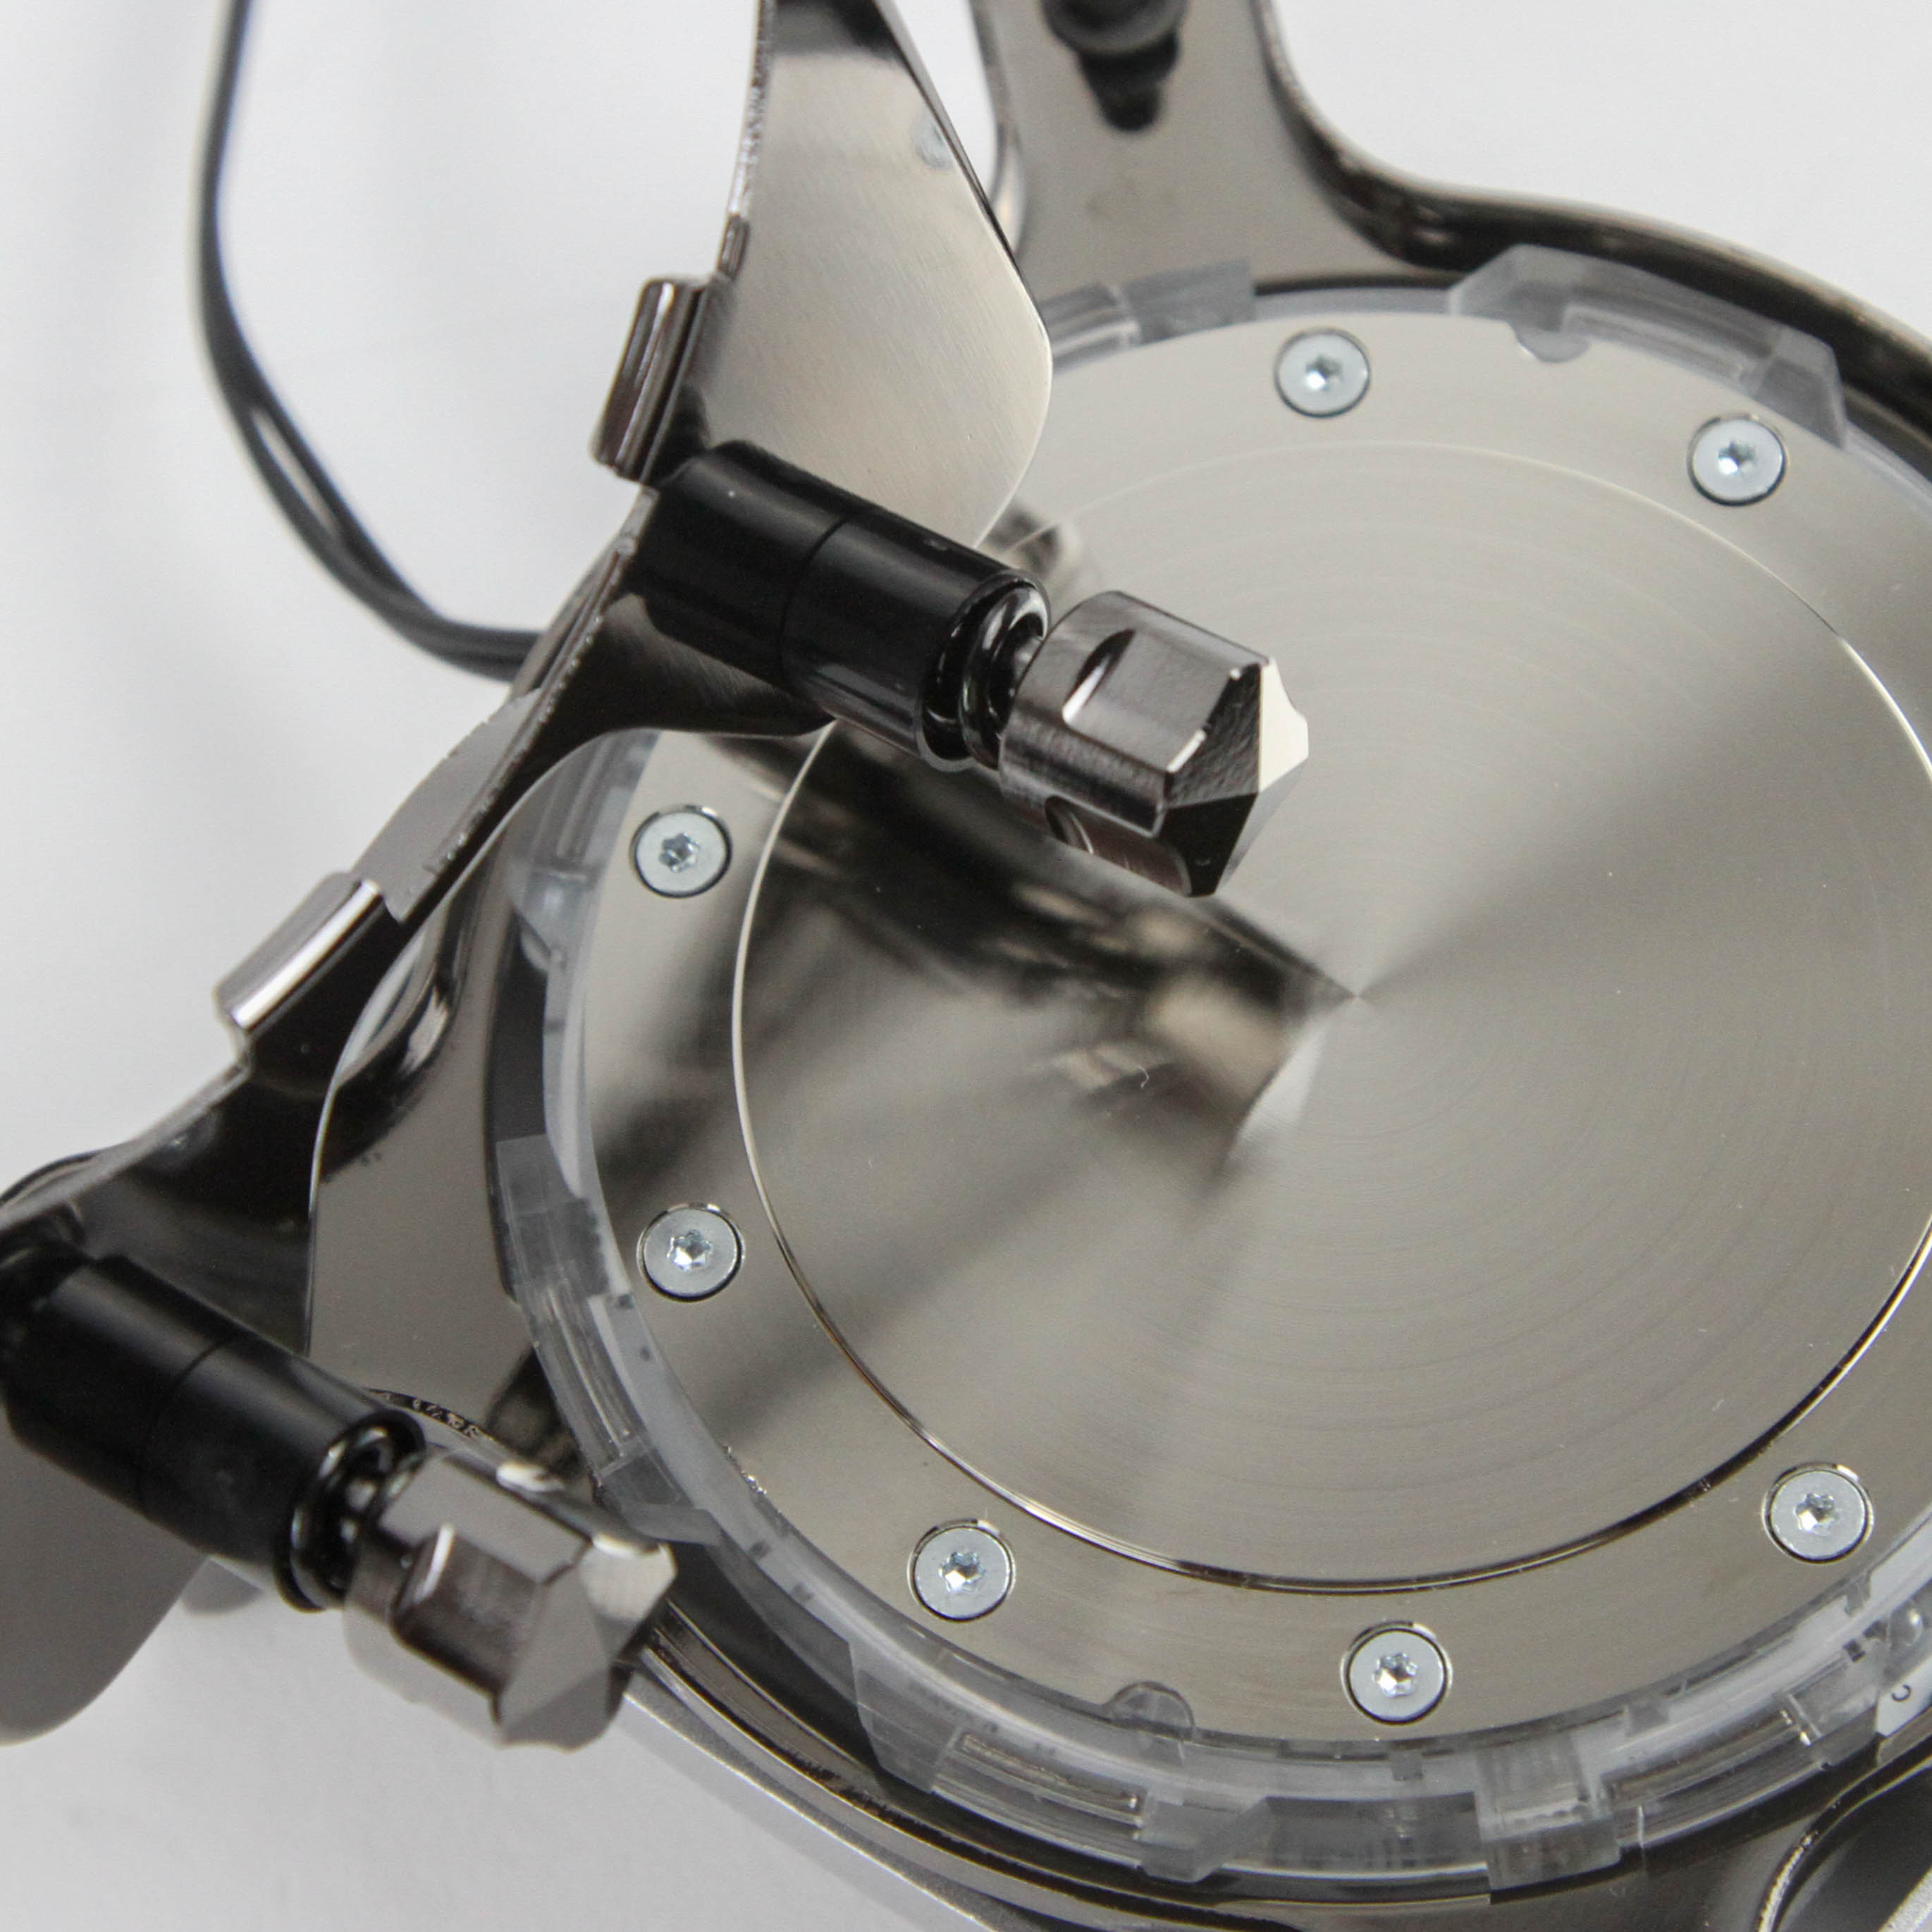
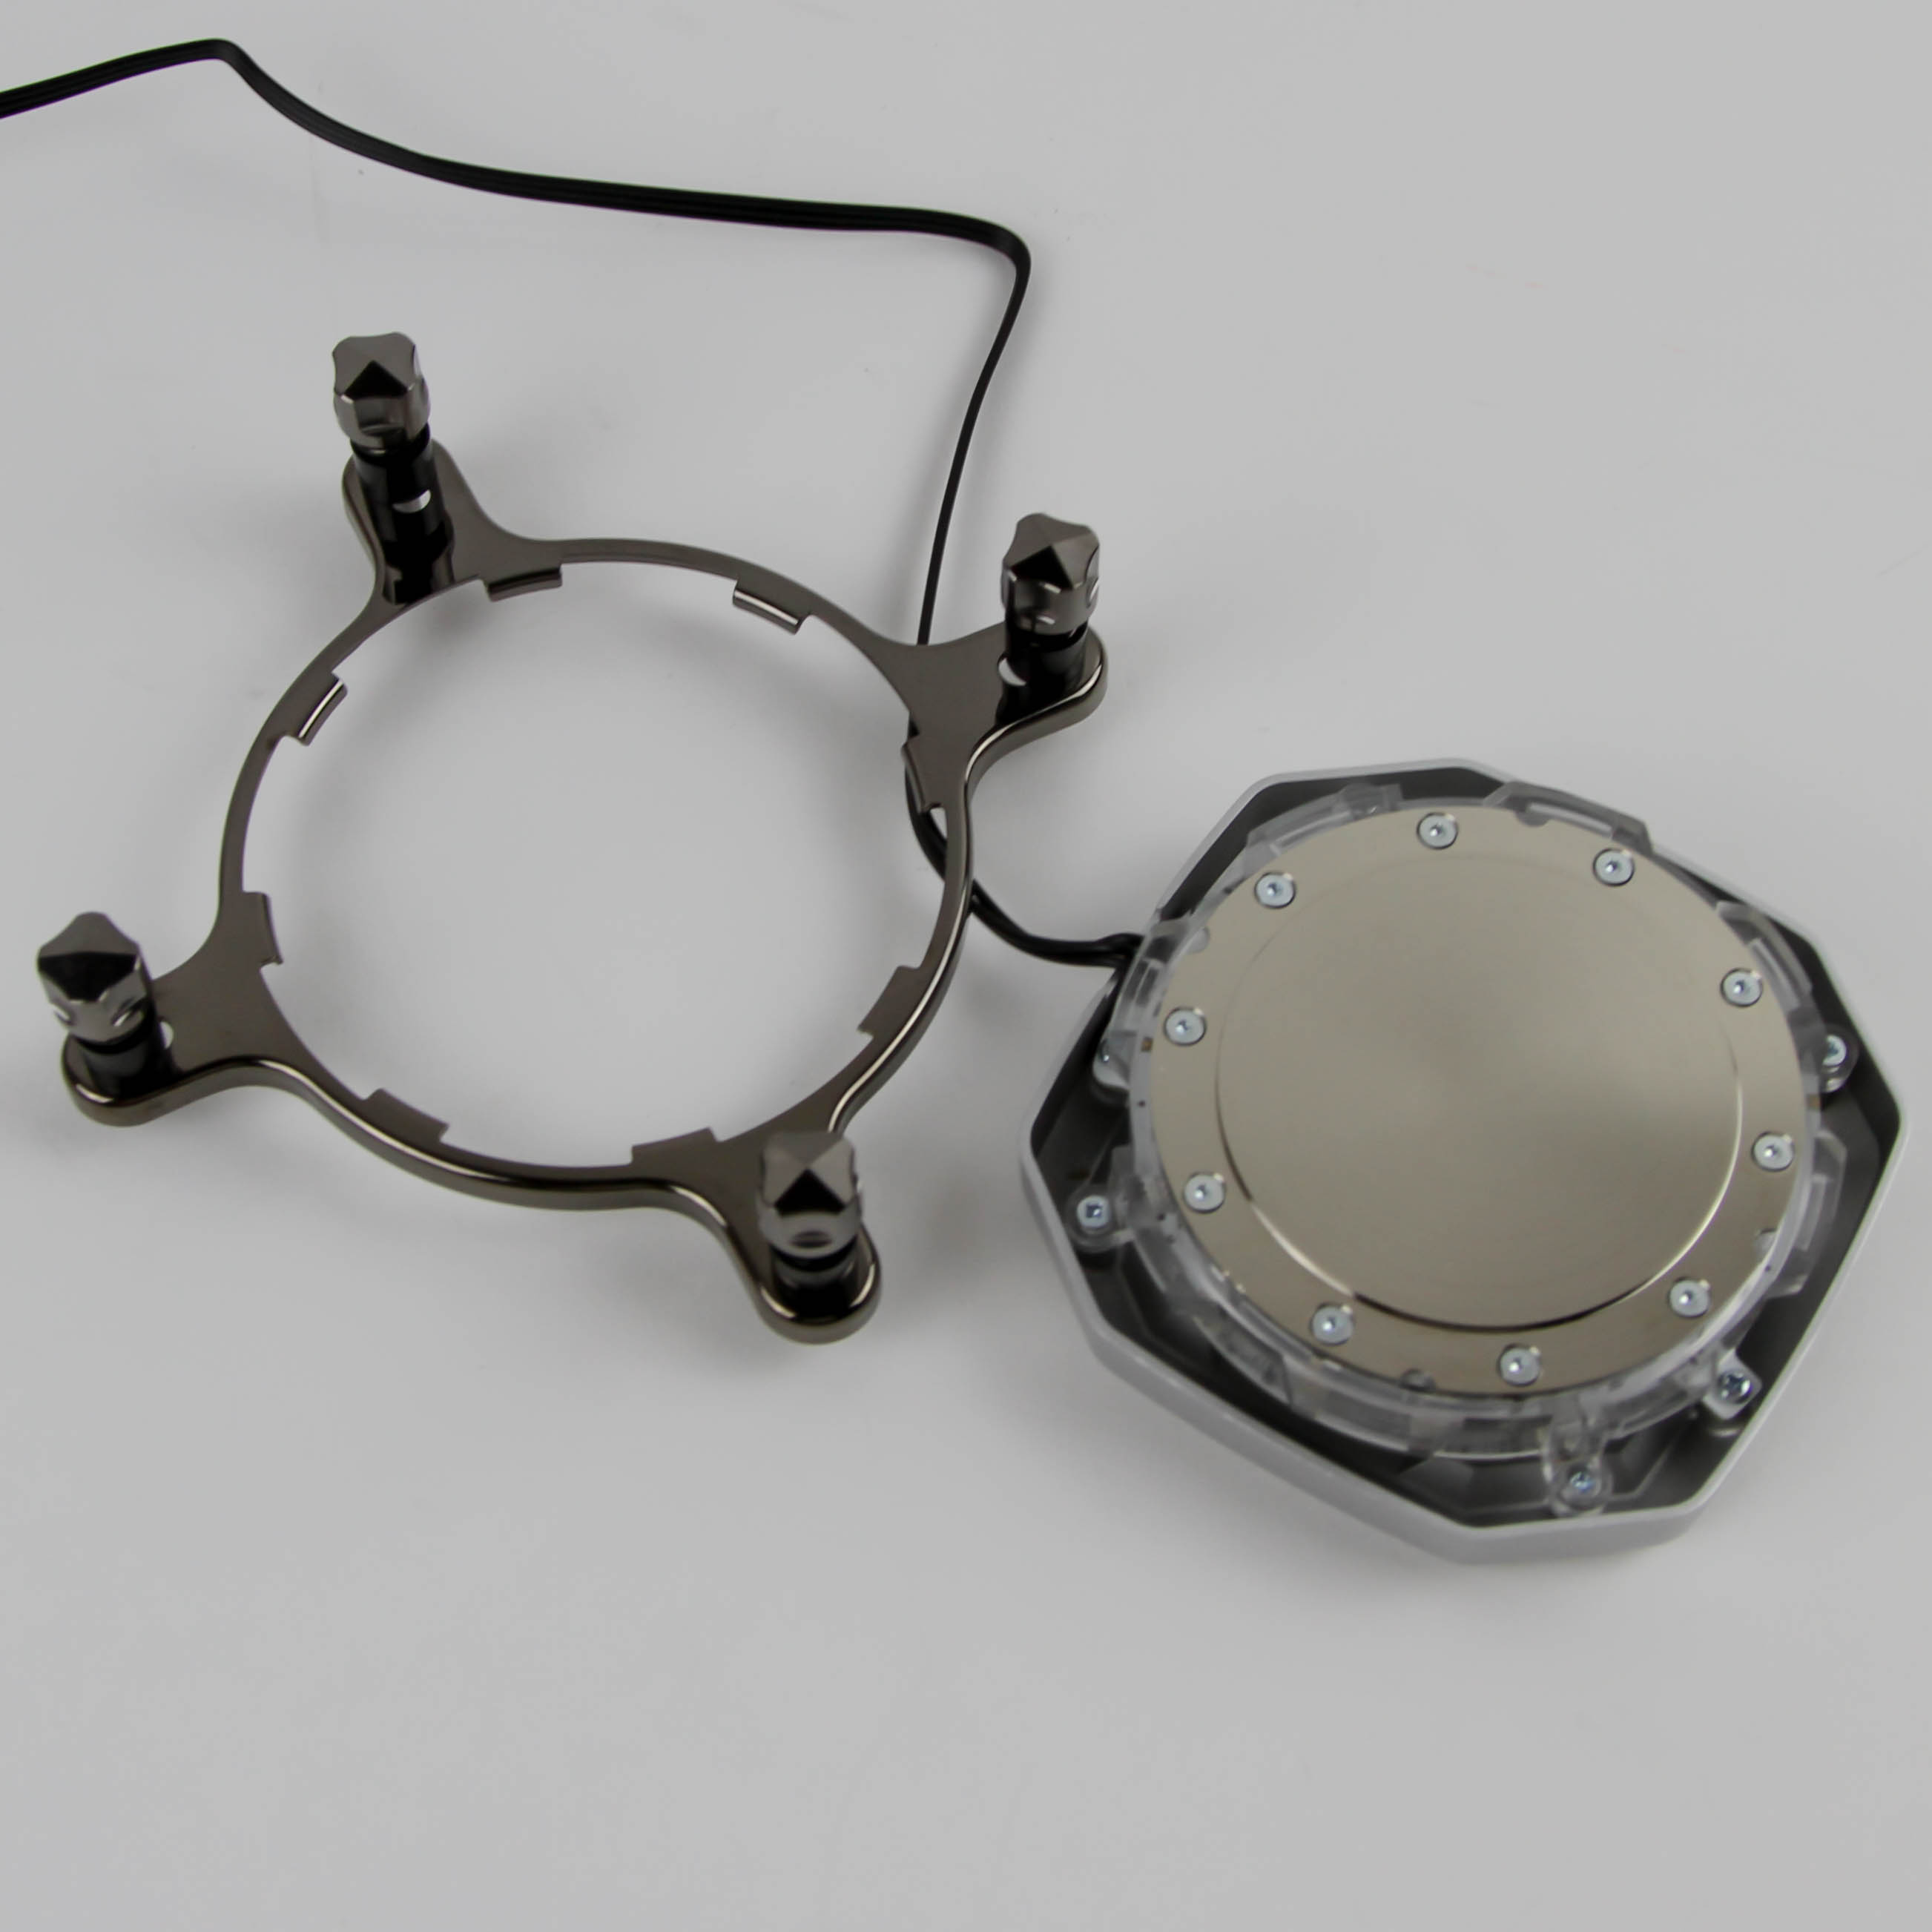
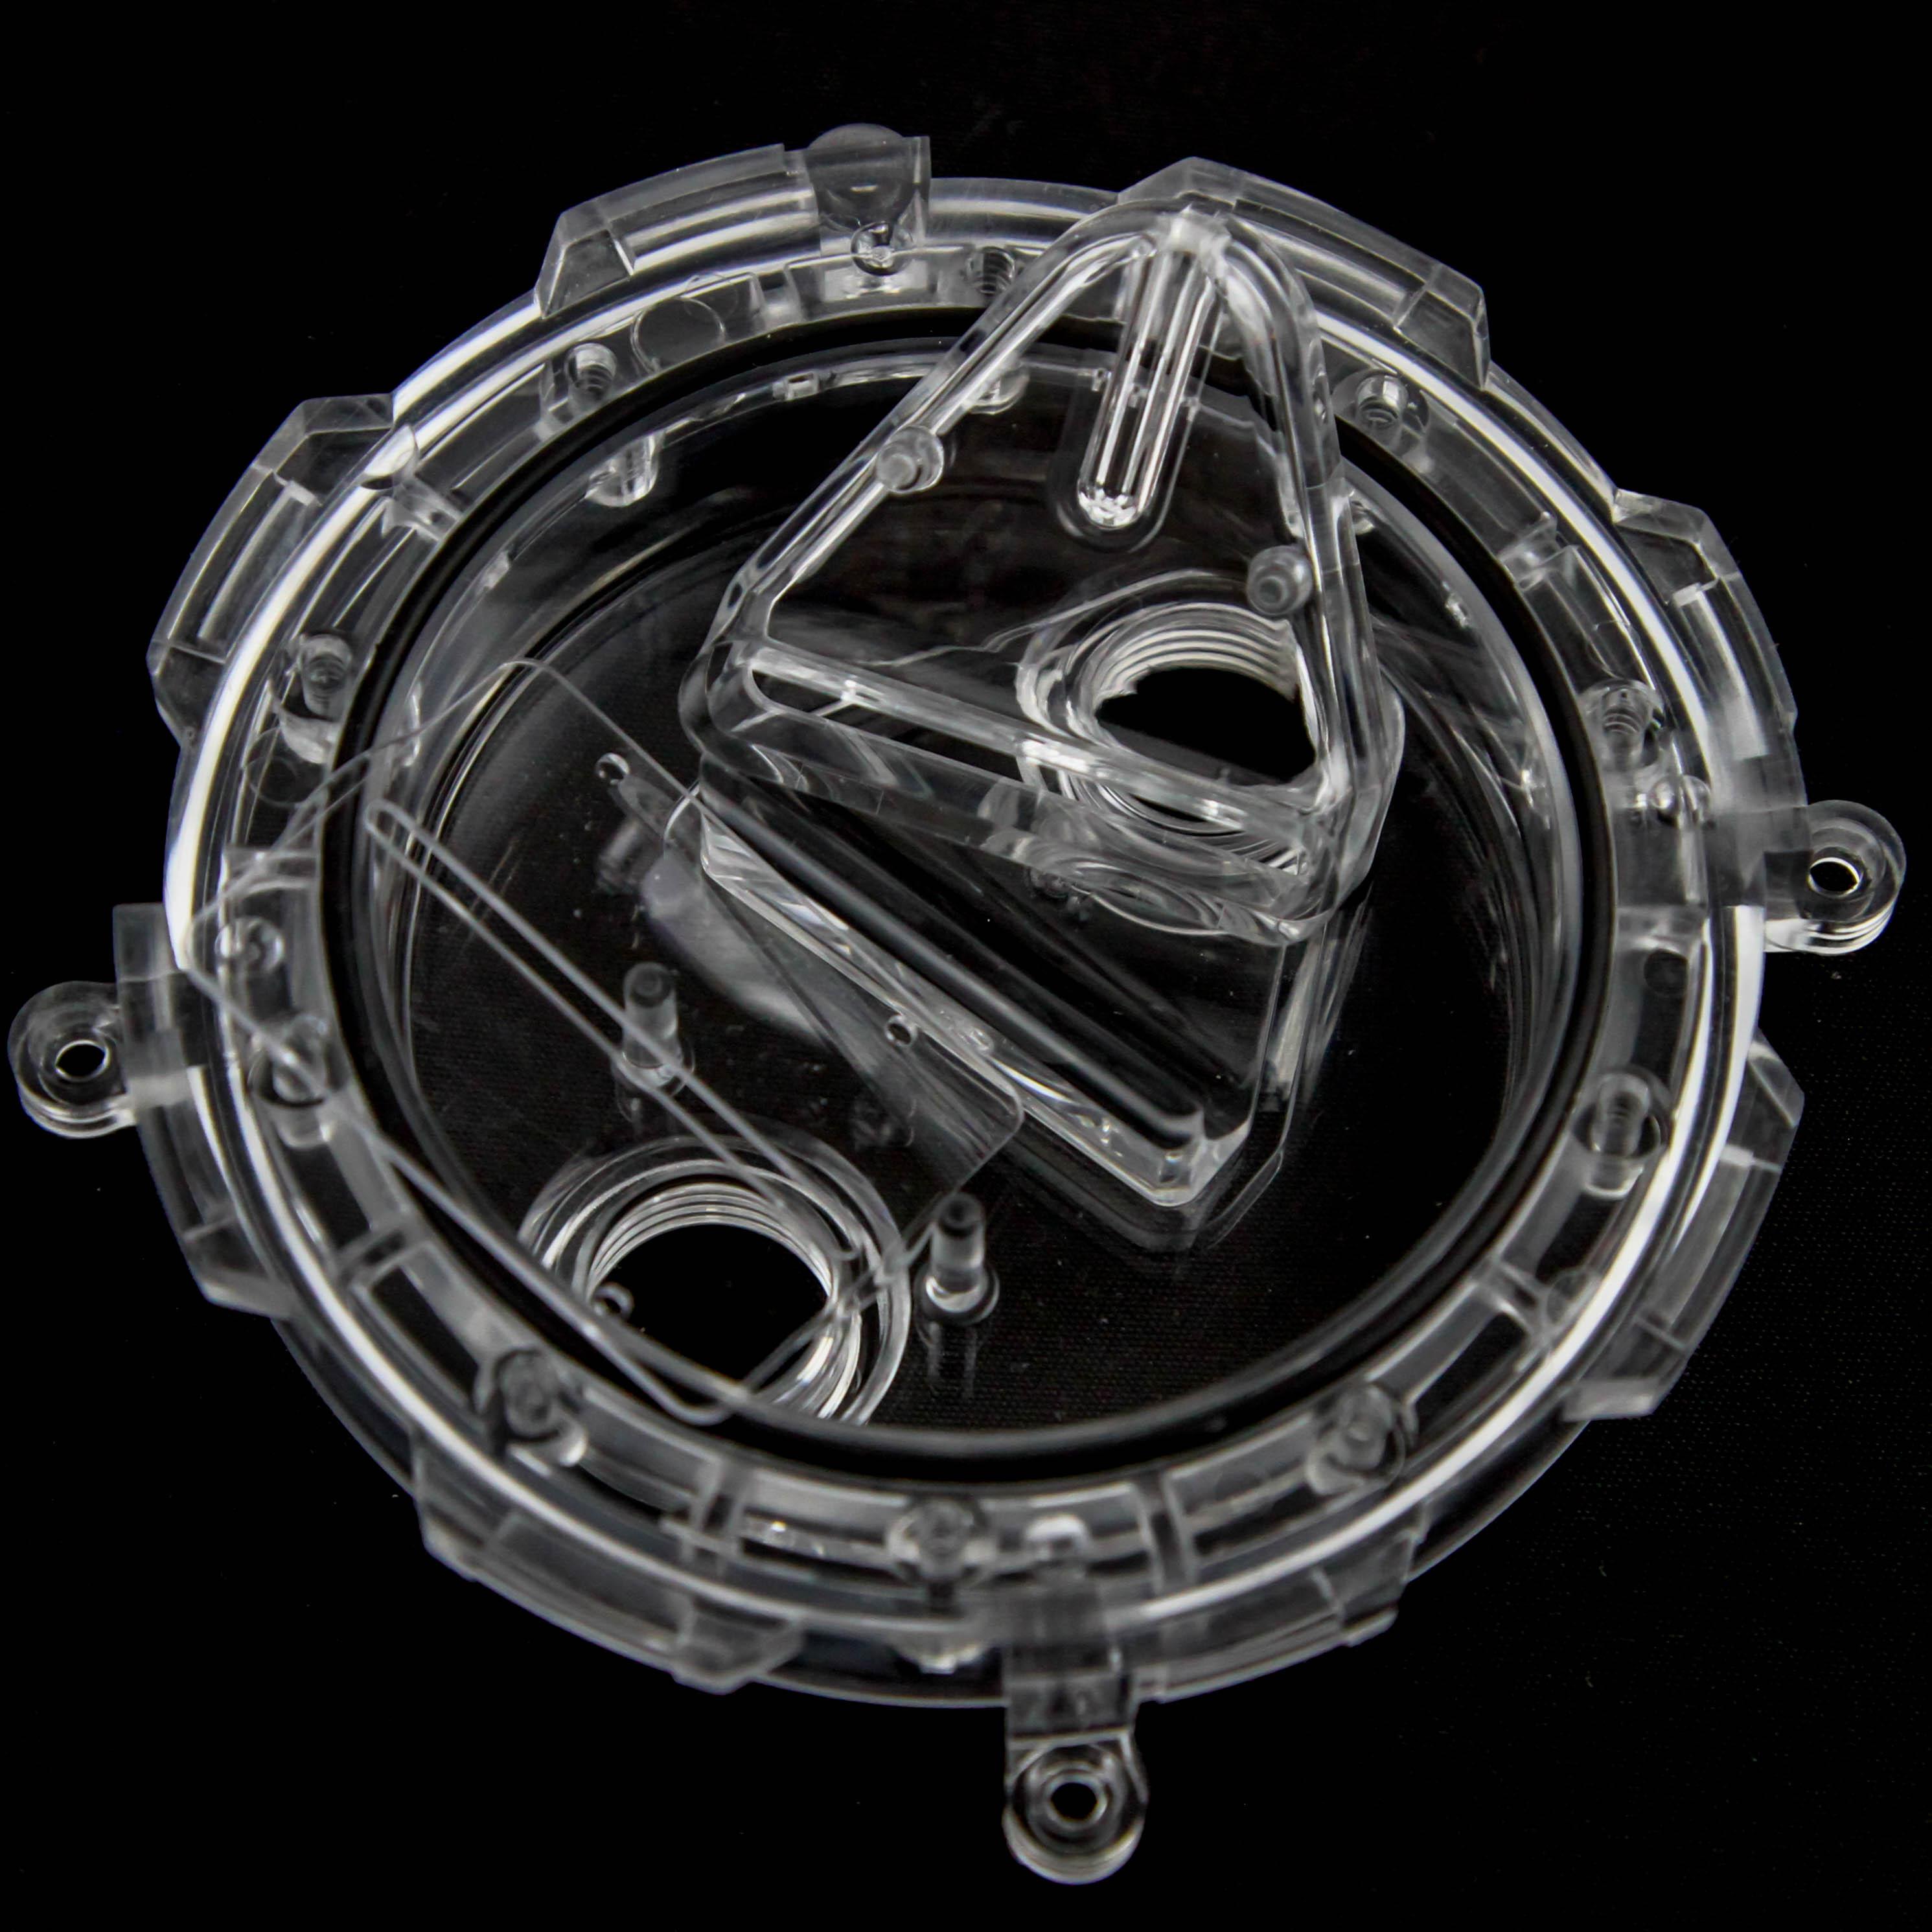
Taking the mounting bracket out exposes four Phillips head screws that keeps the top and aluminium trim together, and a precision screwdriver helps separate them easily, which reveals 16 individually addressable RGB LEDs all around the top, placed on a circular PCB that has the aforementioned cable connected to it for power and control alike. There could be a big light show if you want, and we will take a look at the lighting on the next page.
Removing the aluminium trim shows a fully functional nylon top, which should fare better than the usual plexi/acrylic in case you end up over-tightening fittings/screws, and it is polished to allow for a better look at the cooling engine underneath. The top retains the clips to have the mounting bracket in place, although possible tolerances in manufacturing compared to the out-of-the-box configuration can potentially affect the otherwise precise and fool-proof installation. Should you prefer this look, note that you will miss out on the RGB lighting you have paid for already.
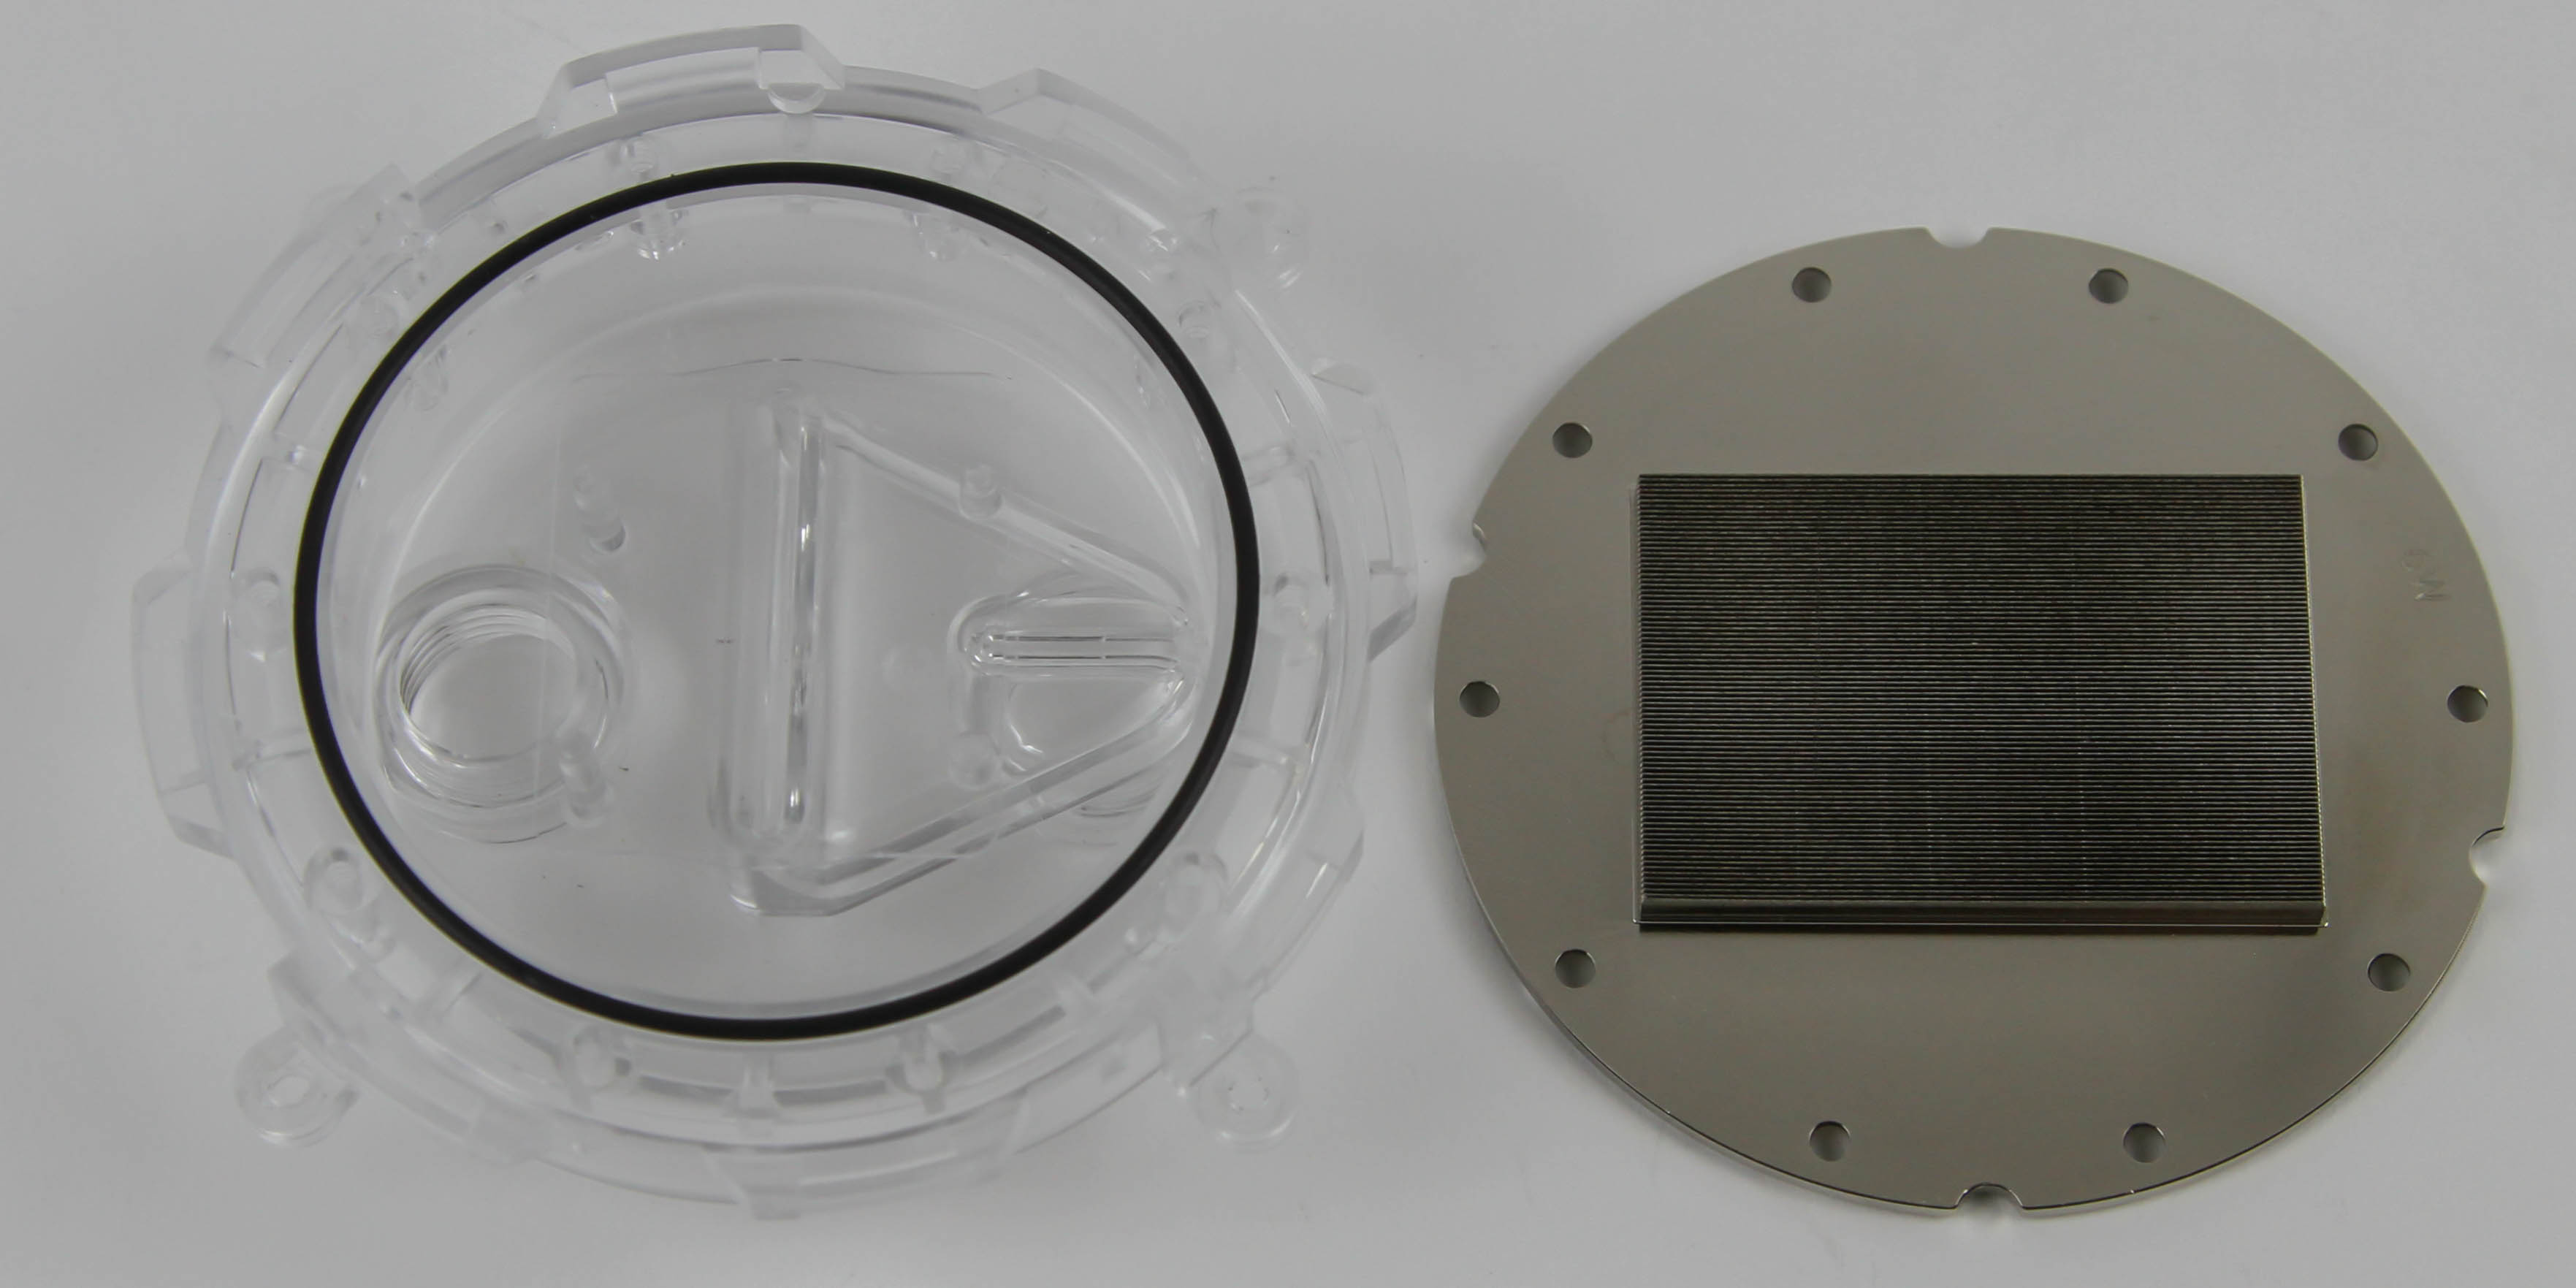

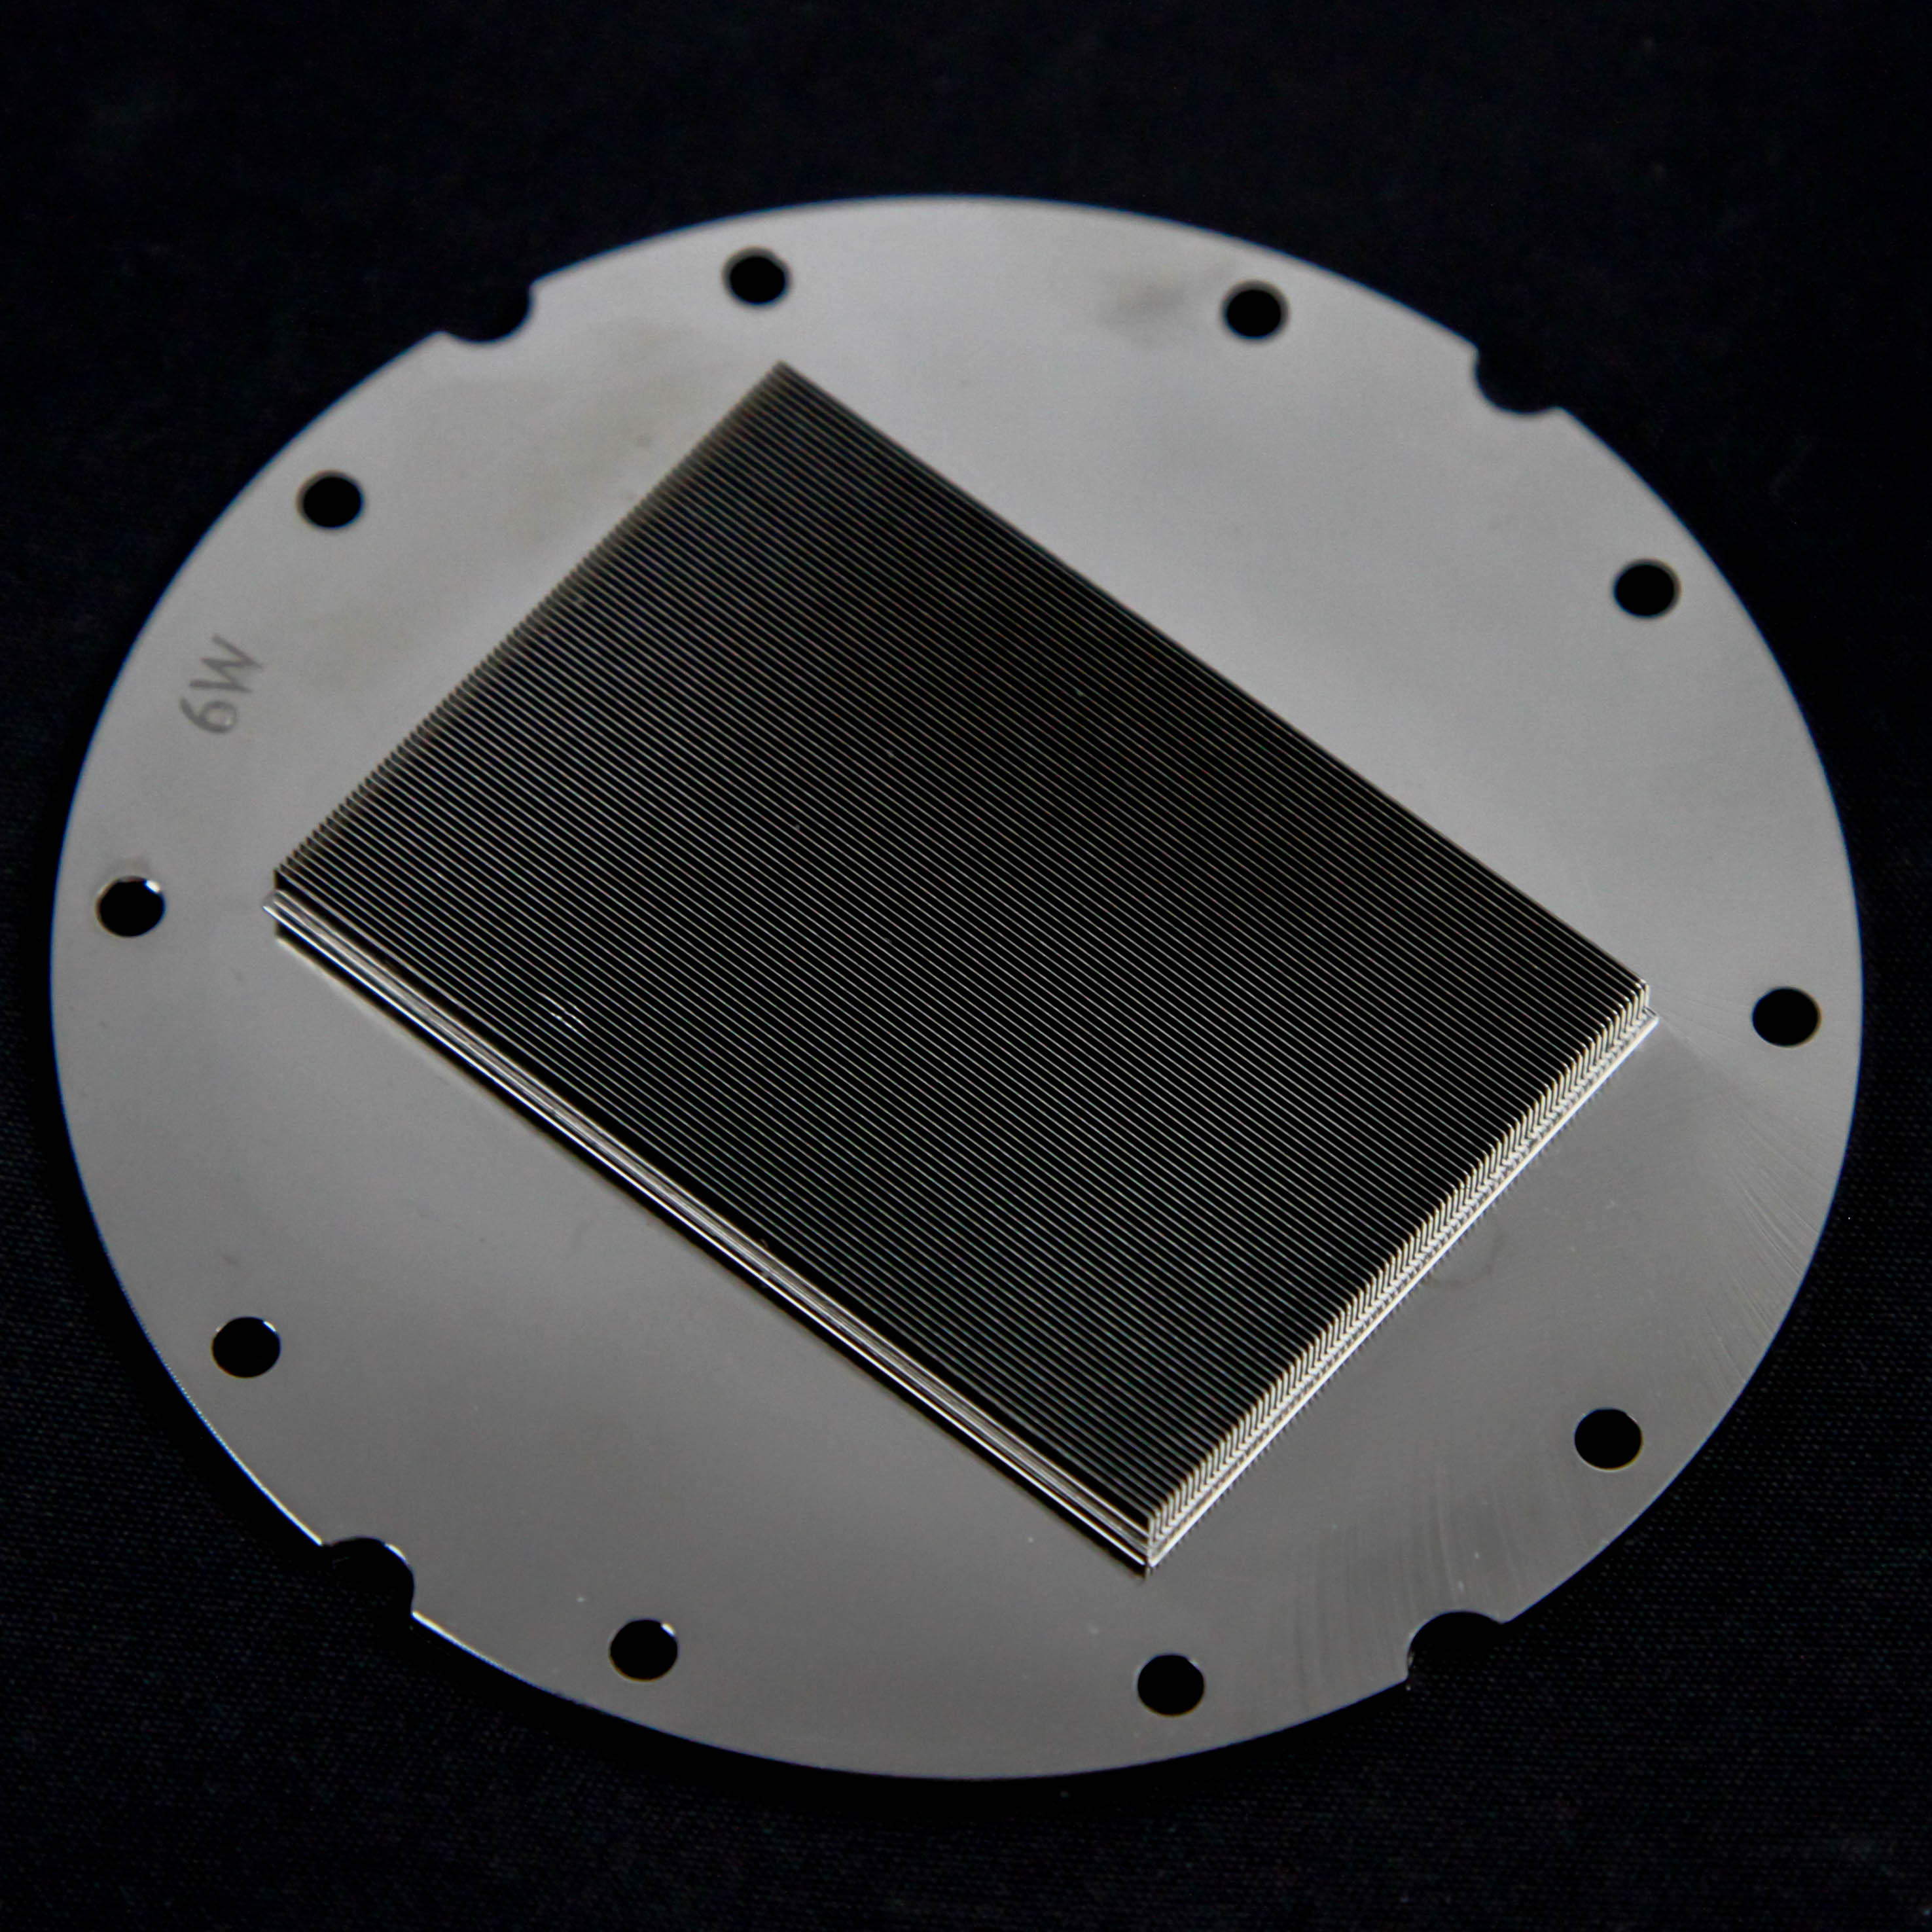

Disassembly of the core block (done after all testing is complete) is fairly easy—unscrew the 10 Torx T6 screws on the back with a compatible screwdriver and separate the components as seen above. The cold plate is 1.5 mm thick outside of the fins and ~5 mm with them, which is more than most. The jetplate is plastic and 0.6 mm thick, which is again fairly thick, but the plastic construction will work against the thickness and help balance out the eventual cold plate bow when installed. I am not sure how well the plastic will hold up over time, but CORSAIR says they have tested various configurations for multiple years without issues. We get the usual machined set of ultra-thin microfins and microchannels, which number over seventy here. The microfins occupy an area of ~30 x 42.75 mm, which is above average to accommodate all the fins. The fins are also ~2.65 mm tall, which is once more higher than average. So all other things being equal, liquid flow restriction might well be higher than average, but the increased surface area will help with the thermal transfer from the cold plate to the coolant.
This is just one part of the cooling engine, and the larger space around the fins coupled with the split-central inlet flow via the jetplate and the flow guide on the top will also contribute to the liquid flow restriction and ease of air bleeding. The circular coolant flow path should allow for air to escape more readily than with a rounded rectangular path often used by others, for example.
Jul 12th, 2025 01:06 CDT
change timezone
Latest GPU Drivers
New Forum Posts
- 'NVIDIA App' not usable offline? (8)
- Can you guess Which game it is? (222)
- What are you playing? (23920)
- RX 9070 XT freezing/locking up only on desktop, anyone else? (43)
- NVIDIA RTX PRO 6000 Workstation Runs Much Hotter Than 5090 FE (22)
- Quick charging your USB devicesUSB 3.2 Gen 2x2 Type-C® front-panel. (1)
- GTX 1050 GPU Owners Club (12)
- ASUS ProArt GeForce RTX 4060 Ti OC Edition 16GB GDDR6 Gaming - nvflash64 VBIOS mismatch (2)
- Will you buy a RTX 5090? (640)
- No offense, here are some things that bother me about your understanding of fans. (33)
Popular Reviews
- Fractal Design Epoch RGB TG Review
- Corsair FRAME 5000D RS Review
- Lexar NM1090 Pro 4 TB Review
- NVIDIA GeForce RTX 5050 8 GB Review
- NZXT N9 X870E Review
- Sapphire Radeon RX 9060 XT Pulse OC 16 GB Review - An Excellent Choice
- AMD Ryzen 7 9800X3D Review - The Best Gaming Processor
- Upcoming Hardware Launches 2025 (Updated May 2025)
- Our Visit to the Hunter Super Computer
- Chieftec Iceberg 360 Review
TPU on YouTube
Controversial News Posts
- Intel's Core Ultra 7 265K and 265KF CPUs Dip Below $250 (288)
- Some Intel Nova Lake CPUs Rumored to Challenge AMD's 3D V-Cache in Desktop Gaming (140)
- AMD Radeon RX 9070 XT Gains 9% Performance at 1440p with Latest Driver, Beats RTX 5070 Ti (131)
- NVIDIA Launches GeForce RTX 5050 for Desktops and Laptops, Starts at $249 (119)
- NVIDIA GeForce RTX 5080 SUPER Could Feature 24 GB Memory, Increased Power Limits (115)
- Microsoft Partners with AMD for Next-gen Xbox Hardware (105)
- Intel "Nova Lake‑S" Series: Seven SKUs, Up to 52 Cores and 150 W TDP (100)
- NVIDIA DLSS Transformer Cuts VRAM Usage by 20% (97)