 1
1
CORSAIR Hydro X Series XD3 Pump/Reservoir Combo Review
Pump Performance Testing »Installation


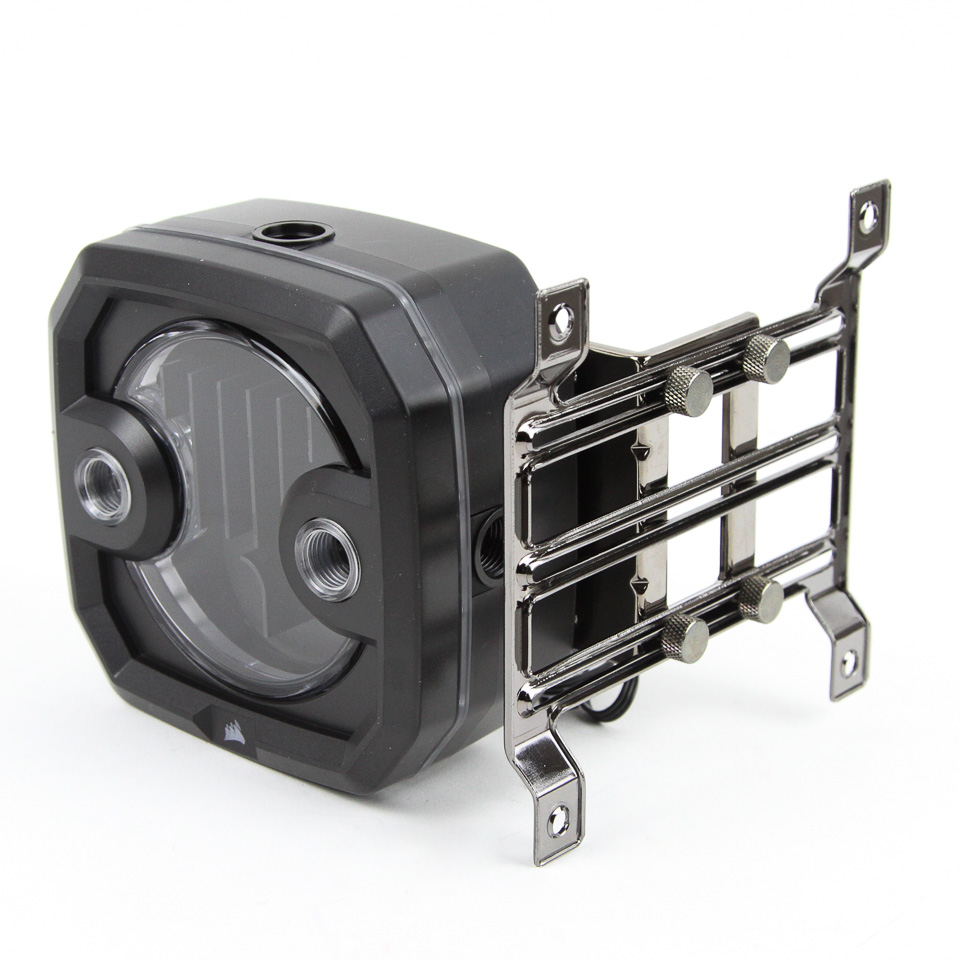
Installation of the CORSAIR Hydro XD3 pump/reservoir combo begins by perusing the list of compatible coolants in the compatibility section. Once you have a coolant of choice, and no doubt CORSAIR would prefer you use their branded coolant, you have to decide whether you are going with a standalone installation to your case or a dedicated panel, or the more user-friendly approach of using 120 or 140 mm fan-hole solutions. For the former, it is as simple as drilling holes into your case or panel and using the rubber-lined screw feet and provided screws and washers.
The mounting bracket accessory paired with the provided fan-mounting metal installation brackets is arguably what you may want to do instead, and the included manual does a good job of going over how the setup works. Simply put, you can use the rubber-lined feet and provided installation hardware to secure the XD3 to a bracket of your choice with the accessory, and the bracket then has holes that line up with the appropriately sized case/radiator/fans. The choice of nylon and lower profile reservoir means the unit is not very heavy, which allows for a stable installation without worry of it pulling something down. Connect the LED and pump cables to the controllers and you are ready to plumb in tubing and the various fittings for the XD3. The lack of a heatsink for the pump is also somewhat mitigated by this method since some of the possible orientations have airflow from the fans hit the pump, but the pump can also withstand higher temperatures than the D5.
Lighting
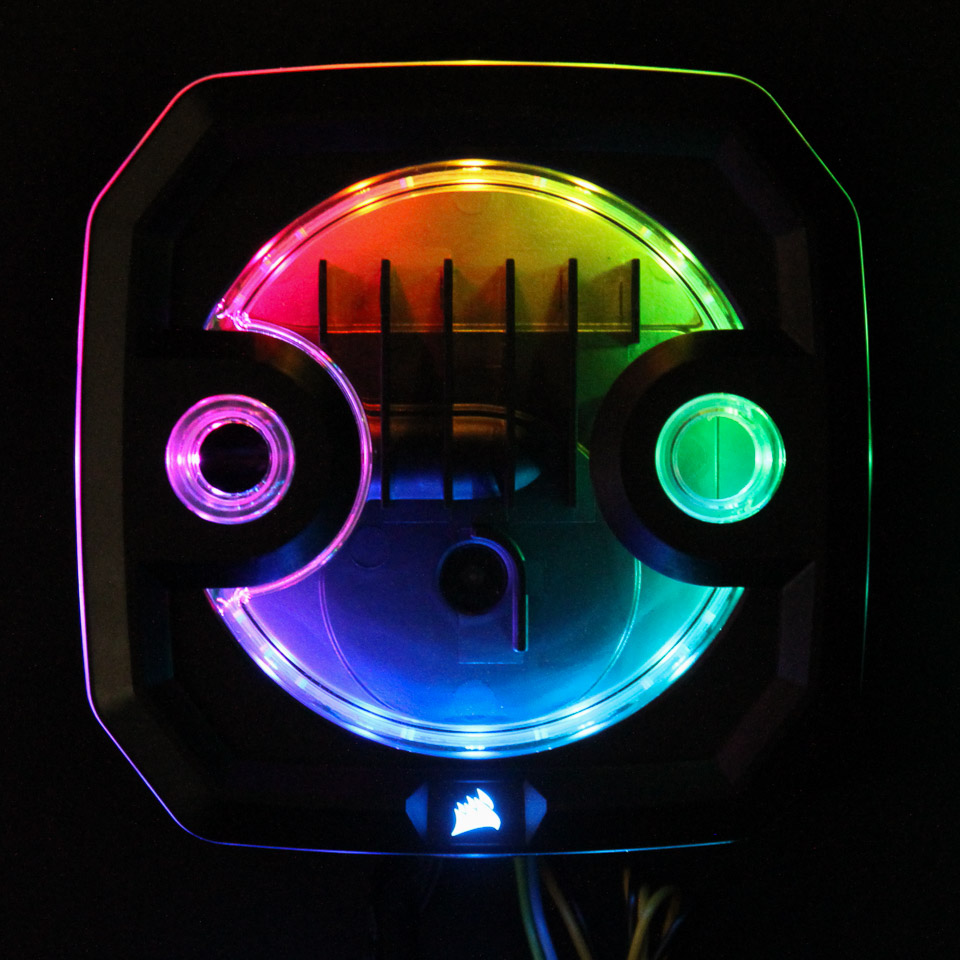
Here's the light show that greets you when the LED cable is connected and powered on. It is a rainbow wave lighting effect that does a good job of showcasing the individually addressable nature of the 16 RGB LEDs, and we can also see how and where the light moves through the top and down into the reservoir body.
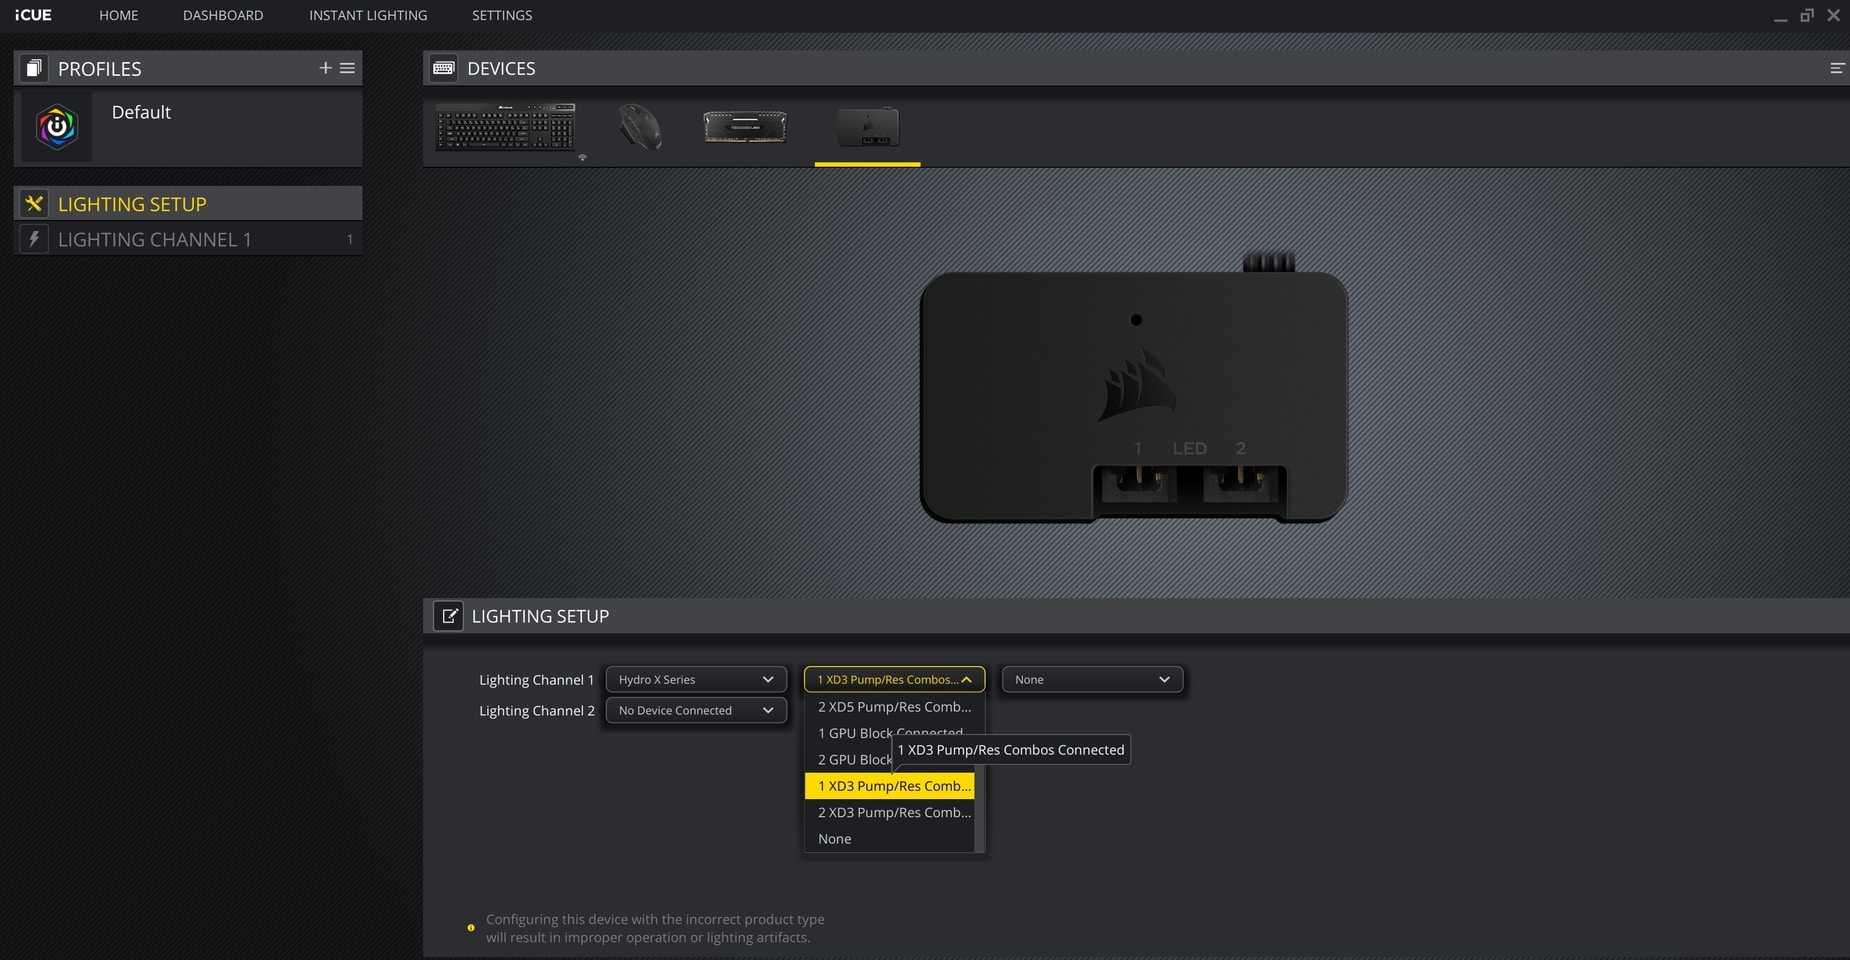

I will go over iCUE as it pertains to the Hydro X series in the final build article, but it works as expected provided you let the driver know what is connected exactly. I used a Lighting Node PRO, which has two channels, and a drop-down list allows for the Hydro XD3 pump/reservoir combo to be chosen. I did not have anything connected to the pass-through cable, which was thus left blank, and an on-screen render nicely visualizes the various lighting effects that are immediately adopted by the block.

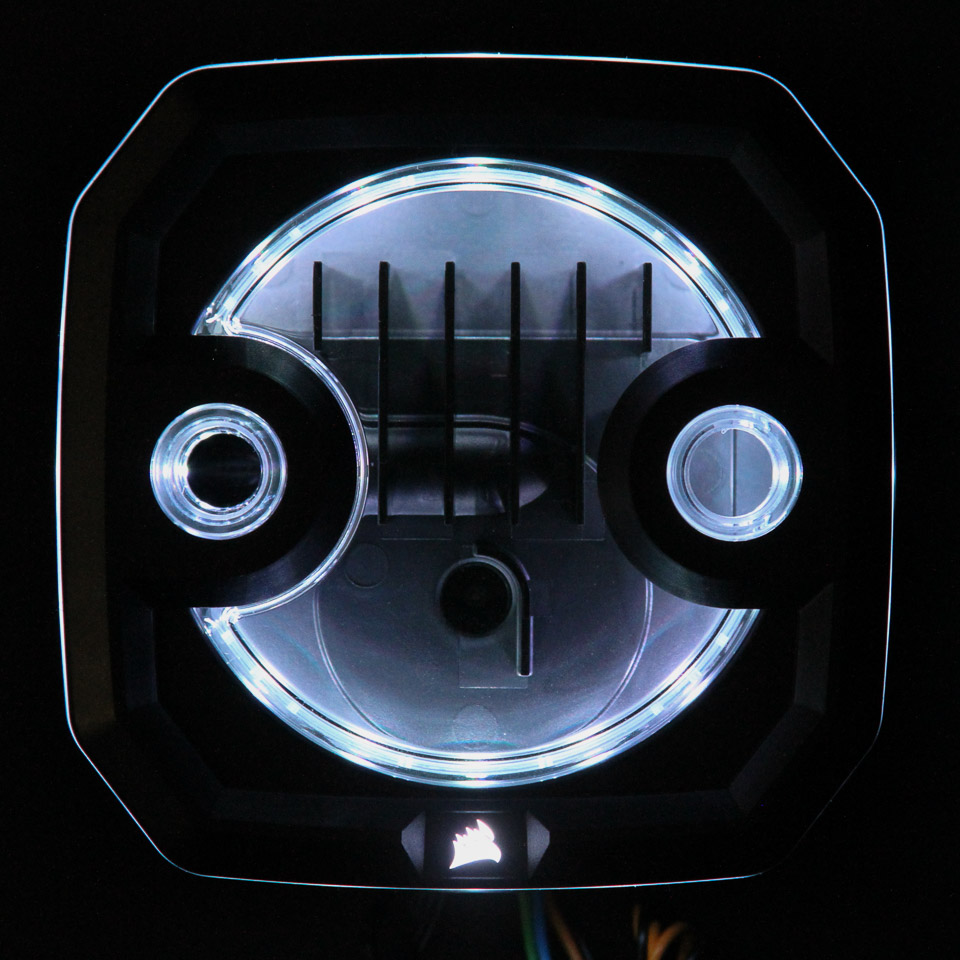
Here is a look at some of the various lighting options, be it static or dynamic. I was impressed with the fairly true to color white these LEDs were able to reproduce, and the downward-facing LEDs are bright enough to illuminate the entirety of the nylon reservoir. The lighting is brightest at the top and dimmer the further towards the pump you go, so it is perhaps good then that this is not a tall reservoir to begin with. CORSAIR recommends using a clear coolant to help diffuse the light from the LEDs better than what you see above, with the actual LEDs allowing for the color customization instead of using colored coolant. As with anything compatible with iCUE, lighting can be configured to match other products collectively.
Jul 14th, 2025 18:58 CDT
change timezone
Latest GPU Drivers
New Forum Posts
- No offense, here are some things that bother me about your understanding of fans. (118)
- AMD 7Ghz? This keeps popping up on my feeds! (22)
- Cryptocoin Value and Market Trend Discussion (1657)
- System stutters with Ryzen 7 9800X3D. (1)
- Dual GPU Motherboard for home VFX (1)
- i7 2860QM how to raise power limit? (24)
- Large Format Plotter WiFi / LAN issue on Laptop (2)
- Is there a WIFI chip I should get? (3)
- How about AMD instead of Intel? (40)
- AI Job Losses: let's count the losses up, total losses to AI so far 94,000 and counting (7)
Popular Reviews
- Lexar NM1090 Pro 4 TB Review
- MSI GeForce RTX 5060 Gaming OC Review
- Our Visit to the Hunter Super Computer
- Fractal Design Epoch RGB TG Review
- NVIDIA GeForce RTX 5050 8 GB Review
- Corsair FRAME 5000D RS Review
- Sapphire Radeon RX 9060 XT Pulse OC 16 GB Review - An Excellent Choice
- Chieftec Iceberg 360 Review
- AMD Ryzen 7 9800X3D Review - The Best Gaming Processor
- Upcoming Hardware Launches 2025 (Updated May 2025)
TPU on YouTube
Controversial News Posts
- Intel's Core Ultra 7 265K and 265KF CPUs Dip Below $250 (288)
- Some Intel Nova Lake CPUs Rumored to Challenge AMD's 3D V-Cache in Desktop Gaming (140)
- AMD Radeon RX 9070 XT Gains 9% Performance at 1440p with Latest Driver, Beats RTX 5070 Ti (131)
- NVIDIA Launches GeForce RTX 5050 for Desktops and Laptops, Starts at $249 (122)
- NVIDIA GeForce RTX 5080 SUPER Could Feature 24 GB Memory, Increased Power Limits (115)
- Microsoft Partners with AMD for Next-gen Xbox Hardware (105)
- Intel "Nova Lake‑S" Series: Seven SKUs, Up to 52 Cores and 150 W TDP (100)
- NVIDIA DLSS Transformer Cuts VRAM Usage by 20% (97)