 3
3
Corsair Katar Pro Wireless Review
Sensor & Performance »Build Quality
Overall build quality is solid. When shaking the mouse, a slight rattle comes from the buttons. When applying lateral pressure, no creaking or flexing of the shell can be observed. It's impossible to activate the side buttons by squeezing the sides. Lastly, when slamming the mouse down, accidental clicks do occur.Buttons

Main buttons on the Katar Pro Wireless are very good. Both pre and post-travel are low, resulting in a very firm and satisfying click response, although the clicks sound a bit hollow. While the buttons are separated from the shell, there is virtually no button wiggle. Button stiffness is medium to light. Kailh switches (blue plunger) are used here.


Side buttons are very good. There is some post-travel, but pre-travel is low, resulting in a snappy click response. The pressure point is even across the entirety of these buttons as well. Button size and placement is good as actuation is possible rather easily by rolling one's thumb over these. Another set of Kailh switches (purple plunger) is used for these.
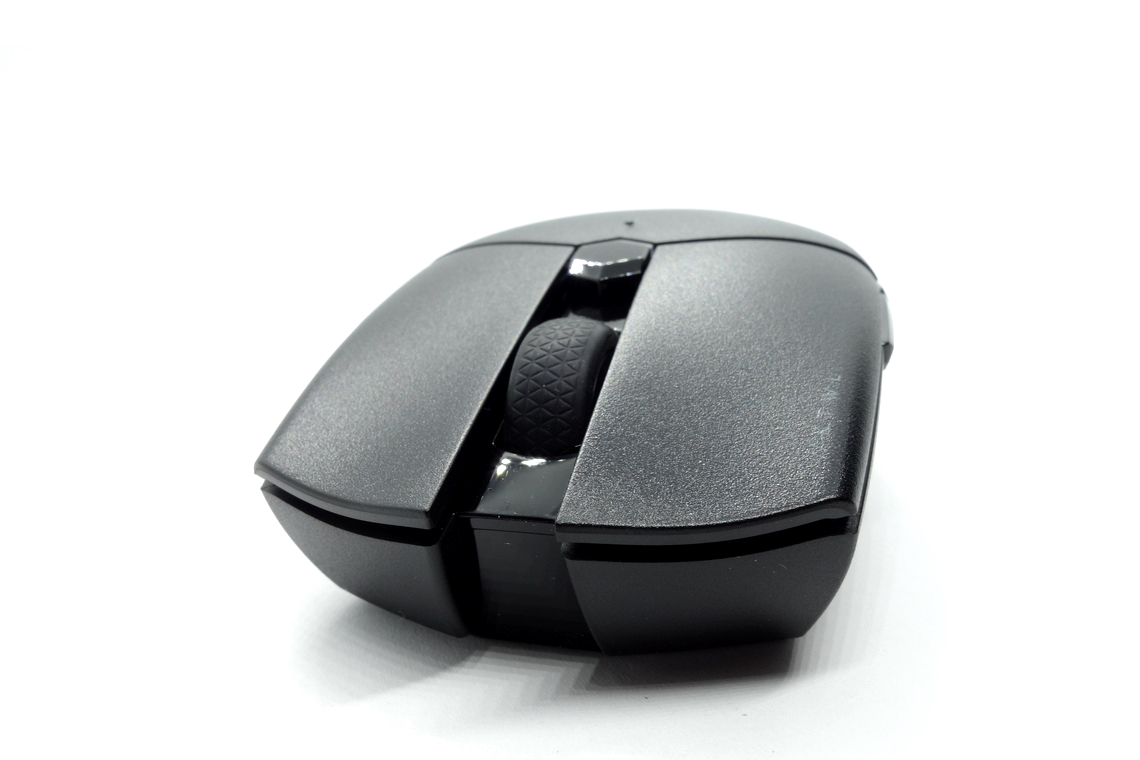
At the top of the mouse is a single button for cycling through the set CPI levels. Its click feel is good. Yet another Kailh switch (purple plunger) is used for this one.
Scroll Wheel
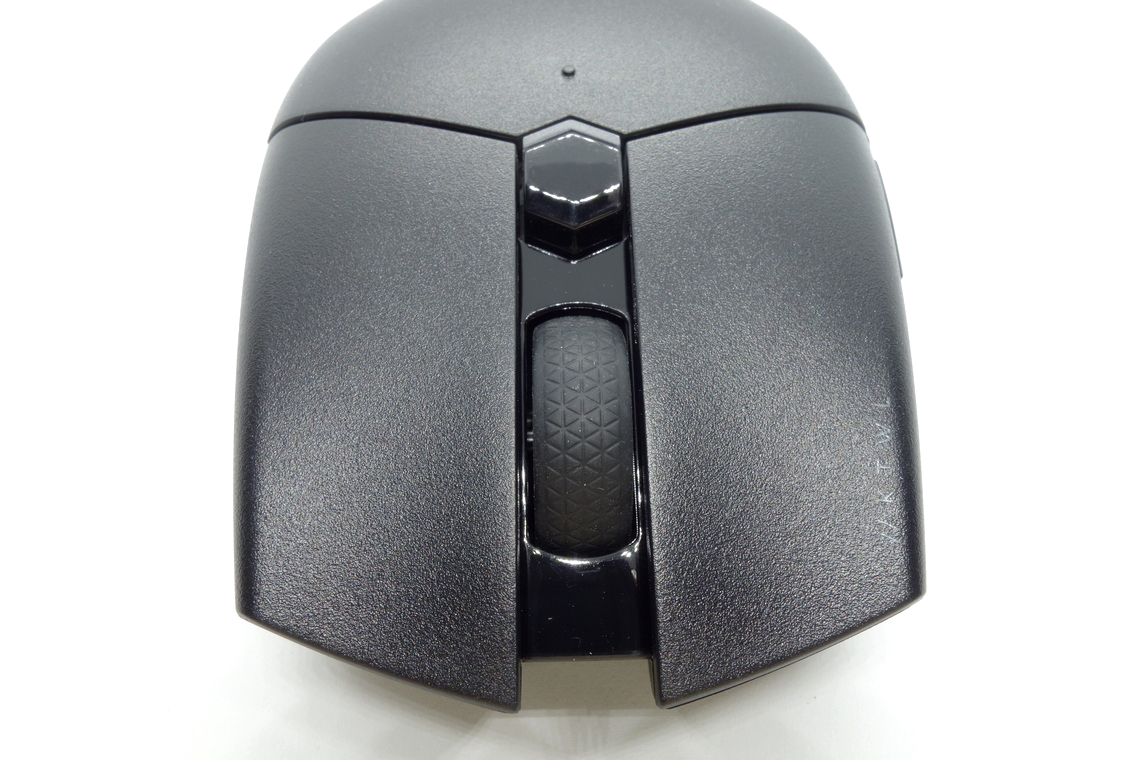

The scroll wheel is good. Scrolling is rather noisy, but the individual steps are quite nicely separated, resulting in good tactility. The encoder comes from Kailh. The middle (scroll wheel) click requires medium to high force for actuation. A tactile switch (most likely from Kailh) is used here.
Coating
The top of the Katar Pro Wireless shell has a matte coating, whereas the sides have a textured surface that feels like rubber. Grip is excellent, and neither surfaces attract fingerprints, dirt, or the likes much at all. The surfaces are easy to clean, and there are no signs of wear left after doing so. All in all, excellent materials.Button Sound Test
Disassembly
Disassembling the Katar Pro Wireless is quite easy. Doing so doesn't require removing the mouse feet, which is nice. First, remove the battery cover. Then, disengage the two locks keeping the main button pieces attached and gently lift them off the top shell. With that done, unscrew the four Y-type screws. You'll notice that the battery holder is part of the lens-illumination assembly. Since I couldn't find a way to safely remove the former, my disassembly had to stop right then and there.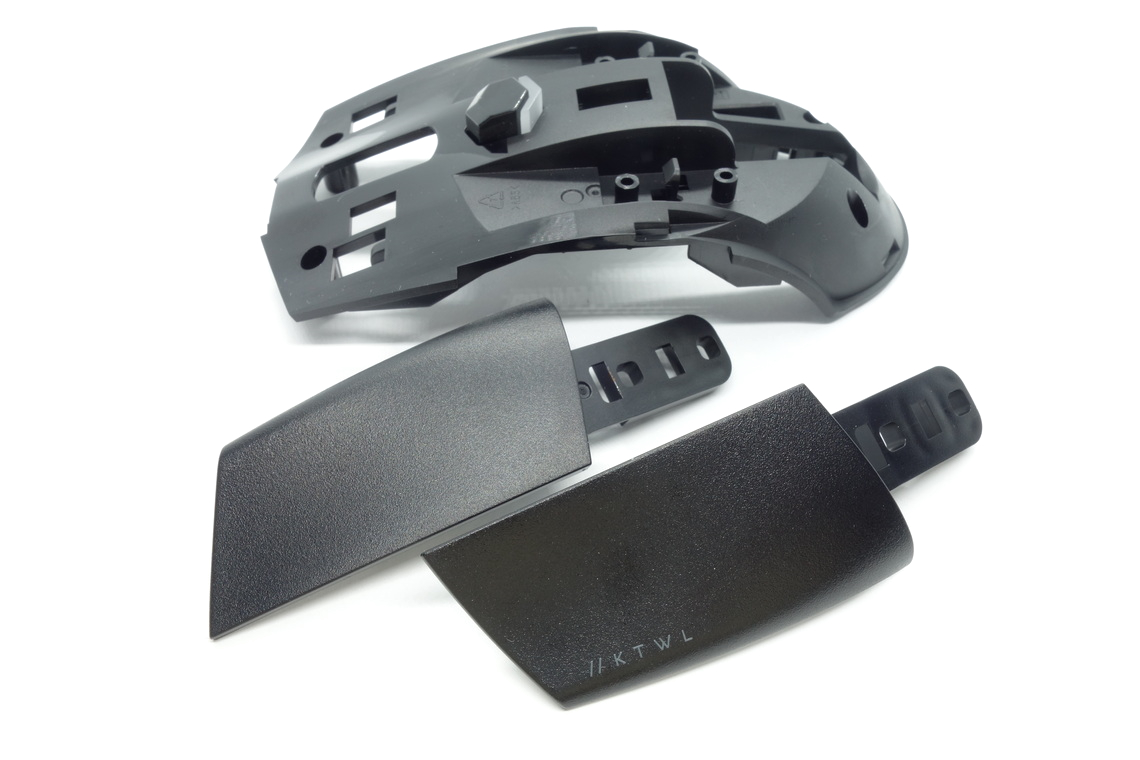
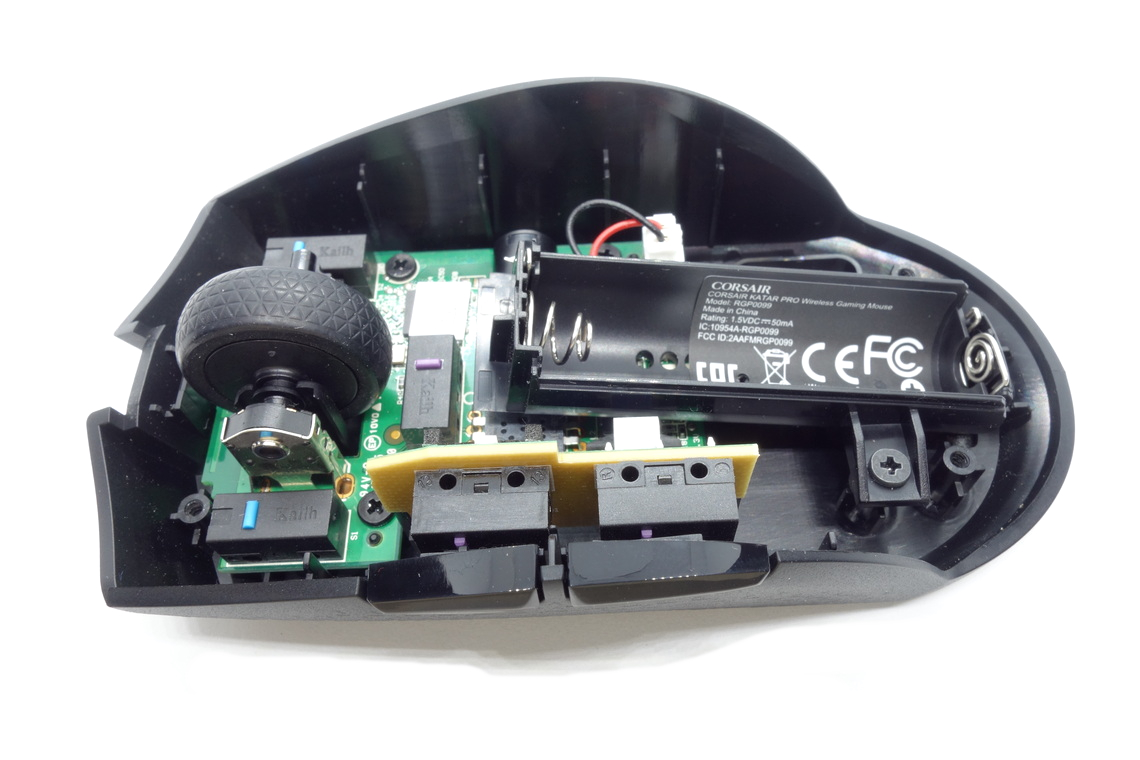
Internally, things are looking pretty simple. Everything but the side buttons, which sit on their own PCB mounted atop of two clips and connected to the main PCB through a ribbon cable, sits on a single PCB. Those two clips fail to provide sufficient resistance, which has the PCB bend inwards when actuating the side buttons. The sensor is rotated by 45 degrees in order to make space for the battery holder. All PCBs are of moderate thickness. Unfortunately, the sticker on the MCU makes it difficult to decipher what's written on it, so I'm unable to identify the MCU.
As for the soldering and general quality of the PCB, I'm unable to find any noteworthy flaws.
Jul 15th, 2025 19:58 CDT
change timezone
Latest GPU Drivers
New Forum Posts
- Is this dual channel or async? (1)
- TPU's Nostalgic Hardware Club (20514)
- What's your latest tech purchase? (24279)
- No offense, here are some things that bother me about your understanding of fans. (147)
- Stupid things one has done with hardware (68)
- Game Informer magazine is back! (5)
- monitor stand became loose after making changes to setup (0)
- What is the latest game you finished or 100% (53)
- How about AMD instead of Intel? (43)
- Adding distilled water to ups batteries really work ? (15)
Popular Reviews
- MSI GeForce RTX 5060 Gaming OC Review
- Our Visit to the Hunter Super Computer
- SilverStone SETA H2 Review
- Lexar NM1090 Pro 4 TB Review
- NVIDIA GeForce RTX 5050 8 GB Review
- Fractal Design Epoch RGB TG Review
- Sapphire Radeon RX 9060 XT Pulse OC 16 GB Review - An Excellent Choice
- AMD Ryzen 7 9800X3D Review - The Best Gaming Processor
- Upcoming Hardware Launches 2025 (Updated May 2025)
- Corsair FRAME 5000D RS Review
TPU on YouTube
Controversial News Posts
- Intel's Core Ultra 7 265K and 265KF CPUs Dip Below $250 (288)
- Some Intel Nova Lake CPUs Rumored to Challenge AMD's 3D V-Cache in Desktop Gaming (140)
- AMD Radeon RX 9070 XT Gains 9% Performance at 1440p with Latest Driver, Beats RTX 5070 Ti (131)
- NVIDIA Launches GeForce RTX 5050 for Desktops and Laptops, Starts at $249 (122)
- NVIDIA GeForce RTX 5080 SUPER Could Feature 24 GB Memory, Increased Power Limits (115)
- Microsoft Partners with AMD for Next-gen Xbox Hardware (105)
- Intel "Nova Lake‑S" Series: Seven SKUs, Up to 52 Cores and 150 W TDP (100)
- NVIDIA DLSS Transformer Cuts VRAM Usage by 20% (99)