 51
51
Creative Sound Blaster X3 Review - Amazing USB Sound Card
Software »Closer Examination


The Creative Sound Blaster X3 has a square shape and fairly compact footprint, and is entirely encased in plastic. It doesn't look or feel very luxurious, as it would if it were made from aluminium or some kind of metal. Still, it's not particularly light, so it won't dance around the table, getting yanked around by your headset's cable. The central point of its exterior is the large multipurpose dial. The dial is surrounded by a glowing ring whose color changes depending on the current function of the dial.

Before diving into the various functions of the dial, let's check out the inputs and outputs of the Sound Blaster X3. On the front are two 3.5-millimeter analogue ports. The left port is the microphone input, and the right one is the headphone output. If your headset only comes with a single, combined audio input/output (4-pole TRRS jack), you'll have to use a 3-pole (TRS) splitter cable to connect it to the Sound Blaster X3. Luckily, most analogue headsets nowadays come factory-equipped with such a splitter. Even if you don't have a splitter, you can buy one for a couple of bucks at any electronics store.

All other inputs and outputs are located on the rear. First, we have a set of four linear outputs, which can be used to connect active (powered) speakers. The Sound Blaster X3 supports 2.0, 2.1, 5.1 and 7.1 speaker configurations. Next, there's a 3.5-millimeter linear input. Here, you can connect external sound sources, such as smartphones and digital audio players. Naturally, Creative also implemented an optical (TOSLINK) output. It will come in handy when connecting the Sound Blaster X3 to an AV receiver or stereo amplifier, or a pair of higher-quality powered speakers which are often equipped with an optical input. When connected this way, the Sound Blaster X3 essentially functions as an audio transport. It takes the sound from the source (your PC, for example) and forwards it to a device it's connected to (AV receiver, powered speakers) while keeping it digital. The digital-to-analogue conversion happens in the DAC of the device connected to the sound card. The last connector on the rear of the Sound Blaster X3 is a USB-C port used for communication with your PC/PS4/Switch and to power the sound card.
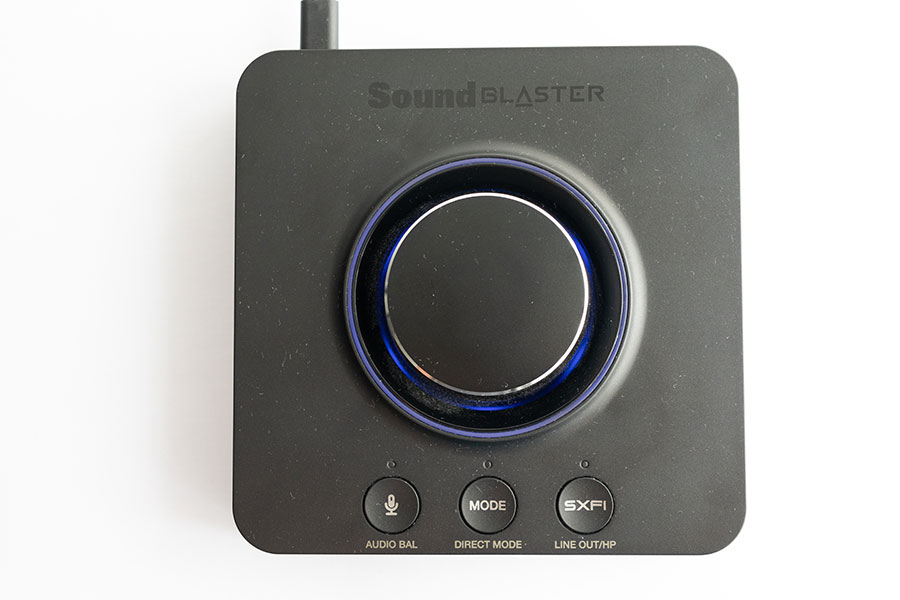
In its "main" operating mode, marked with a glowing blue ring, the large circular dial is used to digitally adjust the sound volume. If you press the dial in this state, sound will instantly be muted, and the glowing ring will begin to pulsate. Pressing it again will unmute the sound.
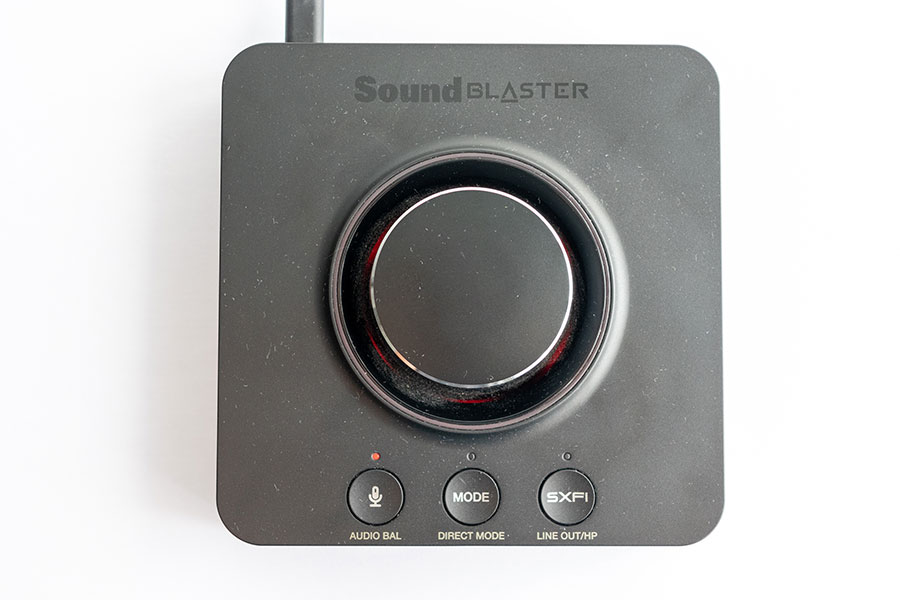
The other two operating modes are activated via the leftmost button below the dial, the one marked with a microphone. Press the microphone button and the glowing ring will switch from blue to red to indicate that the dial now controls the microphone volume. As before, pressing the dial will mute the microphone.
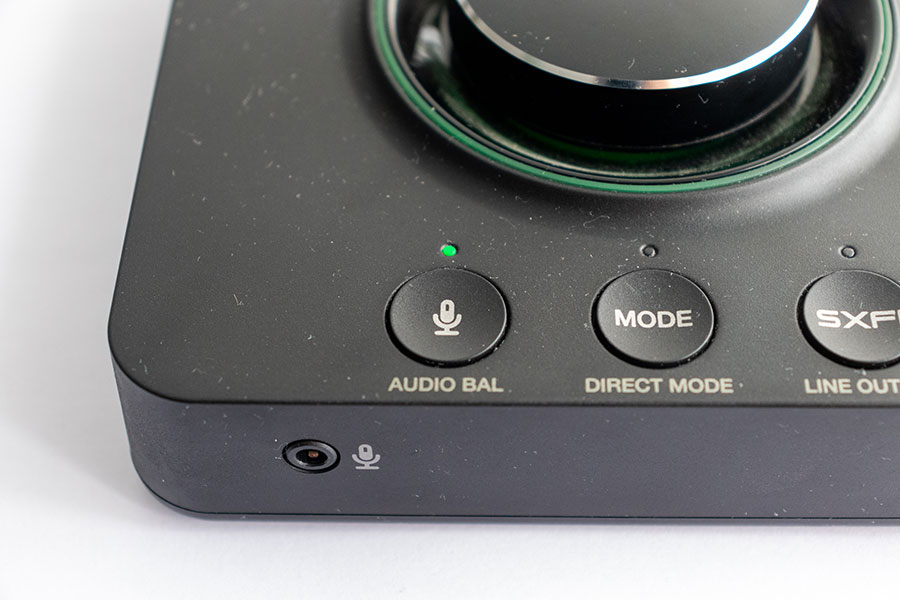
If you press and hold the microphone button for two seconds, you'll activate their so-called "Audio Balance" mode. This mode lets you volume mix between two "software sources"; the game you're playing and Discord, for example. Creative made this work by having the Sound Blaster X3 show up as two separate playback interfaces in Windows/MacOS: "SPDIF Out" and "Speakers". To get it to work set "Speakers" as the default playback device, and open your VoIP app of choice to set "SPDIF Out" as your output device after you have. With that done, you can simply rotate the volume knob clockwise to make your game louder and your teammates quieter, or counterclockwise to do the opposite. The color of the glowing ring changes between orange, cyan, and green depending on which "source" is louder. When green, the volume is balanced. You can instantly reset the balance by pressing the volume knob, too. Audio Balance mode isn't supported on the PS4 or Nintendo Switch as it relies on Windows/MacOS audio drivers to work.
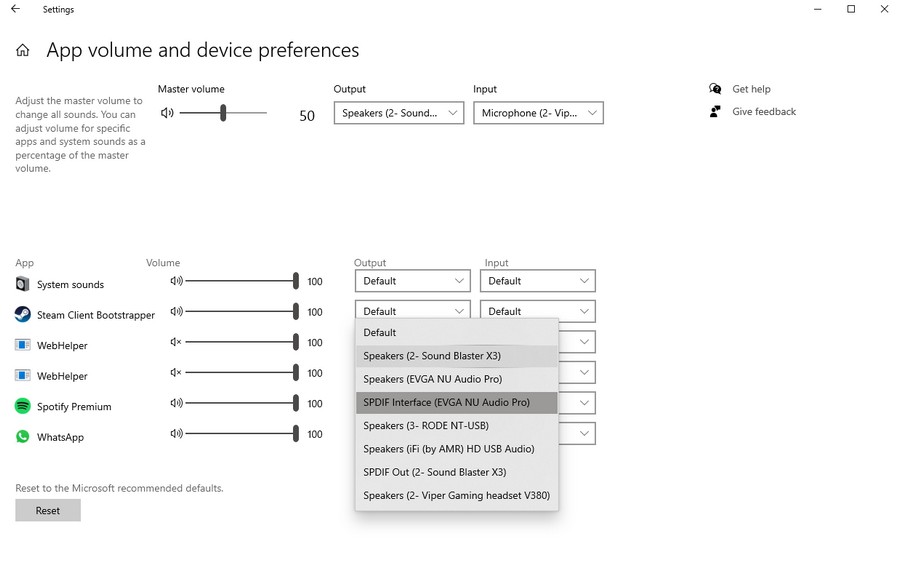
You can use the aforementioned audio balancing for any other app on your PC—nobody is forcing you to use it exclusively with VoIP apps. Perhaps you want to balance the volume between your game and Spotify. You can do so by searching for "Sound mixer options" in the Windows Start menu and selecting "SPDIF Out (Sound Blaster X3)" in the Output drop-down menu next to Spotify (or another app you want to "assign" it to). The app has to be running in order to show up in this menu.
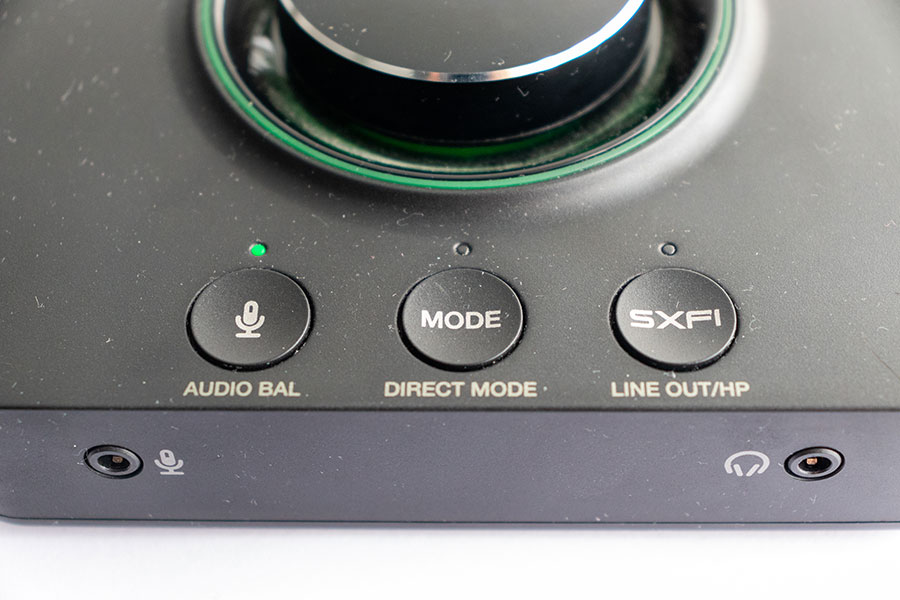
The "Mode" button toggles between three equalizer profiles, or turns these off completely. The equalizer profiles, customizable through the Sound Blaster Command software driver, have three preassigned colors—white, pink, and blue—and a small LED above this button can glow in any of those colors as well. As you're probably guessing, the LED color lets us know which equalizer profile is active. If the LED is off, the equalizer is not active. Holding the Mode button for two seconds activates Direct Mode. In this mode, the Sound Blaster X3 doesn't use its DSP, but aims to leave the audio signal as intact as possible, so you can hear it in its purest form. However, when switching to Direct Mode, you also lose access to various other features that rely on the DSP, such as the system-wide equalizer, microphone monitoring, technologies like Super X-Fi and SBX, and microphone filters and effects. Should you use Direct Mode? That depends on the quality of your speakers or headphones. When I paired the Sound Blaster X3 with higher quality gear, such as the Adam A7X and Edifier S2000 Pro speakers, or the Sennheiser HD 660 S and Oppo PM-3 headphones, Direct Mode definitely made an audible difference. At the same time, it made very little to no difference when I used a mid-range gaming headset. You can easily check if it makes any difference to you by simply playing some music and toggling Direct Mode on and off. If you don't hear any difference or prefer the sound of your speakers or headphones when DSP processing is applied, just keep Direct Mode off.
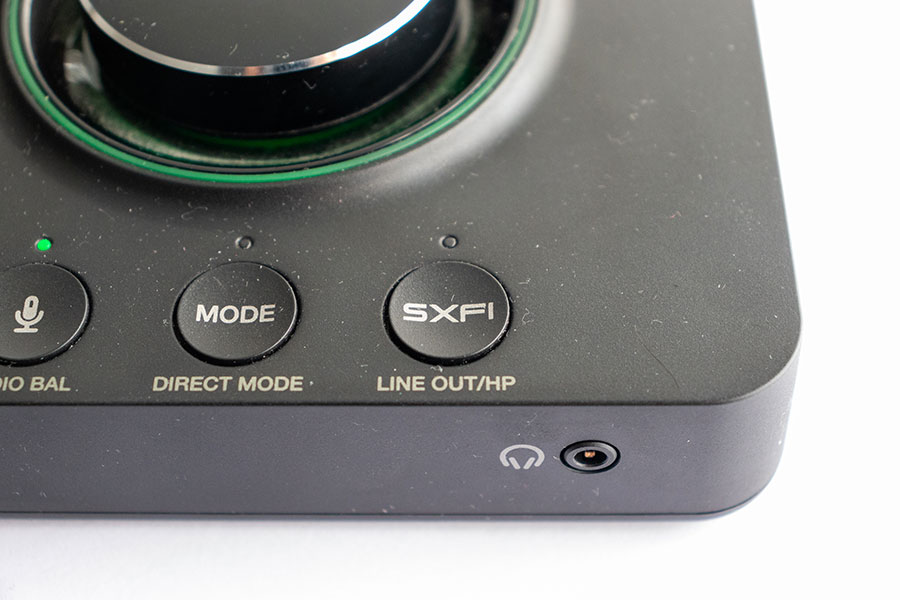
The third button below the volume knob activates and deactivates the Super X-Fi technology. You can read about it in the sound performance section of this review. Holding the SXFI button for two seconds switches between front and rear outputs. In other words, this is what you'll use to quickly switch between your speakers and headphones.
Jul 12th, 2025 09:33 CDT
change timezone
Latest GPU Drivers
New Forum Posts
- Gigabyte graphic cards - TIM gel SLIPPAGE problem (151)
- No offense, here are some things that bother me about your understanding of fans. (36)
- Stupid buggy POS Realtek WiFi RTL8852BE (11)
- Swapping existing router w/ a replacement; any issues? (14)
- 'NVIDIA App' not usable offline? (13)
- Chrome has removed uBlock Origin 1.64.0 (remove google search suggestions) (12)
- Share your AIDA 64 cache and memory benchmark here (3097)
- The Official Linux/Unix Desktop Screenshots Megathread (778)
- [GPU-Z Test Build] New Kernel Driver, Everyone: Please Test (90)
- NVIDIA App (55)
Popular Reviews
- Fractal Design Epoch RGB TG Review
- Lexar NM1090 Pro 4 TB Review
- Corsair FRAME 5000D RS Review
- NVIDIA GeForce RTX 5050 8 GB Review
- NZXT N9 X870E Review
- Our Visit to the Hunter Super Computer
- Sapphire Radeon RX 9060 XT Pulse OC 16 GB Review - An Excellent Choice
- AMD Ryzen 7 9800X3D Review - The Best Gaming Processor
- Upcoming Hardware Launches 2025 (Updated May 2025)
- Chieftec Iceberg 360 Review
TPU on YouTube
Controversial News Posts
- Intel's Core Ultra 7 265K and 265KF CPUs Dip Below $250 (288)
- Some Intel Nova Lake CPUs Rumored to Challenge AMD's 3D V-Cache in Desktop Gaming (140)
- AMD Radeon RX 9070 XT Gains 9% Performance at 1440p with Latest Driver, Beats RTX 5070 Ti (131)
- NVIDIA Launches GeForce RTX 5050 for Desktops and Laptops, Starts at $249 (119)
- NVIDIA GeForce RTX 5080 SUPER Could Feature 24 GB Memory, Increased Power Limits (115)
- Microsoft Partners with AMD for Next-gen Xbox Hardware (105)
- Intel "Nova Lake‑S" Series: Seven SKUs, Up to 52 Cores and 150 W TDP (100)
- NVIDIA DLSS Transformer Cuts VRAM Usage by 20% (97)