 12
12
Danger Den Tyee GPU Waterblock Review
Performance »Installation
With this many pieces, you can tell it’s going to be a bit complicated to install. Anyone with experience in installing aftermarket cooling for their video cards should be able to handle installing the Tyee. In fact, installing the Tyee is not something that should be done by a beginner, as there are a lot of assumptions made by the instructions.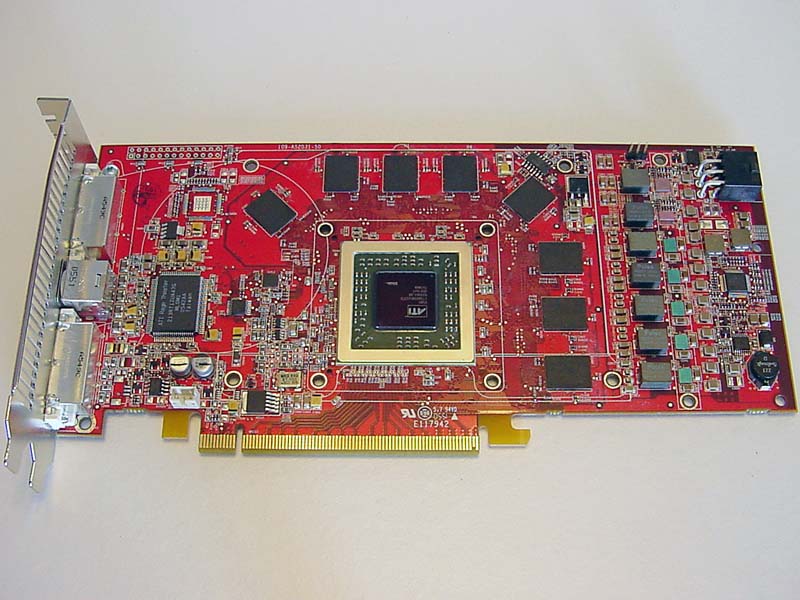
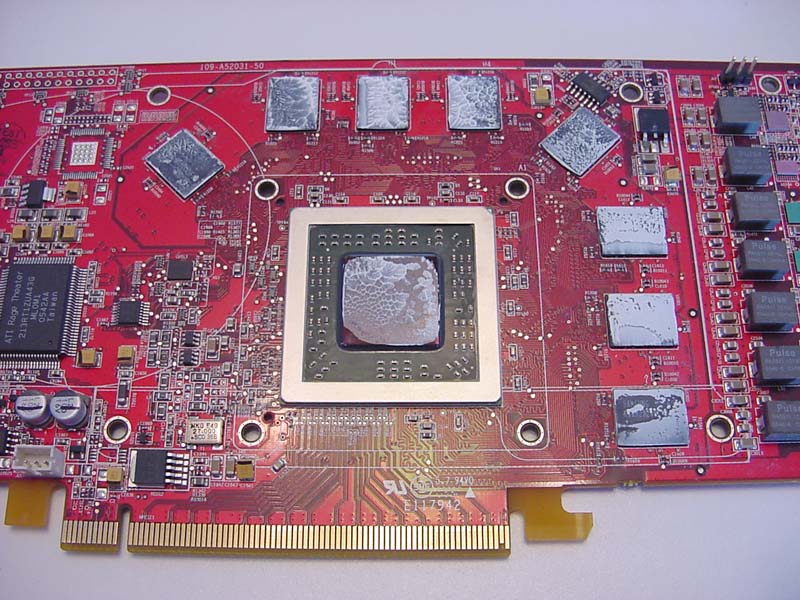
To start the installation, I needed to remove the air cooling I had on my ATI Radeon X1900XT. All the RAM chips and the core needed a good cleaning with some Arctic Silver Cleaner.
I attached the v-reg heat bridge to the block. Installation is simple and straight-forward, however I did add some thermal paste between the bridge and the block. This is one item not included in the installation instructions, but something I would highly recommend. Afterward, I flipped the block over and cleaned it thoroughly with more Arctic Silver Cleaner.
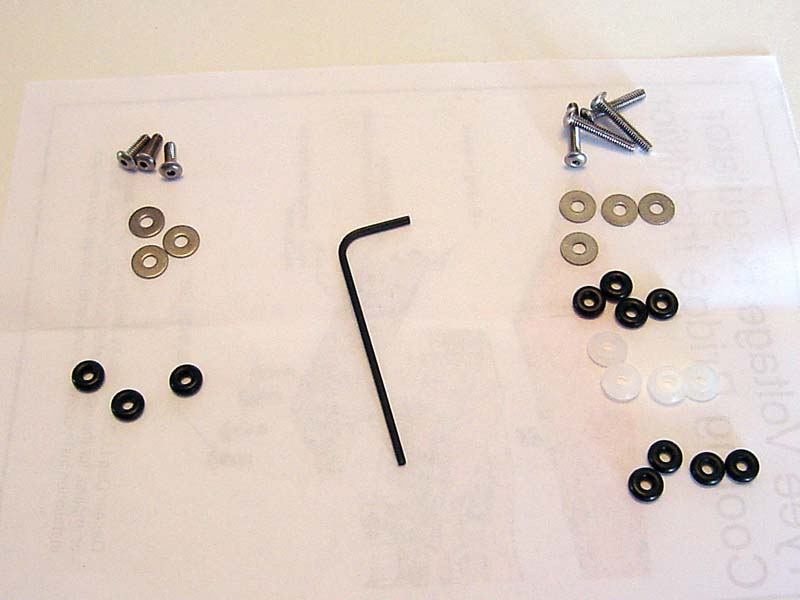
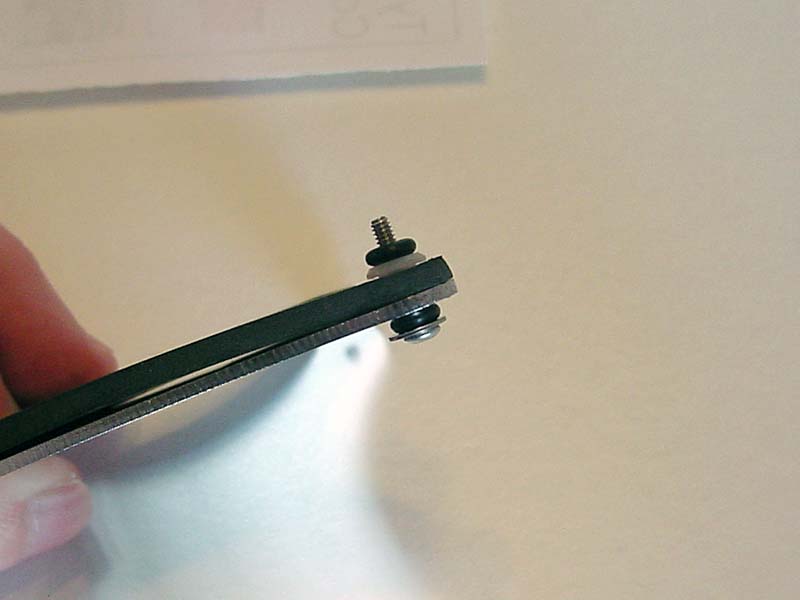
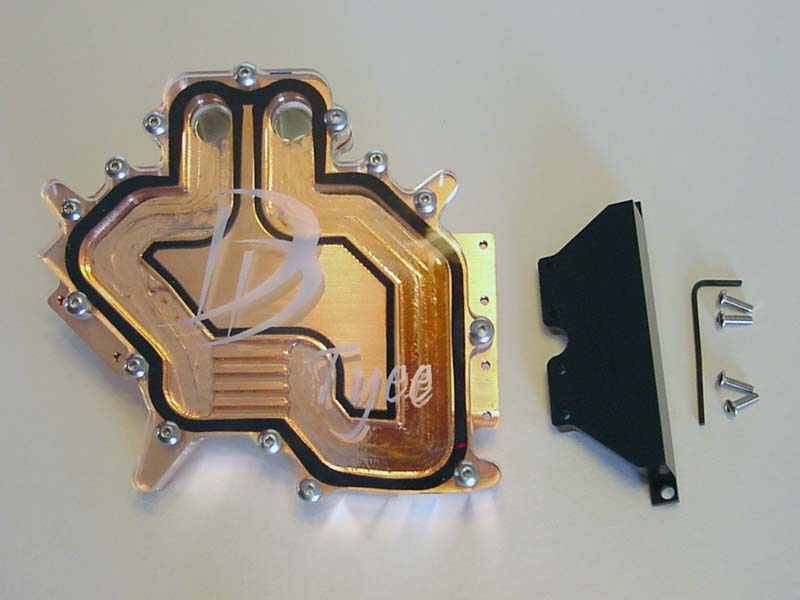
Here you can see the hardware required to install the block to the card. I tried to separate everything to show the order of the installation. The screws, washers and o-rings on the left are used on the outer edges of the block. Everything else on the right is used in conjunction with the backplate and neoprene pad. For the backplate the assembly goes screw, washer, o-ring, backplate, neoprene, nylon spacer, then another o-ring. When completely assembled, the o-rings help to hold everything together quite nicely. For the other three shorter screws, it’s simply screw, washer, then o-ring.
Before mounting the block to the card some thermal paste must be added to each of the memory chips and the core. To get decent contact I made sure to put an opaque layer on each of the memory chips when I spread it out, and the core got a small dot of compound as well. Again, adding compound is not mentioned in the instructions, but is mandatory.

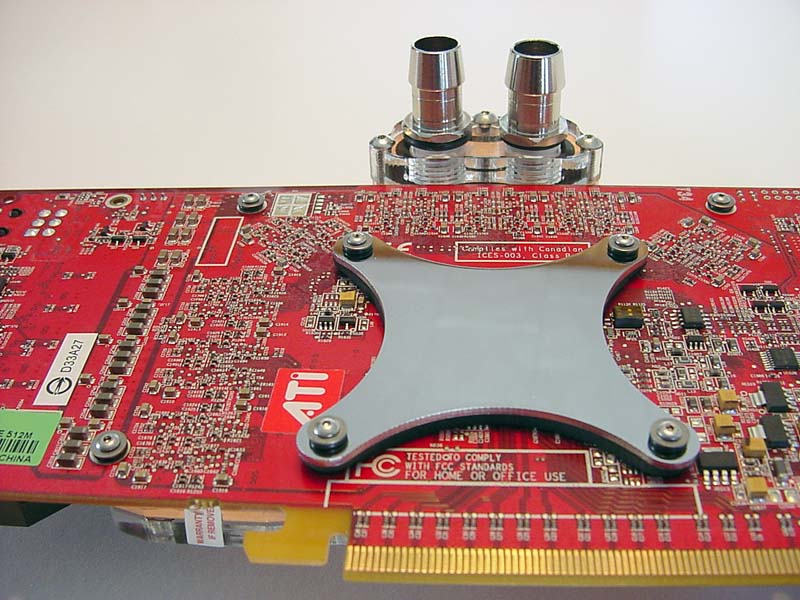
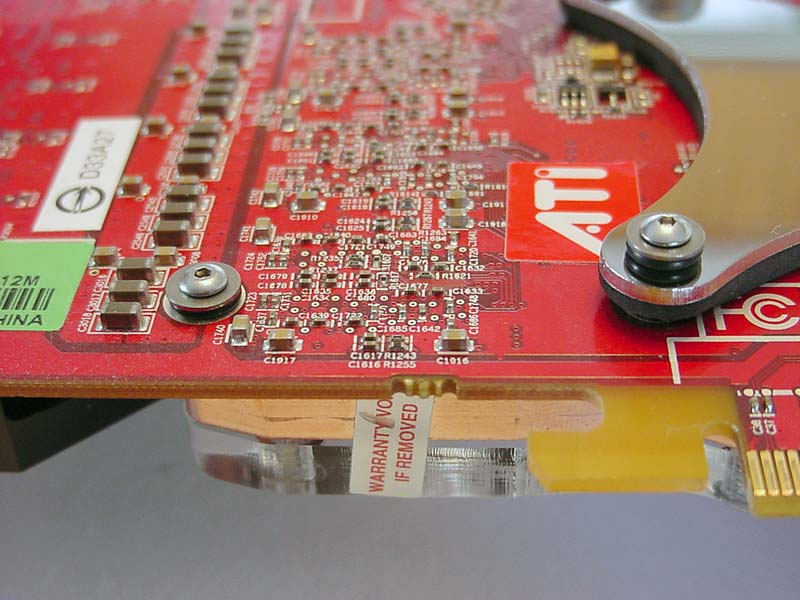
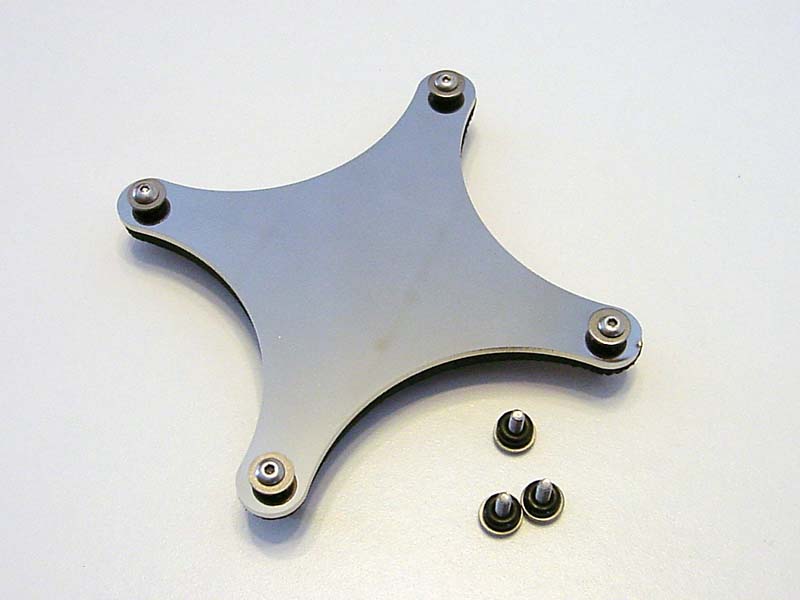
To mount the block to the card I laid the block upside-down on top of the cardboard box for the Tyee. This helped to hold the block level and not allow the PCI backplate on the card to hit the work surface and prevent the block from touching. I then laid the card down onto the block, looking through the mounting holes at the block's screw holes to keep things lined up. With the card in place on top of the block, I mounted the backplate and the three other screws. Danger Den points out that the screws should only be tightened ¼ turn past the point where the o-ring contacts the card. That is a lot harder than it sounds.
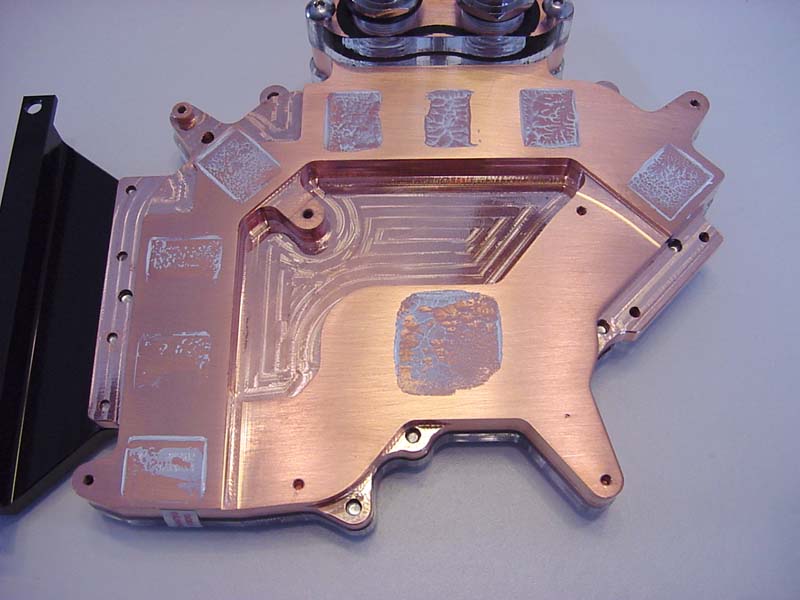
Immediately after mounting the block I removed it to check the contact area. The card was stuck to the block, and required a bit of constant pressure to break free. As you can see from the images above, proper tension on the screws is difficult to achieve. Some of the chips had perfect contact and had pushed the paste past all four edges, while others barely had contact. My assumption is that I had over-tightened the outer screws, causing the card to bow out slightly. The memory chips closest to the voltage regulators had the worst contact, but that may be in part due to not securing the heat bridge. An email from Dan at Danger Den confirmed that the cards may sometimes flex and that is why they recommend only tightening 1/4 turn past contact. One idea to counteract this issue might be to add some kind of non-conductive spacer between the card and the block, and that is something that I would like to see in future revisions.

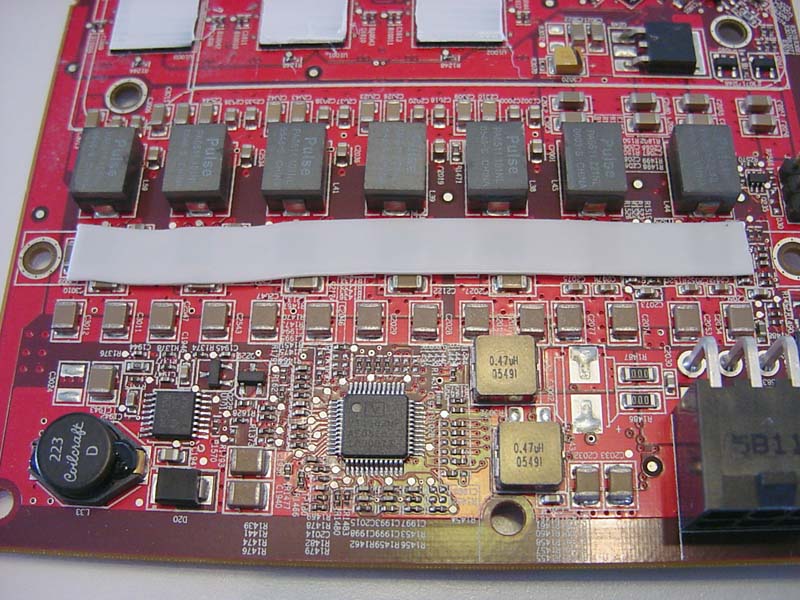
The thermal pad for the v-reg heat bridge is wider than it needs to be. I took the opportunity to cut the strip in half length-wise, and that proved to be just wide enough. I cleaned the regulators with AS Cleaner, then removed the backing from one side of the pad. I affixed the pad to the regulators and smoothed it out as well as I could. The pad is not very sticky, so it can be easily removed and replaced. It is very stretchy however, so be careful not to stretch it too thin.
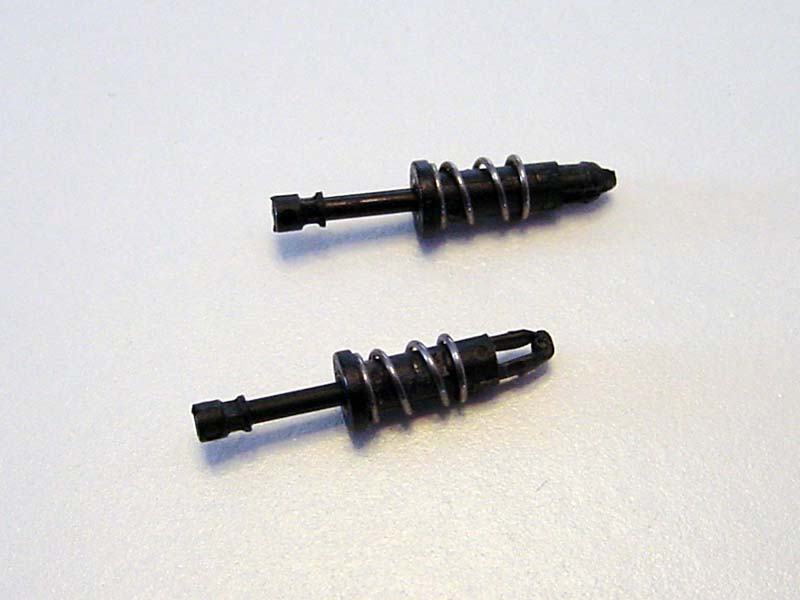
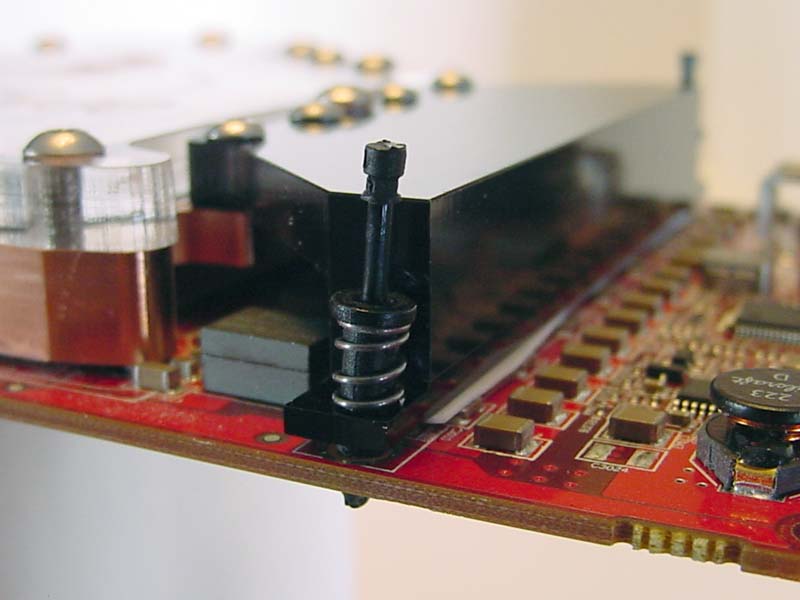
To mount the heat bridge securely, the push pins need to be removed from the original v-reg heatsink. This is done by removing the pin from the center, then carefully squeezing the bottom of the push pin on the back side of the card. When it starts to slip through the hole, you can push it the rest of the way out with your finger. To put it back in the heat bridge, simply reverse the process. Line the pin up from the front, push it through the hole until it’s completely through the back side of the card, then push down the center pin to lock it in place.
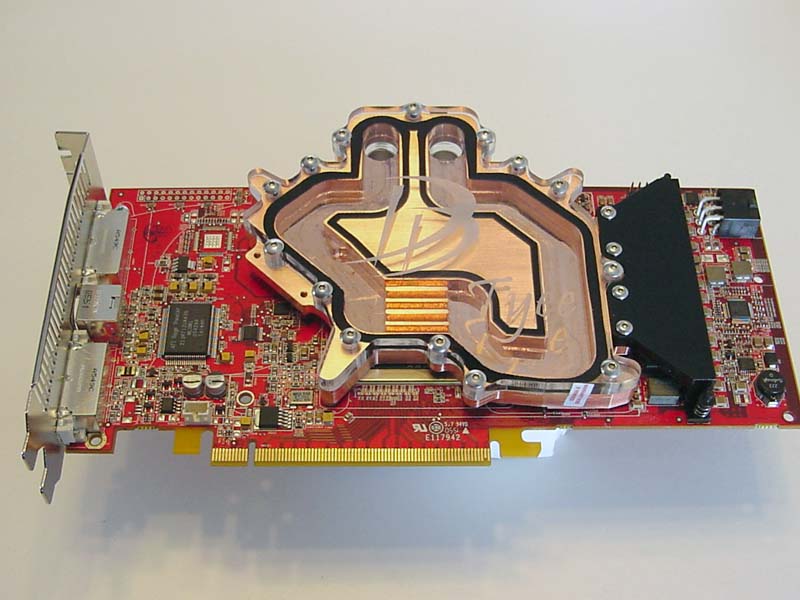
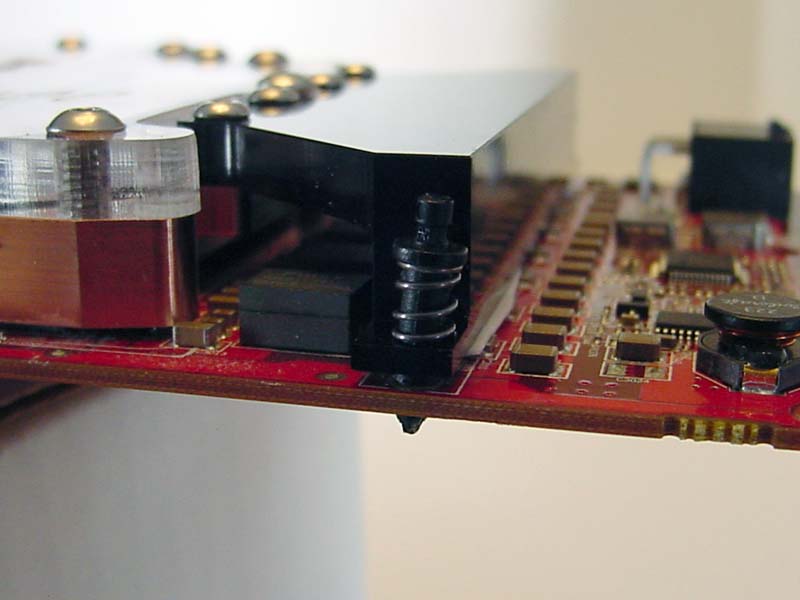
When completely installed, the block adds some serious weight to the card. This is obviously due to the solid copper as well as everything else needed to install the card. This might be an issue if the case is moved around a lot, depending on your configuration.
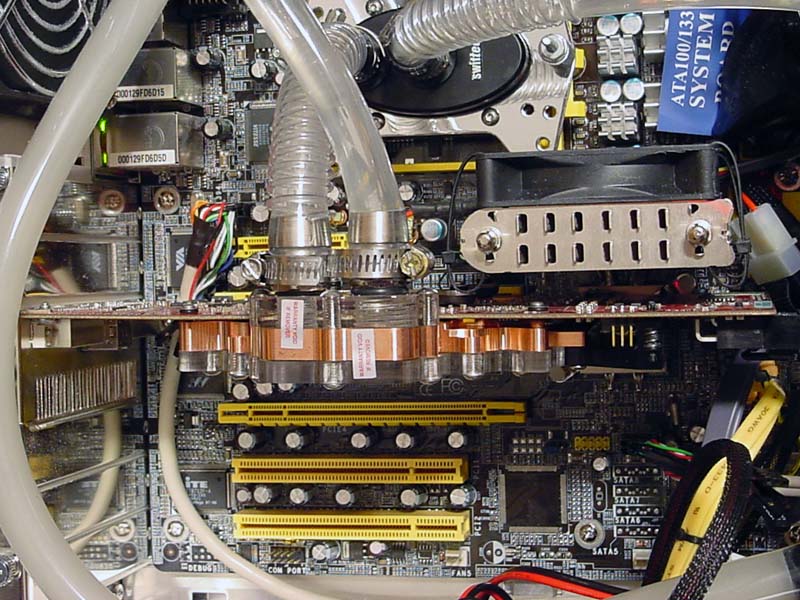
I then installed the card back into the system and proceeded with the leak testing. As you can see, the Tyee was installed after the CPU waterblock. This works well in so many ways due to Danger Den installing the barbs in an upward facing position, instead of how most blocks have their barbs pointing outward parallel to the card. That can make installation and tubing bends difficult, but Danger Den’s method used with the Tyee makes it easy. Not only does this allow a short run from the CPU, but helps when using two of these blocks in a Crossfire mode. In my case, the short run from the CPU to the card helps to support the weight of the Tyee, as the card/Tyee and the CPU block both have to be removed together.
Jul 15th, 2025 16:34 CDT
change timezone
Latest GPU Drivers
New Forum Posts
- No offense, here are some things that bother me about your understanding of fans. (145)
- Stupid things one has done with hardware (65)
- RTX 5070 discussion (11)
- I would give anything for Valve's Steam to have an option to disable the Big Picture Mode button. How many times have I accidently clicked it, fml (52)
- Choosing the right motherboard (6)
- Solidigm NVMe Custom Modded Driver for All NVMe Brands SSDs & Any NVMe SSDs (229)
- Recommend me a decent budget card :) (33)
- What's your latest tech purchase? (24278)
- TOS 6 on Ugreen NAS (0)
- Folding Pie and Milestones!! (9620)
Popular Reviews
- MSI GeForce RTX 5060 Gaming OC Review
- Our Visit to the Hunter Super Computer
- Lexar NM1090 Pro 4 TB Review
- SilverStone SETA H2 Review
- NVIDIA GeForce RTX 5050 8 GB Review
- Fractal Design Epoch RGB TG Review
- Sapphire Radeon RX 9060 XT Pulse OC 16 GB Review - An Excellent Choice
- AMD Ryzen 7 9800X3D Review - The Best Gaming Processor
- Upcoming Hardware Launches 2025 (Updated May 2025)
- Corsair FRAME 5000D RS Review
TPU on YouTube
Controversial News Posts
- Intel's Core Ultra 7 265K and 265KF CPUs Dip Below $250 (288)
- Some Intel Nova Lake CPUs Rumored to Challenge AMD's 3D V-Cache in Desktop Gaming (140)
- AMD Radeon RX 9070 XT Gains 9% Performance at 1440p with Latest Driver, Beats RTX 5070 Ti (131)
- NVIDIA Launches GeForce RTX 5050 for Desktops and Laptops, Starts at $249 (122)
- NVIDIA GeForce RTX 5080 SUPER Could Feature 24 GB Memory, Increased Power Limits (115)
- Microsoft Partners with AMD for Next-gen Xbox Hardware (105)
- Intel "Nova Lake‑S" Series: Seven SKUs, Up to 52 Cores and 150 W TDP (100)
- NVIDIA DLSS Transformer Cuts VRAM Usage by 20% (99)