 2
2
EK-Quantum Vector RE RTX 3080 GPU Block + Backplate Review
Installation & Lighting »Closer Examination

One look at the EK-Quantum Vector RE RTX 3080/3090 immediately tells me that it is an EKWB product and part of the company's Quantum product line. Yes, a lot here has not changed much since my very first EK GPU block. The nickel-plated copper cold plate and polished plexi (acrylic) top is possibly the most popular combination for water blocks from EK and indeed the version I have here. This is a full-cover block in that the cold plate is in contact with the GPU core, VRAM, and VRM modules to actively cool these critical components. It is also a full-length block since the top covers the entire PCB on, well, the top, with precise machining to accommodate larger components, including the capacitors that made life hard for waterblock makers, as well as such items as the PCIe connector plugs and I/O on the side.
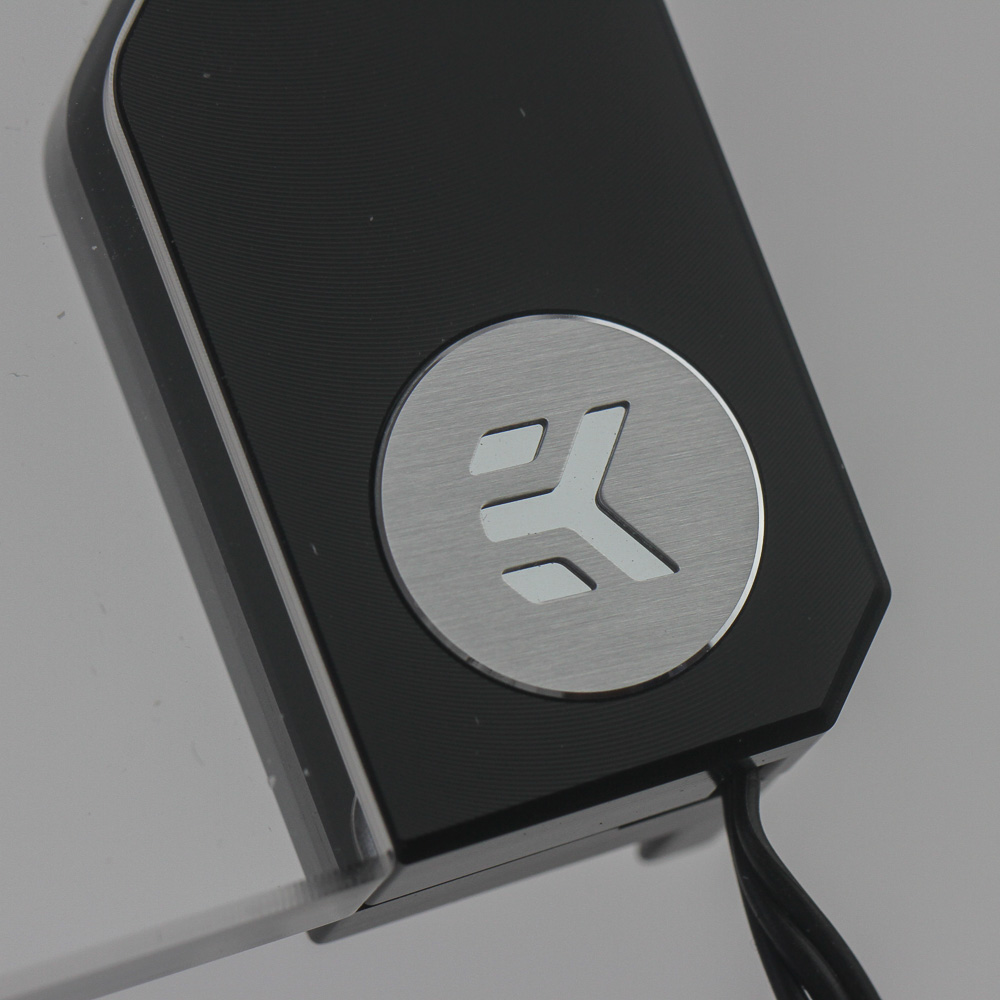
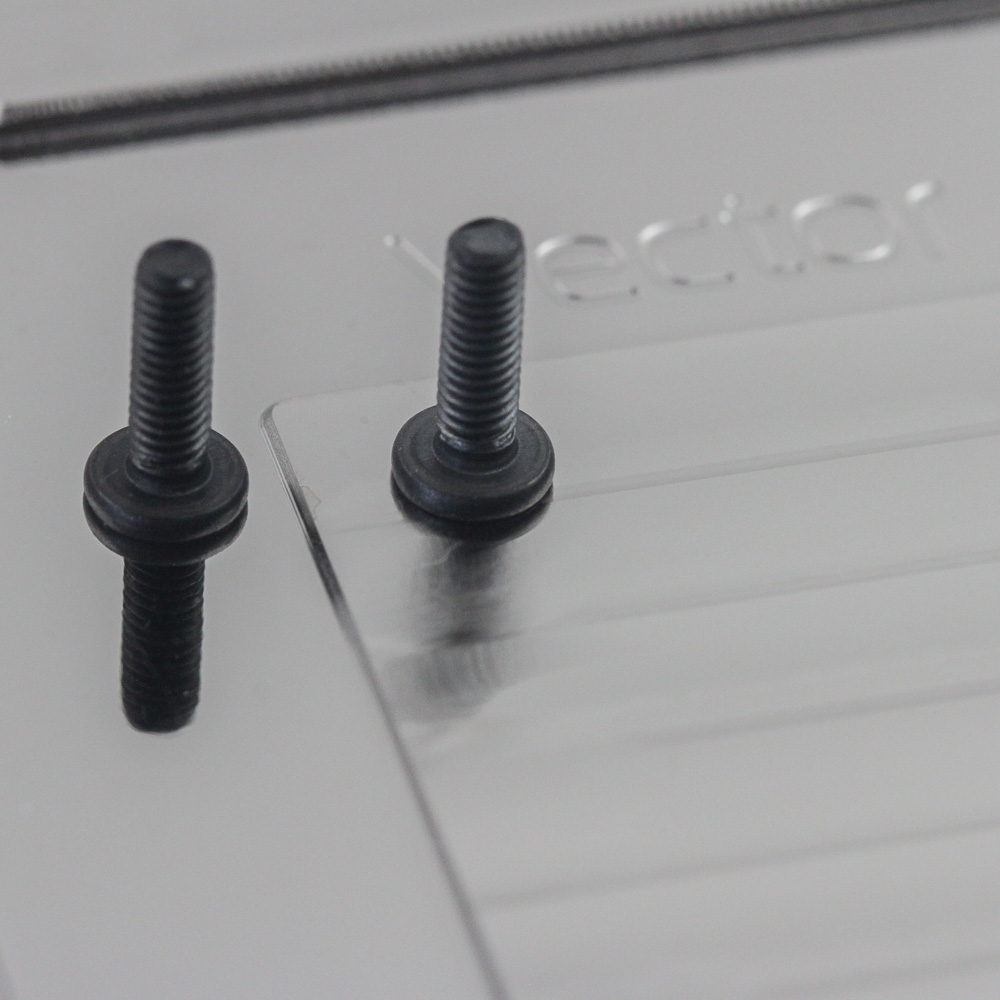
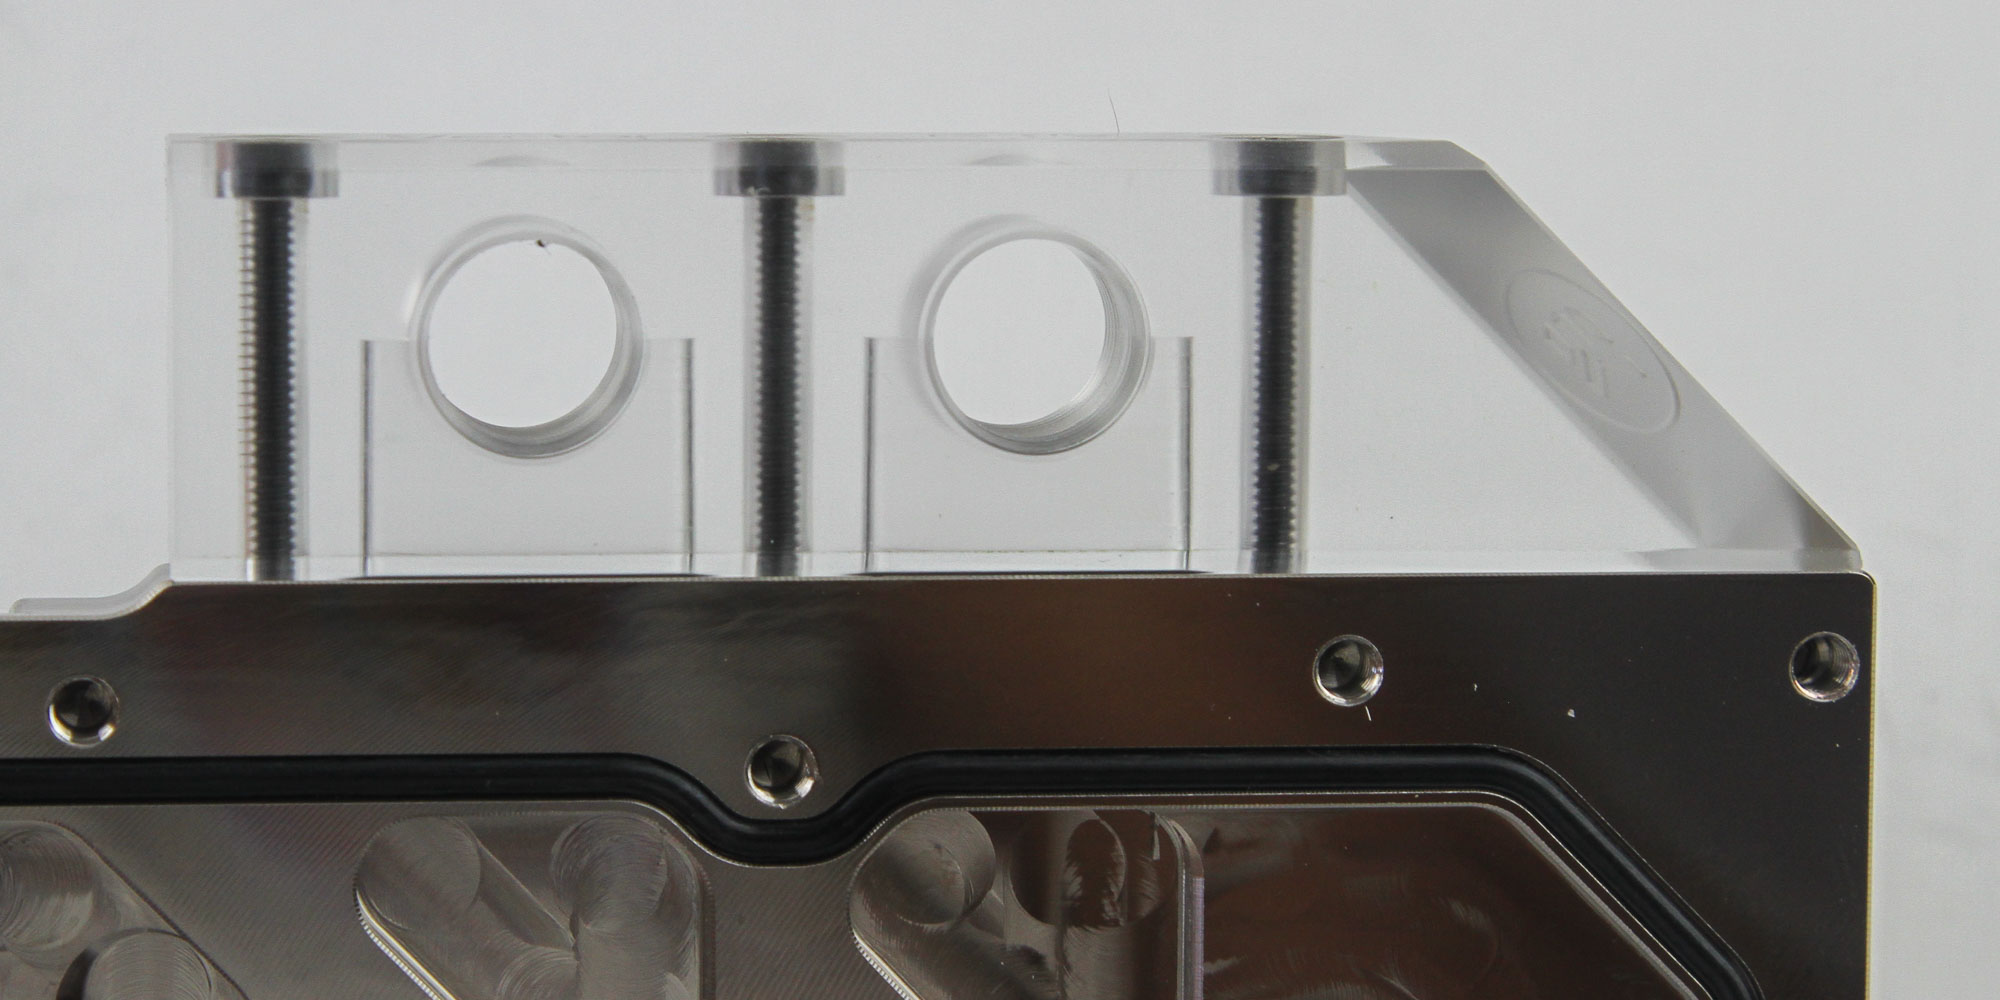
14 H2.5 mm screws go through the plexi top and into the metal cold plate to keep things together, with a large O-ring ensuring the liquid flows through where it should without leaking out. The see-through top allows for a good look at the coolant moving through if colored, as well as the RGB lighting from five D-RGB LEDs at the bottom, which shines upward through the block. An acetal accent piece on the end has the EK badge in a similar location as on the backplate we saw before.
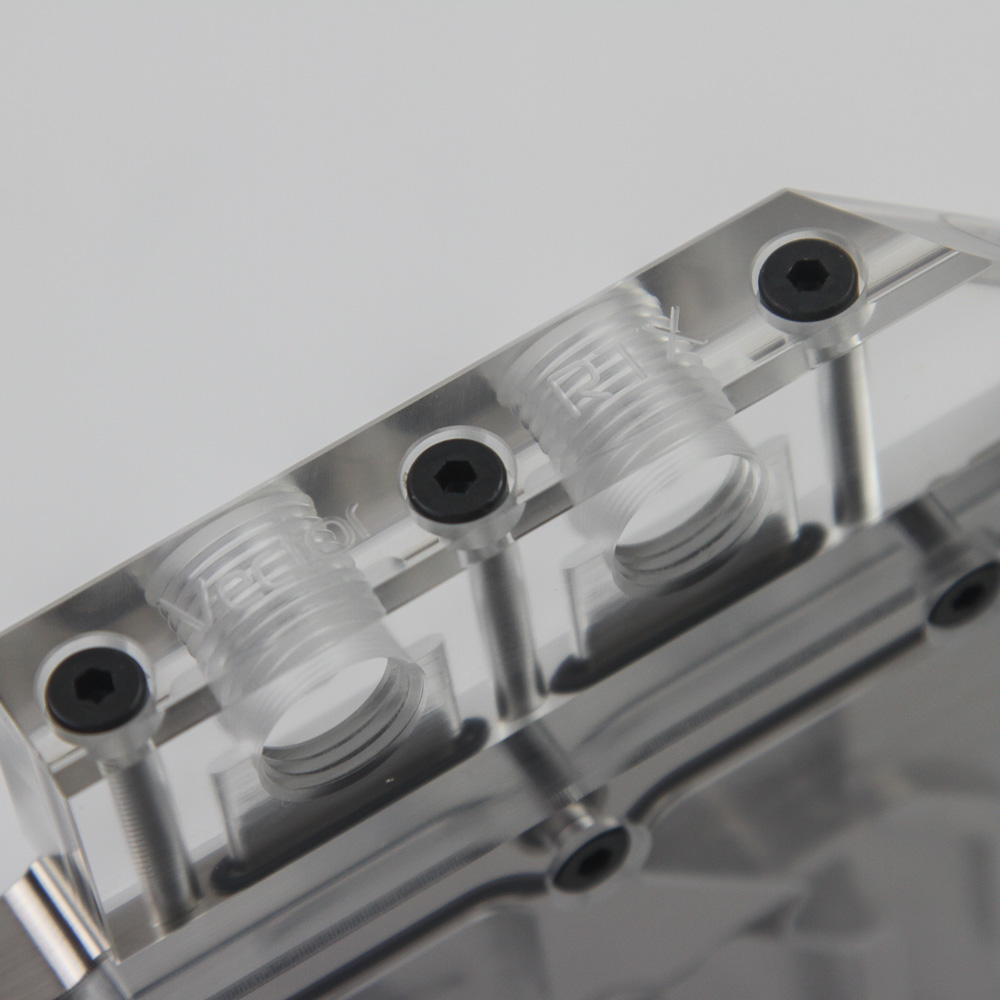
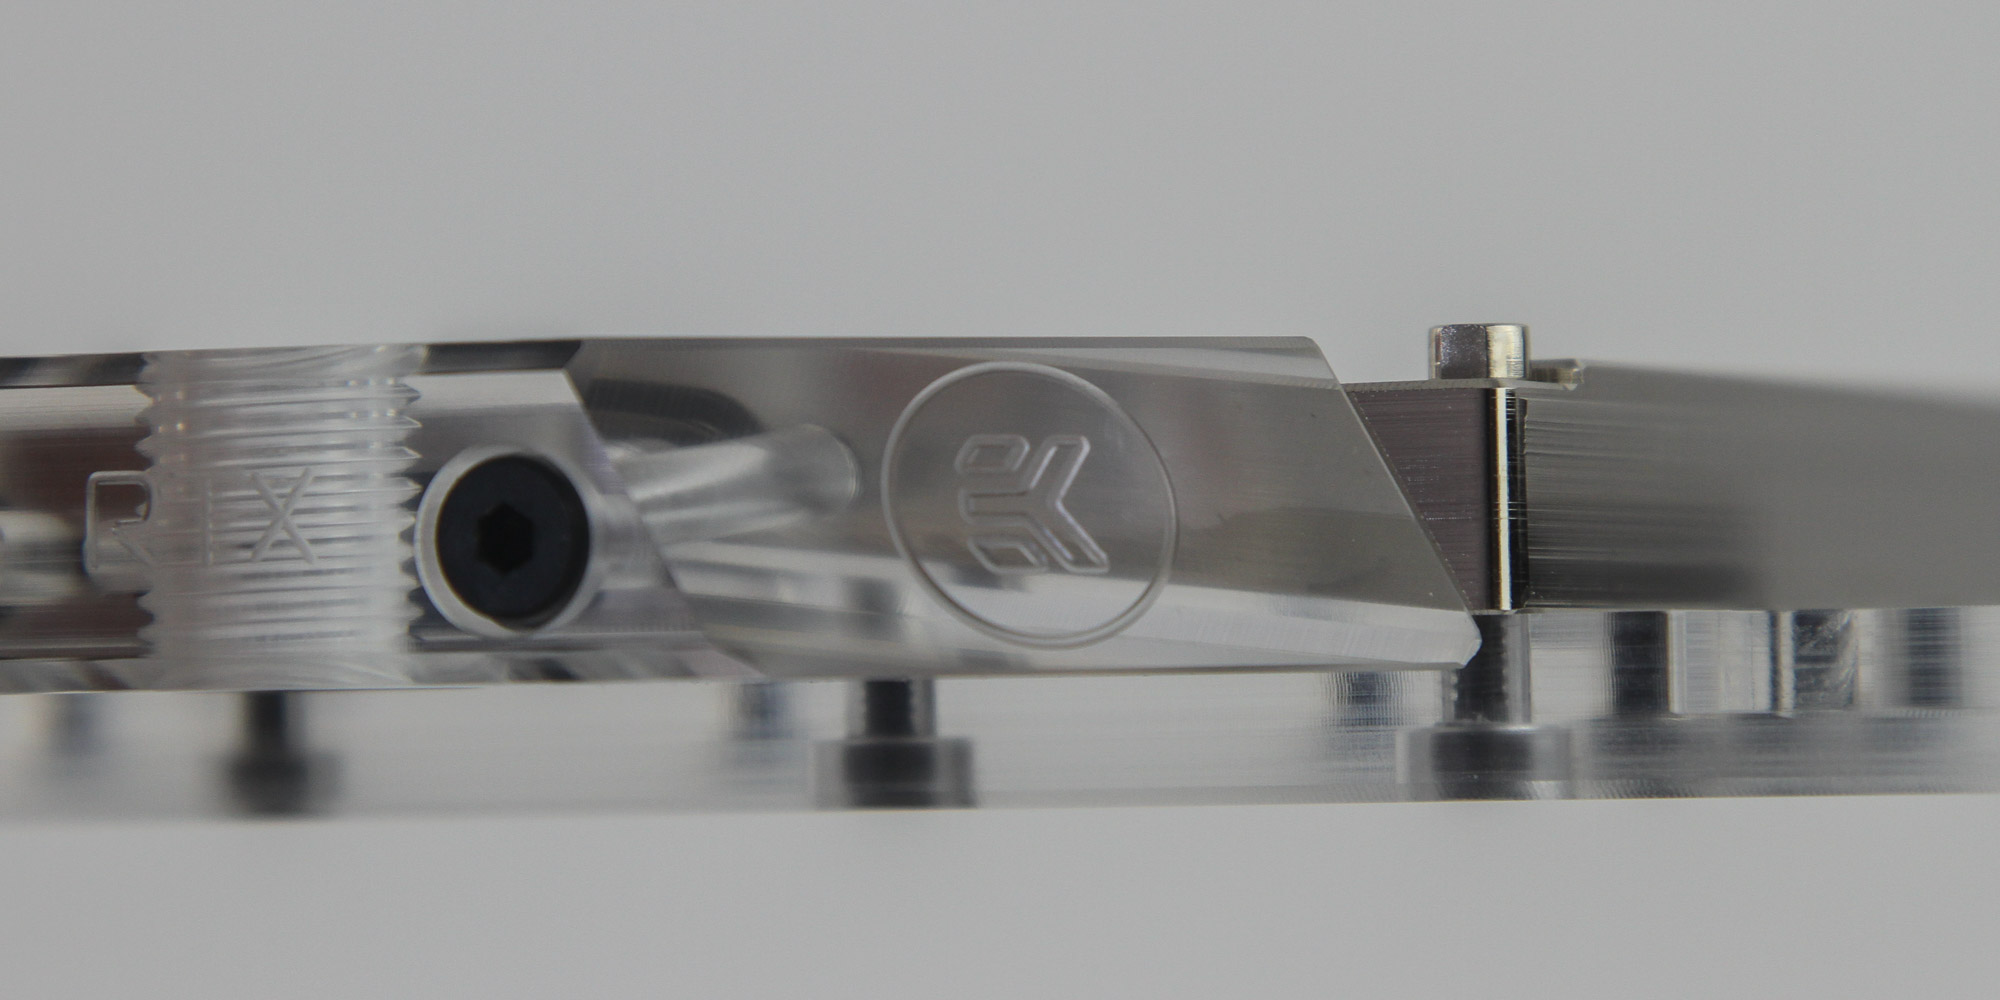
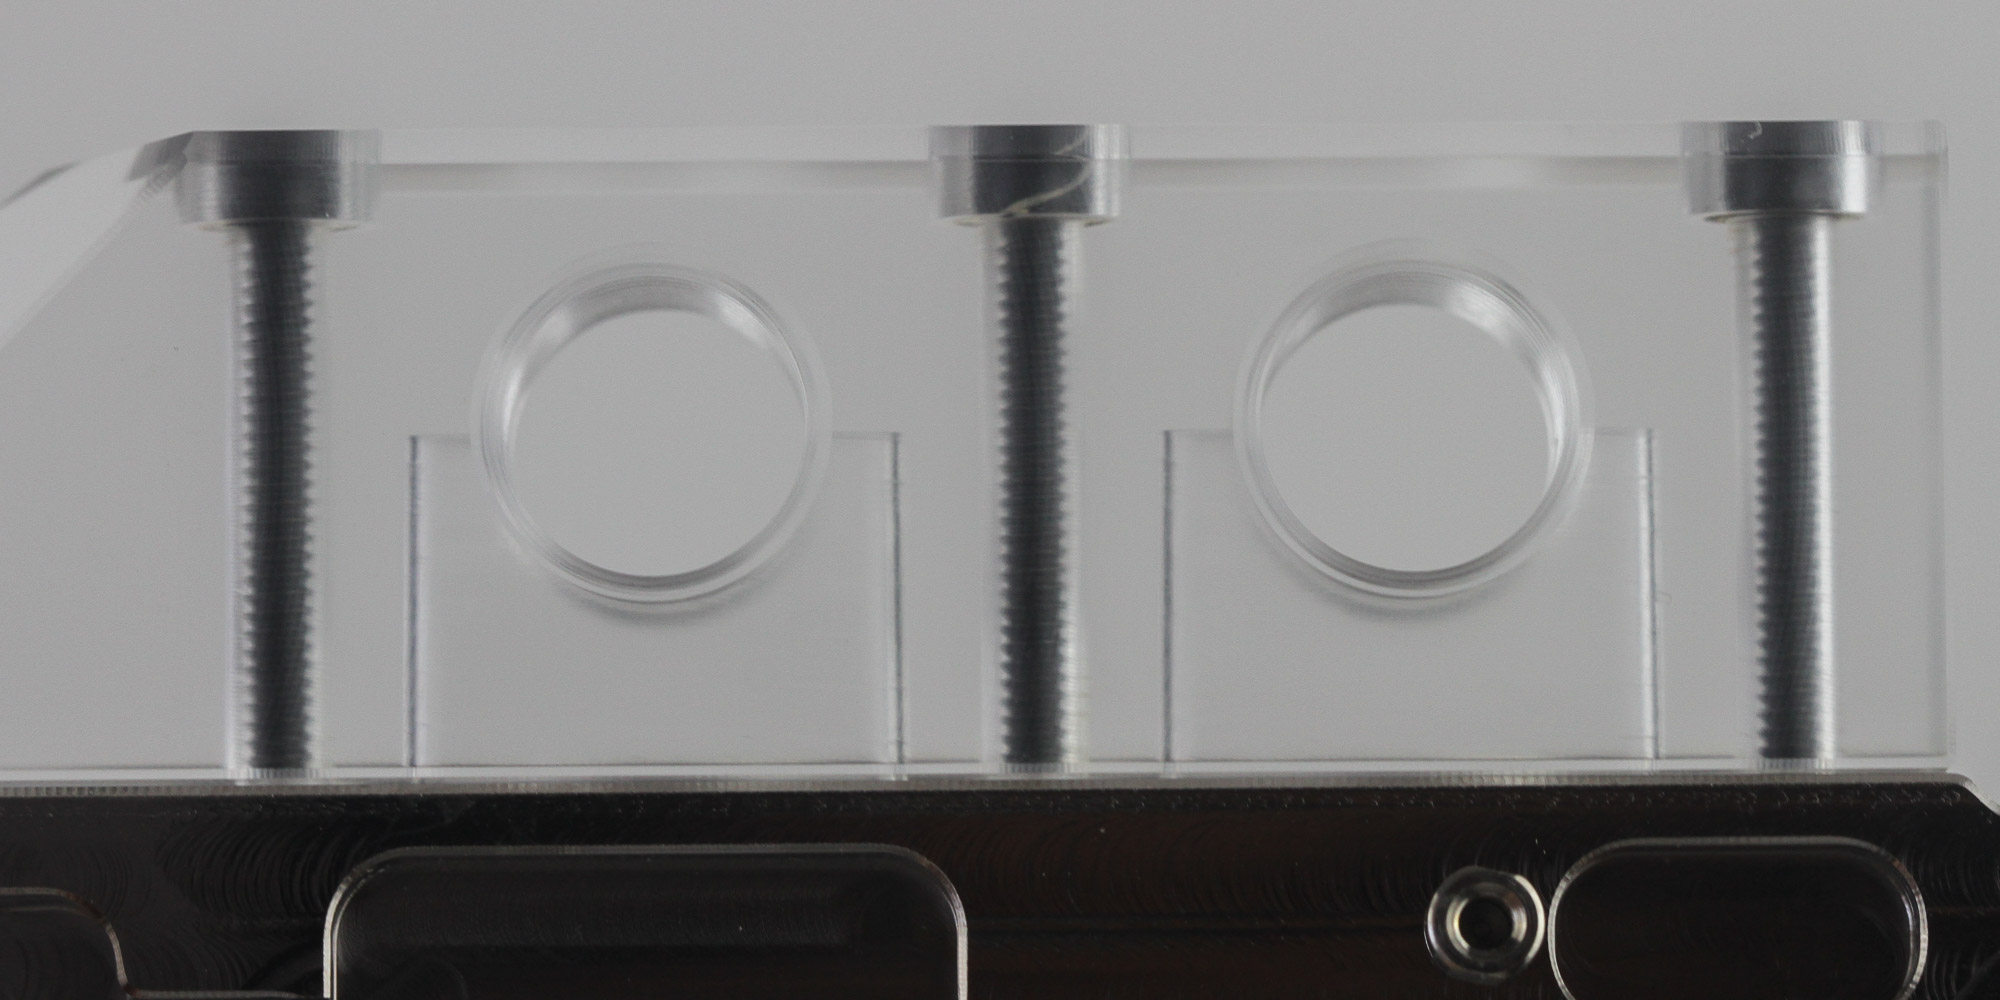
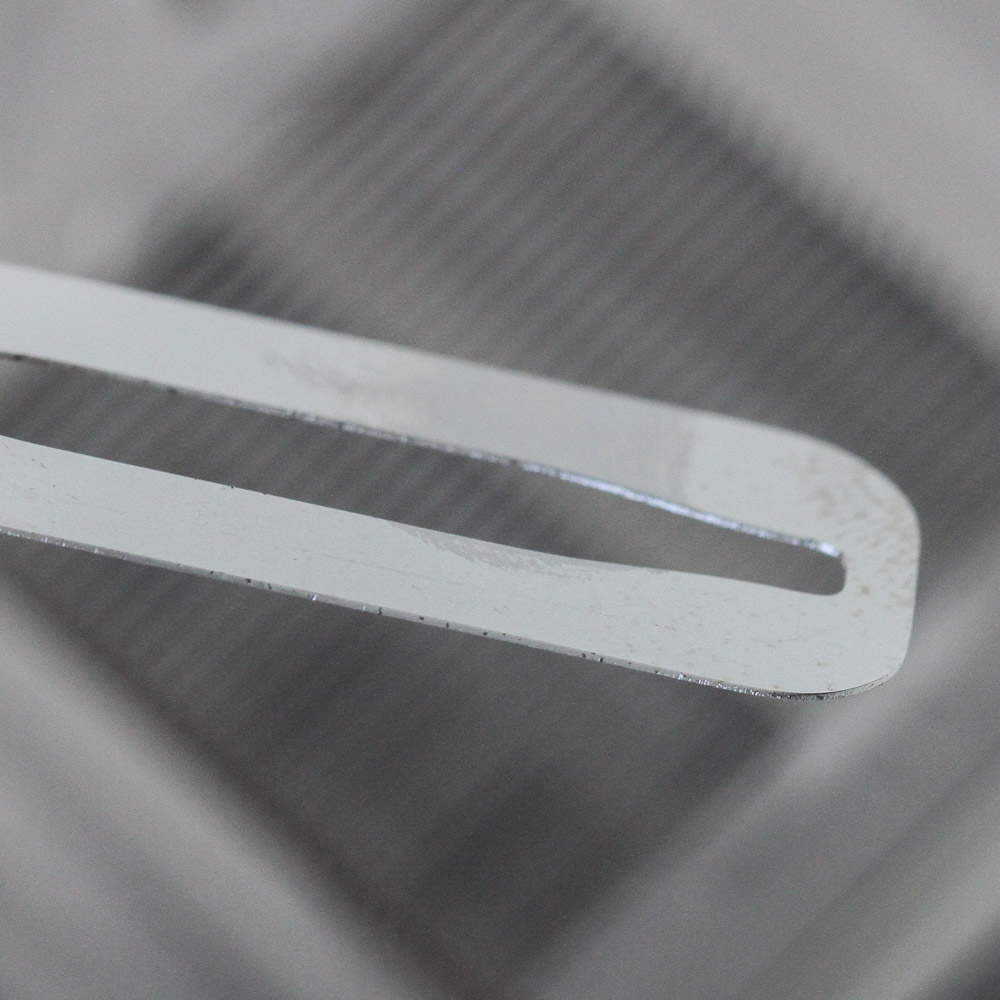
Four BSP G1/4" ports are threaded into the I/O terminal, stylized according to EK's Quantum design language with an angled edge rather than the sharper 90° turns of the EK-Classic line. The terminal is also CNC-machined plexi to match the top, and three screws secure it in place with two O-rings underneath. "Vector," "RTX," and the EK logo are etched into the plexi along the top and side. The four ports are threaded nicely, and you would use two for the coolant flow plumbing. This is also why EK provided two stop plugs with the block, as well as a handy Allen key to install these low-profile plugs. You can use the two spare ports for other things, too, including a temperature sensor fitting or as a drain port if the block is the lowest item in your loop.
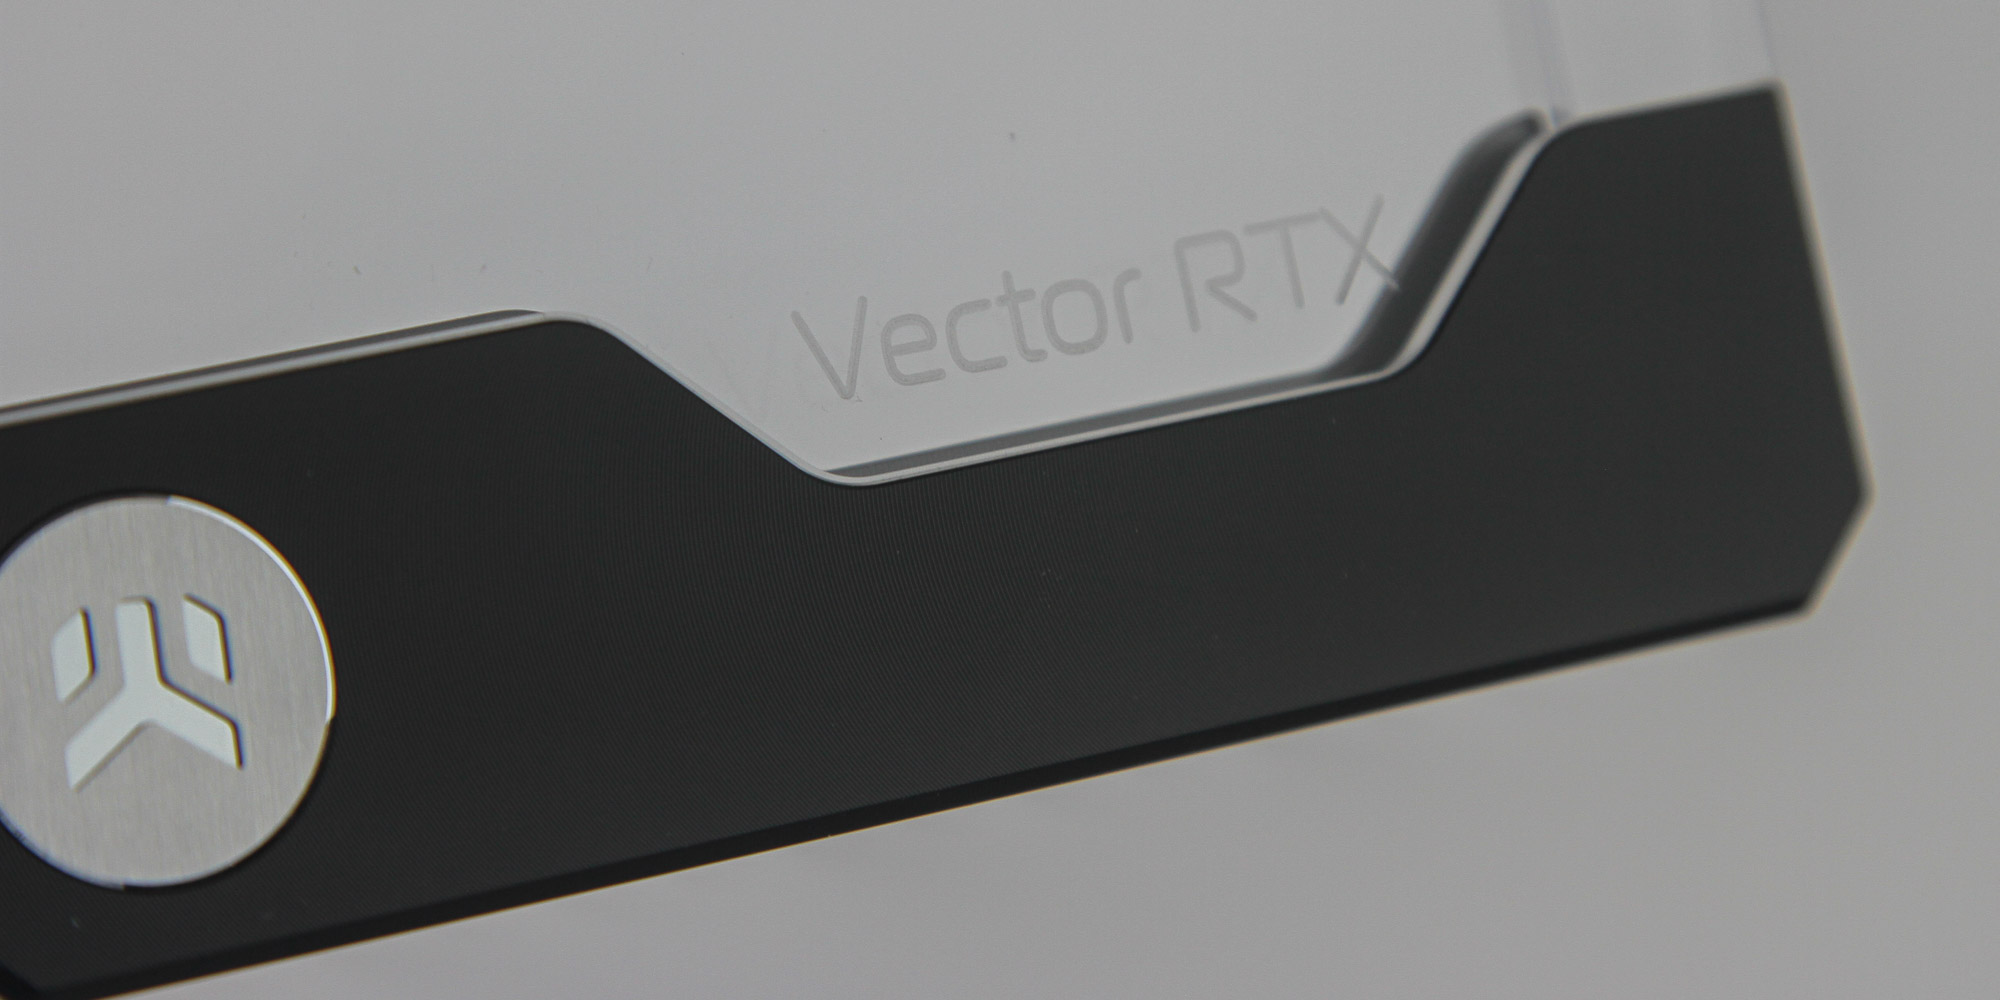
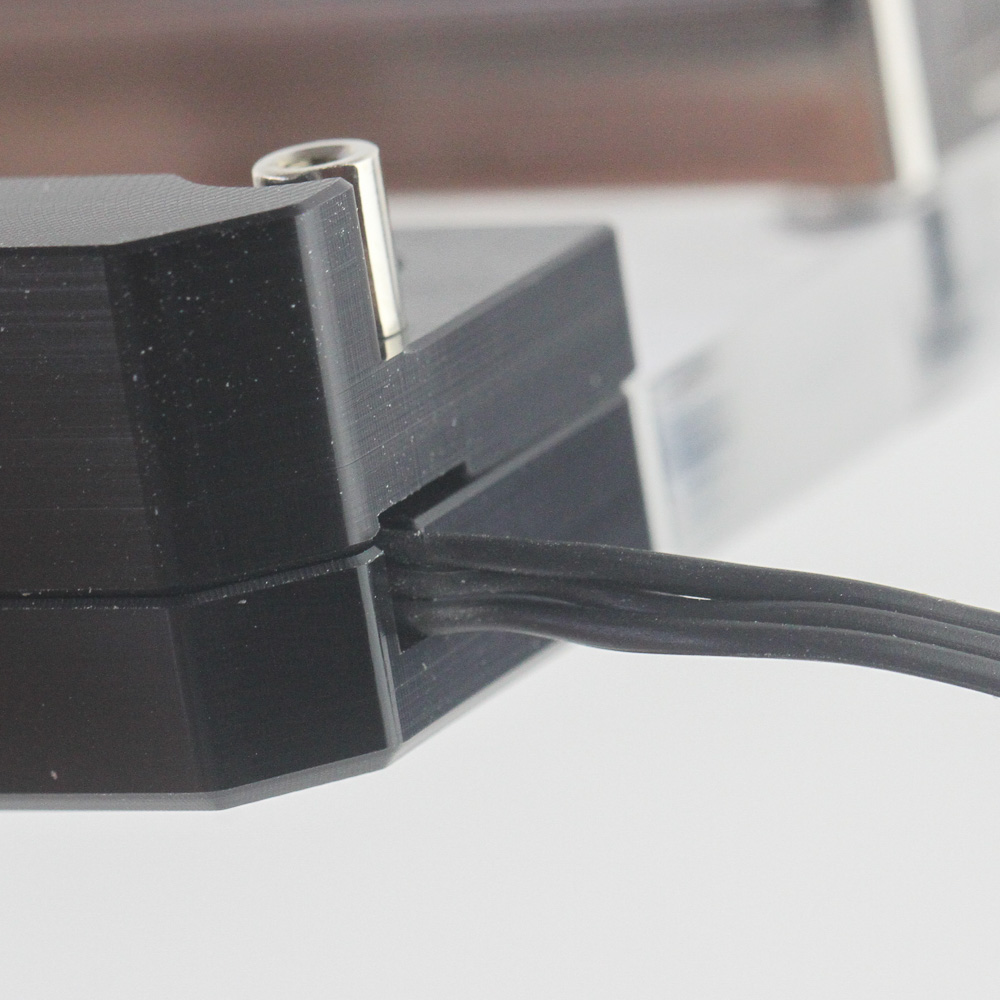
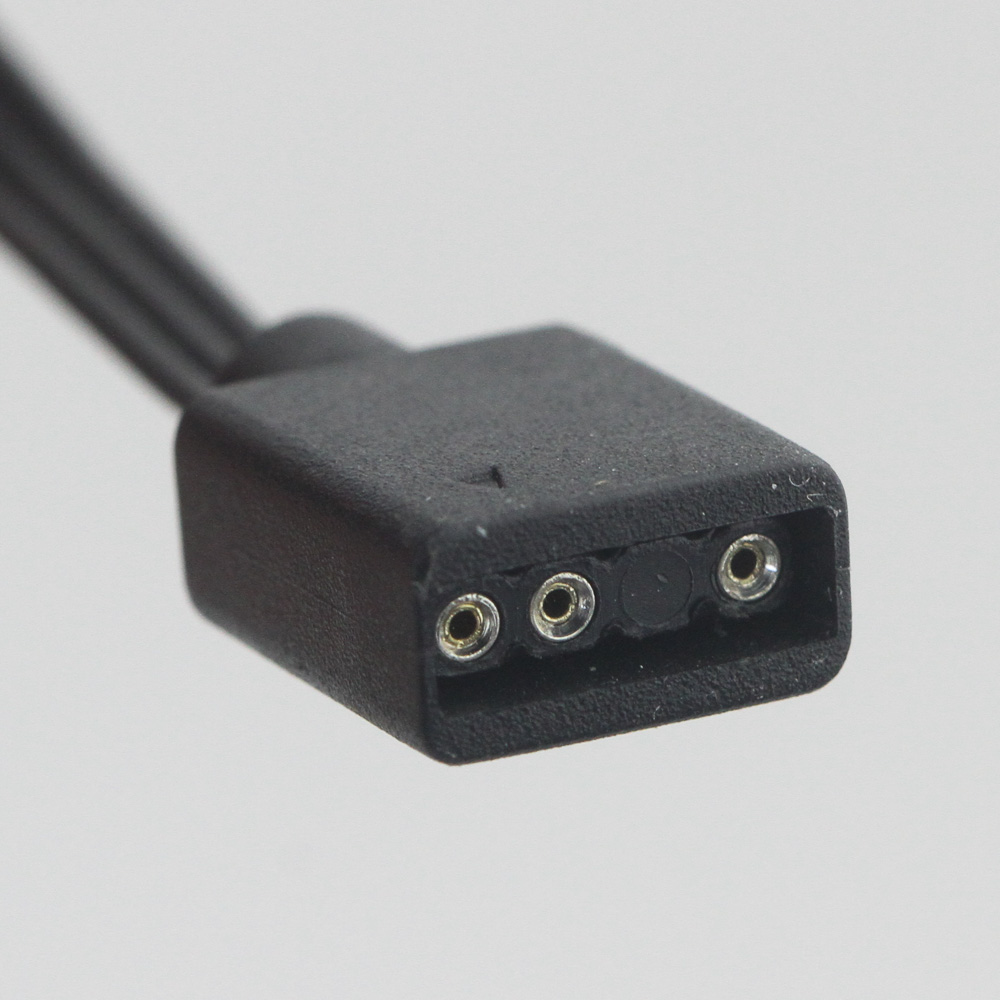
As with the EK-Quantum line of CPU blocks, that acetal accent piece on the end is another piece of the Quantum design puzzle. Not a straight line added to the plexi top, it has a small cutout to accommodate the Vector RTX etched into the top. I mentioned earlier how five D-RGB LEDs are integrated into the block, which I would have liked to see more of too, and these are on a flexible PCB that terminates in a 50 cm long cable extruding from the bottom-right corner of the block. It ends in a 3-pin 5 V connector, so you need a compatible D-RGB header to power and control the lighting, which most motherboards offer these days, or a dedicated lighting controller.
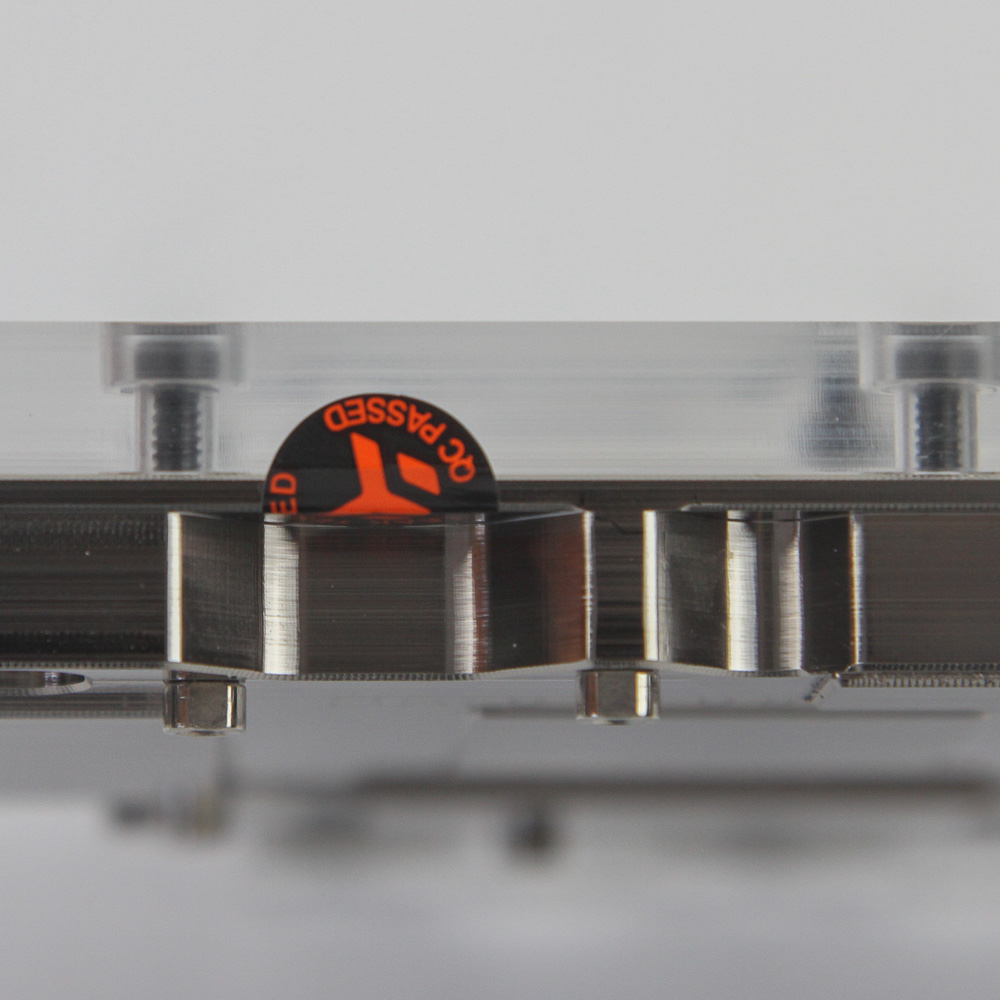
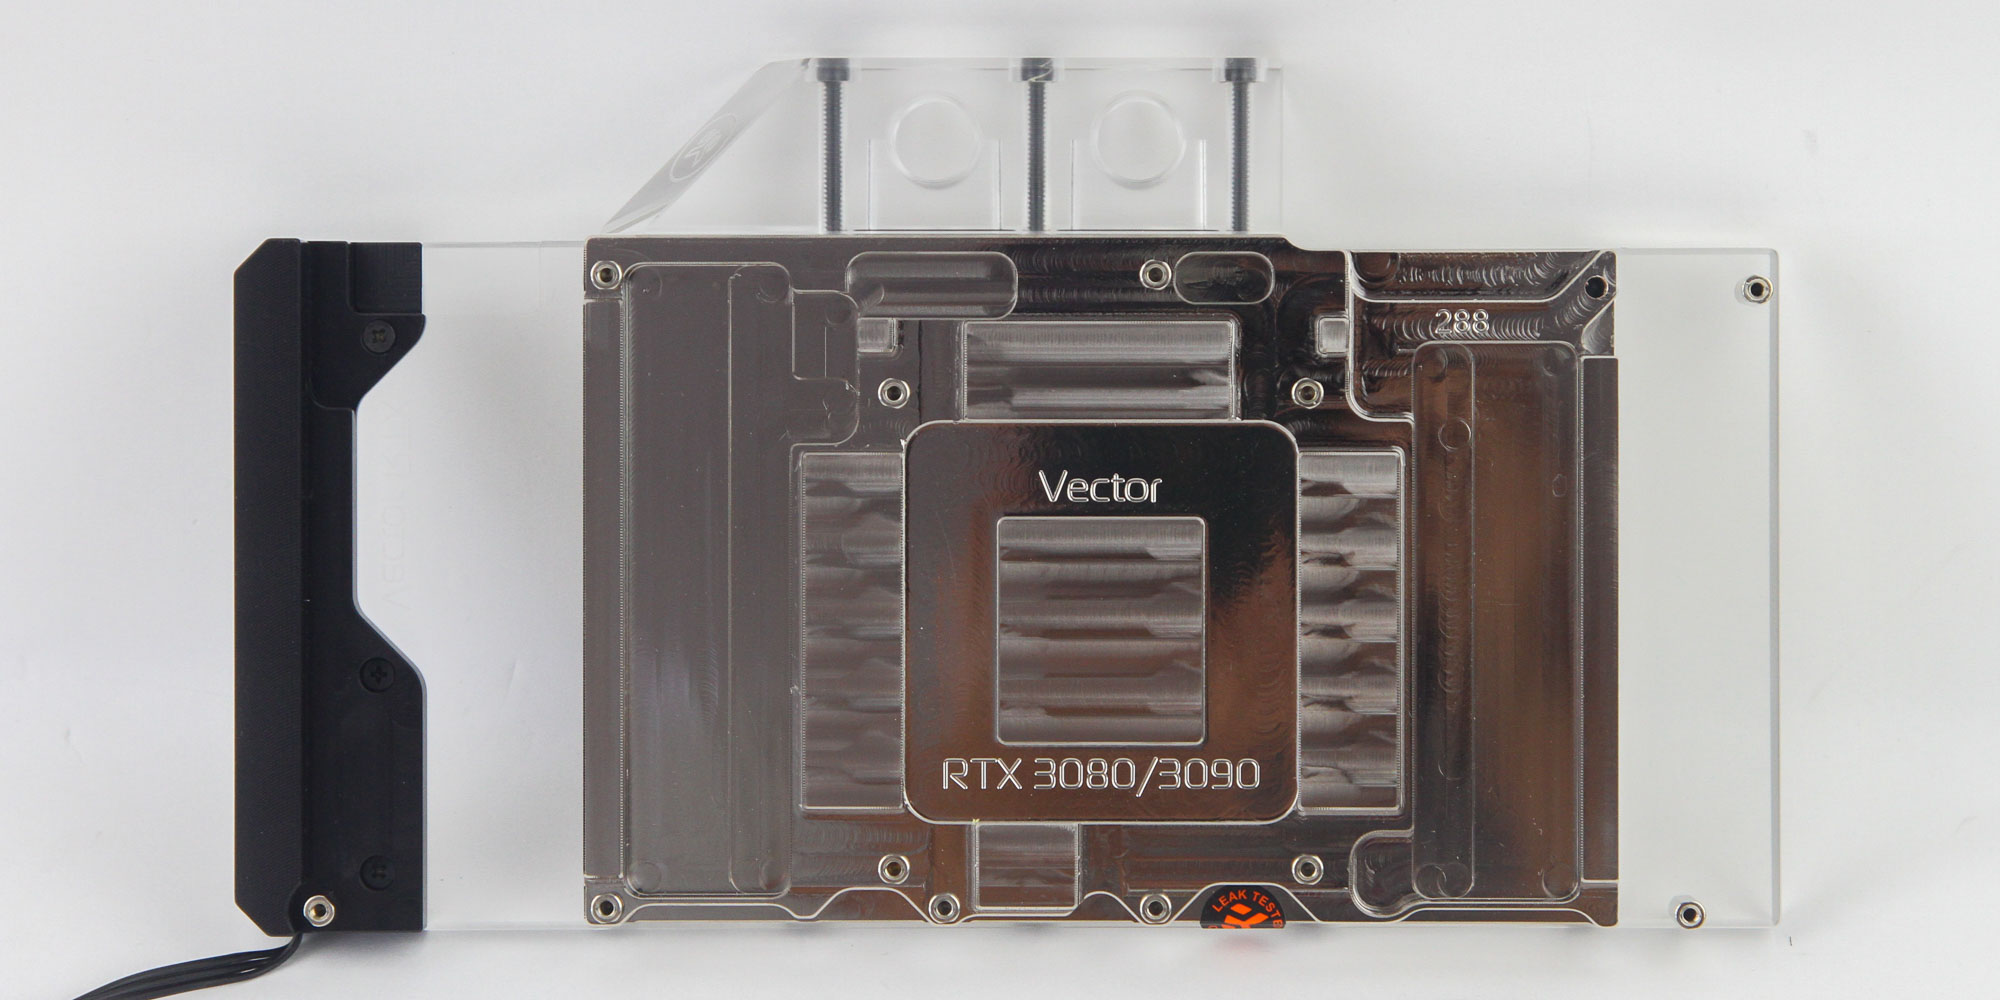
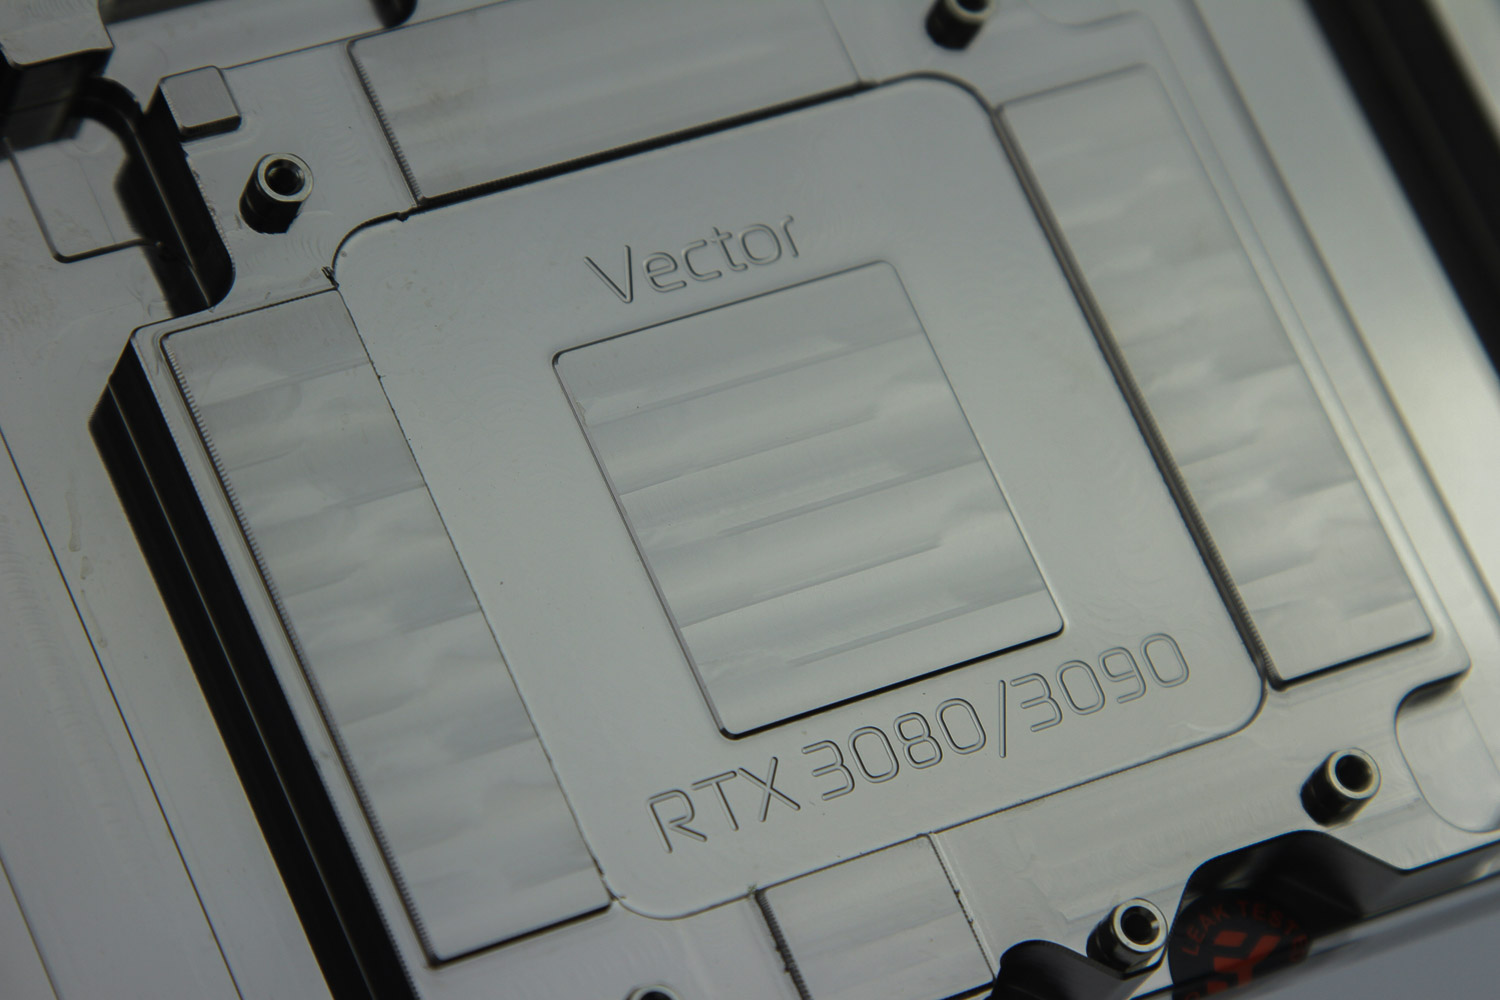
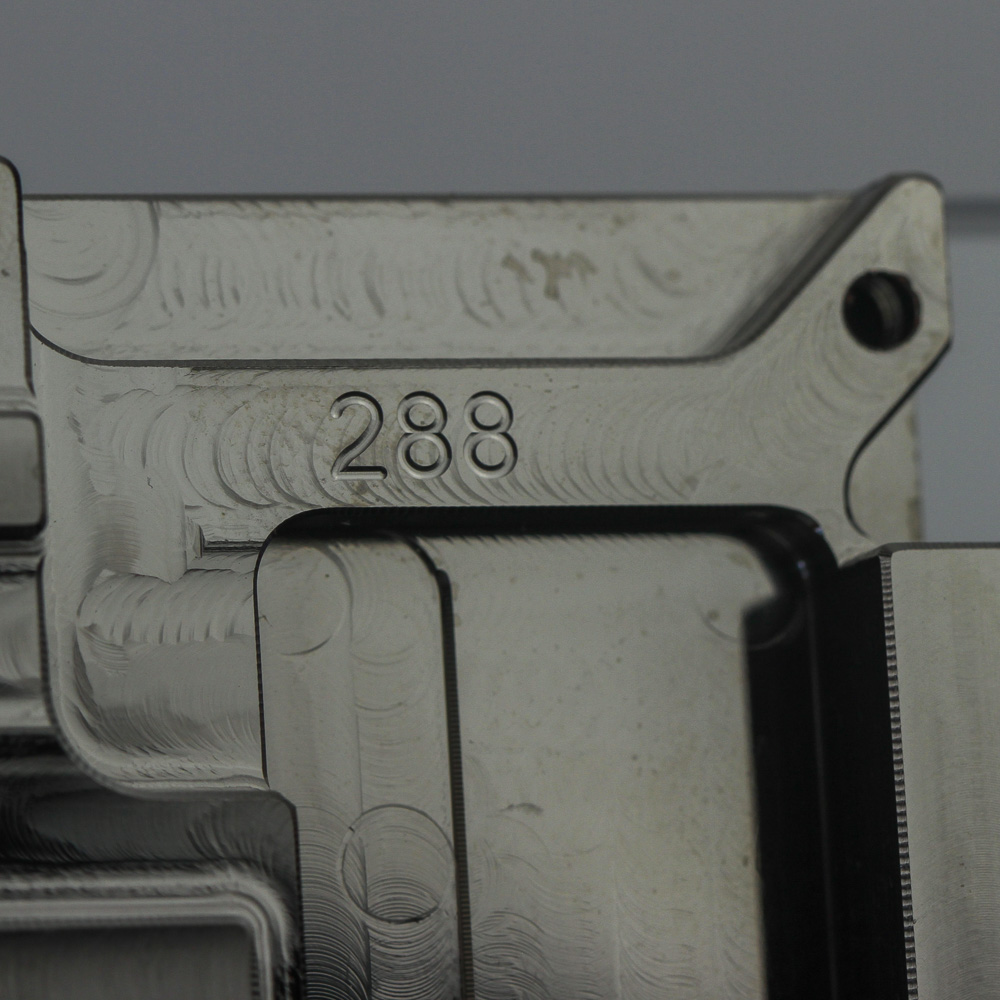
A look from the sides shows the single-slot thickness of the water block, as well as the screws going through the top and into the cold plate. A QC sticker here tells you that the block has passed internal inspection, and then we can rotate the block further to take a closer look at the cold plate itself. Nickel-plated copper greets us here, with a CNC-machined copper plate that is plated. There are contact surfaces for the GPU core, VRAM, and VRM modules, and we see more of the Vector and RTX 3080/3090 etching as with the backplate itself. The contact surfaces do not get a mirror finish, although the area between them does weirdly enough. As with the backplate, we see machining marks as well as a "288" etched into the side—I am not sure what it refers to.
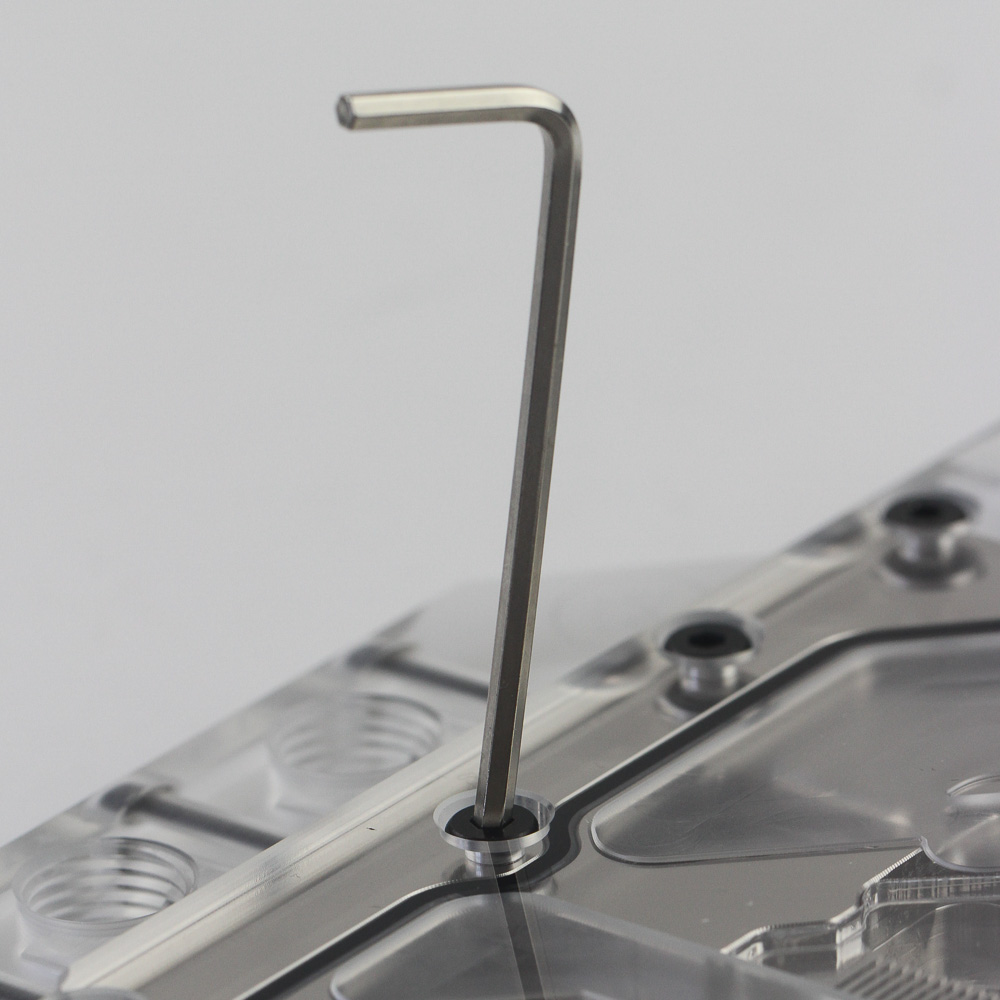
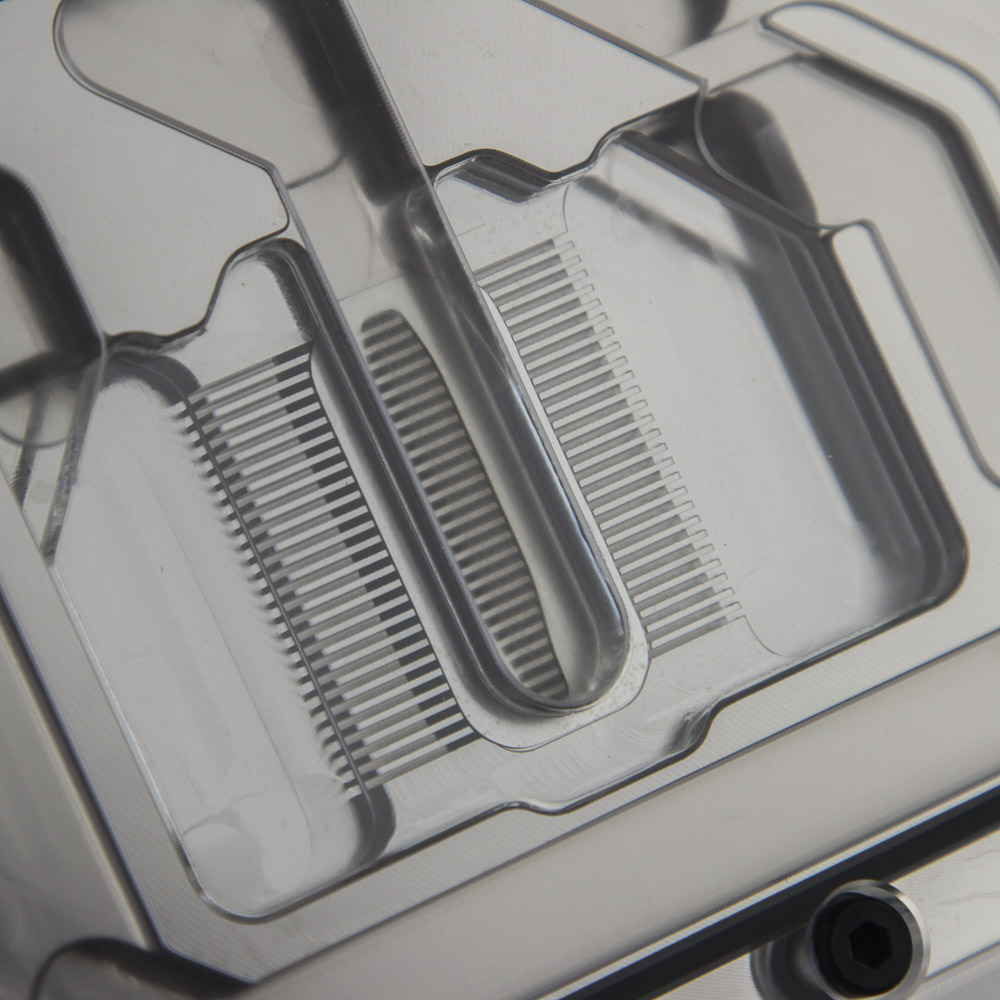
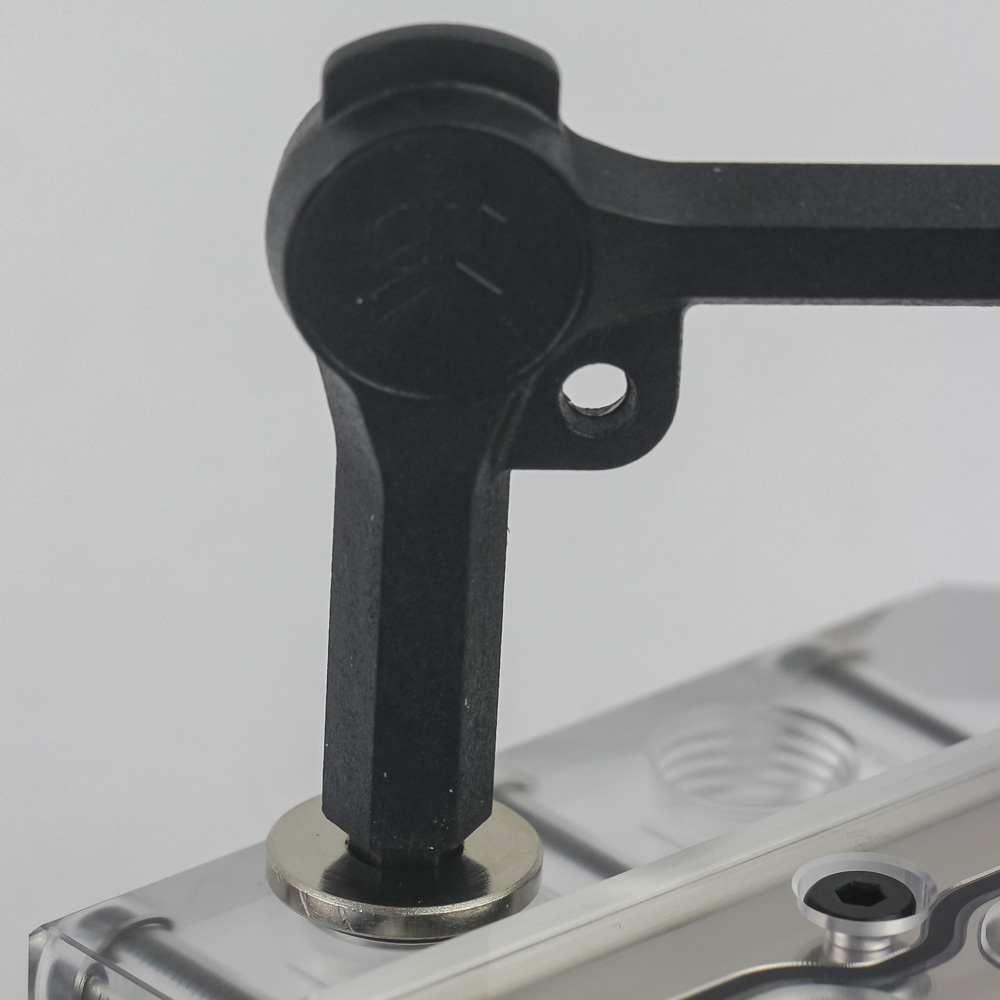
As per usual, disassembly was done after all testing was complete, and the included hex tool works well for removing the 14 screws on the top that hold the block together. Once done, the top can be removed completely for closer examination, which reveals polishing everywhere but for the cut liquid-flow channels, which is a bit of a shame considering this is where you see the coolant. Note also that the terminal piece is separately screwed into the cold plate, which is handy for when you want to replace it if you get the active backplate, but more on that separately.
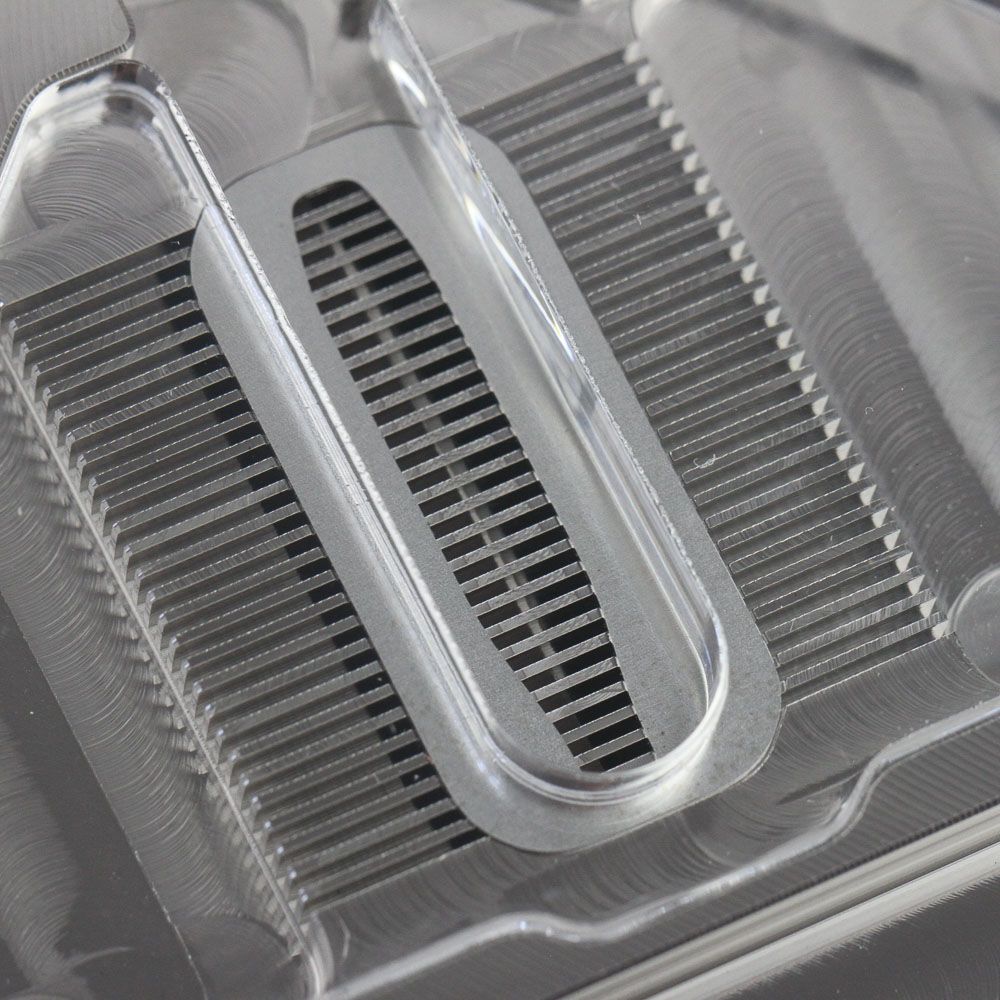
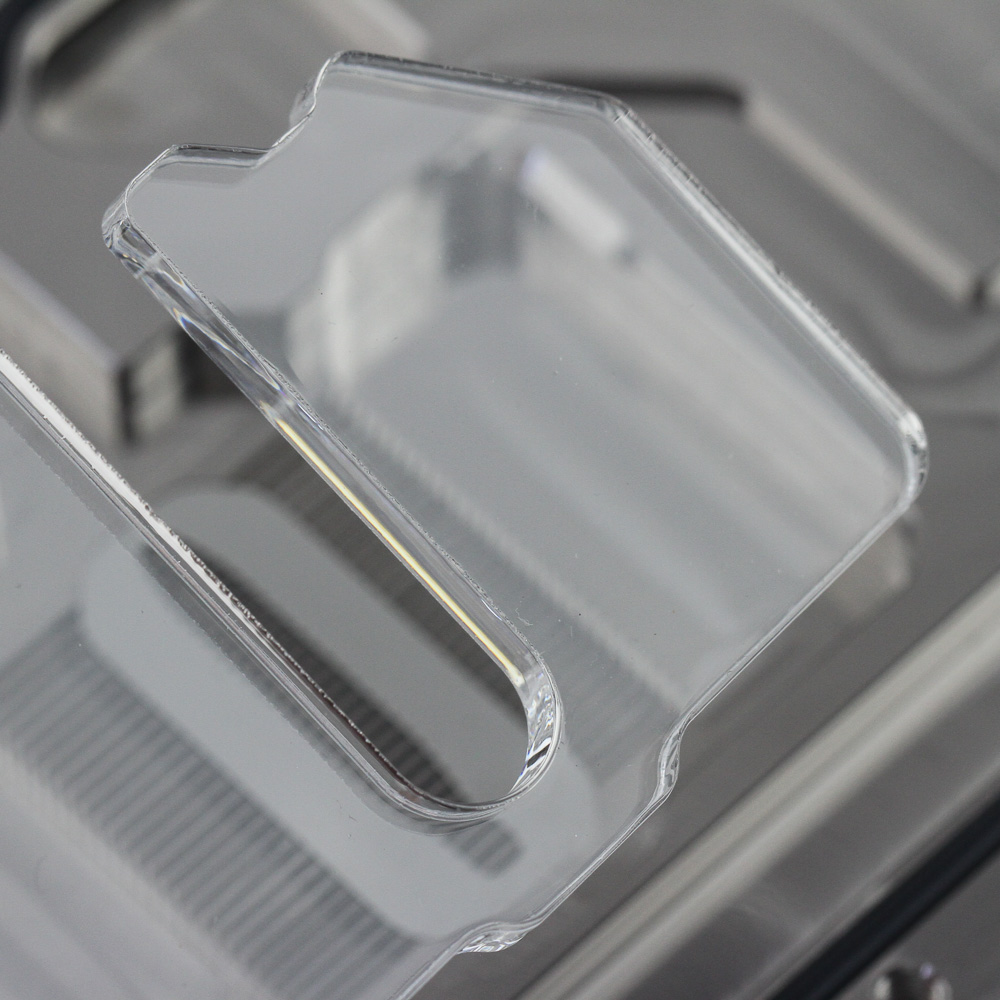
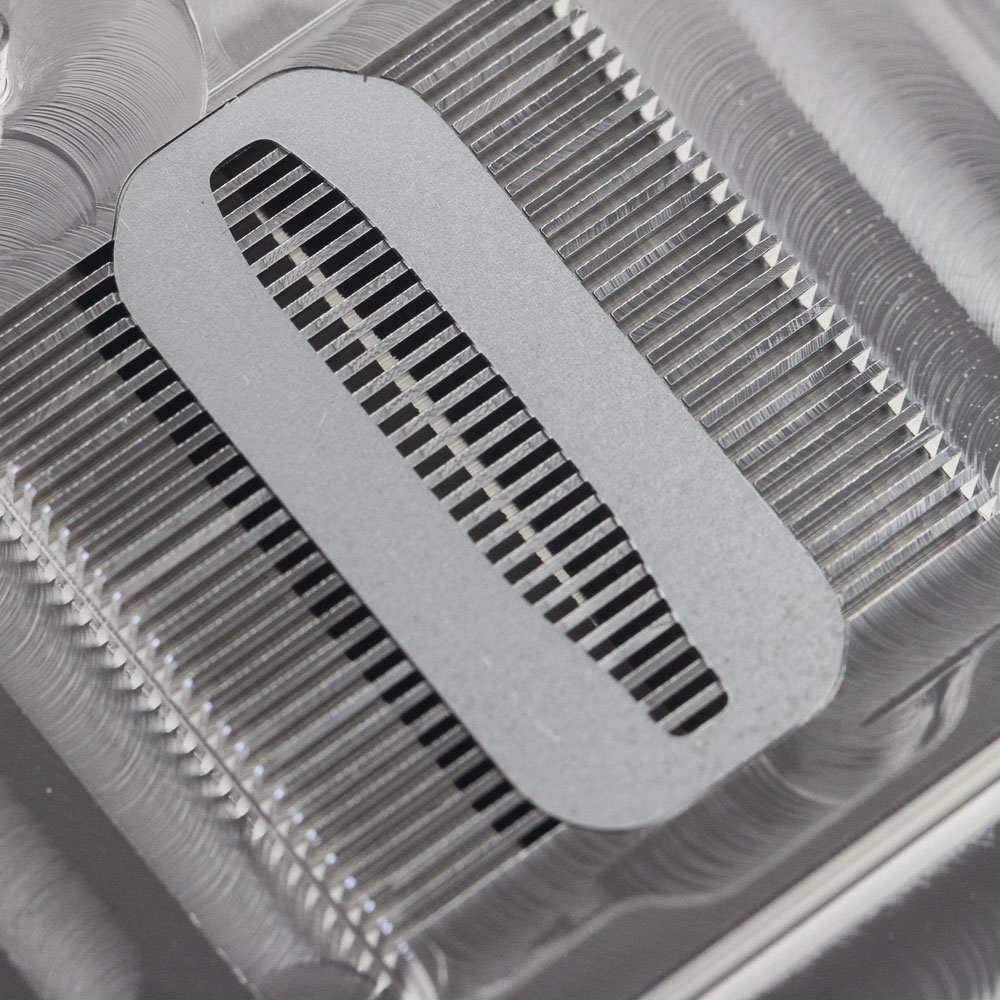
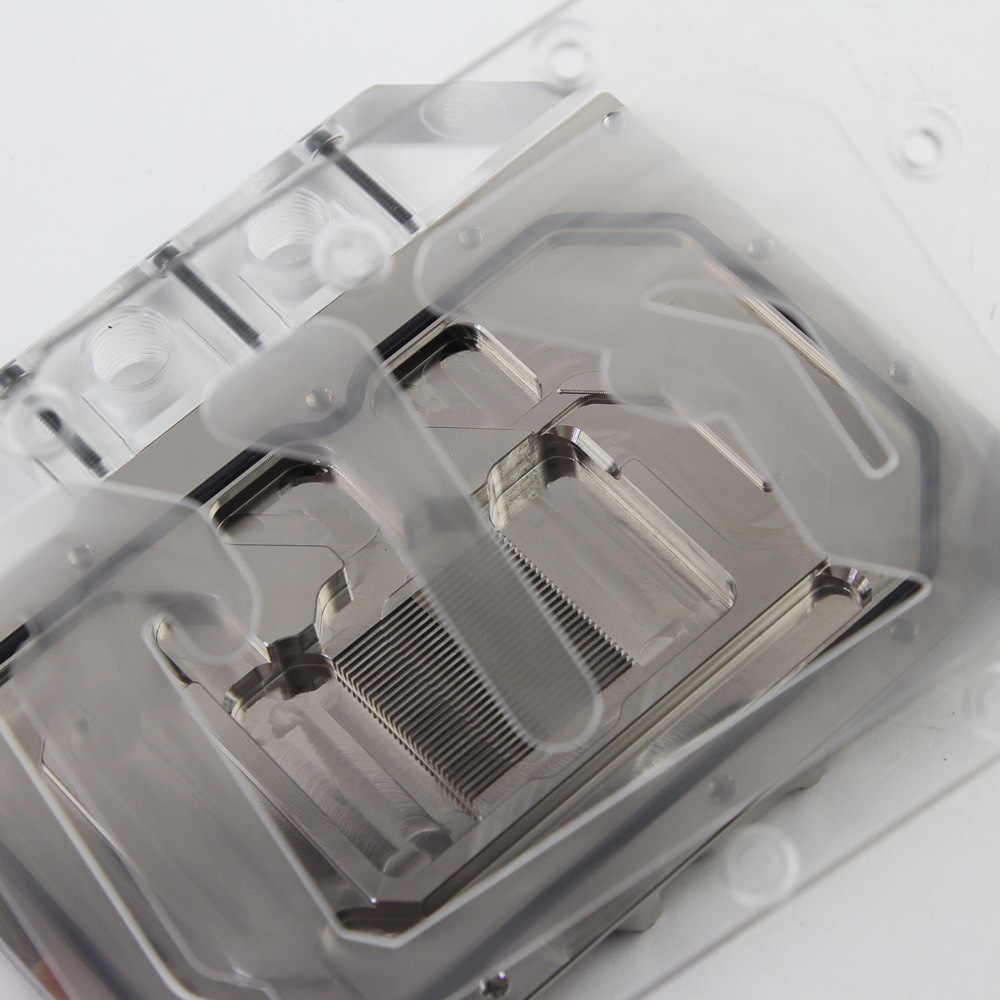
A plastic insert guides the coolant through a thin metal jetplate in the center, which makes for split central-inlet flow to cool the GPU core. The coolant path is thus first directly over the GPU core, which makes sense since you want to have the coldest liquid over the GPU. It then splits into two, with one side going to the left and cooling the VRAM and VRM section before meeting up with the second split off the GPU and then combining before exiting the outlet. The preferred inlet port is thus either of the two on the left as seen from the front.
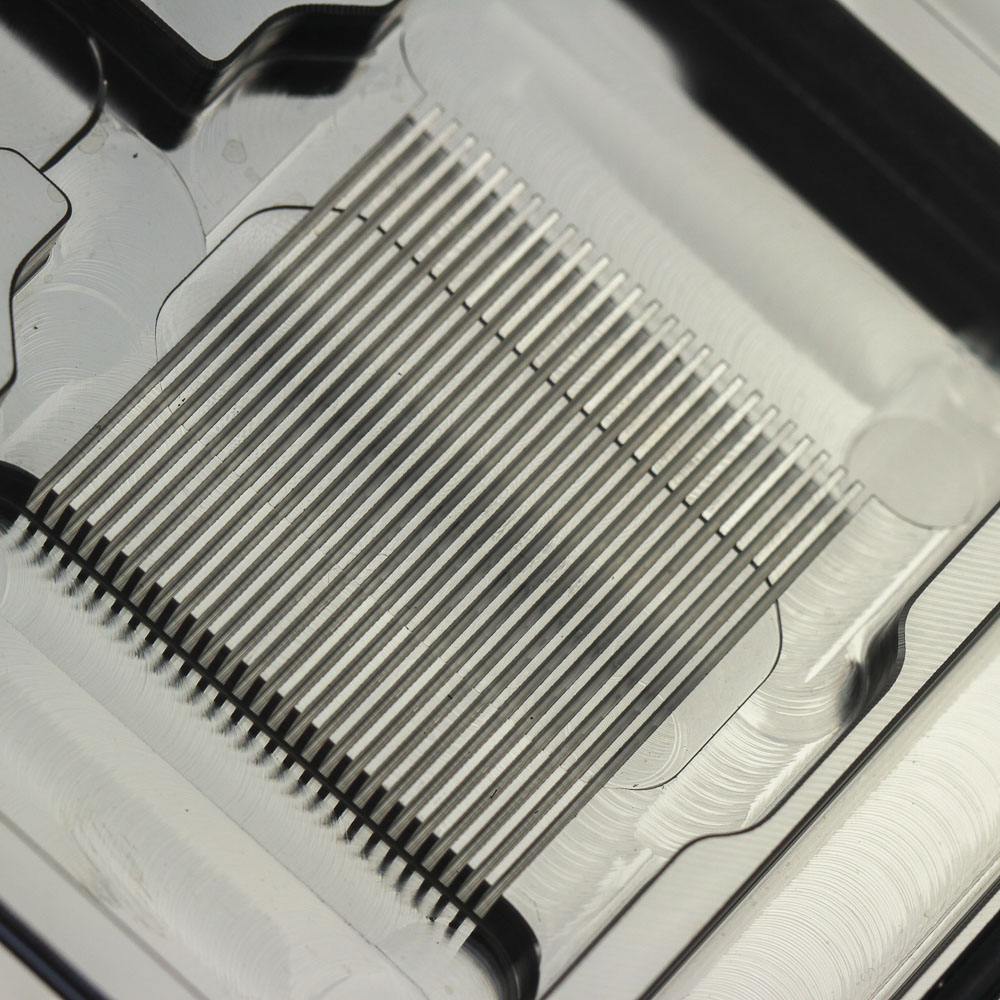
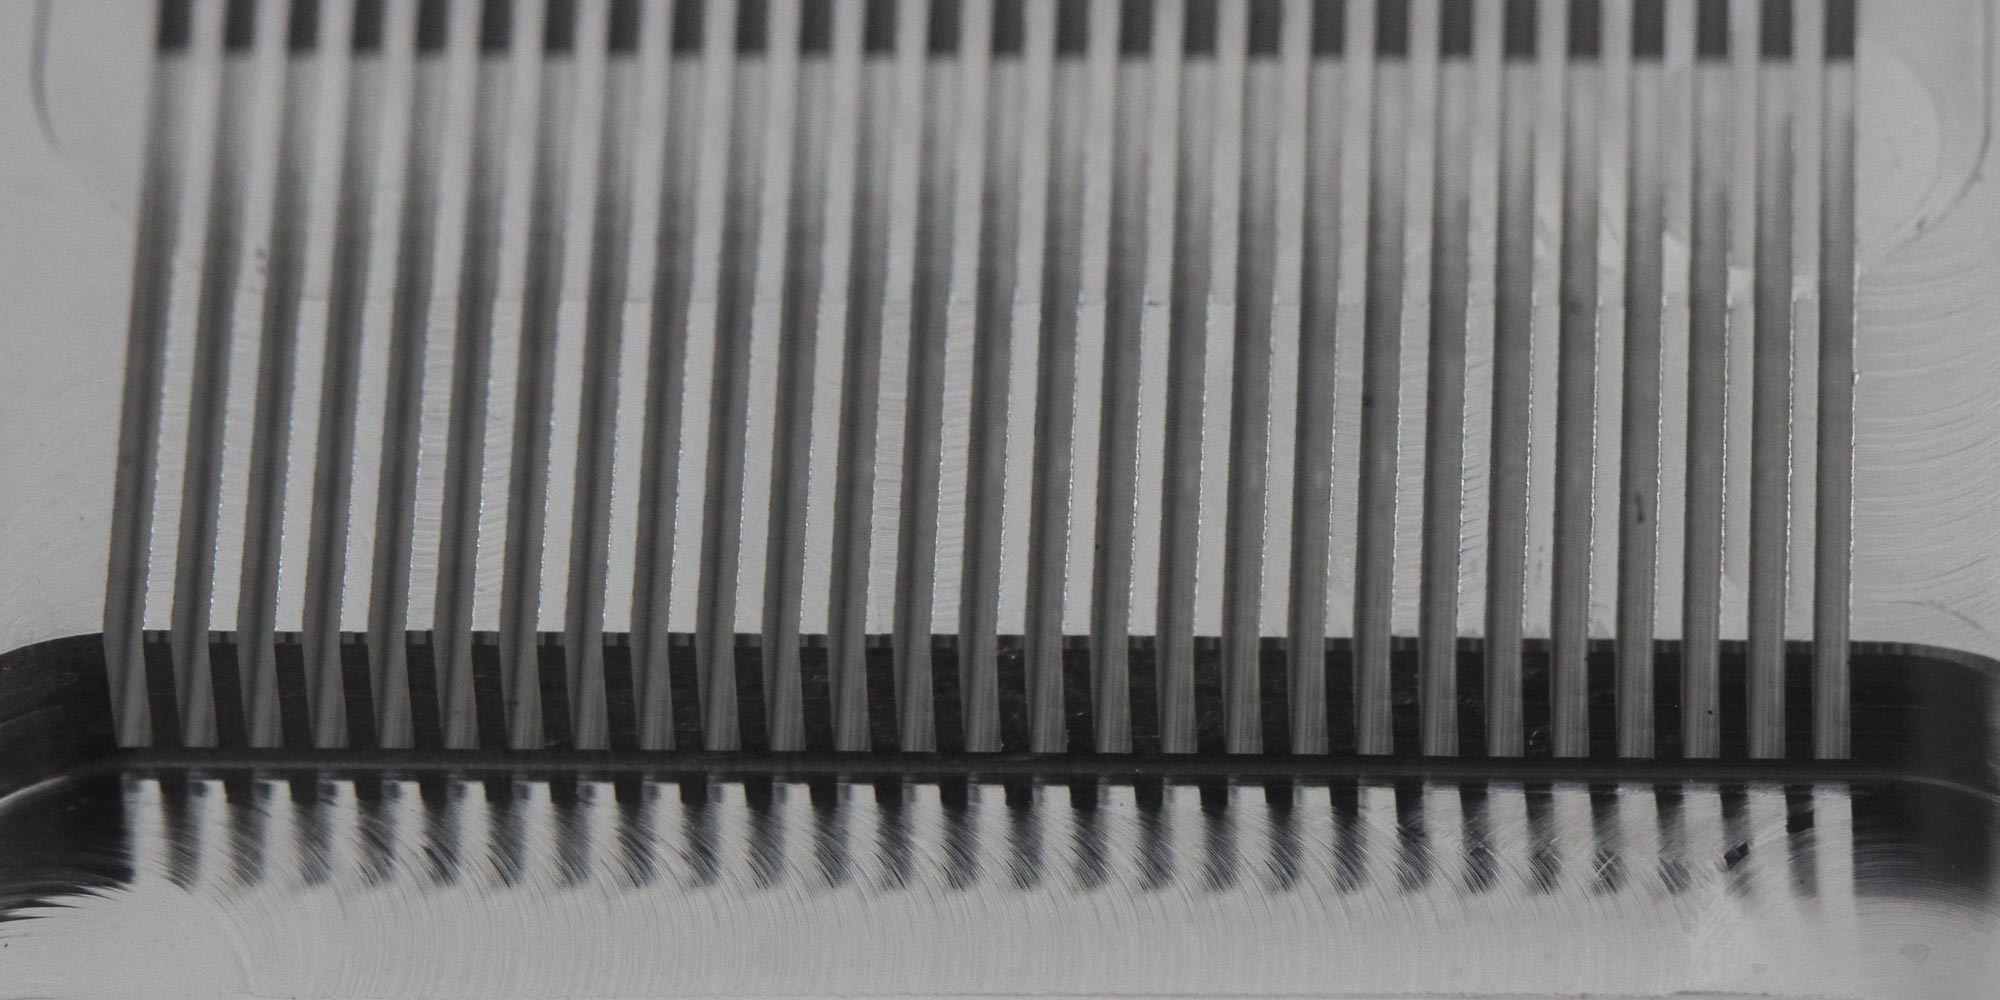
27 microfins increase the contact surface area for heat dissipation from the GPU core underneath. Between the fins are 0.5 mm wide microchannels, so expect a lower pressure drop with the GPU block compared to CPU blocks, which is as with most GPU blocks. EK says that the coolant flow path has been designed to minimize hydrodynamic instabilities and vortexing, and that the block touches MOSFETs and chokes to "maximize cooling and minimize the chances of coil whine."
Jul 5th, 2025 20:56 CDT
change timezone
Latest GPU Drivers
New Forum Posts
- The Official Thermal Interface Material thread (1775)
- 9800x3d temps (2)
- RX 9000 series GPU Owners Club (1126)
- [GPU-Z Test Build] New Kernel Driver, Everyone: Please Test (70)
- How do you view TPU & the internet in general? (With poll) (81)
- Help Watercooling my PC (5)
- TPU's Nostalgic Hardware Club (20485)
- EVGA XC GTX 1660 Ti 8GB ROM (13)
- Do you game on a handheld console? (97)
- AMD RX 9070 XT & RX 9070 non-XT thread (OC, undervolt, benchmarks, ...) (156)
Popular Reviews
- NVIDIA GeForce RTX 5050 8 GB Review
- Fractal Design Scape Review - Debut Done Right
- Crucial T710 2 TB Review - Record-Breaking Gen 5
- ASUS ROG Crosshair X870E Extreme Review
- Sapphire Radeon RX 9060 XT Pulse OC 16 GB Review - An Excellent Choice
- PowerColor ALPHYN AM10 Review
- Upcoming Hardware Launches 2025 (Updated May 2025)
- AMD Ryzen 7 9800X3D Review - The Best Gaming Processor
- Sapphire Radeon RX 9070 XT Nitro+ Review - Beating NVIDIA
- NVIDIA GeForce RTX 5060 8 GB Review
TPU on YouTube
Controversial News Posts
- Intel's Core Ultra 7 265K and 265KF CPUs Dip Below $250 (288)
- NVIDIA Grabs Market Share, AMD Loses Ground, and Intel Disappears in Latest dGPU Update (212)
- Some Intel Nova Lake CPUs Rumored to Challenge AMD's 3D V-Cache in Desktop Gaming (140)
- NVIDIA GeForce RTX 5080 SUPER Could Feature 24 GB Memory, Increased Power Limits (115)
- Microsoft Partners with AMD for Next-gen Xbox Hardware (105)
- NVIDIA Launches GeForce RTX 5050 for Desktops and Laptops, Starts at $249 (105)
- AMD Radeon RX 9070 XT Gains 9% Performance at 1440p with Latest Driver, Beats RTX 5070 Ti (102)
- Intel "Nova Lake‑S" Series: Seven SKUs, Up to 52 Cores and 150 W TDP (100)