 22
22
EK-Velocity CPU Water Block Review
Liquid Flow Restriction »Installation and Lighting


Installation of this Intel version is easy regardless of whether you are going to be using it on the LGA 115x platform or LGA 20xx HEDT ones. For the former, it begins with the use of the rubber gasket on the back and then the backplate itself with the ribbed side facing outward as shown above to prevent electrical shorting. The backplate needs to be oriented to match up with the screws in the socket ILM as well, and note that depending on how many components are on your motherboard, there may be some interference in getting a flush fit with the rubber gasket. There is generally enough give to where this should not be an issue, but please be aware of this and double check before trying to force-fit something.
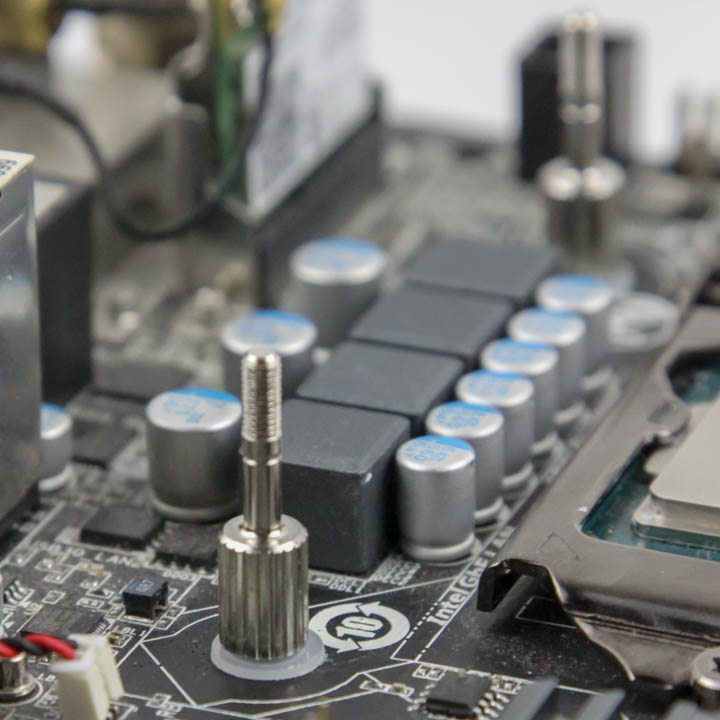
Then take one of the LGA 115x mounting posts and have the shorter end go through the cooler mounting holes in the motherboard with a plastic washer at the end to prevent electrical shorting, which would then screw into the backplate. Repeat this for the other three and you should have a secure platform to now lay the CPU block on. Apply some thermal paste to the CPU IHS, lay over the block on these posts followed by a spring on each post, and finally secure the block in place by using the provided four thumb nuts and tightening them in a diagonal manner. Alternate between the corner sets of two until you run out of thread, and that is it. EKWB uses a precise mount system that is user friendly and allows for no confusion.
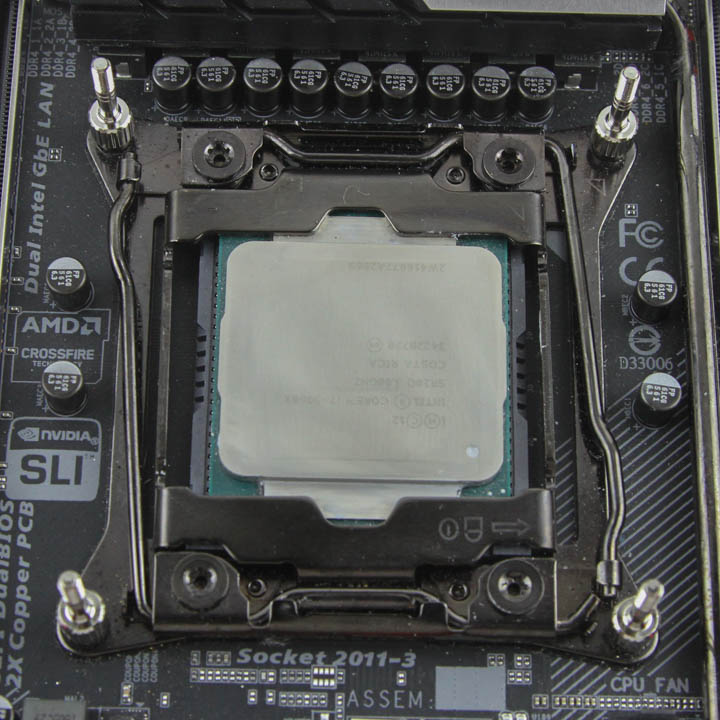
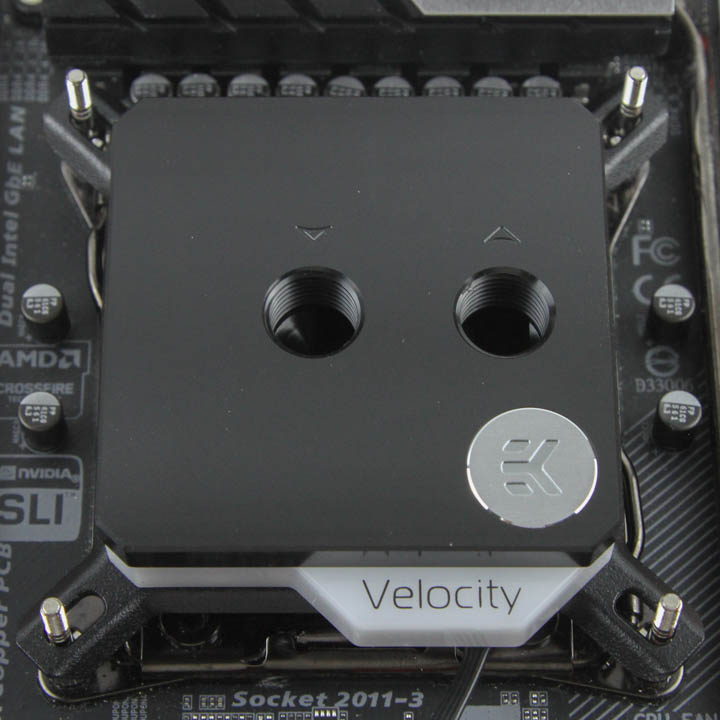
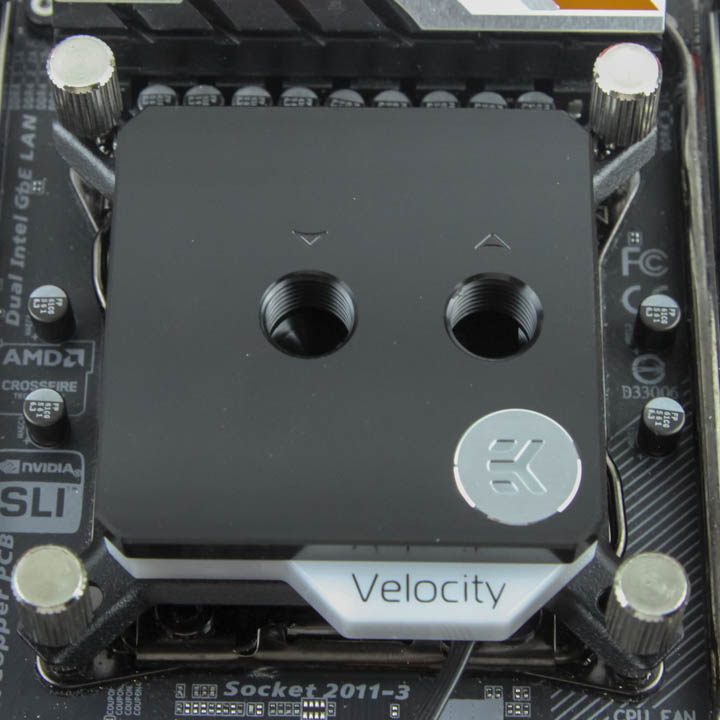

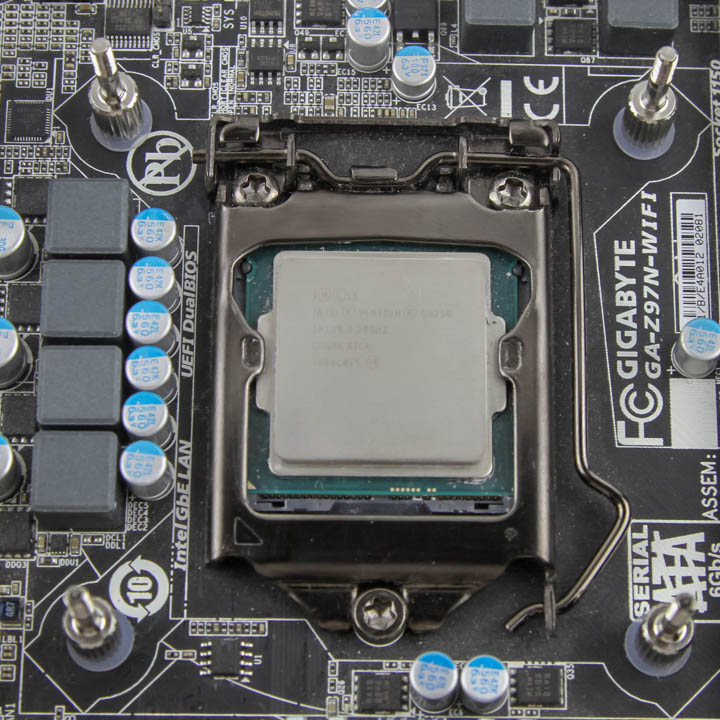
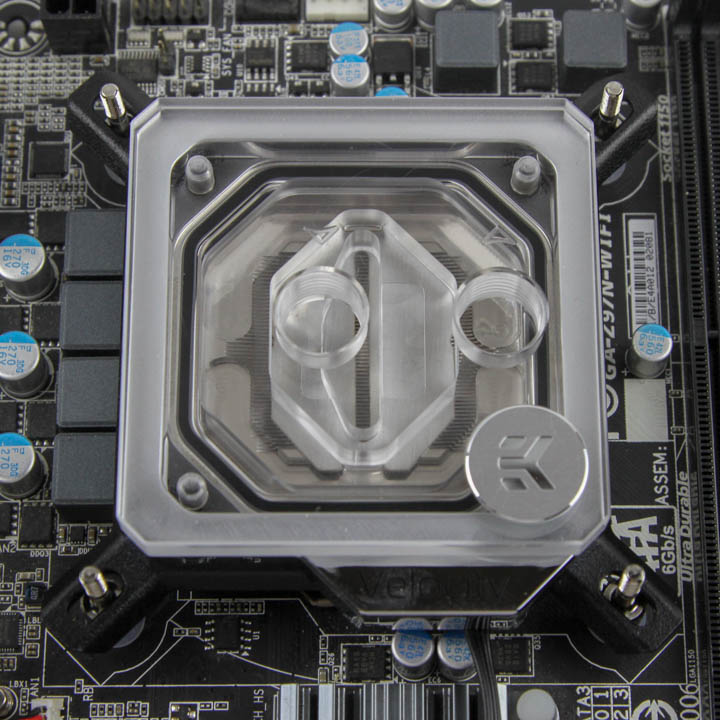
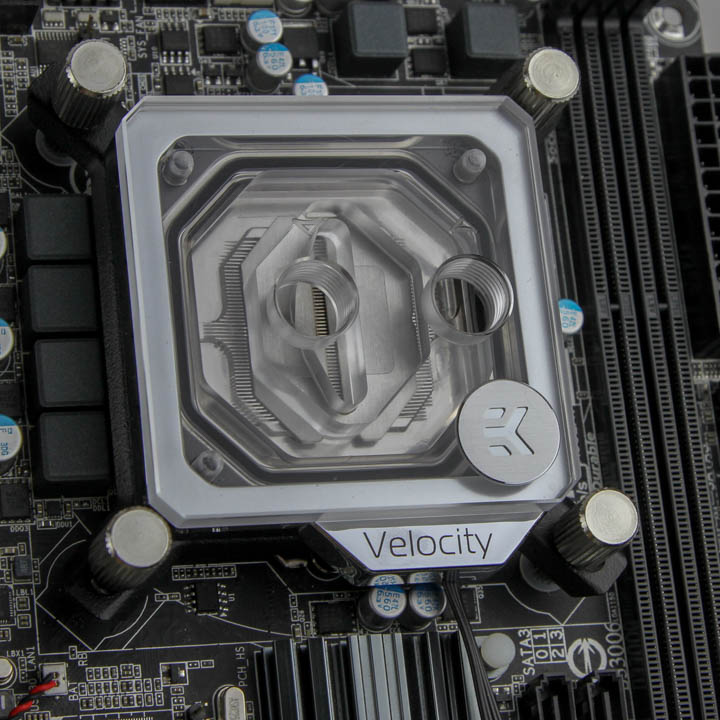
Installation on the Intel HEDT platforms is even simpler owing to the pre-built cooler mounting system on the same side of the motherboard as the CPU itself. Use the M4-threaded mounting posts this time and simply screw in all four around the CPU as seen above. Repeat the steps as before—thermal paste having been applied to the CPU IHS, install the CPU block, springs, and thumb nuts. I am using the RGB nickel/acetal block here to show off how it would look compared to the RGB nickel/plexi block above. Connect the RGB cable to a compatible LED header on your motherboard or LED controller to finish up.
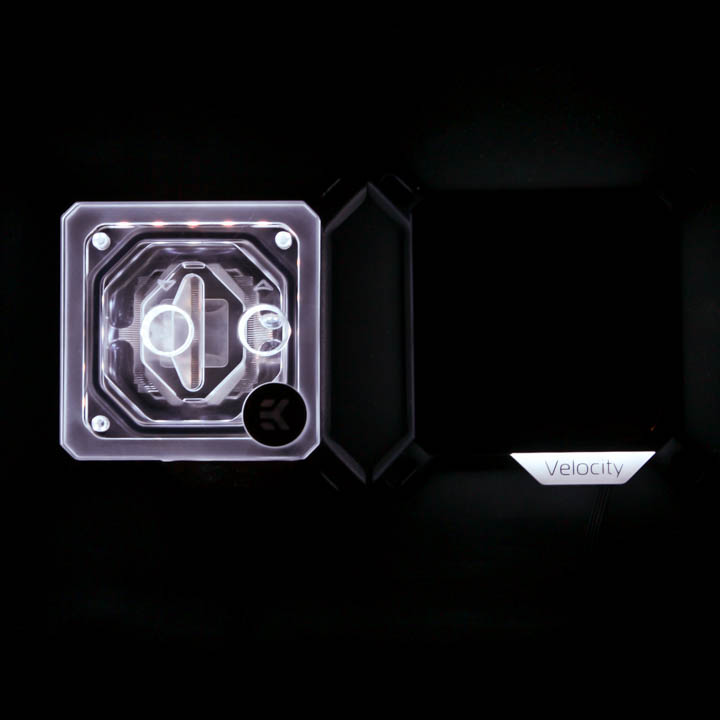

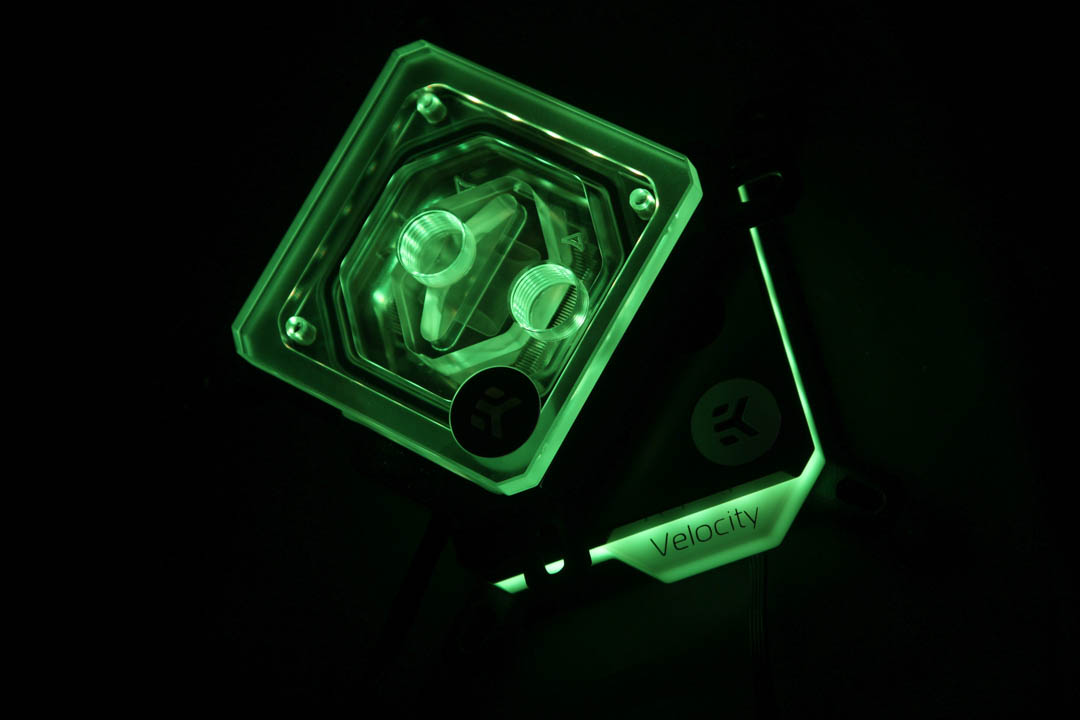
At this point, I do not have a compatible motherboard with LED headers (working on that), but in the meantime, here are some example images as well as a quick video showing how the RGB blocks with the plexi or acetal tops would look. As expected, the plexi top allows for light to mostly shine through the top instead of the opaque frame, whereas with the acetal top, it is the opposite with light diffusing out from the white translucent frame instead. The latter provides for a more uniform and subtle lighting, with the former being brighter and also showing off the individual LEDs more discretely if that was your preference.
Jul 19th, 2025 00:40 CDT
change timezone
Latest GPU Drivers
New Forum Posts
- VMware Workstation is now free for personal use (17)
- What's your latest tech purchase? (24312)
- 9060 XT 8GB or 5060 8GB? (35)
- question for everyone about google play games beta (1)
- Gacha Games - Discussions, Pulls, Updates, etc. (0)
- Idle issue since 5060 ti installed (28)
- Windows 11 General Discussion (6151)
- Have you got pie today? (16795)
- Anime Nation (13054)
- Stalker 2 is looking great. (214)
Popular Reviews
- MSI GeForce RTX 5060 Gaming OC Review
- Razer Blade 16 (2025) Review - Thin, Light, Punchy, and Efficient
- Thermal Grizzly WireView Pro Review
- Pulsar X2 Crazylight Review
- SilverStone SETA H2 Review
- AVerMedia Live Gamer Ultra S (GC553Pro) Review
- Upcoming Hardware Launches 2025 (Updated May 2025)
- Sapphire Radeon RX 9060 XT Pulse OC 16 GB Review - An Excellent Choice
- NVIDIA GeForce RTX 5050 8 GB Review
- Our Visit to the Hunter Super Computer
TPU on YouTube
Controversial News Posts
- Intel's Core Ultra 7 265K and 265KF CPUs Dip Below $250 (288)
- Some Intel Nova Lake CPUs Rumored to Challenge AMD's 3D V-Cache in Desktop Gaming (140)
- AMD Radeon RX 9070 XT Gains 9% Performance at 1440p with Latest Driver, Beats RTX 5070 Ti (131)
- NVIDIA Launches GeForce RTX 5050 for Desktops and Laptops, Starts at $249 (124)
- NVIDIA GeForce RTX 5080 SUPER Could Feature 24 GB Memory, Increased Power Limits (115)
- Microsoft Partners with AMD for Next-gen Xbox Hardware (105)
- NVIDIA DLSS Transformer Cuts VRAM Usage by 20% (99)
- AMD Sampling Next-Gen Ryzen Desktop "Medusa Ridge," Sees Incremental IPC Upgrade, New cIOD (97)