 0
0
Epomaker GK61 + SK21 Red Review - Red Wine on Your Desk
Software »Disassembly
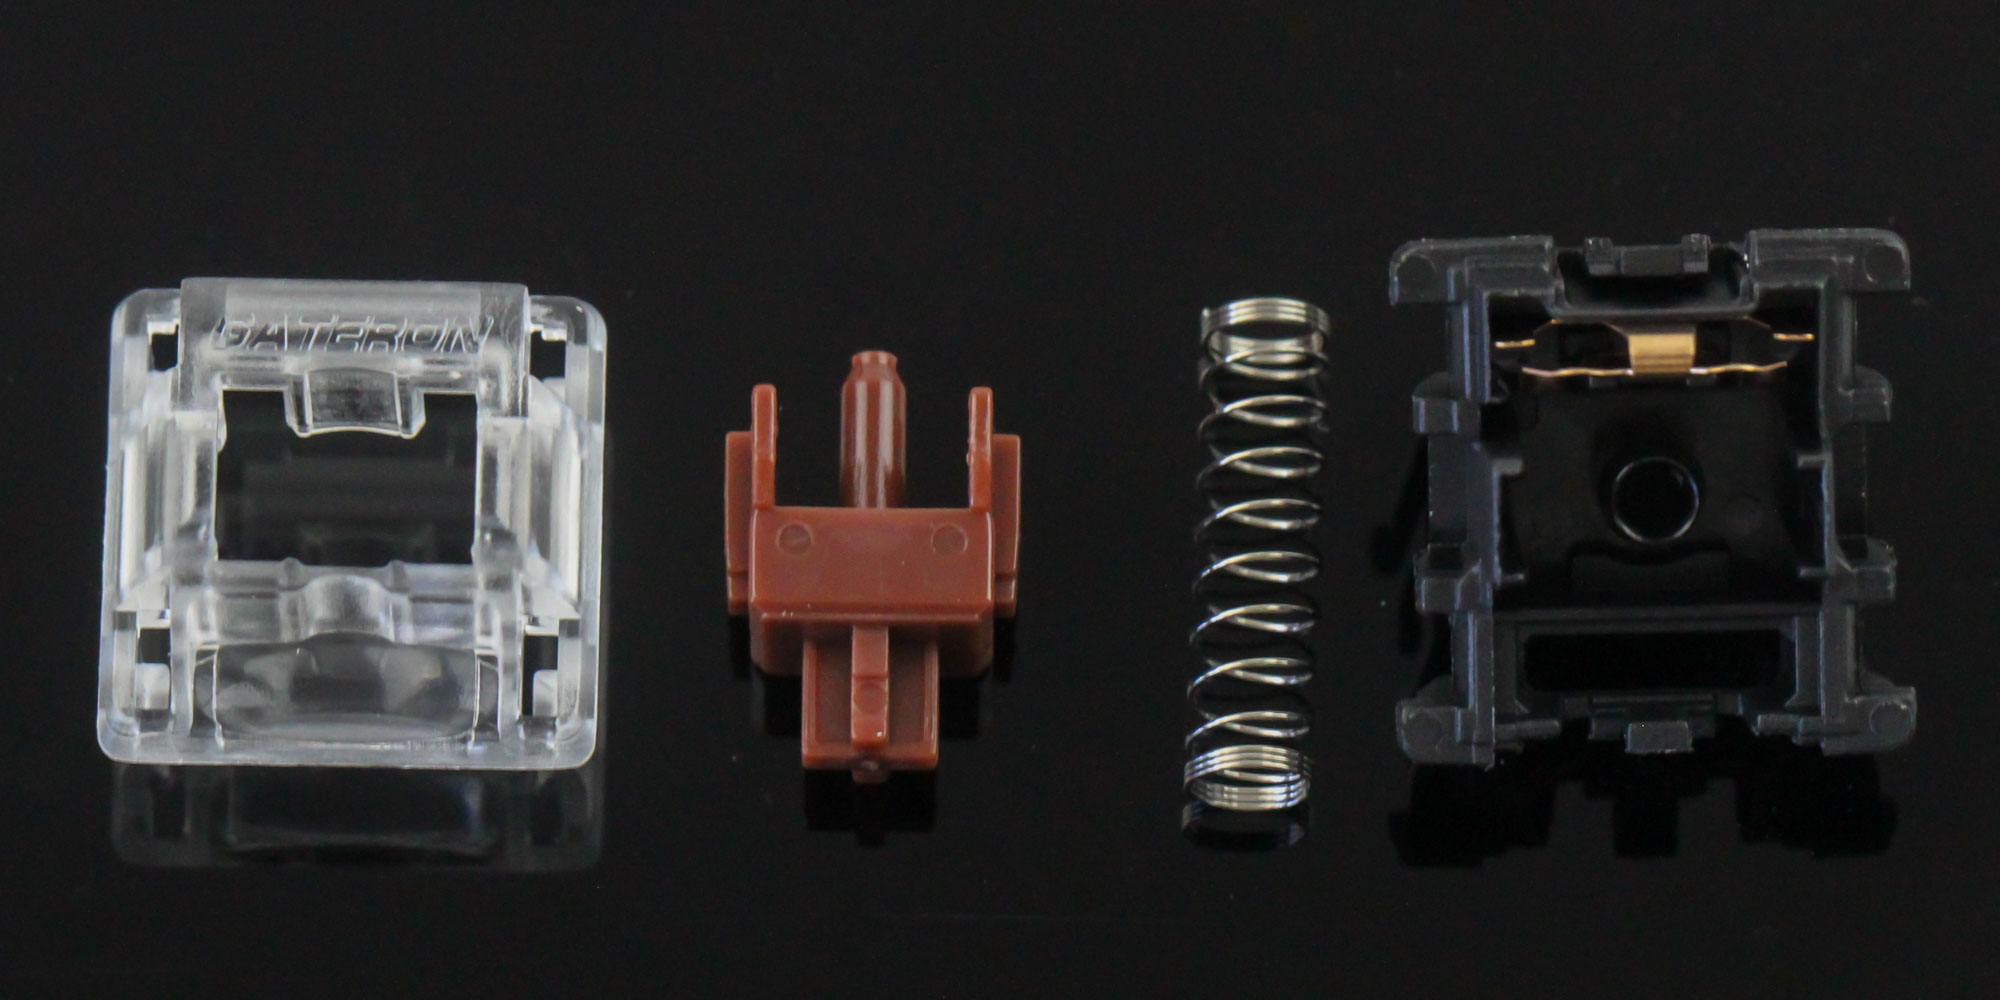

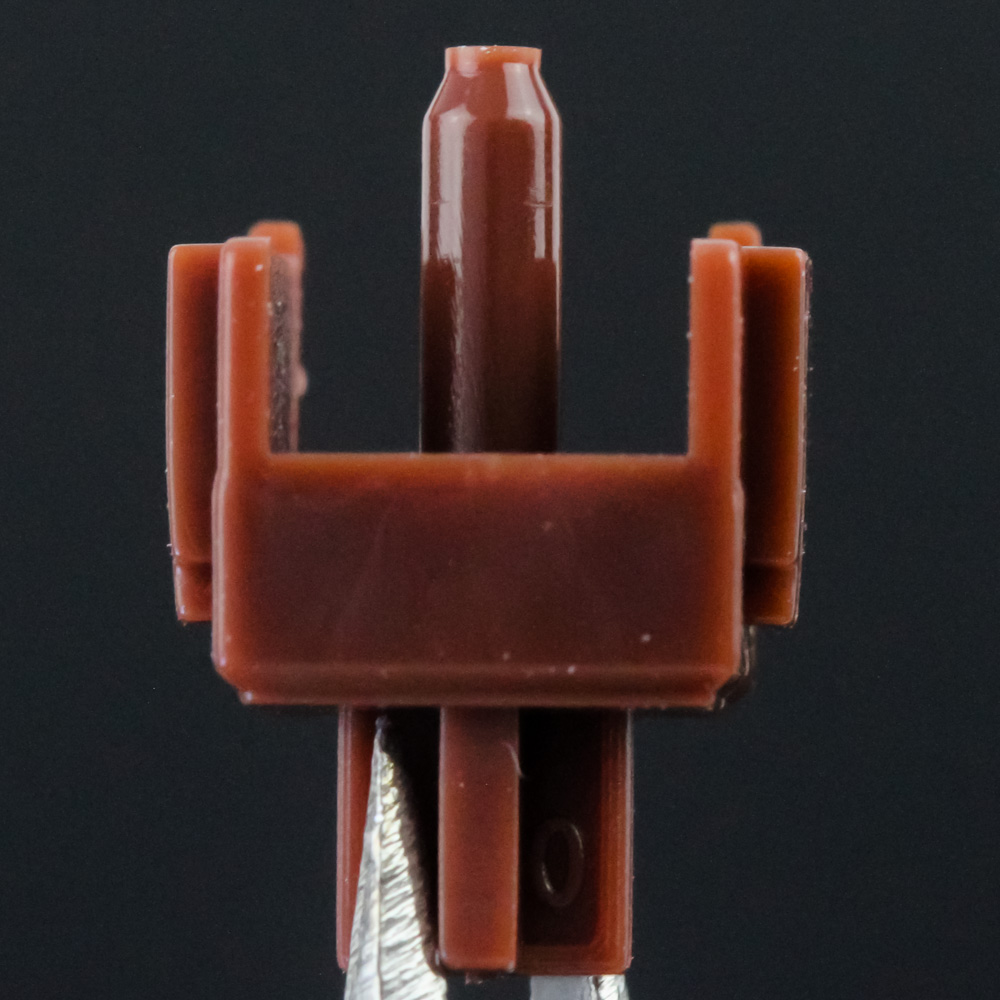

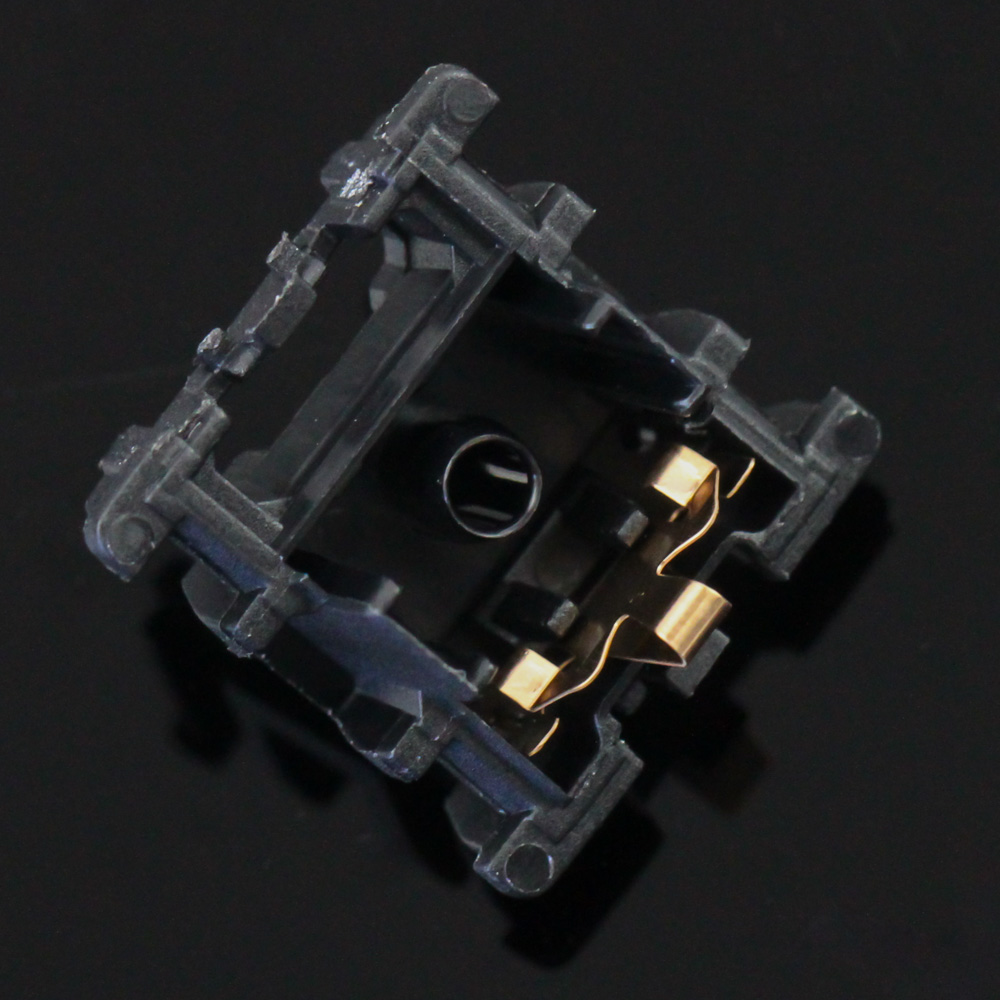

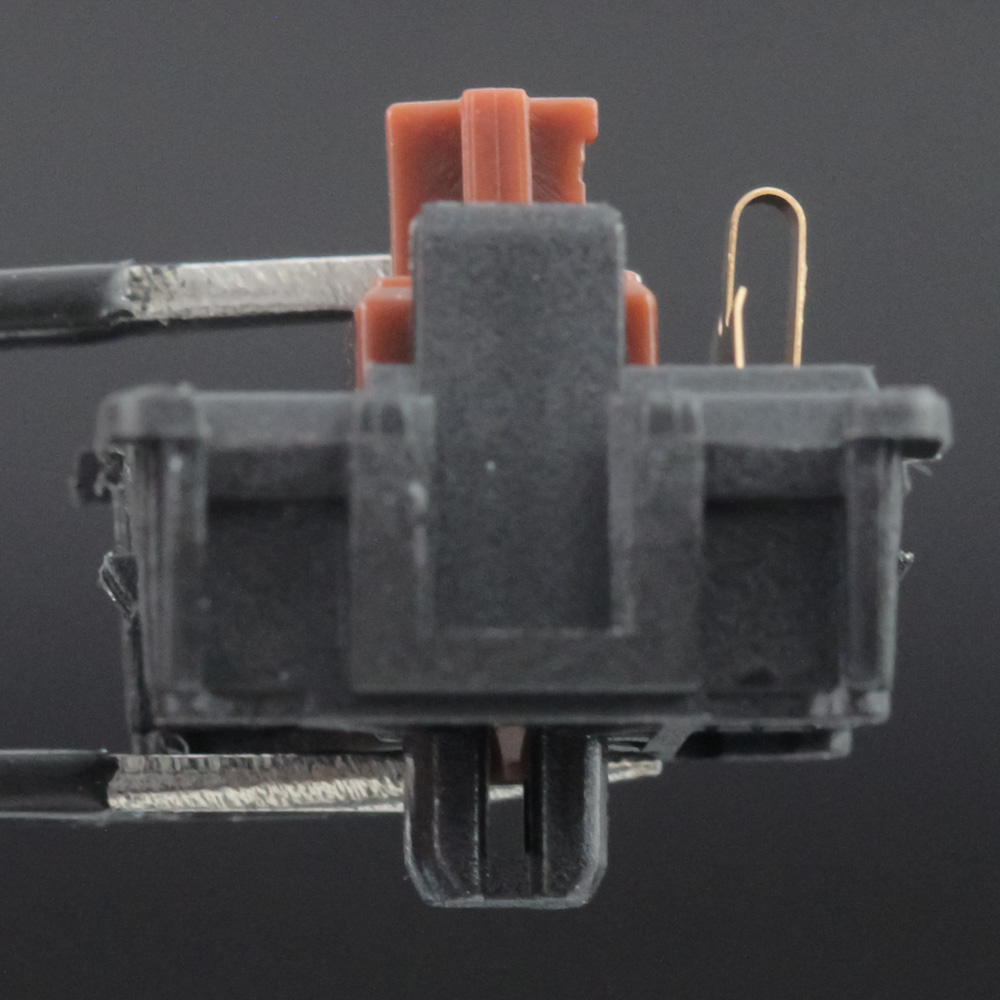
Given we have hot-swappable switches, why not start by taking one apart? The Gateron Optical Brown is a tactile switch adopting the Cherry MX cross-point stem design with a clear top, brown stem, metal spring, and black base housing that also houses the metal leaf contact. As any other tactile switch, mechanical or optical, the stem is similar in design for the tactile feedback, with a bump in the slider for the feedback when typing as it travels down. This is the entire reason the housing still has the metal leaf, which is taken from mechanical switches for the cost benefit of using this redundant part without creating a new one. Actuation happens with the cylindrical stem traveling down into the extension at the bottom, with a cutout on the side for the light from the PCB actuation mechanism to pass through normally. The stem interrupts this signal at the point of actuation, theoretically triggering actuation without any debounce or touching moving parts. This results in a higher rated lifetime for optical switches, especially for optical linear switches that do not need to rely on the metal leaf either.


Disassembly of the Epomaker SK61 is quite simple. You need to remove a few specific keycaps as seen above to access eight Phillips head screws holding the keyboard together. Once all screws are removed, lift up the plate/PCB section from the bottom while taking care not to damage the Type-C connector placed into a cutout in the black ABS case itself, once again made by Jikedinghzi. The case is quite empty, which is not the best idea for minimizing reverberations when typing on this high-profile case. Users may want to add some sound-dampening foam here, and in the absence of any internal cables, doing so would be extremely easy.


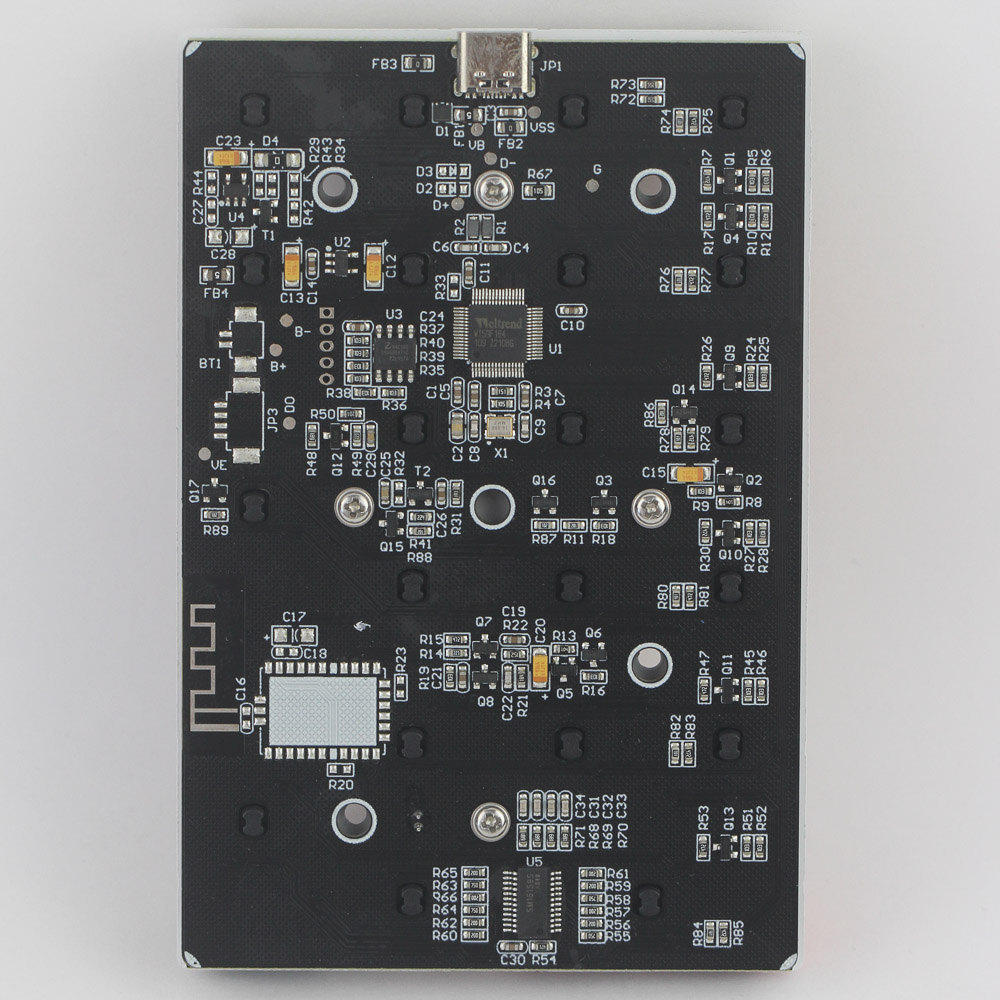
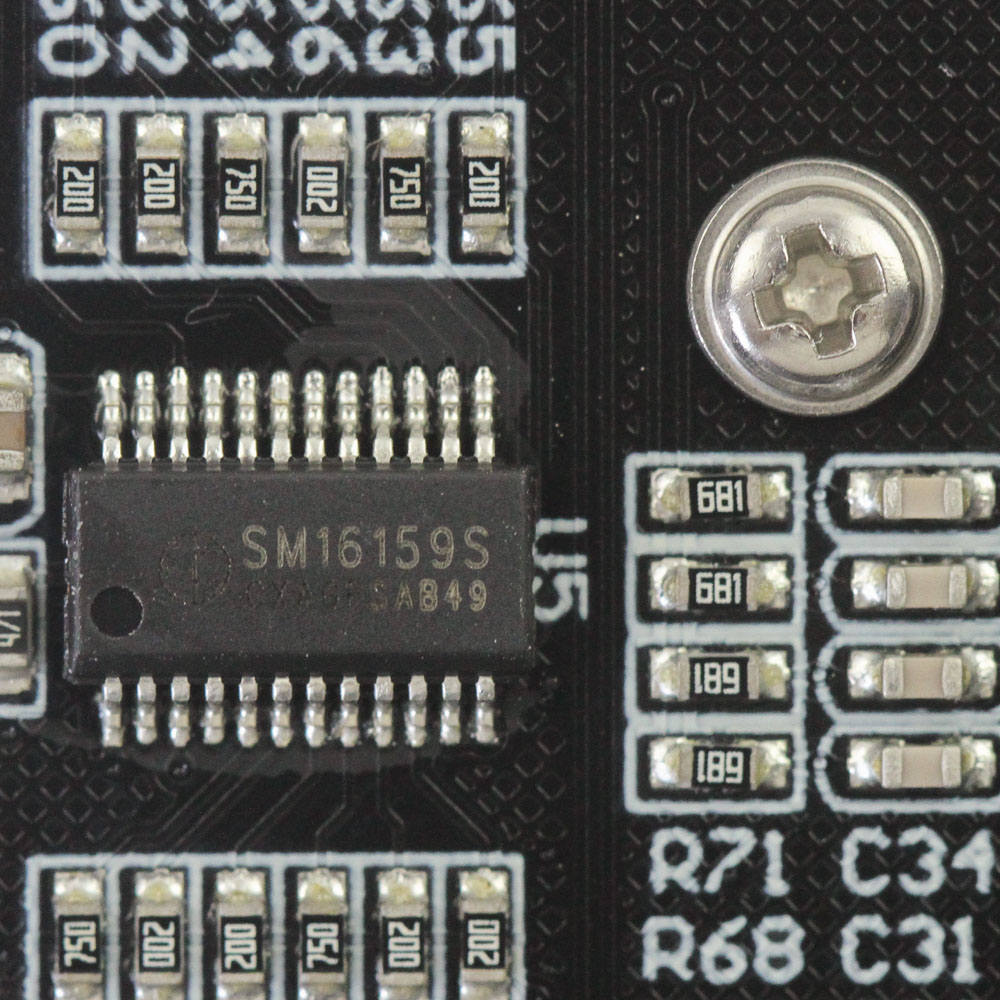
The PCB is white, and solder quality is really good, including on the Type-C connector. The use of optical switches means you can also easily separate the white steel plate and PCB by removing more screws and keycaps, but there was not much to gain by doing so given I had access to the hardware drivers already. Powering the SK6 is a Weltrend WT59F164 32-bit USB microcontroller. It is based on the RISC microarchitecture with up to 64 KB flash and 8 KB RAM. There are also three separate Shenzhen Sunmoon SM16159 LED drivers to run all the RGB LEDs on the keyboard. As is the norm, all the components are soldered onto a multi-layer PCB.
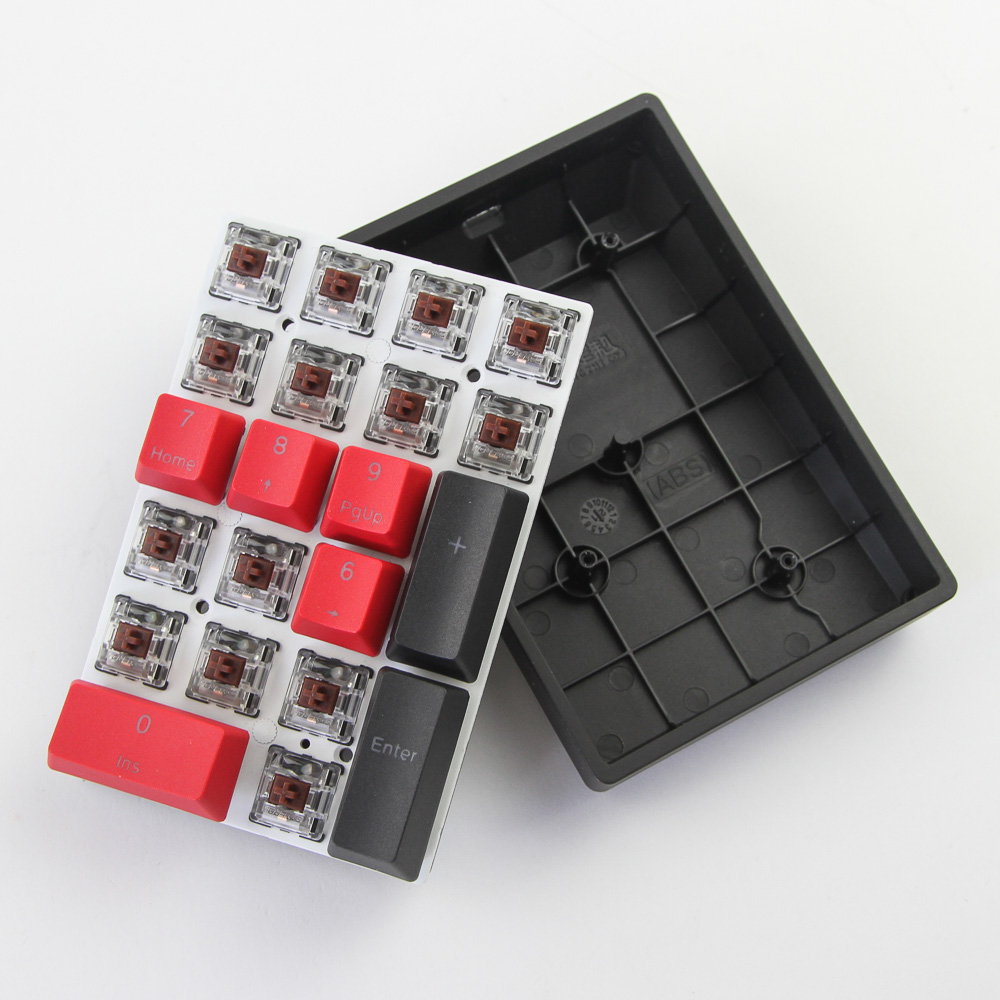

Disassembly of the SK21 numpad is even simpler, and you might as well remove all the keycaps to access the four Phillips screws. The PCB is black, although the steel plate remains white, and we see the same USB microcontroller and LED drivers as well.
Before we move on, be advised that disassembly may void the warranty and that TechPowerUp is not liable for any damages incurred if you decide to go ahead and do so anyway.
Jul 12th, 2025 03:28 CDT
change timezone
Latest GPU Drivers
New Forum Posts
- What's your latest tech purchase? (24237)
- What are you playing? (23921)
- Can you guess Which game it is? (226)
- Gigabyte graphic cards - TIM gel SLIPPAGE problem (144)
- [Intel AX1xx/AX2xx/AX4xx/AX16xx/BE2xx/BE17xx] Intel Modded Wi-Fi Driver with Intel® Killer™ Features (367)
- NVIDIA RTX PRO 6000 Workstation Runs Much Hotter Than 5090 FE (22)
- 3D Printer Club (539)
- Will you buy a RTX 5090? (644)
- [GPU-Z Test Build] New Kernel Driver, Everyone: Please Test (89)
- No offense, here are some things that bother me about your understanding of fans. (34)
Popular Reviews
- Fractal Design Epoch RGB TG Review
- Corsair FRAME 5000D RS Review
- Lexar NM1090 Pro 4 TB Review
- NVIDIA GeForce RTX 5050 8 GB Review
- NZXT N9 X870E Review
- Sapphire Radeon RX 9060 XT Pulse OC 16 GB Review - An Excellent Choice
- AMD Ryzen 7 9800X3D Review - The Best Gaming Processor
- Our Visit to the Hunter Super Computer
- Upcoming Hardware Launches 2025 (Updated May 2025)
- Chieftec Iceberg 360 Review
TPU on YouTube
Controversial News Posts
- Intel's Core Ultra 7 265K and 265KF CPUs Dip Below $250 (288)
- Some Intel Nova Lake CPUs Rumored to Challenge AMD's 3D V-Cache in Desktop Gaming (140)
- AMD Radeon RX 9070 XT Gains 9% Performance at 1440p with Latest Driver, Beats RTX 5070 Ti (131)
- NVIDIA Launches GeForce RTX 5050 for Desktops and Laptops, Starts at $249 (119)
- NVIDIA GeForce RTX 5080 SUPER Could Feature 24 GB Memory, Increased Power Limits (115)
- Microsoft Partners with AMD for Next-gen Xbox Hardware (105)
- Intel "Nova Lake‑S" Series: Seven SKUs, Up to 52 Cores and 150 W TDP (100)
- NVIDIA DLSS Transformer Cuts VRAM Usage by 20% (97)