 4
4
EVGA Hadron Air Review
Value & Conclusion »Assembly

You do have to make sure to get the proper parts for the Hadron Air because of its compact size. EVGA was kind enough to supply us with their latest Z87 ITX motherboard and a compact low-profile Alpenföhn CPU cooler. While this is a nice combination to have, EVGA will also offer their own air cooler specifically for the chassis, the EVGA mini ITX ACX CPU Cooler, soon. Installing the board takes a steady hand and some nerves of steel, but everything does fit in nicely in the end.
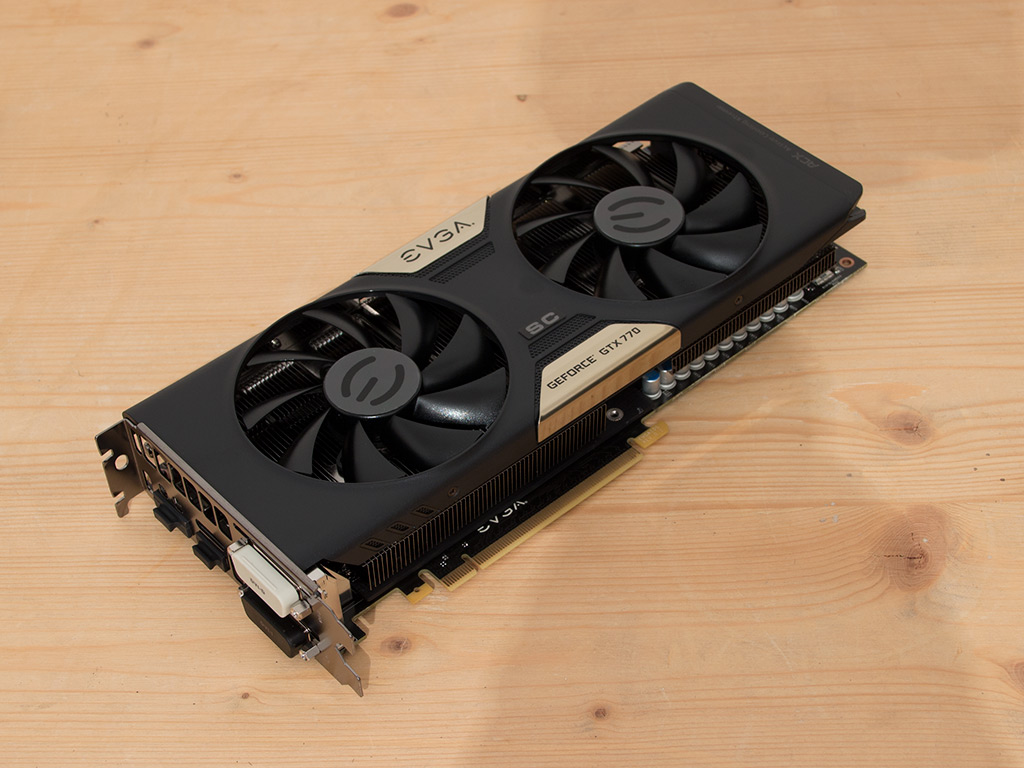
To show you what type of graphics card fits within the Hadron Air, EVGA also send us a GeForce GTX 770 SC /w ACX cooler. Don't slap both hands against your head and scream, "Oh my god, TechPowerUp got the craziest hardware for a basic case review from EVGA!", since we only got all the parts, including the Hadron, as loans that went right back to EVGA after we wrapped up the review.
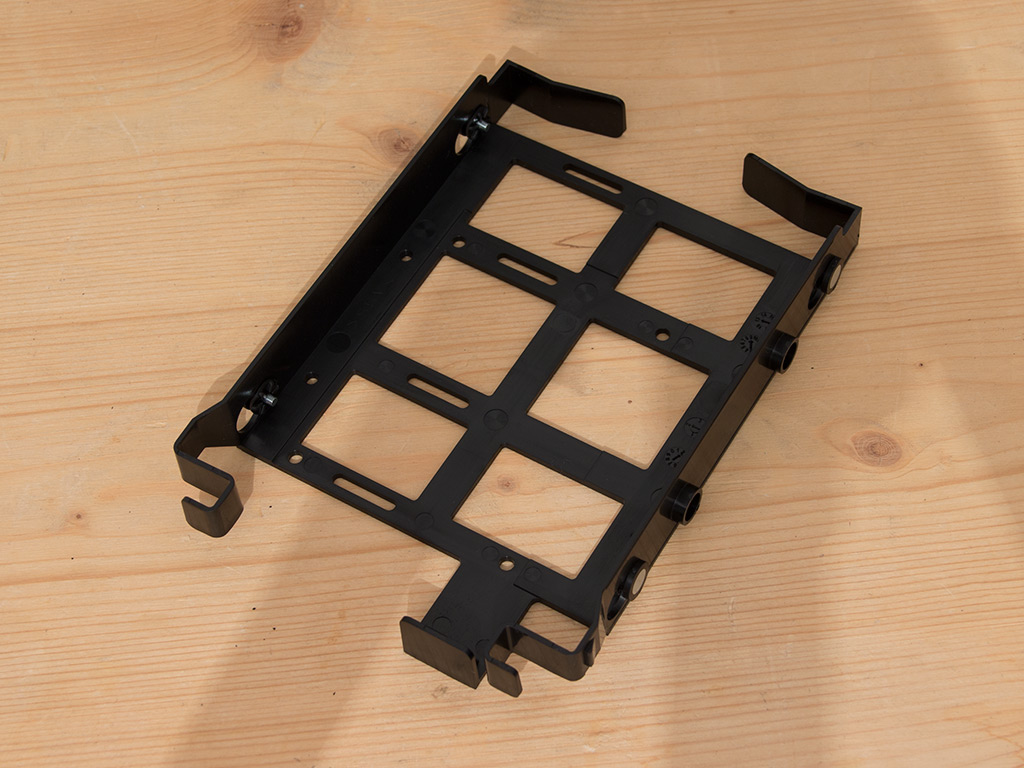
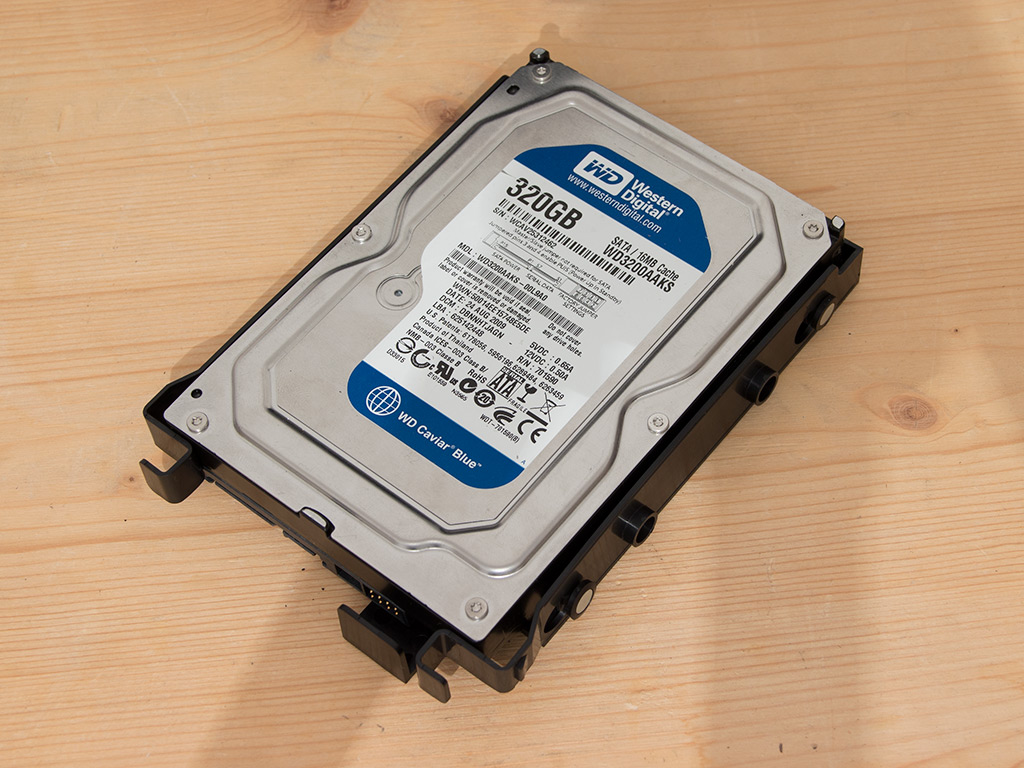

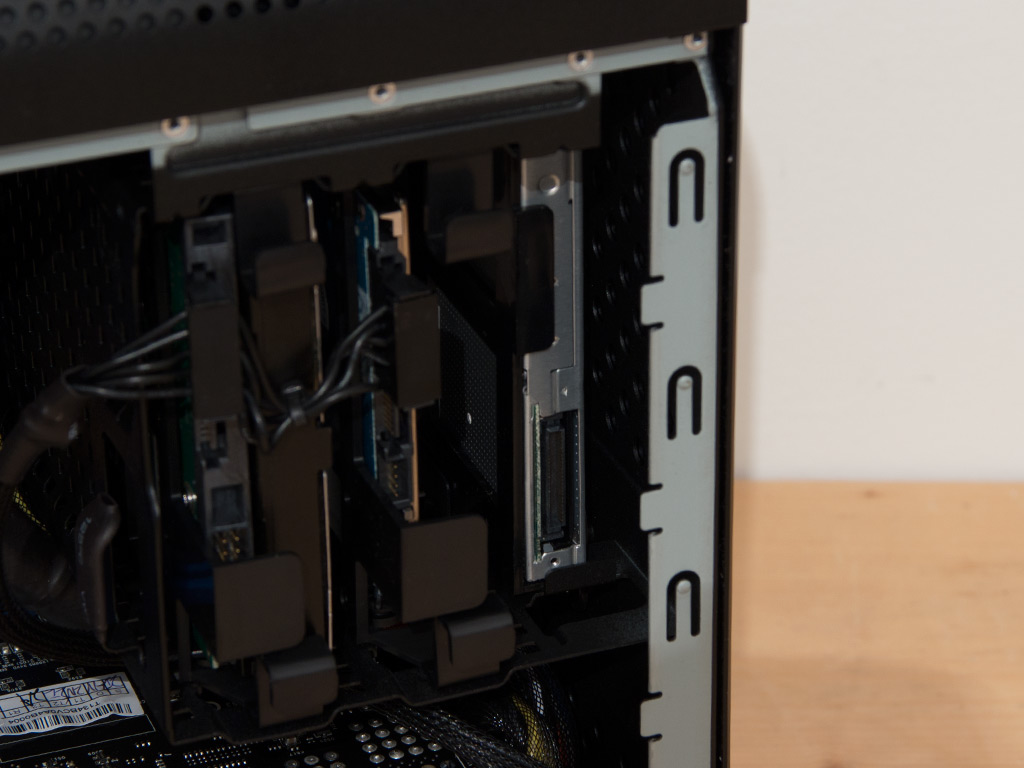
Installing a hard drive does not require any tools as long as it is a 3.5" unit. Such a drive will just snap right into place. Those using SSDs will have to use the supplied screws to secure the drive inside the tray.
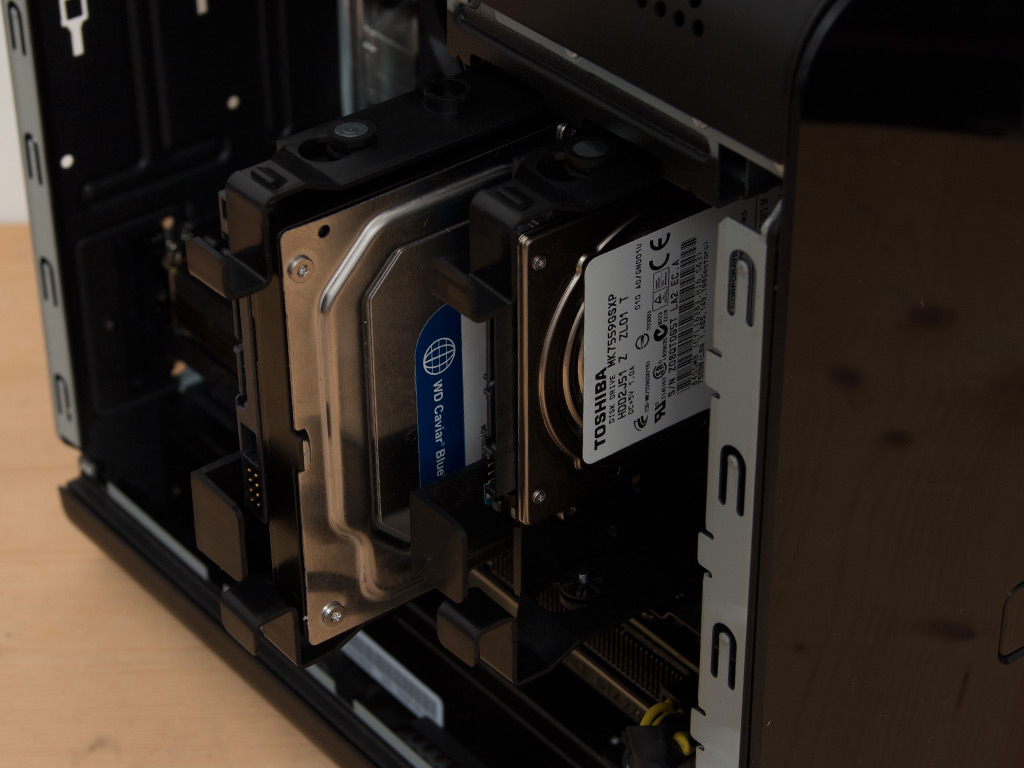
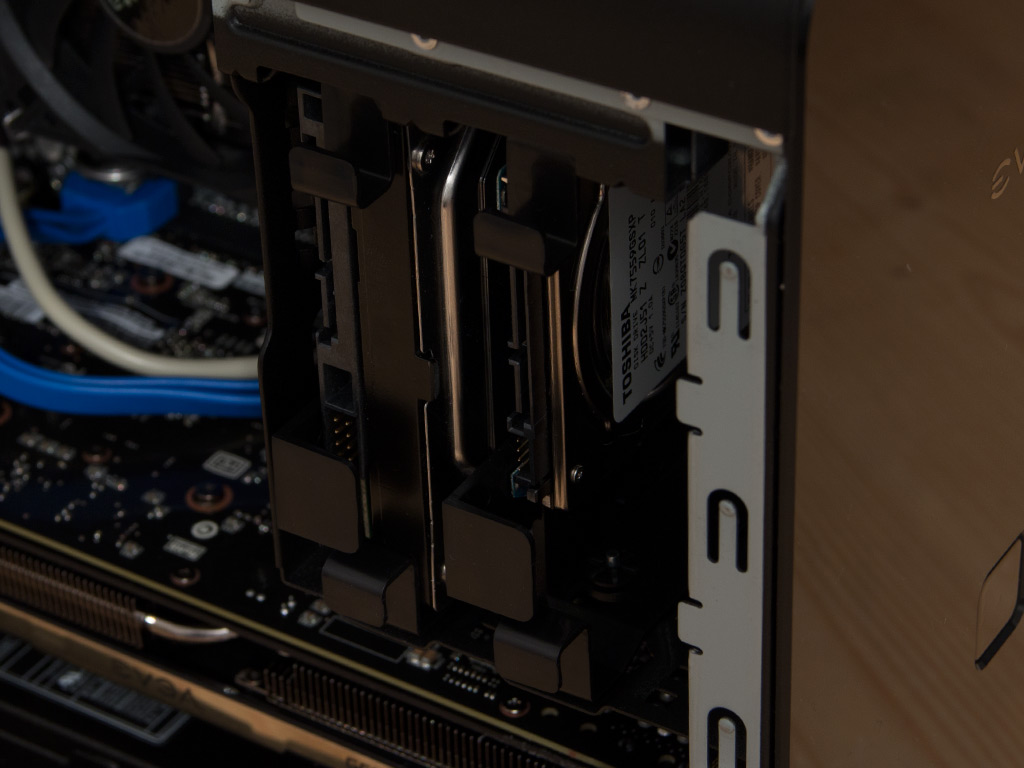
Once filled, simply slide the trays back into place until it snaps down. They hold well, irregardless of what drive is installed.
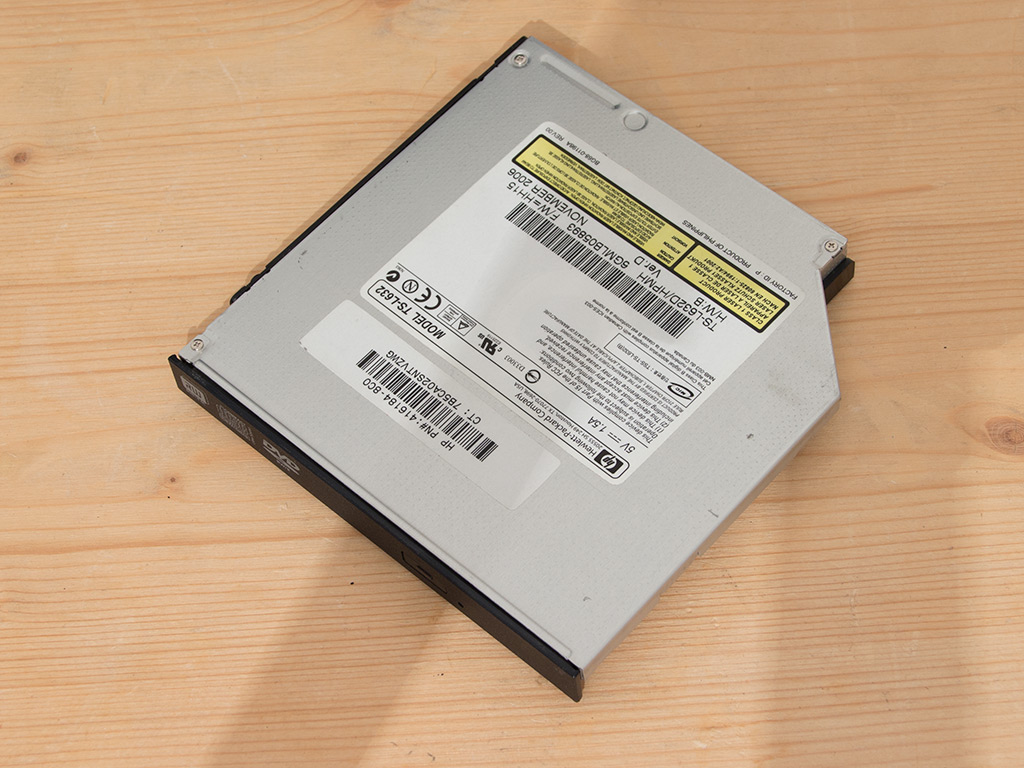
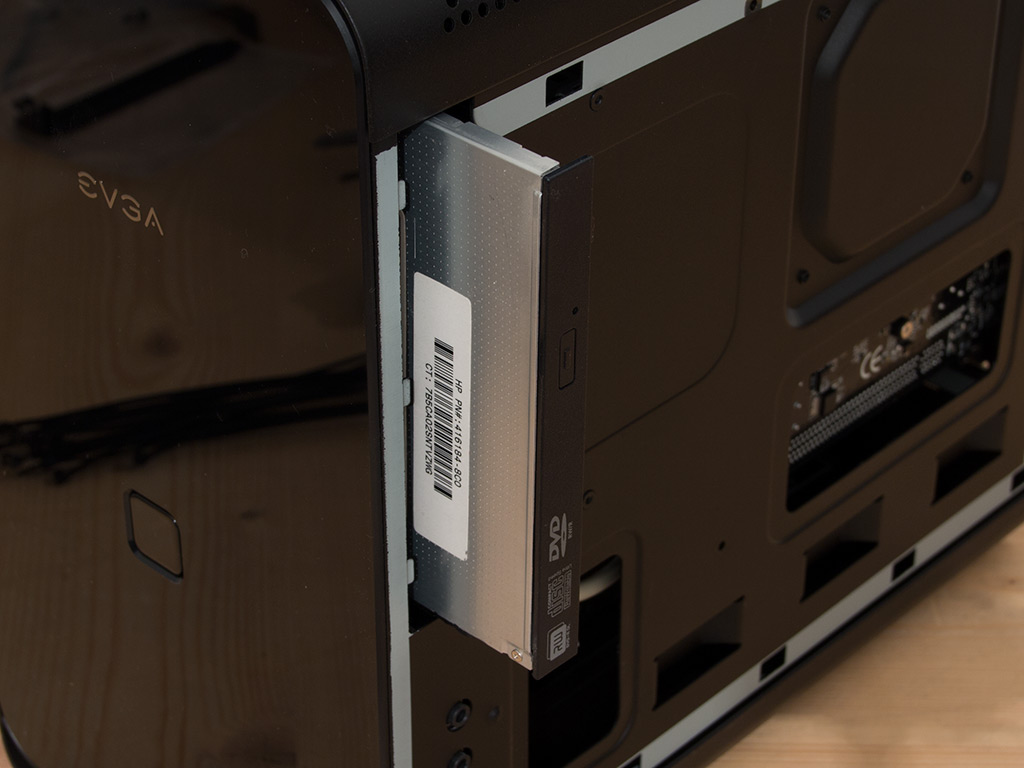
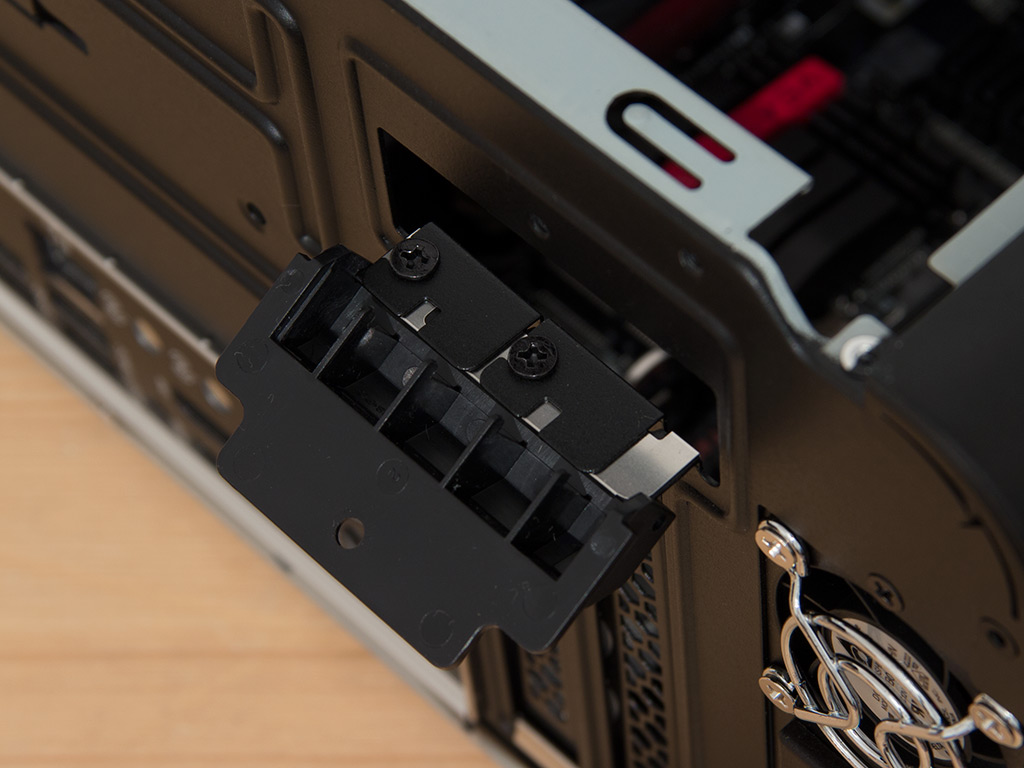
While we don't have the specific Panasonic slimline drive mentioned by EVGA, we can still show you how such a unit is installed within the Hadron Air. The first step entails screwing the drive down onto the plastic tray. Once secured, slide it into the bay until the plastic locks into place inside the metal bay. The drive should now actually hold well. You can simply remove the bay by pushing down on a little piece of the plastic tray. This is a pretty cool installation method and gives you access to the power and data connectors right next to an installed hard drive.
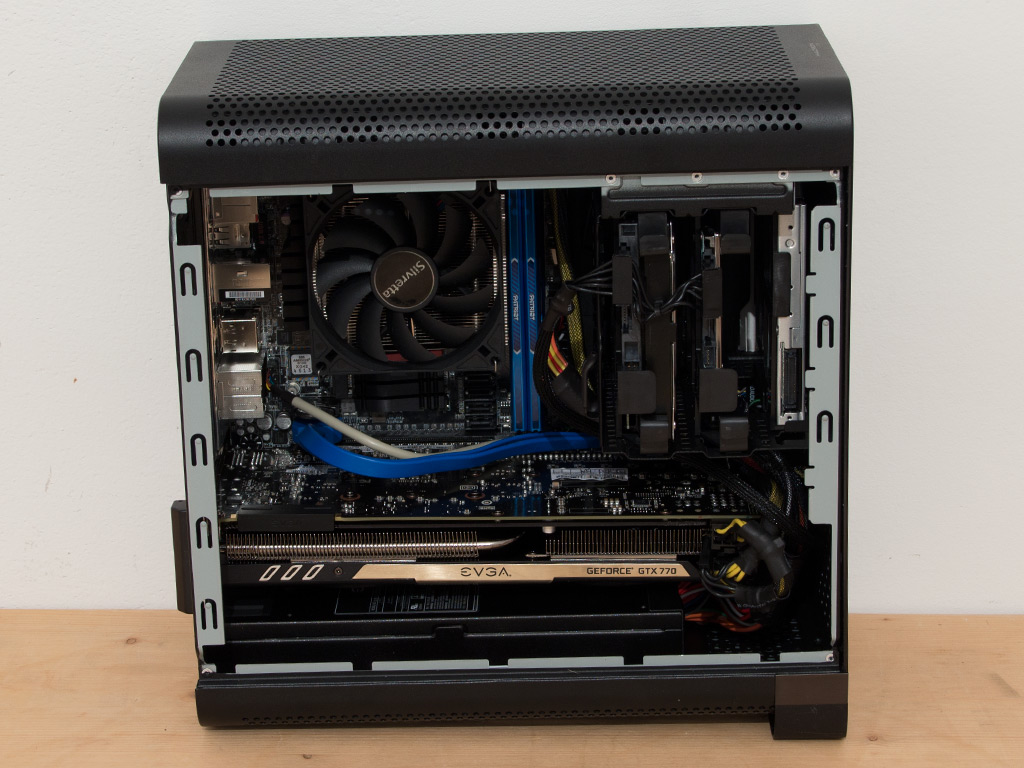
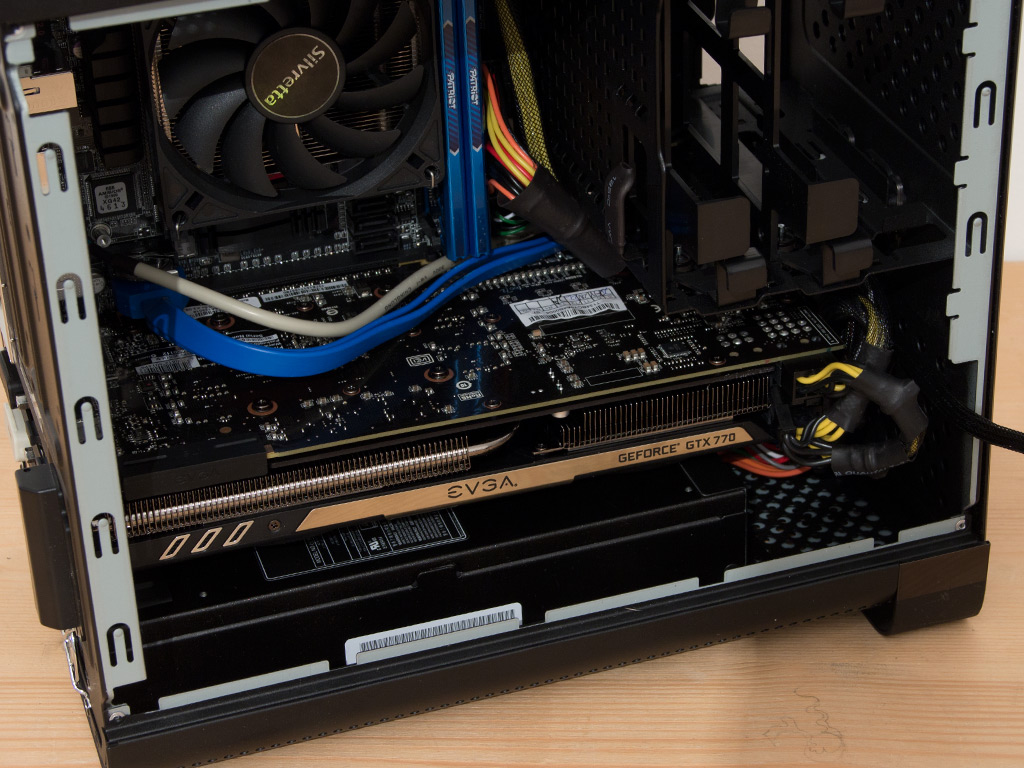
How tight things are within the Hadron Air becomes apparent once everything is in place. The colorful audio and USB 3.0 cables run along the top of the graphics card, while the 8-pin power cable just reaches past the right side of the blue Patriot DIMMs and horizontally to the left-top corner of the motherboard. The other cables are stuffed between PSU and front as the Molex plugs were left unused. Those utilizing the Panasonic drive will use a Molex plug for the miniSATA power connector.
Finished Looks
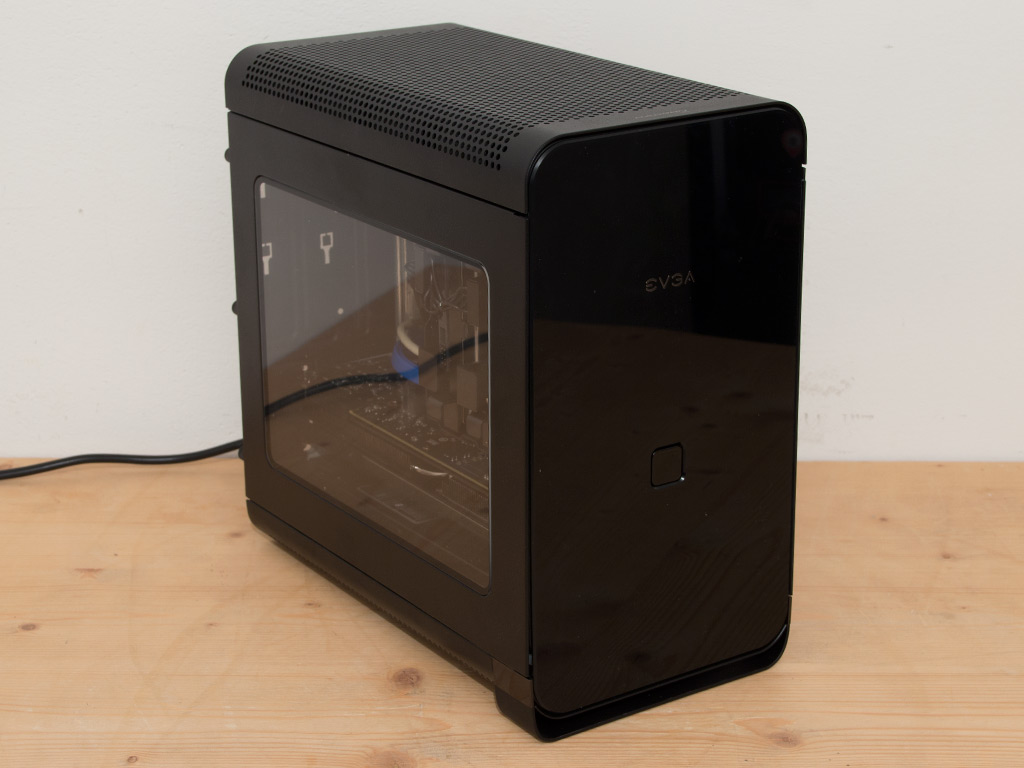
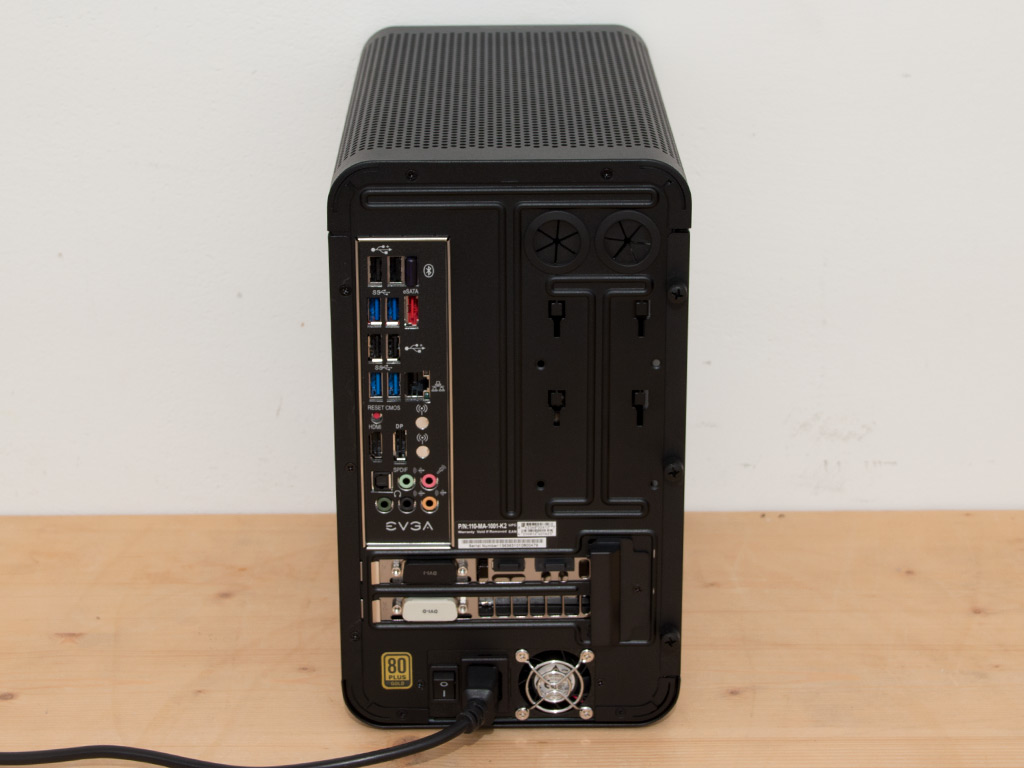
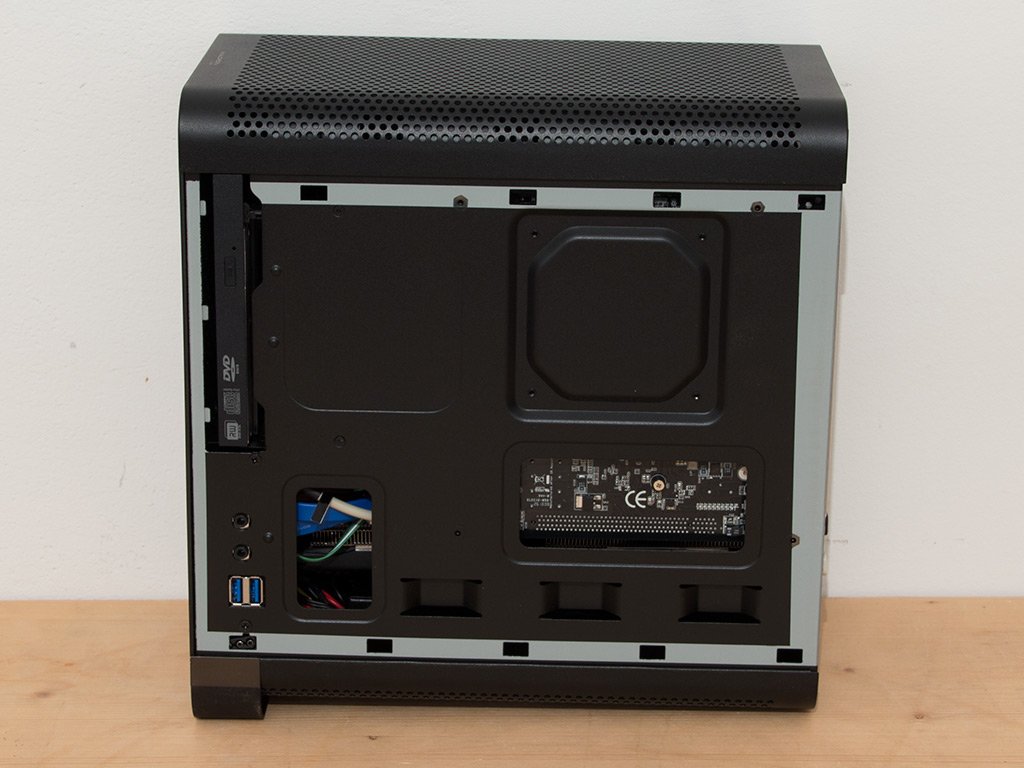
We turned the Hadron Air on after connecting and installing everything. A white LED right behind the power button should light up, but we could not get it to work with our sample, even after checking whether the appropriate cables were plugged in right. Turns out, as we are actually not using a CPU in this review, the H87 based board does not light up the chassis. In a normal build, a nice white LED should fire up. The good news is that the system is not overly loud. Sure, things are not as quiet as with a normally sized 500W power supply, but our fear of the Hadron Air being too loud were definitely debunked. Everything in the rear is where you would expect it to be in such a compact chassis.

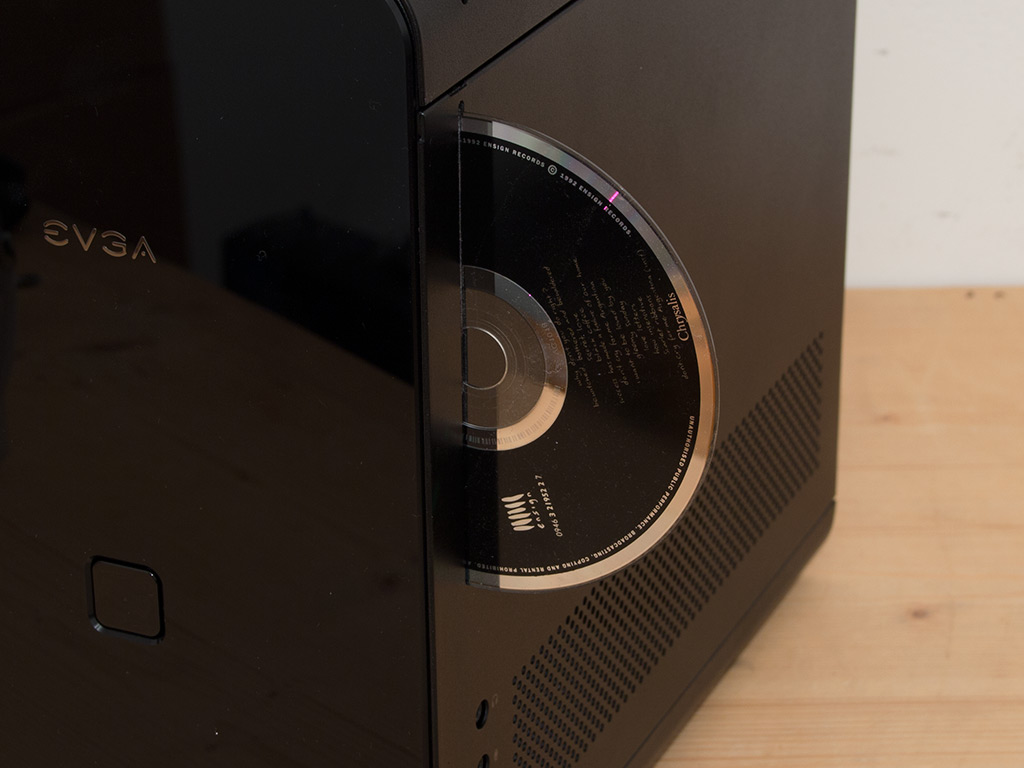
You can see everything through the window of the chassis, which is pretty cool for those taking the system to a LAN Party, for example, but the sight may not be something you'll want to lay your eyes on every day if you want to connect the unit to your TV as a powerful HTPC/Gaming/Steambox rig. It would be nice of EVGA to at least sell a solid side panel as an optional accessory. I used a driver CD to show how slot-loading would work. I did do so with the correct side up, while EVGA does it incorrectly with their own marketing shot on their PDF Spec sheet ;).
Jul 3rd, 2025 22:02 CDT
change timezone
Latest GPU Drivers
New Forum Posts
- GPU-Z Display Bug via DP 2.1? (5)
- [GPU-Z Test Build] New Kernel Driver, Everyone: Please Test (35)
- What Windows is overall the best to you and why? (269)
- How do you view TPU & the internet in general? (With poll) (58)
- HP Zbook 15 G2 GPU Upgrade (12)
- Will you buy a RTX 5090? (610)
- What phone you use as your daily driver? And, a discussion of them. (1756)
- What would you buy? (51)
- A Final Fantasy IX Reminiscence - My love letter and homage to one of the best stories ever told (90)
- GravityMark v1.89 GPU Benchmark (309)
Popular Reviews
- ASUS ROG Crosshair X870E Extreme Review
- Crucial T710 2 TB Review - Record-Breaking Gen 5
- Fractal Design Scape Review - Debut Done Right
- PowerColor ALPHYN AM10 Review
- Sapphire Radeon RX 9060 XT Pulse OC 16 GB Review - An Excellent Choice
- Upcoming Hardware Launches 2025 (Updated May 2025)
- AMD Ryzen 7 9800X3D Review - The Best Gaming Processor
- Sapphire Radeon RX 9070 XT Nitro+ Review - Beating NVIDIA
- SCHENKER KEY 18 Pro (E25) Review - Top-Tier Contender
- AVerMedia CamStream 4K Review
TPU on YouTube
Controversial News Posts
- Intel's Core Ultra 7 265K and 265KF CPUs Dip Below $250 (288)
- NVIDIA Grabs Market Share, AMD Loses Ground, and Intel Disappears in Latest dGPU Update (212)
- Some Intel Nova Lake CPUs Rumored to Challenge AMD's 3D V-Cache in Desktop Gaming (140)
- NVIDIA GeForce RTX 5080 SUPER Could Feature 24 GB Memory, Increased Power Limits (115)
- Microsoft Partners with AMD for Next-gen Xbox Hardware (105)
- NVIDIA Launches GeForce RTX 5050 for Desktops and Laptops, Starts at $249 (105)
- Intel "Nova Lake‑S" Series: Seven SKUs, Up to 52 Cores and 150 W TDP (100)
- NVIDIA DLSS Transformer Cuts VRAM Usage by 20% (97)