 15
15
EVGA X15 Review
Sensor & Performance »Build Quality
Overall build quality is very solid. There is no rattle when shaking the mouse. When applying lateral pressure, no creaking or flexing of the shell can be observed. Activating the side buttons by squeezing the sides is impossible. Lastly, no accidental clicks occur when slamming down the mouse. However, I did notice a high-pitched noise ("coil whine") even when the sensor is not tracking, simply as long as RGB lighting is enabled.Buttons

Main buttons on the X15 are good. Both pre and post-travel are moderate, resulting in a somewhat spongy button response. By comparison, the clicks of the X17 and X20 were much better in this regard. On the flip side, the buttons can be spammed with relative ease. Button stiffness is medium to light. A set of LK optical switches (V2, 70 M) is used.
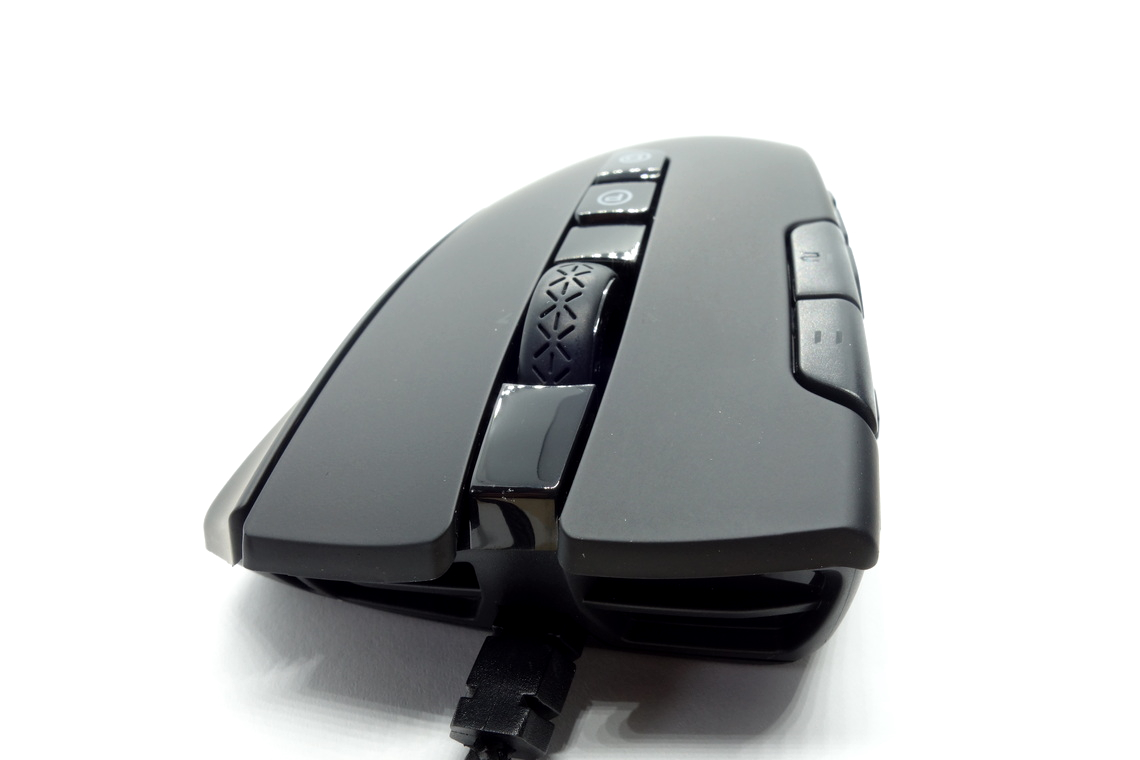
Right next to the left main buttons are two additional buttons, which work just fine. Two tactile switches are used here.
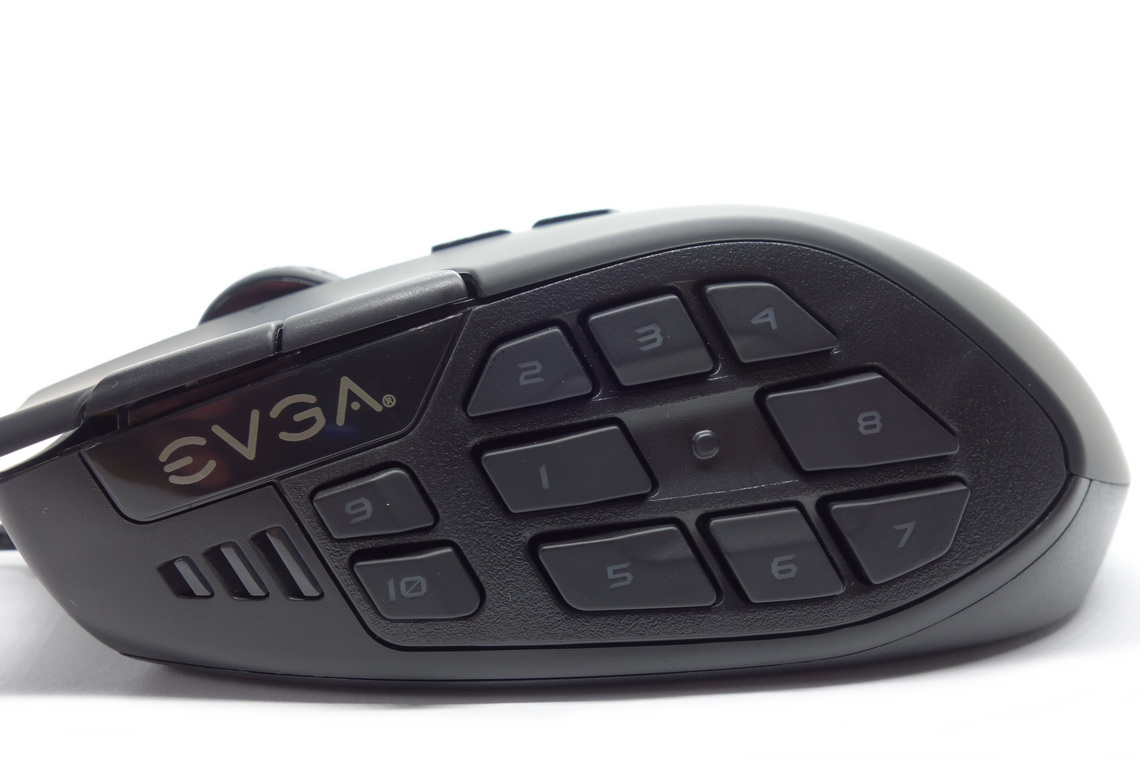
Side buttons are very good. Both pre and post-travel are mostly low, though their response can be mushy. They are positioned similarly to a dial, leaving a spot in the middle unoccupied. Compared to most other MMO mice, which cram the entire left side with buttons, this design leaves some much needed space for the thumb to rest on, which is particularly useful when it comes to avoiding accidentally hitting a button. From this resting position, eight of the ten buttons are readily accessible, and only the two buttons towards the front require some grip readjustment. Further utility is provided by the shift button on the right side. If enabled, another set of binds is made available upon pressing and holding this button, giving one access to 38 binds in total. Ergonomically, this design is excellent, as the button is stiff enough to prevent it from being actuated accidentally or by the weight of one's finger, yet light enough not to be tiresome when holding it for some time. If needed, this functionality can be disabled with the slider on the bottom of the mouse. A TTC Golden Micro Dustproof (60 M) is used for the shift button. Unfortunately, I wasn't able to get the side buttons out of their encasing, so there's no picture of it.
At the top of the mouse are two buttons for cycling through the set CPI levels and profiles. Their click feel is decent. A pair of seemingly unbranded tactile switches is used for these.
Scroll Wheel
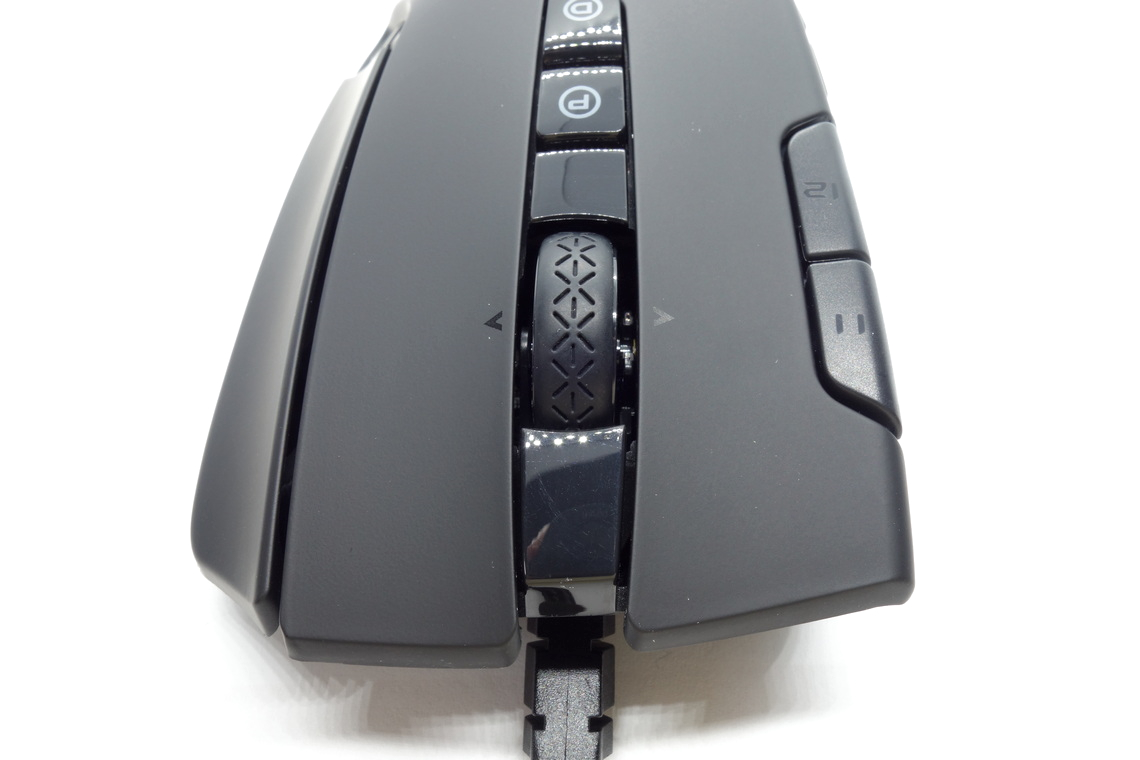

The scroll wheel is good. It is rather noisy when scrolling in either direction, but the individual steps are quite nicely separated, resulting in decent tactility. The scroll wheel also allows for horizontal scrolling (tilting, rather), which is useful for productivity work and play as the software allows for rebinding those directions as buttons. Unfortunately, I wasn't able to identify the encoder. Actuating the middle (scroll wheel) click requires medium force. Three seemingly unbranded tactile switches are used here.
Coating
The X15 has a smooth matte surface almost all over. It doesn't attract fingerprints, dirt, or the likes too much, and is easy to clean, but some oil marks can be difficult to get off. All in all, good materials.Button Sound Test
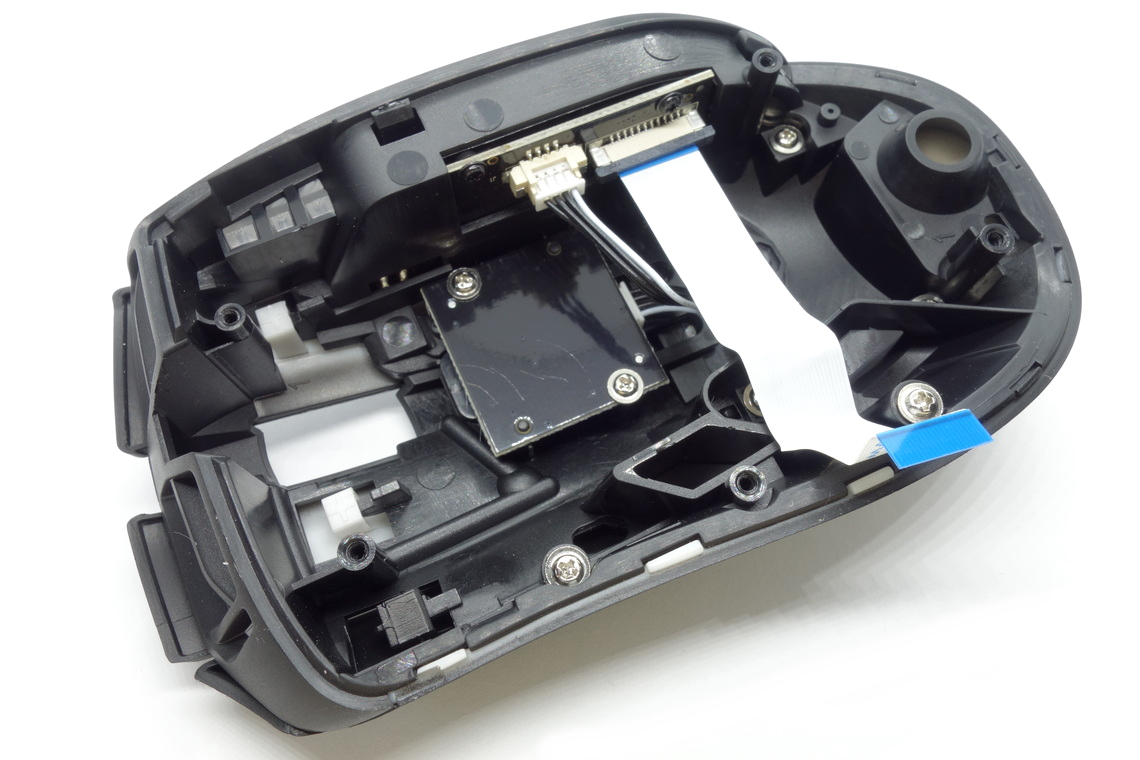
Disassembly
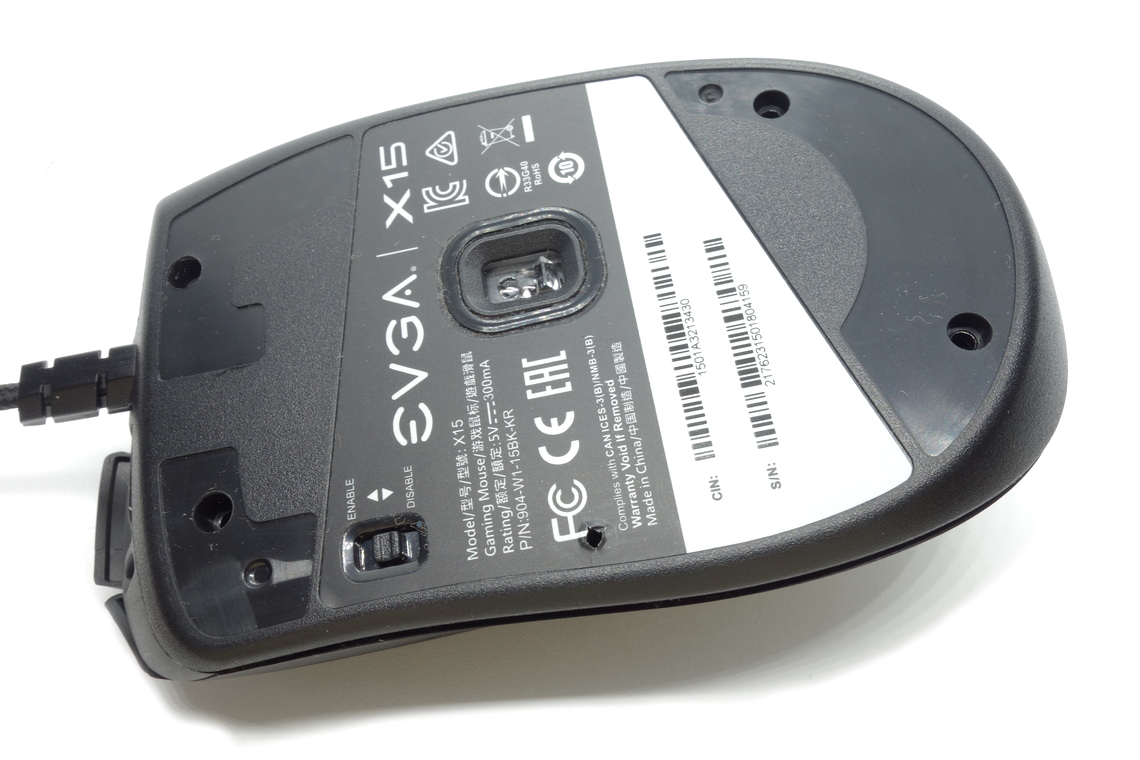
Disassembling the X15 is somewhat difficult. First, all skates and the screws beneath them ought to be removed, along with a single screw located beneath the sticker, roughly below the F of the FCC logo. Top and bottom shell can be separated now, though one has to take care not to rip the ribbon cables.
First, we have the large and very thick main PCB. Aside from the sensor and several connectors, not much can be seen on its top, but on the back, the MCU is located: An NXP LPC5516, whose datasheet can be found here. The main buttons sit on their own PCB, which connects to the main PCB through a ribbon cable and is fixated with four screws. The scroll wheel doesn't sit on that PCB, but is instead suspended in an encasing and directly routed to the main PCB with a 3-pin connector. The top buttons too have their own PCB, screwed into the top shell and connected to the side-button PCB with a 4-pin connector. The side-button PCB is then encapsulated in a plastic assembly and virtually inaccessible. A large ribbon cable connects it to the main PCB. Finally, a 2-pin connector connects the single shift-button switch to the main PCB. Four screws are used to affix the main PCB to the bottom shell.
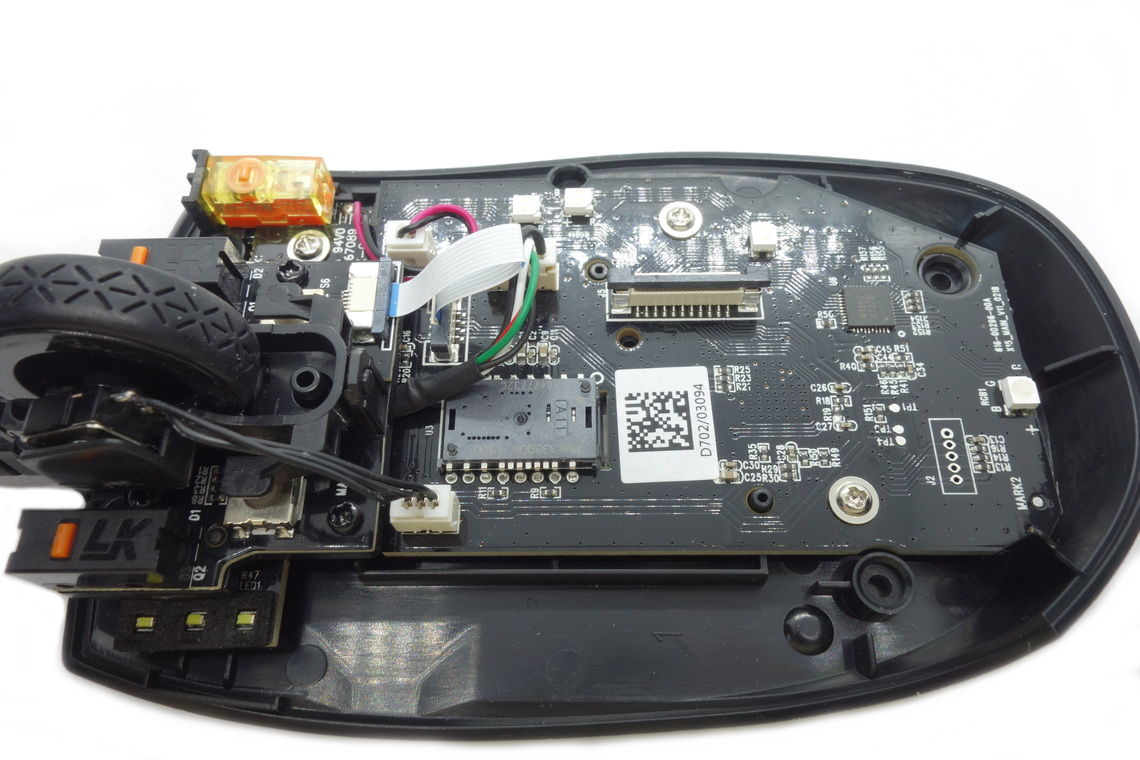
As for the soldering and general quality of the PCBs, I'm unable to find any noteworthy flaws.
Jul 3rd, 2025 22:09 CDT
change timezone
Latest GPU Drivers
New Forum Posts
- GPU-Z Display Bug via DP 2.1? (5)
- [GPU-Z Test Build] New Kernel Driver, Everyone: Please Test (35)
- What Windows is overall the best to you and why? (269)
- How do you view TPU & the internet in general? (With poll) (58)
- HP Zbook 15 G2 GPU Upgrade (12)
- Will you buy a RTX 5090? (610)
- What phone you use as your daily driver? And, a discussion of them. (1756)
- What would you buy? (51)
- A Final Fantasy IX Reminiscence - My love letter and homage to one of the best stories ever told (90)
- GravityMark v1.89 GPU Benchmark (309)
Popular Reviews
- ASUS ROG Crosshair X870E Extreme Review
- Crucial T710 2 TB Review - Record-Breaking Gen 5
- Fractal Design Scape Review - Debut Done Right
- PowerColor ALPHYN AM10 Review
- Sapphire Radeon RX 9060 XT Pulse OC 16 GB Review - An Excellent Choice
- Upcoming Hardware Launches 2025 (Updated May 2025)
- AMD Ryzen 7 9800X3D Review - The Best Gaming Processor
- Sapphire Radeon RX 9070 XT Nitro+ Review - Beating NVIDIA
- SCHENKER KEY 18 Pro (E25) Review - Top-Tier Contender
- AVerMedia CamStream 4K Review
TPU on YouTube
Controversial News Posts
- Intel's Core Ultra 7 265K and 265KF CPUs Dip Below $250 (288)
- NVIDIA Grabs Market Share, AMD Loses Ground, and Intel Disappears in Latest dGPU Update (212)
- Some Intel Nova Lake CPUs Rumored to Challenge AMD's 3D V-Cache in Desktop Gaming (140)
- NVIDIA GeForce RTX 5080 SUPER Could Feature 24 GB Memory, Increased Power Limits (115)
- Microsoft Partners with AMD for Next-gen Xbox Hardware (105)
- NVIDIA Launches GeForce RTX 5050 for Desktops and Laptops, Starts at $249 (105)
- Intel "Nova Lake‑S" Series: Seven SKUs, Up to 52 Cores and 150 W TDP (100)
- NVIDIA DLSS Transformer Cuts VRAM Usage by 20% (97)