 9
9
G.Skill Z5i Review
Assembly & Finished Looks »A Closer Look - Inside


To access the interior of the G.Skill Z5i, simply swing the glass panels open and pull off the hinges. They are each held in place by strong ferrite magnets. which is nice to see. To achieve the bend and keep the panels sturdy enough, G.Skill had to go with 4-mm-thick panels, which becomes apparent in the best possible way as they are heavy and tip over the empty case with one removed.
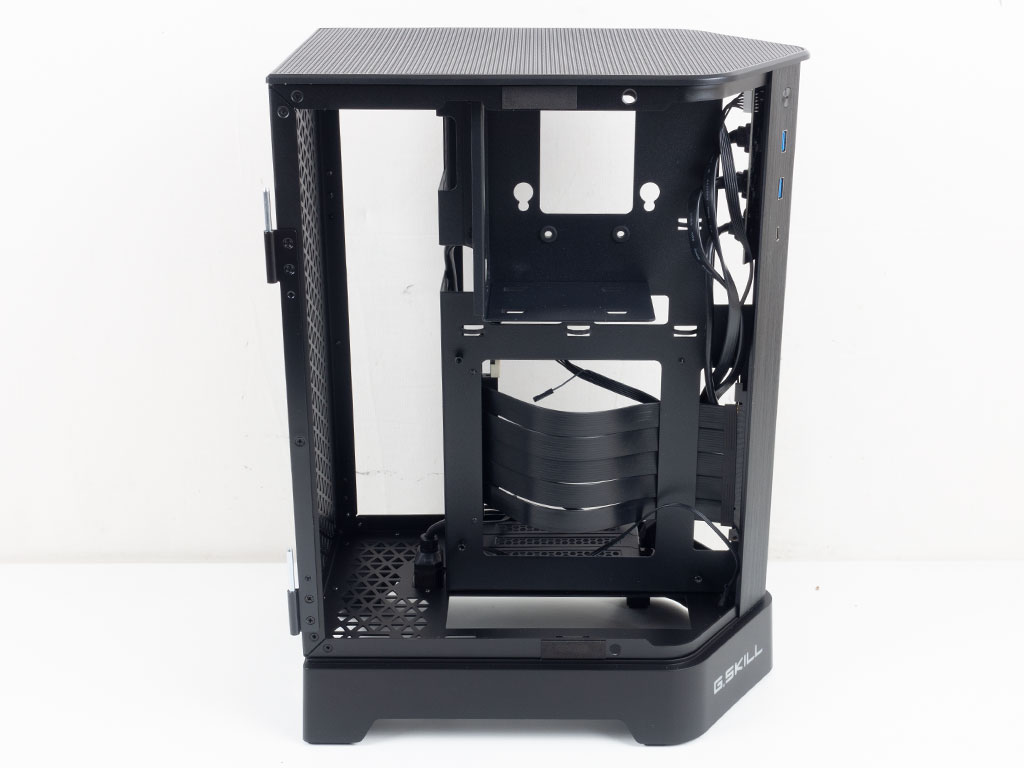
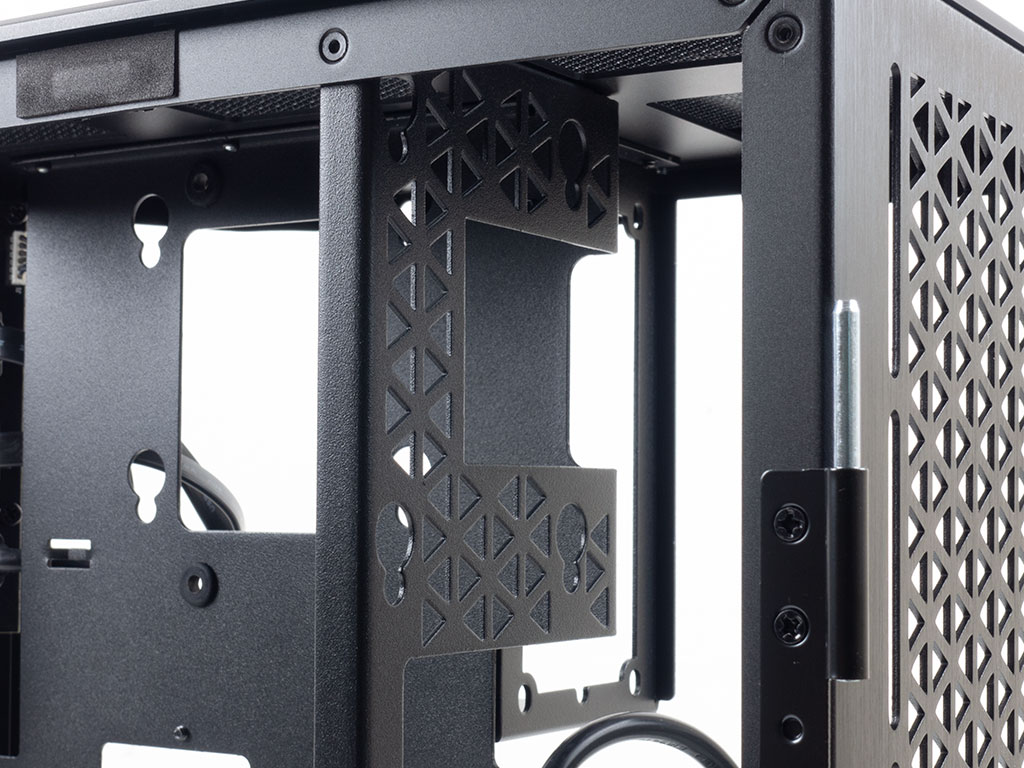
Looking at the main side where the motherboard will reside, it quickly becomes apparent that G.Skill designed the case with AIO or liquid cooling in mind. While advertising the ability to install an air cooler of up to 70 mm in height, you should really add fans to pull air out the back at the same time. On the other side, the space towards the front of the Z5i is meant exclusively for long GPUs, but also storage possibilities if you have a shorter GPU.
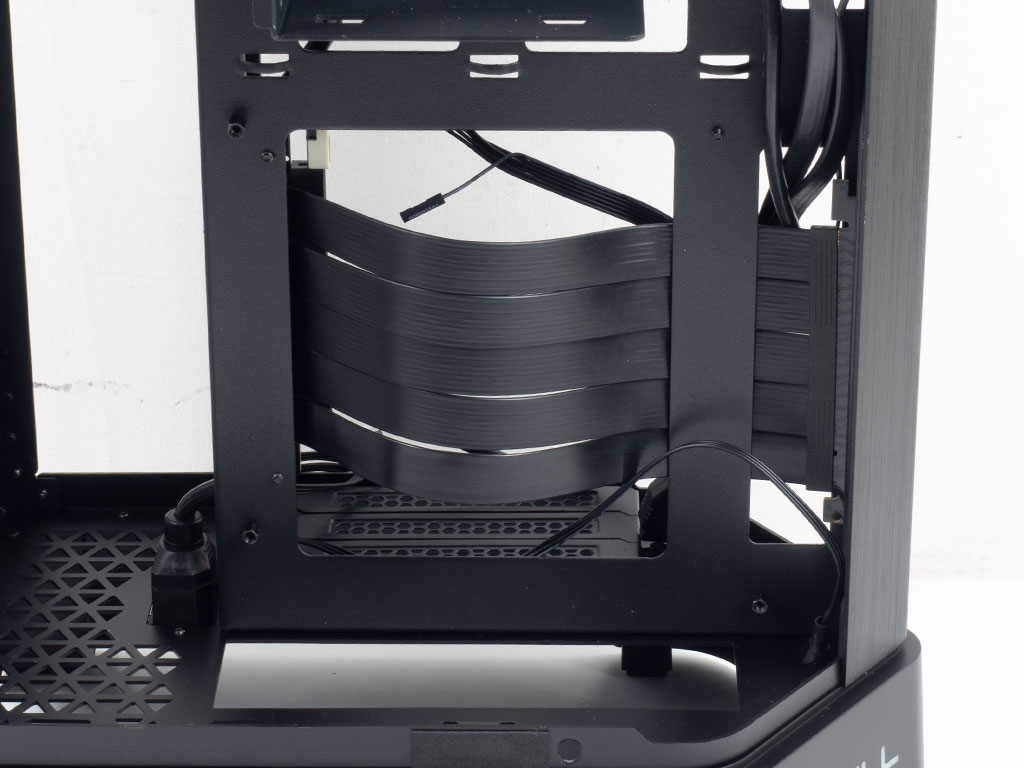

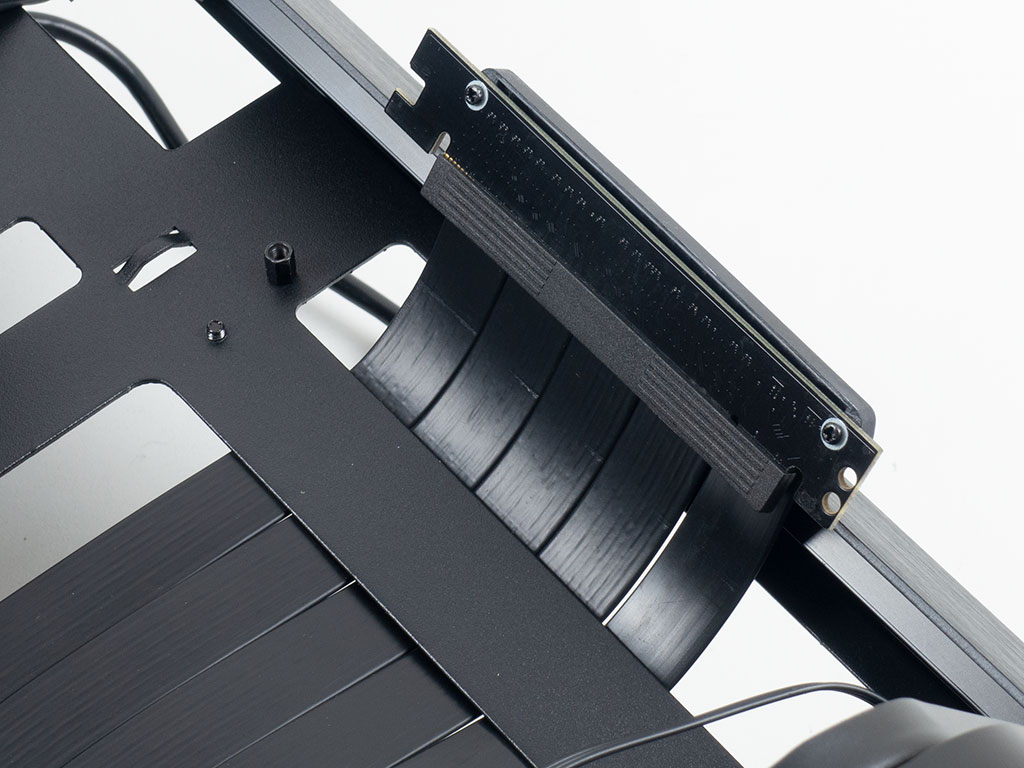
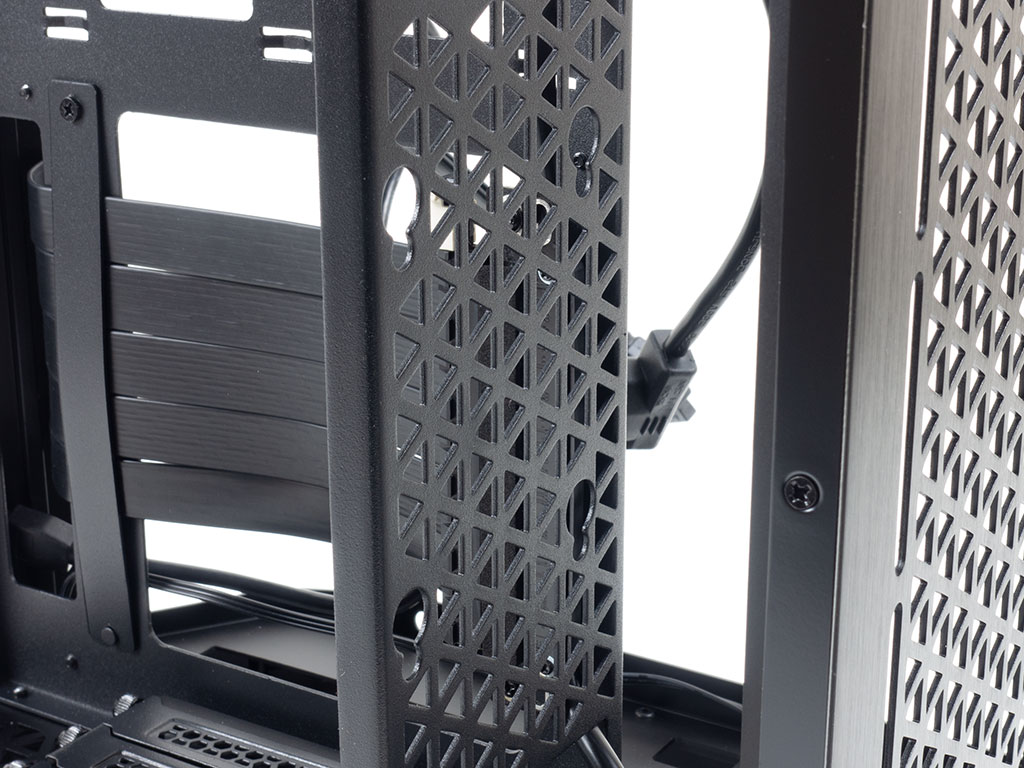
The motherboard tray has been rotated 90° so that its backplate faces downward. Placing the board like this has the only noteworthy element towards the front edge of the case be the PCIe slot, which doesn't require a lot of room and in turn does not interfere with the bend of the glass. The PCIe ribbon cable is pre-installed inside the Z5i.
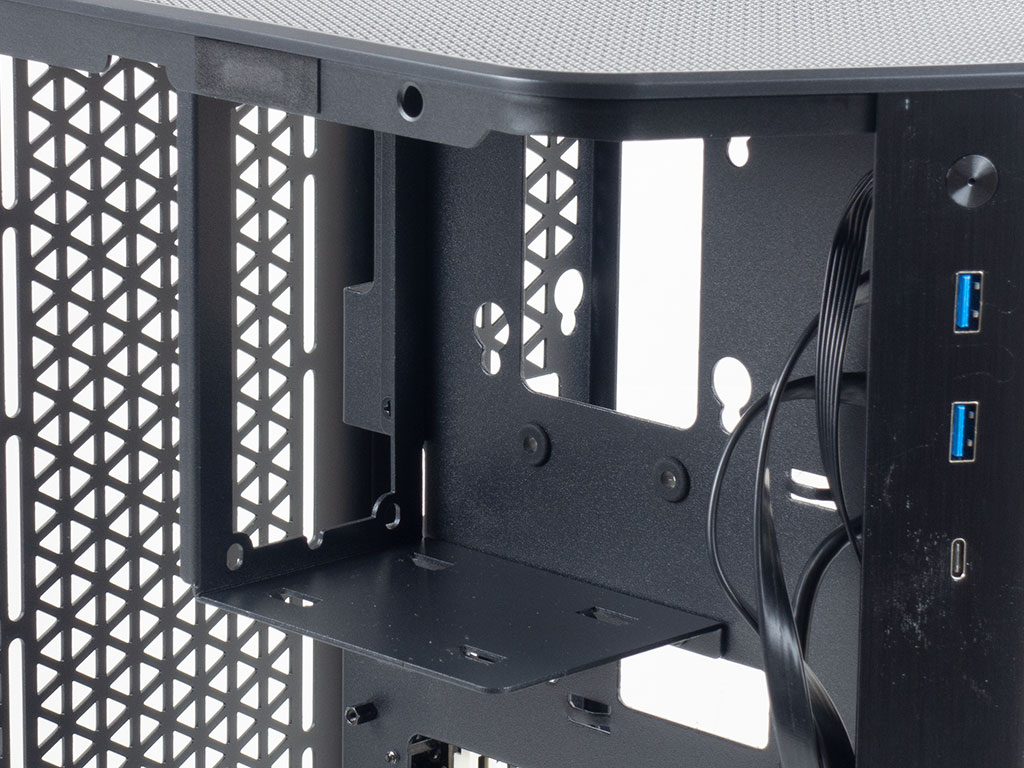
Above the ITX board area is the SFX PSU bay with its pre-wired cable. Even though G.Skill does not explicitly mention it, you should be able to install an SFX-L unit here as well, and we will certainly try to do so. Behind the bay are mounting holes for a hard drive that sits on the other side of the dividing plate in case you use a short GPU. This means you have to install that drive before adding the PSU.
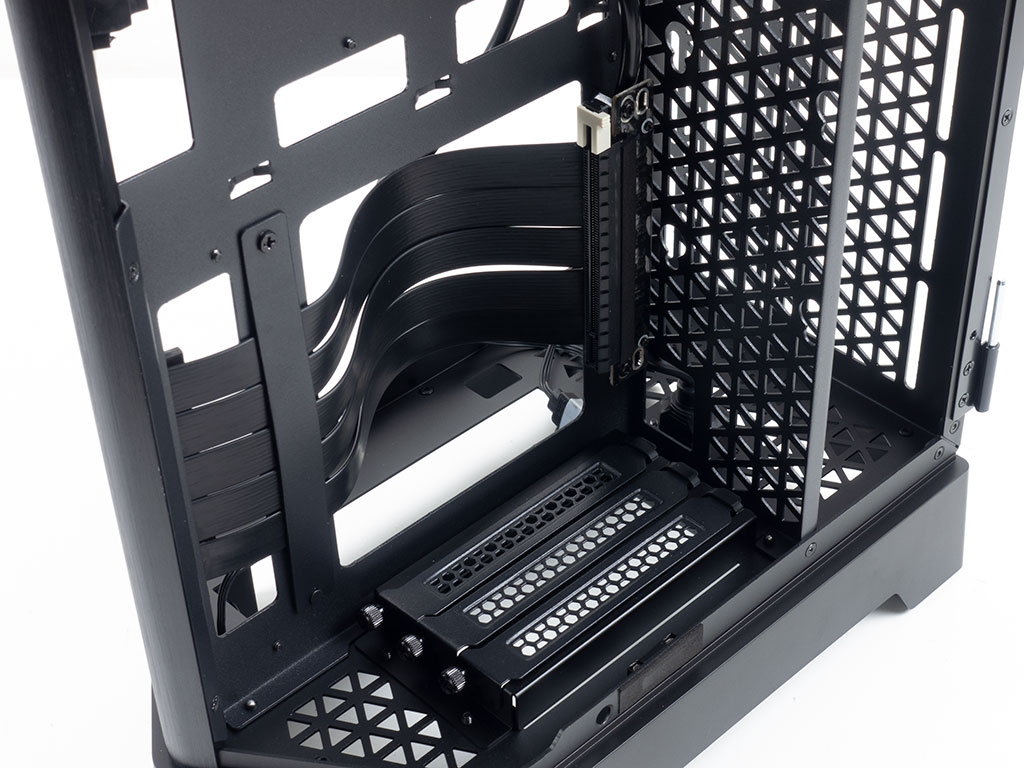
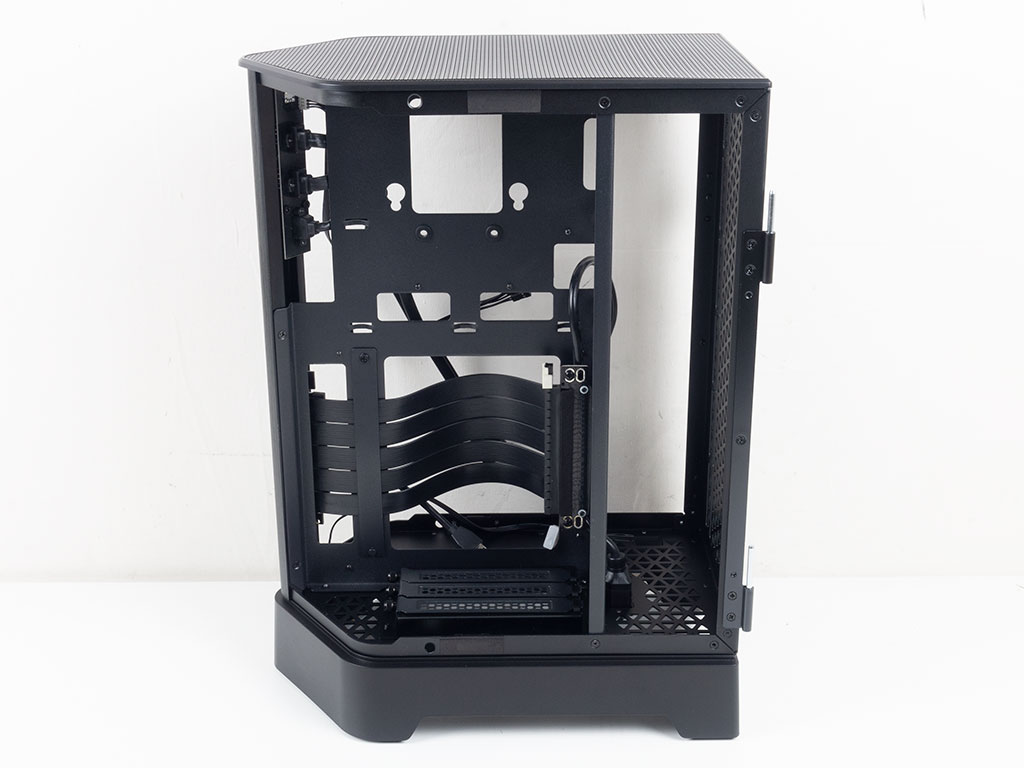
On the other side, the GPU bay can easily hold tri-slot cards of up to 330 mm, or 230 mm when placing a 3.5" storage drive at the top. The PCIe ribbon cable is held in place by a locking bar. All I had to do is ensure that the cable was nice and straight to make the most of it lengthwise, which made it easier to connect the motherboard.
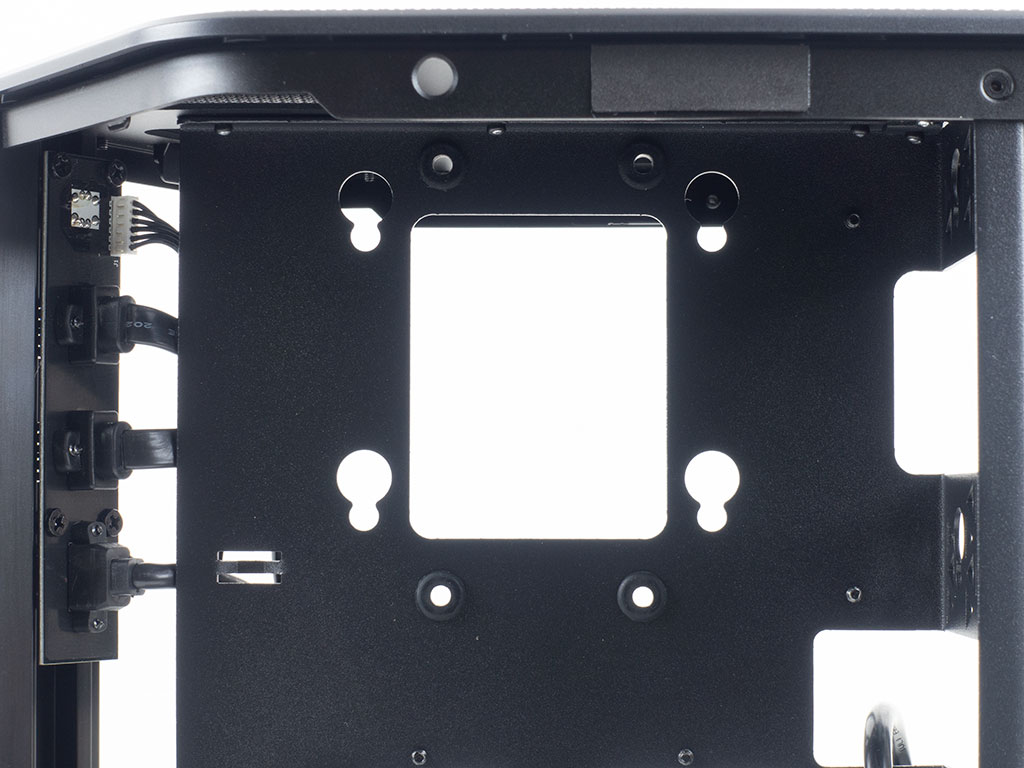
The HDD bay at the top comes with two sets of holes. Those for 2.5" SSDs can be accessed even with the PSU in place, but those for a 3.5" drive require the power supply to be removed. That is generally fine as such a drive is bound to be utilized for games storage anyway.
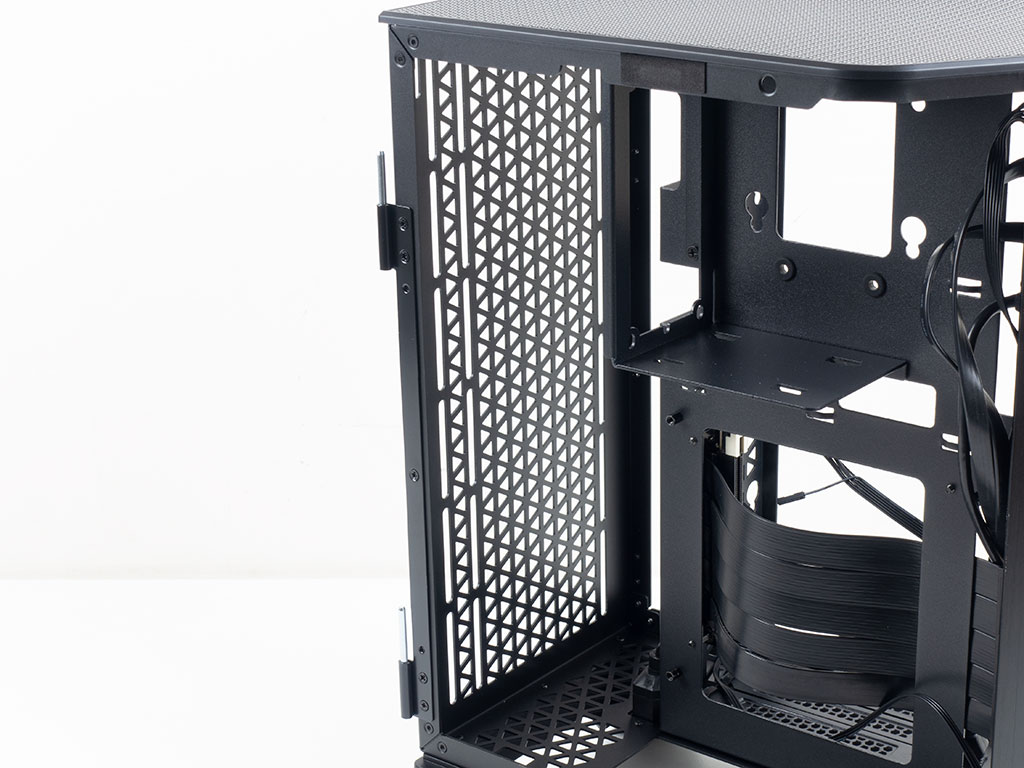
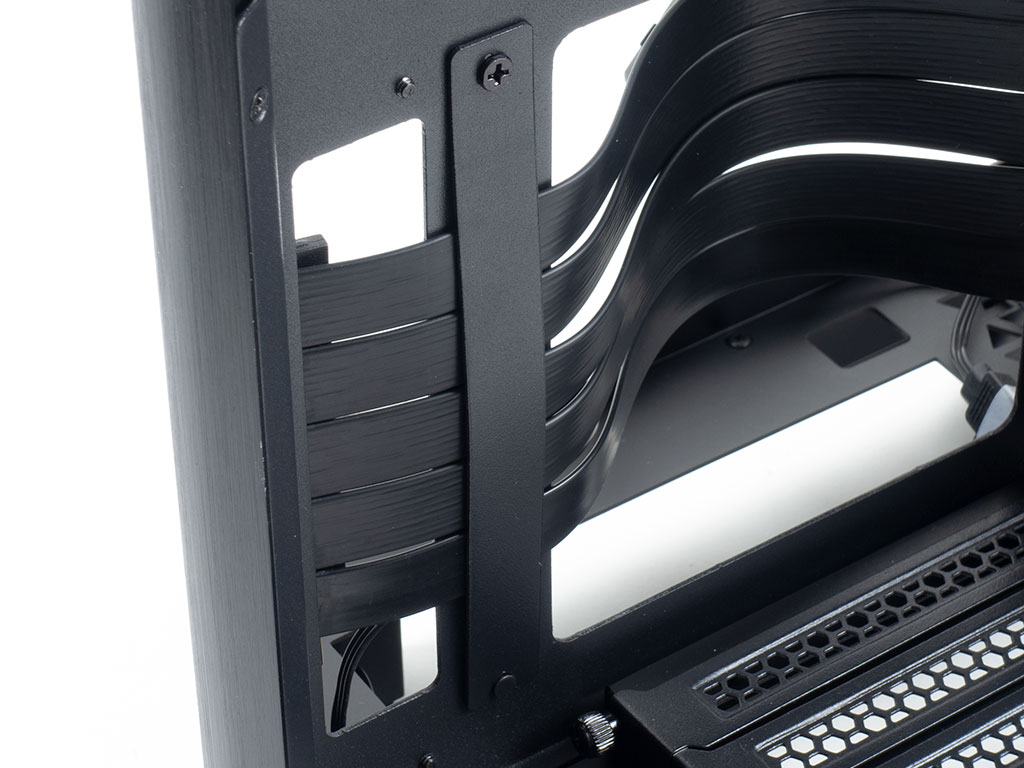
You may install two additional 2.5" drives on the divider that splits the rear cooling area with the front. These drives are meant to be mounted facing the rear of the chassis, so accessing them should be possible even when everything is fully assembled. The rear sports a unique-looking vent design and comes with elongated mounting holes to freely adjust its height placement a bit. The power supply passthrough cable is situated in front of this area of the chassis. I wonder if users will mod this by pulling the plug out the bottom of the case in an attempt to squeeze a push/pull AIO configuration into the Z5i.
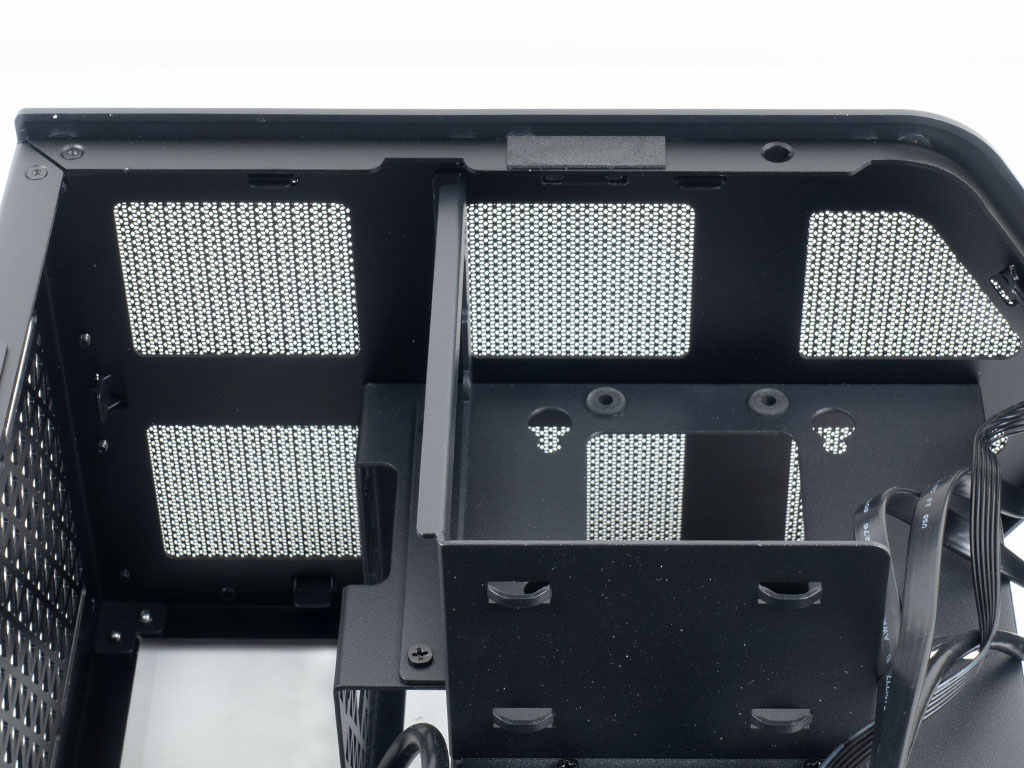
Taking a quick look at the ceiling, you will see the aforementioned metal mesh, which also comes with a unique design pattern to complement the rear by the way. There is really no other purpose to it besides providing a way for hot air to vent and the ability to access the top area of the case during system assembly.
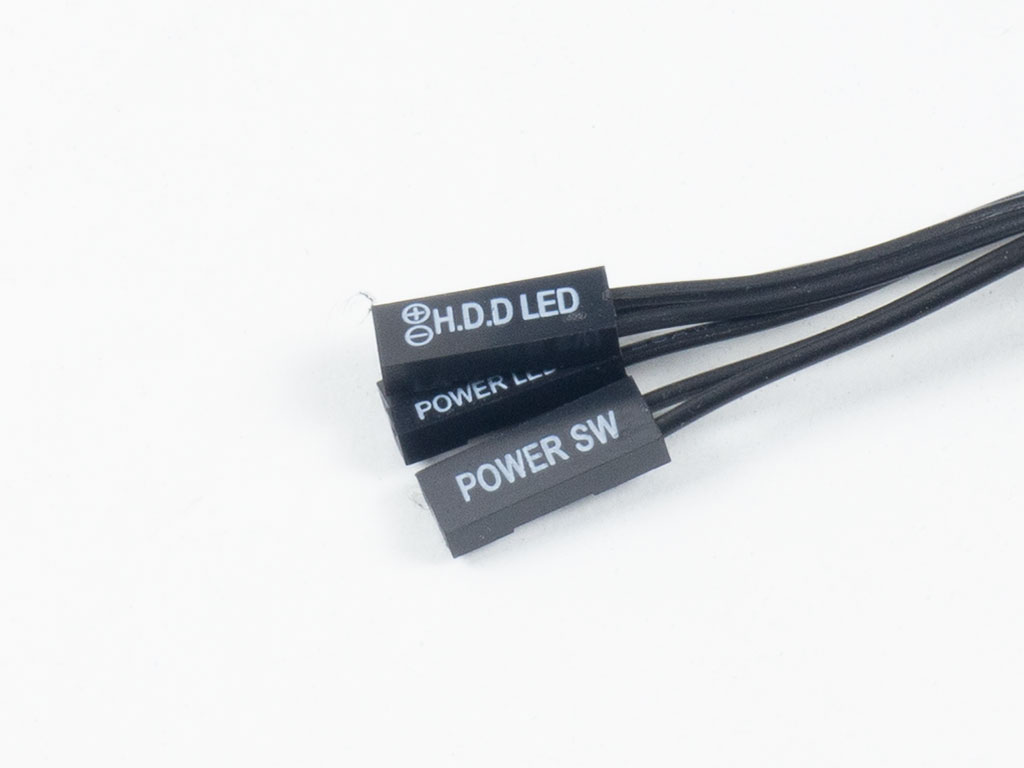
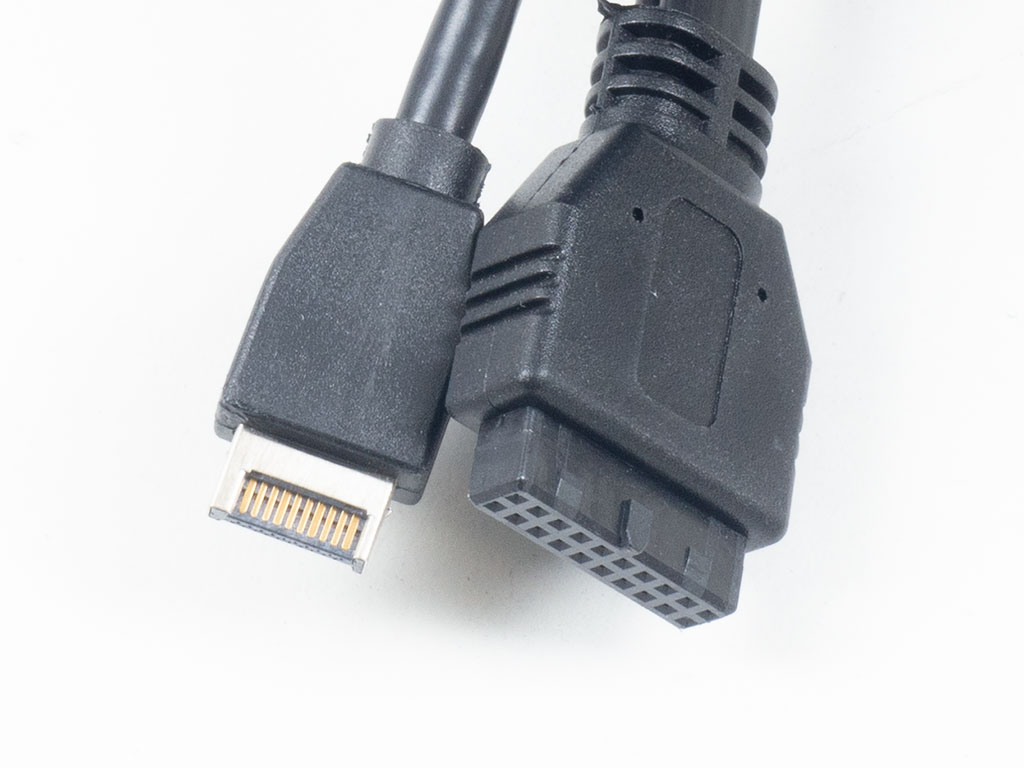
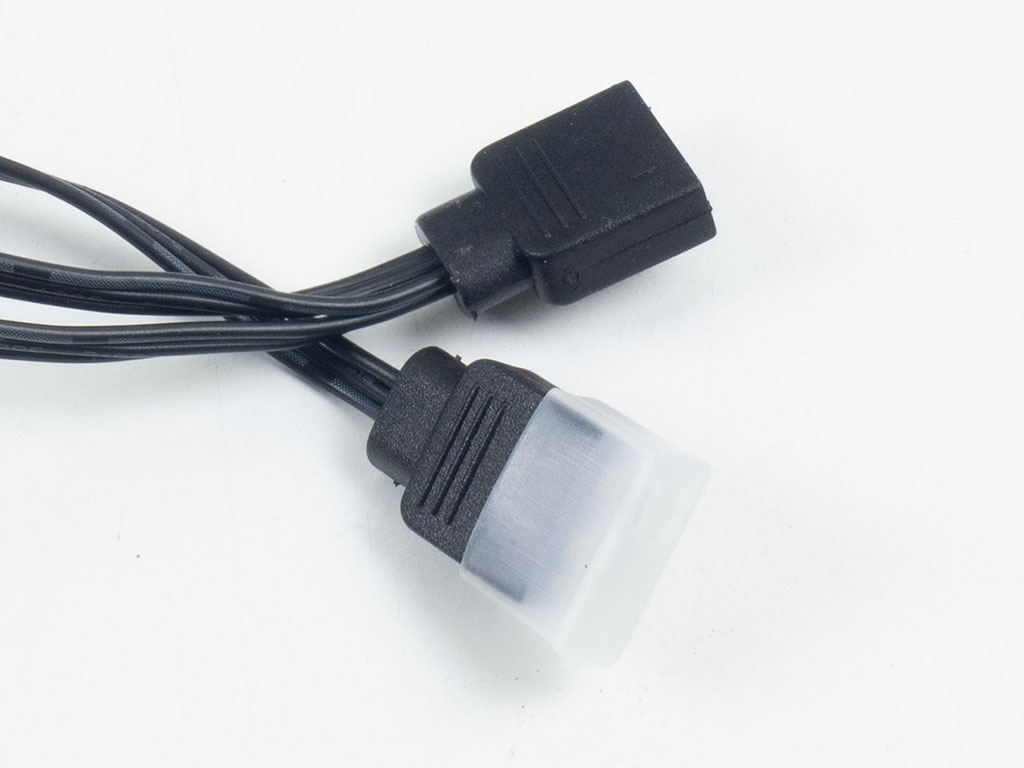
All the cables within the G.Skill Z5i are sleeved black and of the standard variety, so you should have no issues connecting everything. The I/O cables are of a good length overall for a case of this size. As the Z5i does not come with its own ARGB controller, you need your own or a motherboard with built-in support. G.Skill does provide the ability to add further lighting elements easily, so all you really need is a single header on your board.
Jul 10th, 2025 02:45 CDT
change timezone
Latest GPU Drivers
New Forum Posts
- Do you still use Antivirus software on your latest hardware? (75)
- Screen burn-in (21)
- TPU's Nostalgic Hardware Club (20493)
- 3DMARK "LEGENDARY" (326)
- Post Your TIMESPY, PCMARK10 & FIRESTRIKE SCORES! (2019) (321)
- 5070ti overclock...what are your settings? (47)
- 'NVIDIA App' not usable offline? (1)
- G-Sync Not Working in Borderless / Window Mode - Windows 11 (5)
- [GPU-Z Test Build] New Kernel Driver, Everyone: Please Test (78)
- Friend's monitor randomly loses signal (3)
Popular Reviews
- NZXT N9 X870E Review
- NVIDIA GeForce RTX 5050 8 GB Review
- Fractal Design Epoch RGB TG Review
- Corsair FRAME 5000D RS Review
- Fractal Design Scape Review - Debut Done Right
- AMD Ryzen 7 9800X3D Review - The Best Gaming Processor
- Sapphire Radeon RX 9060 XT Pulse OC 16 GB Review - An Excellent Choice
- Upcoming Hardware Launches 2025 (Updated May 2025)
- Sapphire Radeon RX 9070 XT Nitro+ Review - Beating NVIDIA
- PowerColor ALPHYN AM10 Review
TPU on YouTube
Controversial News Posts
- Intel's Core Ultra 7 265K and 265KF CPUs Dip Below $250 (288)
- Some Intel Nova Lake CPUs Rumored to Challenge AMD's 3D V-Cache in Desktop Gaming (140)
- NVIDIA Launches GeForce RTX 5050 for Desktops and Laptops, Starts at $249 (117)
- AMD Radeon RX 9070 XT Gains 9% Performance at 1440p with Latest Driver, Beats RTX 5070 Ti (116)
- NVIDIA GeForce RTX 5080 SUPER Could Feature 24 GB Memory, Increased Power Limits (115)
- Microsoft Partners with AMD for Next-gen Xbox Hardware (105)
- Intel "Nova Lake‑S" Series: Seven SKUs, Up to 52 Cores and 150 W TDP (100)
- NVIDIA DLSS Transformer Cuts VRAM Usage by 20% (97)