 35
35
Gigabyte M32U Review - Finally a Reasonably Priced 4K Gaming Monitor
Software »Controls and OSD
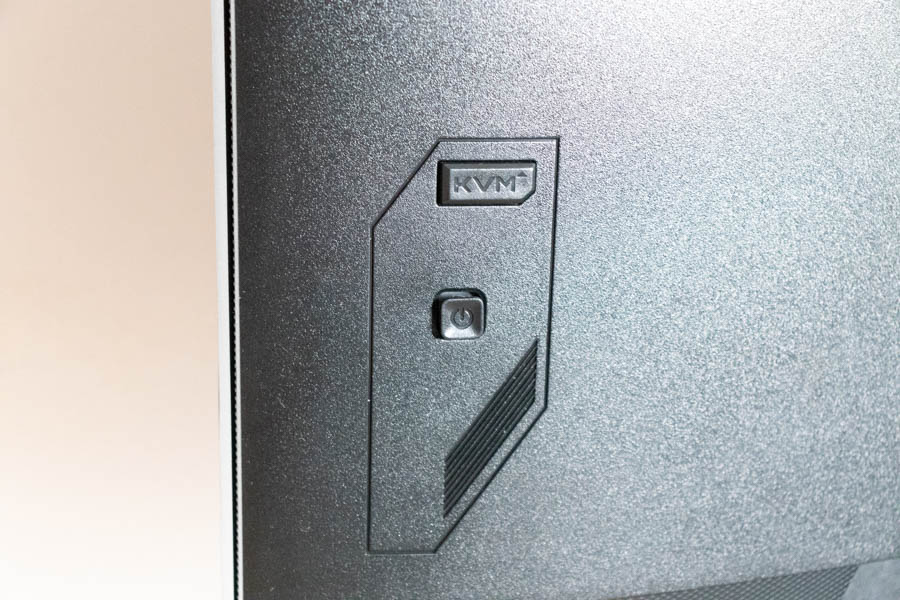
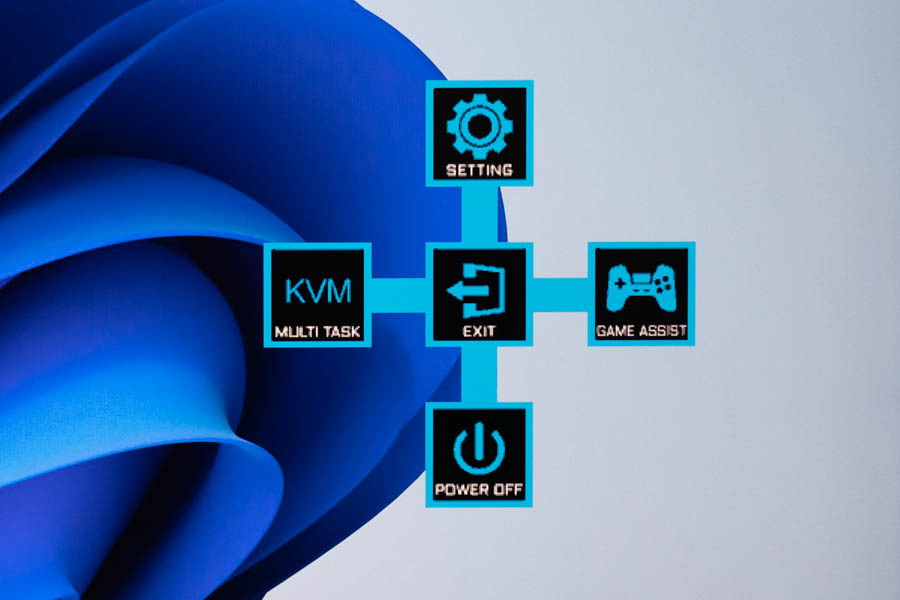
The Gigabyte M32U utilizes a small four-way joystick, which also works as a button for OSD navigation and monitor setup. Use it to quickly access various settings (factory picture profiles, speaker volume, virtual crosshairs, input selection, black level, and so on) as well as dive into the main menu and browse through the various options broken down into six main categories. As far as onboard monitor controls go, those on the Gigabyte M32U are quite good. The joystick is exceptionally intuitive to use, and the OSD layout is solid.
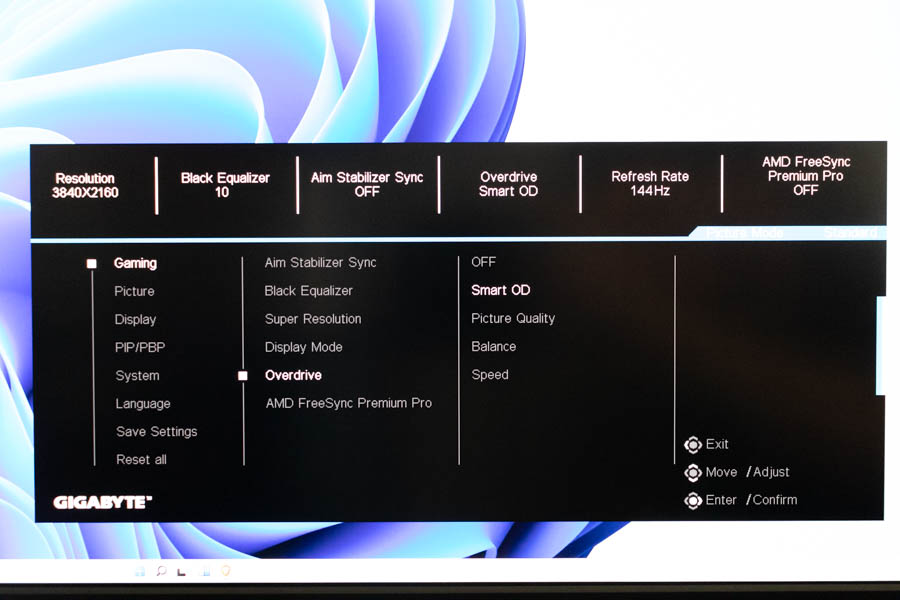
After diving into the OSD main menu, you'll find yourself in the Gaming section. This is where Gigabyte grouped gaming-related technologies, such as Overdrive (makes pixel transitions faster), Aim Stabilizer Sync (backlight will start strobing to achieve a "1 millisecond-like" response time at the expense of picture brightness (this new version of the tech can be combined with adaptive synchronization, which wasn't the case previously), Black Equalizer (boosts dark areas), and AMD FreeSync Premium Pro (turns adaptive synchronization on and off and works on AMD and NVIDIA graphics cards).

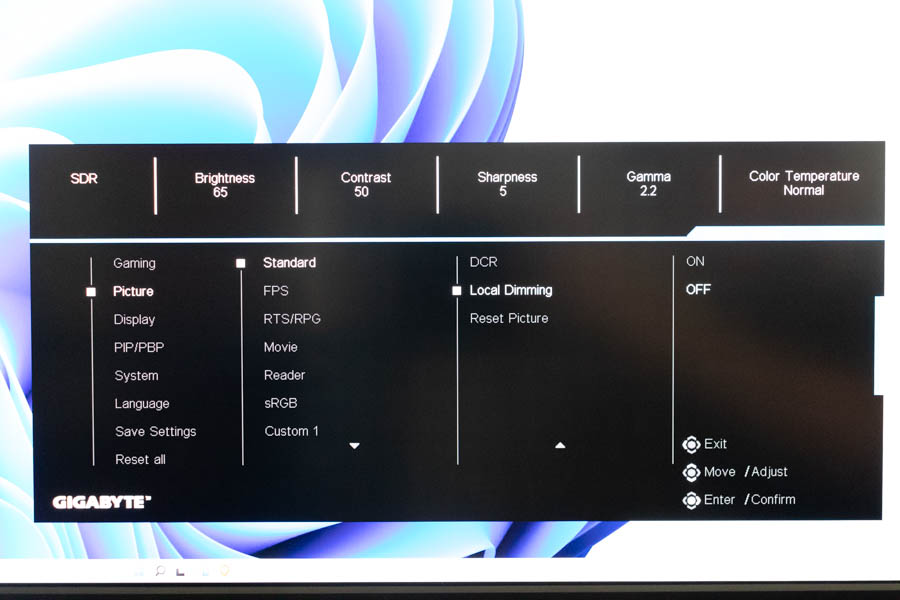
In the Picture submenu, you first have to select a picture profile you want to edit. The factory picture profiles are called Standard, FPS, RTS/RPG, Movie, Reader, and sRGB. Finally, there are three fully customizable profiles (Custom 1, Custom 2, and Custom 3) which let you change every picture quality-related setting on offer, including the 6-axis color, which is grayed out and inaccessible in all factory picture quality profiles. Most options found here are what you'd expect from any decent PC monitor: brightness, contrast, color vibrance, sharpness, gamma, and color temperature (Cool, Normal, Warm, and User Define). The obvious exception is the Local Dimming toggle, which implies that the Gigabyte M32U uses a FALD (Full-Array Local Dimming) backlight technology. That's not the case, though. The backlight has an ordinary edge implementation. The Local Dimming toggle splits the screen into vertical "zones"—I counted 16—and essentially tries to mimic a proper FALD backlight technology. It does so with very little success. The local dimming effect isn't pronounced at all, and the zones don't activate properly if the object traveling across the screen is small. Activating the Local Dimming feature also locks the brightness to 100 (around 320 cd/m²), which is another reason to avoid it.
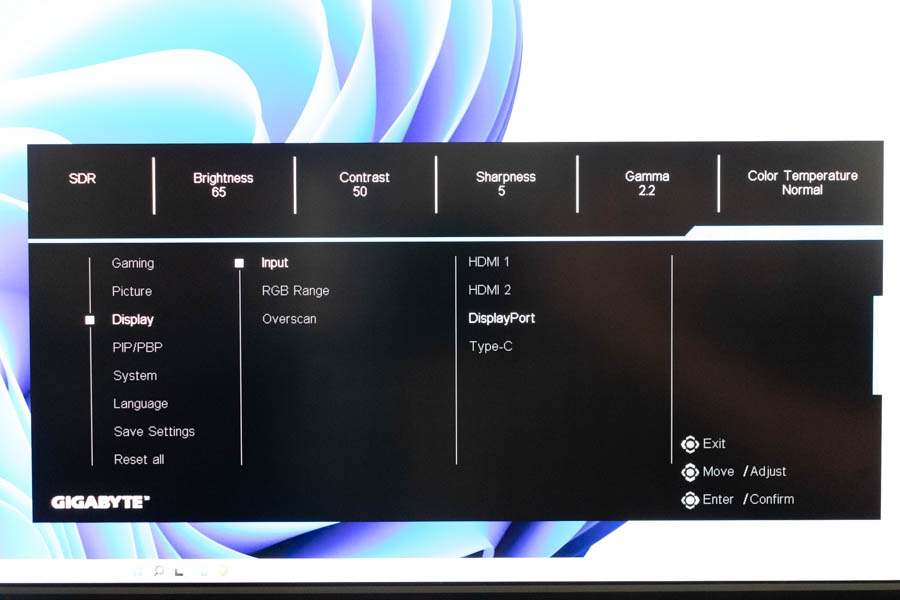
The Display submenu offers input selection, RGB range selection (0–255, 16–235 or Auto), and the Overscan feature, which slightly enlarges the image to hide the outermost edges.
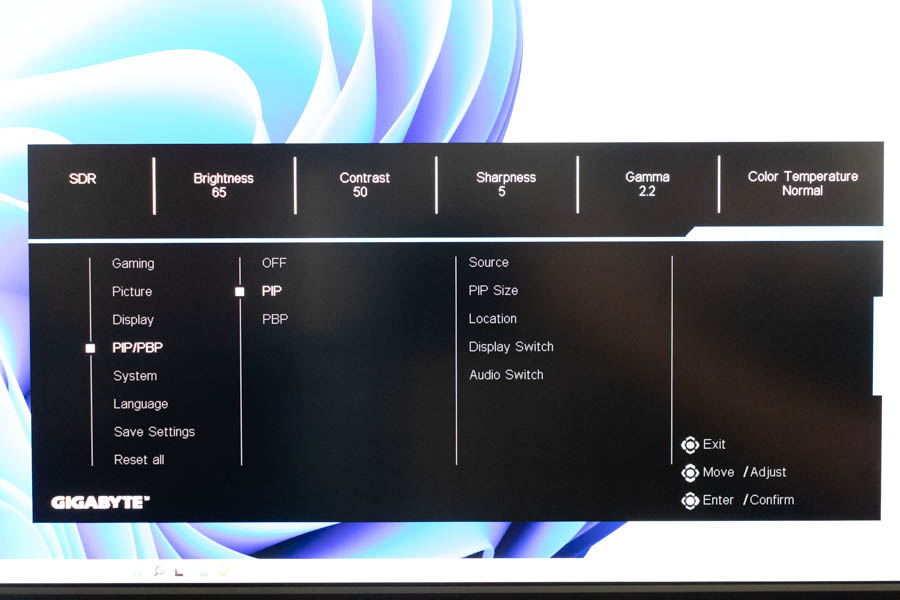
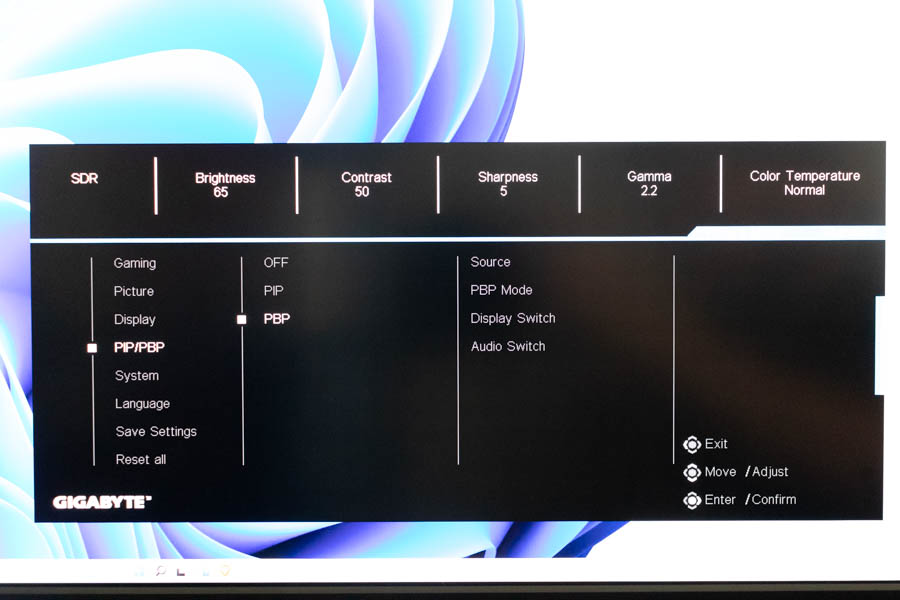
In the PIP/PBP menu, we can select the Picture-in-Picture and Picture-by-Picture signal sources, size and location of the secondary PiP window, swap the chosen signal inputs around, and change audio sources if both inputs are outputting sound.

In the System submenu, we can set the built-in speaker volume, adjust the OSD display time, size, and transparency, change the quick settings (options accessible by pulling the joystick in any of the four directions without accessing the main menu, turn off the front-facing LED, change the HDMI interface version (2.0 or 2.1), and so on.
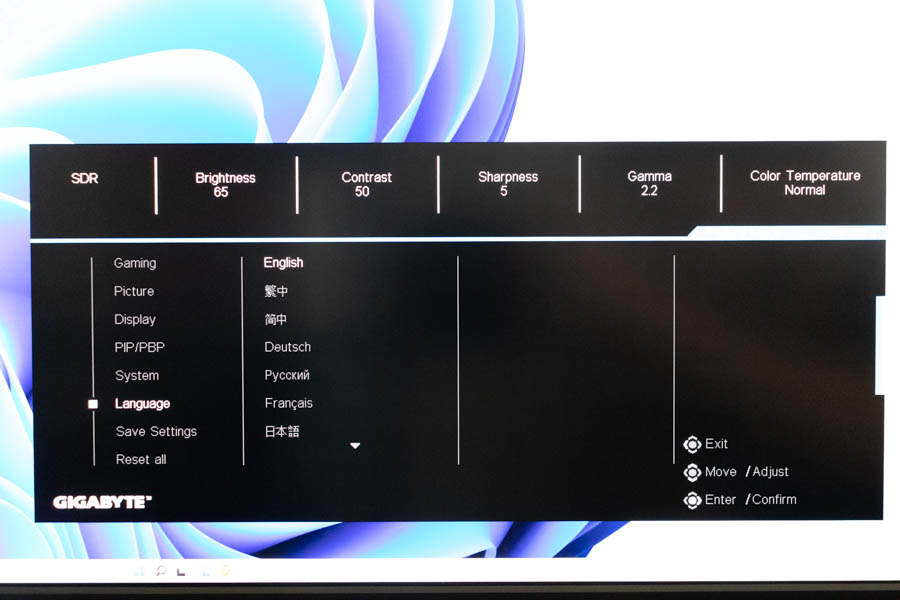
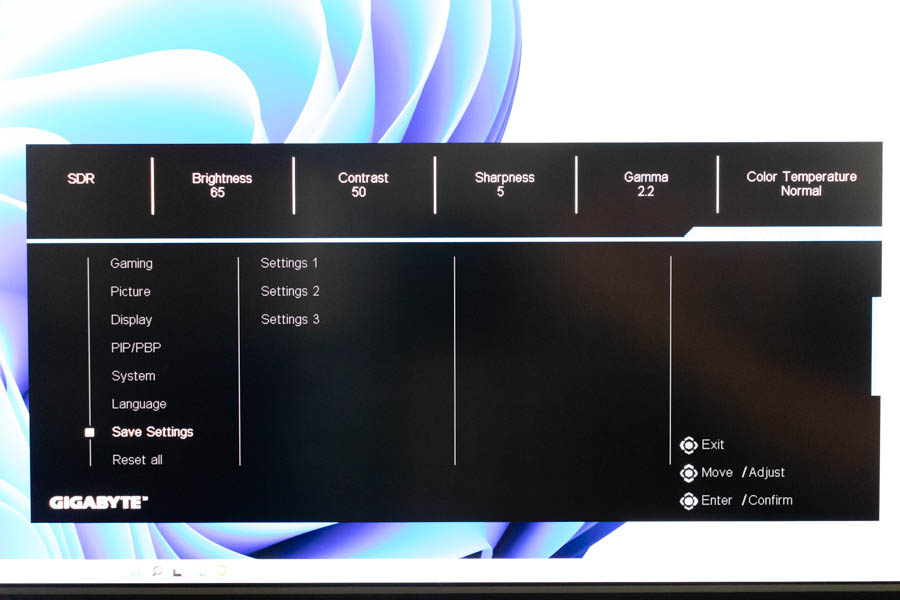
The OSD also lets us select the interface language, and save our settings in three different "slots."
Jul 15th, 2025 15:45 CDT
change timezone
Latest GPU Drivers
New Forum Posts
- No offense, here are some things that bother me about your understanding of fans. (143)
- Recommend me a decent budget card :) (33)
- What's your latest tech purchase? (24278)
- TOS 6 on Ugreen NAS (0)
- Folding Pie and Milestones!! (9620)
- TPU's F@H Team (20436)
- Is there a WIFI chip I should get? (4)
- TPU's Nostalgic Hardware Club (20513)
- PNY RTX 5080 16GB (1)
- Solidigm NVMe Custom Modded Driver for All NVMe Brands SSDs & Any NVMe SSDs (228)
Popular Reviews
- MSI GeForce RTX 5060 Gaming OC Review
- Our Visit to the Hunter Super Computer
- Lexar NM1090 Pro 4 TB Review
- SilverStone SETA H2 Review
- NVIDIA GeForce RTX 5050 8 GB Review
- Fractal Design Epoch RGB TG Review
- Sapphire Radeon RX 9060 XT Pulse OC 16 GB Review - An Excellent Choice
- AMD Ryzen 7 9800X3D Review - The Best Gaming Processor
- Upcoming Hardware Launches 2025 (Updated May 2025)
- Corsair FRAME 5000D RS Review
TPU on YouTube
Controversial News Posts
- Intel's Core Ultra 7 265K and 265KF CPUs Dip Below $250 (288)
- Some Intel Nova Lake CPUs Rumored to Challenge AMD's 3D V-Cache in Desktop Gaming (140)
- AMD Radeon RX 9070 XT Gains 9% Performance at 1440p with Latest Driver, Beats RTX 5070 Ti (131)
- NVIDIA Launches GeForce RTX 5050 for Desktops and Laptops, Starts at $249 (122)
- NVIDIA GeForce RTX 5080 SUPER Could Feature 24 GB Memory, Increased Power Limits (115)
- Microsoft Partners with AMD for Next-gen Xbox Hardware (105)
- Intel "Nova Lake‑S" Series: Seven SKUs, Up to 52 Cores and 150 W TDP (100)
- NVIDIA DLSS Transformer Cuts VRAM Usage by 20% (99)