 5
5
Glorious Modular Mechanical Keyboard Review
Disassembly »Closer Examination
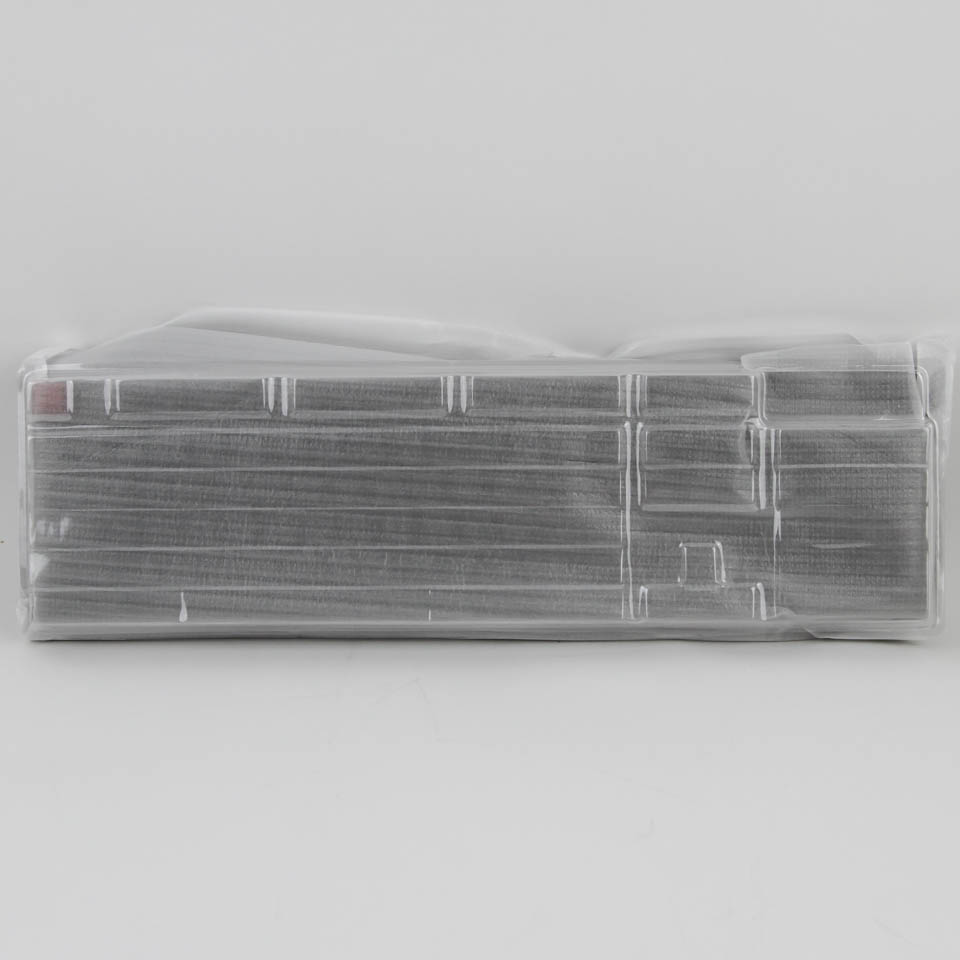
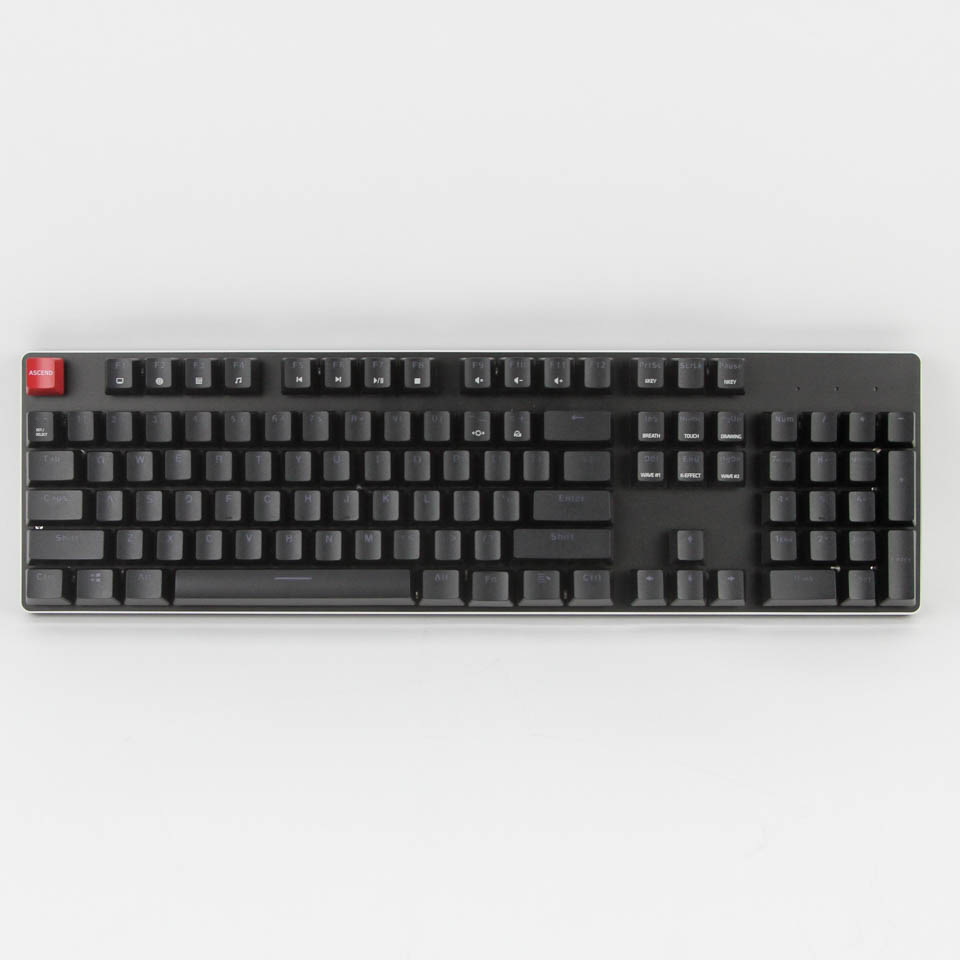
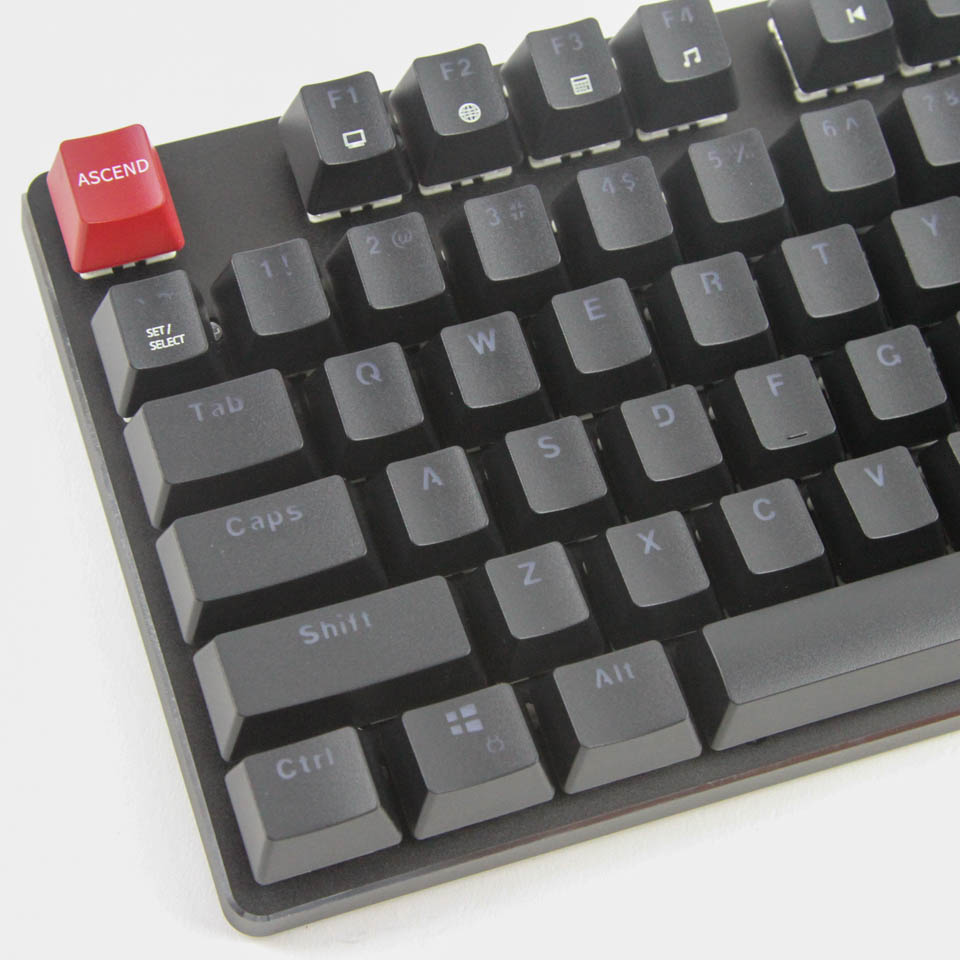
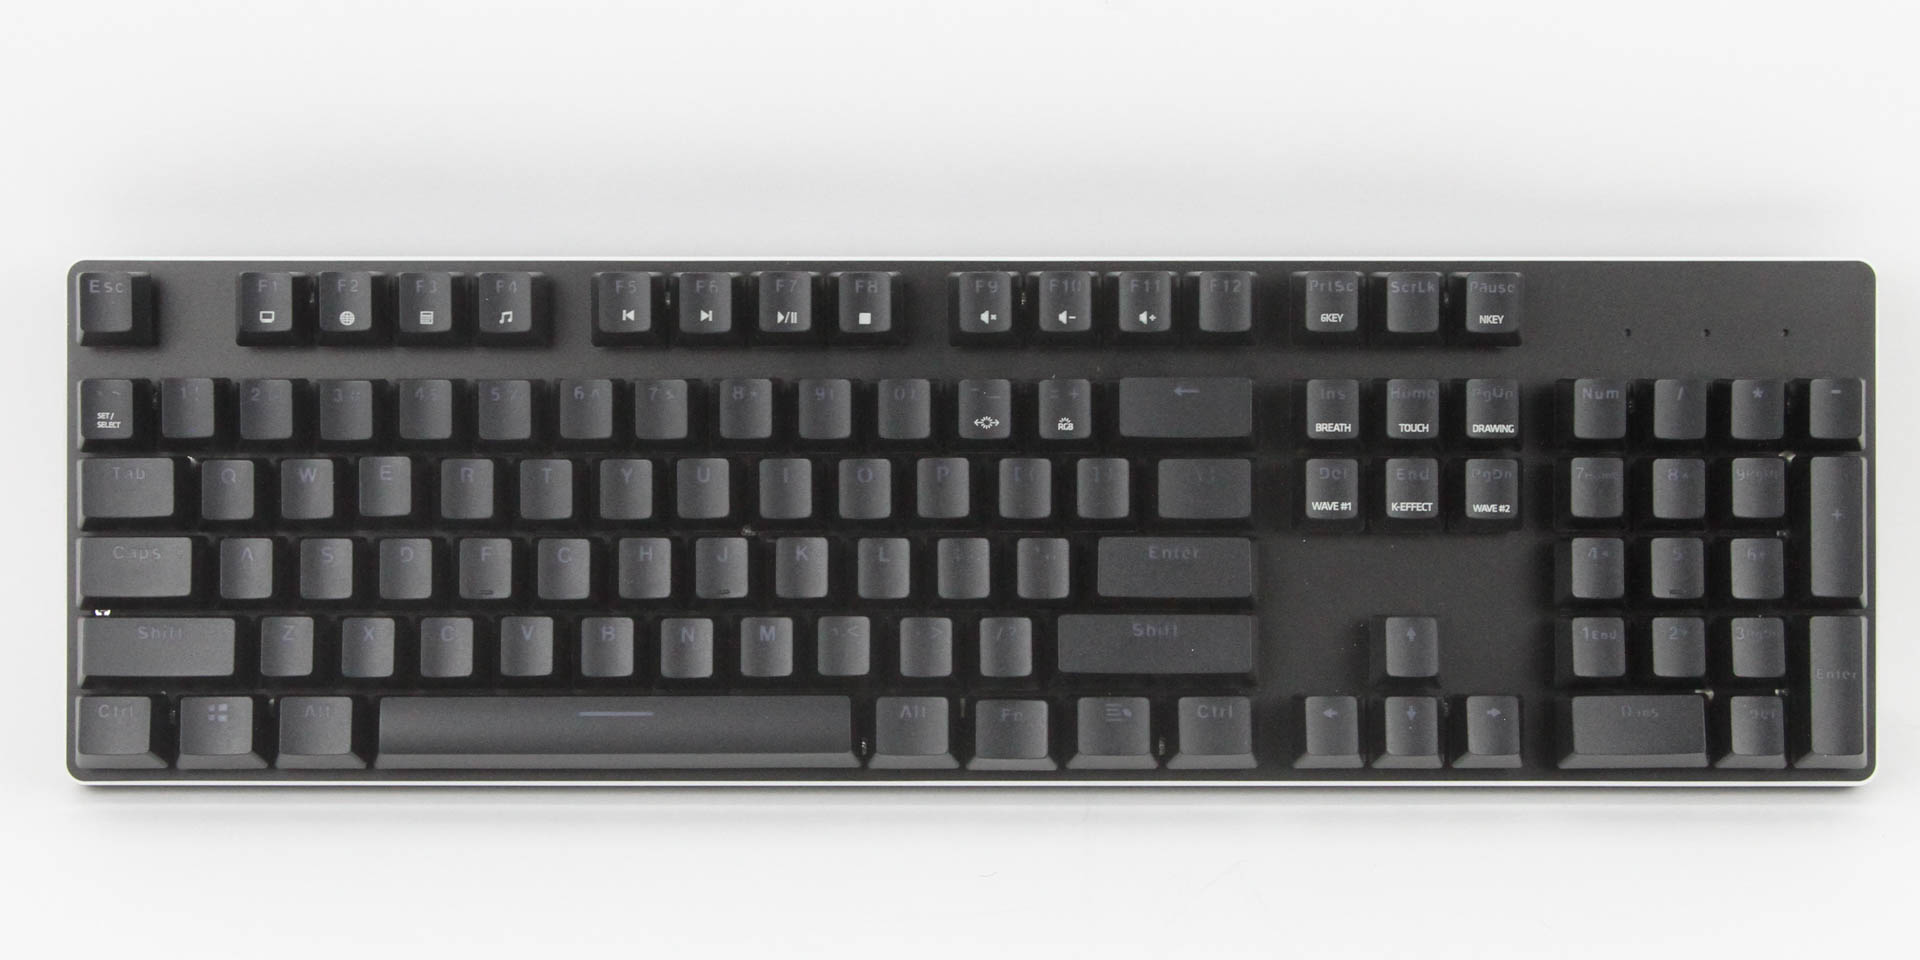
As we saw before, the Glorious Modular Mechanical Keyboard comes in a thin foam wrap with a shaped plastic clamshell on top. With both removed, we get our first good look at the keyboard. There is not much to visually set the GMMK apart, and perhaps that is on purpose too. A minimalist design in an all-black color scheme certainly fits with their goals for the keyboard, although there is that Escape key, a novelty keycap in red and "ASCEND" instead. No company branding to be seen anywhere on the keyboard when in use is combined with no bezels and simple indicator LED cutouts for a stealthy overall design. That said, a thin chrome ring along the edge adds nice little accents to the keyboard itself.
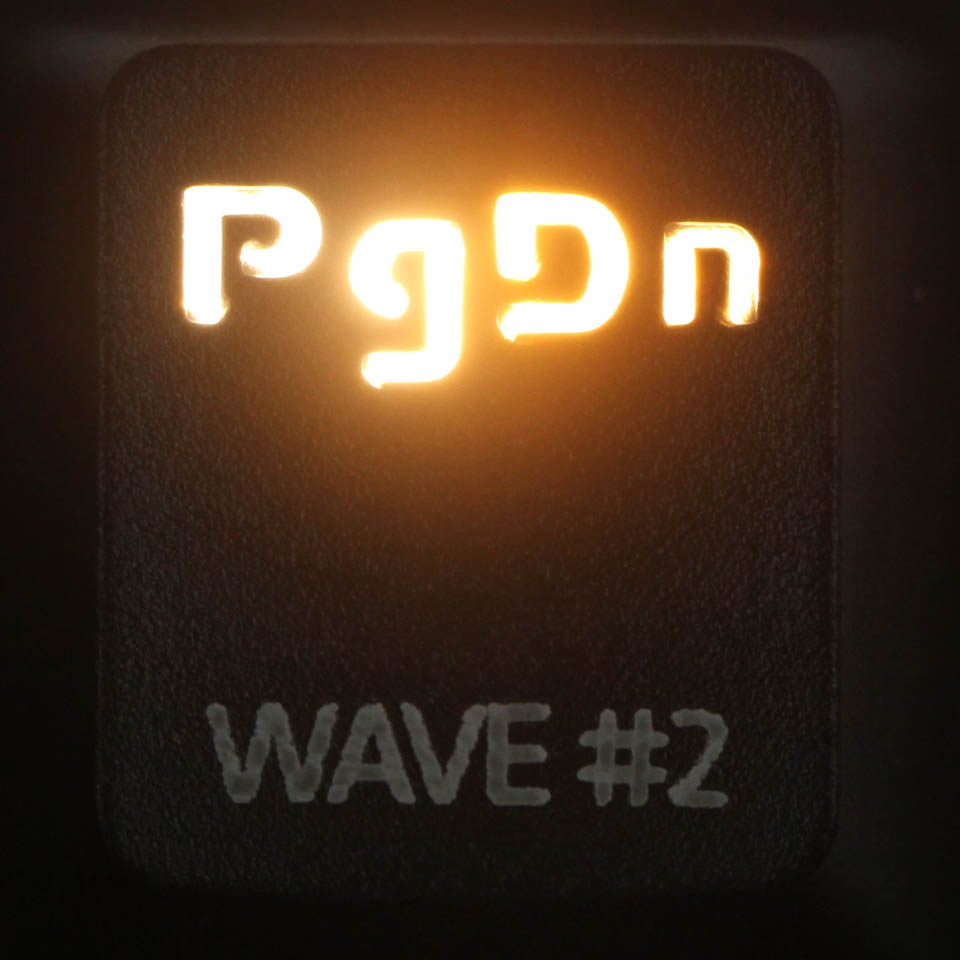
All general secondary legends are put alongside the primary ones, be it on the numpad or alphanumeric section, which makes these legends smaller than average, hurting visibility for some. There are also some keyboard-specific secondary legends which appear underneath their respective primary legends. Single legend placement is top and center, which is a clear indicator of where the LEDs are placed underneath the keycaps. However, with similar issues as the Esc keycap we saw before, the legend typeface is not very well executed even when accounting for the seams in looped legends via the standard doubleshot-injection process.
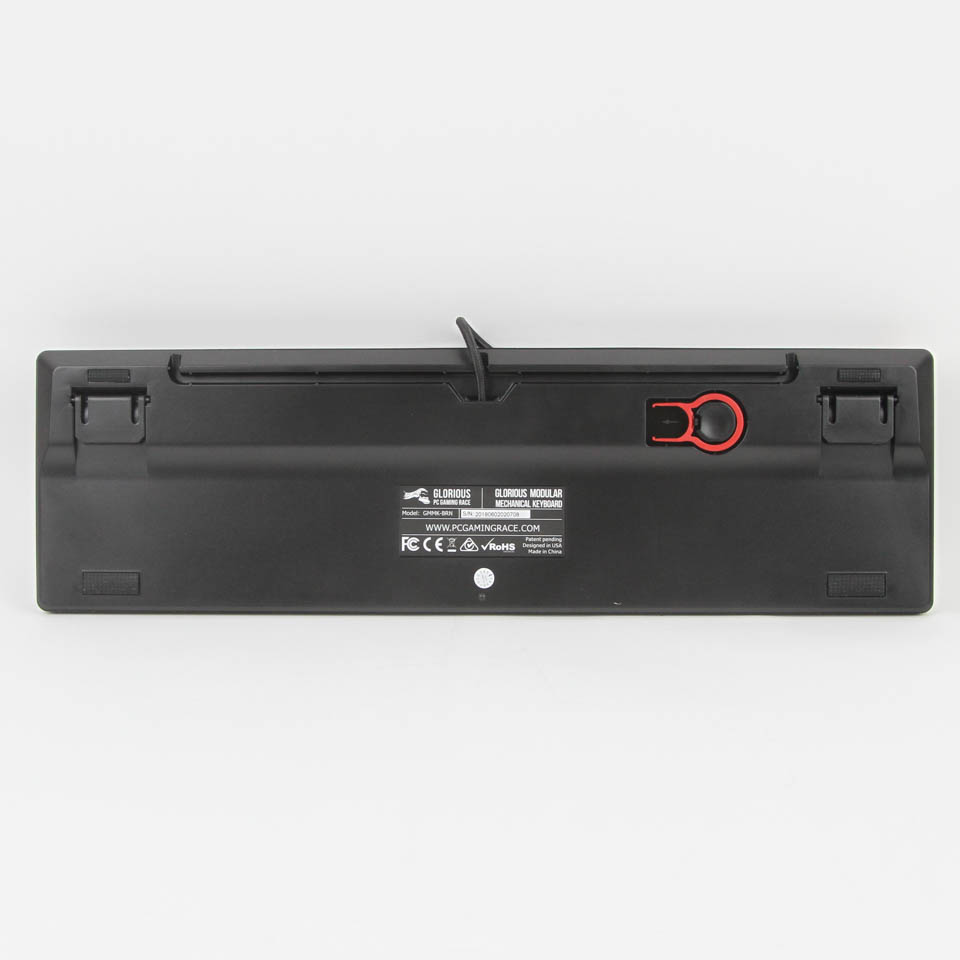

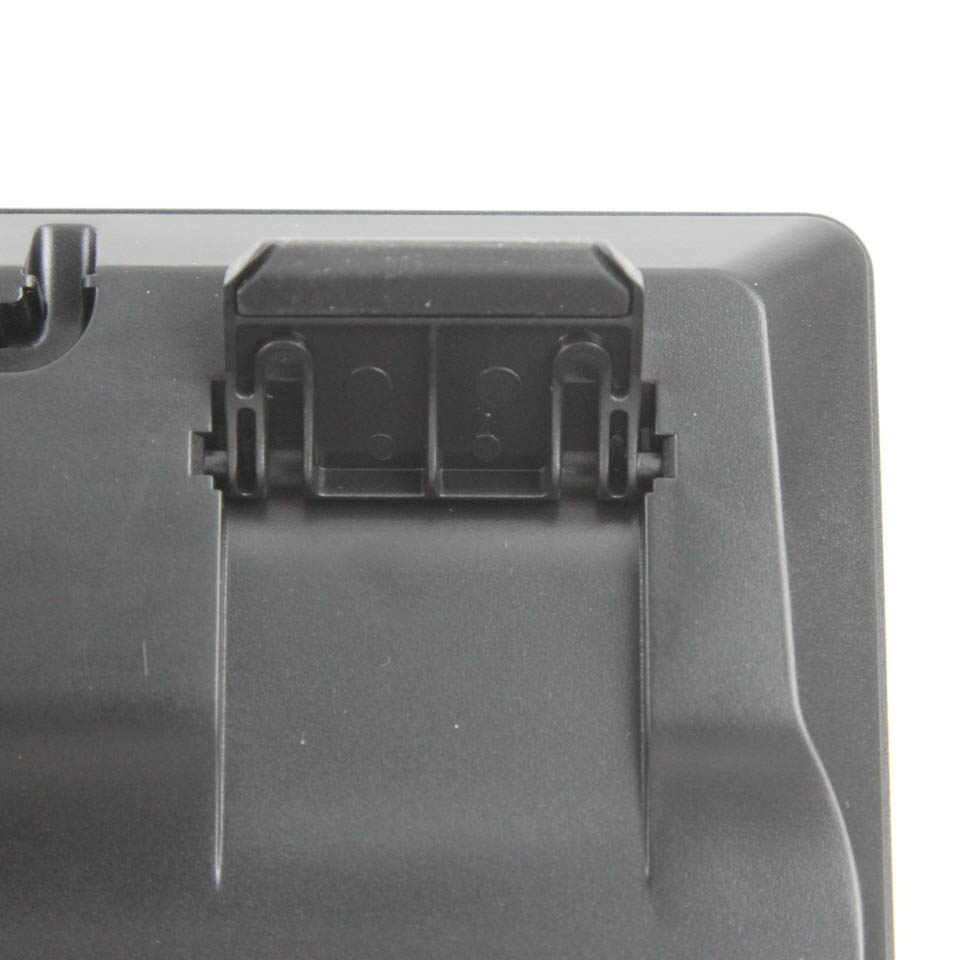
Flipping the keyboard around, we see the certification sticker in the middle. There are four rubber pads on the corners to keep the keyboard from sliding around on the desk, and two feet at the top open up sideways to optionally elevate the keyboard. These feet also have rubber pads to ensure they don't get scratched easily, and these six pads are those we get replacements for in the keyboard accessories section. There are also built-in cable-routing channels with three options to choose from depending on how you want the keyboard cable to go.
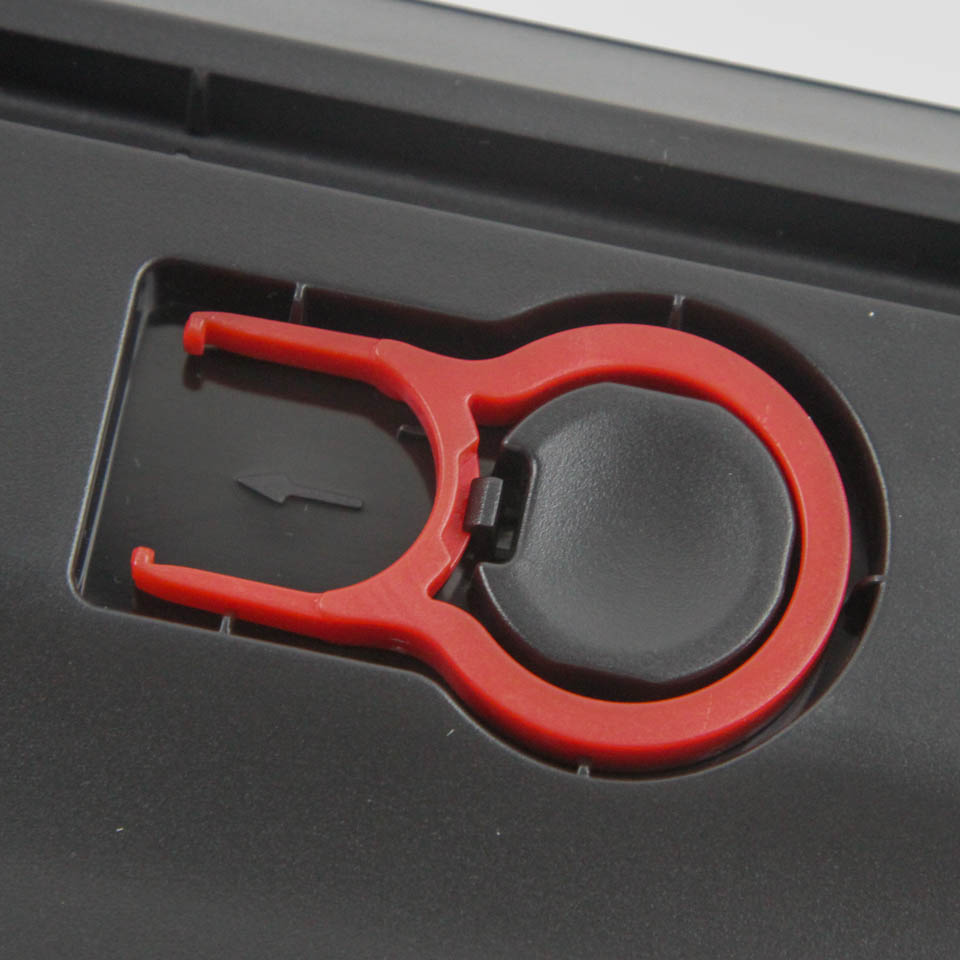
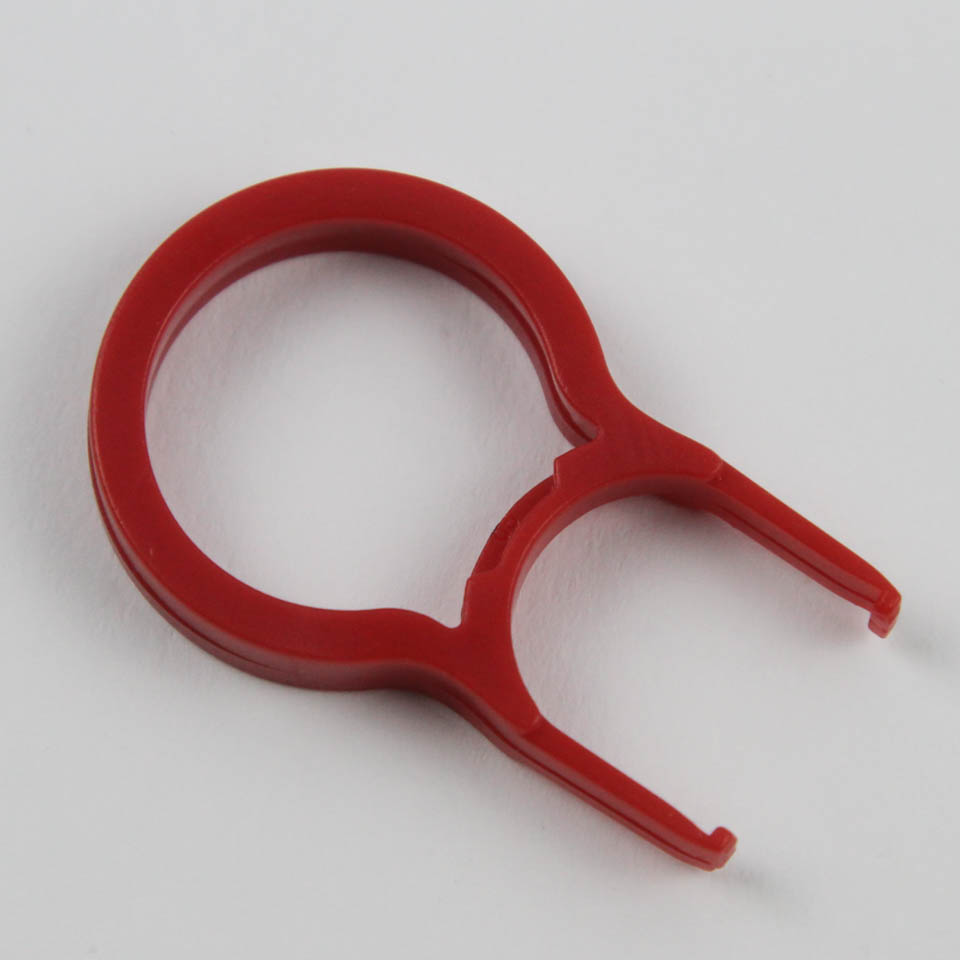

There is a keycap puller tucked in, in a slot that keeps it locked in place until you need it. I really like this implementation, although it does necessitate the use of a plastic ring-style puller instead of a wire-style puller, which increases the potential for the sides of the keycaps to be scratched. The keycap puller is red, matching the Ascend keycap as the company's personal touch of sorts.
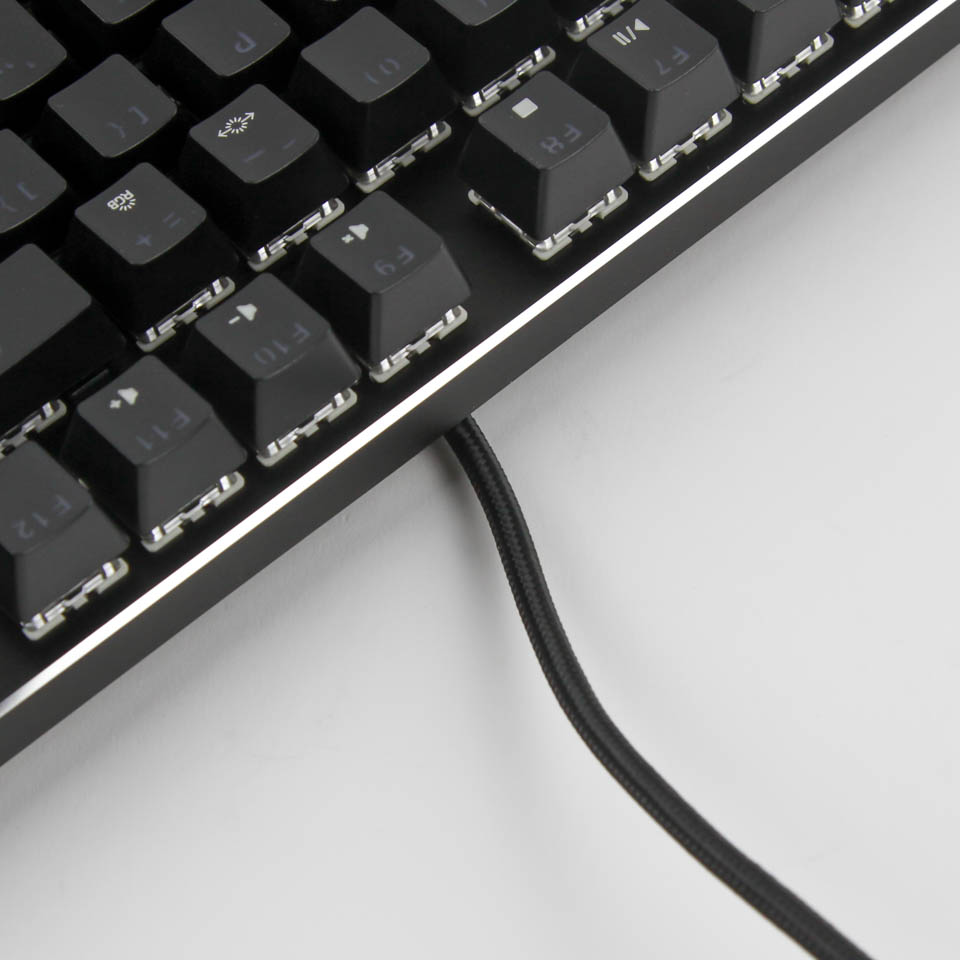
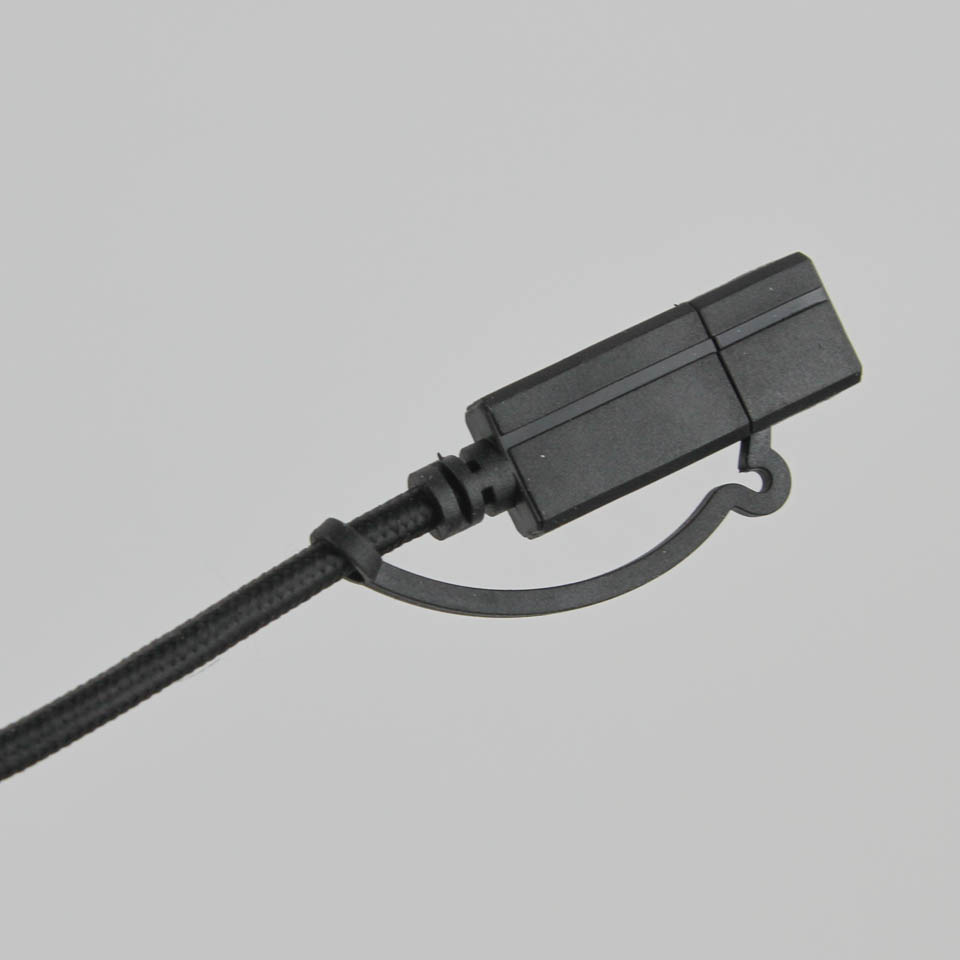
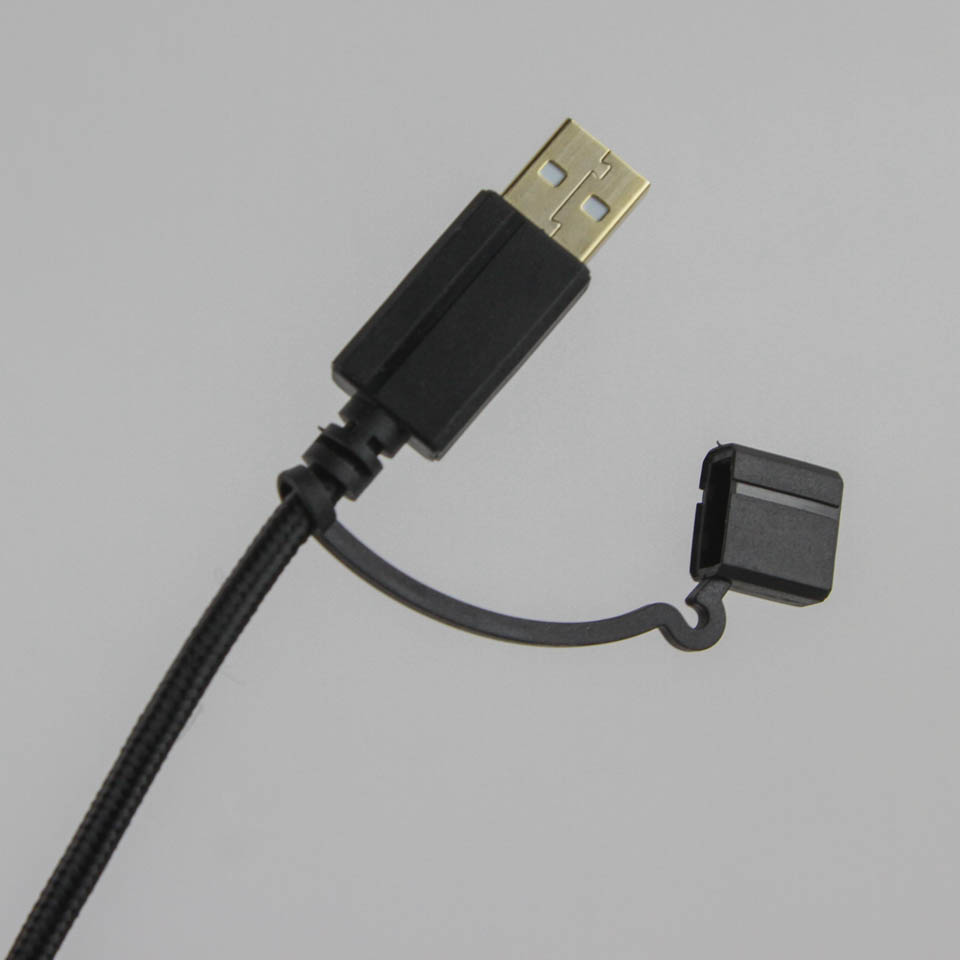
The keyboard has a non-detachable cable, which protrudes through the middle at the back, but can be routed in one of three ways as seen before. It is braided well, completely black, and even has a protective cap for the USB Type-A connector on the end that plugs into an available USB port on your computer. USB 2.0 will suffice for both power and data here.
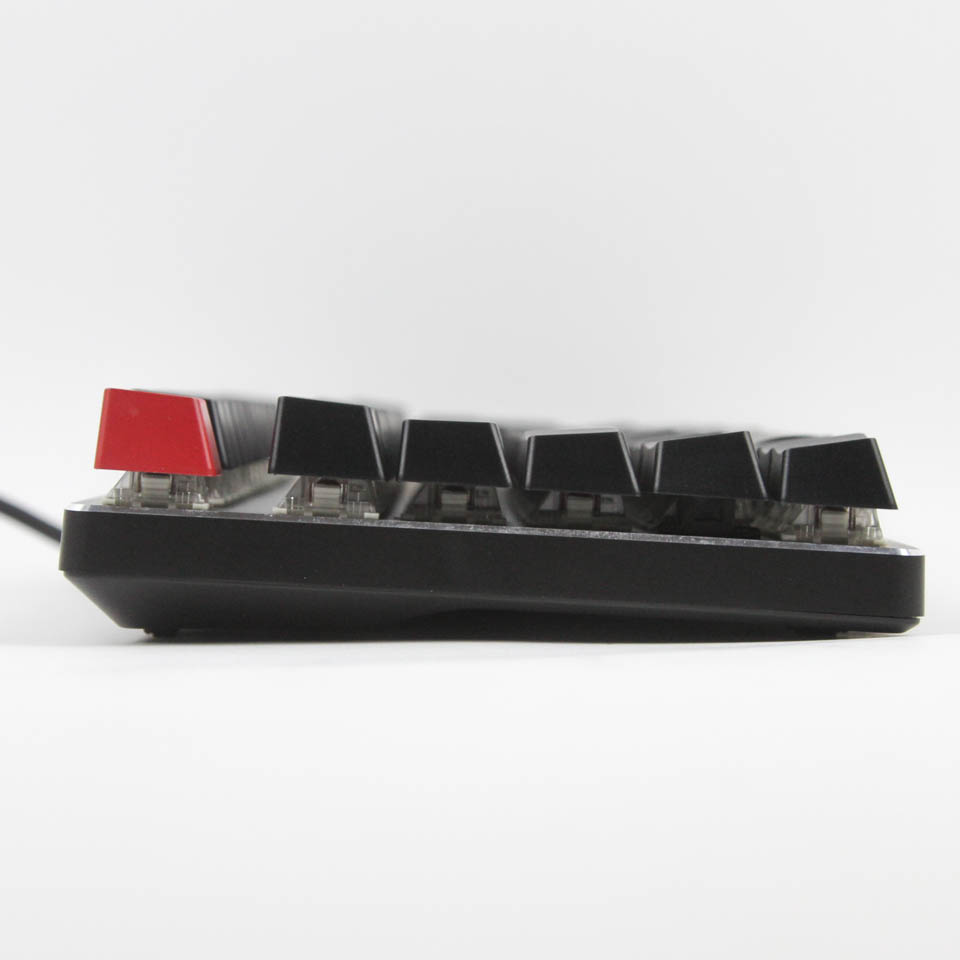
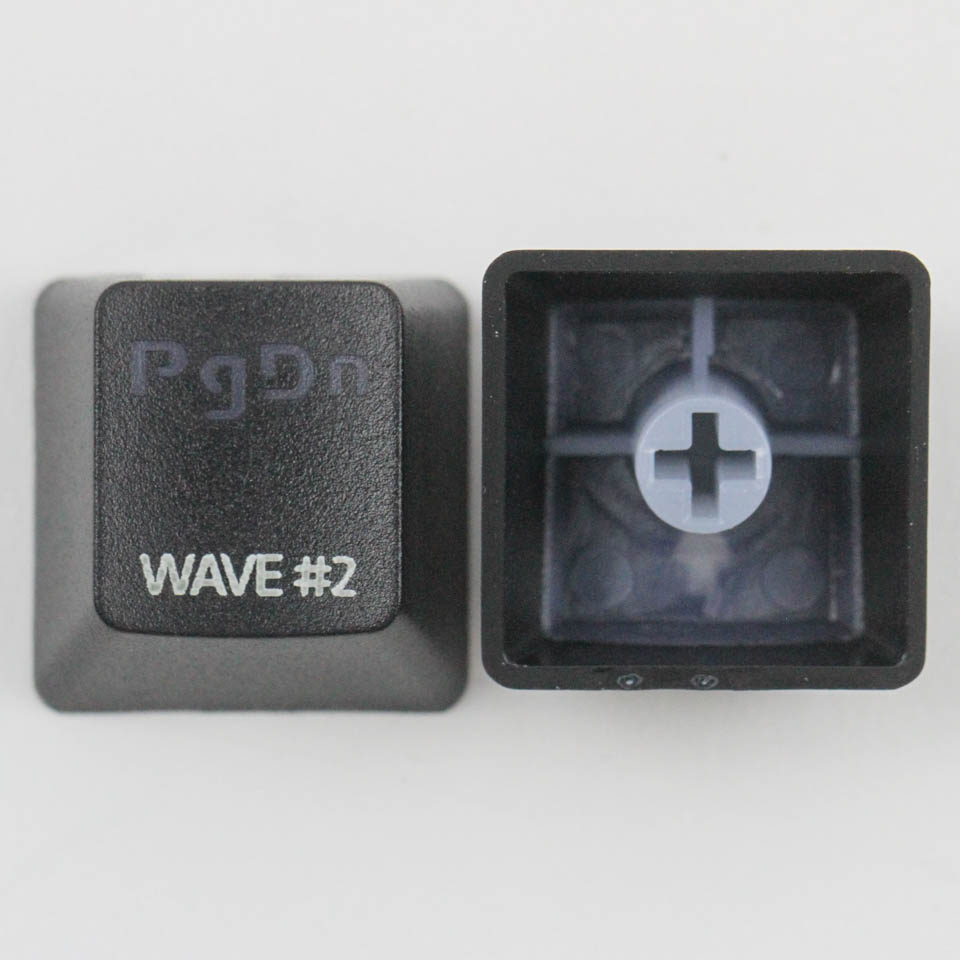
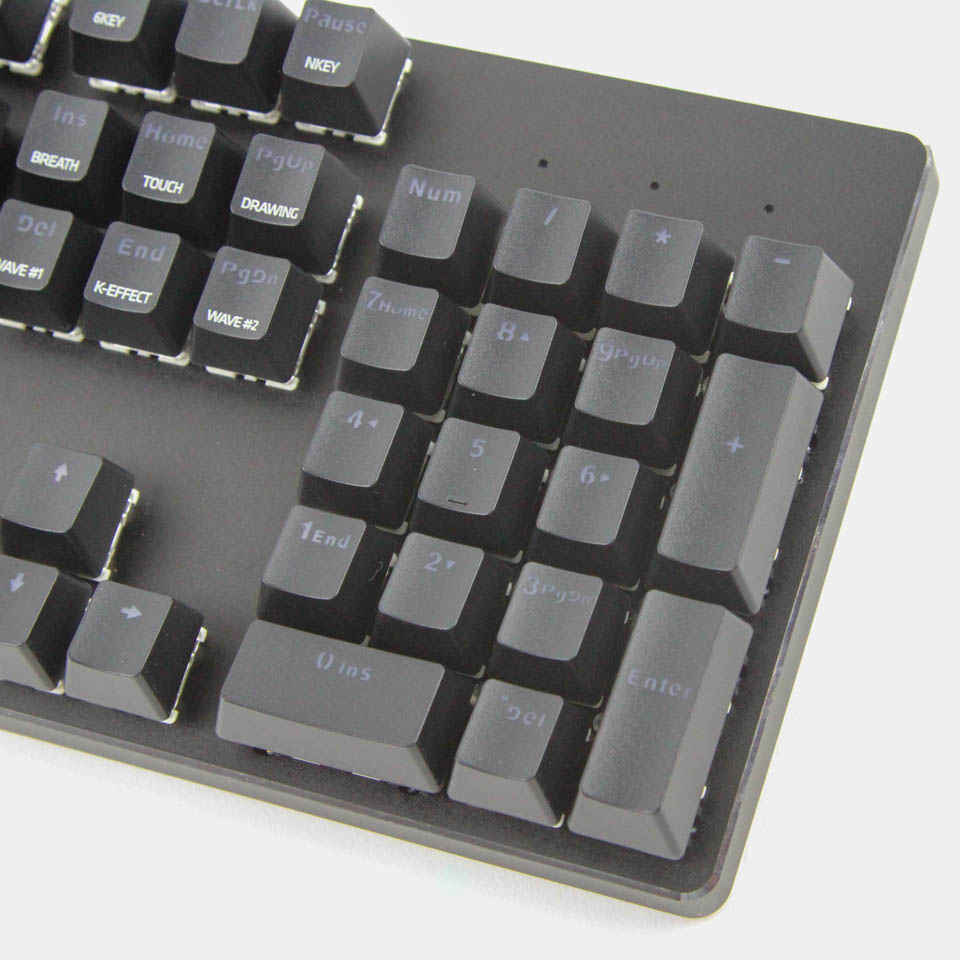
The keycaps have an OEM profile, and the various rows are thus sculpted accordingly. They have a floating design, which allows for easier cleaning, but causes more light bleed, which may or may not be to your liking. The stock keycaps are made out of thick ABS plastic (average wall thickness 1.27 mm) with all general legends (those not specific to this keyboard) doubleshot-injected for longevity. There are some legends specific to this keyboard that appear pad printed or laser etched, which means these will not last as long, especially as they are also opaque as seen above. The stock keycaps are better than average to begin with, at least for build quality, although the doubleshot injection itself is generally unappealing, which is probably due to a bad mold. A "standard" bottom row means that the keyboard offers good compatibility with aftermarket keycap sets if you wanted to go that route for customization. The company also offers a white and "Aura" keycap set if using the barebones option to customize the GMMK during purchase.
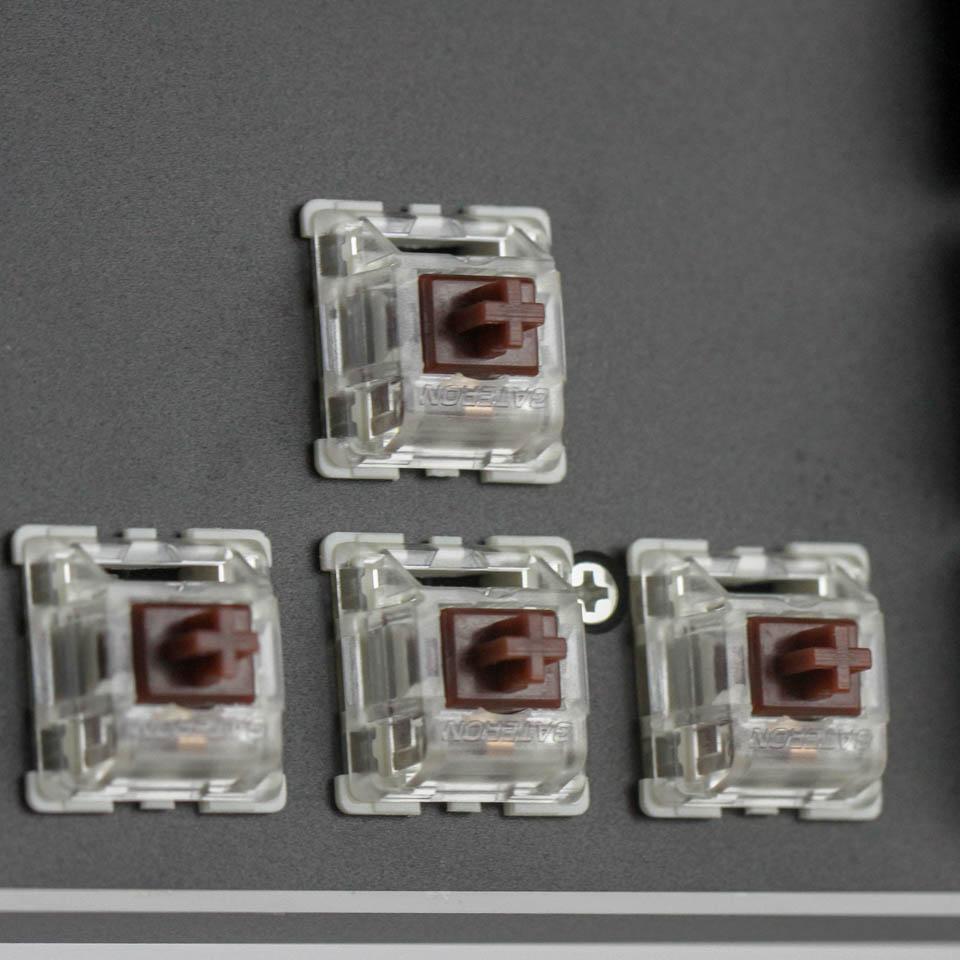

The pre-built version of the GMMK only comes with Gateron Brown switches, although you can customize it to have the switch of your choice with the barebones version you can then put together easily. This is a backlit keyboard with RGB-lighting support, and the switches use a translucent housing to allow for diffused lighting. The larger keycaps use Cherry-style stabilizers, which can feel mushy when typed on, especially for the space bar.

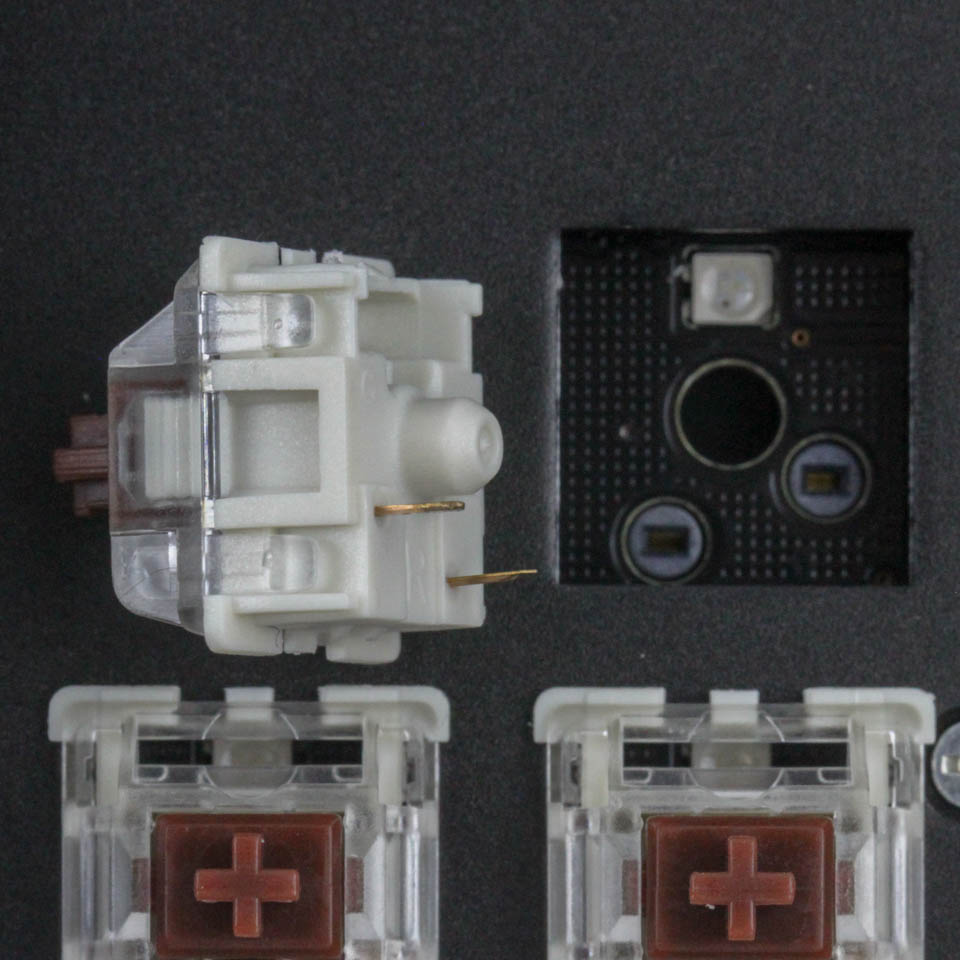
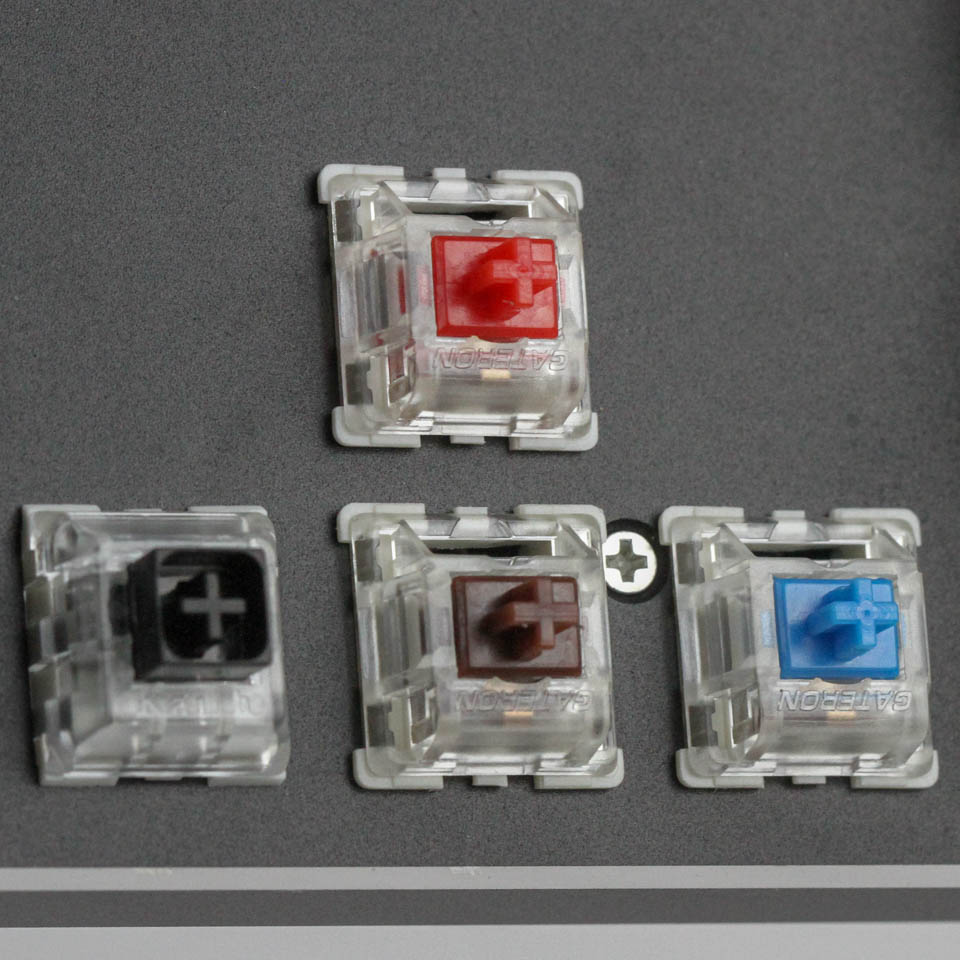
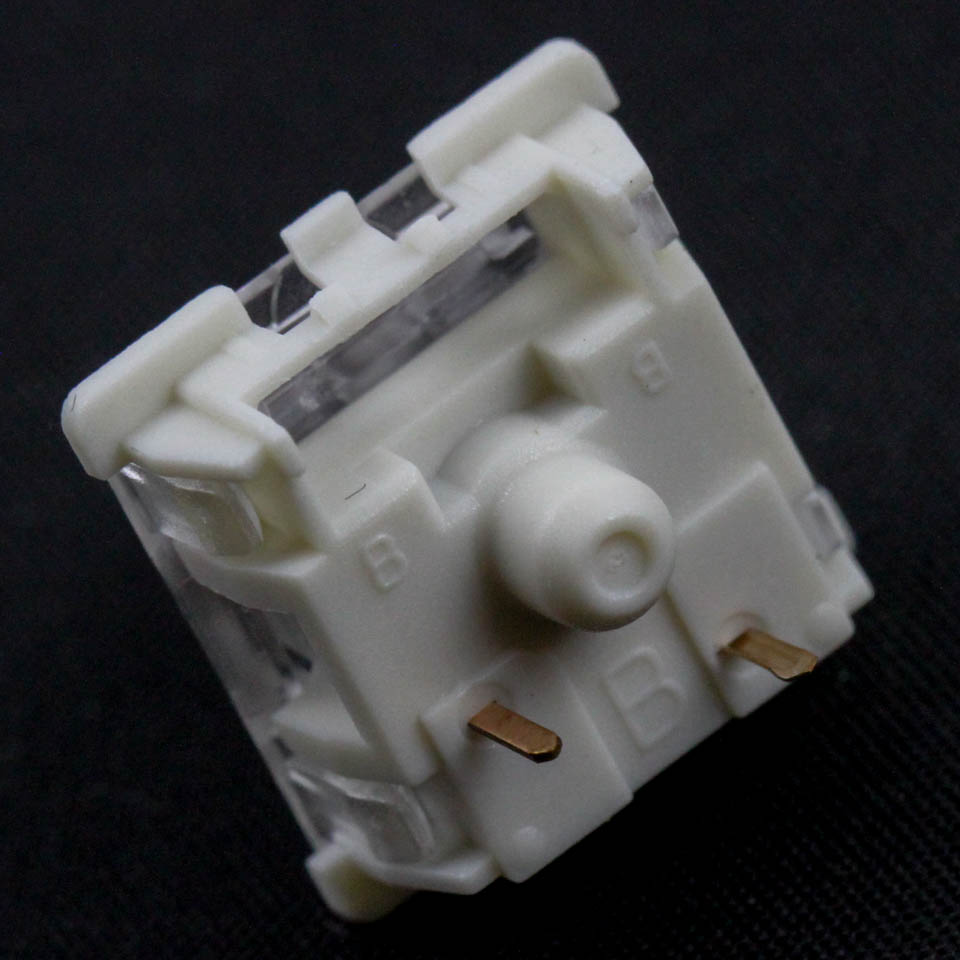
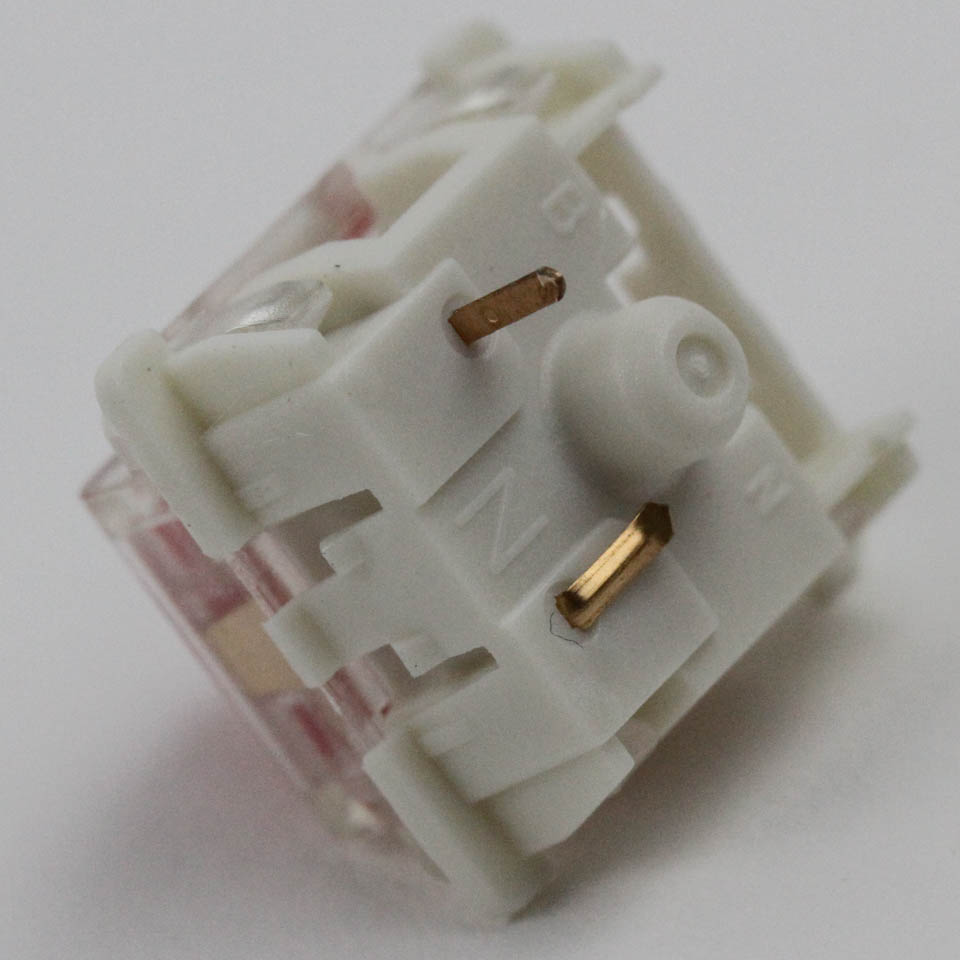
The primary feature of the GMMK is the modular switch, and the provided switch puller works as described in the included manual/user guide. You put the notches into the openings in the switch housing and simply lift the switch upward and away. We can see a CYK switch design here, with the metal contacts of the switch going through and into the PCB to complete the connection. We can also see the LED associated with this switch, which is why SMD LED compatible switches are best chosen to make use of the backlighting support on the keyboard. As we saw before, the GMMK supports a variety of different SMD and back LED compatible switches across switch makers (Cherry, Kailh, Gateron, etc.), with plate-mounted switches generally being fine. PCB-mounted switches need some modding, usually in the form of clipping short some of the extra legs before they can be used.
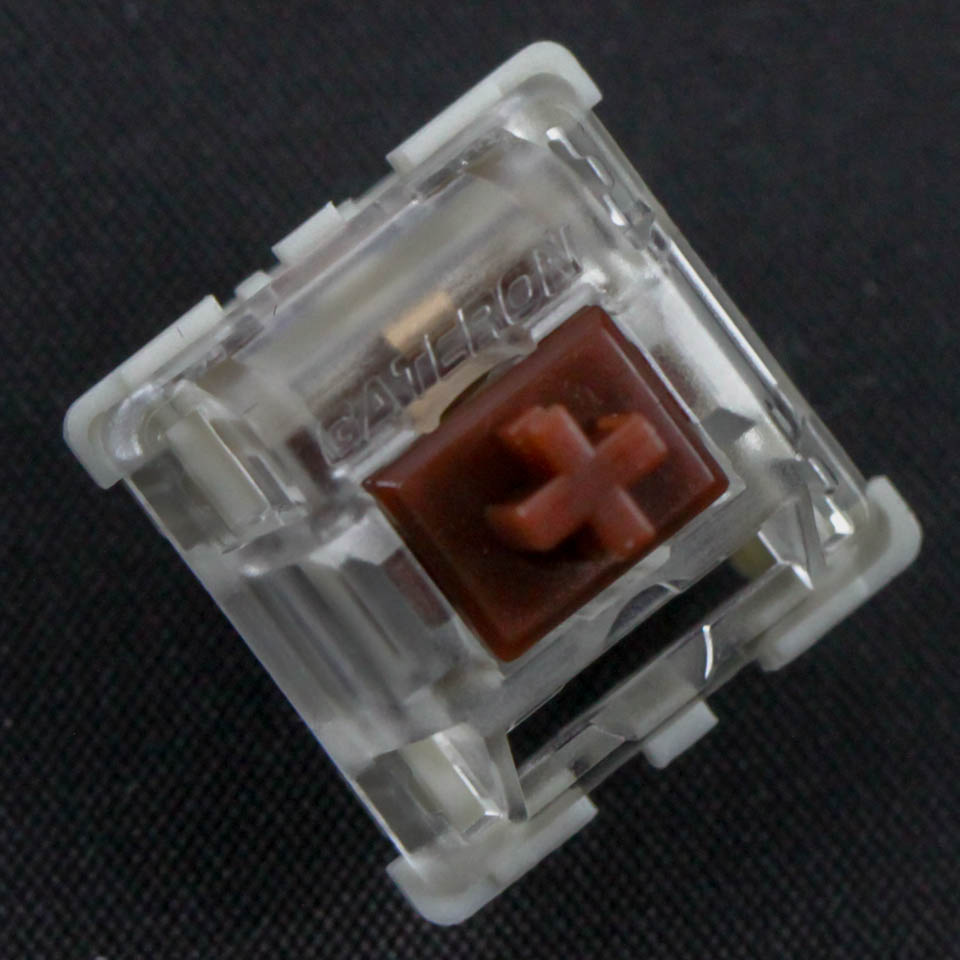

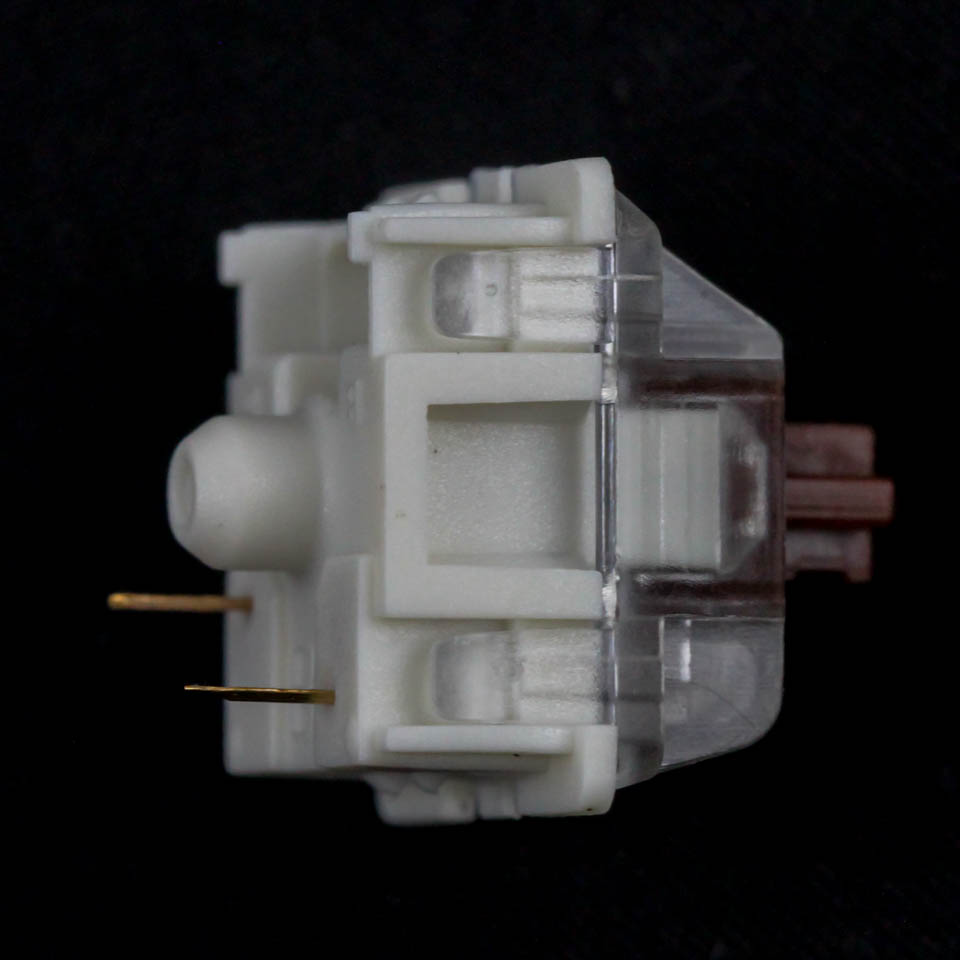
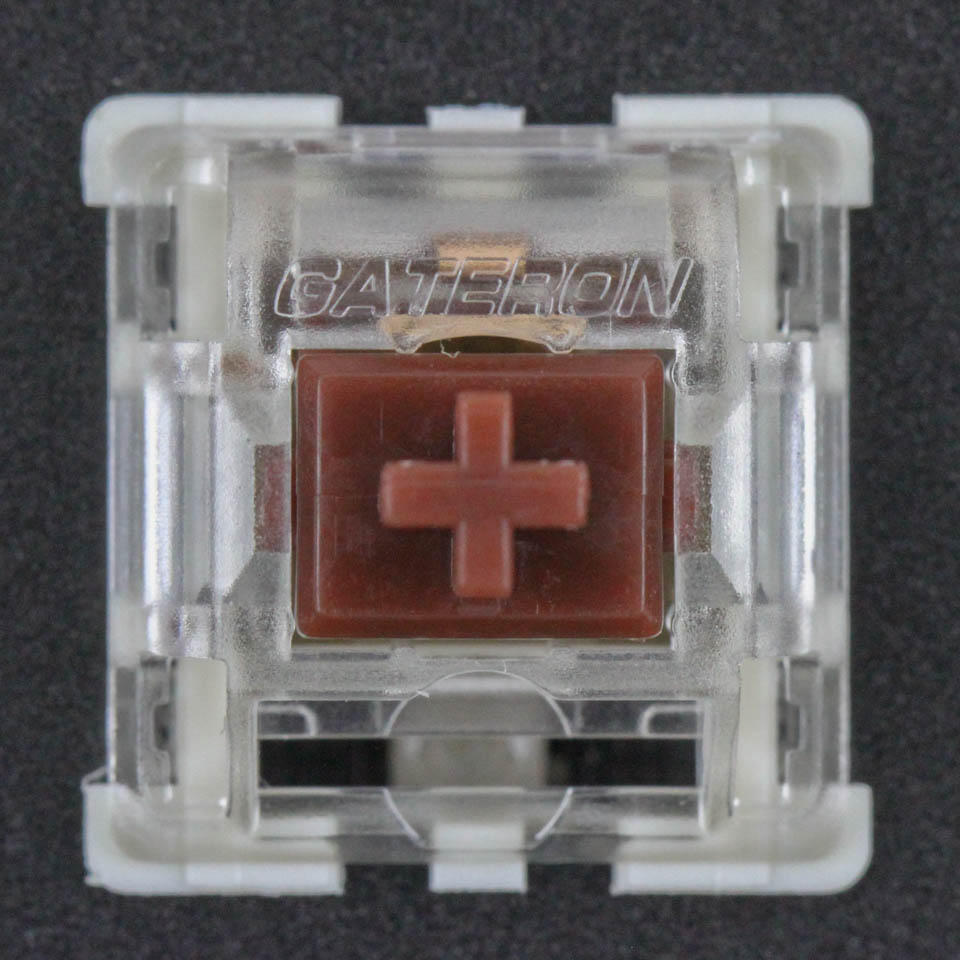
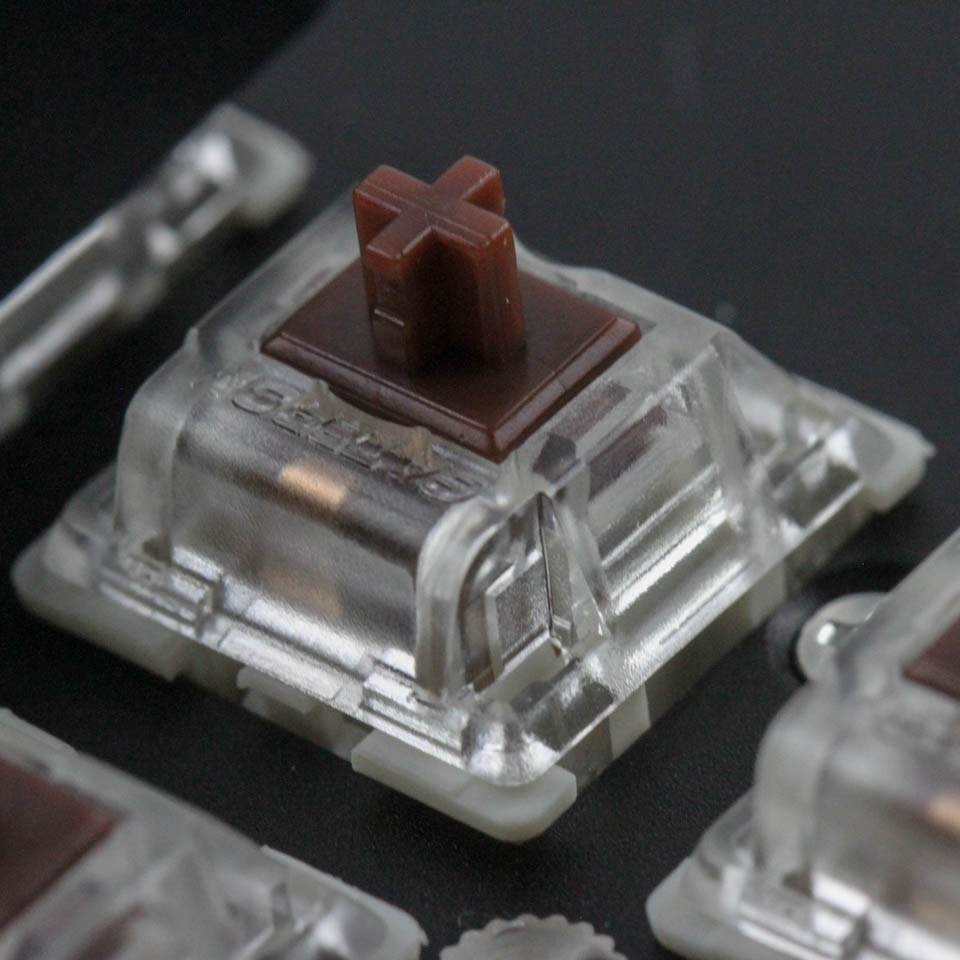
Here is a closer look at the Gateron Brown mechanical switch employed with the pre-built version of the GMMK. We see gold contacts for added corrosion and oxidation resistance, with a brown stem for easy visual identification and the Gateron label on the front.
There is not much going on in terms of provided spare keycaps, but if you are not a fan of the red Ascend keycap, you can just replace it with the spare black Esc keycap and call it a day.
Things are not necessarily great in terms of quality control, at least on my sample. The doubleshot injection is one thing, but having a switch with a bent contact out of the box was not good. I was confused as to why said switch was not working until I took it off and saw the bent contact. It was a simple fix, but Glorious PC Gaming does need to improve their manufacturing and QC if this is anything to go by. Similarly, there were metal shavings from the cutouts for the switches on the aluminium frame, and some cutouts were also not done perfectly since a couple of switches could not go in fully, although by enough to make contact and function properly.
Jul 10th, 2025 02:17 CDT
change timezone
Latest GPU Drivers
New Forum Posts
- TPU's Nostalgic Hardware Club (20493)
- 3DMARK "LEGENDARY" (326)
- Post Your TIMESPY, PCMARK10 & FIRESTRIKE SCORES! (2019) (321)
- 5070ti overclock...what are your settings? (47)
- 'NVIDIA App' not usable offline? (1)
- G-Sync Not Working in Borderless / Window Mode - Windows 11 (5)
- Screen burn-in (19)
- [GPU-Z Test Build] New Kernel Driver, Everyone: Please Test (78)
- Friend's monitor randomly loses signal (3)
- What's your latest tech purchase? (24234)
Popular Reviews
- NZXT N9 X870E Review
- NVIDIA GeForce RTX 5050 8 GB Review
- Fractal Design Epoch RGB TG Review
- Corsair FRAME 5000D RS Review
- Fractal Design Scape Review - Debut Done Right
- AMD Ryzen 7 9800X3D Review - The Best Gaming Processor
- Sapphire Radeon RX 9060 XT Pulse OC 16 GB Review - An Excellent Choice
- Upcoming Hardware Launches 2025 (Updated May 2025)
- Sapphire Radeon RX 9070 XT Nitro+ Review - Beating NVIDIA
- PowerColor ALPHYN AM10 Review
TPU on YouTube
Controversial News Posts
- Intel's Core Ultra 7 265K and 265KF CPUs Dip Below $250 (288)
- Some Intel Nova Lake CPUs Rumored to Challenge AMD's 3D V-Cache in Desktop Gaming (140)
- NVIDIA Launches GeForce RTX 5050 for Desktops and Laptops, Starts at $249 (117)
- AMD Radeon RX 9070 XT Gains 9% Performance at 1440p with Latest Driver, Beats RTX 5070 Ti (116)
- NVIDIA GeForce RTX 5080 SUPER Could Feature 24 GB Memory, Increased Power Limits (115)
- Microsoft Partners with AMD for Next-gen Xbox Hardware (105)
- Intel "Nova Lake‑S" Series: Seven SKUs, Up to 52 Cores and 150 W TDP (100)
- NVIDIA DLSS Transformer Cuts VRAM Usage by 20% (97)