 5
5
InWin A5 Review
Assembly & Finished Looks »A Closer Look - Inside
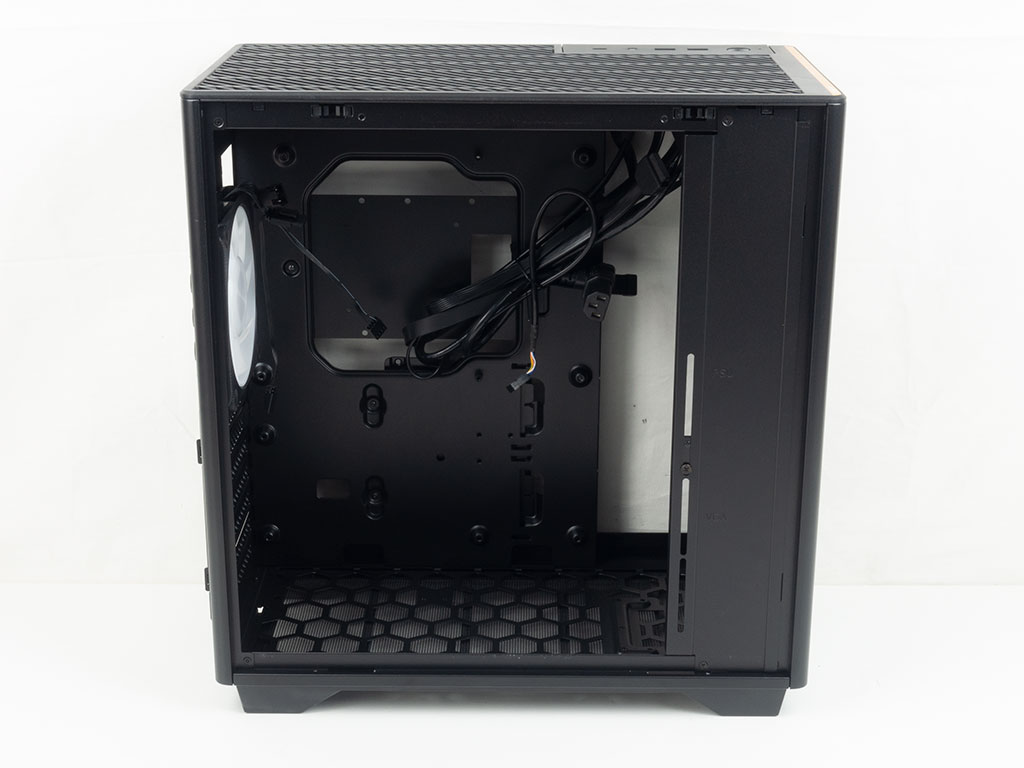
The inside of the InWin A5 doesn't utilize a traditional layout, but does look pretty simple at first sight. The motherboard is to be installed upright with the front used for storage & the PSU. In the rear, there are several mounting brackets and just a few cable routing holes. If you look closely, you will notice a basic lack of hooks to zip tie to, which will make cable management much more difficult than it should be unfortunately.


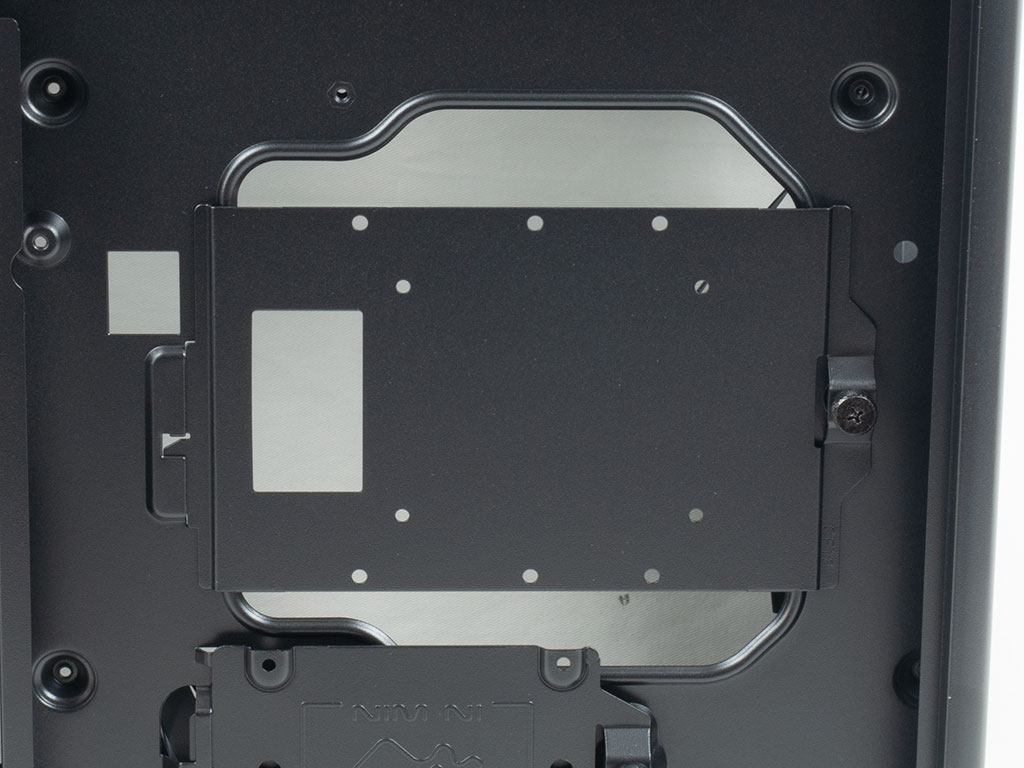
On the floor of the A5, you will be able to install two 120 mm intake fans, which is where we will place some Mercury AM120S fans in our build. Towards the front there is a mounting location for either a 2.5" or 3.5" hard drive, which is partially hidden behind the front cover strip of the chassis. This is nice, but attaching a storage unit here will mean that you have to tip the system over and pull off the dust filter. Instead, InWin could have put a mounting plate here for easy access, just like the other drive locations within the chassis.

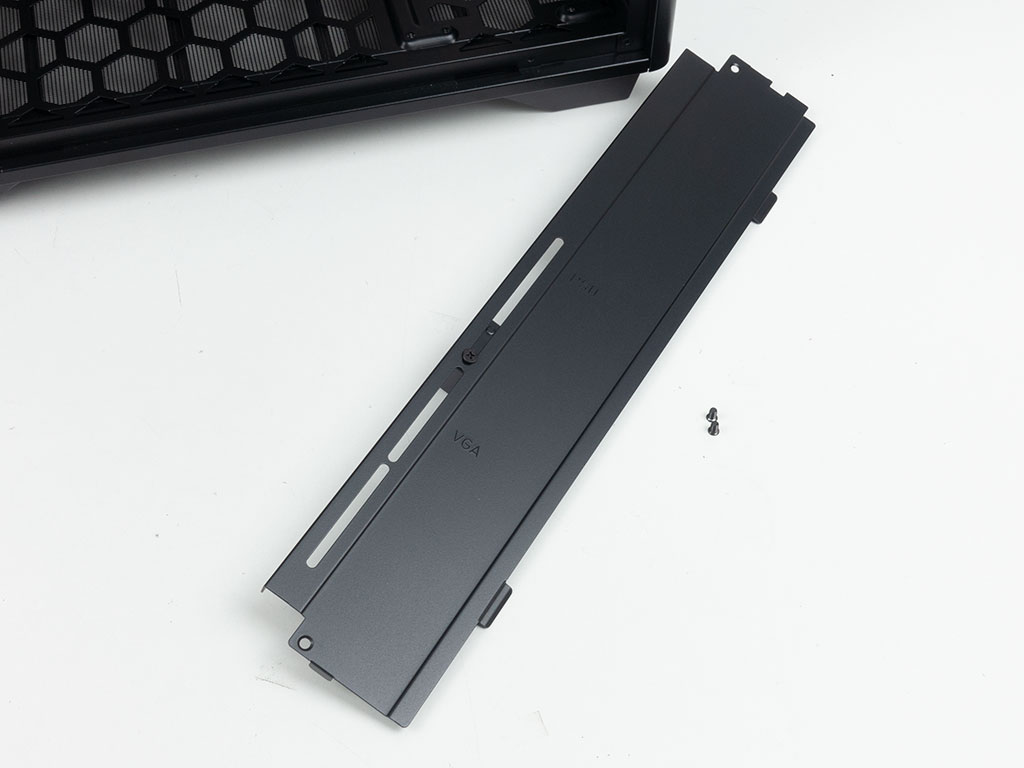

That plate may be removed by detaching two flush screws. It has mounting positions for the pre-installed PSU support clip and the GPU support beam found in the accessories package of the chassis. Removing the cover will give you full access to the front of the enclosure, which is mostly reserved for the full-size ATX PSU that is meant to hang off the ceiling here. That layout is also the reason the InWin A5 has a completely solid front panel.
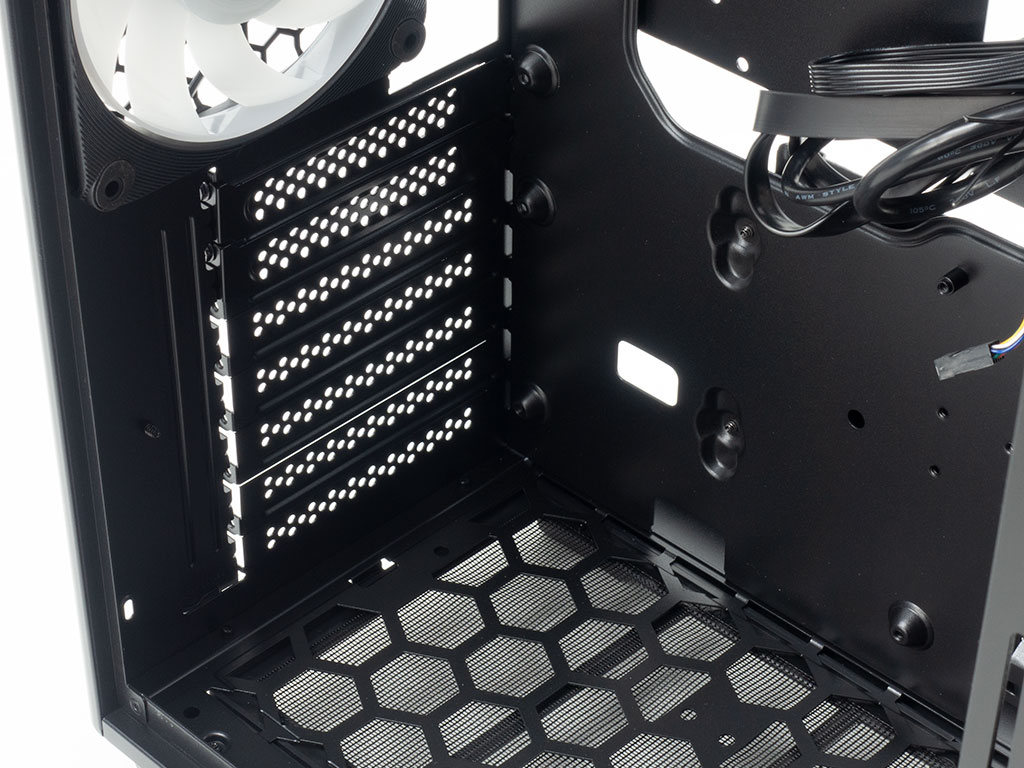

In the rear, the expansion slots have ample clearance to the floor of the chassis, so that any installed fans should not get in the way here. Above that the 120 mm, retail grade Mercury AM120S is set to push hot air out the back. As this fan comes with short wiring, InWin has included extension cables in the accessories pouch.

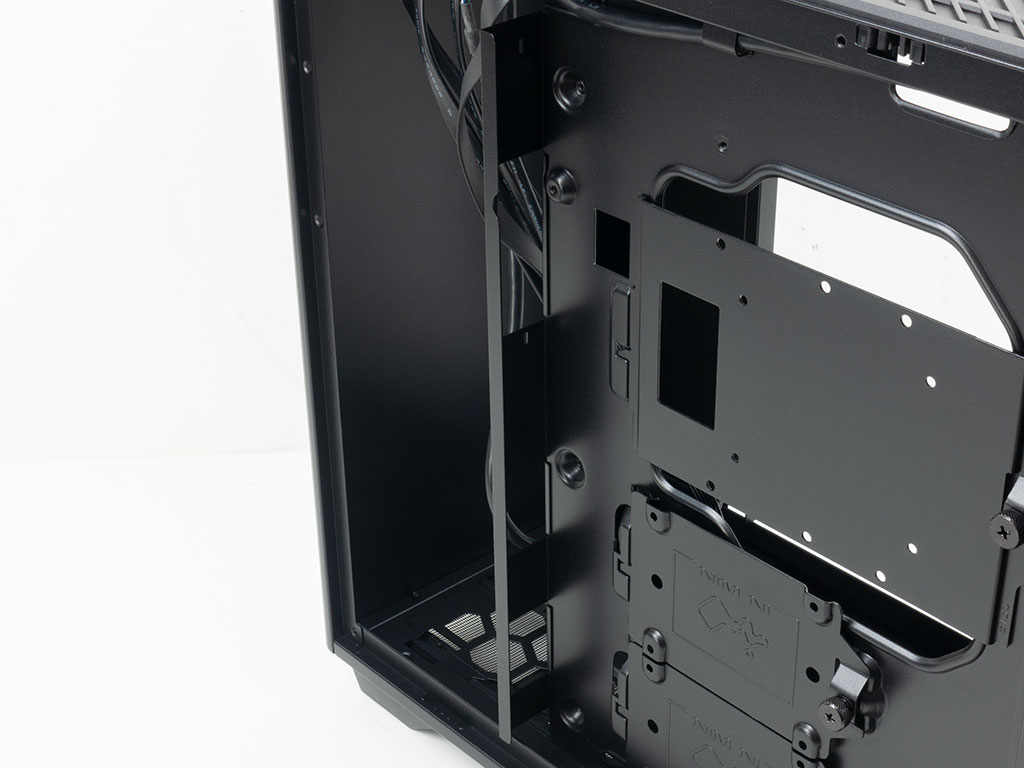
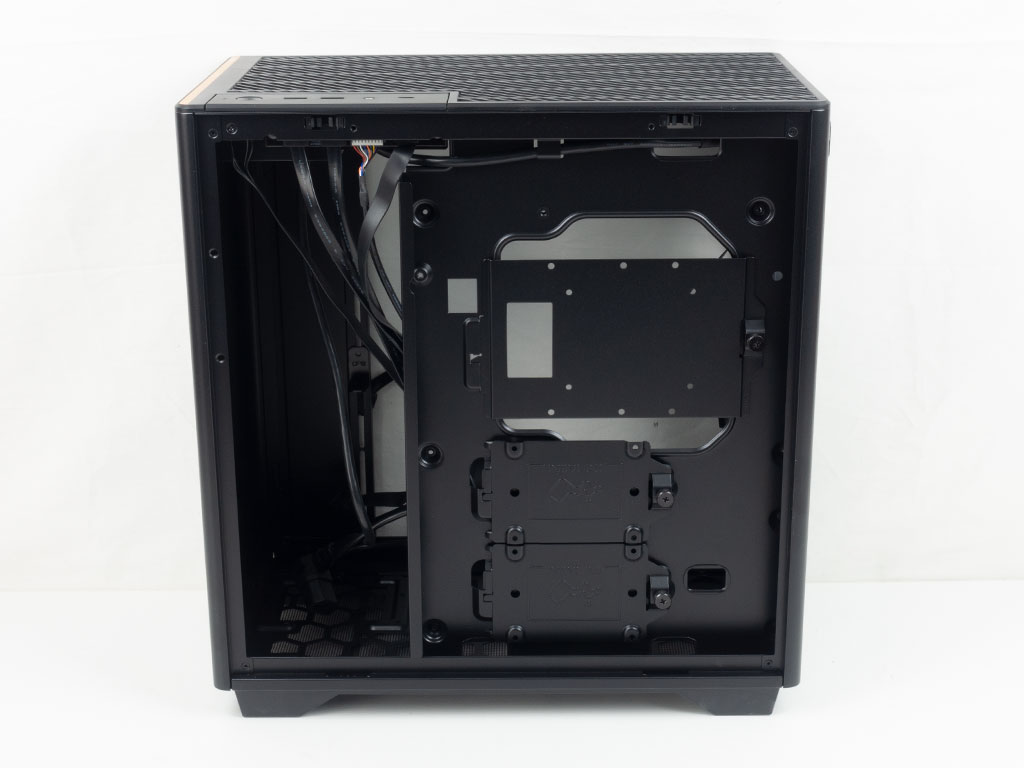
On the back, the top plate allows for another drive of either size to be installed. An opening in the surface allows for easier cable management as well. Below that are two separate 2.5" mounting plates as well. This brings the total number of possible storage units to a solid four within the InWin A5. Looking at the edge of the motherboard tray, InWin has placed a dividing element with several cable routing openings which is where you will pass PSU wiring through to keep them out of view as much as possible.
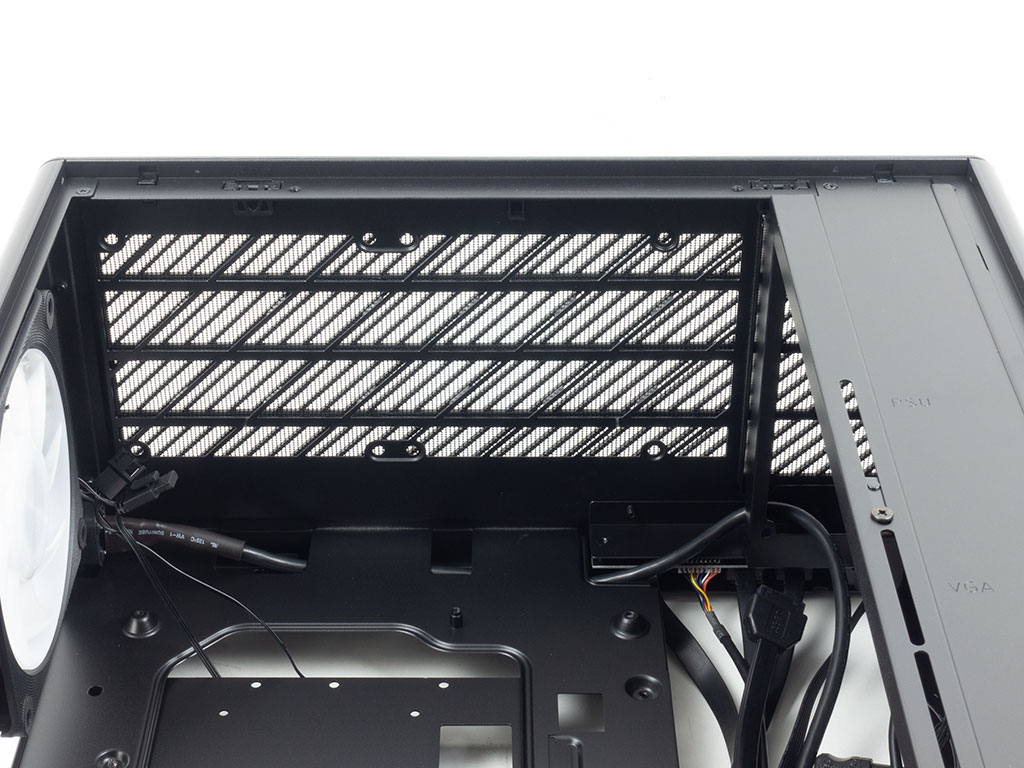
A quick peek at the ceiling shows that there is ample, well designed room for fans or an AIO, which is important as this is the only placement possibility for a radiator & fan combo of up to 240 mm size.
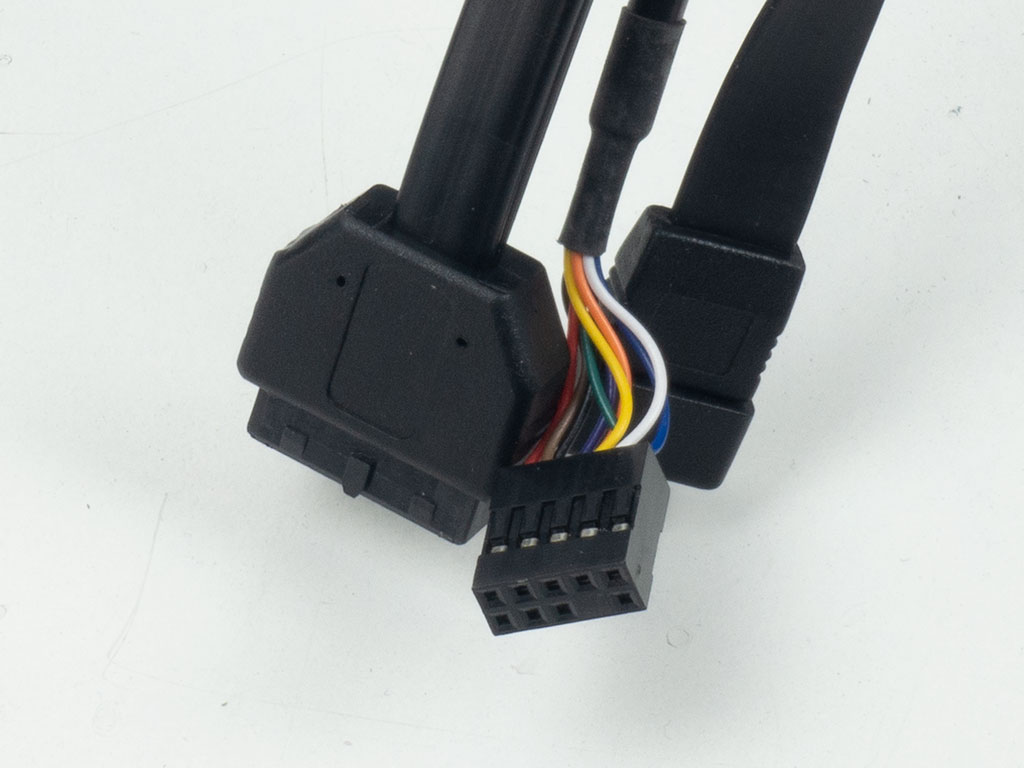
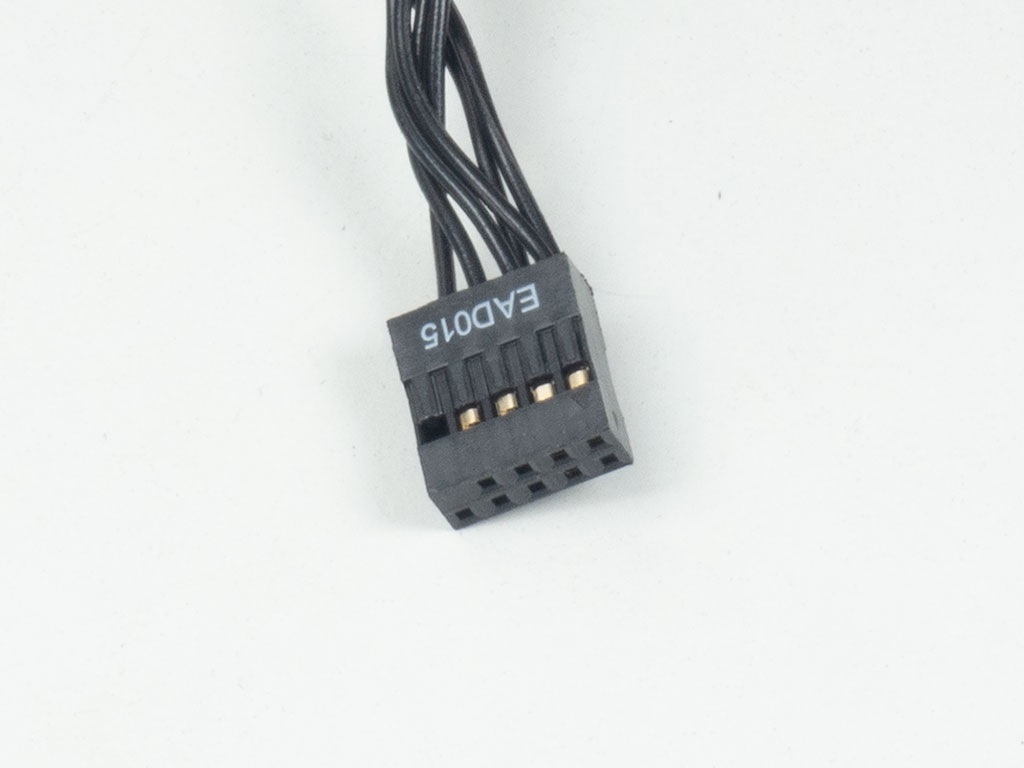
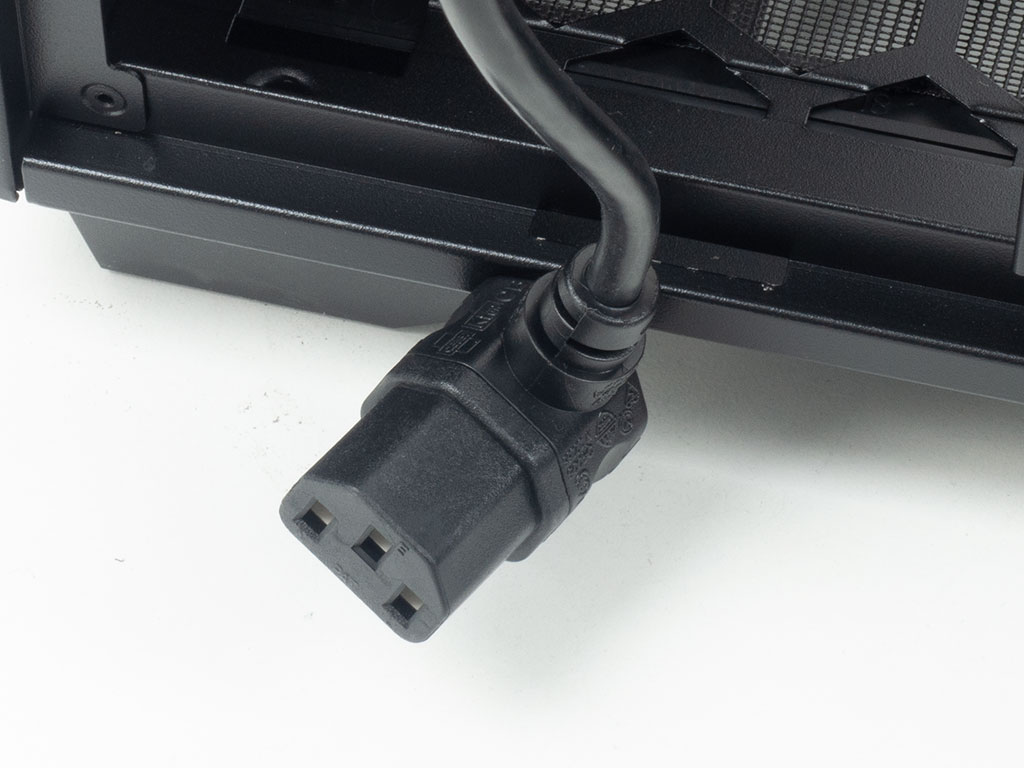
All the wires within the InWin A5 are of the default variety with black sleeving when it comes to the IO. InWin wisely offers a single, unified motherboard connector for the power/LED portion, which is nice to see. The power cables are angled but offer plenty of height and cable length, so that you won't have to worry about the direction of that plug on your power supply.
Jun 30th, 2025 17:48 CDT
change timezone
Latest GPU Drivers
New Forum Posts
- Can you guess Which game it is? (194)
- Help me choose the right PSU , Cooler Master vs Seasonic (53)
- HOW TO ADD NVMe M.2 SSD SUPPORT TO OLD MOTHERBOARDS WITH AWARD-Phoenix LEGACY SUPPORT? (2)
- Whats a fair asking price - MSI 4070 Super (4)
- HTPC Power Consumption Discussion, Upgrade vs Migration (18)
- RX 9000 series GPU Owners Club (1103)
- Will you buy a RTX 5090? (579)
- Rare GPUs / Unreleased GPUs (2111)
- Steam Deck Owners Clubhouse (530)
- Good time in the year to buy a new PC (4)
Popular Reviews
- Sapphire Radeon RX 9070 XT Nitro+ Review - Beating NVIDIA
- ASUS ROG Crosshair X870E Extreme Review
- Sapphire Radeon RX 9060 XT Pulse OC 16 GB Review - Samsung Memory Tested
- Lexar NQ780 4 TB Review
- AVerMedia CamStream 4K Review
- ASRock Phantom Gaming Z890 Riptide Wi-Fi Review
- AMD Ryzen 7 9800X3D Review - The Best Gaming Processor
- Upcoming Hardware Launches 2025 (Updated May 2025)
- Intel Core Ultra 7 265K Review
- NVIDIA GeForce RTX 5060 8 GB Review
TPU on YouTube
Controversial News Posts
- Intel's Core Ultra 7 265K and 265KF CPUs Dip Below $250 (288)
- NVIDIA Grabs Market Share, AMD Loses Ground, and Intel Disappears in Latest dGPU Update (204)
- Some Intel Nova Lake CPUs Rumored to Challenge AMD's 3D V-Cache in Desktop Gaming (140)
- Microsoft Partners with AMD for Next-gen Xbox Hardware (105)
- NVIDIA Launches GeForce RTX 5050 for Desktops and Laptops, Starts at $249 (104)
- Intel "Nova Lake‑S" Series: Seven SKUs, Up to 52 Cores and 150 W TDP (100)
- NVIDIA GeForce RTX 5080 SUPER Could Feature 24 GB Memory, Increased Power Limits (89)
- Reviewers Bemused by Restrictive Sampling of RX 9060 XT 8 GB Cards (88)