 22
22
InWin Airforce Review
A Closer Look - Outside »Building the Airforce
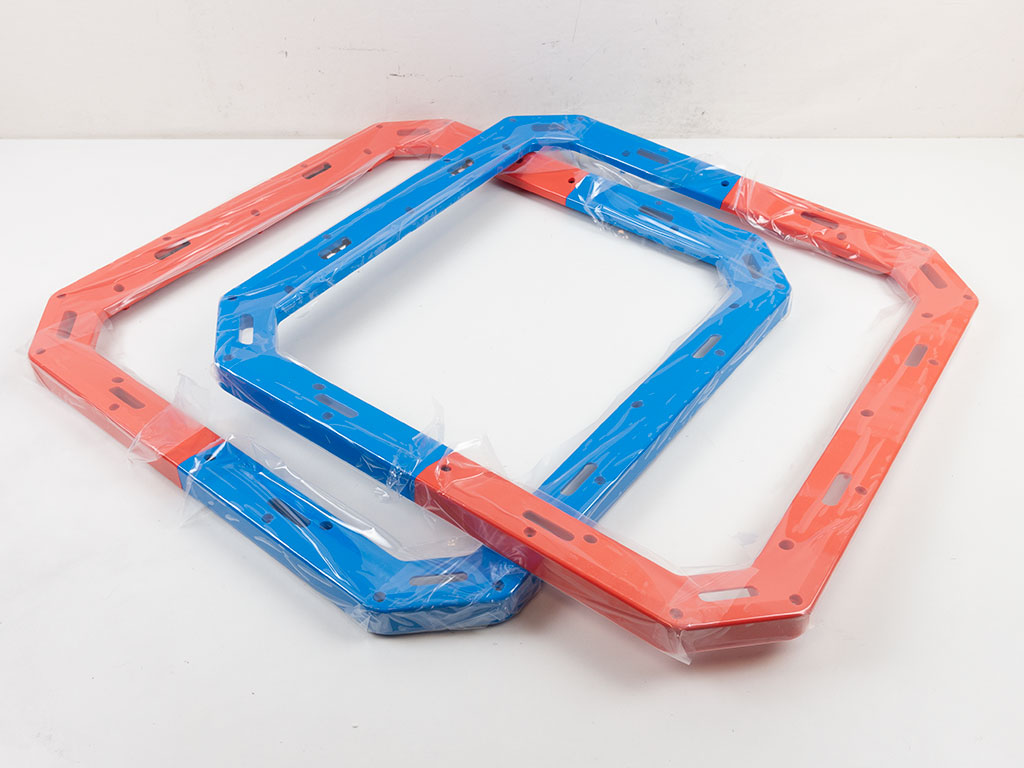

Building the Airforce mostly revolves around using one of the bags of screws with the highest count and longest size. While that is doable by comparing numbers and looks with those in the assembly manual, InWin could label the bags with simple numbers or letters to eliminate any guesswork. The first step in the build process revolves around the two frame pieces. InWin's vision would have you mix the red and blue colors together. That said, you could totally opt to have one blue and one red frame as well. They are held together by two screws. As these parts have a glossy finish, I left the protective layer on these for as long as possible to avoid scratching them. The second step is to assemble the two metal parts which make up the interior of the InWin Airforce with their own set of screws.
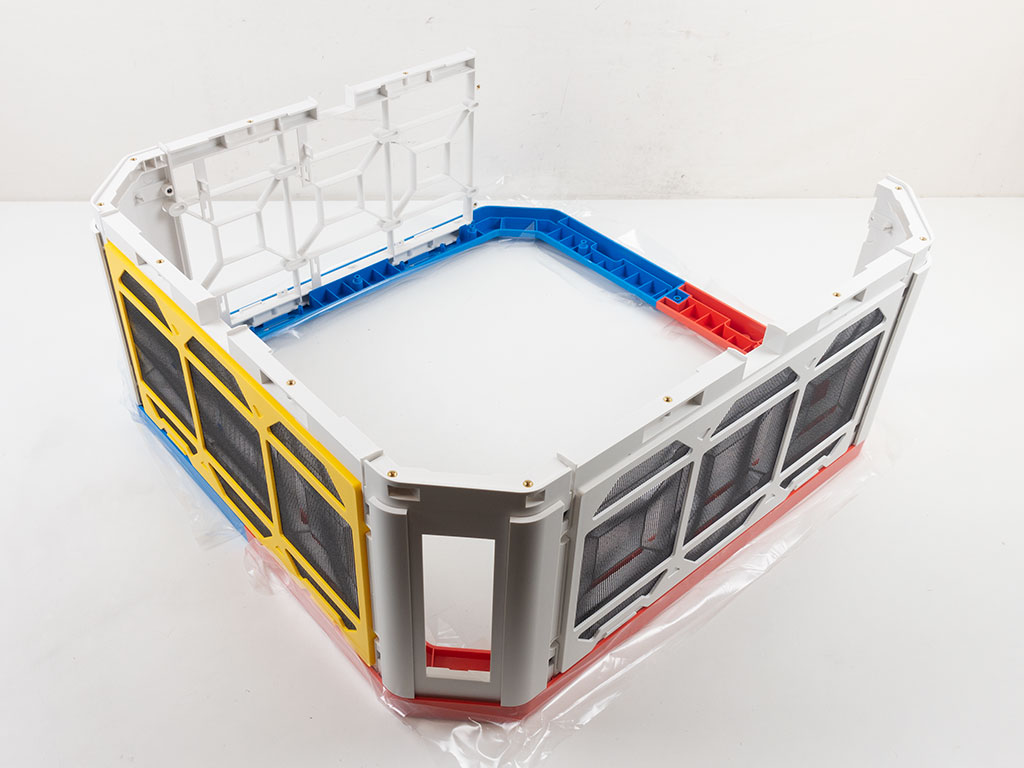
At this point, InWin mentions that you should put together the exterior panels and place it on one of the color frames. While doable, this should really be a separate step in the manual to help those who may find the process more challenging than others. You have to make sure you use the right corner pieces, which are very similar, but not quite identical. These are not symmetrical, which adds another layer of complexity. InWin does well to label the individual bags these come in, but once you unpacked them, things are no longer as clear.
With the shell and frame in place loosely, you also get to place the metal interior and attach the corner of the PSU bay with two screws. At this point, there is nothing holding the blue and red frame and rest of these parts together, so flipping it around for the next step means keeping a cool head as the metal will flex out of shape a bit until you screw it down.
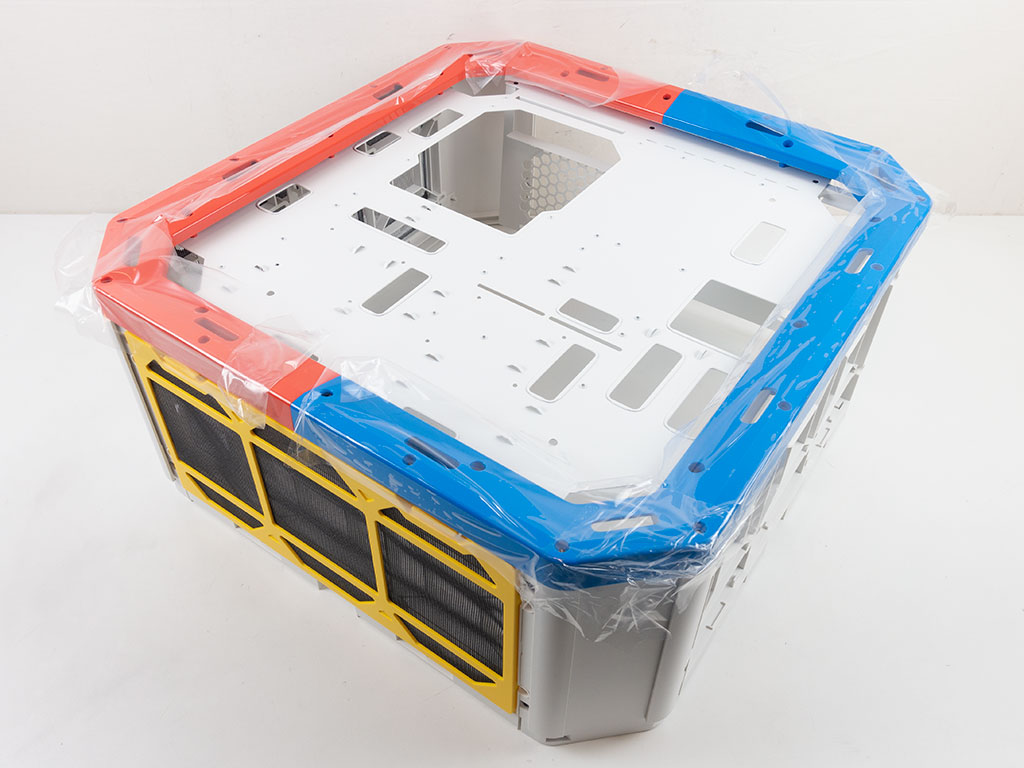
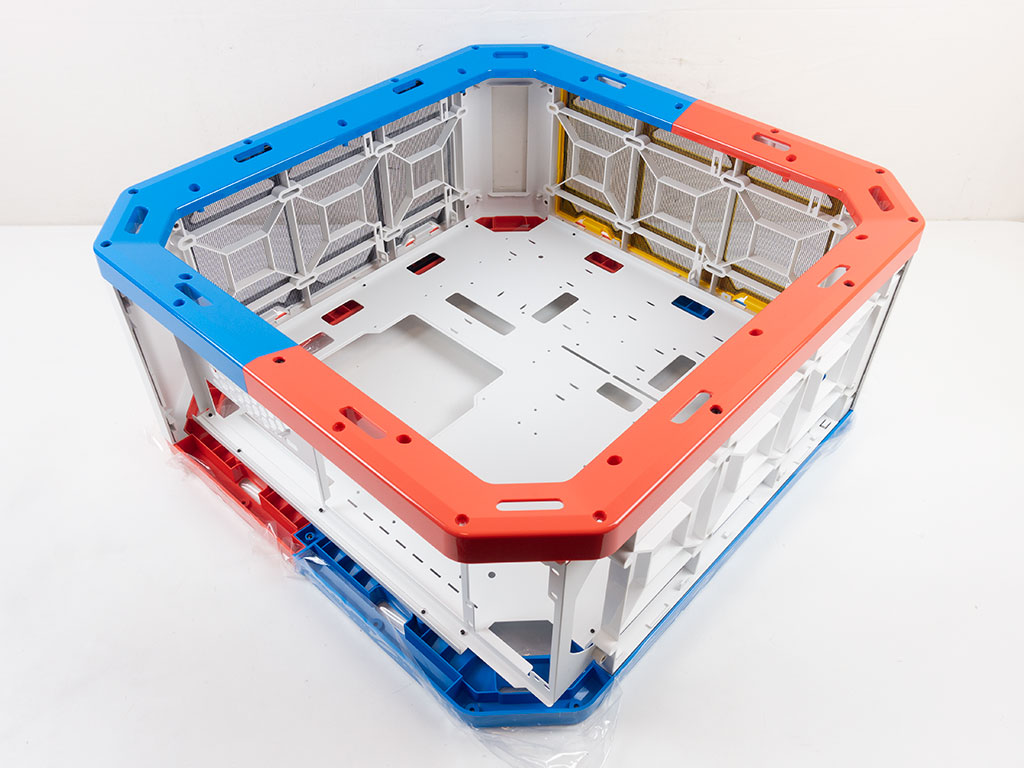
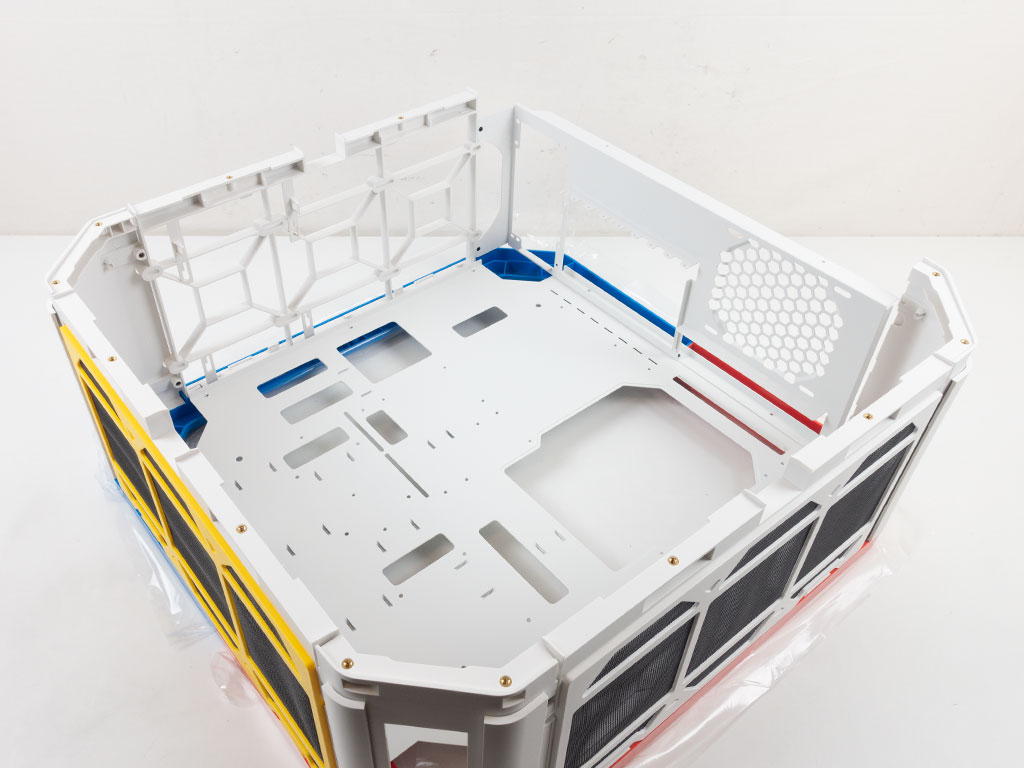
With the chassis body flipped around, you get to employ most of the initially mentioned long screws in one fell swoop to both connect the blue and red frame to the shell and pin down the metal interior of the Airforce. Once this is done, the case has plenty of rigidity to it, so flipping it back over is no longer a big issue. At this point, you may place the second frame on the shell and screw it down. As you can see, I have also removed the plastic protective layer from this side, as the case body is essentially done at this point.


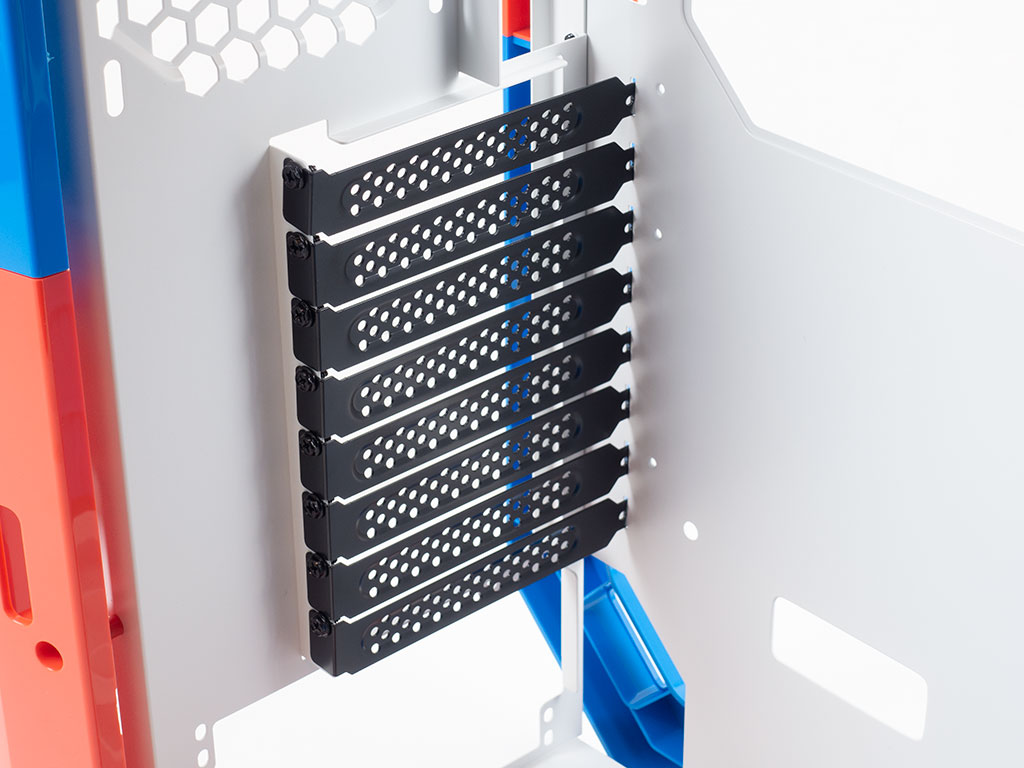
Before being able to stand up the Airforce, you have to clip on the feet, which come with pre-installed rubber pads. They do stay in place, but have a bit of play. I am sure InWin could have designed a way to use screws on them to pin things down better. In the interior, you may clip in the two blue HDD cages, which are actually really nicely engineered and stay put well.
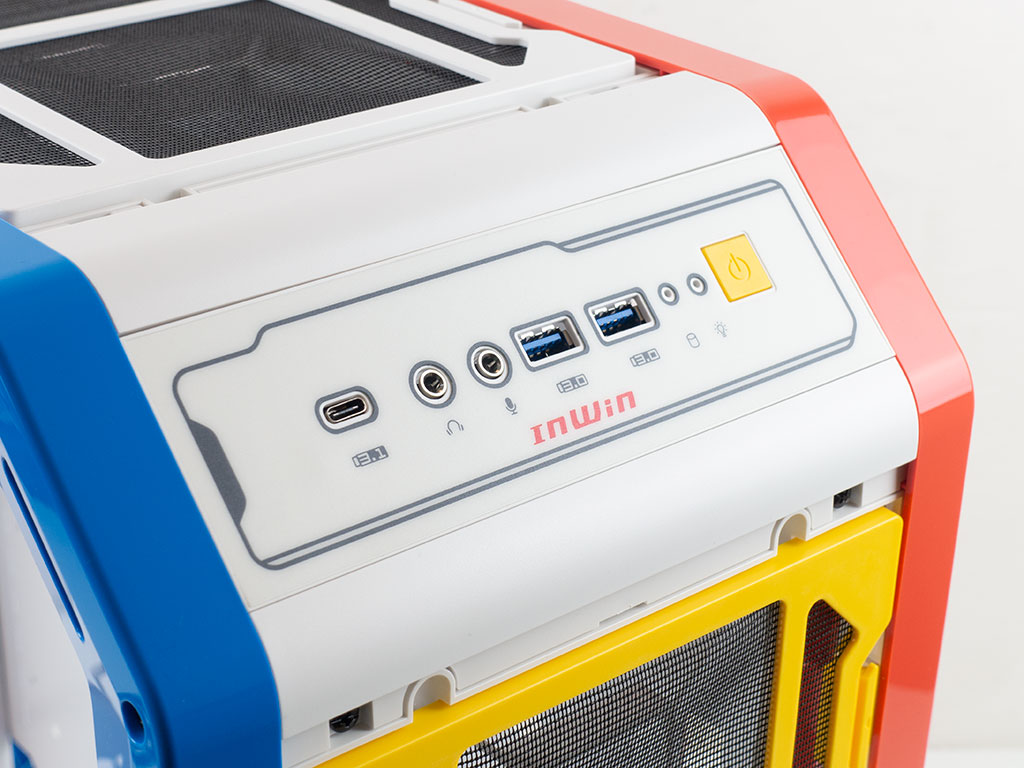
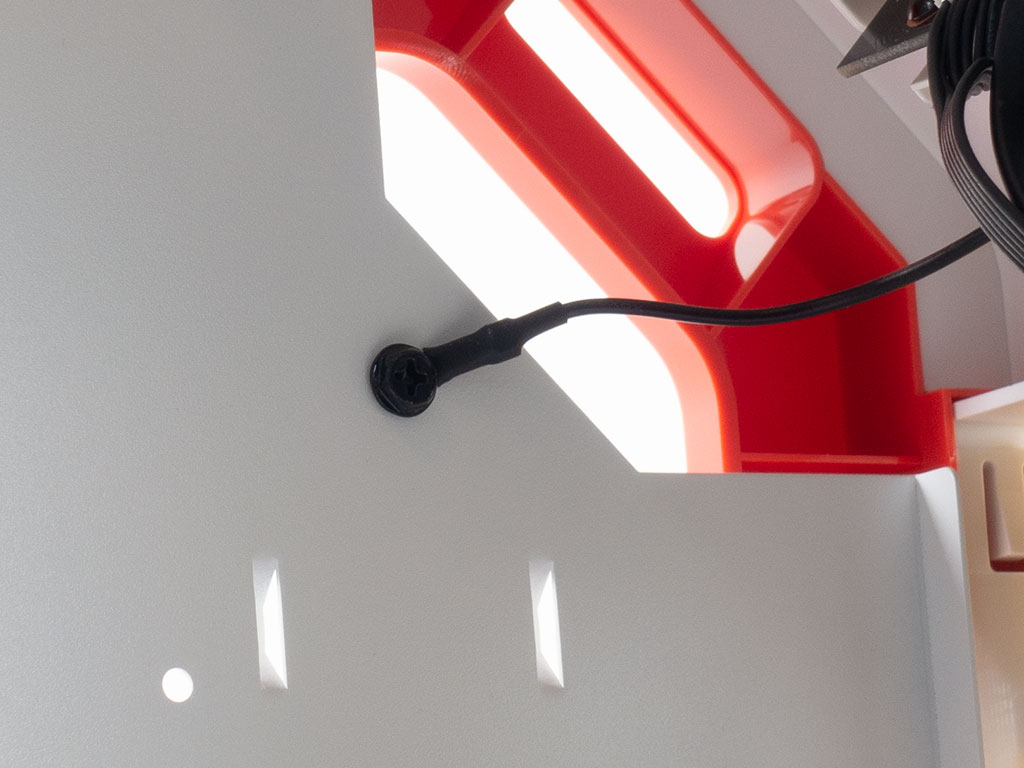
The I/O panel for the InWin Airforce simply clips into the opening in the top of the case, but you have to make sure to connect the grounding wire to the metal housing as the plastic around the I/O component is essentially insulating it otherwise.
While not mentioned in the assembly manual explicitly, to really complete the case, the rear expansion slot brackets need to be installed. These parts are black and add a layer of contrast as well as a sixth color to the mix of the "Justice White" case variant. That said, it doesn't look bad at all.
Jul 5th, 2025 18:32 CDT
change timezone
Latest GPU Drivers
New Forum Posts
- [GPU-Z Test Build] New Kernel Driver, Everyone: Please Test (69)
- How do you view TPU & the internet in general? (With poll) (80)
- EVGA XC GTX 1660 Ti 8GB ROM (11)
- Rx580 subsystem id (0)
- What are you playing? (23893)
- Do you use Linux? (677)
- Optane performance on AMD vs Intel (58)
- Frametime spikes and stuttering after switching to AMD CPU? (521)
- Stalker 2 is looking great. (187)
- b550m aorus elite not posting with new ram (7)
Popular Reviews
- NVIDIA GeForce RTX 5050 8 GB Review
- Fractal Design Scape Review - Debut Done Right
- Crucial T710 2 TB Review - Record-Breaking Gen 5
- ASUS ROG Crosshair X870E Extreme Review
- PowerColor ALPHYN AM10 Review
- Sapphire Radeon RX 9060 XT Pulse OC 16 GB Review - An Excellent Choice
- Upcoming Hardware Launches 2025 (Updated May 2025)
- AMD Ryzen 7 9800X3D Review - The Best Gaming Processor
- Sapphire Radeon RX 9070 XT Nitro+ Review - Beating NVIDIA
- NVIDIA GeForce RTX 5060 8 GB Review
TPU on YouTube
Controversial News Posts
- Intel's Core Ultra 7 265K and 265KF CPUs Dip Below $250 (288)
- NVIDIA Grabs Market Share, AMD Loses Ground, and Intel Disappears in Latest dGPU Update (212)
- Some Intel Nova Lake CPUs Rumored to Challenge AMD's 3D V-Cache in Desktop Gaming (140)
- NVIDIA GeForce RTX 5080 SUPER Could Feature 24 GB Memory, Increased Power Limits (115)
- Microsoft Partners with AMD for Next-gen Xbox Hardware (105)
- NVIDIA Launches GeForce RTX 5050 for Desktops and Laptops, Starts at $249 (105)
- AMD Radeon RX 9070 XT Gains 9% Performance at 1440p with Latest Driver, Beats RTX 5070 Ti (102)
- Intel "Nova Lake‑S" Series: Seven SKUs, Up to 52 Cores and 150 W TDP (100)