 7
7
Kinesis Advantage360 Split Ergonomic Keyboard Review
Software »Closer Examination
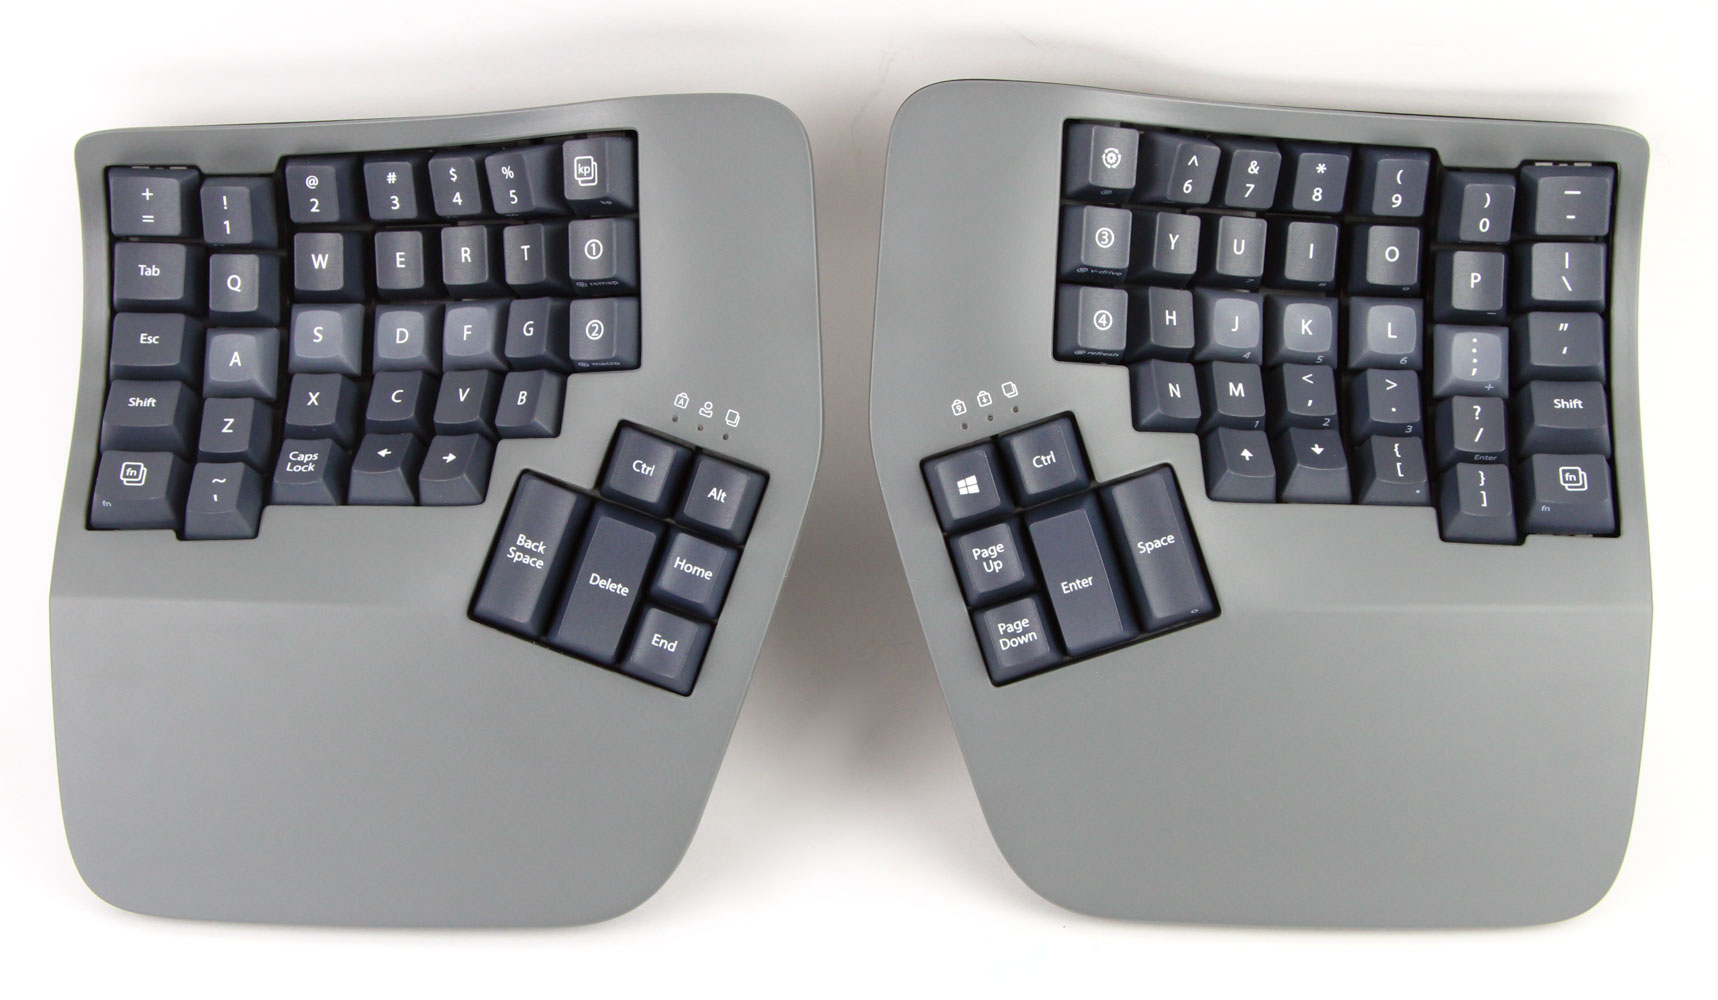

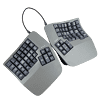
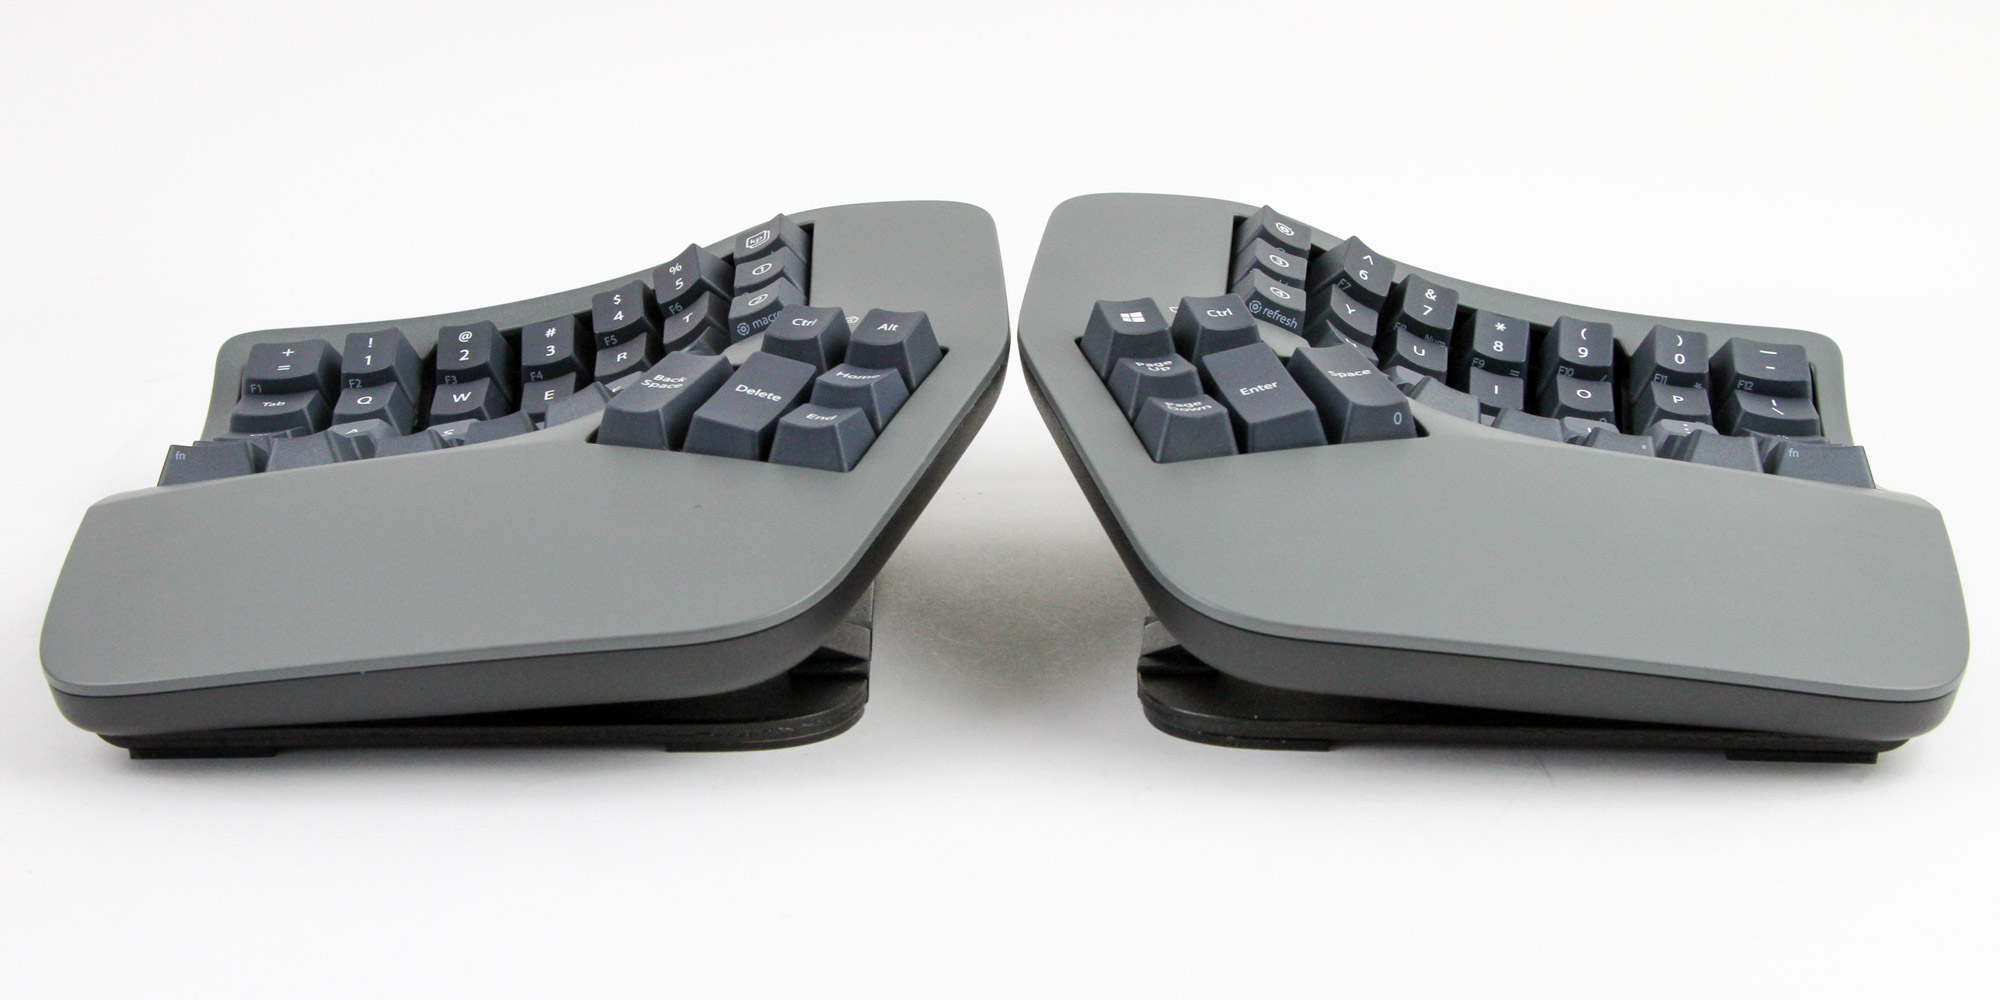
We've covered a lot of split ergonomic keyboards before, but very few that are contoured too. In fact, this is the first thing that grabs the eye on the Kinesis Advantage360. The two sides use a unique curved PCB that results in the various keys being installed in concave "wells." This helps achieve a more natural use of all five fingers on each hand, especially when you consider the thumb clusters. The goal here is to reduce finger travel, especially for the shorter fingers, in reaching the keys further away from the center. Having them be placed in a curve thus reduces the shortest distance between individual keys while still allowing for them to have enough space to occupy standard 1u keycap spacing. The larger modifiers are also typical size, with some going shorter as with the space bar key. Notice also how the two sides have the keys arranged symmetrically to each other, including with the thumb clusters and indicator LEDs. The placement and actual keys assigned here will never be universally pleasing, which is why Kinesis is using easily swappable keycaps in addition to full key mapping support. The various columns are also straight, as opposed to staggered as with most keyboards, and are easily identifiable by touch once you have gotten used to typing on the keyboard. The various colors also help visually in the beginning, and I highly recommend going with these stock keycaps that have legends on them—as opposed to the blanks—for the first few weeks at least. There is a good amount of space at the bottom of each side for your palms to rest upon, and you can purchase optional magnetic palm pads if you so desire.
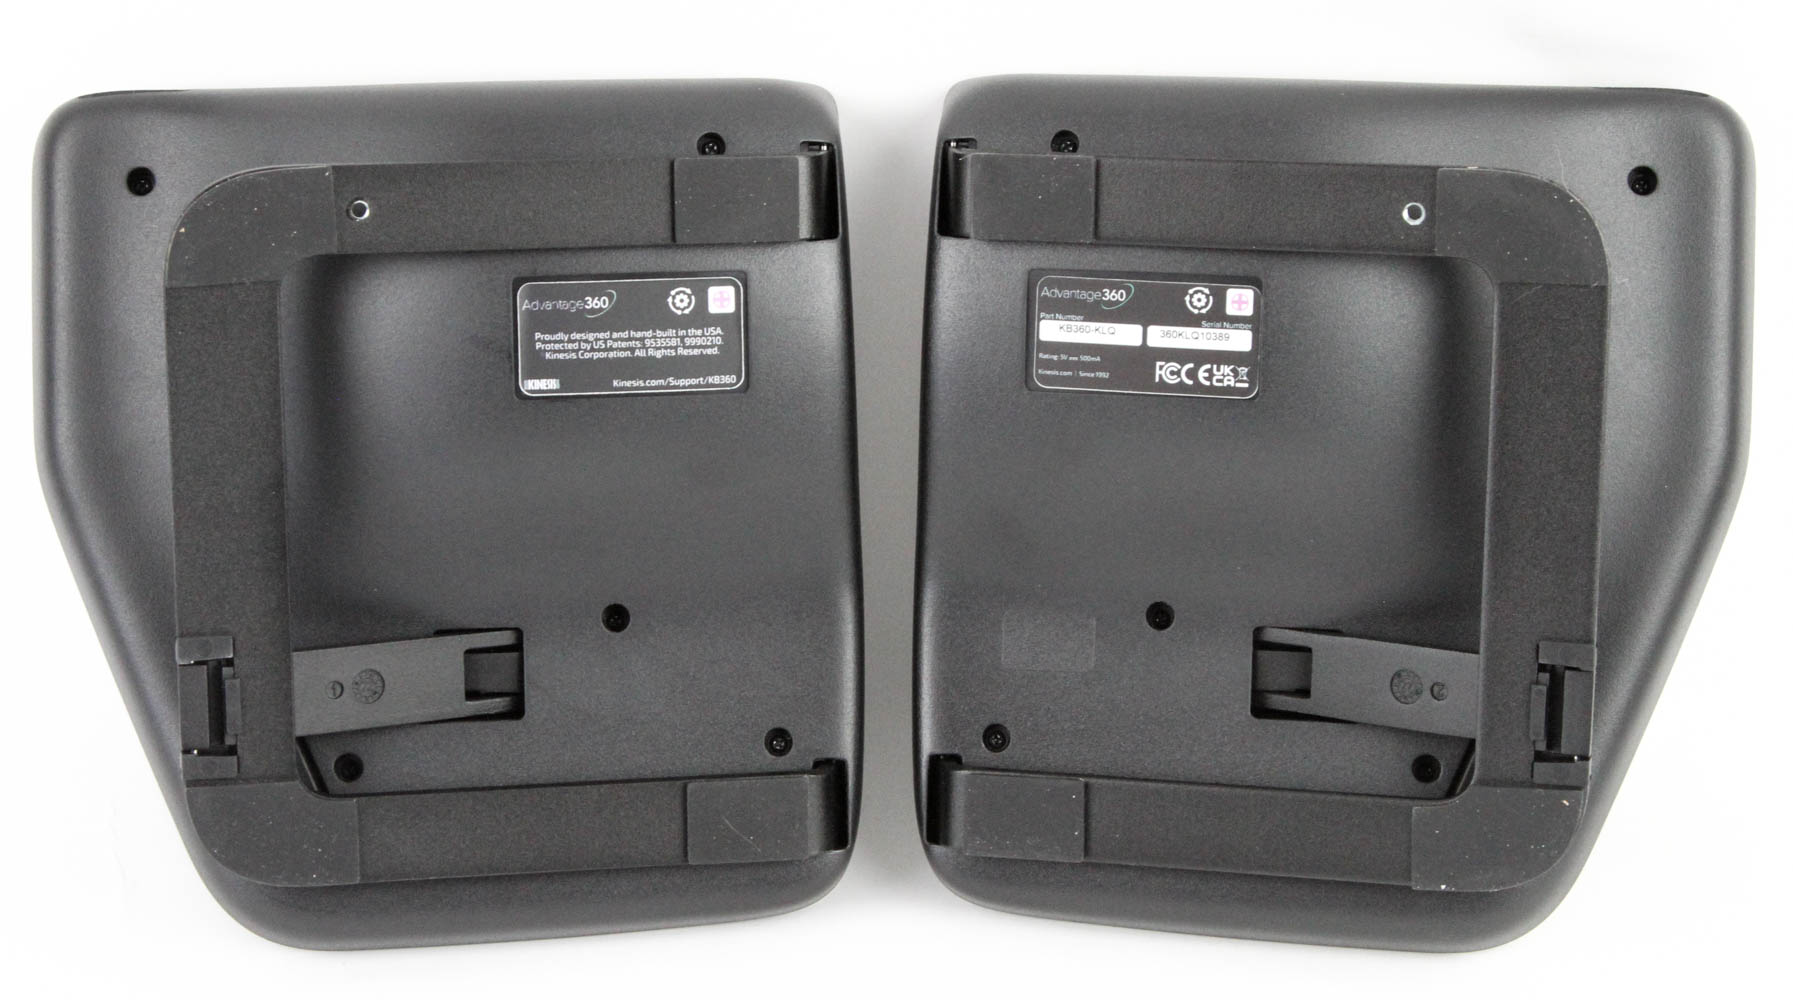
The Advantage360 is on the larger side thus, especially when the two halves are separated, and yet it's relatively light thanks to the use of ABS plastic construction. The top is in that gunmetal gray color in contrast to the black on the back, where we also see labels with certification stickers, marketing lingo, and the serial number of the exact unit here. We also have a metal stand on each side that has rubber pads to add friction against the resting surface, and there is also a threaded screw hole in each allowing you to mount the keyboard to something else you may have such as a sliding desk, perhaps.
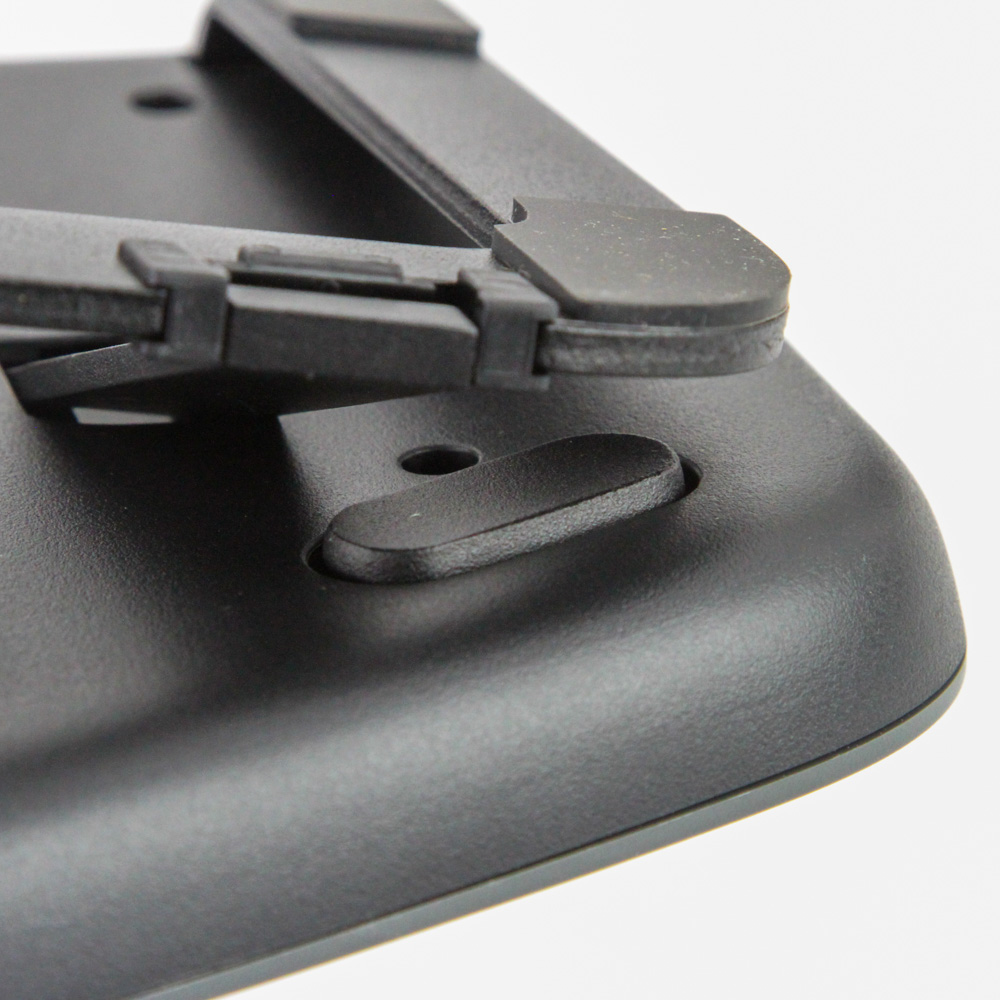
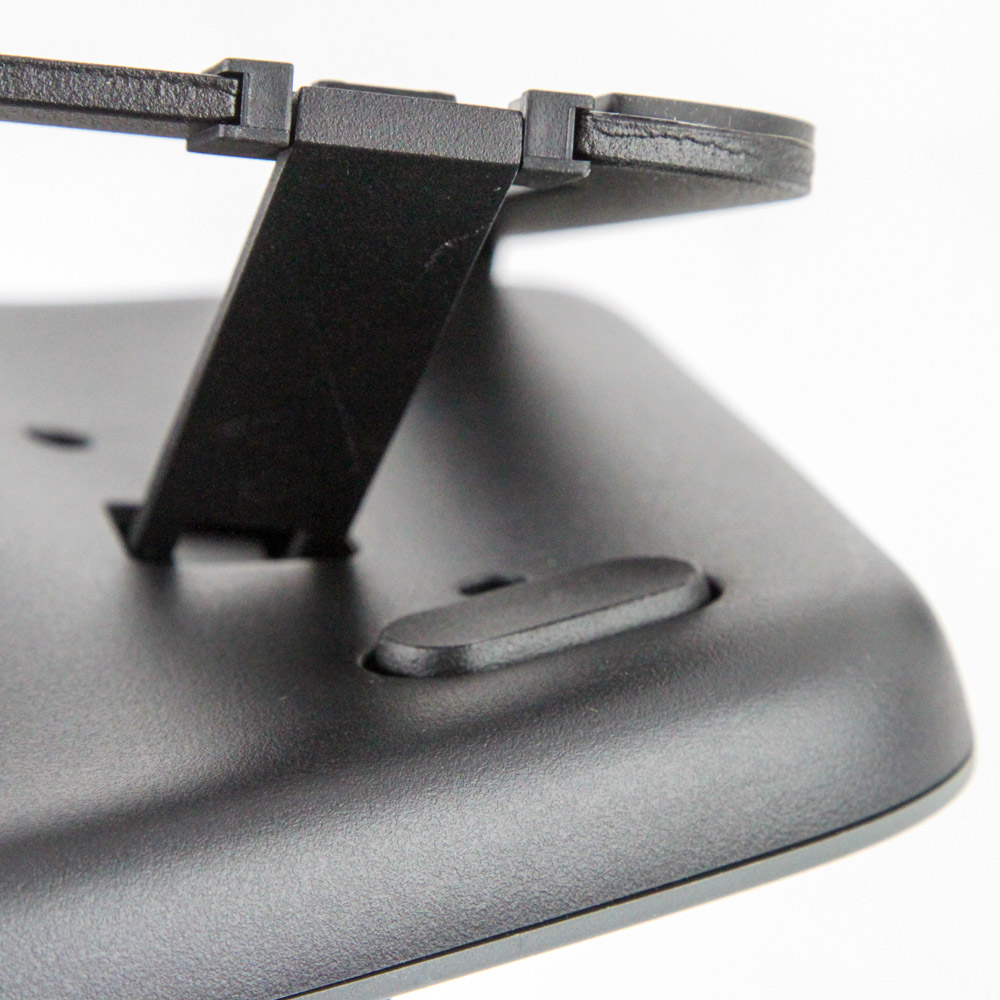
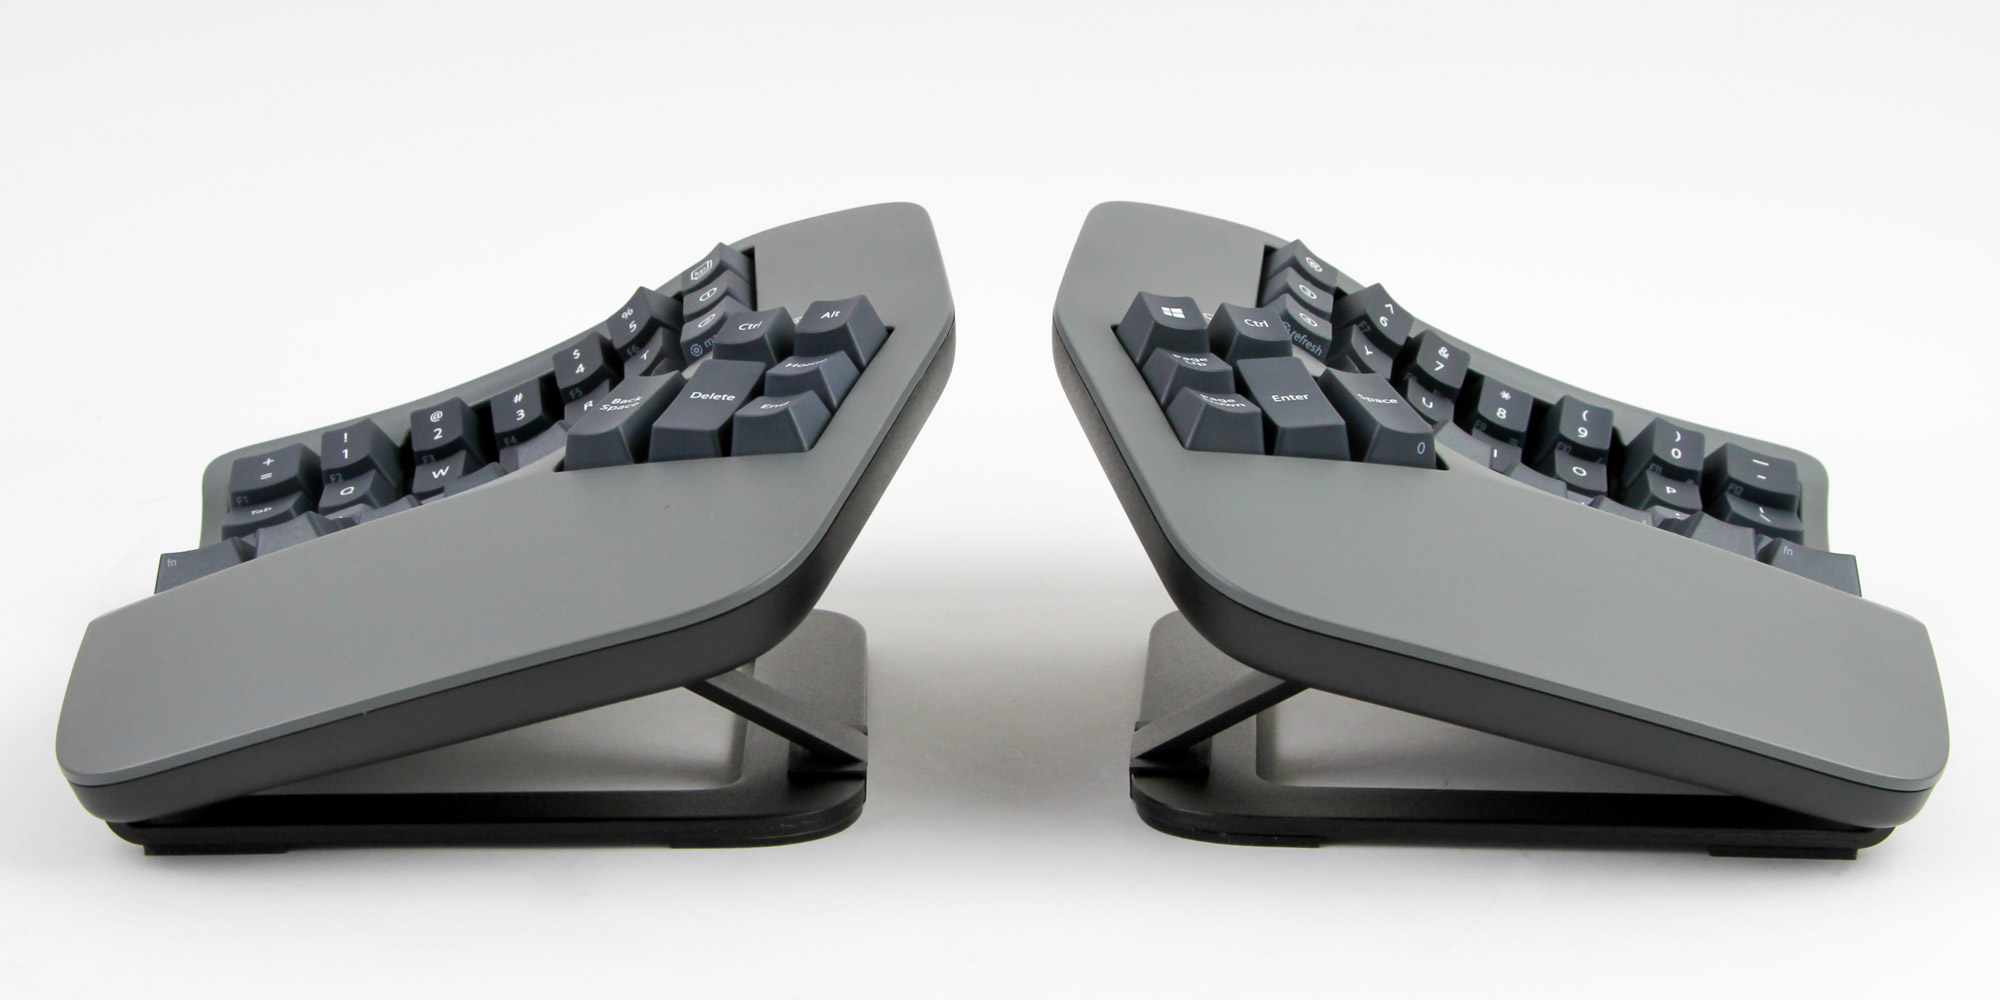
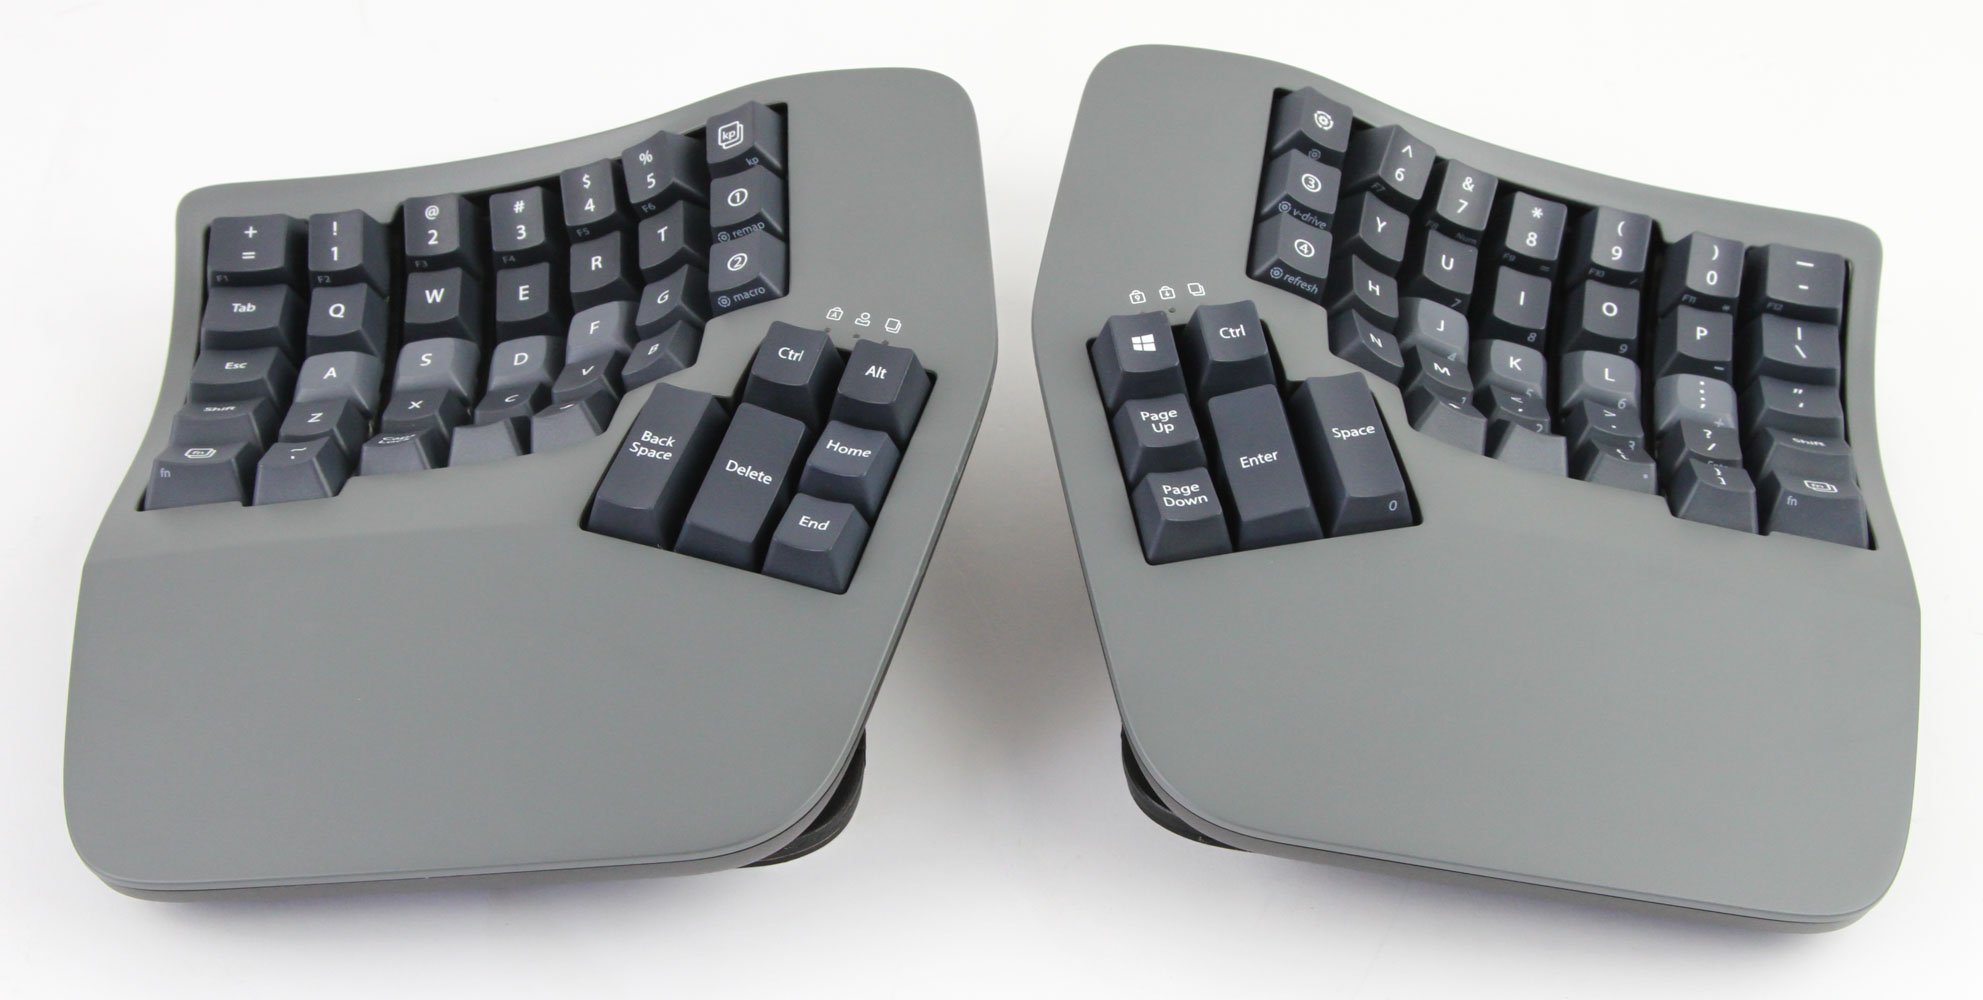
Underneath the stand is a large plastic button you press to allow the stand to move inward or outward on a lever arm. This allows you to control the extent of tenting of the keyboard, with the two extreme options seen above. I would have liked to see more such steps, but I will say this is the most user-friendly of such tenting options on ergonomic split keyboards I have ever used, and it takes practically no time to set either.
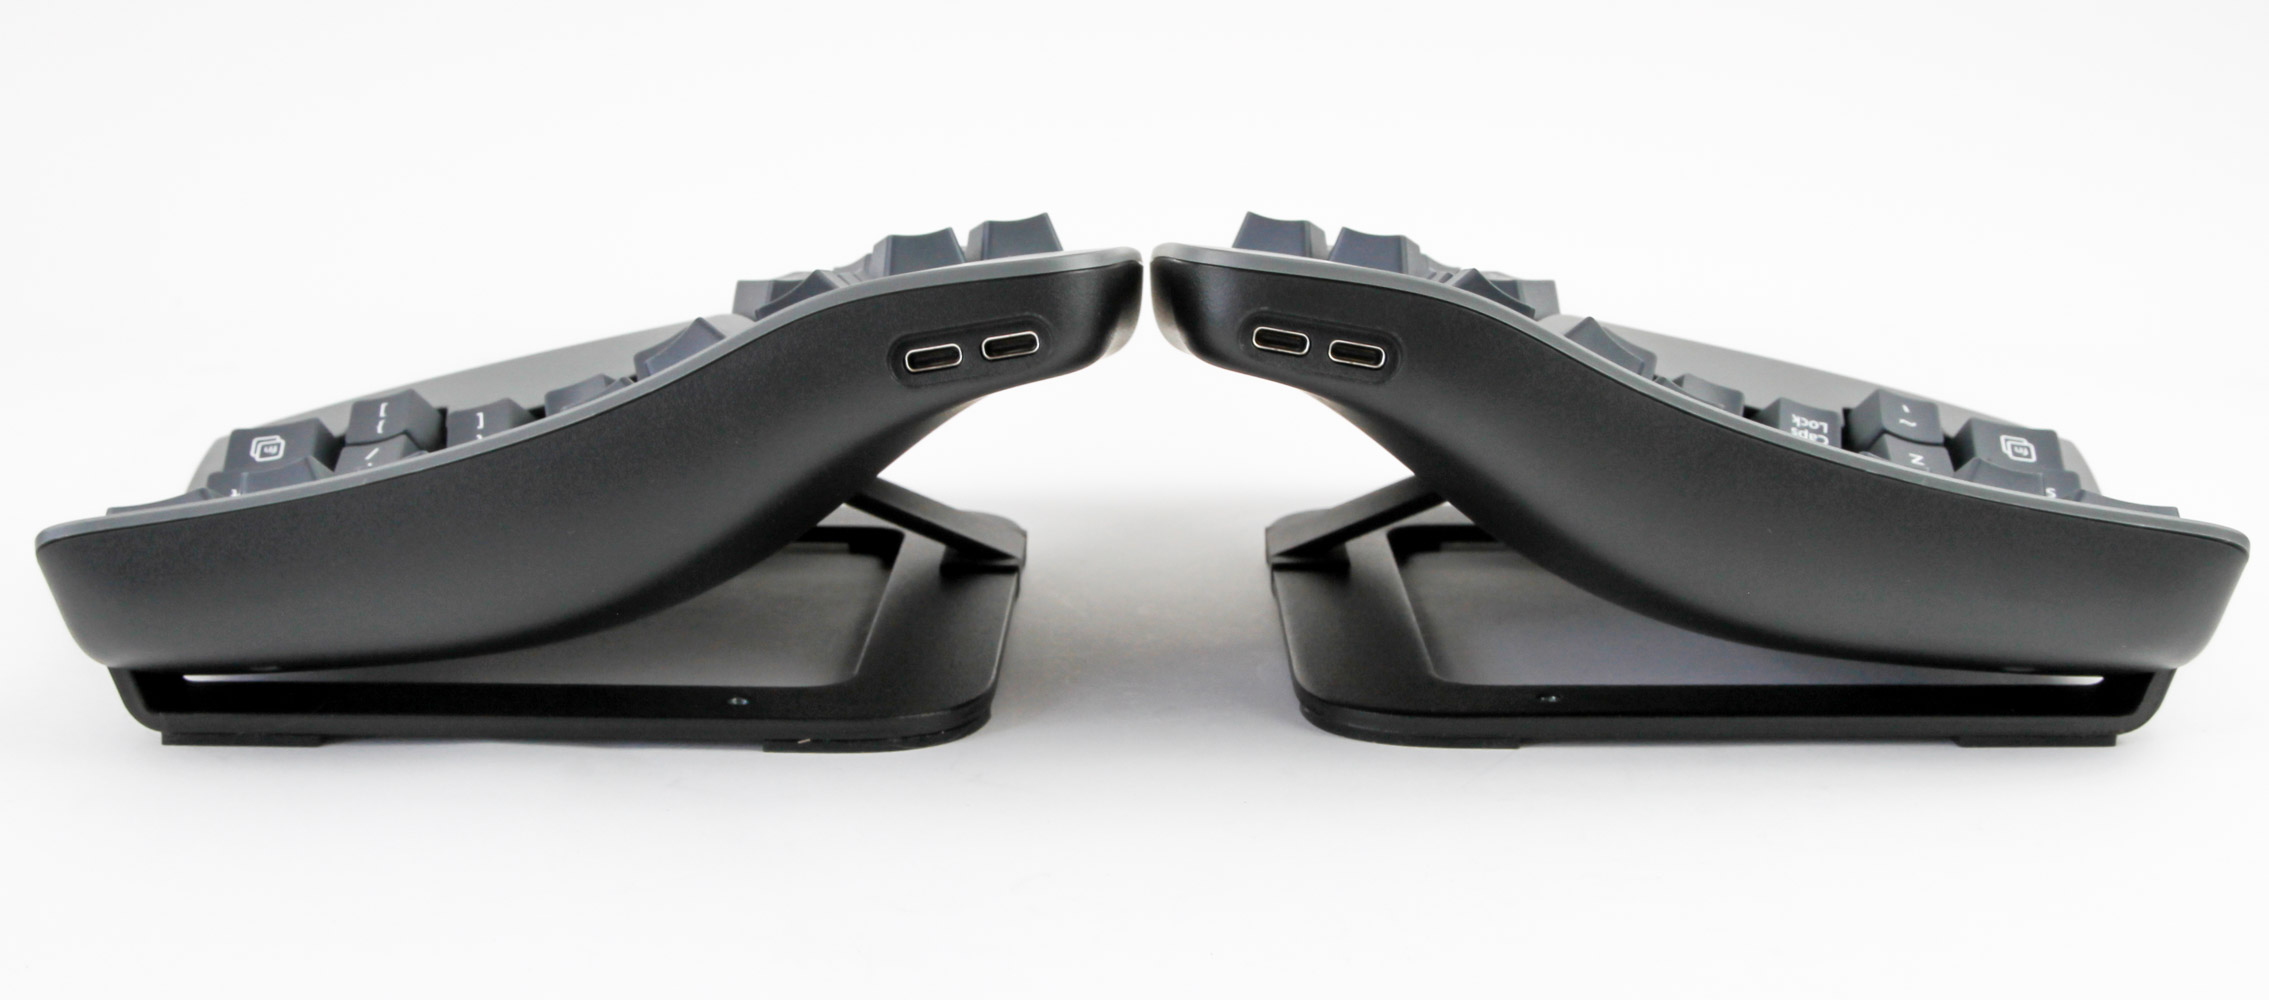
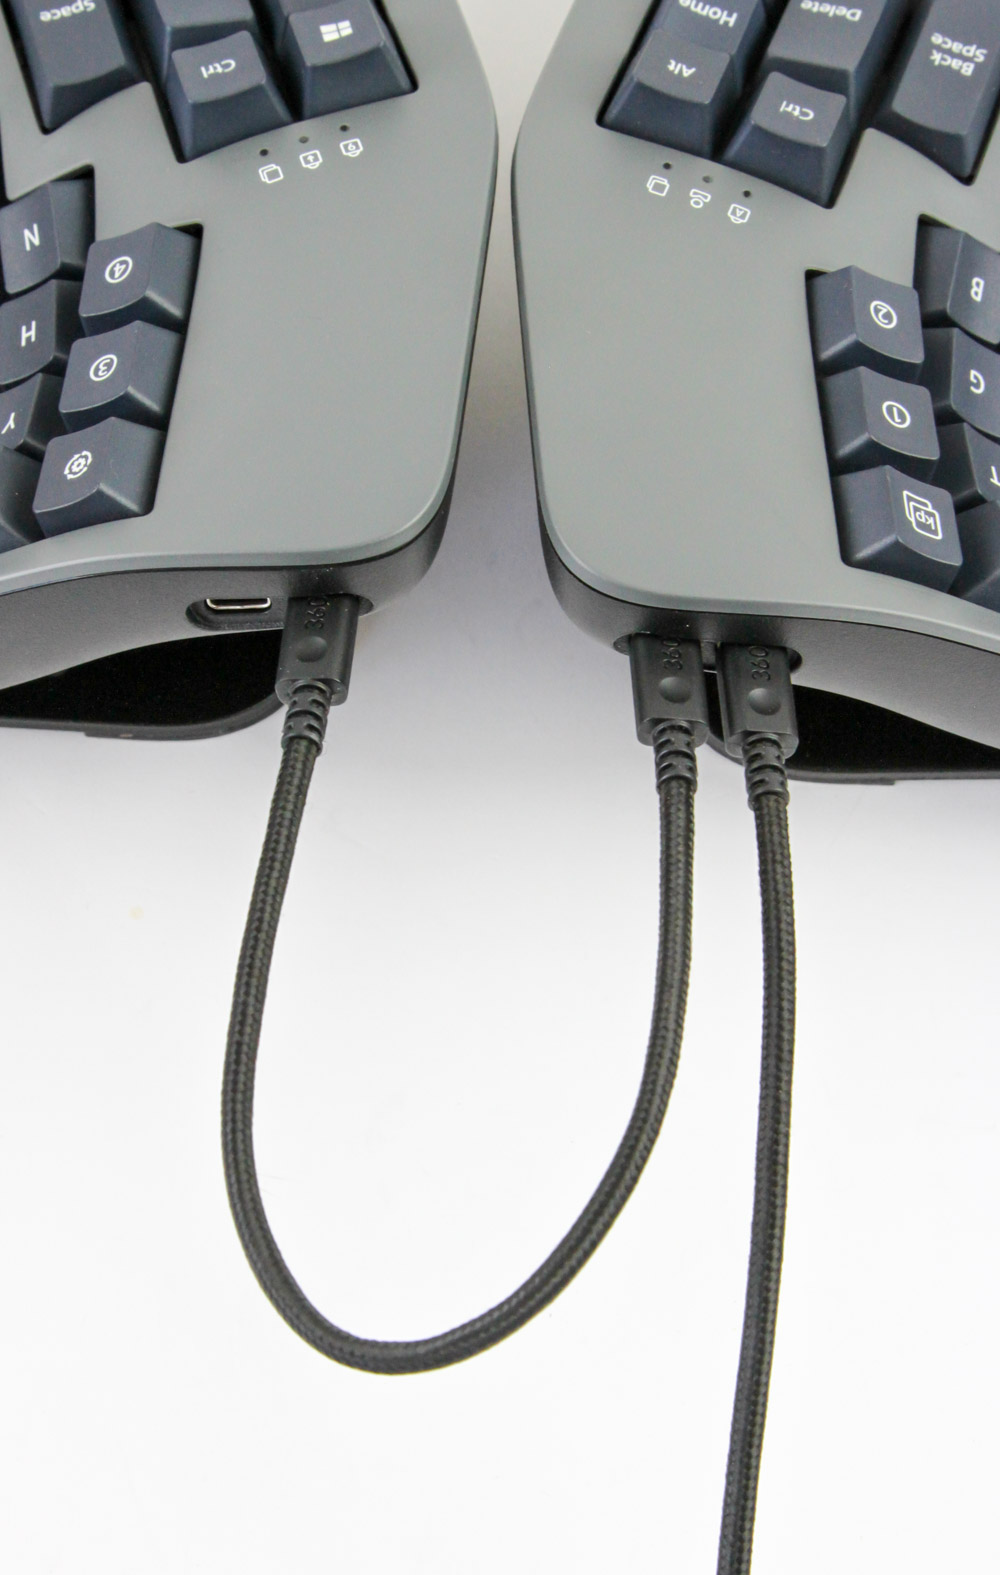
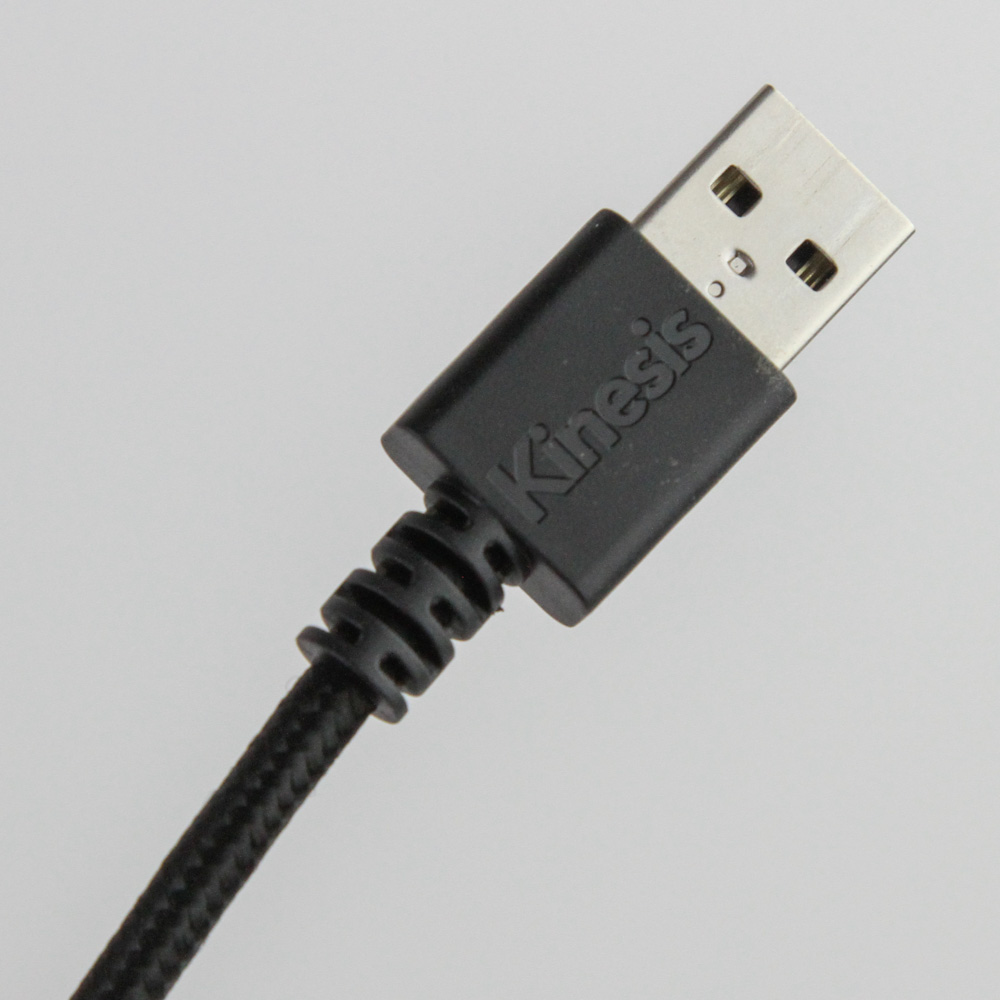
Connectivity on the Advantage360 is simple—as long as you have read the setup/quick start guide first. This version is wired-only, as previously discussed, and yet there are four Type-C ports pointing outwards on the back. The ones closest to each other with the sides alongside will be taken up by the shorter Type-C to Type-C link cable, with the remaining port on the right half now becoming the de-facto keyboard port that the longer 6' black Type-C to Type-A cable plugs into. This is the configuration you need to follow, the Advantage360 does not support plugging on only a single side as with a few other such split keyboards. The port on the left side is used for an optional smart foot pedal accessory, which admittedly is smarter than I initially thought before finding out the possibilities on offer with the pedal.
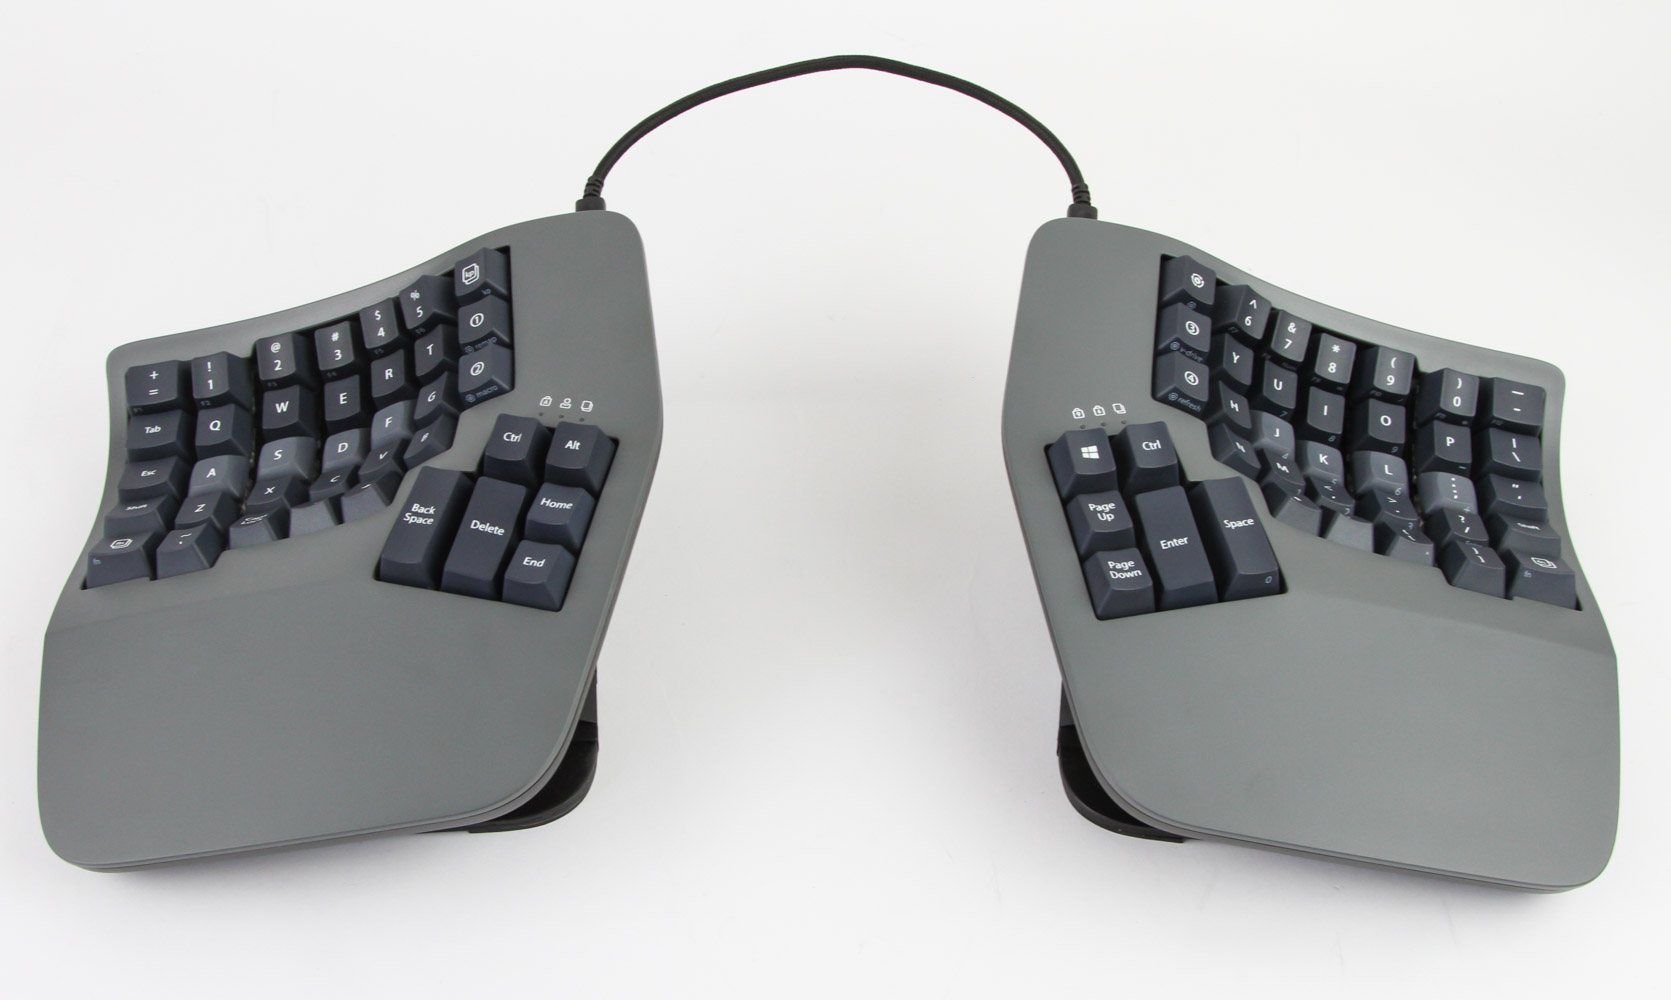
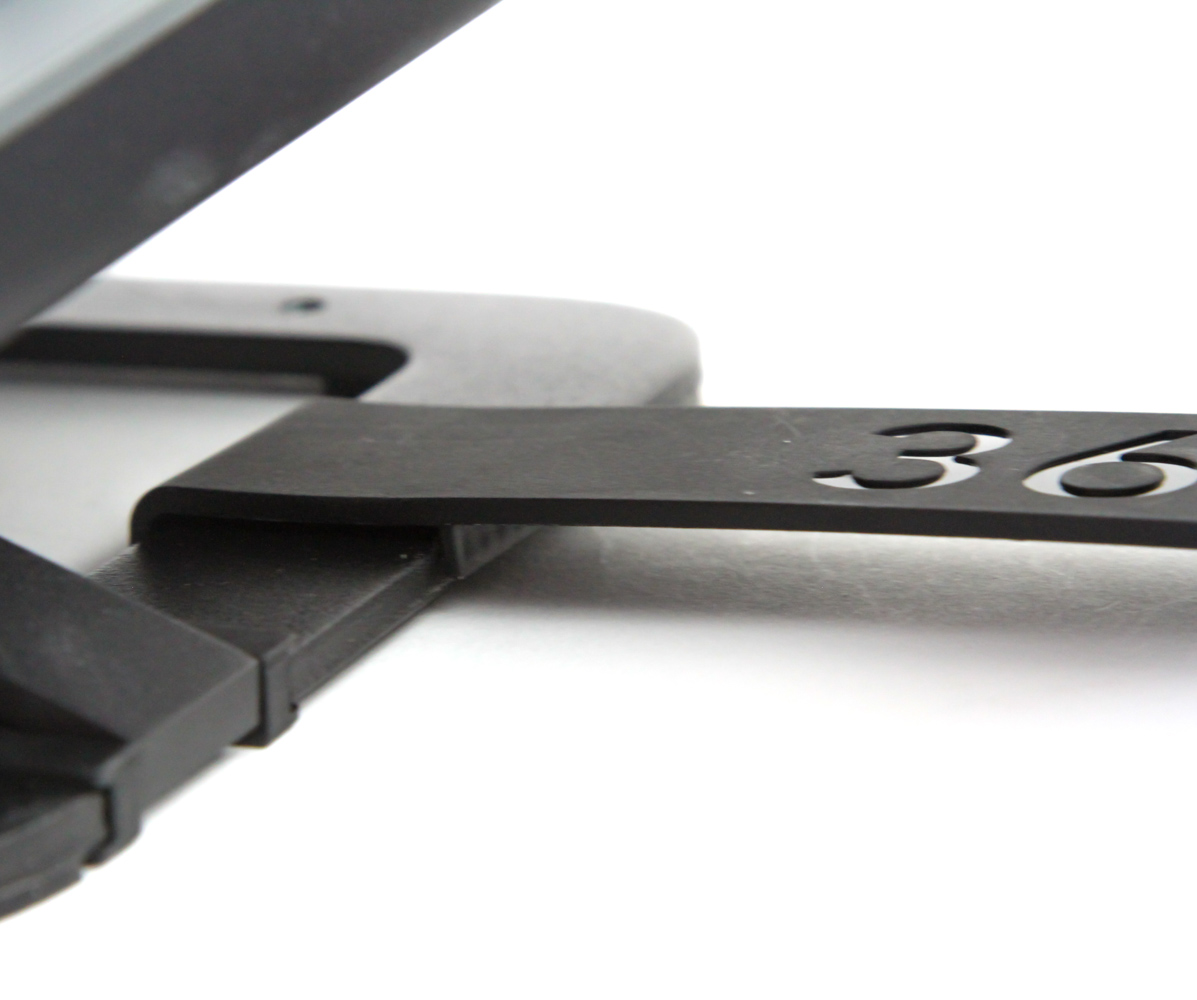
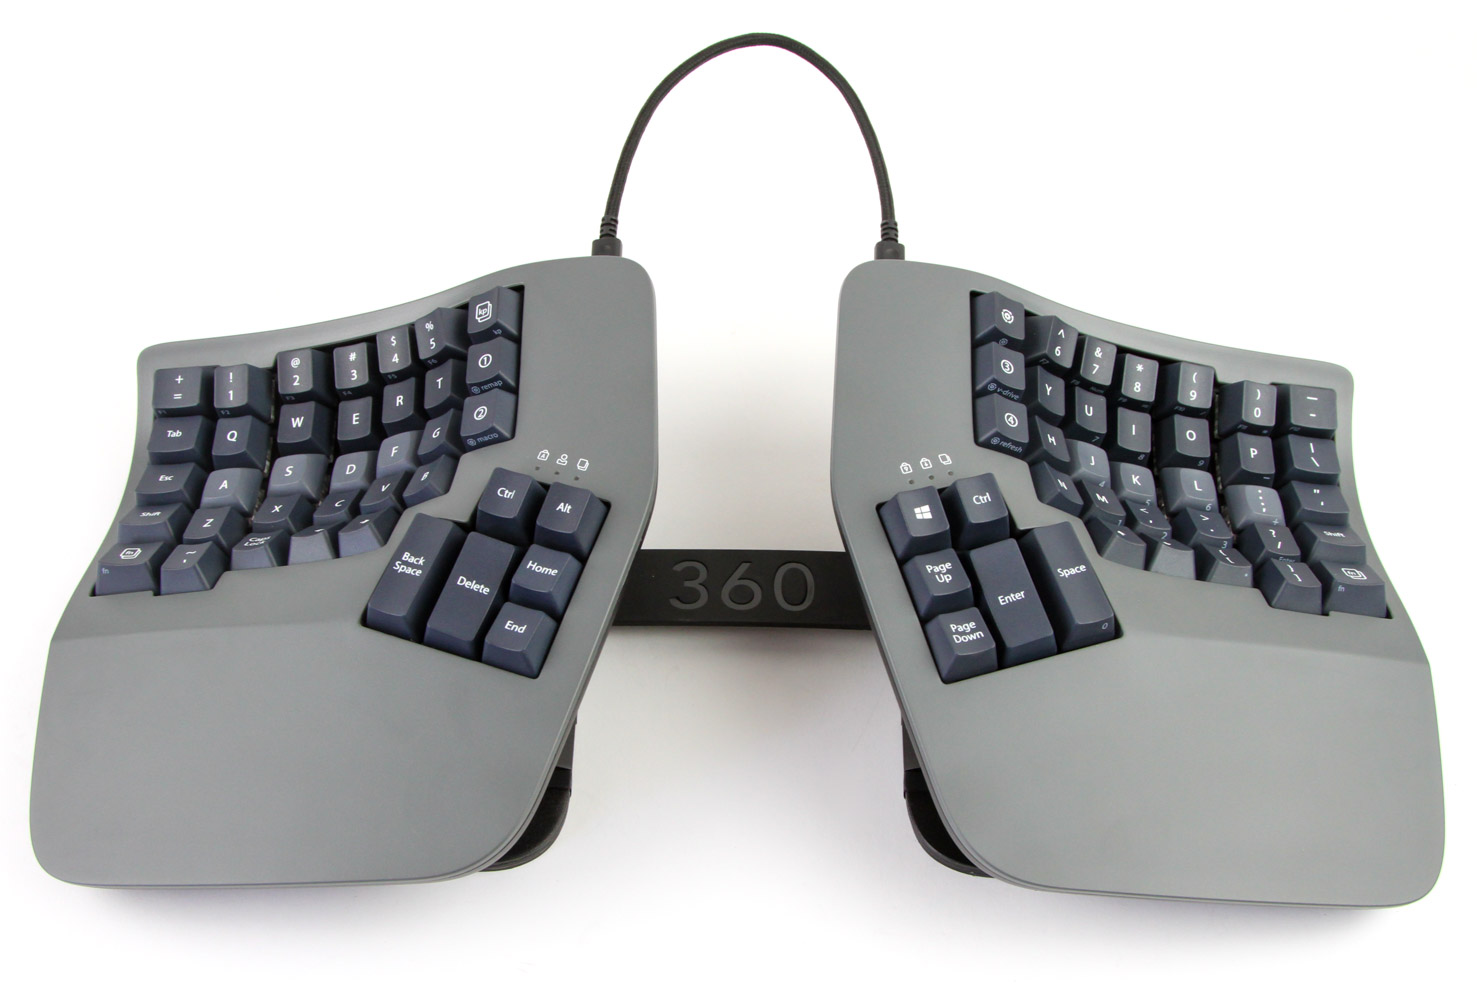
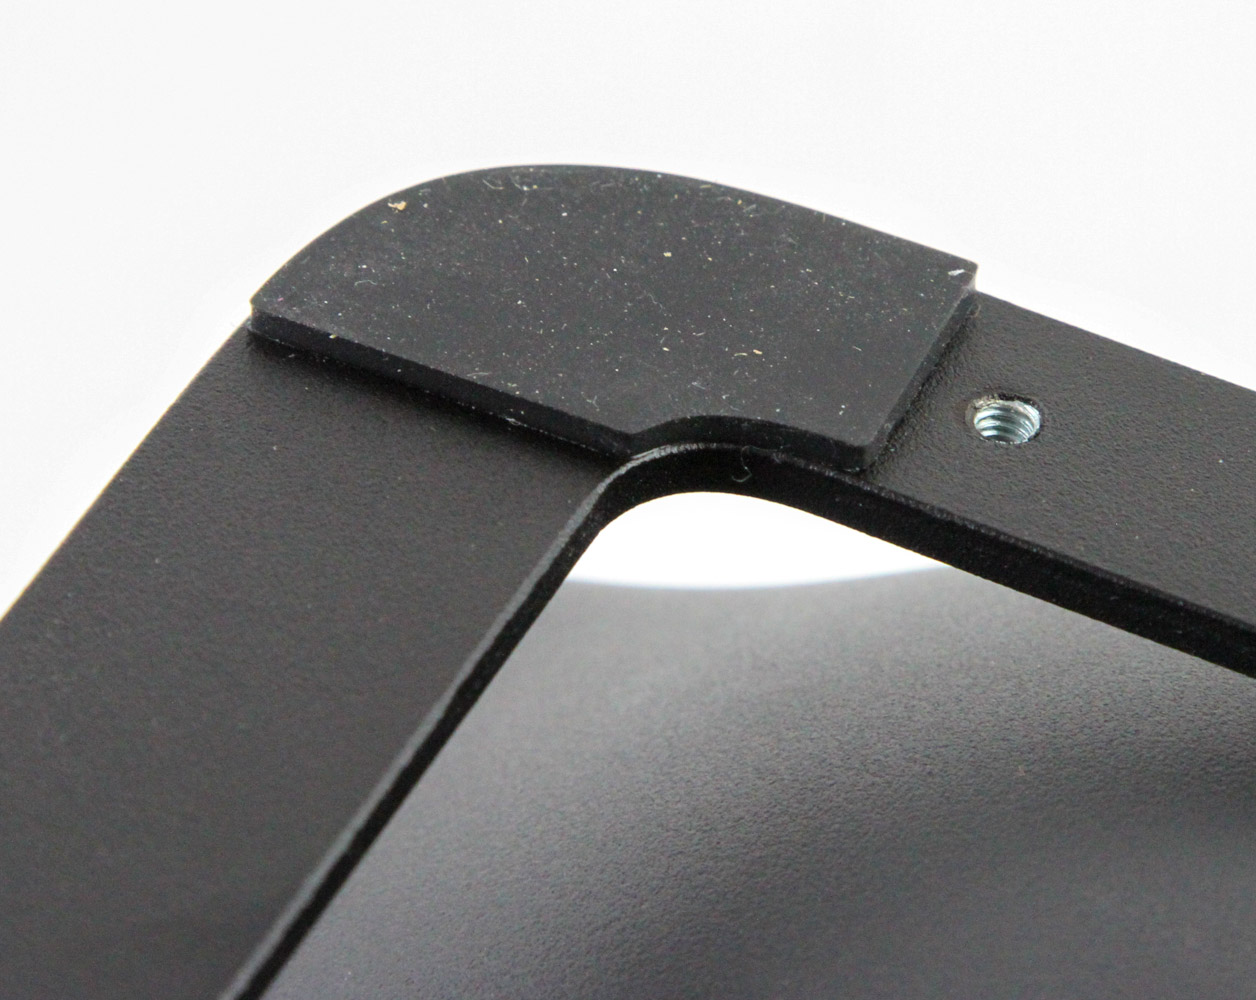
The link cable effectively determines how much you can split the two sides, which is plenty even for people with huge shoulders when coupled with the countered keys and the tenting feature. I suppose you can always use your own Type-C to Type-C cable of a different length if needed, too. The freedom to position the two sides separately is extremely useful for ergonomics and to achieve a more natural typing experience compared to a standard flat and fixed keyboard. However, the various changes here compared to a more common keyboard may be a lot to handle initially. As such, Kinesis also includes a bridge connector that you simply clip on to the stands to allow for a more fixed position of the keyboard. This makes the Advantage360 closer in use to the Advantage2 and many other non-split, ergonomic keyboards. Try it out and see what works best for you. I personally found the bridge connector somewhat limiting, especially when I occasionally wanted the right side to be positioned at a slight angle to allow for, say, a USB microphone on the desk between the two halves.
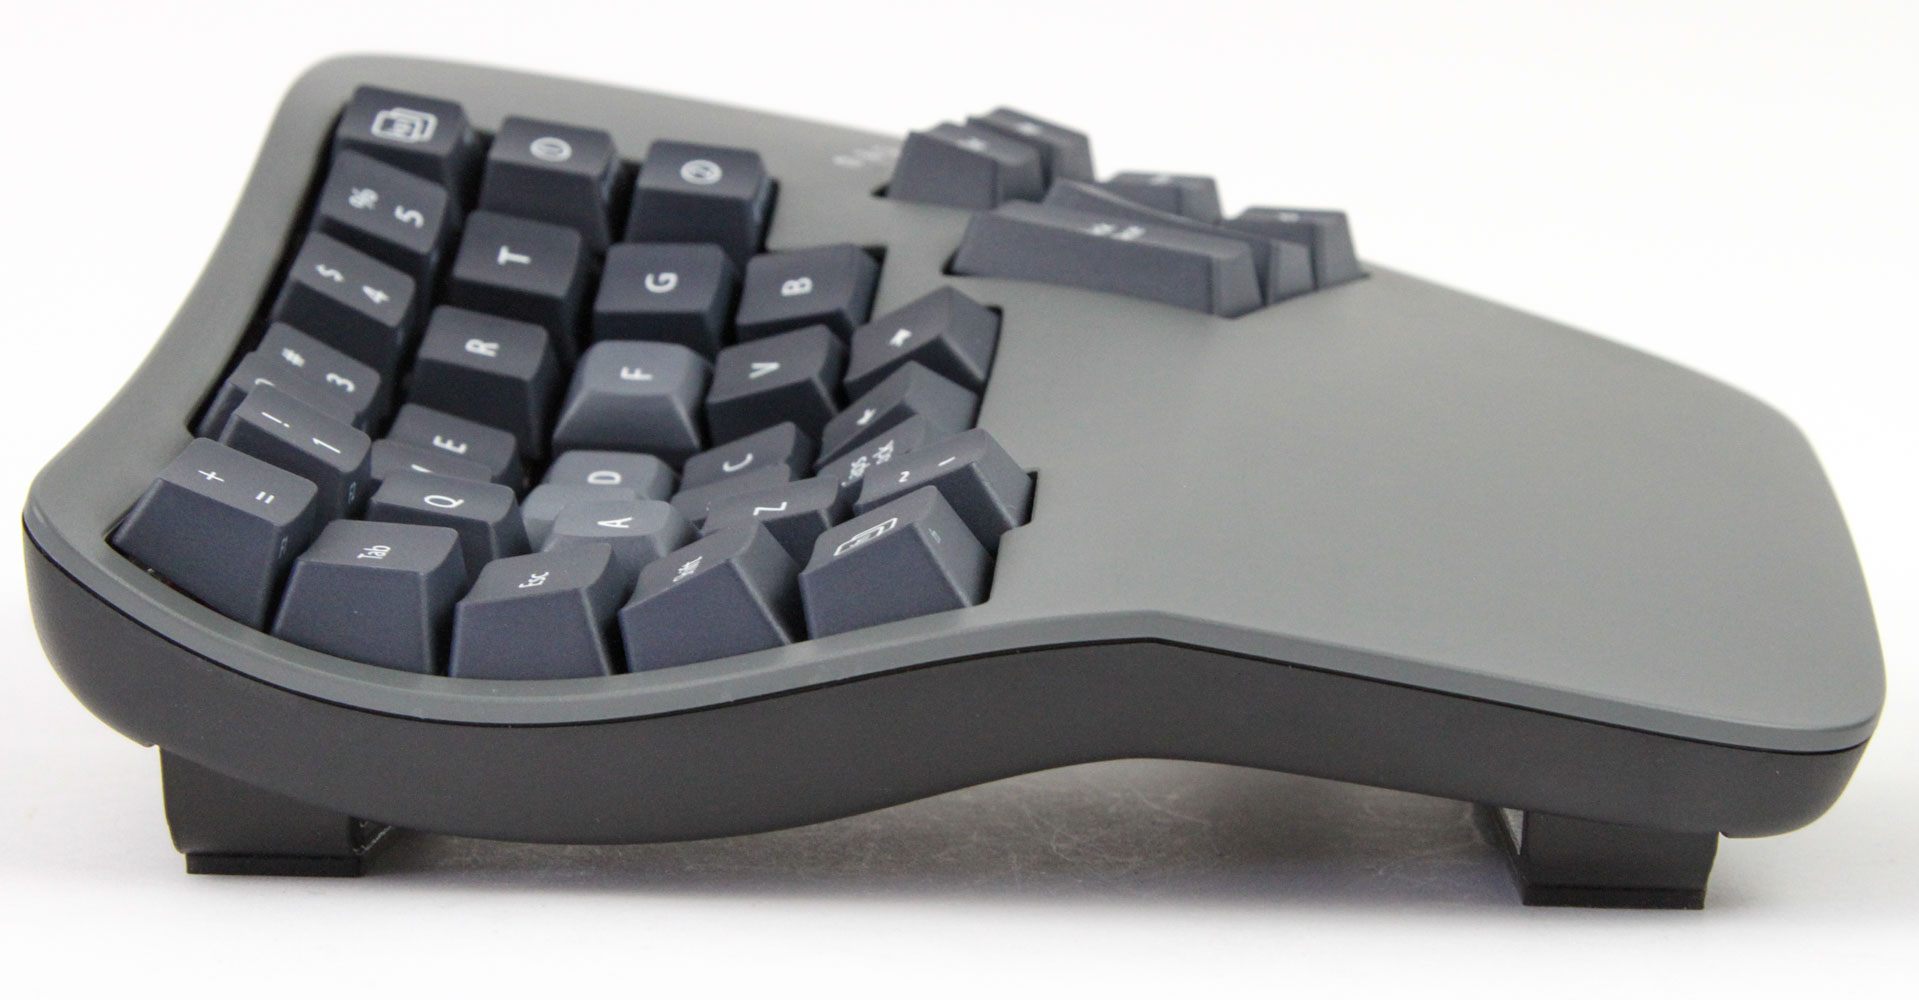
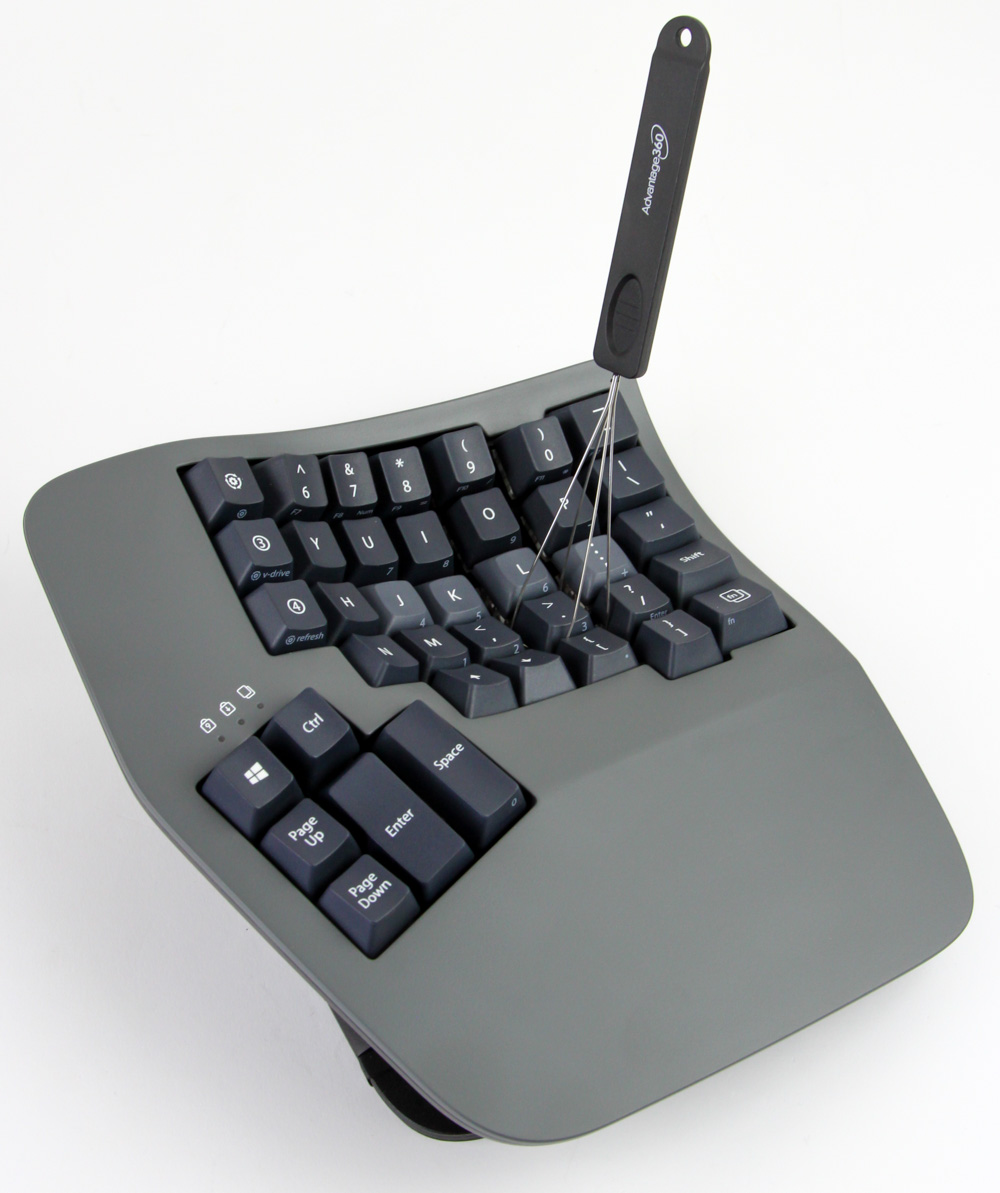
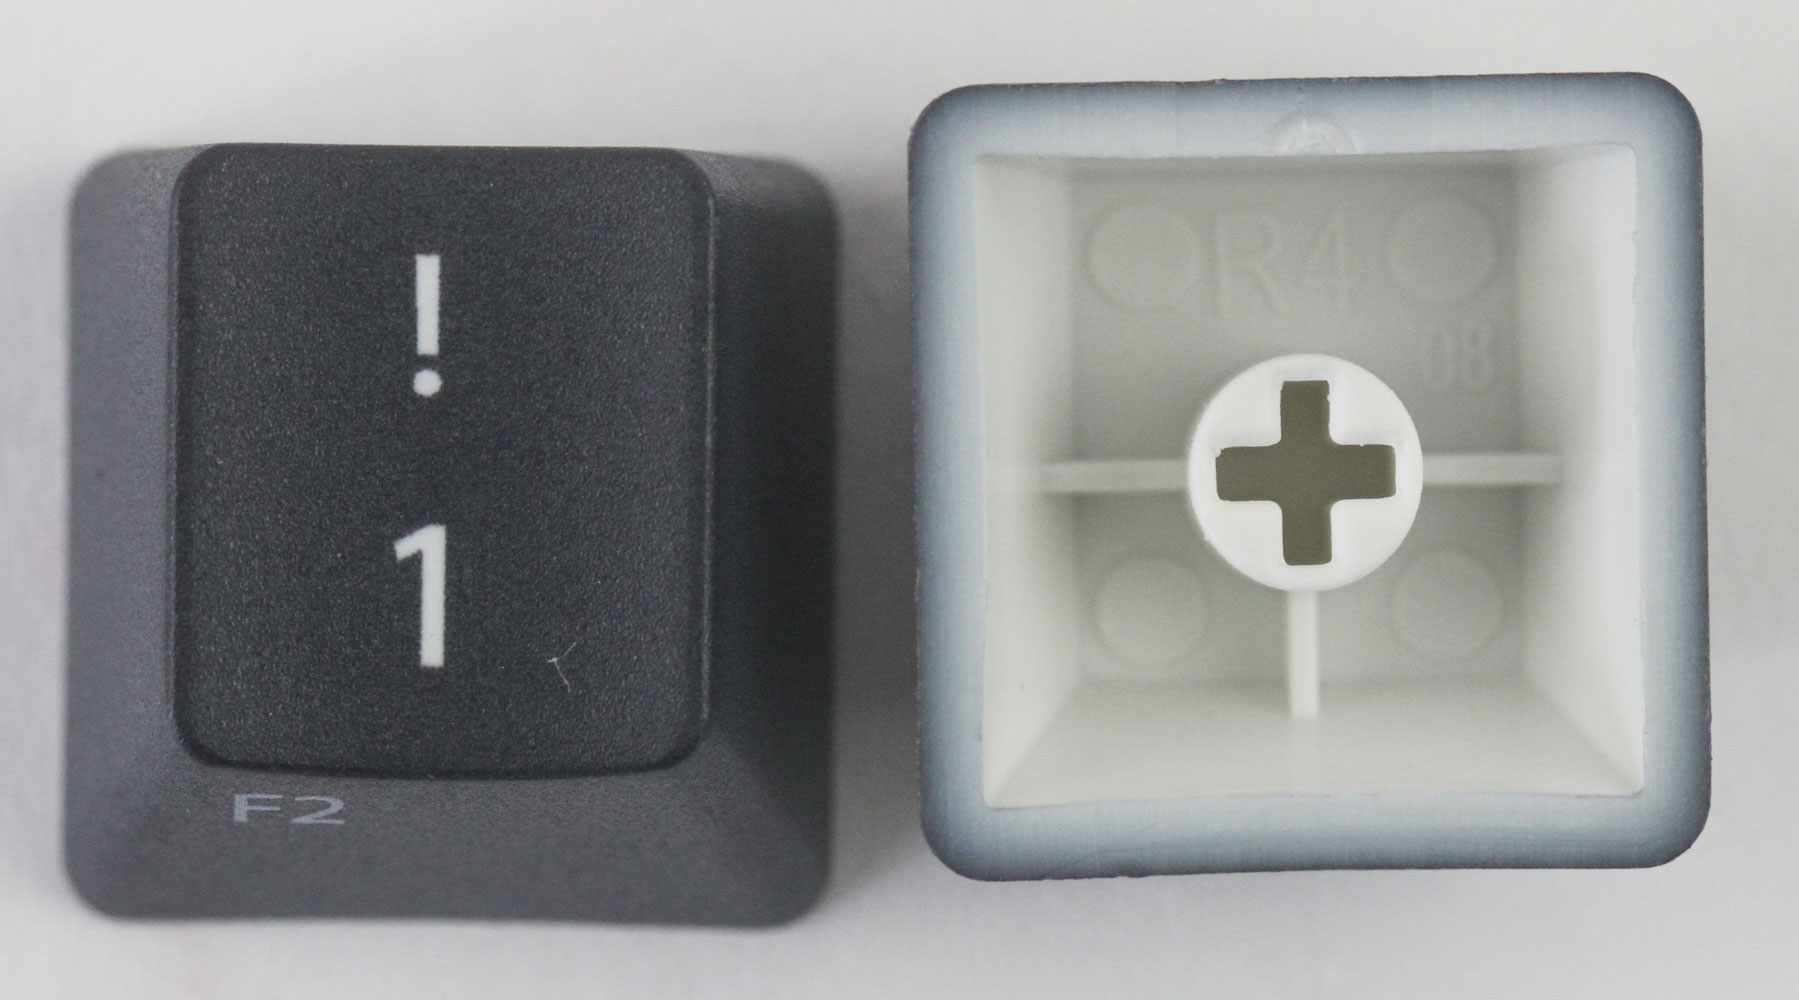
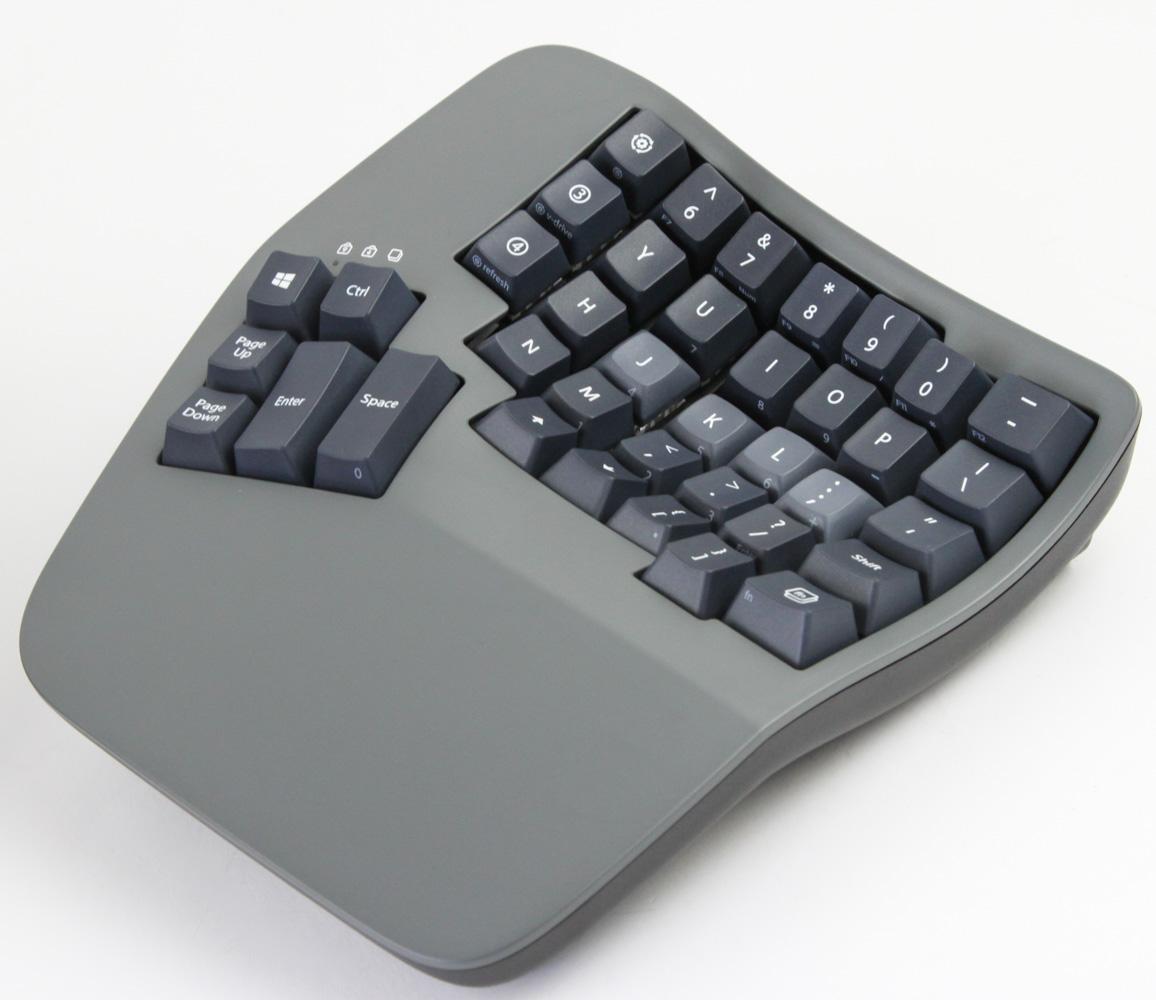
A look from the side shows the built-in curvature and elevation of the keyboard, which is quite unlike anything else. The integrated rest, be it the harder plastic or the optional soft palm rests, help tremendously here in positioning your fingers over the keys without fatigue. The provided keycap puller helps remove some of the keycaps for a closer examination, without scratching their sides as with the plastic ring-style cheaper keycap pullers some brands provide even in the price range this keyboard operates in. The keycaps appear to be using the OEM profile, although realistically it barely matters in this highly specialized use case. Kinesis also have optional keycap sets in a different colorway, as well as for Dvorak users, should you so prefer. The stock keycaps here follow the US ANSI (QWERTY) layout and are made of thick PBT plastic with dye-sublimed legends which are opaque—not that it really matters on this keyboard which does not have backlighting anyway.
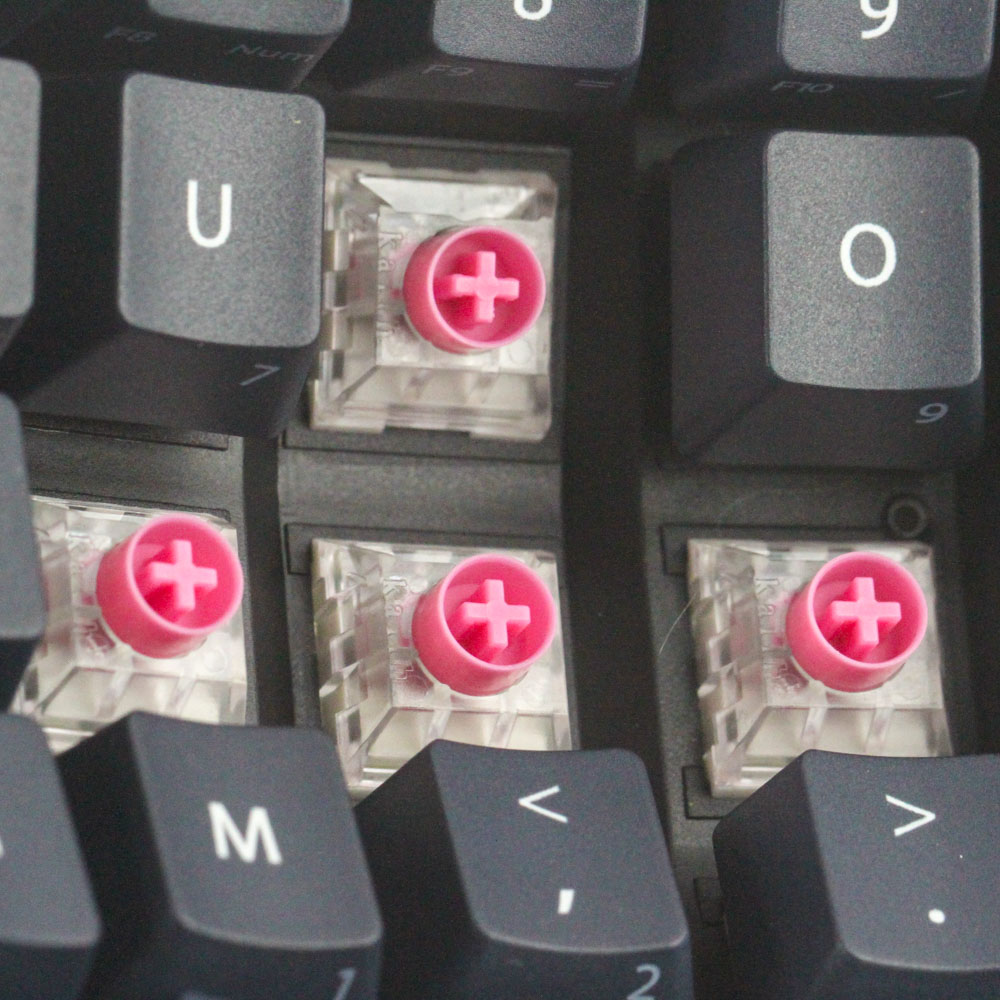
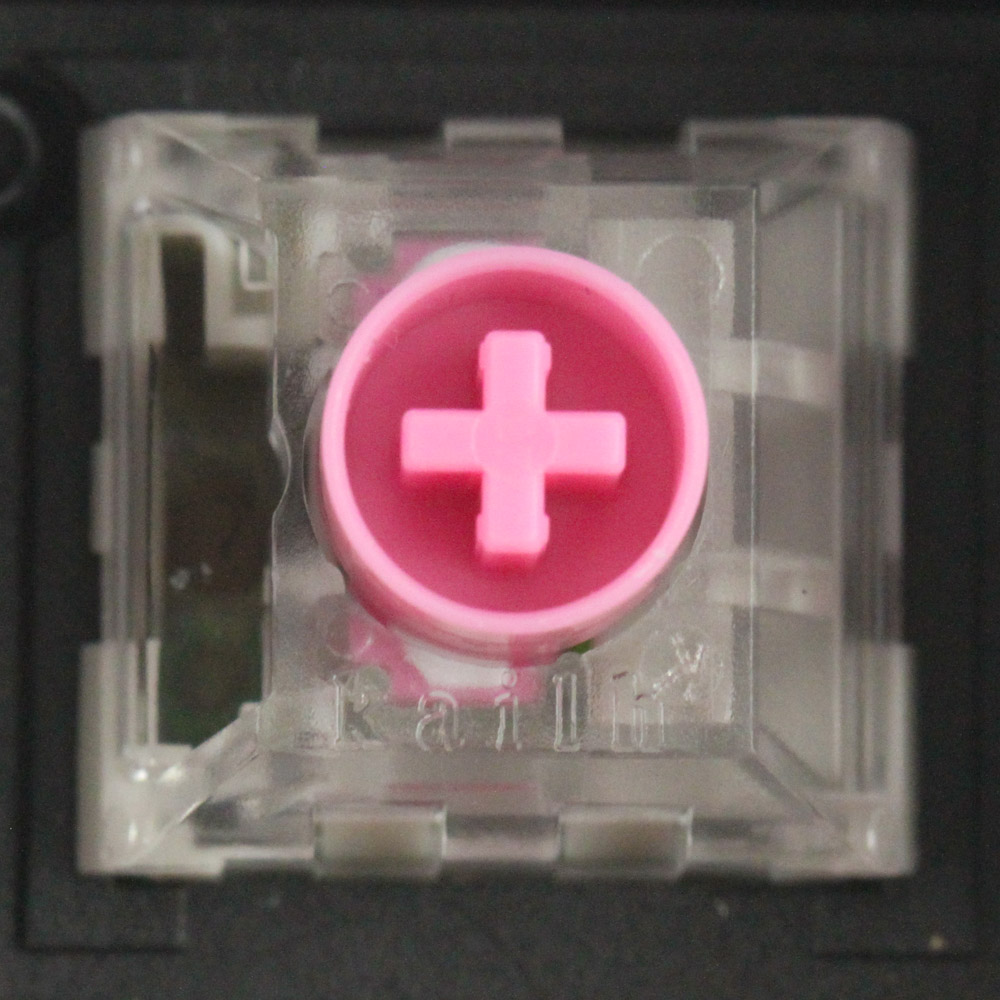
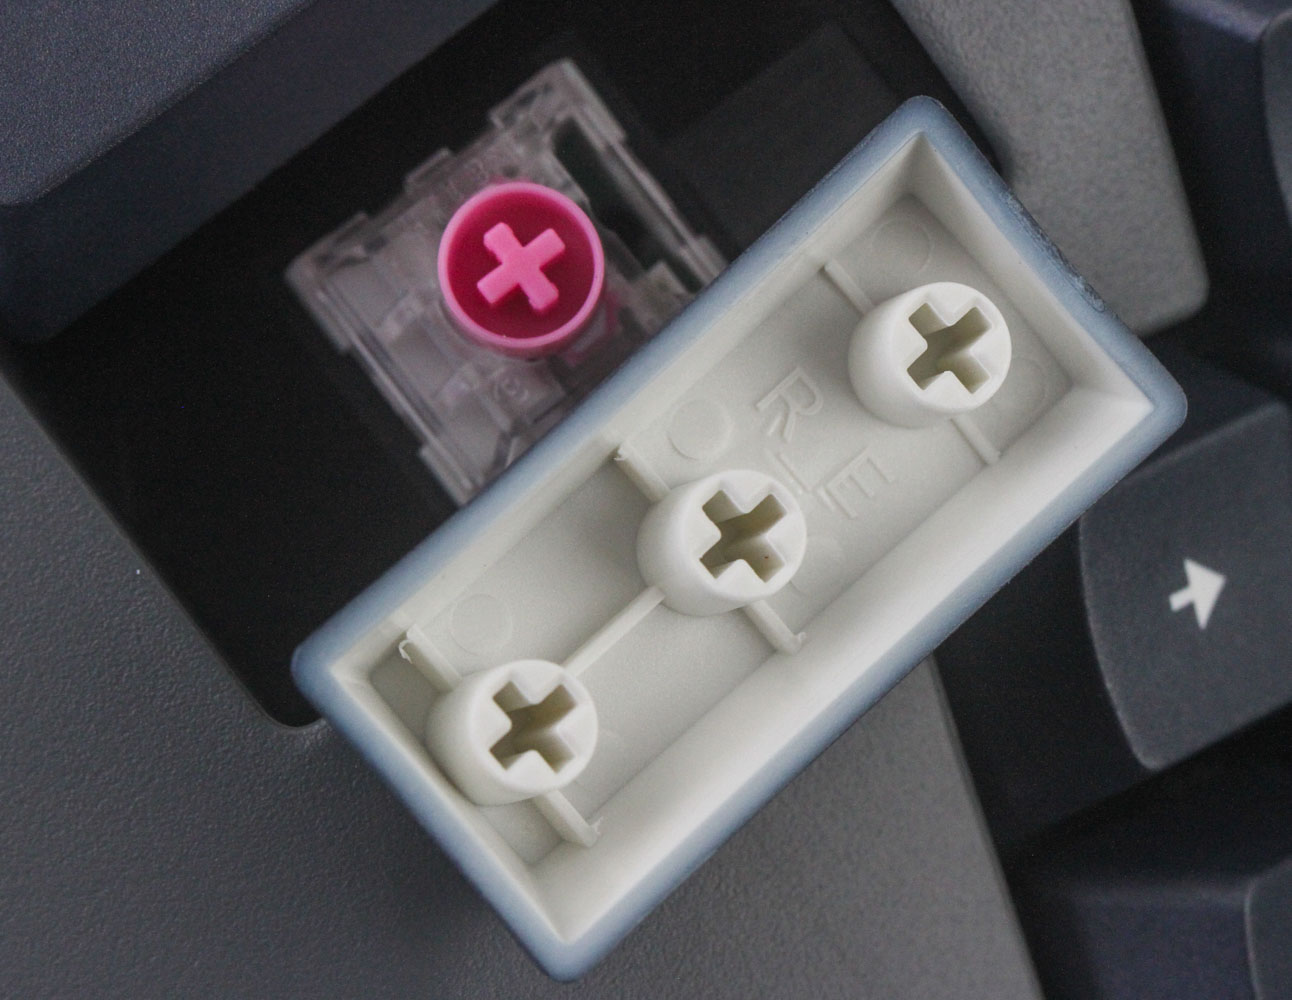
There are two switch options for the Advantage360—at least if you don't go for the slightly more expensive Signature version—in the form of the Gateron Brown (tactile) and Kailh BOX Silent Pink (linear). I have the latter here, as confirmed by the pink cross-point stem and the Kailh branding on the clear top housing. This being a BOX switch that is also a silent switch, we also have the expected round walls around the stem as opposed to the square one for a non-silent BOX switch. The switches are installed in a north-facing configuration and there are no keycaps that have stabilizers used on this keyboard. Note also that the highly curved PCB here results in hot-swap switch sockets being deemed less reliable than Kinesis is comfortable using, and thus the switches are soldered in place. Between this, and the keyboard being a demo unit, I do not have a disassembly section for you, and we move on to the software customization page now.
Jul 3rd, 2025 20:54 CDT
change timezone
Latest GPU Drivers
New Forum Posts
- Will you buy a RTX 5090? (609)
- What would you buy? (51)
- A Final Fantasy IX Reminiscence - My love letter and homage to one of the best stories ever told (90)
- GravityMark v1.89 GPU Benchmark (309)
- RTX 5070 discussion (5)
- STAR CITIZEN - RSI POLARIS Project (39)
- Undervolting my i7-9750H (4)
- They're b...a....c....k.... (10)
- TPU's Nostalgic Hardware Club (20471)
- Free Games Thread (4787)
Popular Reviews
- ASUS ROG Crosshair X870E Extreme Review
- Crucial T710 2 TB Review - Record-Breaking Gen 5
- Fractal Design Scape Review - Debut Done Right
- PowerColor ALPHYN AM10 Review
- Sapphire Radeon RX 9060 XT Pulse OC 16 GB Review - An Excellent Choice
- Upcoming Hardware Launches 2025 (Updated May 2025)
- AMD Ryzen 7 9800X3D Review - The Best Gaming Processor
- Sapphire Radeon RX 9070 XT Nitro+ Review - Beating NVIDIA
- SCHENKER KEY 18 Pro (E25) Review - Top-Tier Contender
- AVerMedia CamStream 4K Review
TPU on YouTube
Controversial News Posts
- Intel's Core Ultra 7 265K and 265KF CPUs Dip Below $250 (288)
- NVIDIA Grabs Market Share, AMD Loses Ground, and Intel Disappears in Latest dGPU Update (212)
- Some Intel Nova Lake CPUs Rumored to Challenge AMD's 3D V-Cache in Desktop Gaming (140)
- NVIDIA GeForce RTX 5080 SUPER Could Feature 24 GB Memory, Increased Power Limits (115)
- Microsoft Partners with AMD for Next-gen Xbox Hardware (105)
- NVIDIA Launches GeForce RTX 5050 for Desktops and Laptops, Starts at $249 (105)
- Intel "Nova Lake‑S" Series: Seven SKUs, Up to 52 Cores and 150 W TDP (100)
- NVIDIA DLSS Transformer Cuts VRAM Usage by 20% (97)