 1
1
Matias Quiet Pro Mechanical Keyboard Review
Driver & Performance »Disassembly


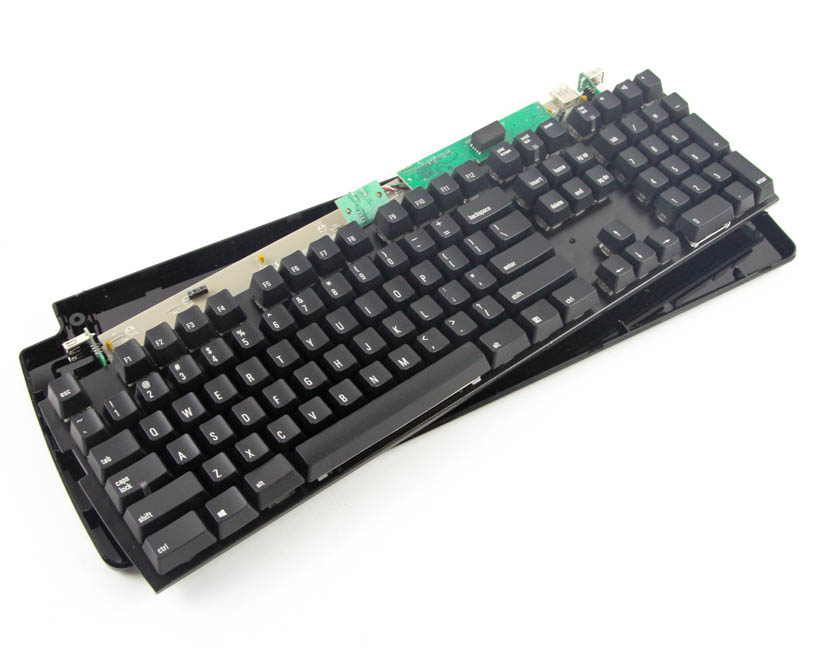
There are two screws with a Phillips head that need to be removed from the back before you can use a flat object to pry open the various plastic tabs around the the keyboard that keep the top and bottom panel pieces together. This will likely scratch the body, so I do not recommend doing so unless absolutely necessary. Once done, the top piece comes off and can be removed.
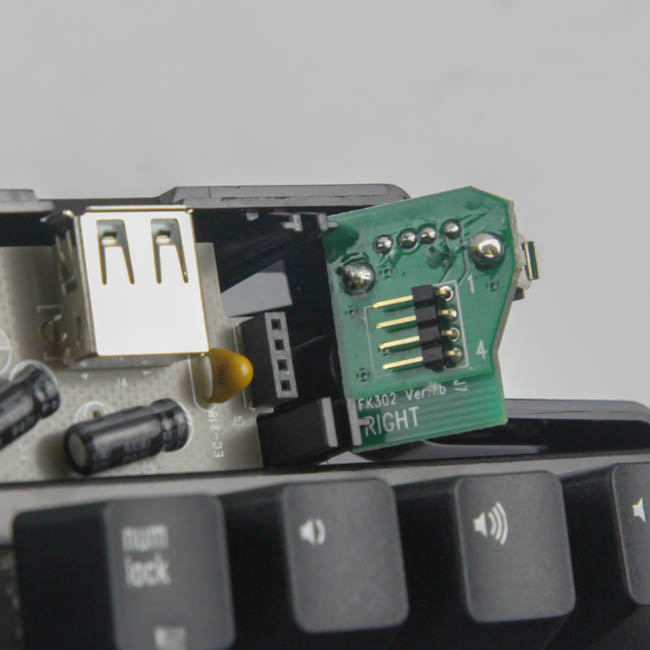
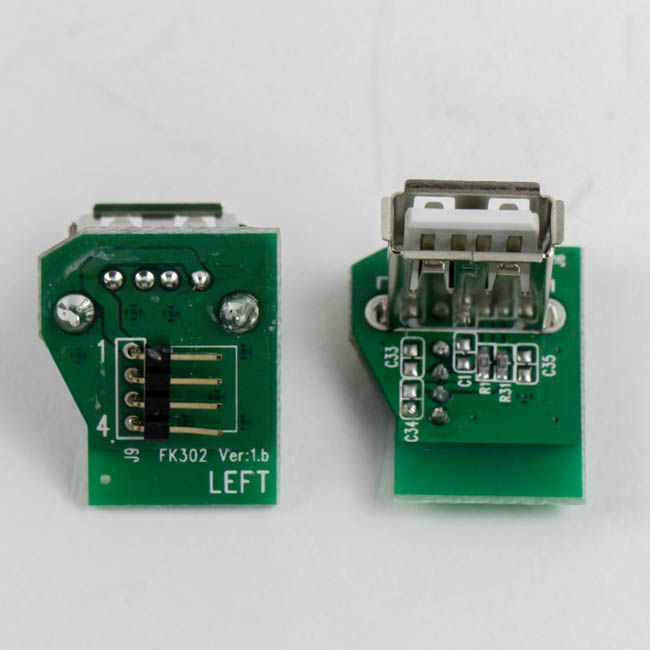
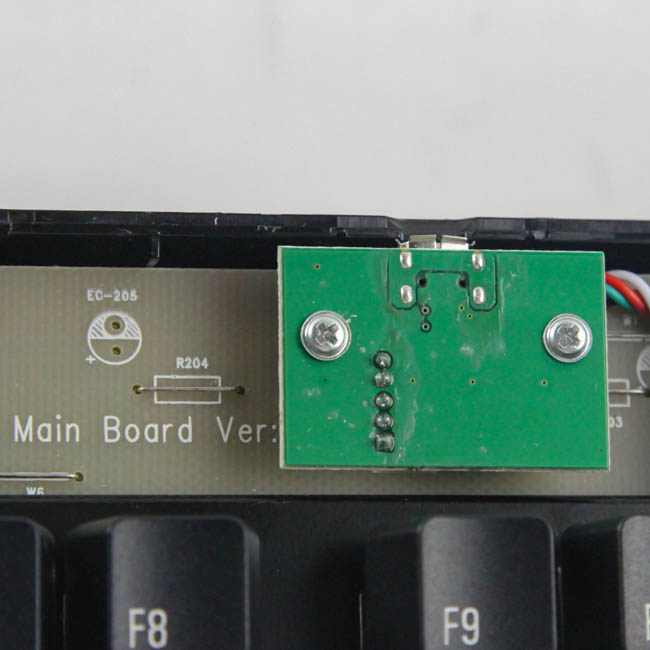
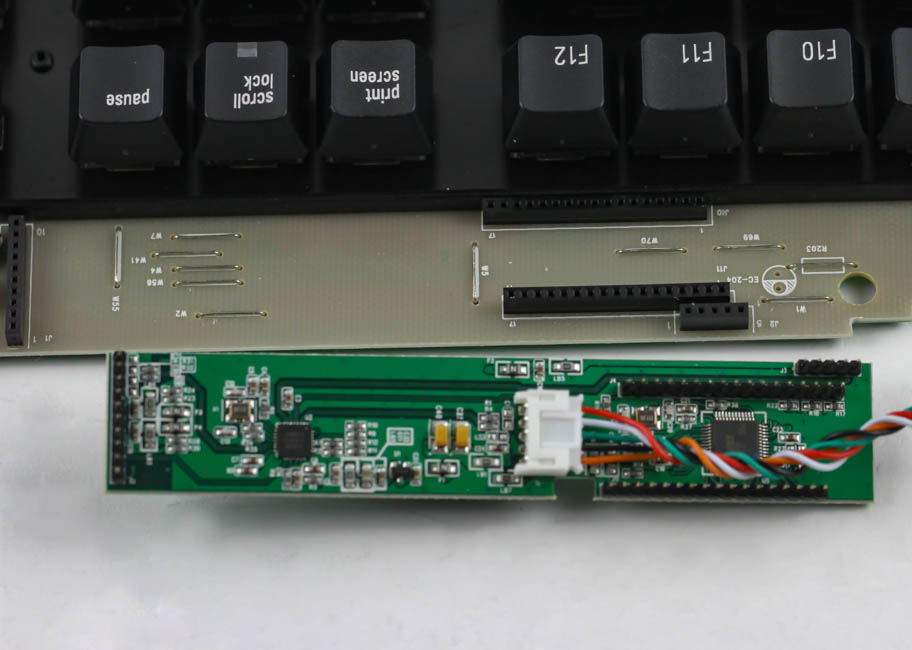
To remove the bottom panel pieces, three daughter PCBs need to be removed. The first two are for the two USB ports on the extreme ends that are held in place in ABS plastic housings built into the bottom panel piece, and you can dislodge them by slowly lifting the steel plate/main PCB upward. Once done, disconnect them by loosening the male pin connector on each and they come off. The third is for the micro-USB port, and here, you need to also remove the two precision Phillips head screws seen above. Once done, the entire assembly is free from the bottom panel piece.
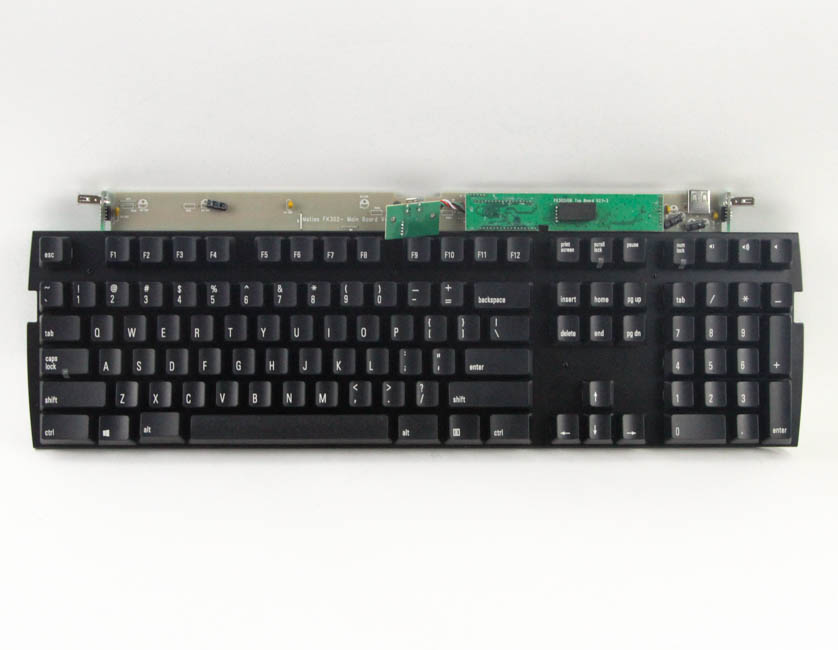

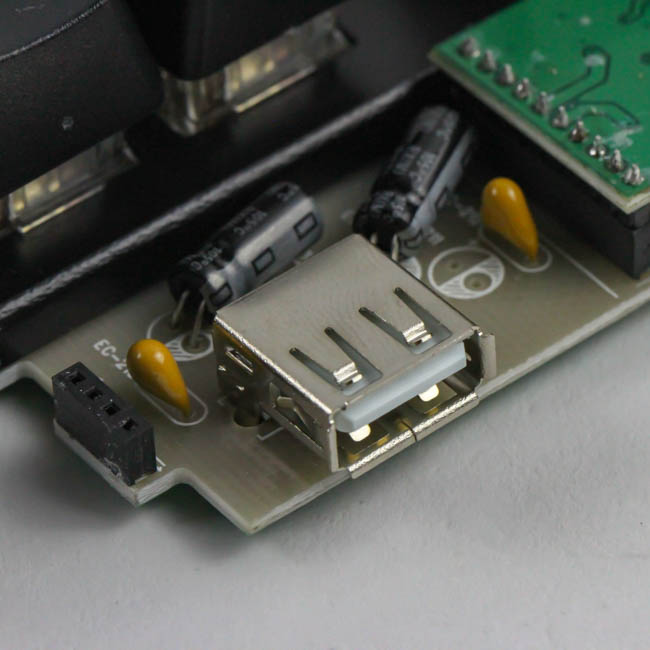
We see here that the micro-USB daughter PCB is held in place via an internal USB cable, so dislodge it from the internal USB header to get this third daughter PCB out. The main PCB is printed Matias, and the third USB port is soldered in place with lots of capacitors around.
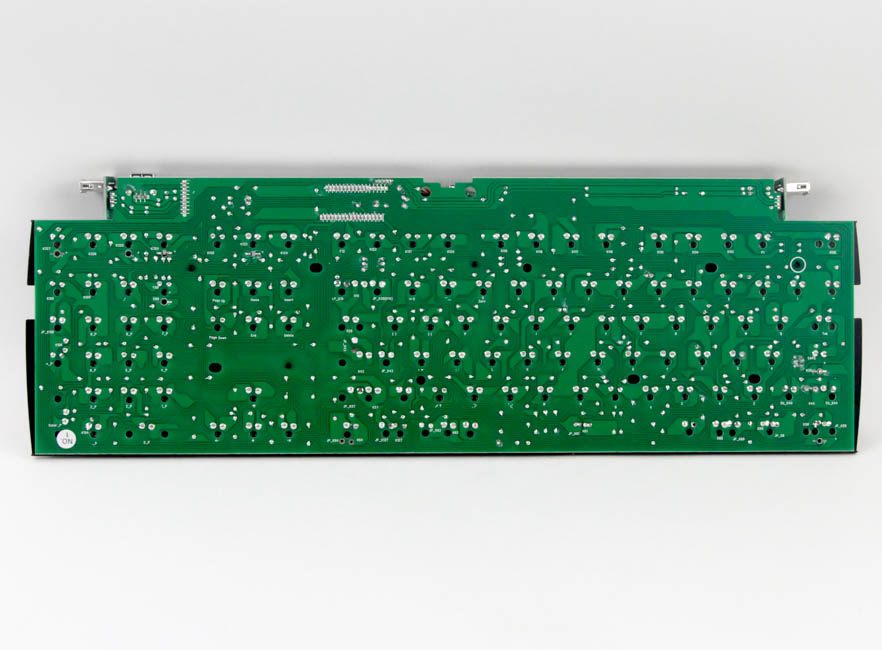
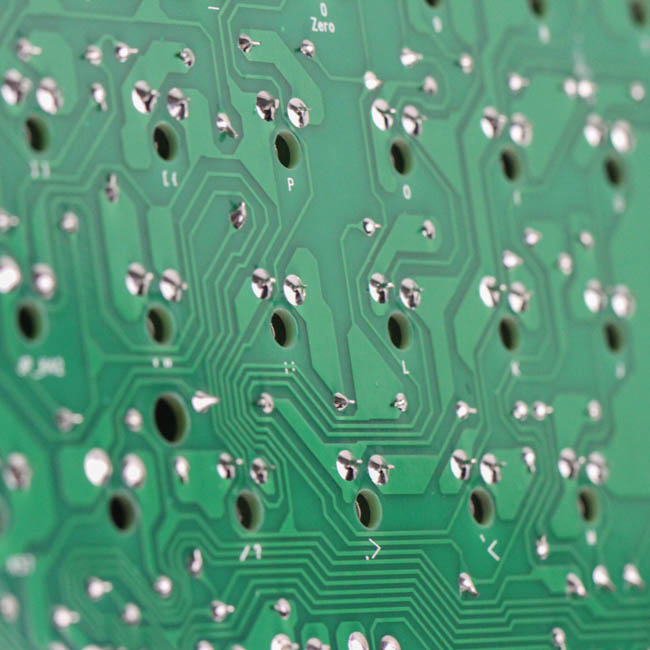
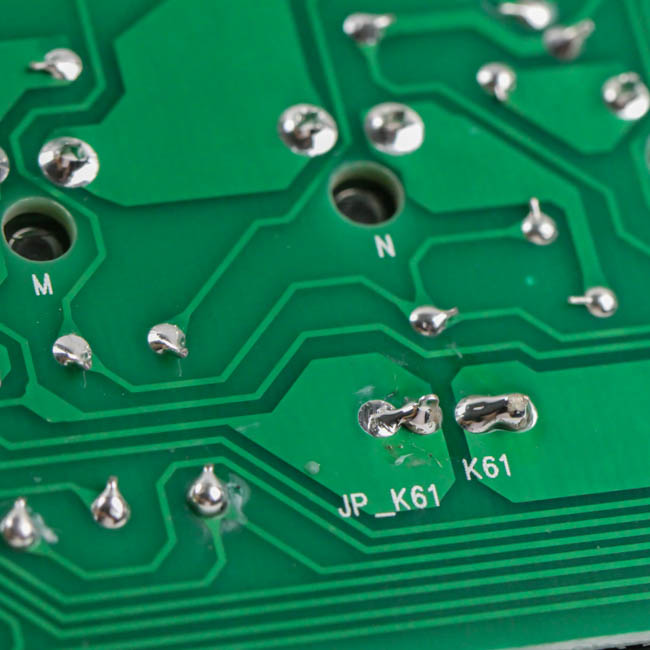
The main PCB, as with the daughter PCBs, is green in color. There is nothing to see here aside from all the soldering, which, to be frank, can really be improved upon. This looks like the job of a time-crunched assembly technician who did not care if the solder points met, or if there was some excess flux left. While it did not affect this particular sample and I would have no doubt been blissfully unaware had I not opened this up, I still urge Matias to get this improved lest it cause an actual issue at the assembly line or, worse, at the customer's house/office.
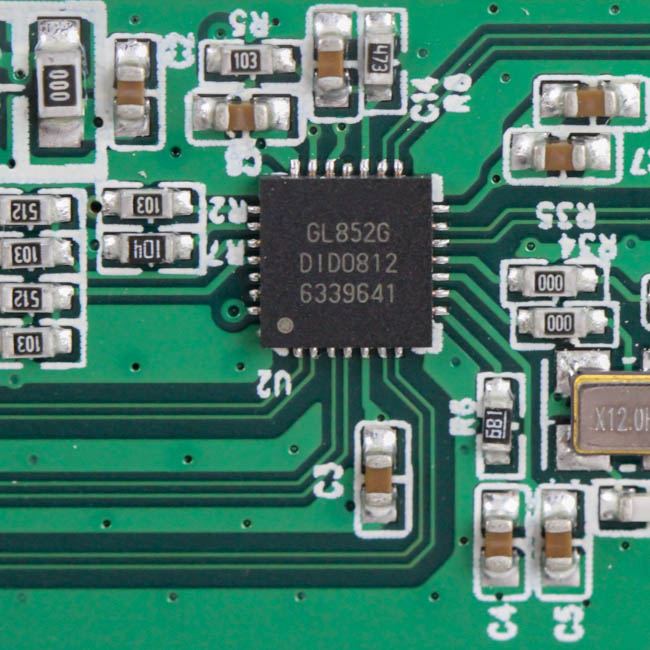
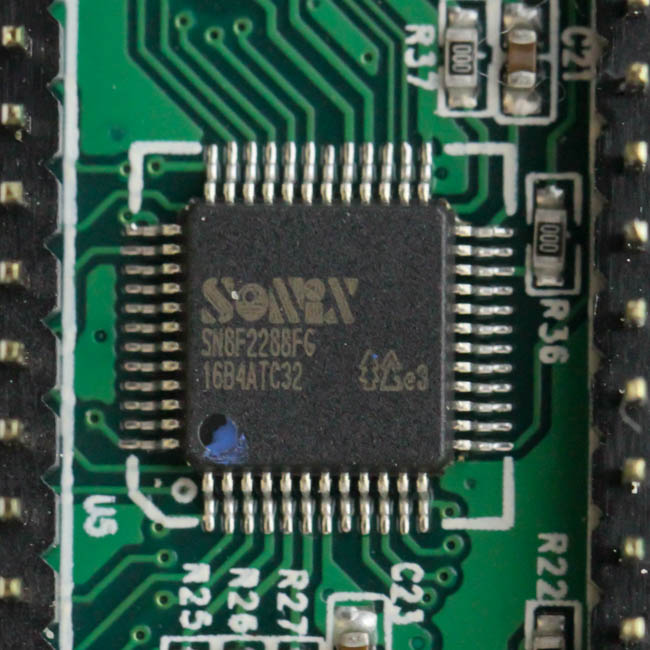
Noting that there were no controllers to be seen on the other side, it made sense that they must be on the front too, on a fourth daughter PCB. Indeed, that is where they were, and this daughter PCB was connected by a lot of pins, as seen above. Matias is using a Genesys Logic GL852G USB 2.0 hub controller, which supports up to four USB 2.0 ports and thus works just fine for this application. Powering the keyboard itself is a Sonix SN8F2288 8-bit microcontroller with 12 KB on-board flash memory and 512 B ROM, and it is fairly dated compared to most MCUs used by similar keyboards of newer designs now. But then again, there really is nothing the MCU has to take care of aside from the 104 + 4 key functionality, so if the dated MCU helps create cost savings which are passed on to the consumer, I have no issues with it at all. All PCBs are multi-layered, as is the norm these days.
Before we take a look at the driver, be advised that disassembly will void the warranty and that TechPowerUp is not liable for any damages incurred if you decided to go ahead and do so anyway.
Jul 5th, 2025 18:39 CDT
change timezone
Latest GPU Drivers
New Forum Posts
- What are you playing? (23894)
- [GPU-Z Test Build] New Kernel Driver, Everyone: Please Test (69)
- How do you view TPU & the internet in general? (With poll) (80)
- EVGA XC GTX 1660 Ti 8GB ROM (11)
- Rx580 subsystem id (0)
- Do you use Linux? (677)
- Optane performance on AMD vs Intel (58)
- Frametime spikes and stuttering after switching to AMD CPU? (521)
- Stalker 2 is looking great. (187)
- b550m aorus elite not posting with new ram (7)
Popular Reviews
- NVIDIA GeForce RTX 5050 8 GB Review
- Fractal Design Scape Review - Debut Done Right
- Crucial T710 2 TB Review - Record-Breaking Gen 5
- ASUS ROG Crosshair X870E Extreme Review
- PowerColor ALPHYN AM10 Review
- Sapphire Radeon RX 9060 XT Pulse OC 16 GB Review - An Excellent Choice
- Upcoming Hardware Launches 2025 (Updated May 2025)
- AMD Ryzen 7 9800X3D Review - The Best Gaming Processor
- Sapphire Radeon RX 9070 XT Nitro+ Review - Beating NVIDIA
- NVIDIA GeForce RTX 5060 8 GB Review
TPU on YouTube
Controversial News Posts
- Intel's Core Ultra 7 265K and 265KF CPUs Dip Below $250 (288)
- NVIDIA Grabs Market Share, AMD Loses Ground, and Intel Disappears in Latest dGPU Update (212)
- Some Intel Nova Lake CPUs Rumored to Challenge AMD's 3D V-Cache in Desktop Gaming (140)
- NVIDIA GeForce RTX 5080 SUPER Could Feature 24 GB Memory, Increased Power Limits (115)
- Microsoft Partners with AMD for Next-gen Xbox Hardware (105)
- NVIDIA Launches GeForce RTX 5050 for Desktops and Laptops, Starts at $249 (105)
- AMD Radeon RX 9070 XT Gains 9% Performance at 1440p with Latest Driver, Beats RTX 5070 Ti (102)
- Intel "Nova Lake‑S" Series: Seven SKUs, Up to 52 Cores and 150 W TDP (100)