![[Updated] MOONDROP DASH HiFi Mechanical Keyboard Review - Premium DAC/Amplifier Inside!](/review/moondrop-dash-hifi-mechanical-keyboard/images/small@1x.png) 20
20
[Updated] MOONDROP DASH HiFi Mechanical Keyboard Review - Premium DAC/Amplifier Inside!
Update: Disassembly + Re-assembly »Disassembly
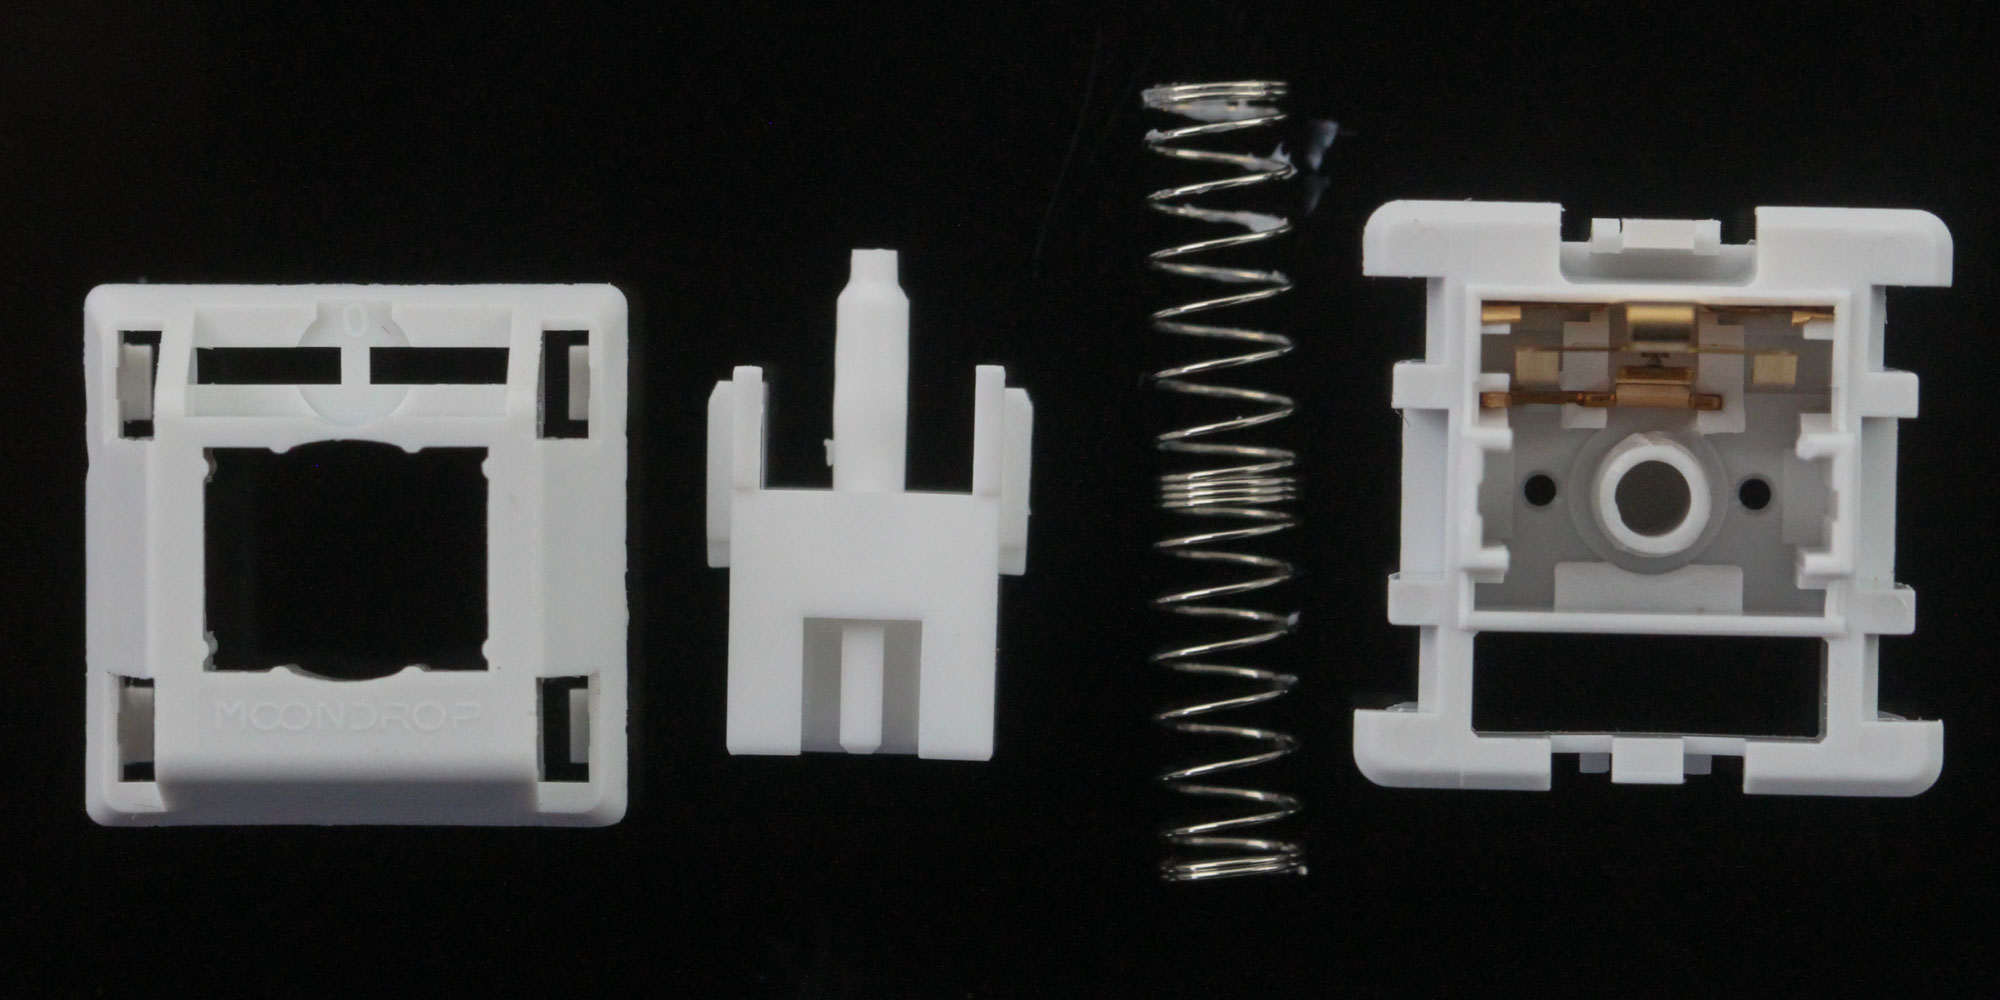

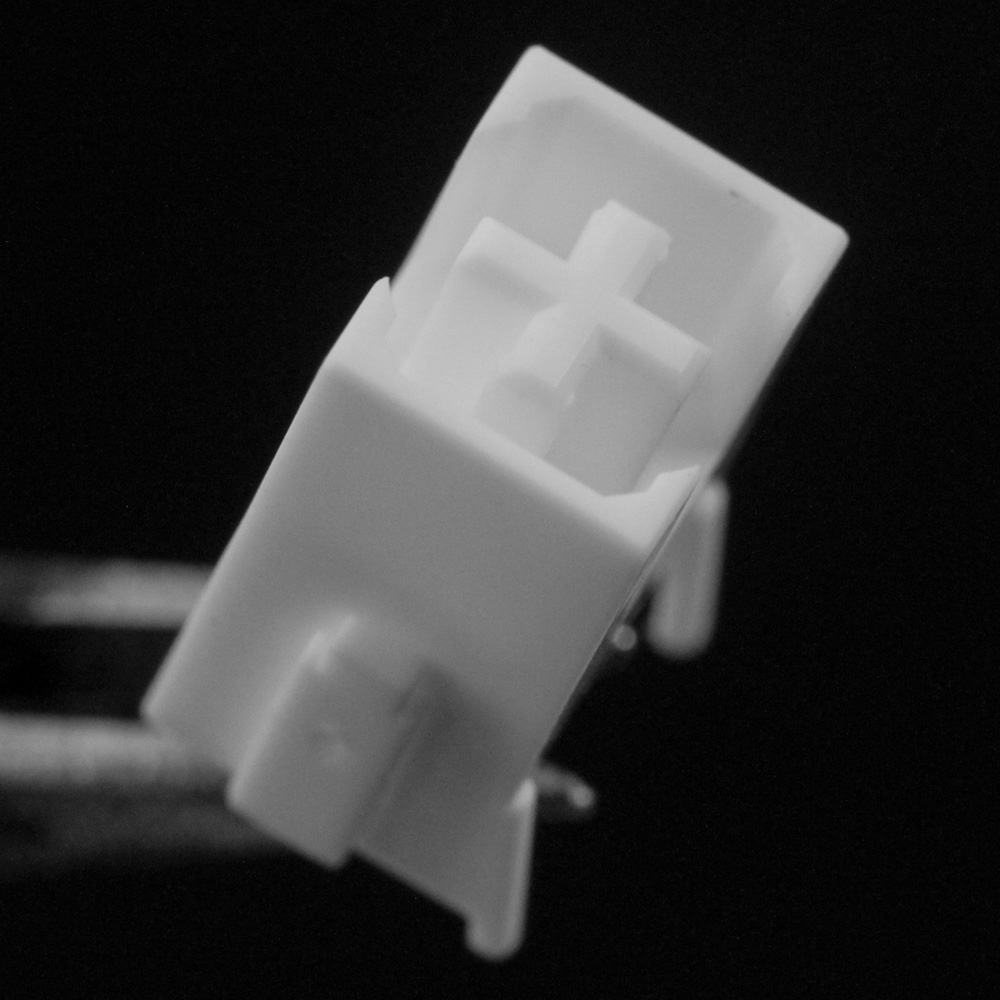
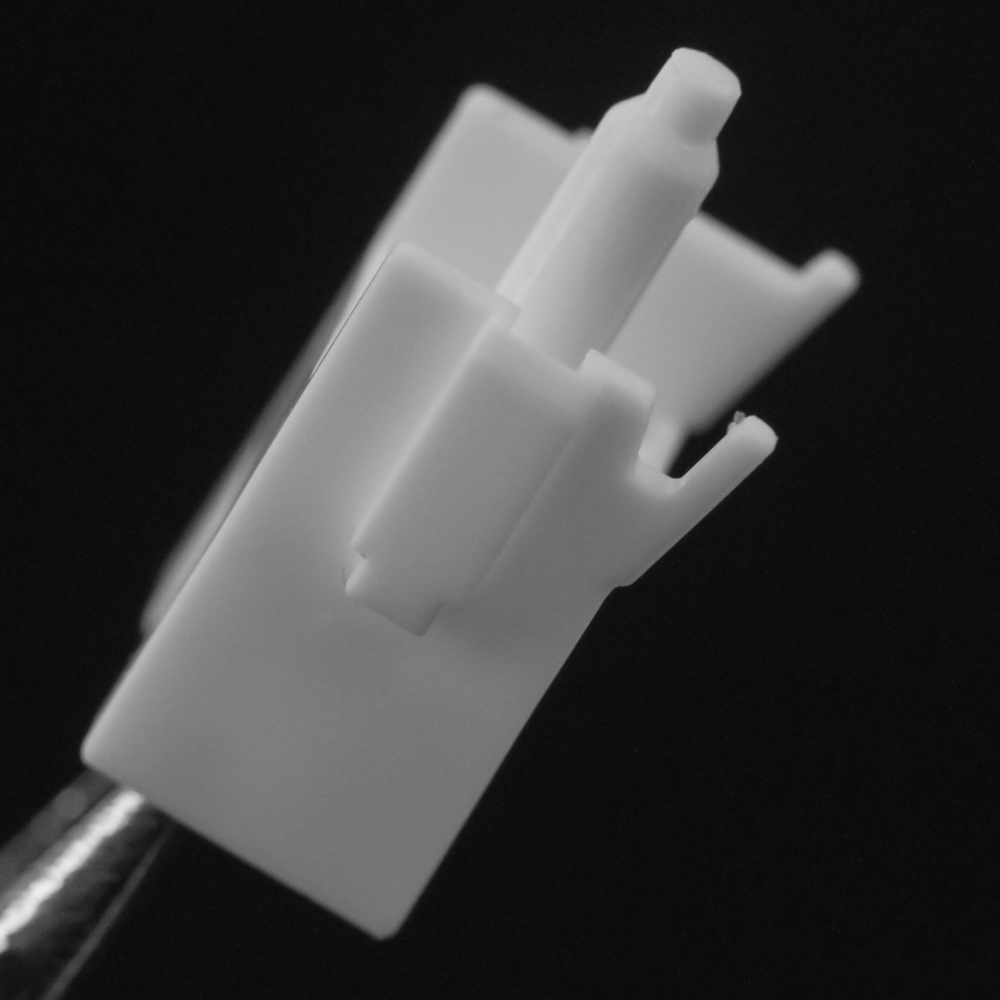


Now that we've thoroughly examined the outside of the MOONDROP DASH keyboard, it's time to go inside. Let's begin with a closer examination of the MOONDROP x G-Square Lunalight switches given they were not only provided as spare units but also are easily removable from the keyboard. This is a typical Cherry MX style switch complete with a cross-point stem, but with multiple modifications to the actual pieces. Take a look at that nylon top housing, for example, with a very interesting injection mold that allows for the stem to glide up and down vertically without much lateral movement. This specific housing design is one I have not seen yet—especially on the injection points here—and helps make these extremely smooth in practice with the tight tolerances all round. The POM stem uses a longer slider piece that is lubed very well as with the stabilizers—and even not excessively so. This is a linear switch and thus there are no extra bumps to be found along the contact pathway of the slider itself as it meets the metal contacts in the nylon bottom housing. The spring is made of high-quality KOS stainless steel, employs a dual coil with an overall longer length that should make for more uniform resistance, and also comes lightly lubed where it meets the bottom housing itself. Switch actuation works the same way as all other such switches in that the stem pushes the two copper contacts together at the actuation point to complete the circuit that's read by the keyboard USB microcontroller, which in turn sends out the correct keystroke to the connected PC.

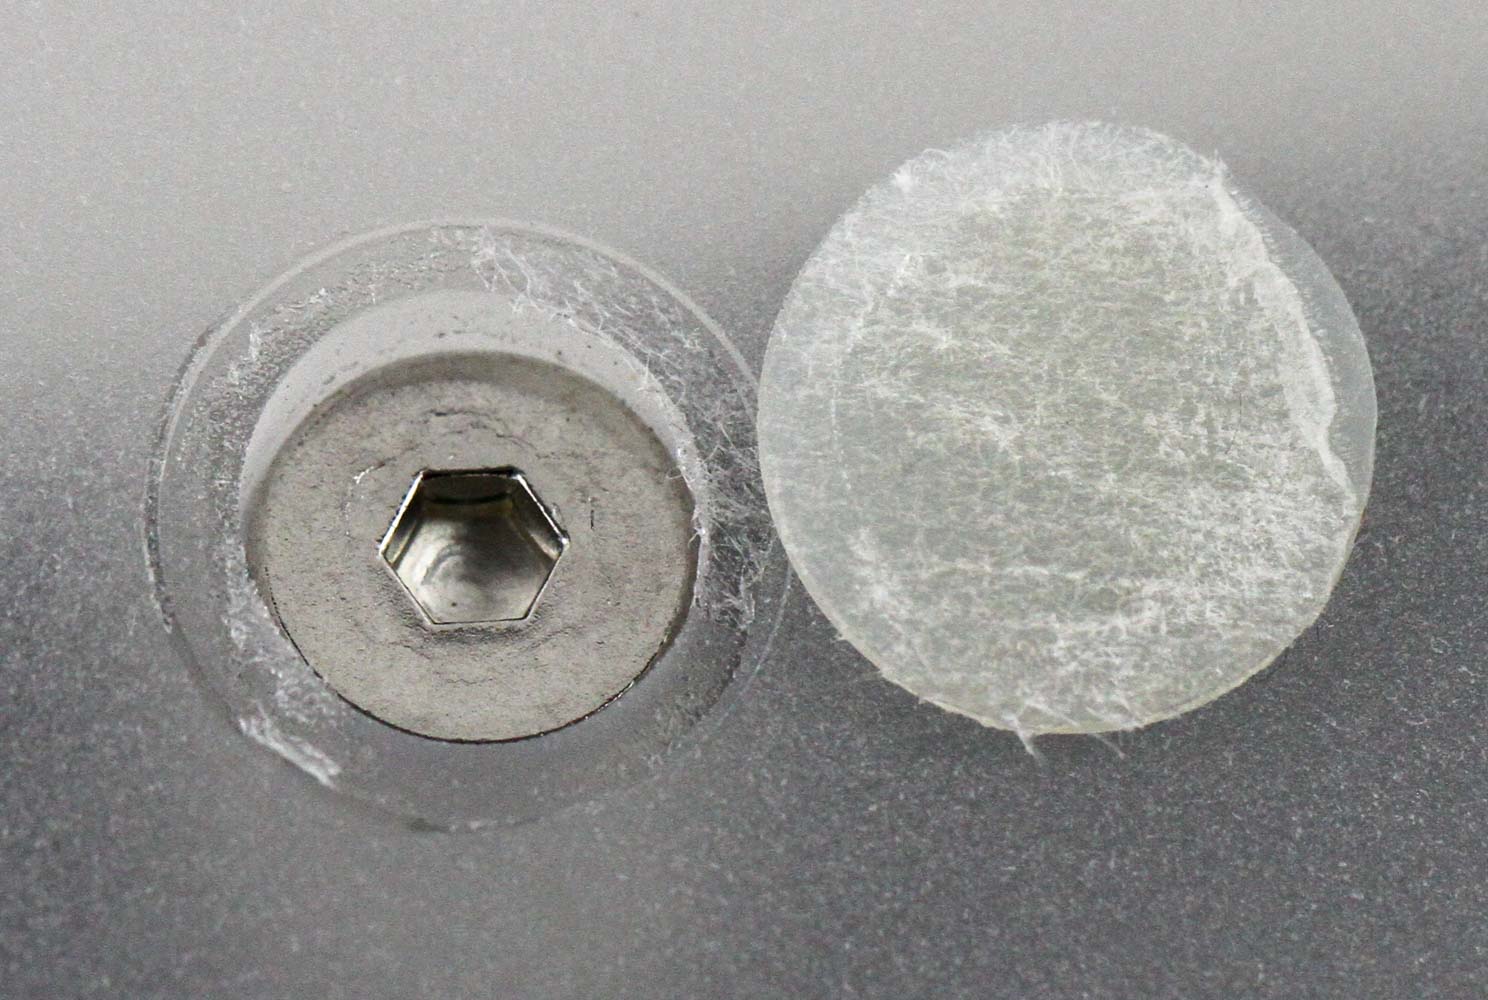
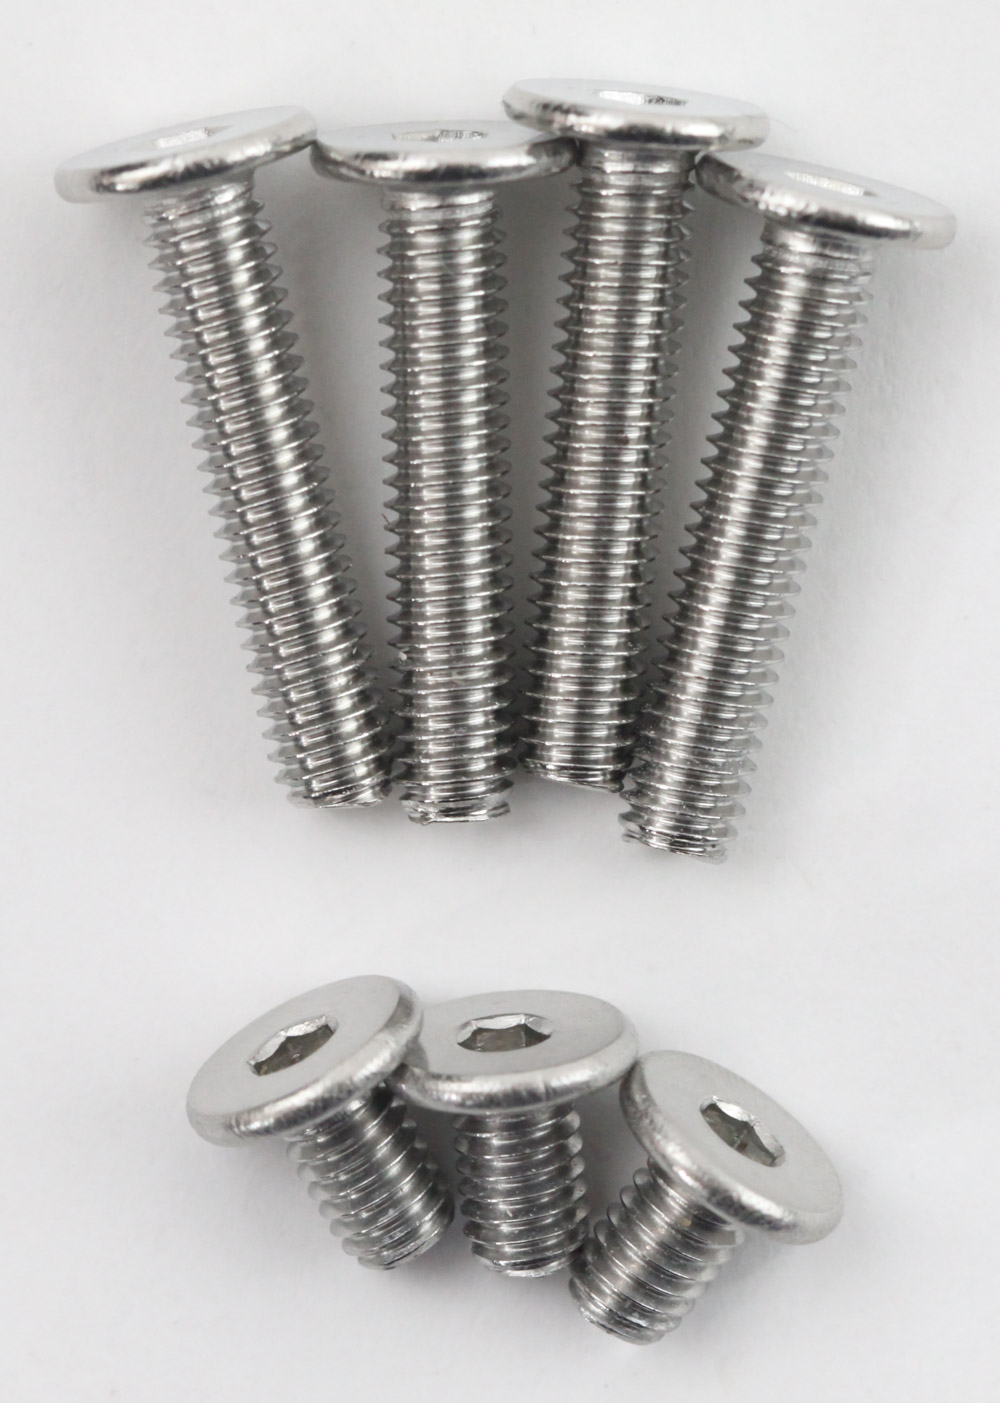


The top-mounted nature of the keyboard means the PCB is connected to the top chassis itself and thus disassembly happens from the bottom. There are several hex head screws underneath the circular rubber pads with four longer ones at the top and three shorter screws towards the bottom. Remove them and the polycarbonate panel can be taken off to reveal the angular nature helping with the built-in elevation of the keyboard. It's also thicker than I thought so perhaps having bottom-facing LEDs may not have worked as well as it did in my mind. At this point you are greeted with the rest of the keyboard, and you can separate the plate/PCB from the aluminium chassis by removing all keycaps and switches, but there is not much to gain here given the good design employed thus far.
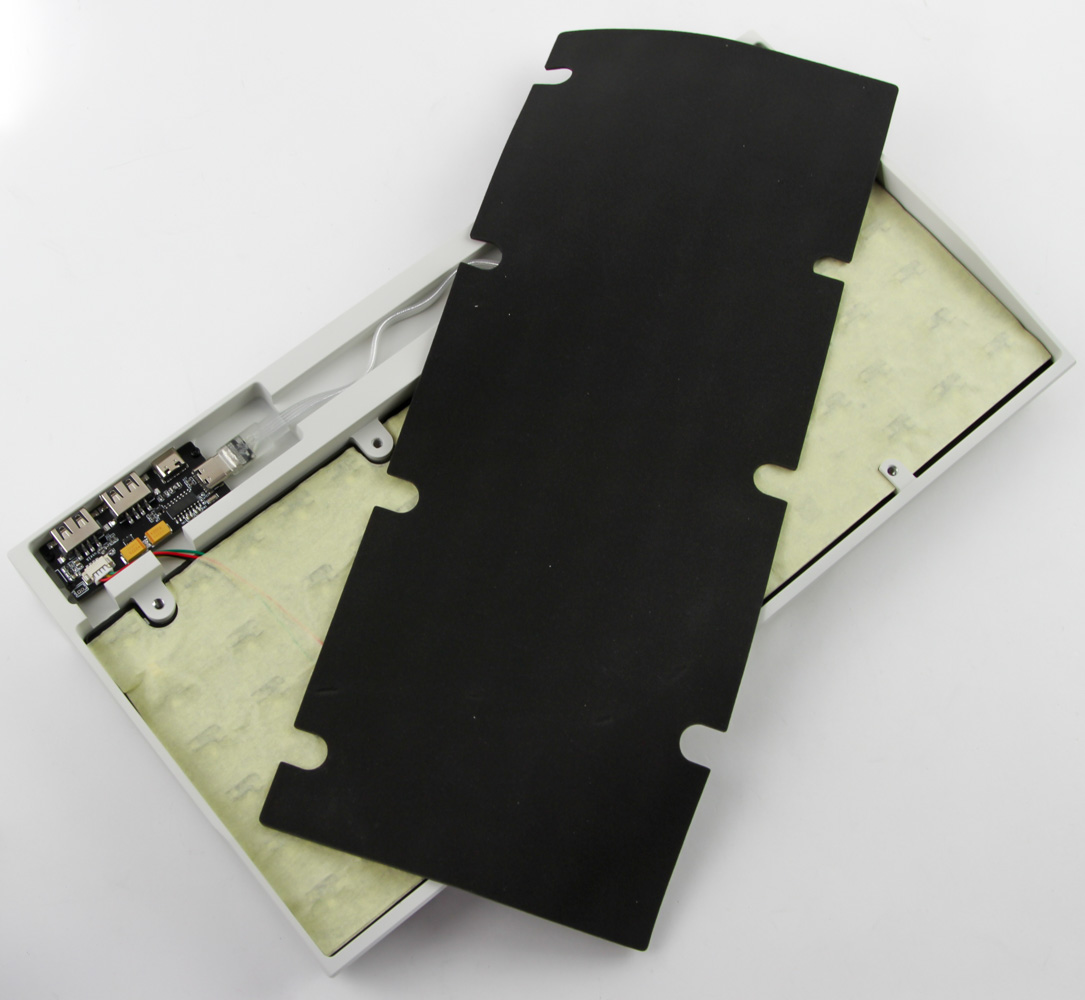
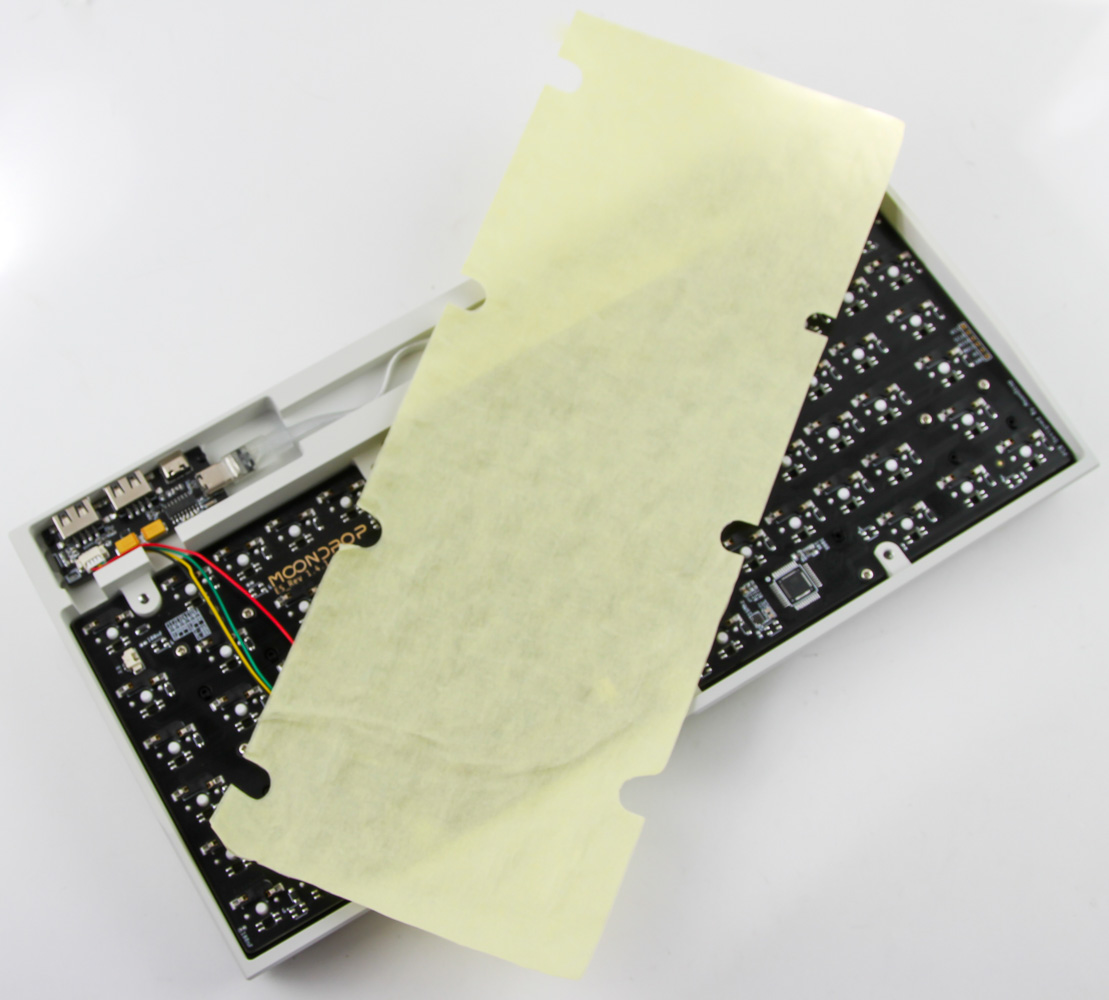
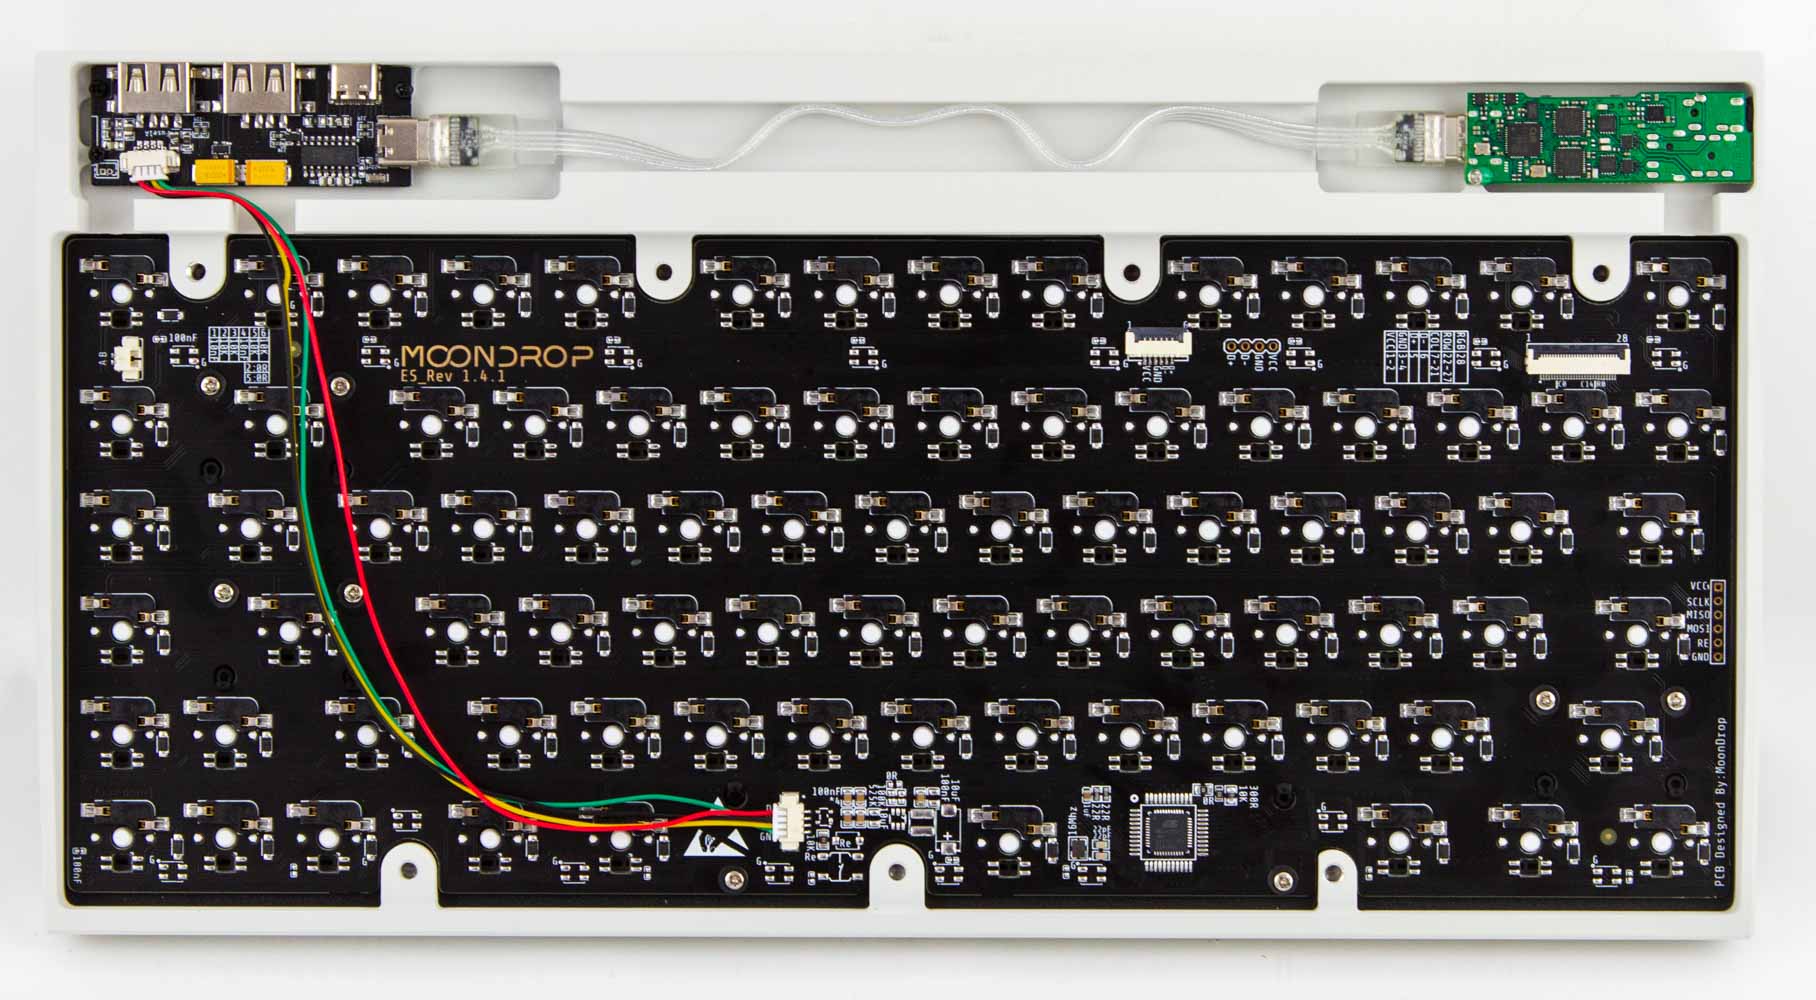
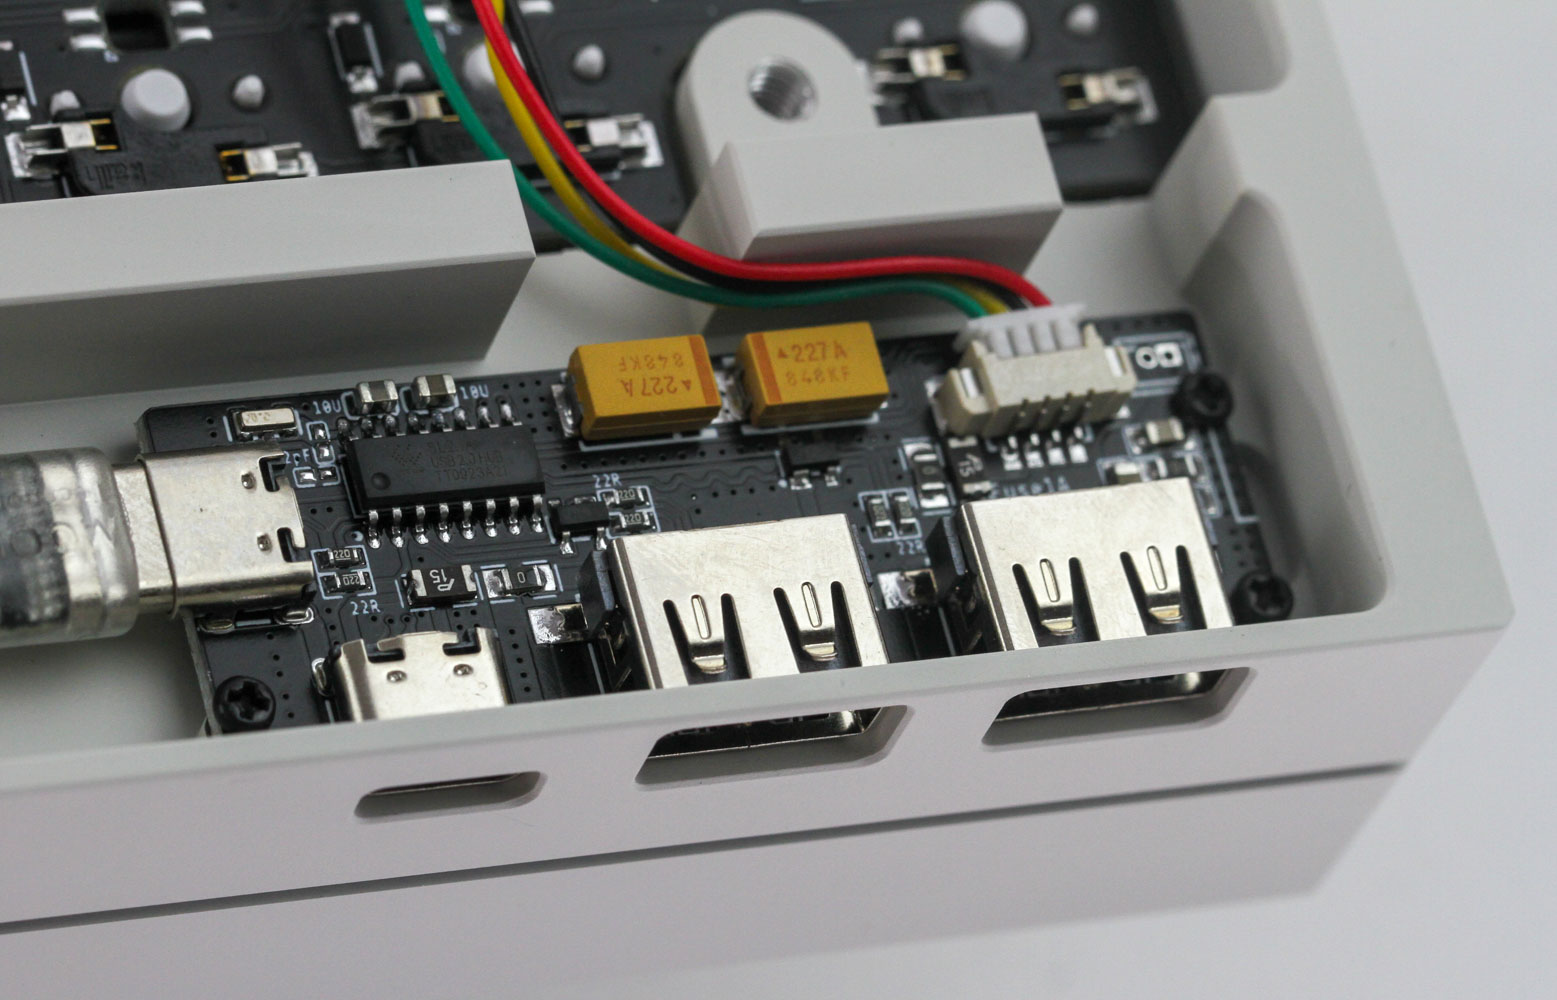
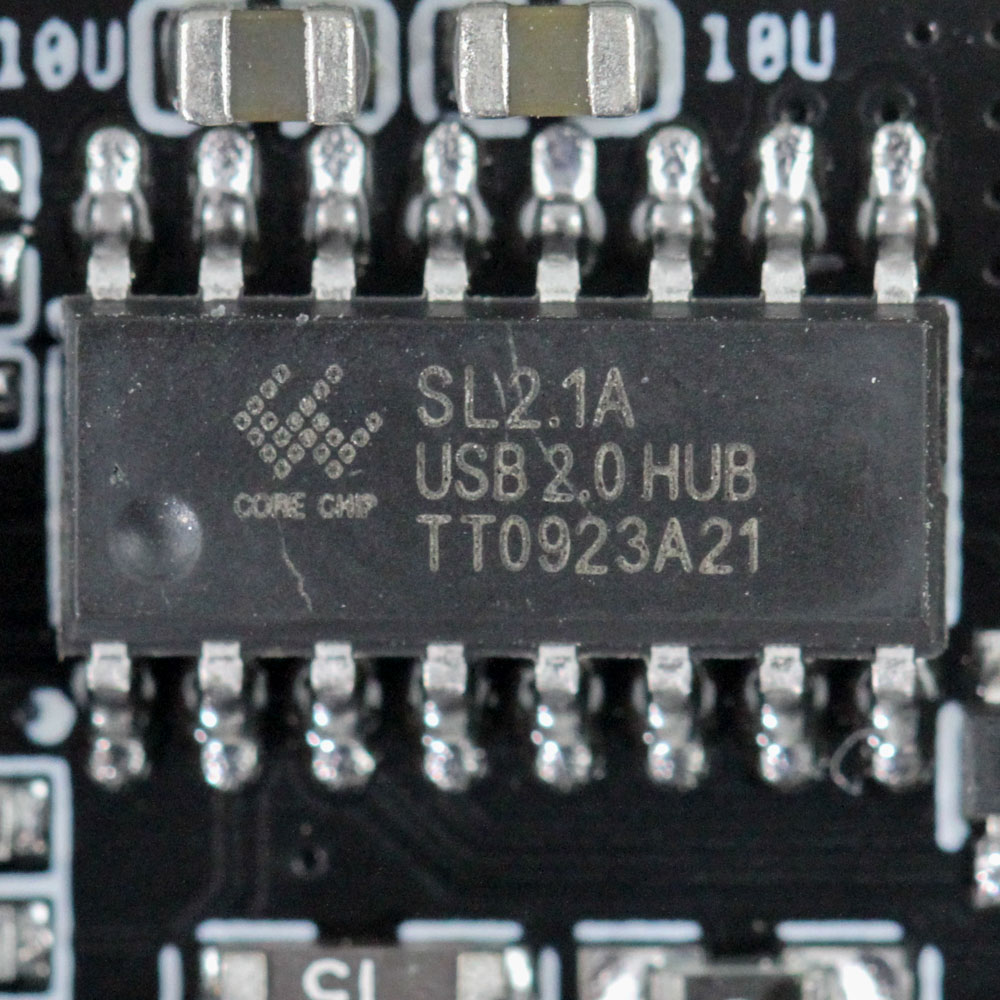
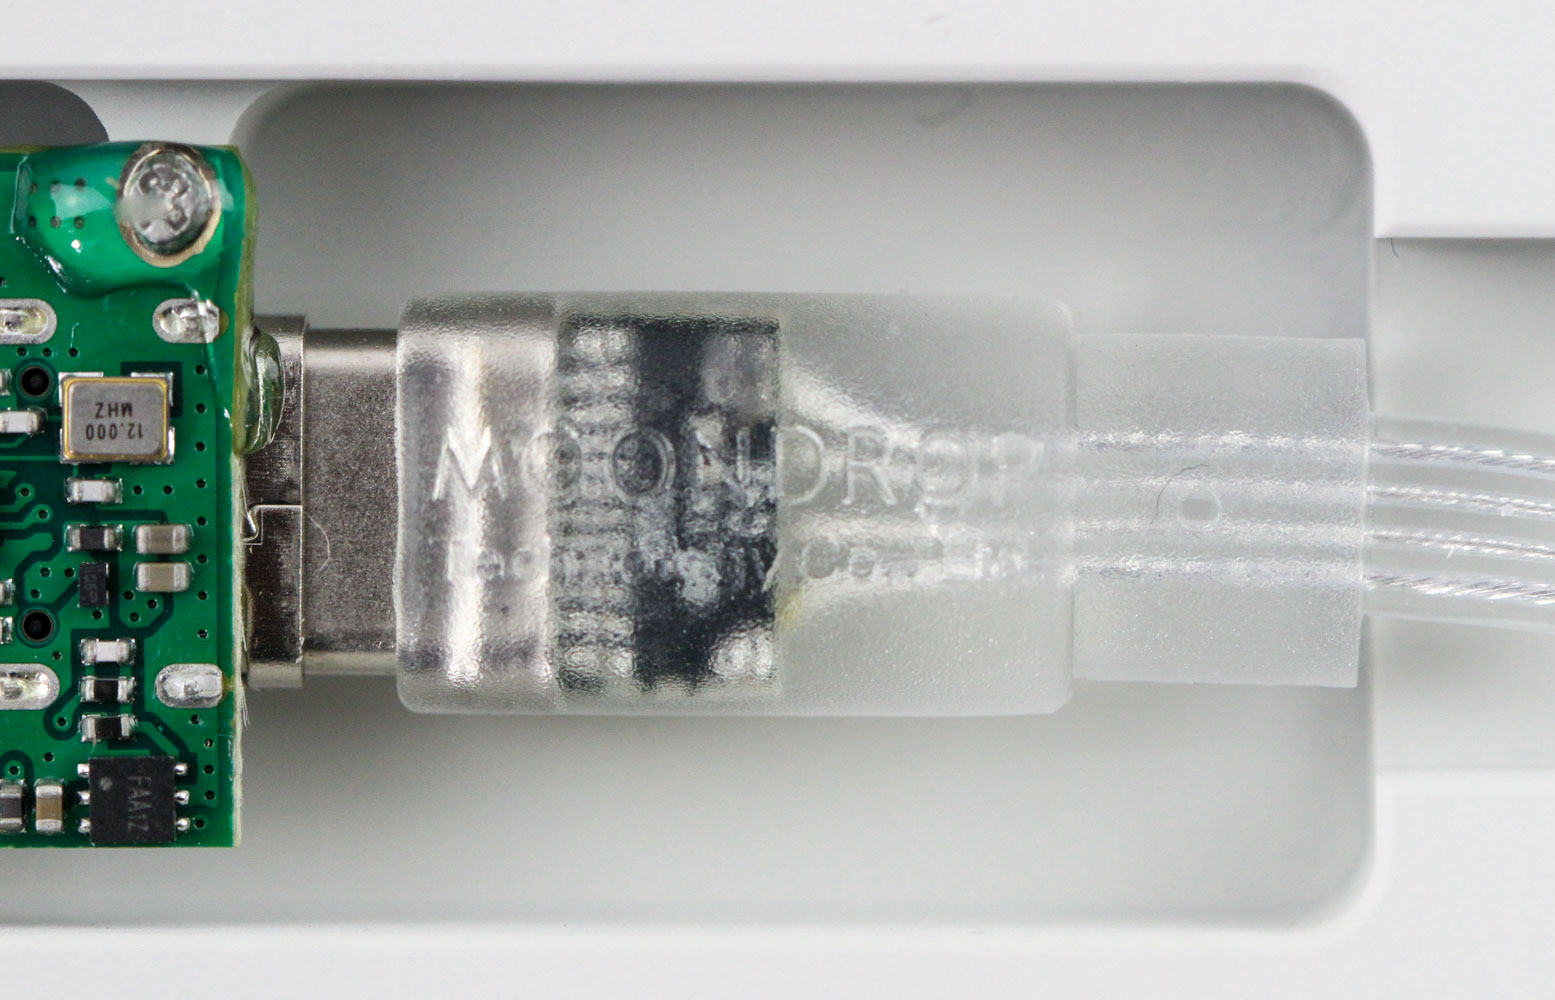
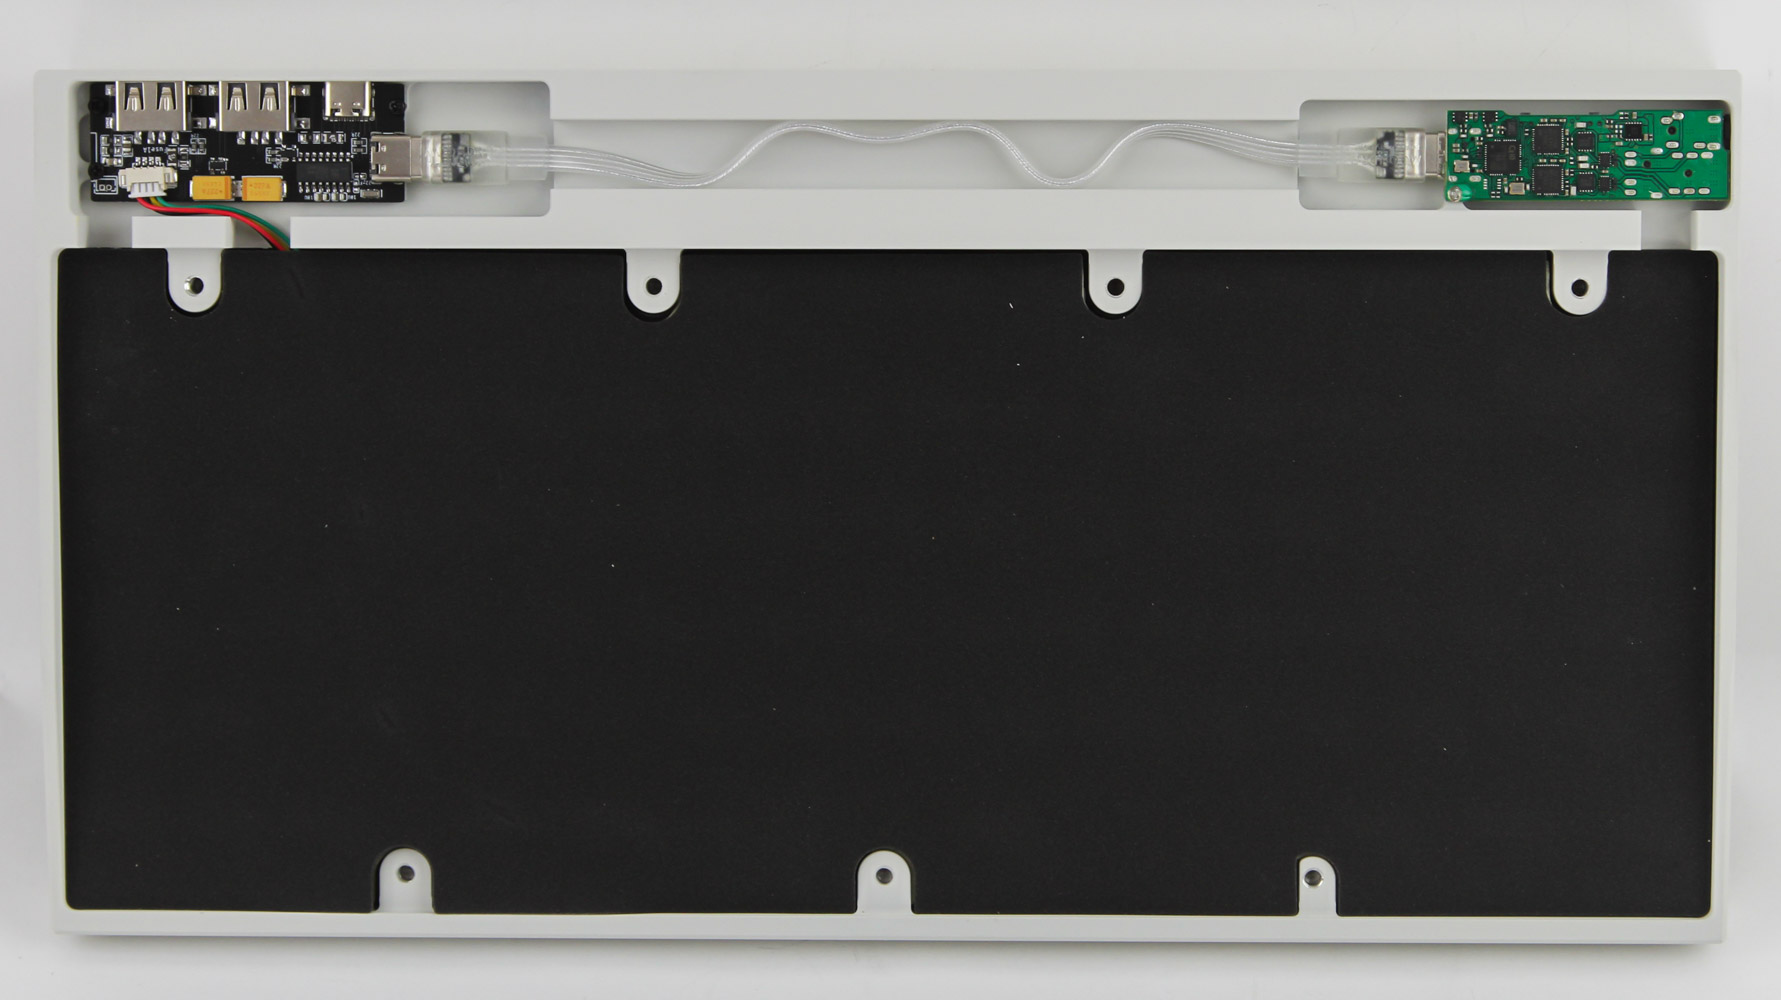
Another poron foam sheet is present between the PCB and the bottom panel, so I suppose this was the final straw for my bottom-LED accent lighting plan. This helps prevent reverberations in the case from keystrokes. There will be more foam on the top above the daughter PCBs in the finished retail units, for both aesthetics and further dampening. There is a tape mod being done here underneath, with a sticky tape pad glued to the underside of the PCB that has the goal of toning down some specific sound frequencies from your typing on the keyboard, and the foam sheet doing the rest in making for a less-hollow, deeper sound that most people associate as being pleasing. You can easily remove/modify both layers to experiment with the desired sound signature. Taking both off finally reveal the primary PCB as well as the two daughter PCBs at the top. The first daughter PCB contains the USB hub itself that takes in power and data from the USB Type-C input—preferably from a USB 3.2 Gen 1 port on your PC or better—and has a CoreChips SL2.1A 4-port USB 2.0 hub controller to handle the splitting. The two spare USB ports are thus USB 2.0 compliant only but that's still plenty enough for peripherals. The third split goes to the primary PCB to power/control the keyboard itself, and I understand the retail version will have this internal connection be closer to the daughter PCB for cleaner cable management and to minimize any USB cable length-related losses.. The fourth one goes simply to a female Type-C port and now we get a longer version of that exact same Type-C to Type-C USB cable that ships with the MoonRiver 2!
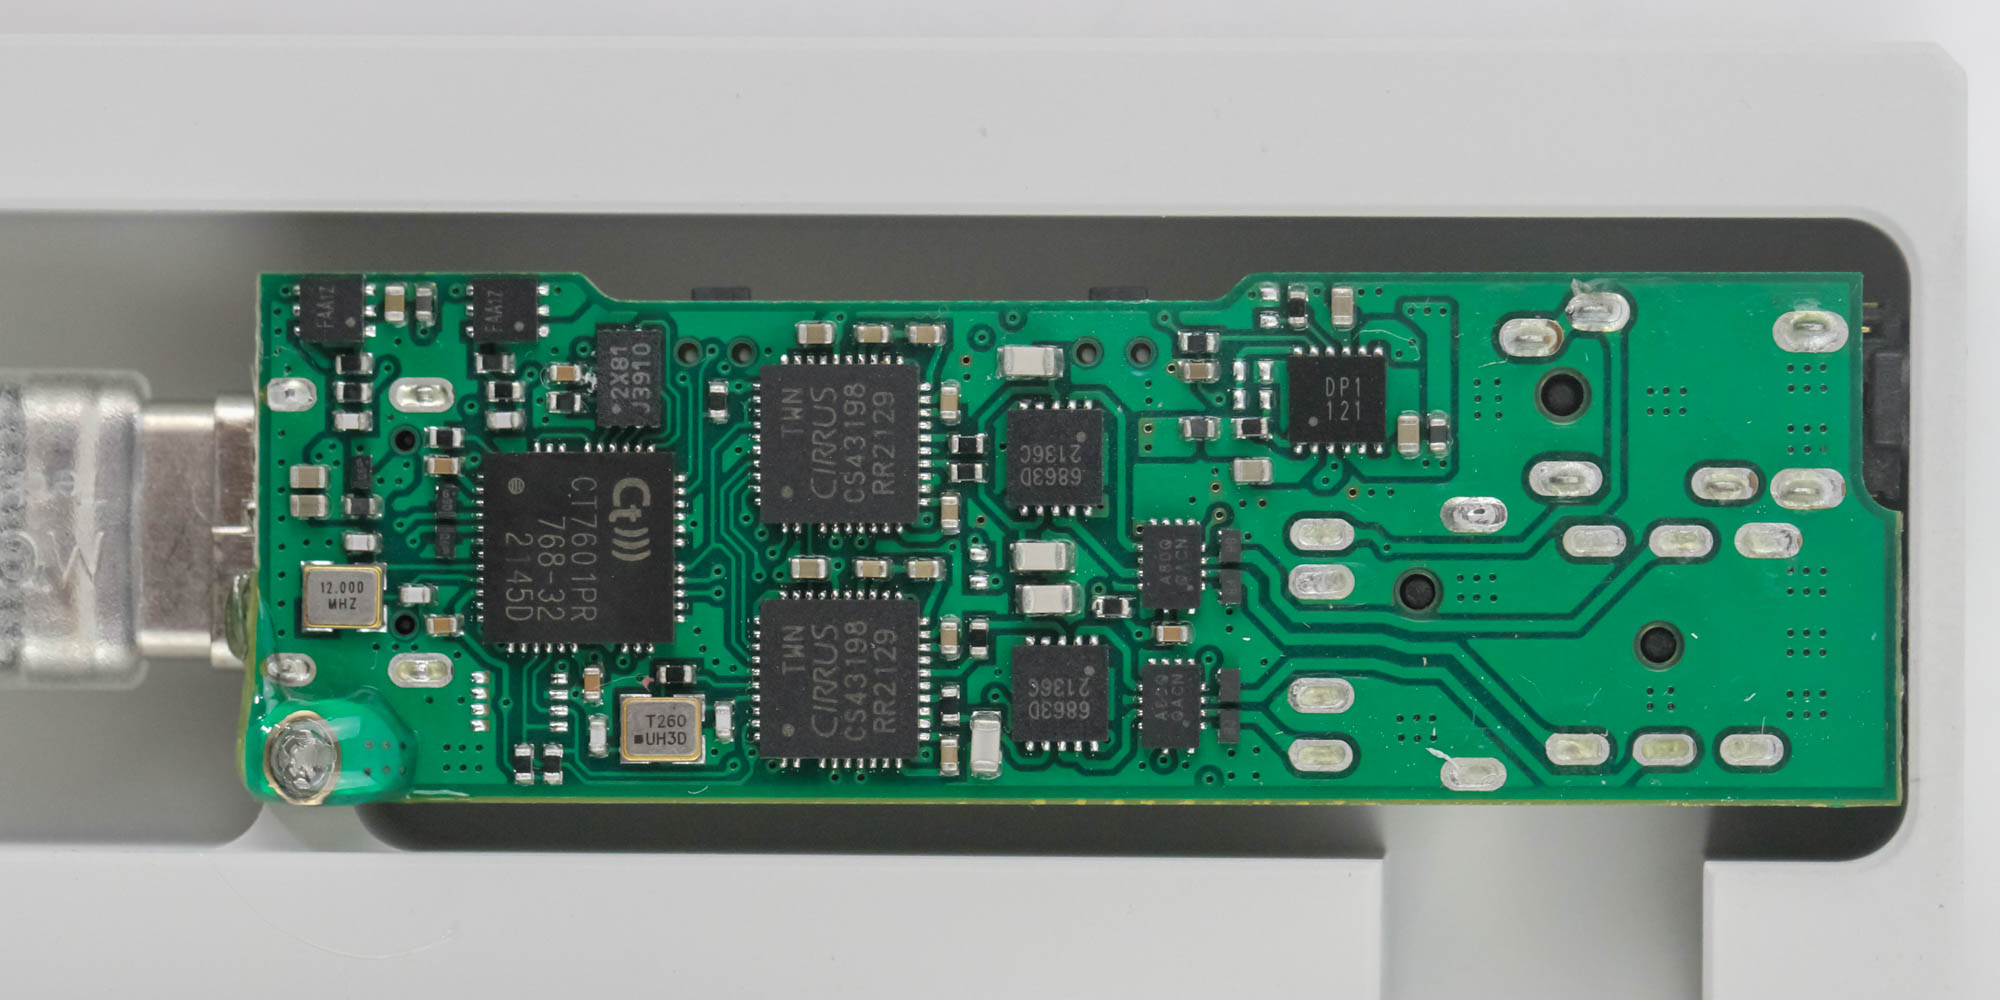
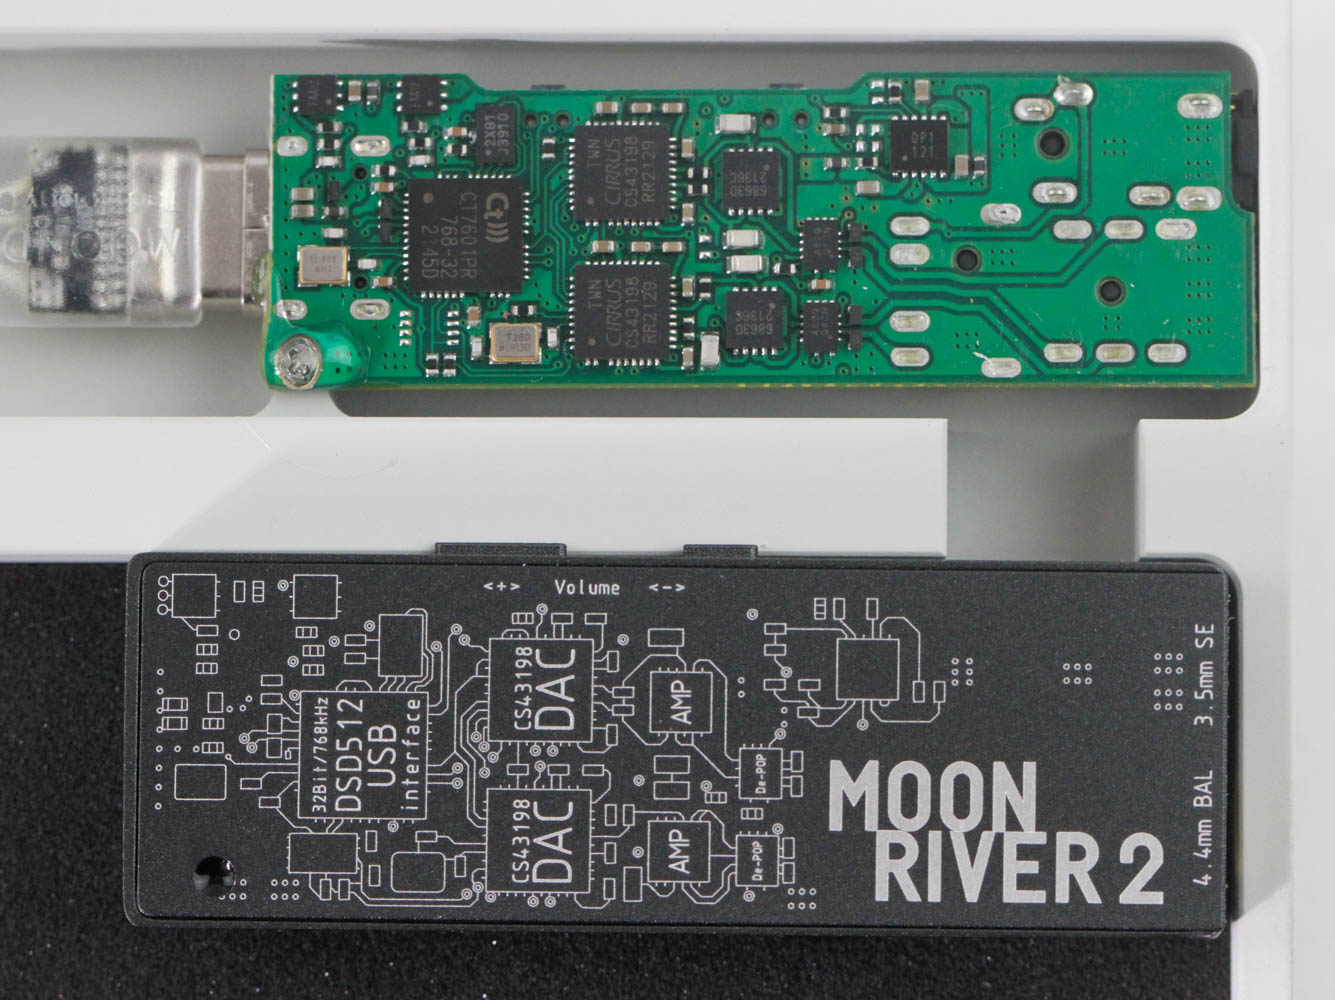
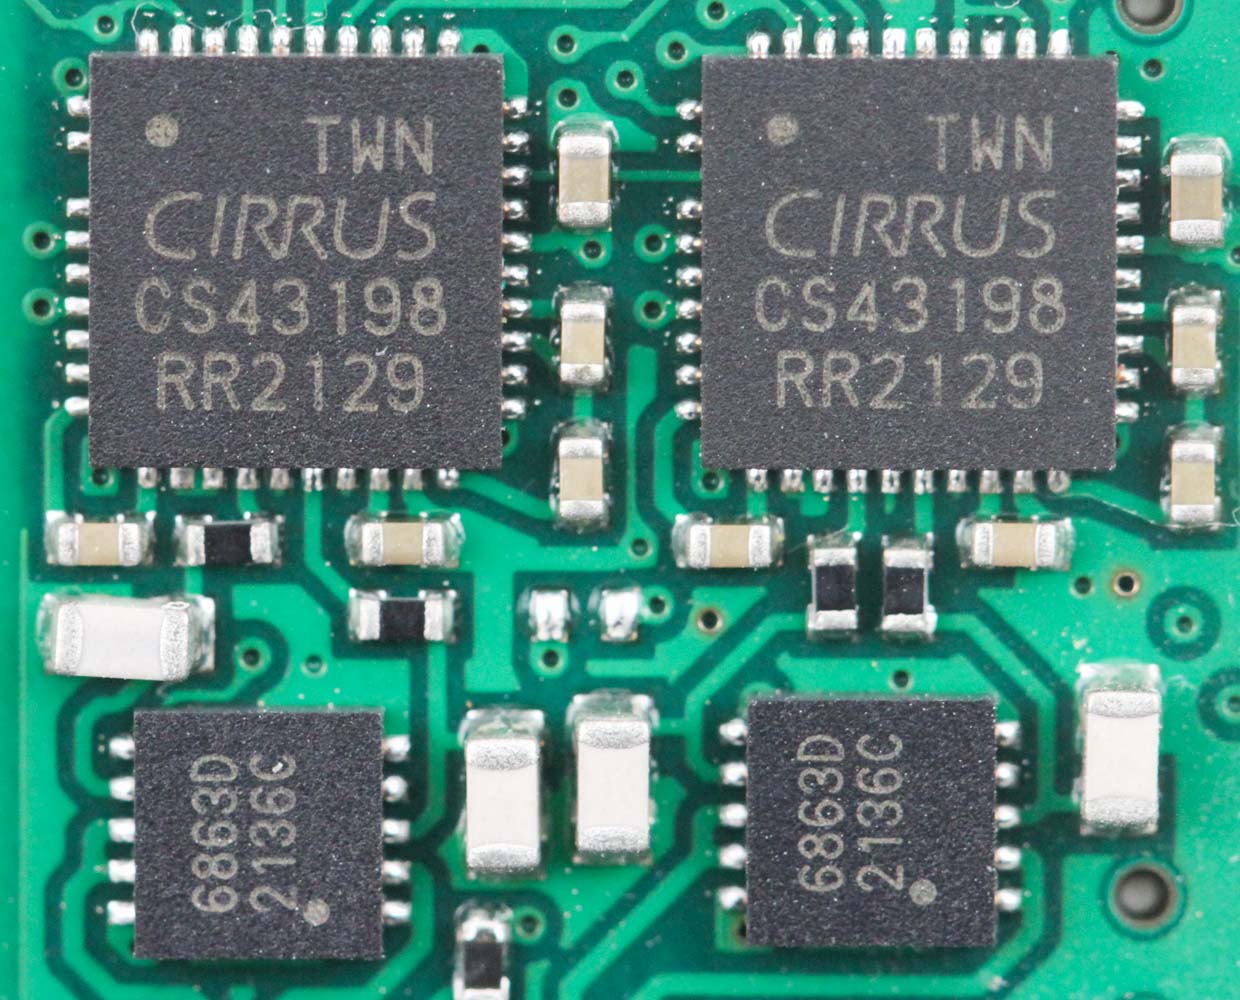
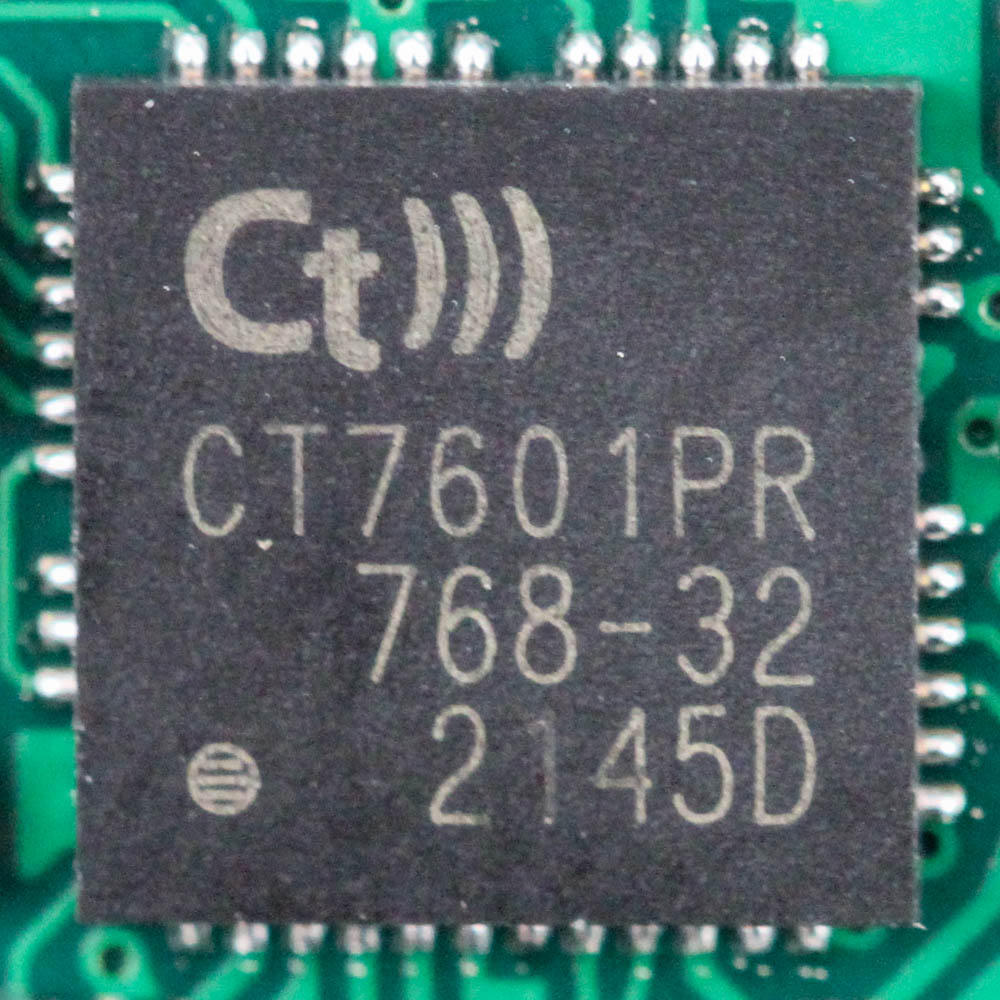
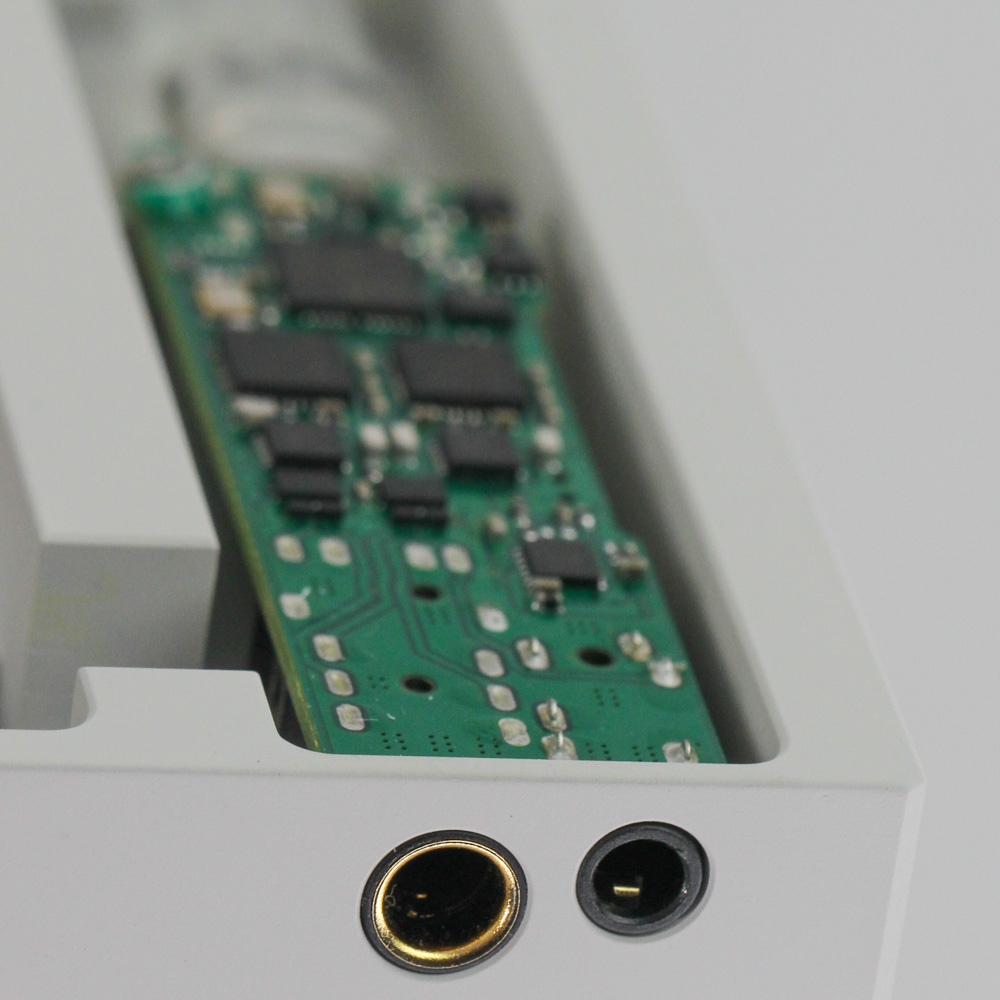
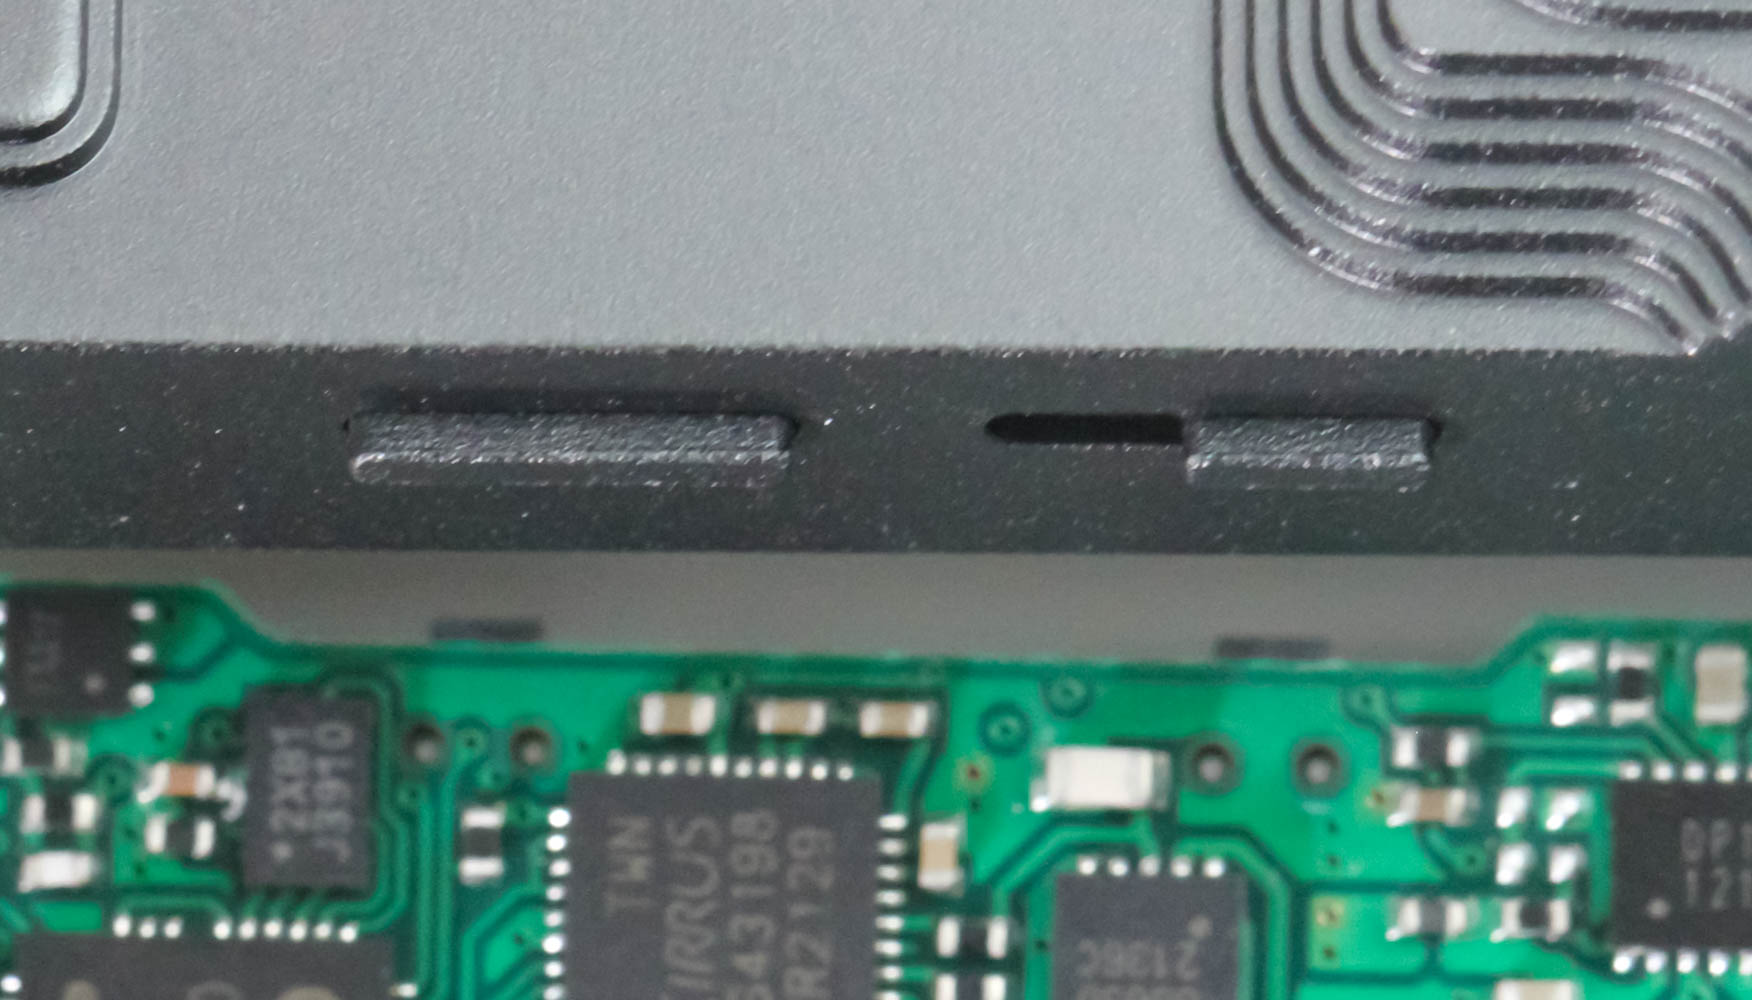
That longer cable traverses the length of the keyboard via a cutout in the case, so this simply lends more credence to the hypothesis that MOONDROP could have easily made this a hot-swap keyboard for the MoonRiver 2 as discussed before. What we have here is a simple solution either way, where MOONDROP just uses the MoonRiver 2 PCB in the keyboard and the USB hub is a necessity to make this happen. We see the use of a ComTrue CT7601 USB bridge/controller allowing for the high PCM playback rates here, and this feeds to the dual Cirrus Logic CS43198 DAC chips used. Each DAC is associated with a linear voltage amplifier that then heads out to the two headphone outputs. The good thing with this simple engineering solution is the entire aluminium keyboard chassis now becomes a heatsink for the integrated MoonRiver 2, thus avoiding the heat dissipation issues from the standalone unit. The overly bright indicator LED is also not visible in use now but then you realize that the PCB still has the volume/gain control buttons on the side facing the outside of the keyboard. It would have been possible for MOONDROP to cut holes in the chassis and have long-stem buttons leading to the outside to have dedicated volume increase and decrease buttons on the outside! It's not as elegant a solution as re-engineering the PCB to have a volume encoder wheel itself, but this would still be better than nothing and I have to see this as a lost opportunity to address the biggest complaint people will have with the MOONDROP DASH.
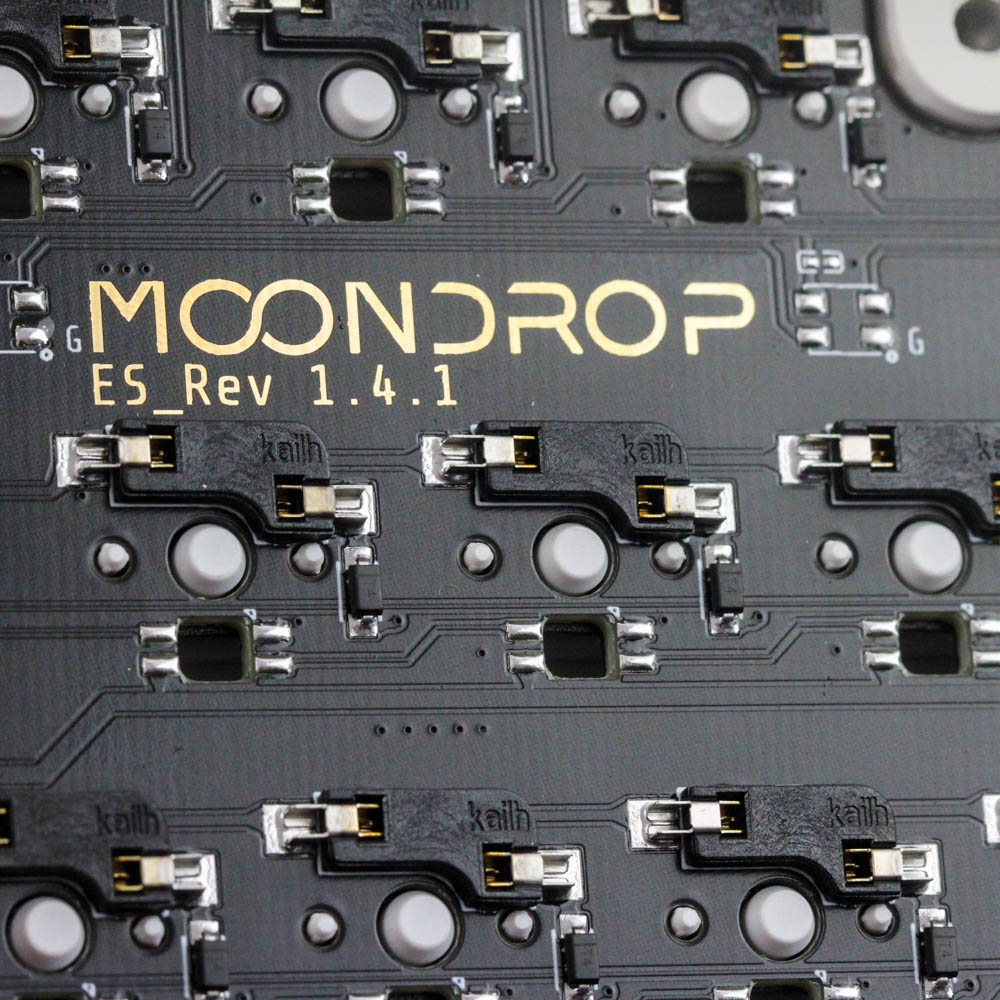
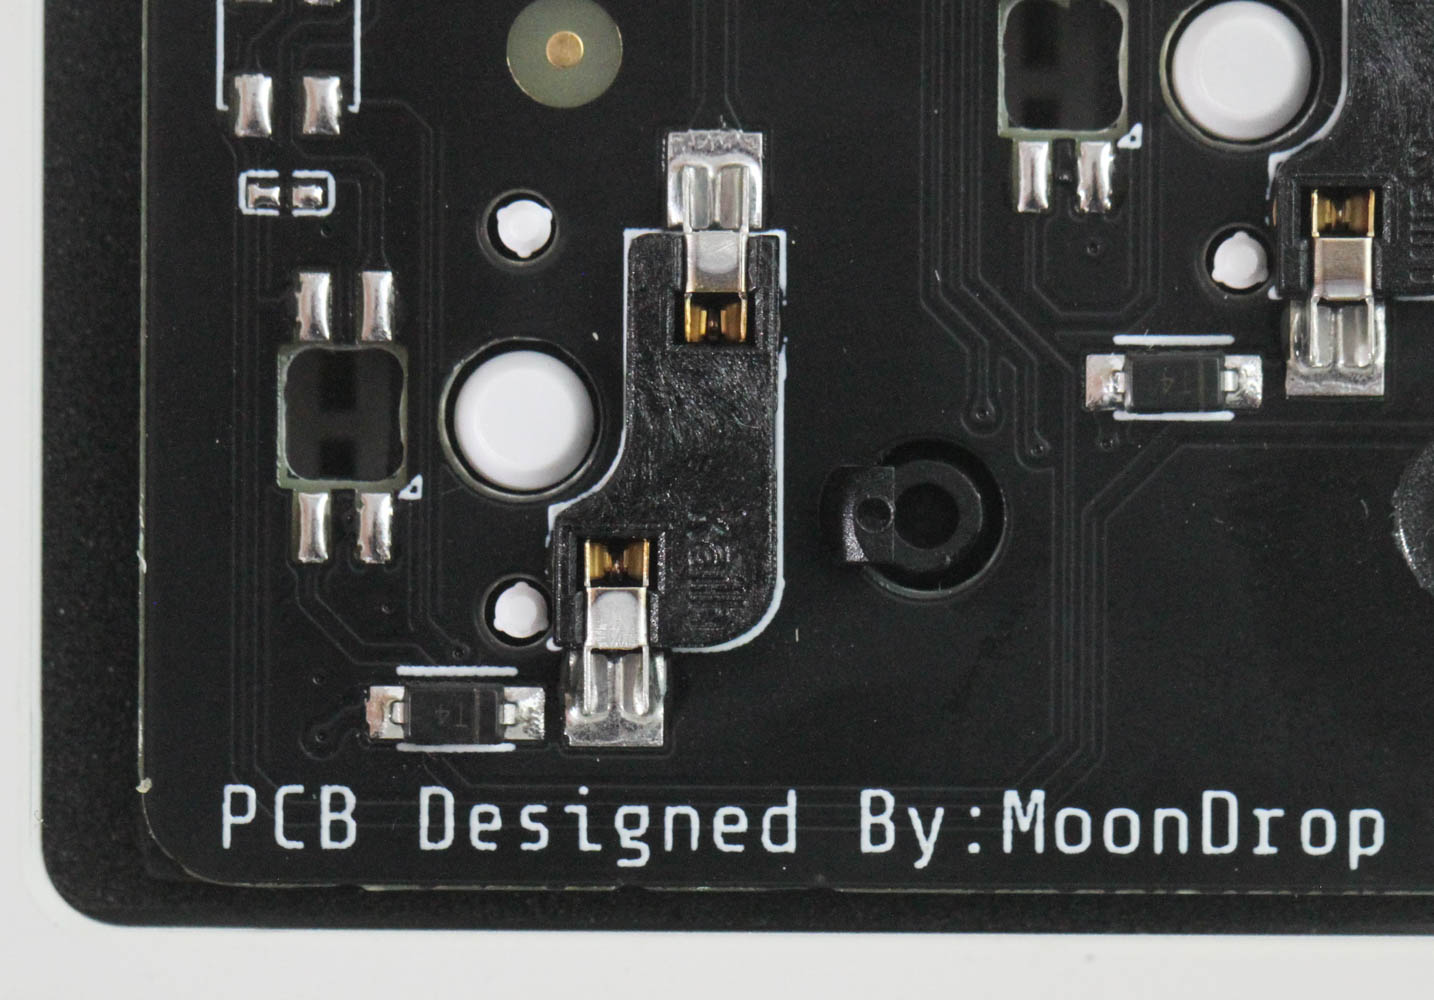
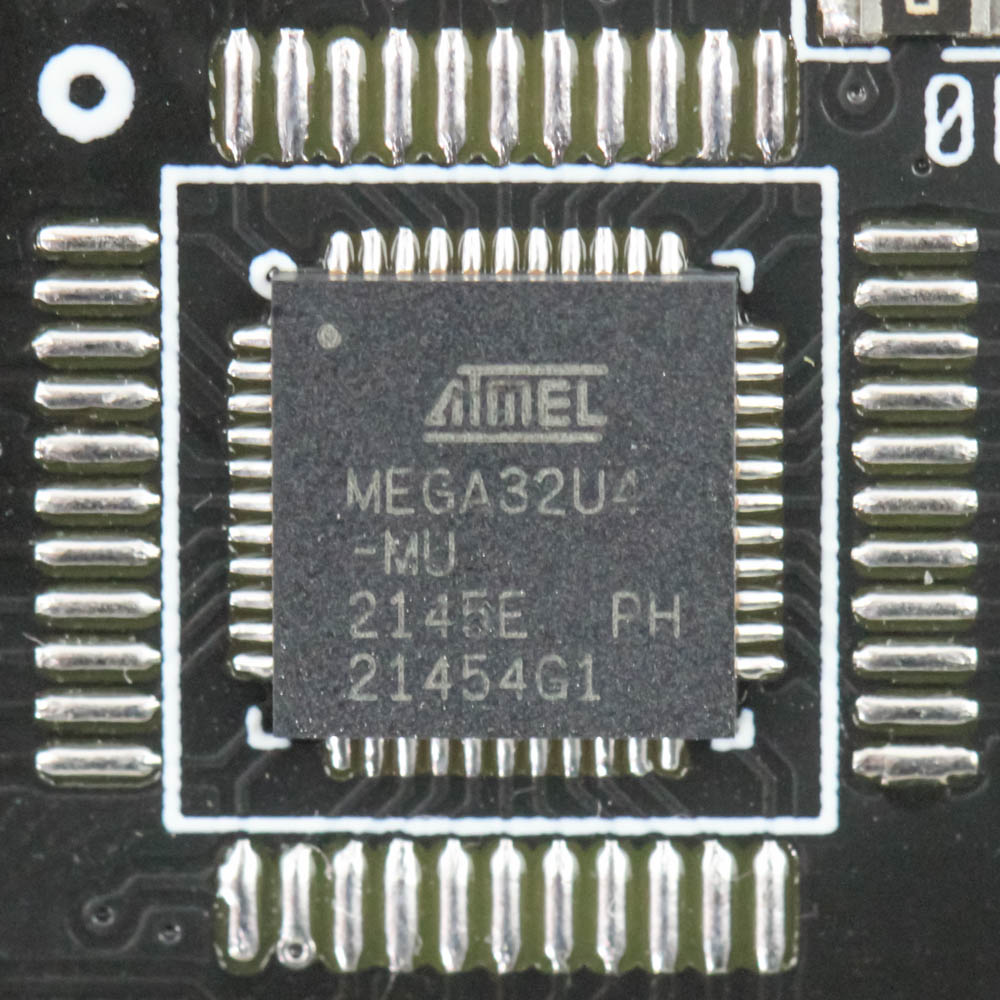
Now we get to the primary PCB itself and we see two separate markings to confirm this is also an in-house developed product. The DASH uses high-quality Kailh 5-pin hot-swap switch sockets and the keyboard functionality comes in the form of an ATMEL ATmega32U4 8-bit AVR RISC-based USB microcontroller with 32 KB onboard flash memory, 2.5 KB SRAM, and 1 KB EEPROM. It means the MOONDROP DASH is a USB 2.0 device at heart, so the USB 2.0 hub is not holding back the keyboard. There are no other hardware drivers or extra flash modules here although the lack of LEDs means there's no need for LED drivers in the first place. But the ATmega32U4 got me happy for a big reason which we will get to on the next page and I am sure many reading this review also know what I am teasing.
Before we move on, be advised that disassembly may void the warranty and that TechPowerUp is not liable for any damages incurred if you decide to go ahead and do so anyway.
Jul 15th, 2025 16:30 CDT
change timezone
Latest GPU Drivers
New Forum Posts
- No offense, here are some things that bother me about your understanding of fans. (145)
- Stupid things one has done with hardware (65)
- RTX 5070 discussion (11)
- I would give anything for Valve's Steam to have an option to disable the Big Picture Mode button. How many times have I accidently clicked it, fml (52)
- Choosing the right motherboard (6)
- Solidigm NVMe Custom Modded Driver for All NVMe Brands SSDs & Any NVMe SSDs (229)
- Recommend me a decent budget card :) (33)
- What's your latest tech purchase? (24278)
- TOS 6 on Ugreen NAS (0)
- Folding Pie and Milestones!! (9620)
Popular Reviews
- MSI GeForce RTX 5060 Gaming OC Review
- Our Visit to the Hunter Super Computer
- Lexar NM1090 Pro 4 TB Review
- SilverStone SETA H2 Review
- NVIDIA GeForce RTX 5050 8 GB Review
- Fractal Design Epoch RGB TG Review
- Sapphire Radeon RX 9060 XT Pulse OC 16 GB Review - An Excellent Choice
- AMD Ryzen 7 9800X3D Review - The Best Gaming Processor
- Upcoming Hardware Launches 2025 (Updated May 2025)
- Corsair FRAME 5000D RS Review
TPU on YouTube
Controversial News Posts
- Intel's Core Ultra 7 265K and 265KF CPUs Dip Below $250 (288)
- Some Intel Nova Lake CPUs Rumored to Challenge AMD's 3D V-Cache in Desktop Gaming (140)
- AMD Radeon RX 9070 XT Gains 9% Performance at 1440p with Latest Driver, Beats RTX 5070 Ti (131)
- NVIDIA Launches GeForce RTX 5050 for Desktops and Laptops, Starts at $249 (122)
- NVIDIA GeForce RTX 5080 SUPER Could Feature 24 GB Memory, Increased Power Limits (115)
- Microsoft Partners with AMD for Next-gen Xbox Hardware (105)
- Intel "Nova Lake‑S" Series: Seven SKUs, Up to 52 Cores and 150 W TDP (100)
- NVIDIA DLSS Transformer Cuts VRAM Usage by 20% (99)