 11
11
MSI Oculux NXG251R 240 Hz G-Sync Gaming Monitor Review
Response Time, Input Lag & Motion Blur »Picture Quality
The MSI Oculux NXG251R features a 24.5-inch Full HD TN panel. It's a 6-bit panel that uses Frame Rate Control (FRC) to represent colors by using 8 bits of information per RGB channel. FRC is a form of temporal dithering that cycles between different color shades with each new frame to simulate an intermediate shade. Using FRC on TN panels to make them capable of displaying 16.7 million colors is standard practice, so MSI didn't do anything out of the ordinary in that regard. TN panels are generally the fastest non-OLED monitor panels available, but suffer from two major drawbacks compared to IPS or VA panels—mediocre color reproduction and narrow viewing angles. We'll dissect both of those aspects of the MSI Oculux NXG251R below.The screen uses a White-LED (W-LED) backlight unit. It's controlled by direct current (DC). As such, it doesn't flicker regardless of the brightness setting. The screen coating is light anti-glare (AG). The screen is very resistant to reflecting its surroundings even when used in a room with lots of natural or artificial light, and the picture isn't perceived as grainy or dirty from a normal sitting distance, which can be the case with heavier AG coatings. For reasons unknown to me, MSI almost hides the maximum brightness of the panel (I only found it inside the user manual), but there's no escaping my colorimeter, so we'll have no trouble finding out how far it can be pushed. Recently, I upgraded to the Datacolor SpyderX, their fastest and most advanced colorimeter to date, so that's the tool I'm going to use to evaluate the picture performance of the MSI Oculux NXG251R.
Picture Quality at Factory Settings
Picture quality of the MSI Oculux NXG251R at its factory defaults was tested right after plugging it in and allowing it to warm up for about an hour. Straight out of the box, the "Standard" picture profile was selected, with the Brightness set to 80, Contrast to 50, and Adaptive Contrast (dynamic contrast) turned off. Just for the record, Dark Boost is also turned off and Response Time is set to Fast in this profile. This results in a very high brightness of 374.48 nits with a color temperature of 6,266 K, which makes fro a slightly yellowish and somewhat washed out picture. The high brightness will also strain your eyes during nighttime, especially if you don't have anything illuminating the wall behind your monitor. Since we want to adjust those settings to a more suitable level, we'll first need to open up the OSD and set the monitor to Profile 1 (Gaming > Mode > Profile 1).To set the color temperature to around 6,500 K and lower the brightness to around 250 nits, a level which many find ideal for general use, you'll have to open the OSD, go to the Image menu, and set the Brightness to 41. In the Color Temperature submenu, go to Customization and reduce the gain of the red color to 46, while leaving the green and blue channels at the default value of 50. After doing so, the picture becomes noticeably nicer to look at—the yellowish tint is gone, and the sheer brightness of the panel won't burn your eyes. The colors still don't magically become exceptionally deep or rich, though they're as decent as you could hope for when buying a monitor with a TN panel. I did see a couple of gaming monitors with better TN panels in terms of color depth and punchiness—the Alienware AW2518H (also 240 Hz with G-Sync) immediately springs to mind.
Let's see what the colorimeter has to say after completing the aforementioned adjustments.

As we can see by looking at the CIE diagram, we get a 95% coverage of the sRGB, 74% coverage of the Adobe RBG, and 76% coverage of the DCI-P3 color space out of the box. These are good results for a TN panel. Focusing on the sRGB color space, there's a noticeable overcoverage in the greens and reds, although not too drastic or particularly noticeable to the naked eye.

I was initially disappointed that the OSD doesn't offer any gamma-related adjustments, but after conducting the tone response test, my worries disappeared. With only a slight, negligible deviation of 0.02, the measured gamma curve almost looks ideal. That's great news as gamma-related issues are not easy to fix without a proper calibration.
These are the measured brightness and contrast values for various brightness settings:
| Brightness and Contrast - Pre-Calibration | ||||
|---|---|---|---|---|
| Setting | Brightness | Black | Contrast | White Point |
| 0% | 110.1 | 0.14 | 770:1 | 6,500 (0,313, 0,327) |
| 25% | 200.8 | 0.24 | 830:1 | 6,500 (0,313, 0,327) |
| 50% | 286.1 | 0.33 | 870:1 | 6,500 (0,313, 0,326) |
| 75% | 366 | 0.41 | 890:1 | 6,500 (0, 312, 0,326) |
| 100% | 441 | 0.48 | 910:1 | 6,600 (0,312, 0,325) |
These are some interesting and revealing numbers. First of all, they tell us that the brightness of the MSI Oculux NXG251R can be pushed all the way up to 441 nits, which is retina-burning bright. On the other hand, some users are attracted to a super-bright picture, and in certain games, pushing the brightness this far can help you spot your virtual enemies easier, so some may see it as an advantage. The white point is very consistent on all brightness levels, and the static contrast ratio isn't spectacular, which is partly why this monitor won't knock your socks off with the vividness of its colors. The brightness can't be set below 100 nits no matter what you do—it stays at 110 nits with the OSD Brightness set to 0. As this monitor isn't to be used for color-critical work, this isn't an issue.


Depending on the brightness level of whatever is on screen, color uniformity varies from very good to quite problematic. The brighter the objects, the less noticeable and measurable the deviation; ∆E doesn't go above 3.2 (upper-right corner of the screen) and manages to stay below 1.6 on most other parts of the screen. These are values that are nearly impossible to spot with the naked eye and perceive as imperfections. Unfortunately, things take a sharp turn for the worse with less brightness, where ∆E on the entire upper third of the panel varies from 5.8 to 6.9. Will this bother you in fast-paced games? Probably not, but that doesn't change the fact that overall color uniformity is far from perfect.


Luminance uniformity is decent. It never deviates by more than 11% from the maximum measured value, which I manually adjusted to 250 nits at the center point of the screen before conducting the test. No parts of the screen have noticeable bright spots or backlight bleed.

Uncalibrated color accuracy, measured at the center of the screen, is actually quite good with an average ∆E of 2.44. However, going by what values would be ideal, some significant deviations can definitely be spotted, especially in various shades of gray and dark cyan (∆E 6.88). Read on to find out if this improves after calibration, and to what extent if so.
Let's analyze what happens when we switch between factory picture profiles. These measurements have been made without any additional profile adjustments. It should be noted that some profiles can be customized—by brightness and contrast adjustments, for instance—but they lock you out of other picture-related options. Overall, you should avoid using any of the "gaming" profiles as all do undesirable things to the overall picture quality.
| Brightness, Contrast, and White Point at Different Presets | |||||
|---|---|---|---|---|---|
| Setting | Brightness | Black | Contrast | White Point | Description |
| Profile 1 | 255.1 | 0.30 | 850:1 | 6,500 (0,313, 0,326) | This is one of two available custom profiles. All image-related options are unlocked. It was manually adjusted to achieve the screen brightness of around 250 nits and the white point of 6,500 K. |
| Standard | 302.5 | 0.34 | 890:1 | 6,300 (0,316, 0,326) | The factory profile. As previously stated, brightness is very high and the color temperature is set to around 6,300 K, which results in a yellowish picture. Everything but the color temperature can be adjusted manually within this profile. |
| FPS | 418.1 | 0.45 | 920:1 | 6,400 (0,316, 0,325) | Extremely, almost painfully bright picture with a ton of added sharpening. Completely crushes the bright and dark details and washes out the colors. Looks awful and should be avoided at all costs. Locks you out of changing the brightness, contrast, and color temperature. |
| Racing | 403.2 | 0.44 | 910:1 | 6,400 (0,316, 0,325) | Similar to the FPS profile but with the contrast boosted into oblivion, resulting in punchier, but completely unnatural colors and, again, crushed details. |
| RTS | 378.2 | 0.43 | 910:1 | 6,400 (0,316, 0,326) | Unnatural colors, overly sharpened picture, and a boosted contrast to where every finer detail is completely lost. Yet another profile that is best avoided. |
| RPG | 378.2 | 0.43 | 910:1 | 6,400 (0,316, 0,326) | Even though it measures identically to the RTS profile, this one actually manages to look somewhat (and that's a big "somewhat") acceptable. The finer bright and dark details aren't crushed as much (although still quite messy, especially in the grays), and the colors are vibrant and punchy. This is the fastest way to get a more vivid, lively picture (much less accurate, though) should you find the colors too bland at the factory defaults. It comes at a cost, though, so I'd avoid using this profile as well. |
Picture Quality After Calibration
I calibrated the display by using the Datacolor SpyderX. My targets were 250 nits of brightness and a color temperature of 6,500 K. Let's take a look at the post-calibration report:| Post-Calibration Report | ||
|---|---|---|
| Brightness (Candelas) | Black | White |
| Uncalibrated | 0.29 | 261.1 |
| Target | 0.29 | 250.0 |
| Calibrated | 0.29 | 250.9 |
| White Point (CIE xy) | ||
| Uncalibrated | 0.316 | 0.327 |
| Target | 0.313 | 0.329 |
| Calibrated | 0.314 | 0.329 |
| Primaries (CIE xy) | ||
| Red | 0.659 | 0.331 |
| Green | 0.327 | 0.613 |
| Blue | 0.154 | 0.064 |
| Delta-E (Lab) | ||
| White Point | 0.5 | |
| 50% Gray | 0.3 | |
| Gamma | ||
| Uncalibrated | 2.19 (0.02) | |
| Target | 2.20 (0.00) | |
| Calibrated | 2.22 (0.01) | |
Calibration resulted in deeper, prettier, and more natural colors with smoother gradients. Here's the ICC profile that was generated after calibrating the monitor.
Backlight Uniformity
To give you an idea of the backlight's uniformity, brightness was set to 120 and 250 nits before I took photos in a completely dark room. I did my best to find a combination of the ISO value and shutter speed that would capture the screen in a way that has it look as close to what my eyes were seeing in real life.

At 250 nits, we see minor backlight bleed along the very right edge of the panel. It all but disappears at 120 nits. The backlight implementation is generally very solid.
Viewing Angles
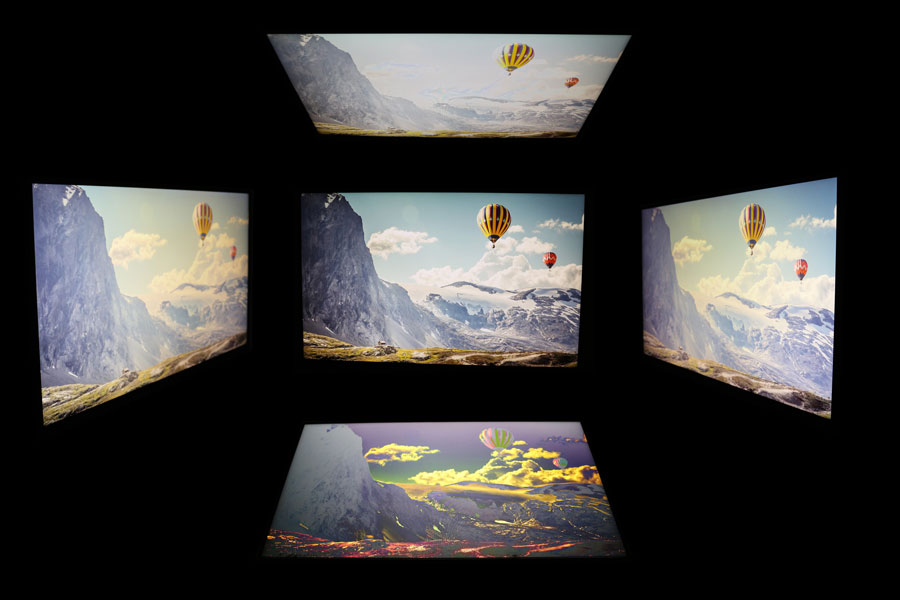
This being a TN panel, the viewing angles aren't great. There's substantial color shift, especially at the top of the screen, when you change your sitting position. As with any other TN monitor, you'll want to sit in a way that has your head level with the center of the screen to avoid any issues related to viewing angles.
Jul 4th, 2025 03:10 CDT
change timezone
Latest GPU Drivers
New Forum Posts
- Do you use Linux? (669)
- They're b...a....c....k.... (20)
- RDNA 4 Fine Wine? (HUB Vid) (58)
- Gigabyte graphic cards - TIM gel SLIPPAGE problem (128)
- Will you buy a RTX 5090? (616)
- [GPU-Z Test Build] New Kernel Driver, Everyone: Please Test (38)
- What Windows is overall the best to you and why? (272)
- How often do you (re)install your OS? (206)
- What would you buy? (53)
- Need help with X-Fi xtremegamer Fatal1ty card (1)
Popular Reviews
- Fractal Design Scape Review - Debut Done Right
- ASUS ROG Crosshair X870E Extreme Review
- Crucial T710 2 TB Review - Record-Breaking Gen 5
- PowerColor ALPHYN AM10 Review
- Sapphire Radeon RX 9060 XT Pulse OC 16 GB Review - An Excellent Choice
- Upcoming Hardware Launches 2025 (Updated May 2025)
- AMD Ryzen 7 9800X3D Review - The Best Gaming Processor
- Sapphire Radeon RX 9070 XT Nitro+ Review - Beating NVIDIA
- SCHENKER KEY 18 Pro (E25) Review - Top-Tier Contender
- AVerMedia CamStream 4K Review
TPU on YouTube
Controversial News Posts
- Intel's Core Ultra 7 265K and 265KF CPUs Dip Below $250 (288)
- NVIDIA Grabs Market Share, AMD Loses Ground, and Intel Disappears in Latest dGPU Update (212)
- Some Intel Nova Lake CPUs Rumored to Challenge AMD's 3D V-Cache in Desktop Gaming (140)
- NVIDIA GeForce RTX 5080 SUPER Could Feature 24 GB Memory, Increased Power Limits (115)
- Microsoft Partners with AMD for Next-gen Xbox Hardware (105)
- NVIDIA Launches GeForce RTX 5050 for Desktops and Laptops, Starts at $249 (105)
- Intel "Nova Lake‑S" Series: Seven SKUs, Up to 52 Cores and 150 W TDP (100)
- NVIDIA DLSS Transformer Cuts VRAM Usage by 20% (97)