 17
17
Phanteks Glacier 1080 GPU Waterblock Review
Installation »Closer Examination
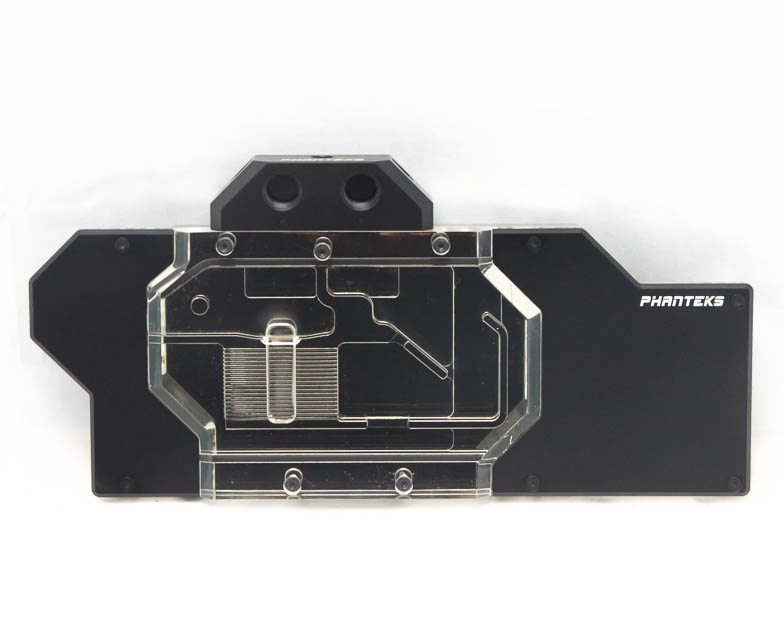
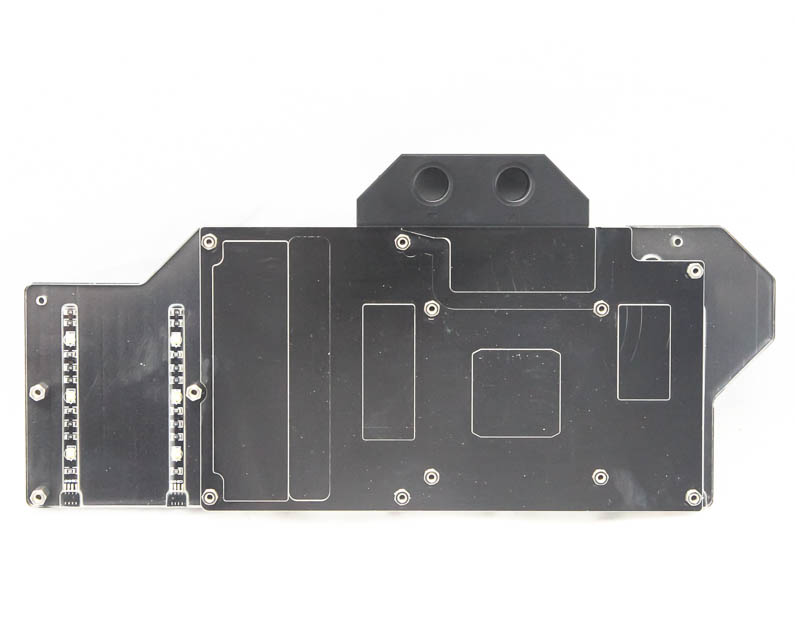
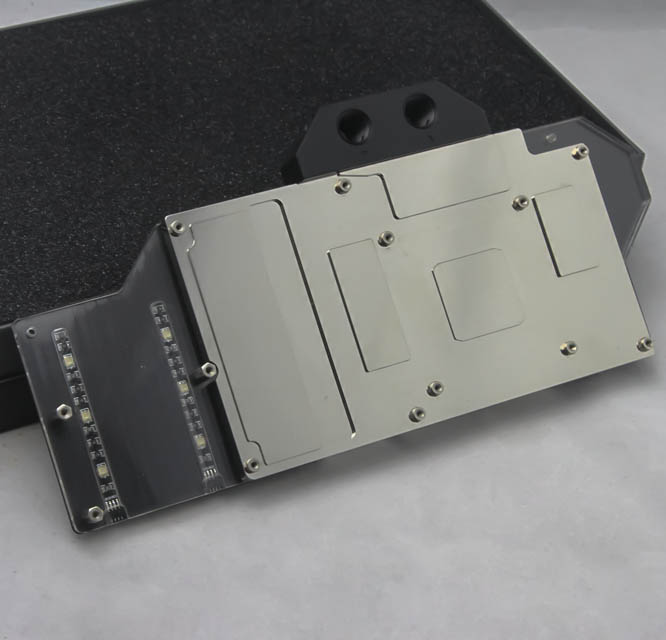
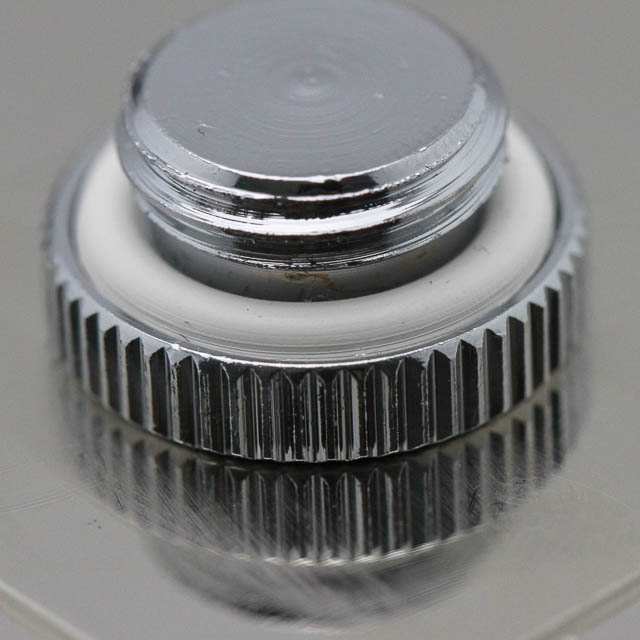
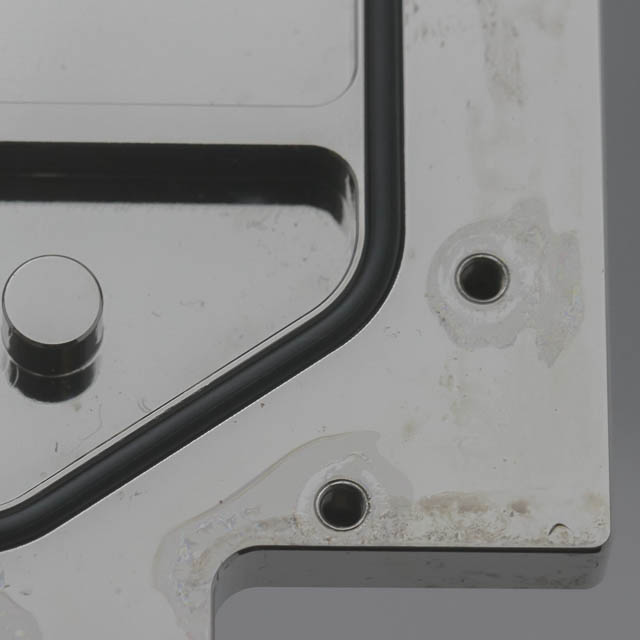
The GPU block itself weighs over a kilogram (1.054 kg to be exact), and while a lot of this has to do with the thick full-cover cold plate, the thick acrylic top and anodized aluminum side covers also add to the bulk. As such, be sure the PCI-E slot the GPU with this block is installed in is not struggling to hold it in place. The problem when photographing nickel- or chrome-plated blocks from the front is that you will either get everything over-exposed or under-expose the shiny parts, while having the rest looking well. So I have images taken at an angle as well to better illustrate the true nature of the components that make up the block. Notice the two LED strips seen here, and there is another hidden on the other side of the business area, which is where you get the integrated RGB lighting from. The cold plate end itself has raised sections for the core, VRM, and VRAM and does not have a mirror polish, as the final picture above shows. There are some machining marks to be seen here as well, but the surface itself has no upward protrusions, and that is really all one needs. Interestingly, we see that Phanteks has gone with Viton O-rings for the stop plugs (and also the internal one inside the block), which is pretty overkill for PC watercooling. Phanteks is using it as a selling point, and while the claims of Viton being able to withstand harsher conditions are true, it is also conveniently omitting the part where standard Buna-based O-rings are plenty fine too. The limitation when it comes to coolant/loop temperatures is inevitably the pump itself, with the Laing D5 and DDC rated at ~60 °C for those with plastic housings, which no loop should ever get close to anyway.
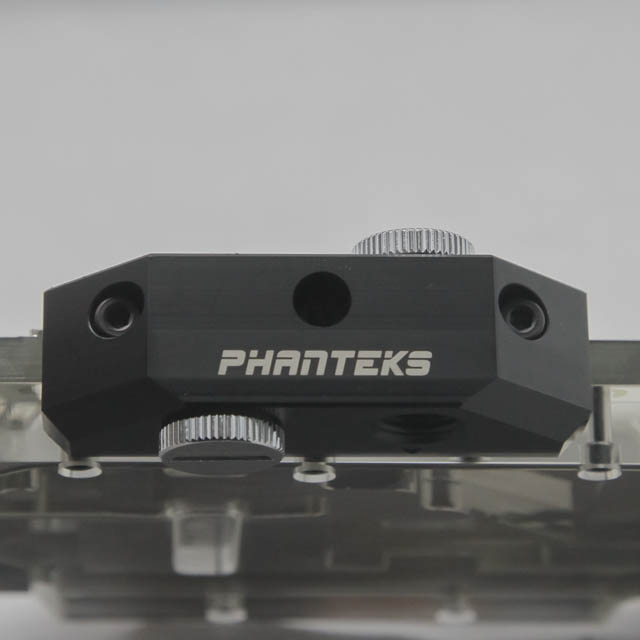

The I/O port manifold is made of machined Delrin and has rounded corners with a design that is more a trapezoid than a rectangle. There are two ports each on either side, in line with the block, and there are none on the front. The two stop plugs provided thus are to be used on a maximum of two ports that will not be in use. There are arrows indicating the designated inlet and outlet directions, with the same for the ports immediately behind these. Given the nature of the split central flow design here, it is best to follow this, although it most certainly will not be the end of the world if the reverse helps your plumbing layout better.
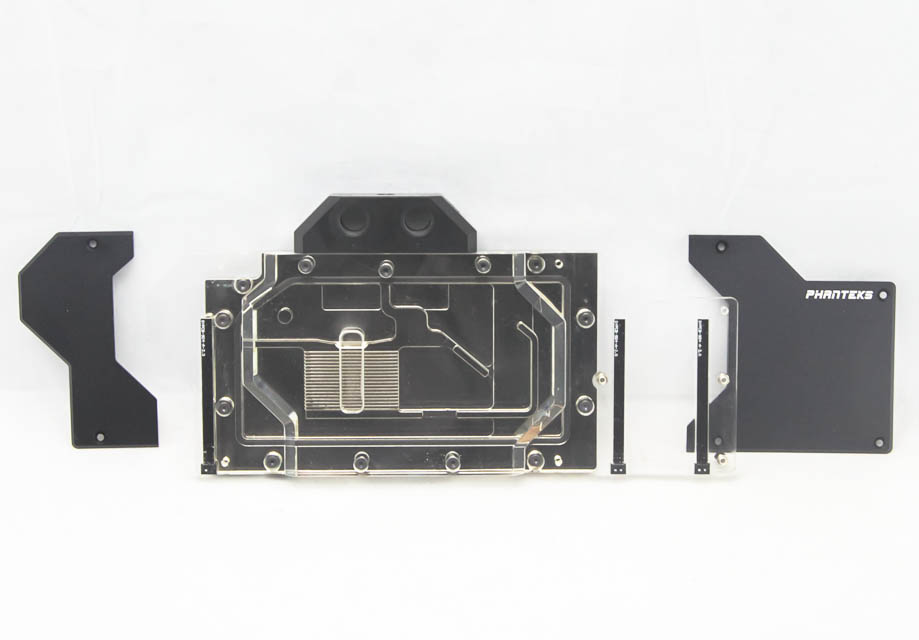
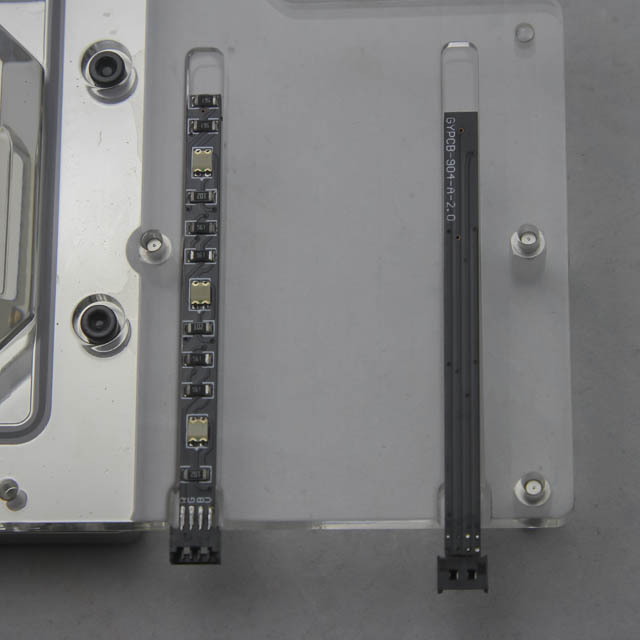
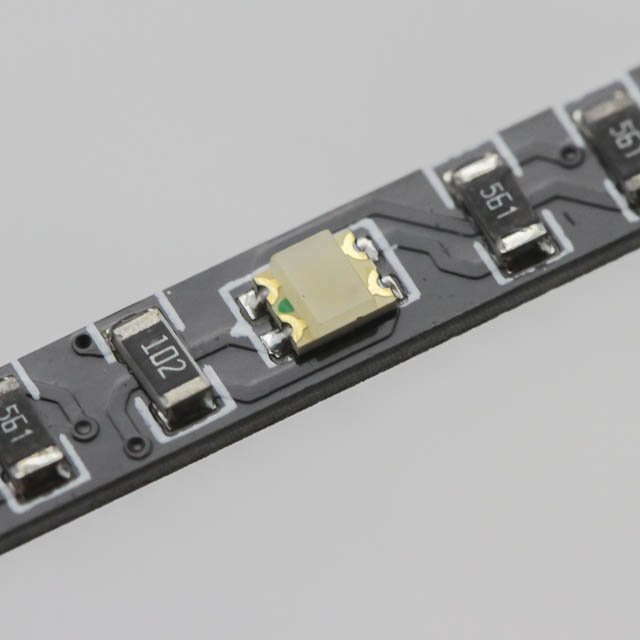
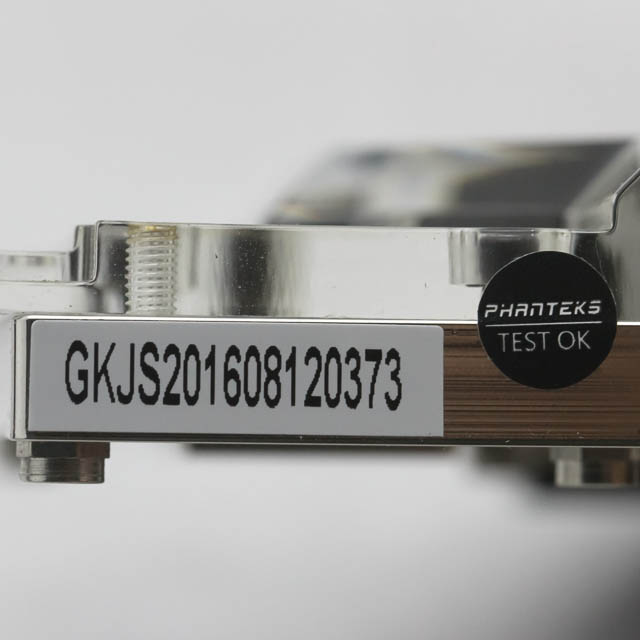
Disassembly begins with the removal of the six screws holding the two aluminum side covers in place. The block is still perfectly functional at this point, and all we have done is reveal the extra acrylic hang-off from either side, as well as the channels in it where the three RGB LED strips, which are actually small PCBs, are installed out of the box. Each strip has three addressable RGB LEDs in it, and the aluminum helps deflect the light around and inwards, which results in a halo-style appearance around the coolant and the periphery of the entire block. There is a QC sticker connecting the acrylic top to the cold plate, and removing it will likely void your warranty as well.
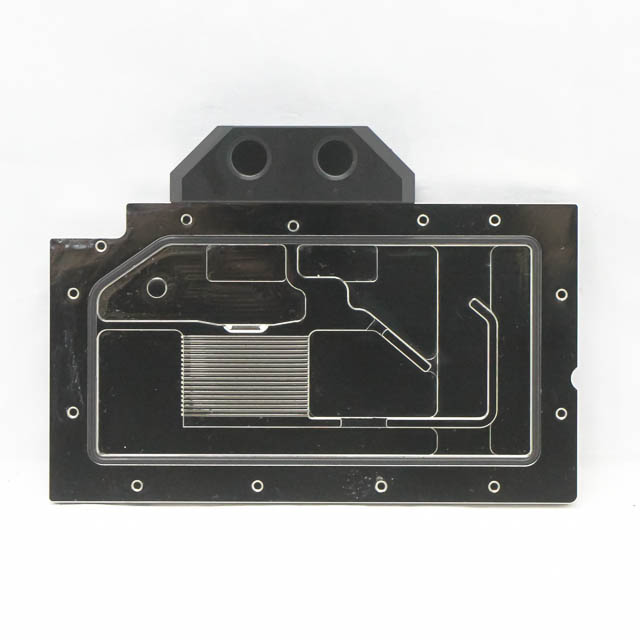


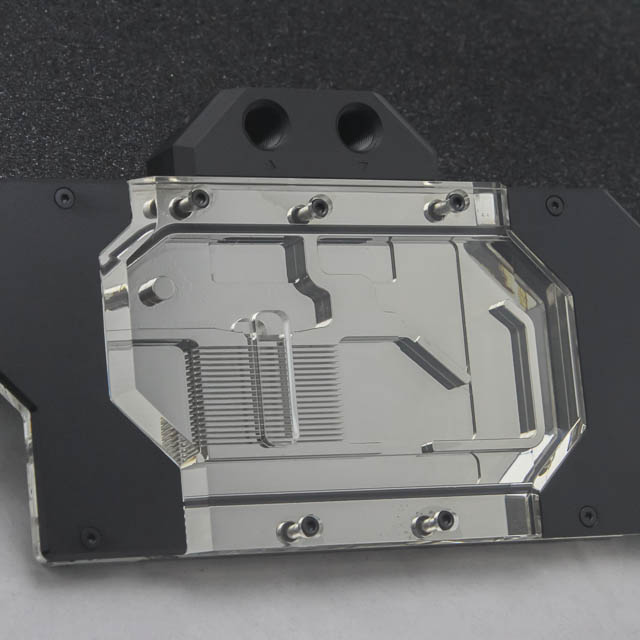
More screws to remove here, including some that hold the I/O manifold in place. Once done, we can get our first good look inside. The top itself is fairly thick acrylic, and Phanteks has gone with a split central flow design which has the coolant entering the left port (as seen from the front) and cooling some VRAM before going through the microchannels over the GPU core. It then splits up into two parallel streams which further cool the remaining components before combining and exiting through the right port. The advantage here is a lower liquid flow restriction and better heat transfer from the core relative to a design with the coolant simply going in series in a circle. EK first introduced this design a couple years back, and today, there remain some watercooling-only companies that have stuck to the older design scheme, thus making Phanteks' first entry all the more impressive.
In terms of actual microfins and microchannels, there are not as many as with other blocks, and Phanteks has gone in favor of a lower flow restriction here. Perhaps simply due to manufacturing limitations wherein they could not machine thinner channels and fins, this will be a place where other manufacturers can extract more performance at the expense of a lower flow rate.
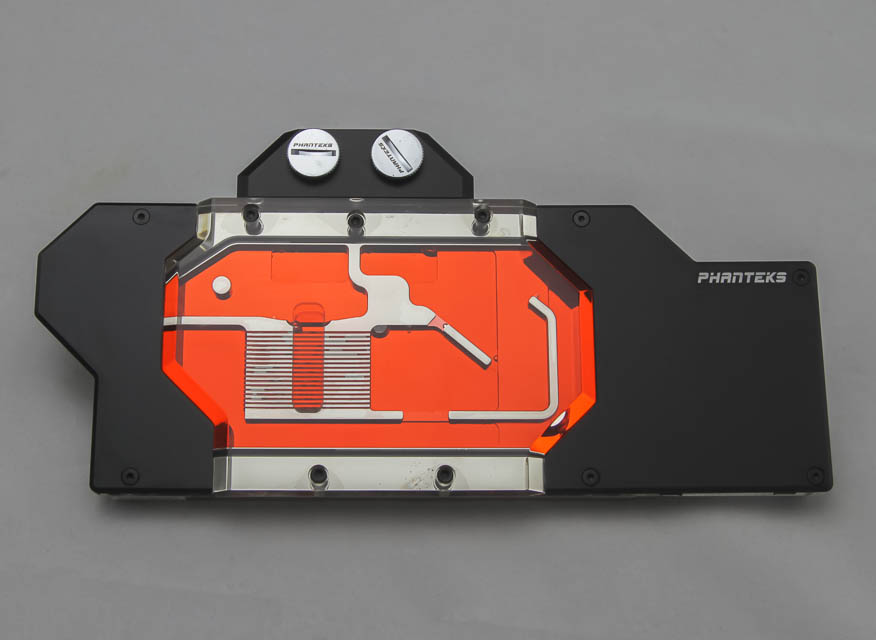
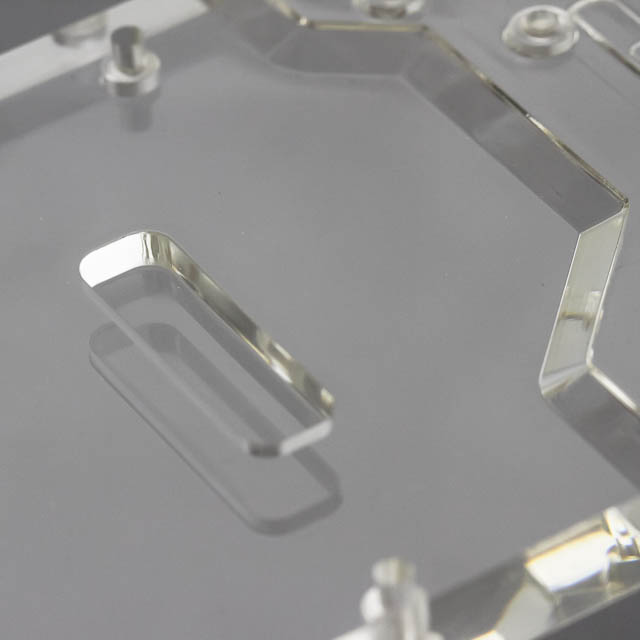
This image with an orange-colored coolant does a good job of explaining how the coolant flows through in the block. The combination of a transparent top over the cooling engine, if you will, RGB lighting (not pictured here), and aluminum side covers keeps it clean but offers a lot of customization options.
When re-assembling, just remember to put the O-ring back in place if it got dislodged and reverse engineer these steps accordingly. As always, TechPowerUp is not liable for any issues that arise from your disassembly of the waterblock.
Jul 12th, 2025 01:17 CDT
change timezone
Latest GPU Drivers
New Forum Posts
- Will you buy a RTX 5090? (642)
- 'NVIDIA App' not usable offline? (8)
- Can you guess Which game it is? (222)
- What are you playing? (23920)
- RX 9070 XT freezing/locking up only on desktop, anyone else? (43)
- NVIDIA RTX PRO 6000 Workstation Runs Much Hotter Than 5090 FE (22)
- Quick charging your USB devicesUSB 3.2 Gen 2x2 Type-C® front-panel. (1)
- GTX 1050 GPU Owners Club (12)
- ASUS ProArt GeForce RTX 4060 Ti OC Edition 16GB GDDR6 Gaming - nvflash64 VBIOS mismatch (2)
- No offense, here are some things that bother me about your understanding of fans. (33)
Popular Reviews
- Fractal Design Epoch RGB TG Review
- Corsair FRAME 5000D RS Review
- Lexar NM1090 Pro 4 TB Review
- NVIDIA GeForce RTX 5050 8 GB Review
- NZXT N9 X870E Review
- Sapphire Radeon RX 9060 XT Pulse OC 16 GB Review - An Excellent Choice
- AMD Ryzen 7 9800X3D Review - The Best Gaming Processor
- Upcoming Hardware Launches 2025 (Updated May 2025)
- Our Visit to the Hunter Super Computer
- Chieftec Iceberg 360 Review
TPU on YouTube
Controversial News Posts
- Intel's Core Ultra 7 265K and 265KF CPUs Dip Below $250 (288)
- Some Intel Nova Lake CPUs Rumored to Challenge AMD's 3D V-Cache in Desktop Gaming (140)
- AMD Radeon RX 9070 XT Gains 9% Performance at 1440p with Latest Driver, Beats RTX 5070 Ti (131)
- NVIDIA Launches GeForce RTX 5050 for Desktops and Laptops, Starts at $249 (119)
- NVIDIA GeForce RTX 5080 SUPER Could Feature 24 GB Memory, Increased Power Limits (115)
- Microsoft Partners with AMD for Next-gen Xbox Hardware (105)
- Intel "Nova Lake‑S" Series: Seven SKUs, Up to 52 Cores and 150 W TDP (100)
- NVIDIA DLSS Transformer Cuts VRAM Usage by 20% (97)