 12
12
Razer DeathStalker V2 Pro Low Profile Wireless Optical Keyboard Review
Software »Disassembly


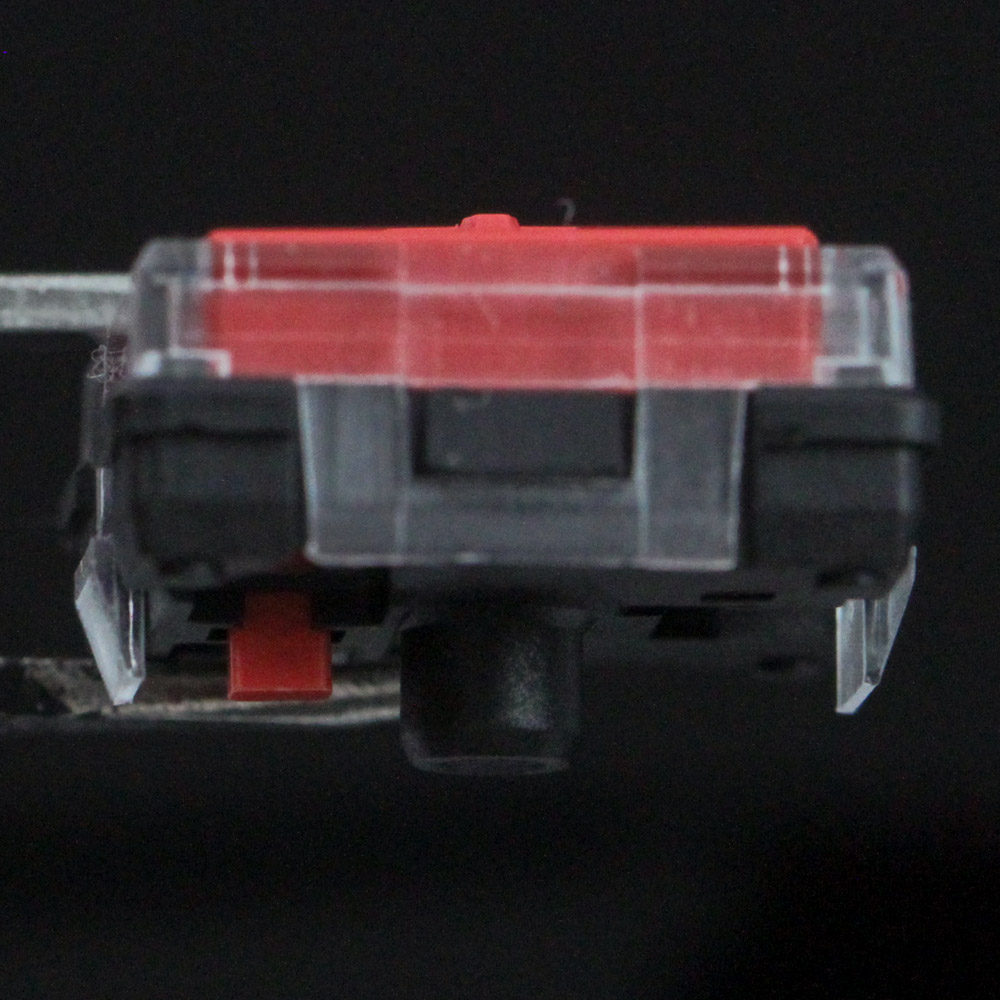
Given we have readily removable switches here, I wanted to begin the disassembly page by taking one of the new Razer Low Profile Linear Optical switches apart. It is built similar to any other optical switch, which in itself shares a lot with the typical cross-point mechanical switch design from the Cherry MX platform. There is a tiny spring in the middle which is extremely easy to lose so I don't encourage disassembly of the switches unless you wish to lube the stem slider. What is interesting to me is the use of silicone pads on the underside of the stem where it meets the base, which effectively dampens and quietens the downstrokes. Actuation happens when the slider interrupts the light signal going through the switch socket itself, as seen above.

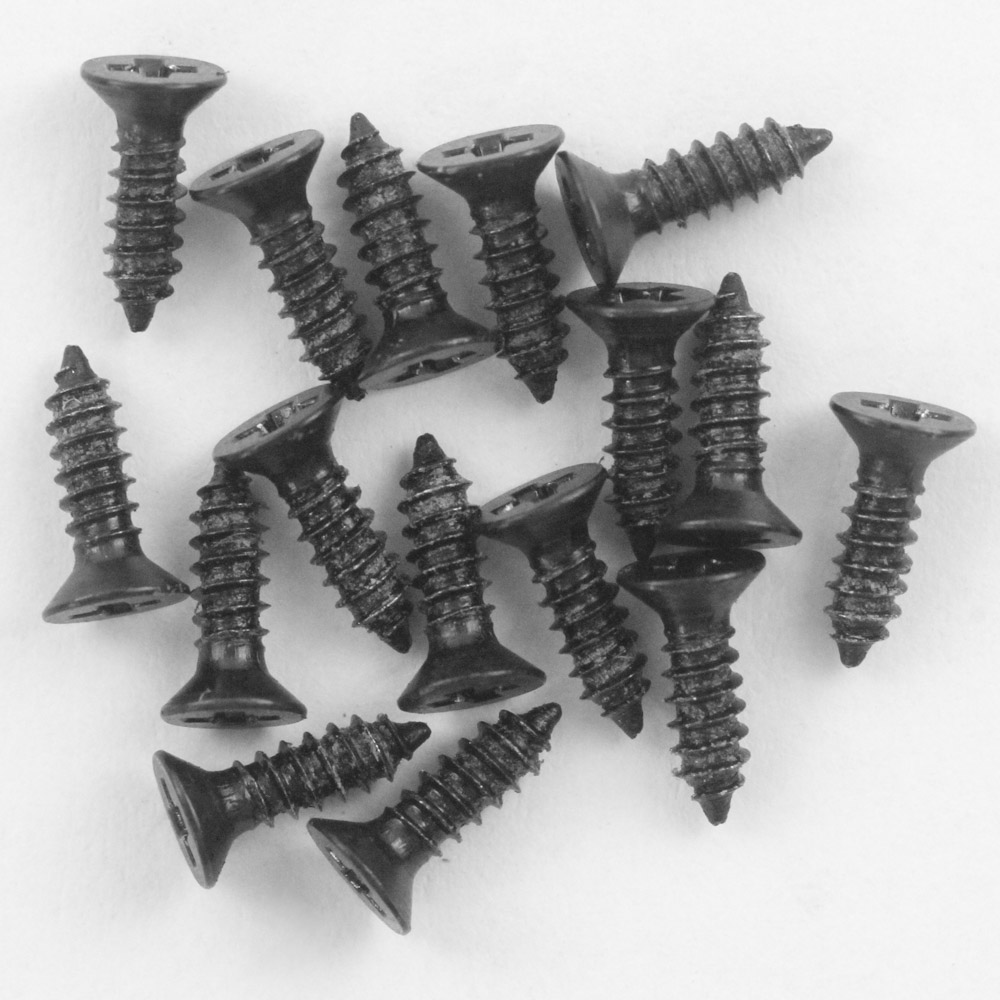
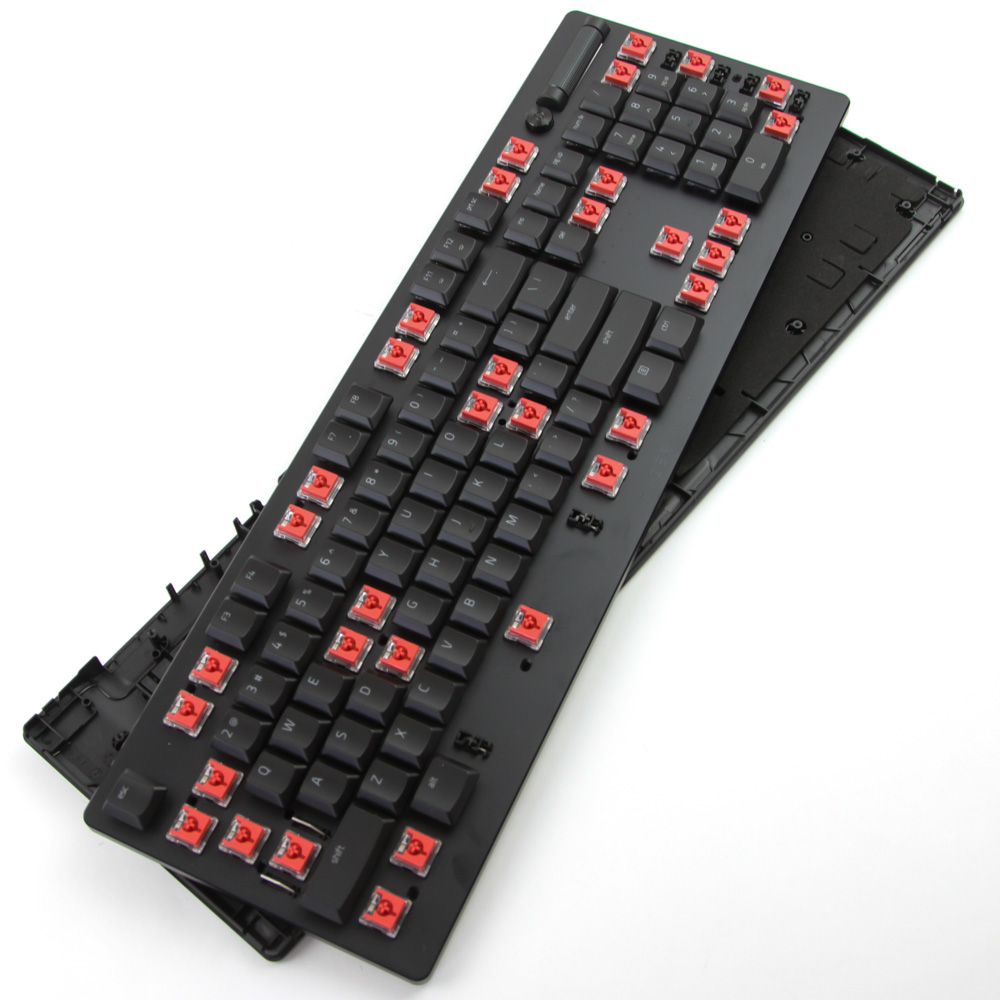
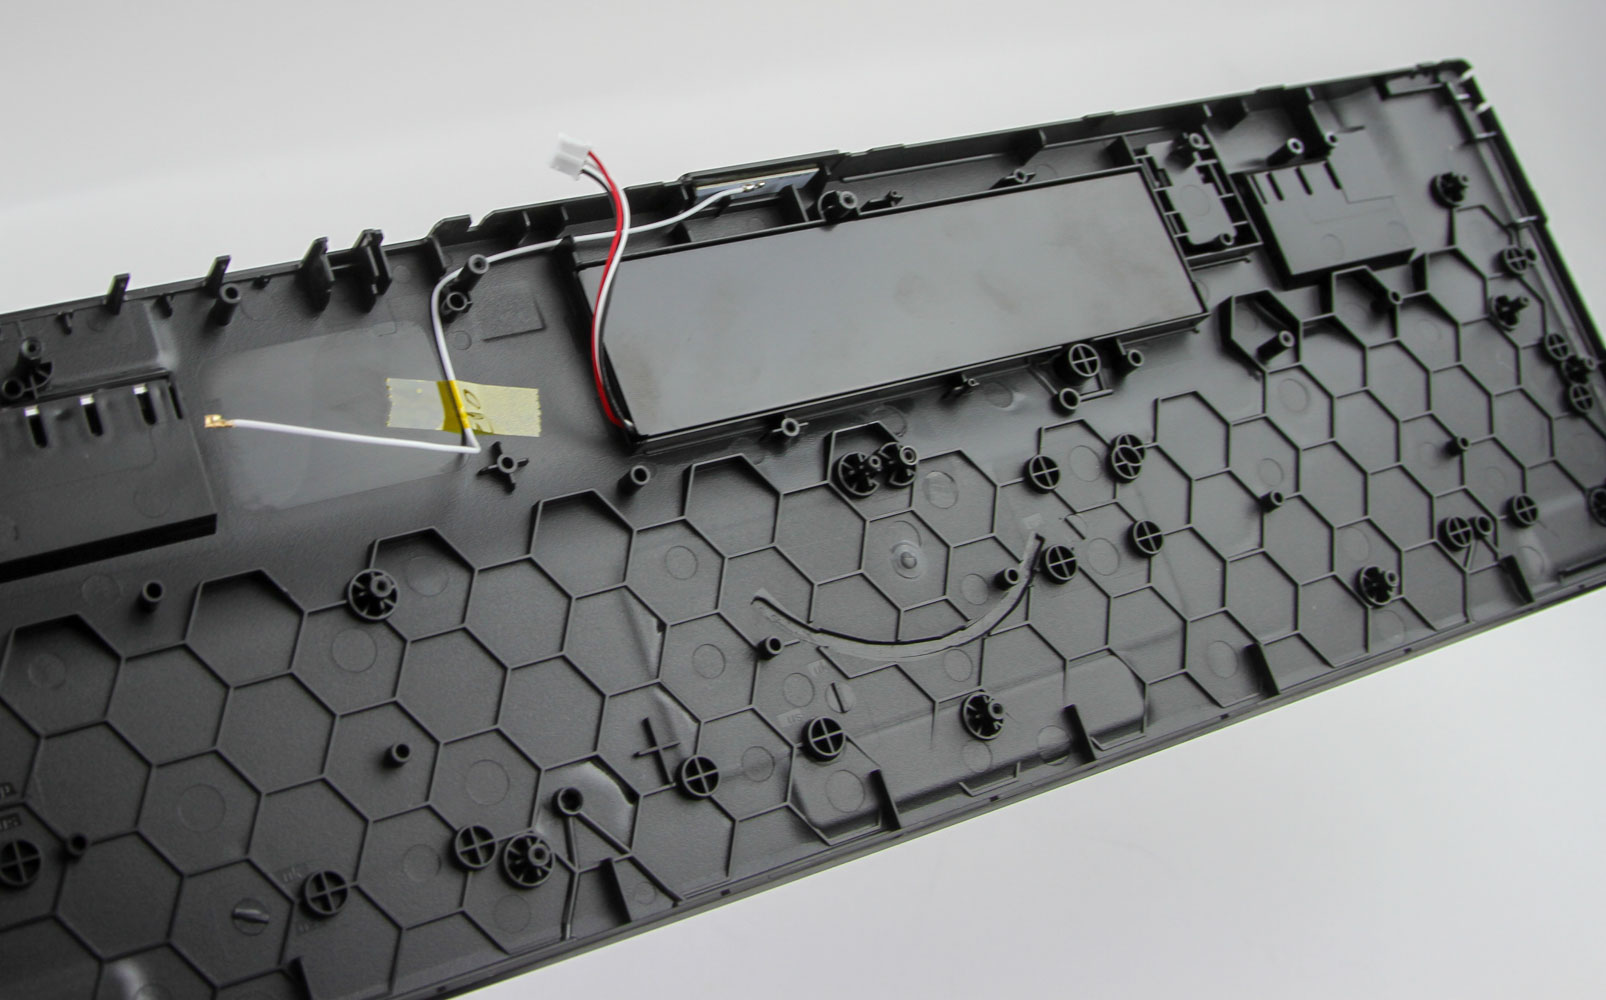
Disassembly of the Razer DeathStalker V2 Pro is simple enough given the aluminium frame also acts as the keyboard plate and is held in place by 16 Phillips head screws. You need to remove certain specific keycaps to access them and a precision screwdriver comes in handy here. Once done, there are small interlocking plastic tabs in the ABS case at the corners that you need to press inward slightly to release. At this point the top piece comes off enough to access the internal USB cable and electrical isolating cable. Dislodge both to fully separate the two pieces, and then you will see a mostly empty but thin ABS case that hosts the 4200 mAh battery for wireless connectivity. This is a good-sized battery here and should make for a long battery life.
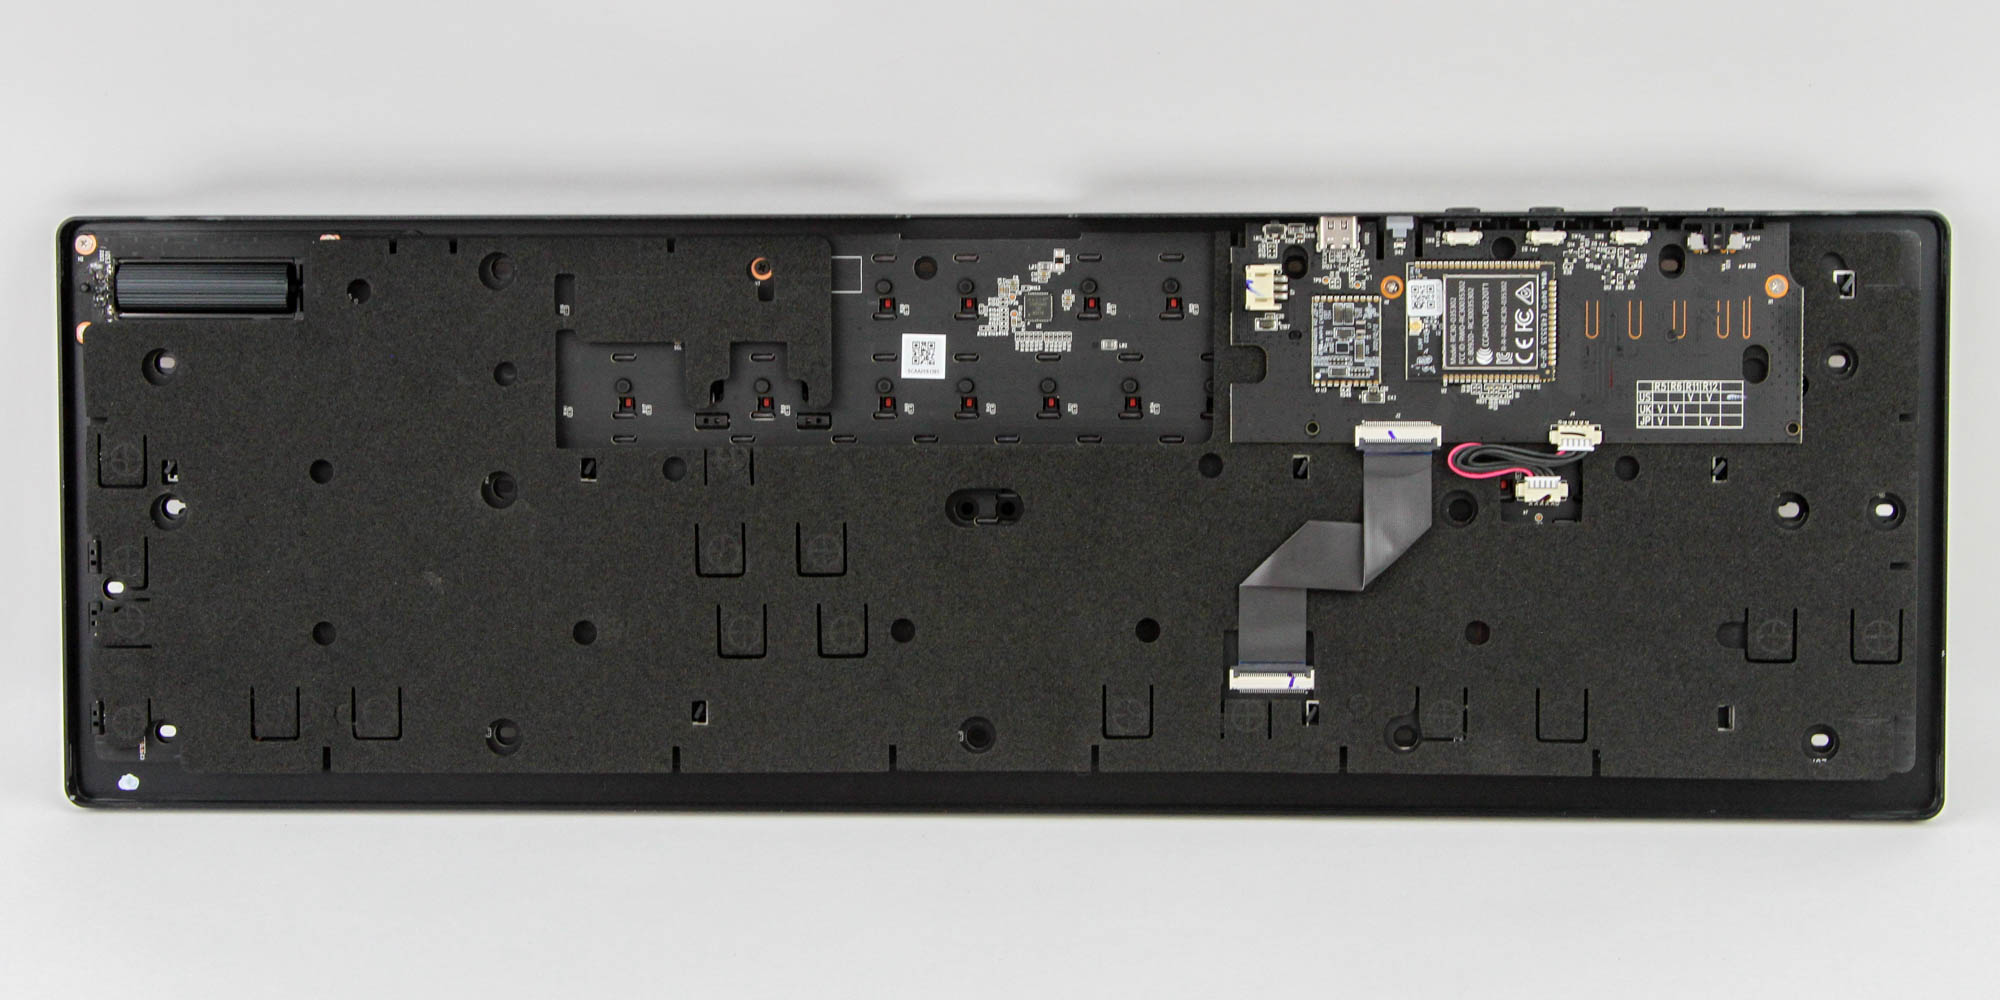
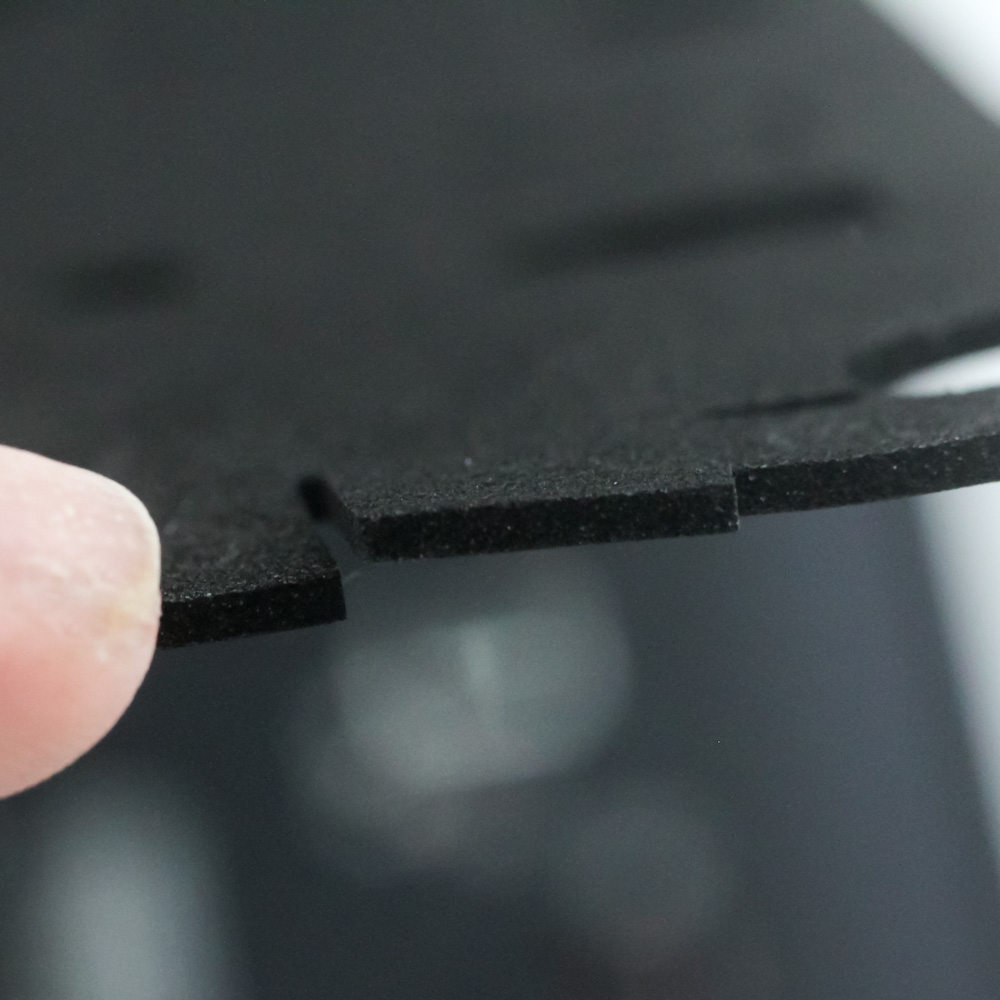
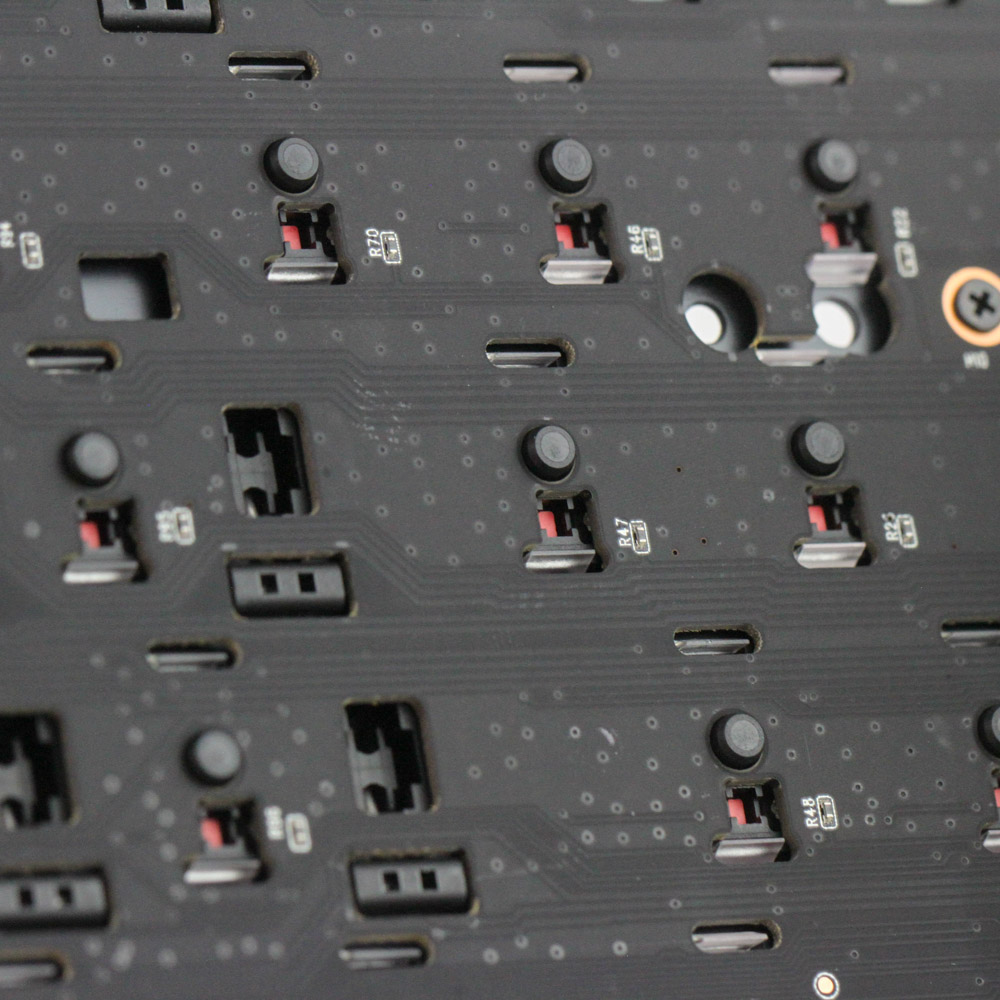

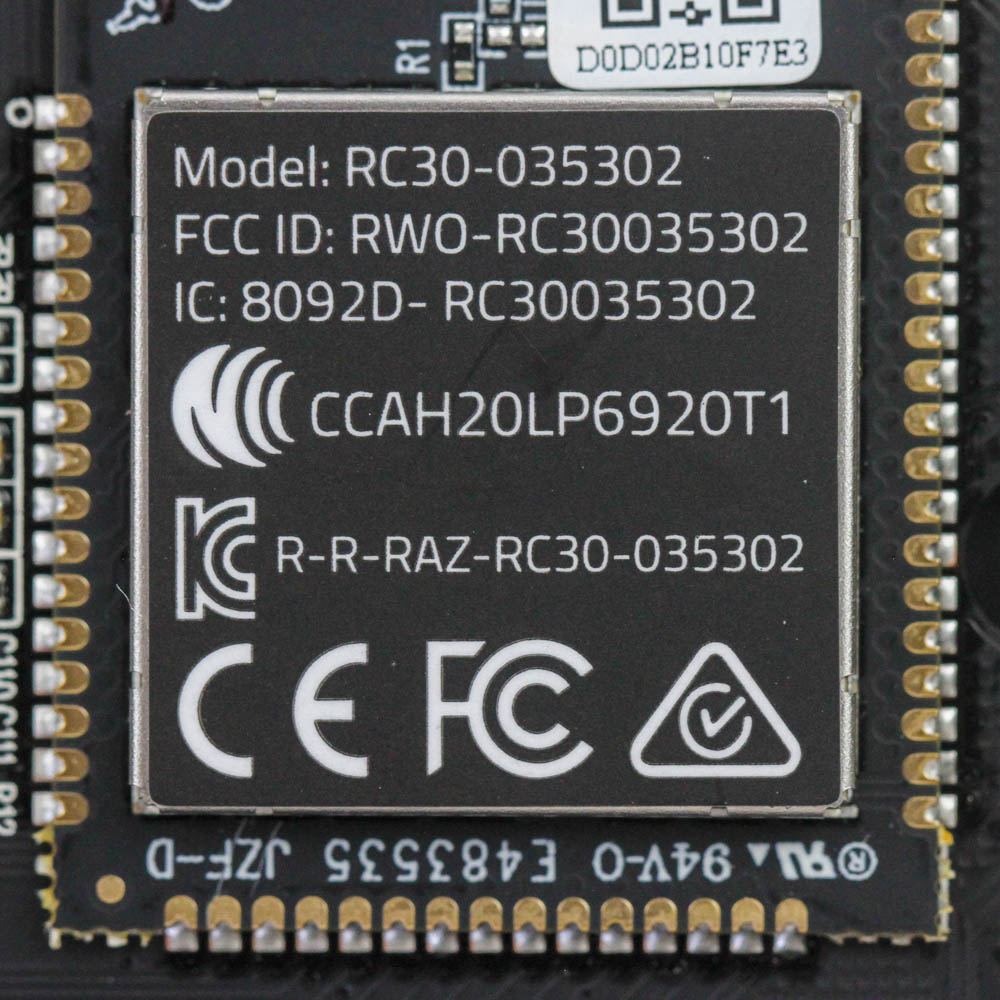
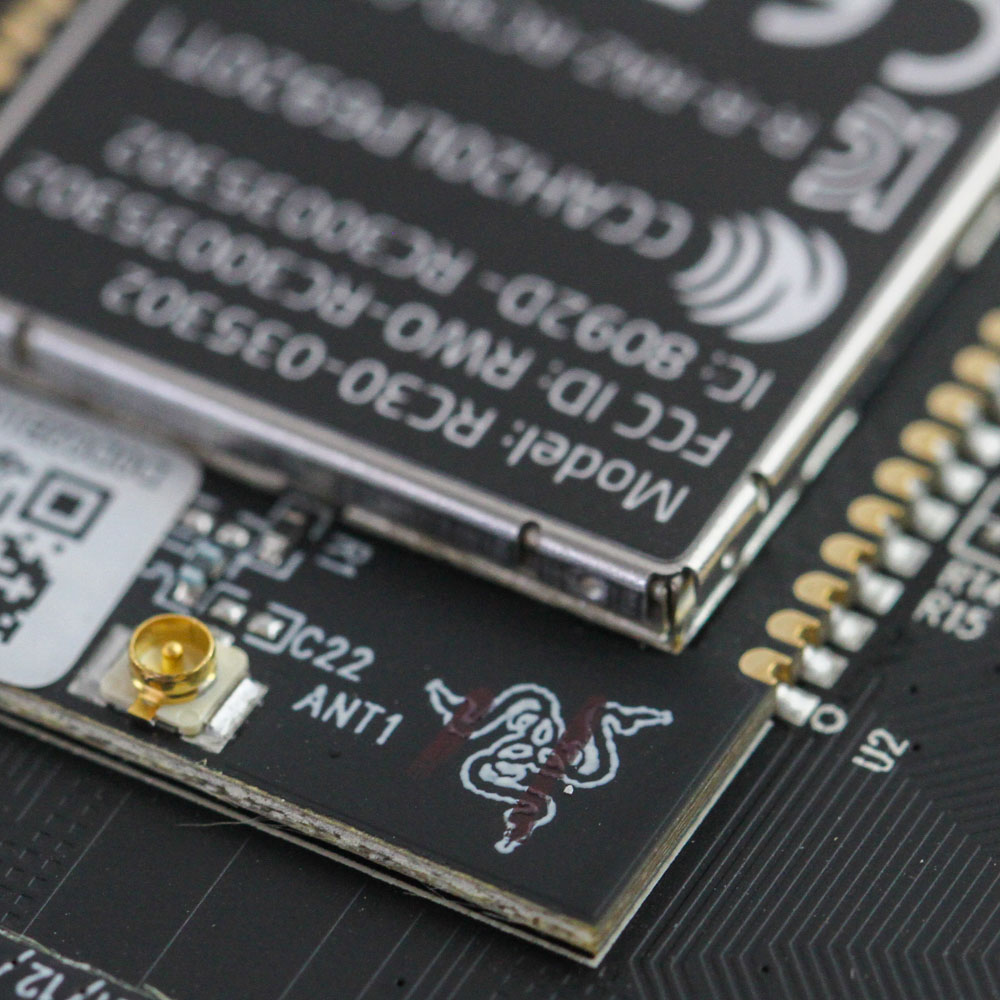
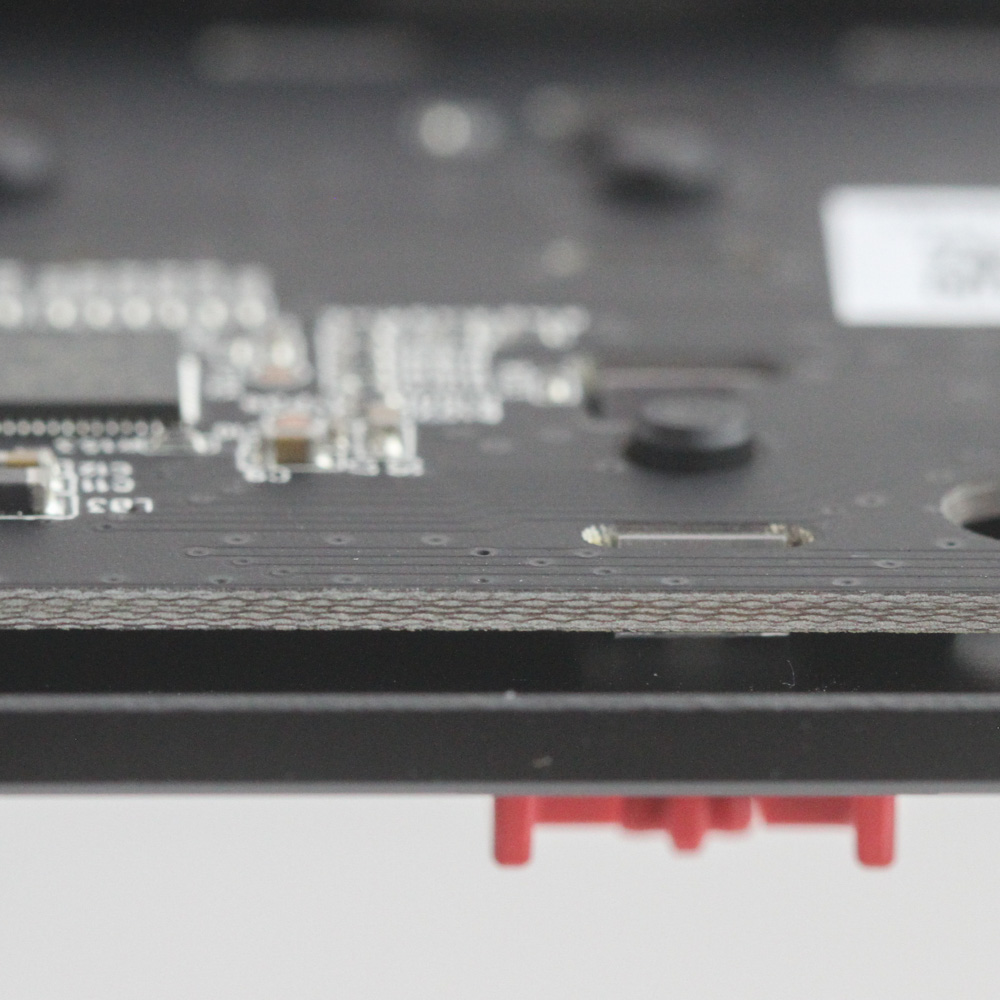
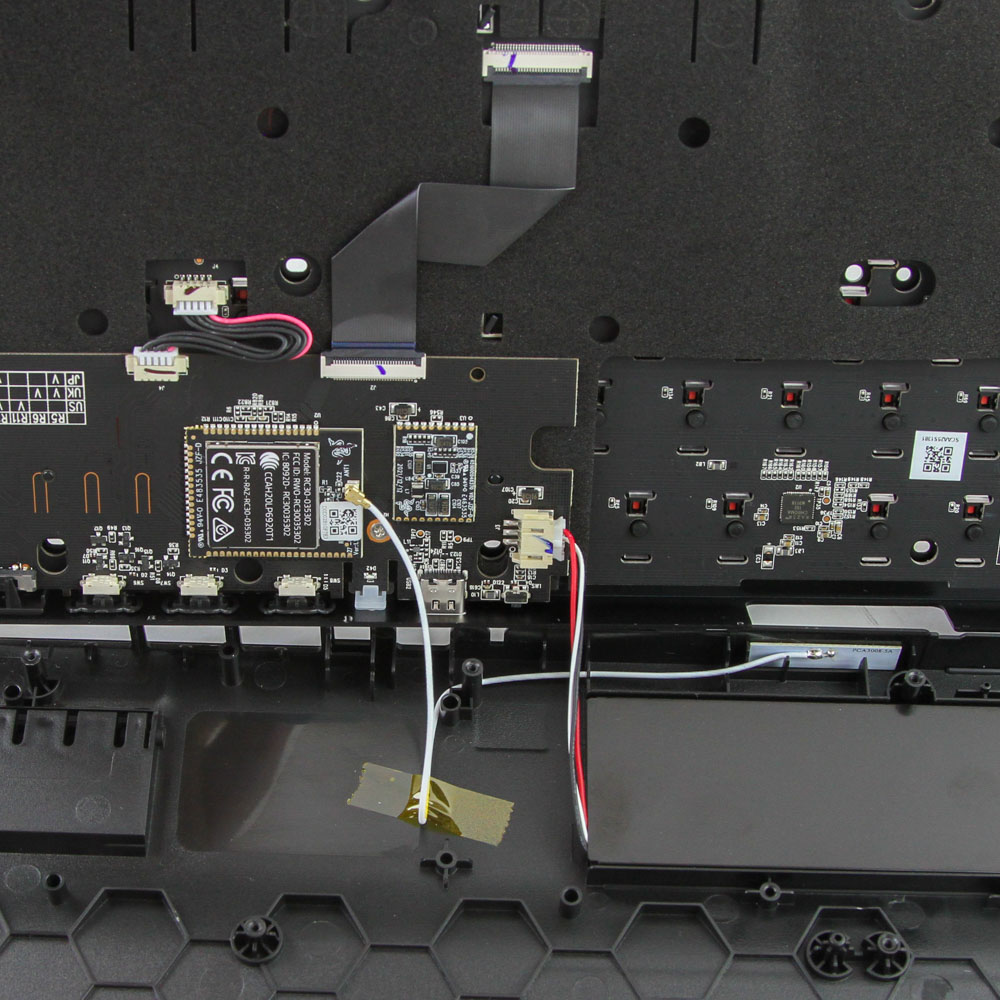
There is a thin foam sheet underneath the PCB itself, and a daughter PCB is on the other side of the sheet that hosts the connectivity port and buttons from earlier. The volume wheel and media button are connected directly to the primary PCB, and both are black in color with excellent solder quality throughout. The aluminium alloy plate can be removed from the PCB by removing all the switches, and this is useful should you wish to lube the stabilizers. Razer is also using first-party branded controllers here making it hard to identify the actual hardware in play, but we know there's a USB microcontroller, a dedicated Chroma LED hardware driver, and a combo RF/Bluetooth transceiver too. As is the norm, all the components are soldered onto a multi-layered PCB.
Before we move on, be advised that disassembly may void the warranty and that TechPowerUp is not liable for any damages incurred if you decide to go ahead and do so anyway.
Jul 18th, 2025 19:02 CDT
change timezone
Latest GPU Drivers
New Forum Posts
- AI Job Losses: let's count the losses up, total losses to AI so far 94,000 and counting (34)
- TPU's Nostalgic Hardware Club (20539)
- 3DMARK "LEGENDARY" (329)
- Hatsune Miku x ASUS TUF Gaming Build (67)
- What's your latest tech purchase? (24304)
- Anime Nation (13051)
- Ferrari themed mod cont. 4070s repaste (7)
- Stalker 2 is looking great. (213)
- Share your CPU-X Benchmarks! (6)
- Are UPS lithium LiFePO4 batteries finally as cheap as lead-acid? (20)
Popular Reviews
- Razer Blade 16 (2025) Review - Thin, Light, Punchy, and Efficient
- SilverStone SETA H2 Review
- Thermal Grizzly WireView Pro Review
- Pulsar X2 Crazylight Review
- MSI GeForce RTX 5060 Gaming OC Review
- Our Visit to the Hunter Super Computer
- NVIDIA GeForce RTX 5080 Founders Edition Review
- NVIDIA GeForce RTX 5050 8 GB Review
- Sapphire Radeon RX 9060 XT Pulse OC 16 GB Review - An Excellent Choice
- Upcoming Hardware Launches 2025 (Updated May 2025)
TPU on YouTube
Controversial News Posts
- Intel's Core Ultra 7 265K and 265KF CPUs Dip Below $250 (288)
- Some Intel Nova Lake CPUs Rumored to Challenge AMD's 3D V-Cache in Desktop Gaming (140)
- AMD Radeon RX 9070 XT Gains 9% Performance at 1440p with Latest Driver, Beats RTX 5070 Ti (131)
- NVIDIA Launches GeForce RTX 5050 for Desktops and Laptops, Starts at $249 (124)
- NVIDIA GeForce RTX 5080 SUPER Could Feature 24 GB Memory, Increased Power Limits (115)
- Microsoft Partners with AMD for Next-gen Xbox Hardware (105)
- NVIDIA DLSS Transformer Cuts VRAM Usage by 20% (99)
- AMD Sampling Next-Gen Ryzen Desktop "Medusa Ridge," Sees Incremental IPC Upgrade, New cIOD (97)