 13
13
SteelSeries Aerox 3 Wireless Review
Sensor & Performance »Build Quality
Overall build quality is very solid. There is no rattle when shaking the mouse. When applying lateral pressure, no creaking or flexing of the shell can be observed. It's impossible to activate the side buttons by squeezing the sides. Lastly, no accidental clicks occur when slamming down the mouse.Buttons

Main buttons on the Aerox 3 Wireless are excellent. Both pre and post-travel are low, resulting in a firm and satisfying click response. Though the main buttons are separated from the mouse body, button wiggle is minimal. Button stiffness is medium, and a set of TTC Golden Micro Dustproof switches is used.
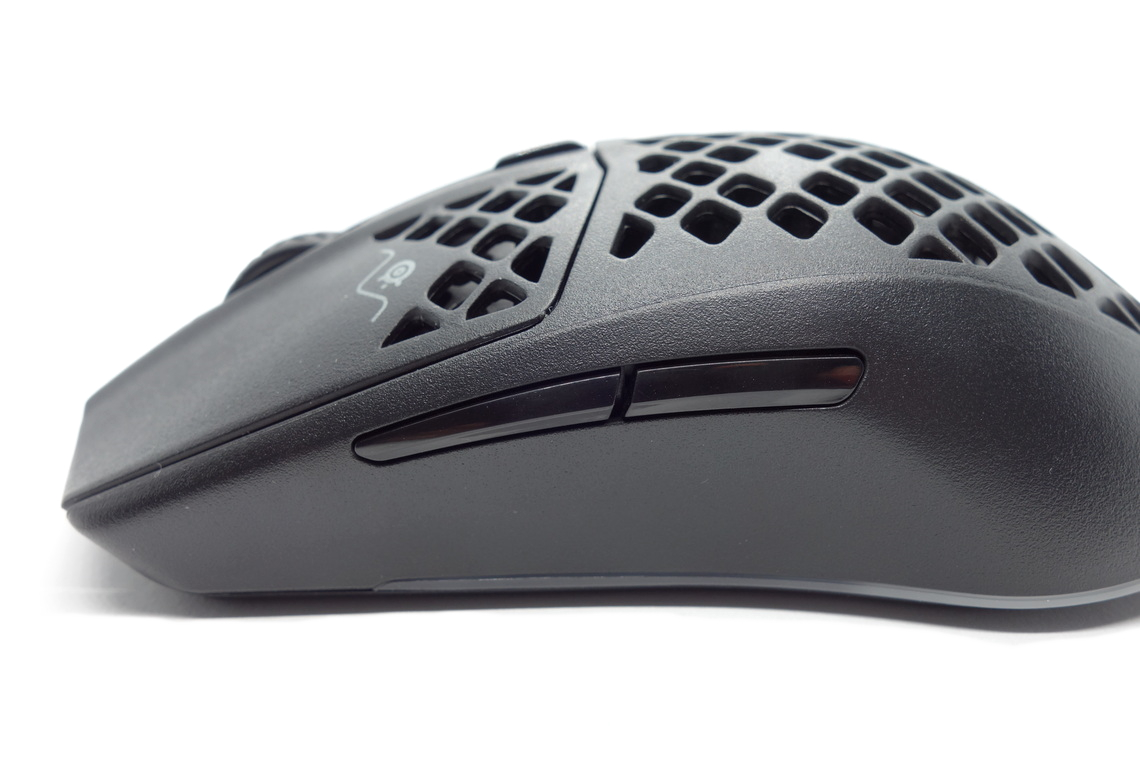
Side buttons are excellent. Both pre and post-travel are low, resulting in a snappy click response. The pressure point is even across the entirety of these. They're quite small and thin, but actuation by rolling one's thumb across is still perfectly possible. I do not recognize the brand of these switches.
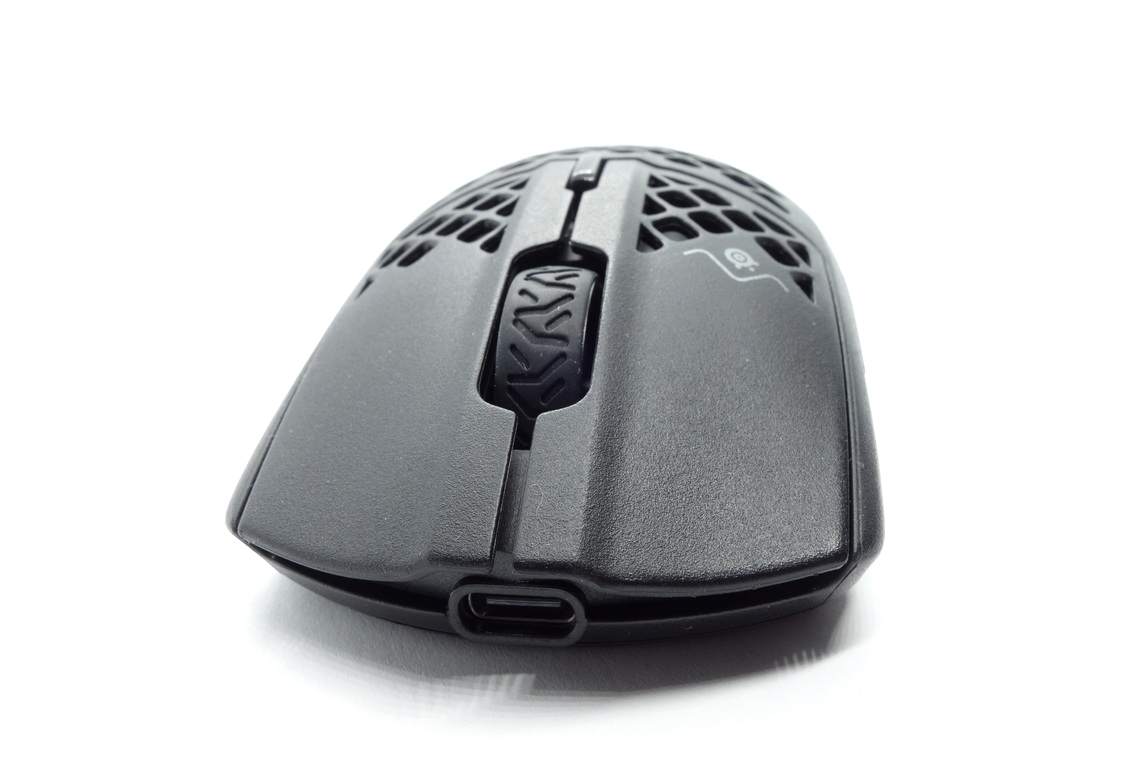
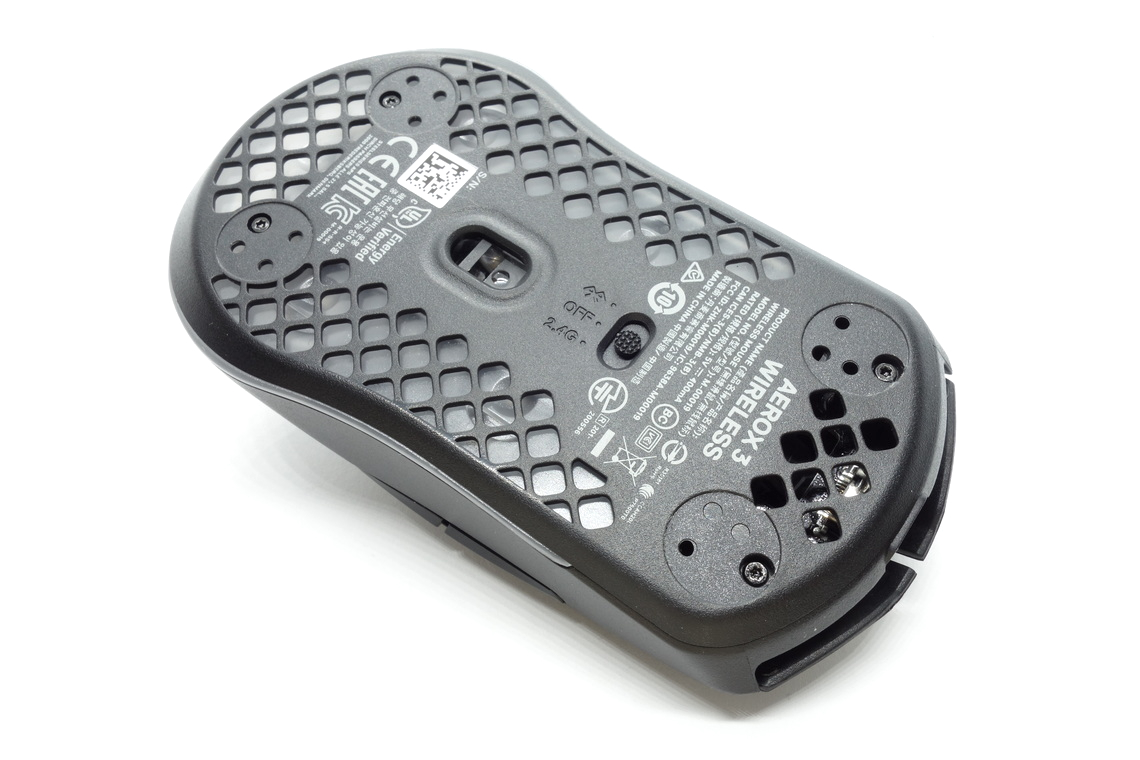
At the top of the mouse is a single button for cycling through the set CPI levels. Its click feel is good. Another switch from the unfamiliar brand is used for this one. The slider for switching between off-state, 2.4 GHz, and Bluetooth at the bottom of the mouse is working just fine, too.
Scroll Wheel
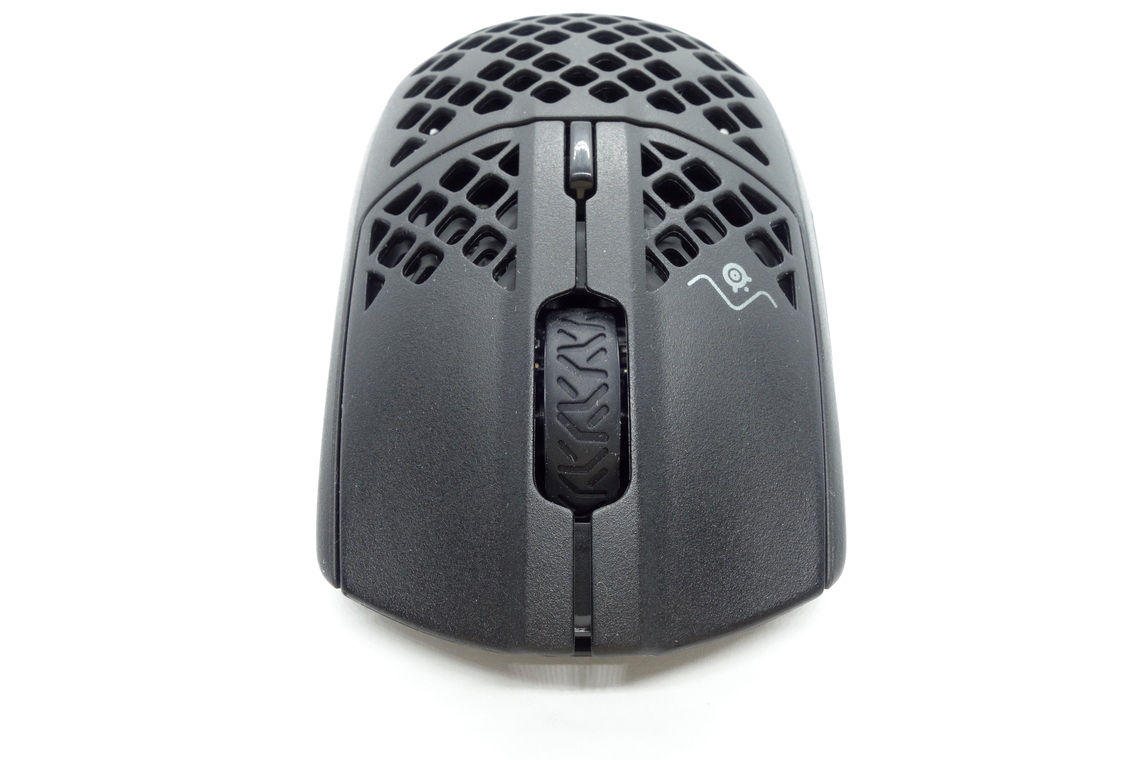
The scroll wheel is very good. Scrolling in either direction produces some unwanted noise, but the individual steps are very nicely separated, resulting in great tactility. Much like on previous iterations of this shape, the wheel sits lower compared to other mice. The encoder comes from TTC, and the middle (scroll wheel) click requires medium force for actuation. A seemingly unbranded tactile switch is used here.
Coating
The Aerox 3 Wireless has a slightly grainy and rough matte coating all over. It provides fantastic grip and doesn't attract fingerprints, dirt, or the likes much at all. It's easy to clean, and there are no signs of wear left after doing so. All in all, an excellent coating.Button Sound Test
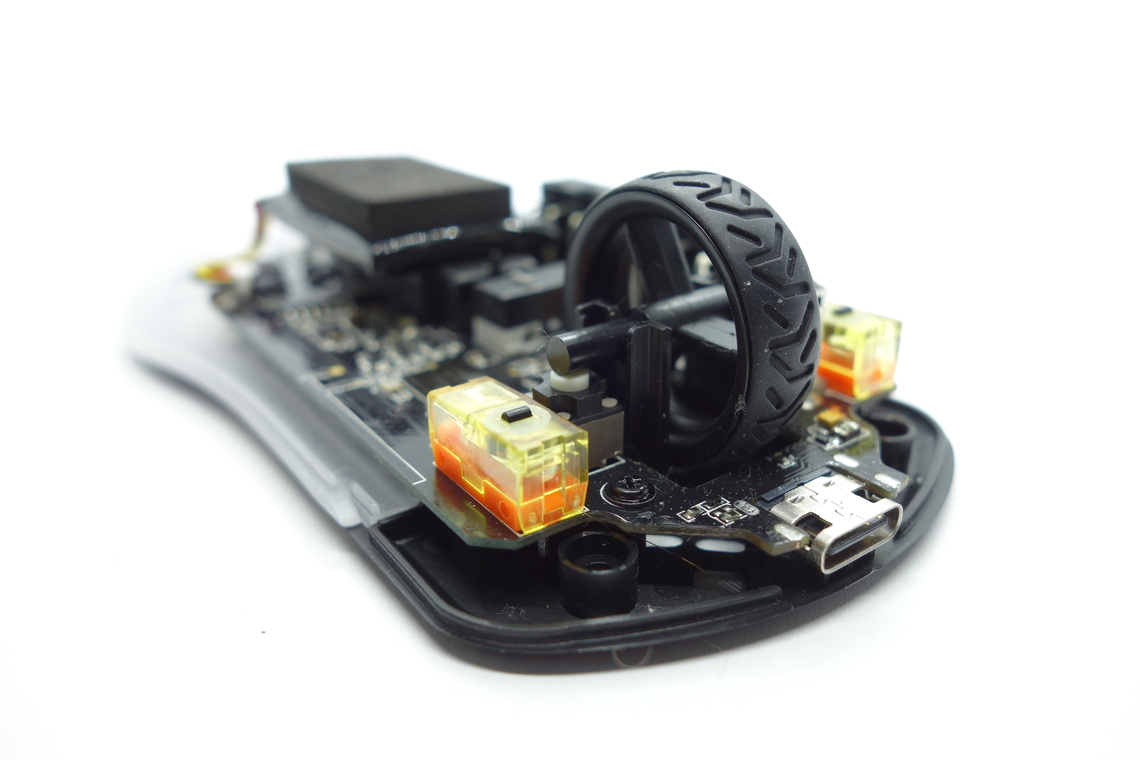
Disassembly
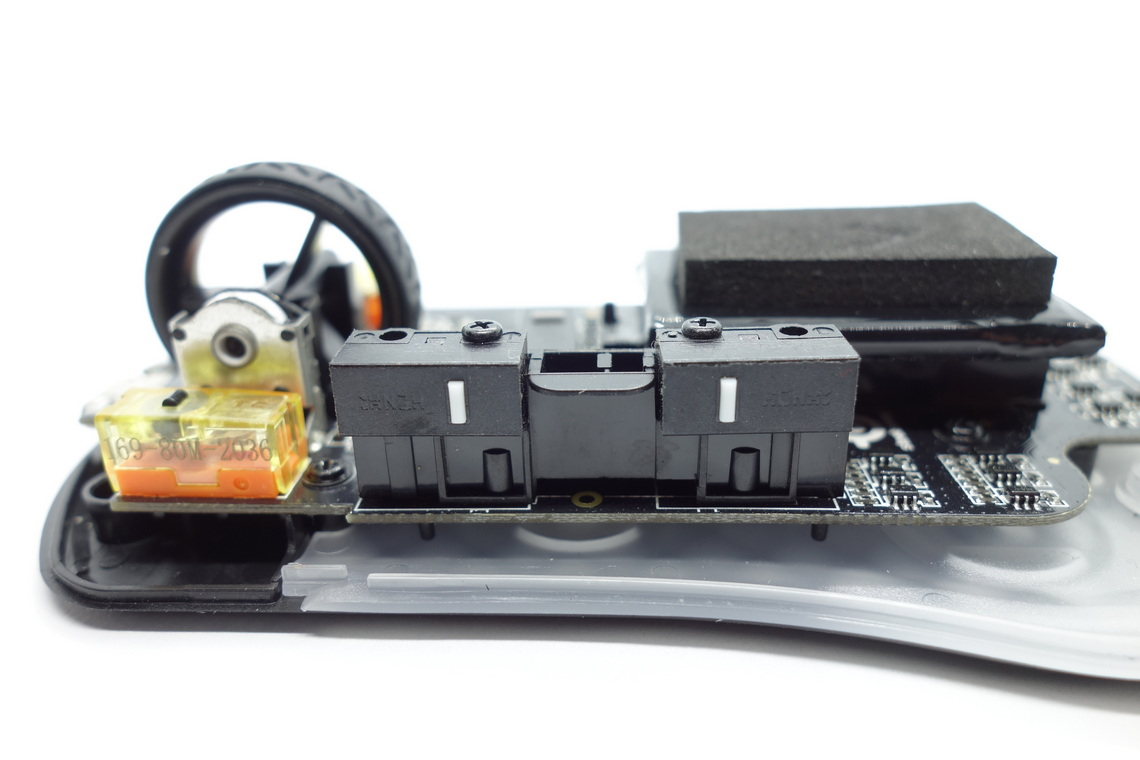
Disassembling the Aerox 3 Wireless is easy if you have the right tools at your disposal. First, remove all four skates. Underneath, you'll find Torx T5 screws, so you better have a corresponding screwdriver. Once those are taken care of, simply pop the top and bottom shells apart.
The internal design is pretty much as efficient as it gets. On top of the sensor assembly (external illumination) rests the battery, neatly packaged and cushioned. The side buttons are mounted directly atop the main PCB, which holds everything else. The entire PCB is coated and fairly thin, and several screws are used to keep the PCB locked in place. The MCU is a Nordic nRF52833—please refer to this for more details.

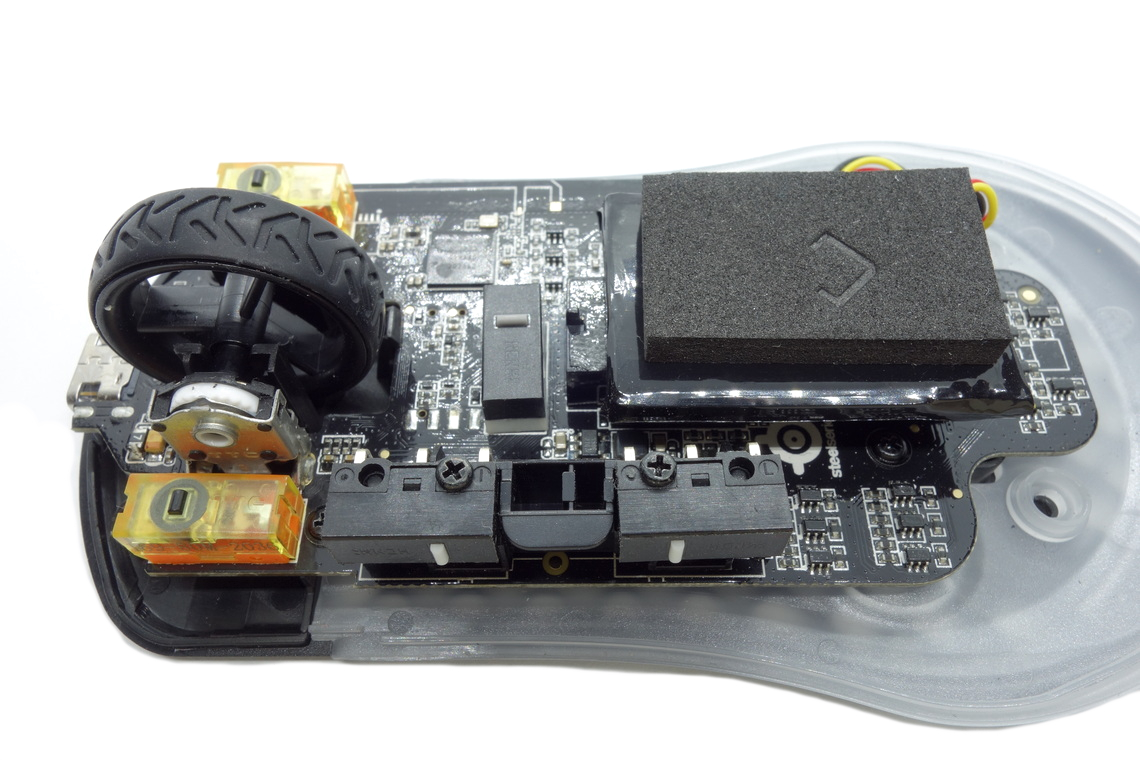
As for the soldering and general quality of the PCB, I'm unable to find any noteworthy flaws.
Jul 14th, 2025 16:02 CDT
change timezone
Latest GPU Drivers
New Forum Posts
- AAF Optimus Modded Driver For Windows 10 & Windows 11 - Only for Realtek HDAUDIO Chips (578)
- i7 2860QM how to raise power limit? (21)
- AMD 7Ghz? This keeps popping up on my feeds! (6)
- Stupid things one has done with hardware (49)
- No offense, here are some things that bother me about your understanding of fans. (111)
- Choosing the right motherboard (5)
- Best motherboards for XP gaming (151)
- Which CPU to Choose for a 7900 XT? Ryzen 7 7700 or Ryzen 5 9600X? (43)
- Bent pins on an AM5 mobo, any way to test them and also find which ones were on the schematic? (6)
- Arc 770a 16gb money pit (9)
Popular Reviews
- Lexar NM1090 Pro 4 TB Review
- Our Visit to the Hunter Super Computer
- MSI GeForce RTX 5060 Gaming OC Review
- Fractal Design Epoch RGB TG Review
- NVIDIA GeForce RTX 5050 8 GB Review
- Corsair FRAME 5000D RS Review
- Sapphire Radeon RX 9060 XT Pulse OC 16 GB Review - An Excellent Choice
- Chieftec Iceberg 360 Review
- AMD Ryzen 7 9800X3D Review - The Best Gaming Processor
- Upcoming Hardware Launches 2025 (Updated May 2025)
TPU on YouTube
Controversial News Posts
- Intel's Core Ultra 7 265K and 265KF CPUs Dip Below $250 (288)
- Some Intel Nova Lake CPUs Rumored to Challenge AMD's 3D V-Cache in Desktop Gaming (140)
- AMD Radeon RX 9070 XT Gains 9% Performance at 1440p with Latest Driver, Beats RTX 5070 Ti (131)
- NVIDIA Launches GeForce RTX 5050 for Desktops and Laptops, Starts at $249 (122)
- NVIDIA GeForce RTX 5080 SUPER Could Feature 24 GB Memory, Increased Power Limits (115)
- Microsoft Partners with AMD for Next-gen Xbox Hardware (105)
- Intel "Nova Lake‑S" Series: Seven SKUs, Up to 52 Cores and 150 W TDP (100)
- NVIDIA DLSS Transformer Cuts VRAM Usage by 20% (97)