 8
8
Streacom BC1 V2 Open Benchtable Review
Assembly & Finished Looks »A Closer Look
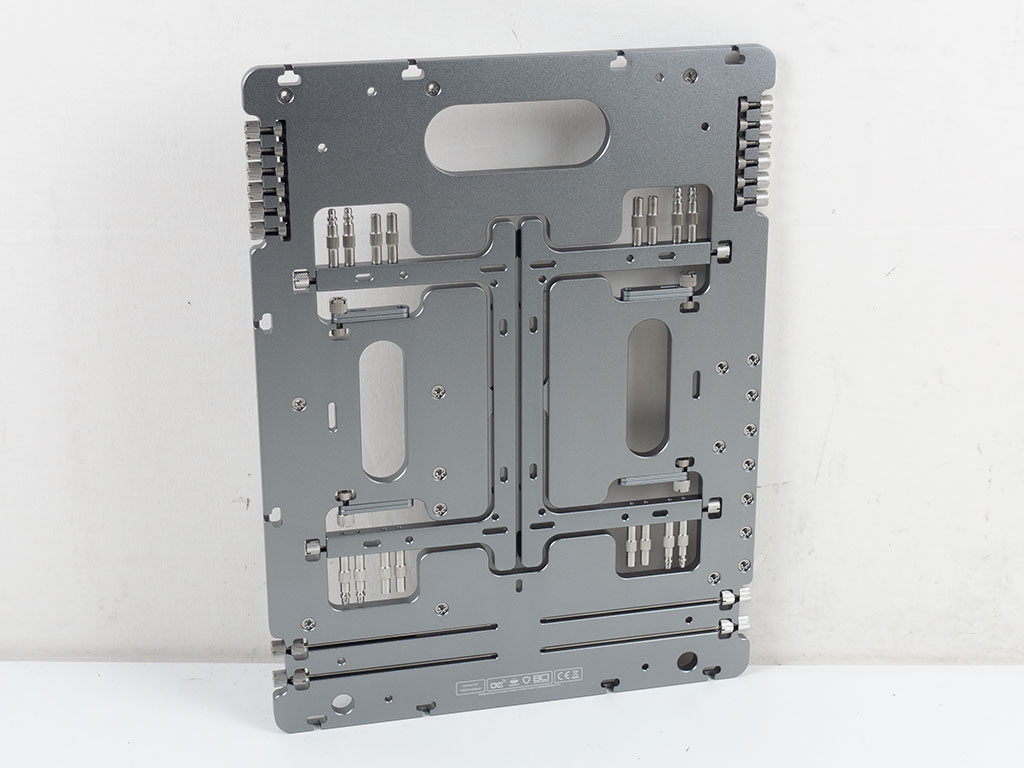
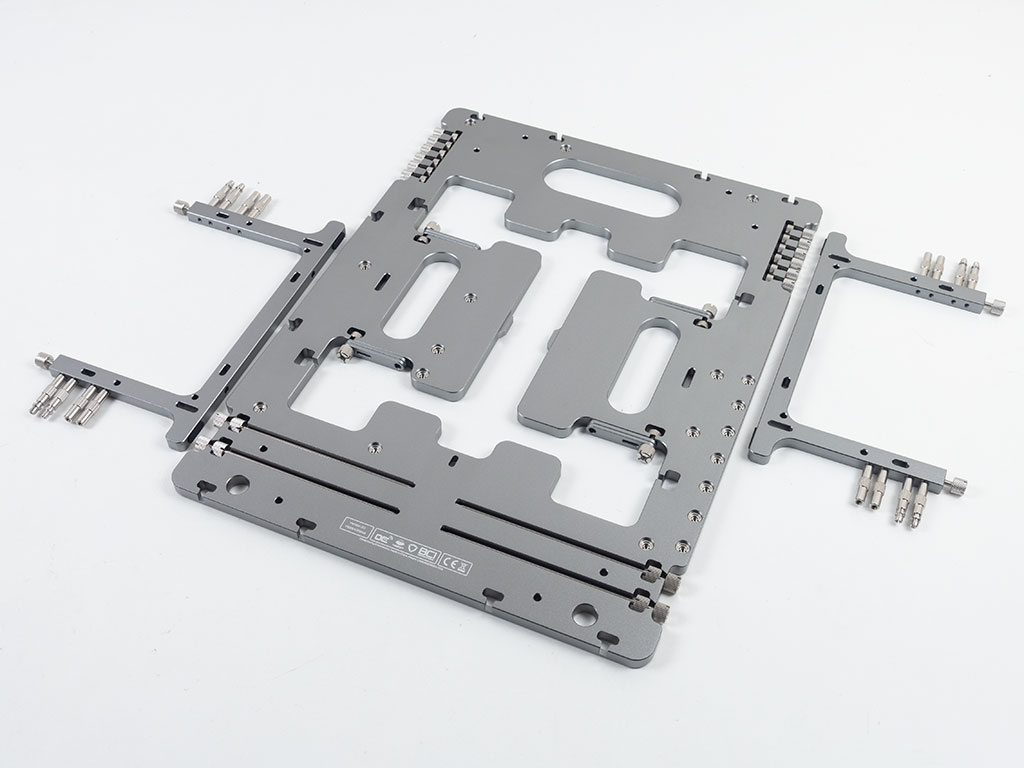
As we received the "Titanium" color, there is a subtle difference in hue between the aluminium and stainless steel parts. There is still a larger handle on the top to easily carry the unit around in one piece. In the rear is quite a bit of additional engineering revolving around retention pieces for the screws to mount onto, all of which will not be visible when using the table fully assembled.
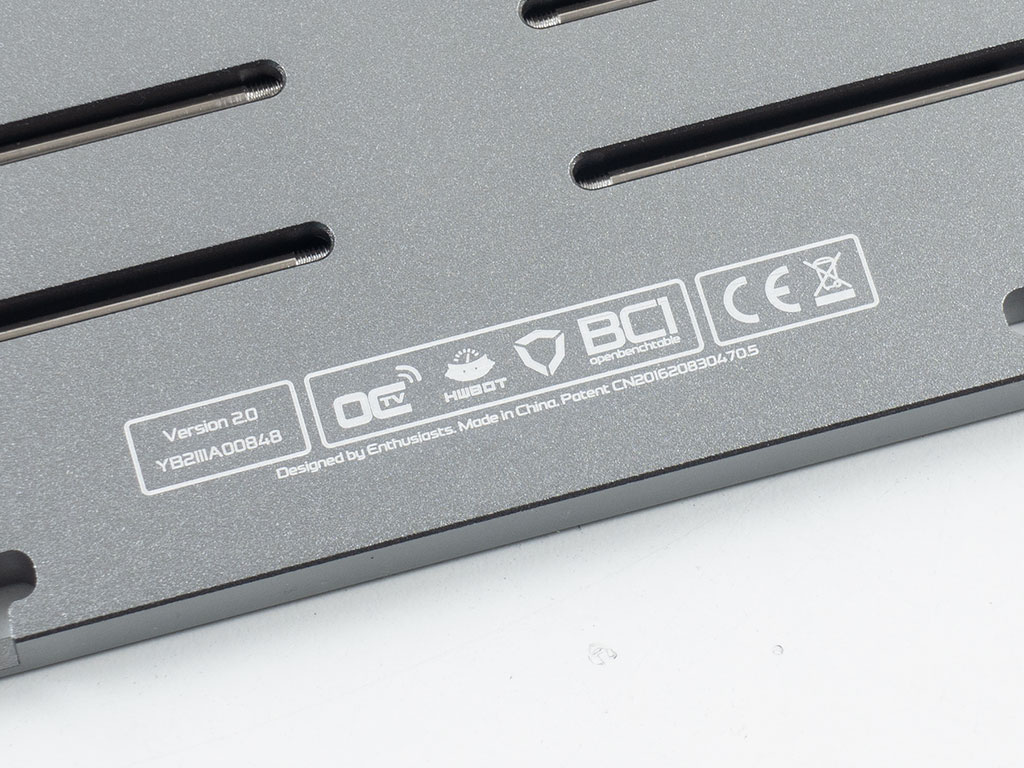
The OC TV, HWBOT, and Streacom labels have also been printed onto the sandblasted aluminium. Speaking of which, the manufacturing and engineering details of the BC1 V2 are intricate, and quite fascinating to look at.
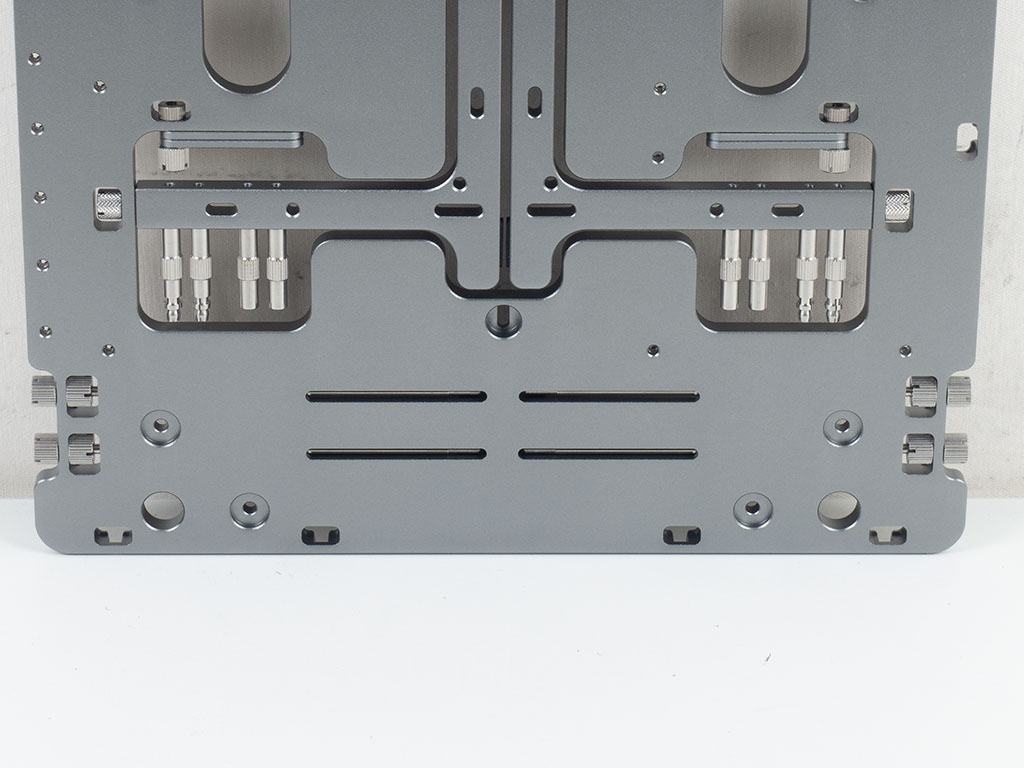
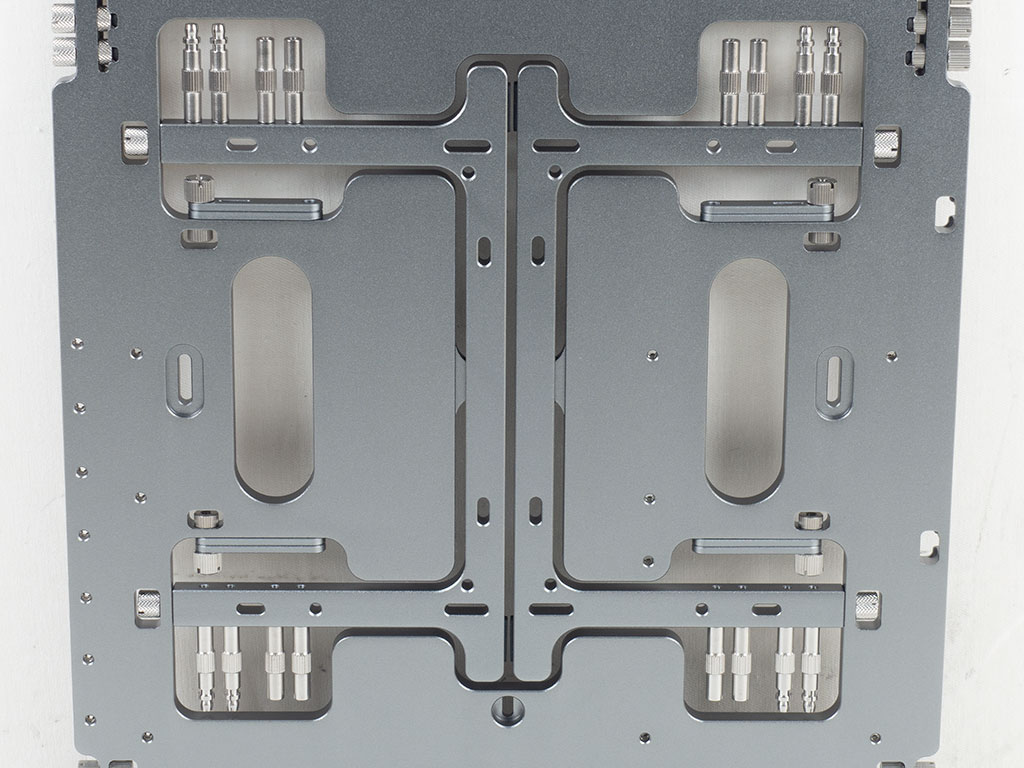
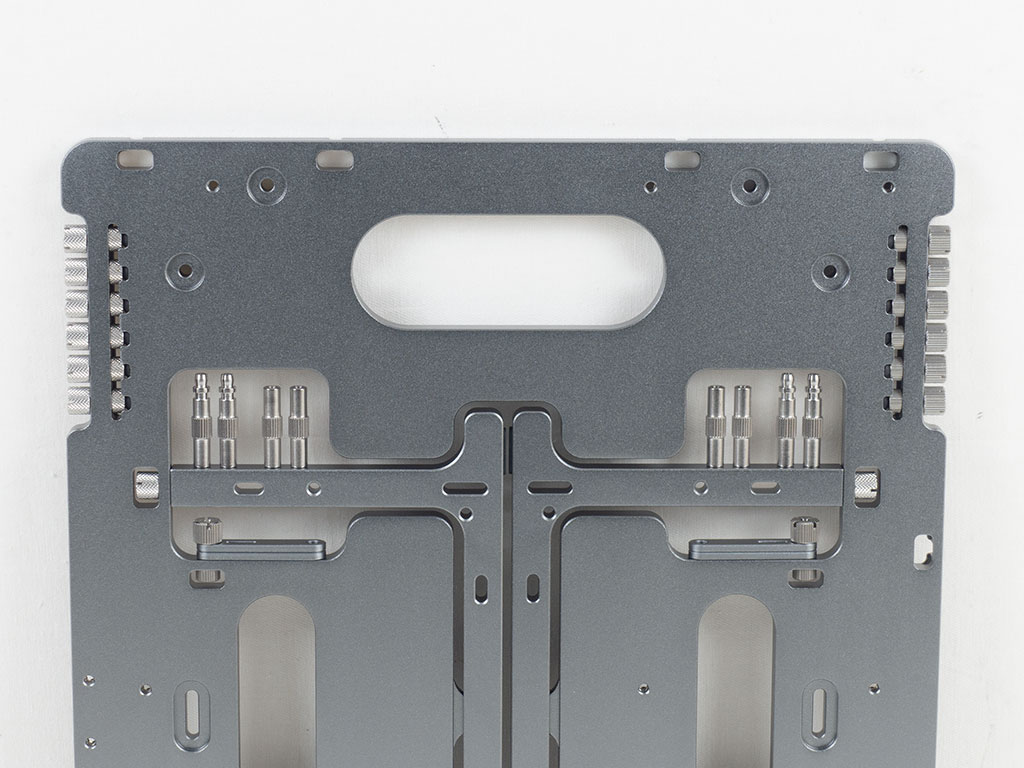
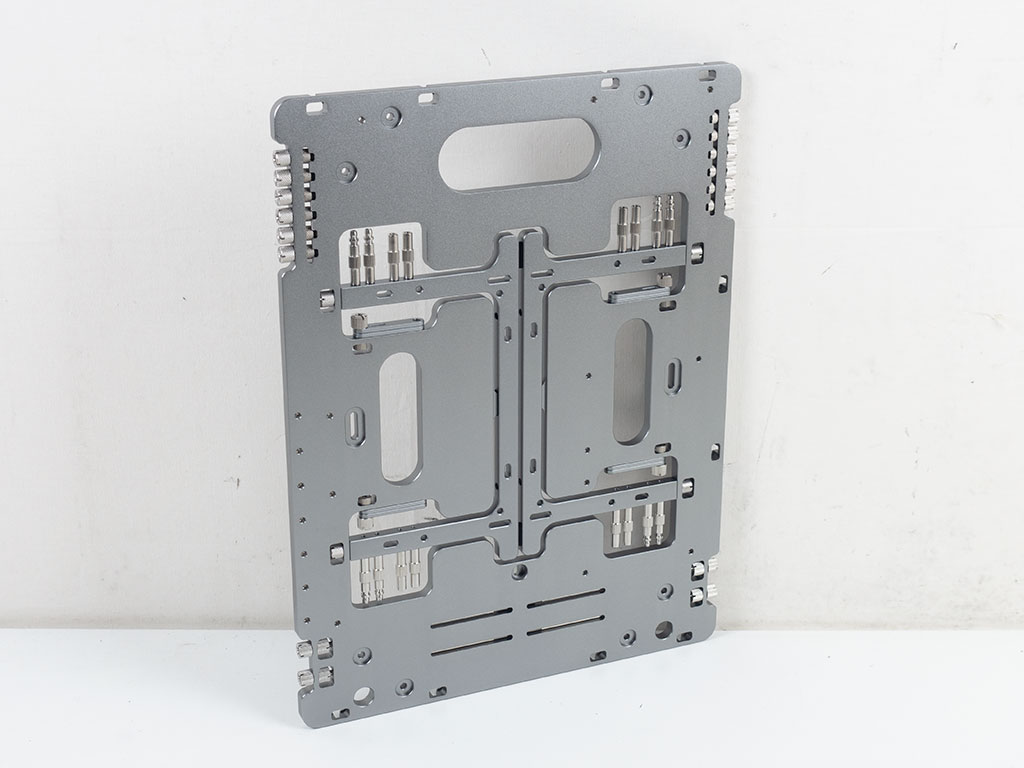
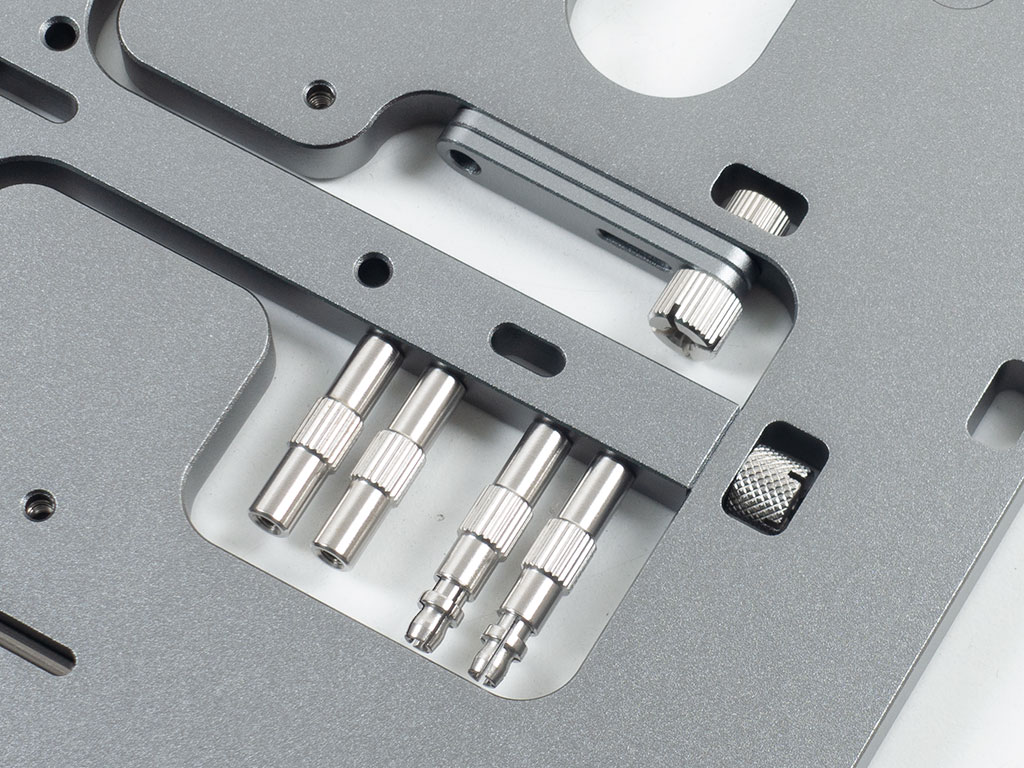
Going over the various parts embedded within the BC1 V2, the bottom section holds the four pins for the expansion slots. In the center, you will find the two feet which each hold various spacers for both the expansion slots and motherboard. In the top third are ten thumb screws at the edges, five on either side. Look closely and you will notice that these have different finishes on the thick end so that you may easily differentiate between fine and coarse threads without having to look too closely—what a cool little touch!

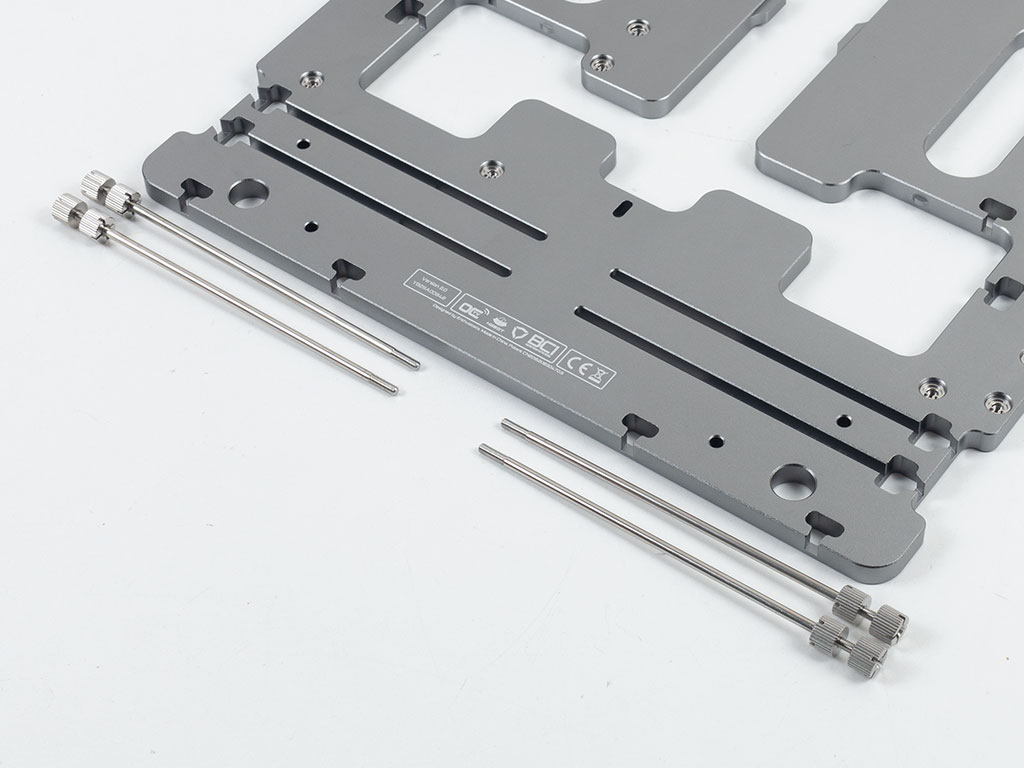
Before assembling the bench table, simply detach all parts. The first of these clearly are the feet held in place by thumb screws, which are later used to secure the feet to the main deck. With those removed, you may detach the four brackets for fans or an AIO. Streacom redesigned these to be dual-layered. You may keep them as is or split them for the most flexible compatibility to whatever cooling solution you are attaching to the BC1 V2. Next, there are the long pins for the expansion slots. While you do have access to all seven slots of an ATX motherboard, only four such pins are included, which will be more than enough for most modern motherboard, as those skip expansion slots in favor of NVMe drive slots.
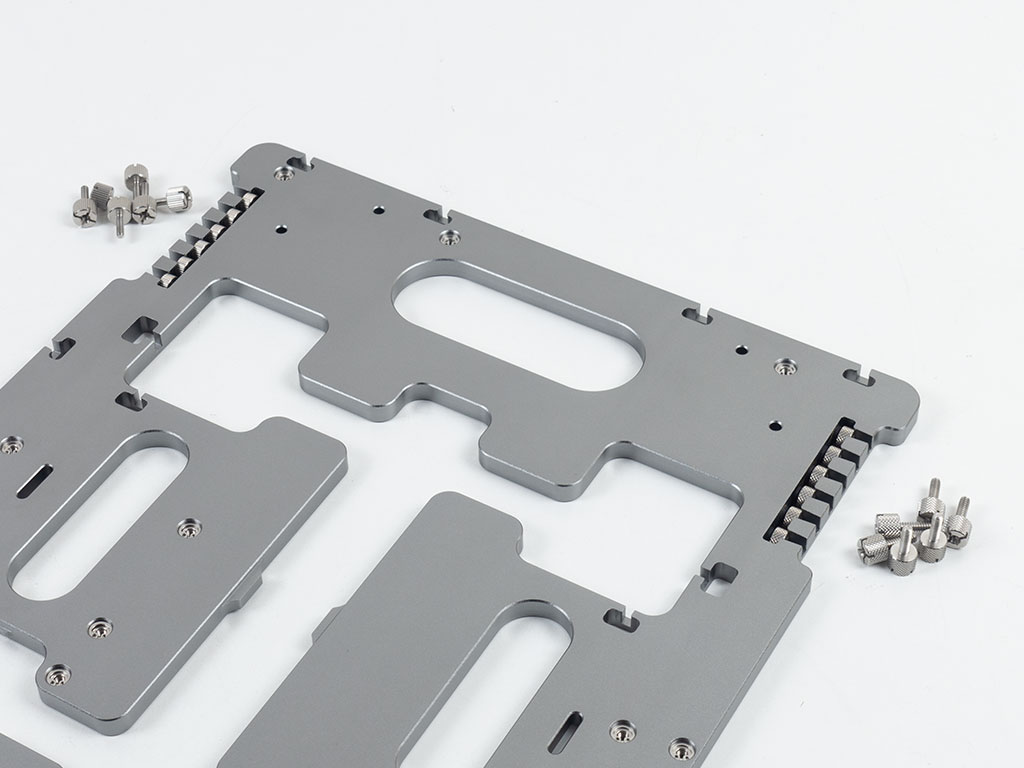
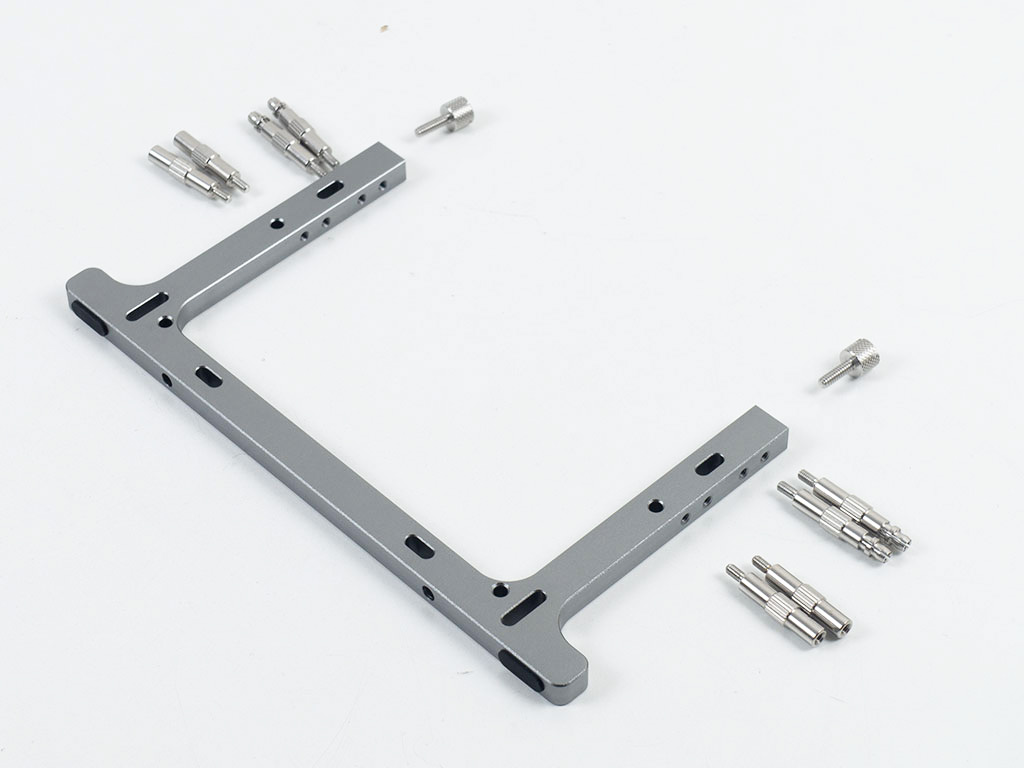
Lastly, there are the thumb screws with different threads, which you may detach for access, too. As their storage points are at the edge of the main deck, you will always have direct access even with a fully assembled bench table. Even the two stands hold parts: eight standoffs of two different types, of which seven are for the expansion slots and eight push pin standoffs for the motherboard. That math leaves that eighth expansion slot stand-off, which will be used to pin down the center of the motherboard.
Feb 19th, 2025 16:49 EST
change timezone
Latest GPU Drivers
New Forum Posts
- Should I make a thermal maintenance on my GPU? (53)
- 5800X3D Undervolting ? (6)
- Optimizing performance of the Lenovo i7-14700 desktop (10)
- TECHPOWERUP HWBOT Contest with Cash Prizes (81)
- TPU's Nostalgic Hardware Club (19962)
- Zotac 5090 Solid disabled ROPs (11)
- "Is the RX 6800 hotspot value normal ? (9)
- VRR Flicker when using Frame Generation (0)
- ASRock PHANTOM GAMING X870E Nova WiFi opinions (11)
- GUIDE: AMD AM5 System Optimization (9)
Popular Reviews
- MSI GeForce RTX 5070 Ti Ventus 3X OC Review - Beating RX 7900 XTX
- Gigabyte GeForce RTX 5090 Gaming OC Review
- Galax GeForce RTX 5070 Ti 1-Click OC White Review
- Ducky One X Inductive Keyboard Review
- AMD Ryzen 7 9800X3D Review - The Best Gaming Processor
- WD Black SN7100 2 TB Review - The New Best SSD
- AVerMedia X'Tra Go GC515 Review
- NVIDIA GeForce RTX 5080 Founders Edition Review
- Kingdom Come Deliverance II Performance Benchmark Review - 35 GPUs Tested
- MSI MAG Z890 Tomahawk Wi-Fi Review
Controversial News Posts
- AMD Radeon 9070 XT Rumored to Outpace RTX 5070 Ti by Almost 15% (301)
- AMD is Taking Time with Radeon RX 9000 to Optimize Software and FSR 4 (256)
- AMD Plans Aggressive Price Competition with Radeon RX 9000 Series (245)
- Edward Snowden Lashes Out at NVIDIA Over GeForce RTX 50 Pricing And Value (241)
- AMD Radeon RX 9070 and 9070 XT Listed On Amazon - One Buyer Snags a Unit (240)
- AMD Denies Radeon RX 9070 XT $899 USD Starting Price Point Rumors (239)
- New Leak Reveals NVIDIA RTX 5080 Is Slower Than RTX 4090 (215)
- AMD's Radeon RX 9070 Launch Faces Pricing Hurdles (175)